Articles
How To Machine Quilt For Beginners
Modified: August 17, 2024
Learn the art of machine quilting with our comprehensive articles for beginners. Discover helpful tips, techniques, and step-by-step guides to master the craft.
(Many of the links in this article redirect to a specific reviewed product. Your purchase of these products through affiliate links helps to generate commission for Storables.com, at no extra cost. Learn more)
Introduction
Welcome to the world of machine quilting! If you’re a beginner looking to explore the art of quilting with a sewing machine, you’ve come to the right place. Machine quilting allows you to create beautiful and intricate designs on your quilts while saving time and effort compared to traditional hand quilting. In this article, we will guide you through the essential steps and techniques to help you get started with machine quilting.
Quilting is a centuries-old craft that has evolved over time. Traditionally, quilts were stitched together by hand, requiring hours, if not days, of meticulous work. However, with advancements in technology, machine quilting has become increasingly popular and accessible to quilters of all skill levels.
Machine quilting offers a variety of benefits. Not only does it help you complete your quilts faster, but it also allows you to experiment with different designs and patterns that would be otherwise challenging to achieve by hand. The precision and versatility of a quilting machine enable you to create stunning quilts that are sure to impress.
Before we dive into the specifics of machine quilting, it’s essential to familiarize yourself with the basic equipment needed. This includes choosing the right quilting machine, gathering the necessary tools and materials, and understanding different quilting techniques. By having a solid foundation, you’ll be well-equipped to embark on your quilting journey.
In the following sections, we will provide a step-by-step guide that covers everything from setting up your quilting machine to troubleshooting common issues. We’ll also explore various quilting designs and patterns, equipping you with the knowledge to unleash your creativity.
Whether you’re a complete beginner or have some experience with quilting, we hope this article will serve as a valuable resource on your machine quilting endeavors. So, let’s dive in and discover the joy of machine quilting!
Key Takeaways:
- Machine quilting offers a fast and versatile way to create stunning quilts, providing beginners with the tools and techniques to embark on a rewarding quilting journey.
- From choosing the right quilting machine to mastering essential techniques, this guide empowers beginners to unleash their creativity and achieve professional results in machine quilting.
Read more: How To Quilt For Beginners
Getting Started
Before you begin your machine quilting journey, it’s crucial to have a clear understanding of the process and gather the necessary equipment. Here are the essential steps to get you started:
- Choose a quilting project: Decide on the type of quilt you want to create. Whether it’s a lap quilt, baby quilt, or a bed-sized quilt, having a project in mind will help you stay focused throughout the process.
- Select your fabrics: Choose fabrics that complement each other and align with the theme or color scheme of your quilt. Consider the weight and texture of the fabrics to ensure they are suitable for machine quilting.
- Prepare your sewing machine: Ensure that your sewing machine is in good working condition. Clean and oil the machine as per the manufacturer’s instructions. Make sure you have the appropriate quilting foot and a fresh needle installed.
- Gather your quilting tools: Along with your sewing machine, you’ll need a few essential tools such as quilting gloves, rotary cutter, cutting mat, acrylic rulers, quilting pins, and a seam ripper.
- Set up your workspace: Clear a spacious area where you can comfortably lay out your fabric, cutting tools, and sewing machine. Having a clutter-free and well-lit workspace will enhance your quilting experience.
- Prepare your fabric: Pre-wash and press your fabric to remove any shrinkage or wrinkles. This step will also help prevent colors from bleeding onto the finished quilt.
- Create a design plan: Sketch out a design plan for your quilt. Decide on the layout, block patterns, and any additional elements such as borders or sashing. This will serve as a visual guide throughout the quilting process.
By following these initial steps, you’ll be well-prepared and ready to dive into the world of machine quilting. The next step is to choose the right quilting machine that suits your needs, which we’ll explore in the next section.
Choosing the Right Quilting Machine
When it comes to machine quilting, having the right tool is essential. Finding the perfect quilting machine can greatly enhance your quilting experience and make the process more enjoyable. Here are some factors to consider when choosing a quilting machine:
- Mechanical vs. Computerized: Decide whether you prefer a mechanical or computerized quilting machine. Mechanical machines are generally more affordable and straightforward to use, while computerized machines offer advanced features and stitch options.
- Throat Space: Look for a machine with sufficient throat space, which refers to the distance between the needle and the machine body. A larger throat space allows you to maneuver bulky quilts more easily.
- Stitch Options: Consider the variety of stitches available on the machine. While straight and zigzag stitches are essential for quilting, having additional decorative stitches can add more versatility to your designs.
- Speed Control: Look for a machine that offers adjustable speed control. Being able to control the speed of the machine can be beneficial, especially when working on intricate designs or quilting in tight spaces.
- Needle Positioning: Check if the machine allows you to adjust the needle position. This feature is useful for achieving precise stitching and making quick adjustments while quilting.
- Quilting Feet: Ensure that the machine comes with a quilting foot or has the option to purchase one separately. Quilting feet, such as the walking foot or free-motion quilting foot, are specially designed to help feed multiple layers of fabric smoothly.
- Reviews and Recommendations: Take the time to read reviews and seek recommendations from experienced quilters. Hearing about other quilters’ experiences with different machine brands and models can provide valuable insights and help you make an informed decision.
Remember, choosing a quilting machine is a personal preference, and what works for one quilter may not work for another. Consider your budget, skill level, and long-term quilting goals when making a decision. It’s also a good idea to test-drive the machine if possible or consult with knowledgeable sewing machine dealers.
By taking these factors into account, you can select a quilting machine that meets your needs and allows you to unleash your creativity as you embark on your quilting journey.
Essential Tools and Materials
Having the right tools and materials is crucial for successful machine quilting. Here is a list of essential items you’ll need to ensure a smooth quilting process:
- Quilting Ruler and Cutting Mat: A quilting ruler and self-healing cutting mat are essential for accurate fabric cutting. These tools provide precise measurements and a stable cutting surface.
- Rotary Cutter: A rotary cutter with a sharp blade is used to cut fabric strips or pieces. It offers more precision and ease compared to traditional scissors.
- Quilting Pins: Quilting pins hold fabric layers together while you sew. Opt for longer pins specifically designed for quilting to ensure they are secure and easy to maneuver around.
- Quilting Needles: Use quilting needles with a sharp point and a slightly larger eye to accommodate the thread. These needles are designed to stitch through multiple layers of fabric without causing damage.
- Quilting Thread: Choose a high-quality thread specifically designed for quilting. Polyester or cotton threads are commonly used, as they offer strength and durability.
- Quilting Gloves: Quilting gloves provide better grip and control while maneuvering the fabric under the machine’s needle. They help reduce hand fatigue and provide more precise movements.
- Quilting Marking Pens or Pencils: Use marking pens or pencils specifically designed for fabric to make temporary marks for quilting lines or design placement. Ensure the marks can be easily removed or fade over time.
- Batting: Batting is the layer of material placed between the quilt top and backing. Choose a batting that suits the desired loft, warmth, or drape of your quilt. There are various types available, such as cotton, polyester, or wool.
- Backing Fabric: Select a backing fabric that coordinates with your quilt top. It should be wide enough to accommodate your quilt and provide some overhang for the quilting process.
- Quilt Basting Spray or Safety Pins: Use quilt basting spray or safety pins to secure the layers of your quilt sandwich together before quilting. Basting spray provides a temporary bond, while safety pins offer a traditional method of securing the layers.
Having these essential tools and materials at hand will enable you to efficiently quilt your projects and achieve professional-looking results. Remember to choose high-quality supplies for better durability and longevity.
Now that you have gathered your tools and materials, let’s move on to understanding different quilting techniques in the next section.
Understanding Quilting Techniques
In machine quilting, there are various techniques and approaches you can use to achieve different effects and designs. Understanding these quilting techniques will expand your creative possibilities. Here are some common techniques to familiarize yourself with:
- Straight Line Quilting: Straight line quilting involves stitching parallel lines across the quilt top, either vertically, horizontally, or diagonally. This technique adds a clean and modern aesthetic to your quilt.
- Free-Motion Quilting: Free-motion quilting allows you to create intricate designs by moving the fabric freely under the machine’s needle. This technique requires a free-motion quilting foot, and it offers endless possibilities for unique motifs and patterns.
- Stippling or Meandering: Stippling is a popular quilting technique where you create a continuous line of small, curvy stitches. This technique adds texture and dimension to your quilt, and it is often used as a background quilting design.
- Echo Quilting: Echo quilting involves stitching parallel lines around a shape or motif, creating a ripple effect. This technique emphasizes the design and adds depth to your quilt.
- Trapunto: Trapunto is a quilting technique where additional batting is placed selectively in certain areas of the quilt design, typically behind motifs or shapes. This technique creates a raised or puffy effect, adding a three-dimensional element to your quilt.
- Shadow Quilting: Shadow quilting is a technique where you stitch two parallel lines of quilting on each side of a design or shape, creating a shadow effect. This technique adds definition and visual interest to your quilt.
- Continuous Curve Quilting: Continuous curve quilting involves stitching a series of curved lines in a continuous pattern. This technique is often used to quilt individual blocks or border designs.
These are just a few examples of quilting techniques, and there are countless others to explore. Experimentation and practice will help you refine your skills and develop your unique quilting style.
It’s also worth mentioning that the choice of quilting technique depends on the design of your quilt, the desired result, and your personal preference. You can combine different techniques, adjust the scale or spacing of the quilting lines, or add embellishments to create a quilt that truly reflects your artistic vision.
Next, we will delve into the process of preparing your quilt sandwich for quilting.
Read more: How To Quilt A Table Runner For Beginners
Preparing Your Quilt Sandwich
Before you start machine quilting, it’s important to prepare your quilt sandwich – the layers of fabric, batting, and backing that make up your quilt. Here are the steps to properly assemble and secure your quilt sandwich:
- Backing Fabric: Start with your backing fabric, which should be larger than your quilt top. Lay it flat and smooth out any wrinkles or folds. Secure it to a large flat surface, such as a table or a design wall, using quilting clamps or tape.
- Batting: Place the batting on top of the backing fabric, aligning the edges. Smooth it out to ensure an even distribution, free from bumps or creases.
- Quilt Top: Lay your quilt top right-side up on top of the batting, aligning the edges with the backing fabric. Smooth out any wrinkles or folds and ensure it lays flat.
- Basting: To hold the layers together before quilting, you can choose between using quilt basting spray or safety pins. If using spray, spray a light, even layer onto the batting. If using safety pins, insert them through all the layers at regular intervals to secure them together.
- Quilt Marking: If you have a specific quilting design or pattern in mind, use your quilting marking pens or pencils to mark the lines or motifs on the top layer of your quilt. Make sure to use markings that are easily removable or fade over time.
Once your quilt sandwich is prepared, it’s ready for machine quilting. The layers of fabric, batting, and backing work together to provide stability and support as you stitch through them with your sewing machine. The basting or safety pins hold everything in place and prevent shifting during the quilting process.
Remember to remove any basting pins as you quilt and avoid stitching over the marked lines. It’s also a good practice to start quilting from the center of your quilt and work your way outward, smoothing out any wrinkles or puckers as you go.
Preparing your quilt sandwich is an essential step that ensures a smooth and successful machine quilting experience. Take the time to carefully assemble and secure your layers, and you’ll be well on your way to creating a beautiful and professionally quilted piece.
Next, let’s explore different quilting designs and patterns to inspire your creativity.
When starting out with machine quilting, practice on scrap fabric to get a feel for the machine’s speed and tension. This will help you gain confidence before working on your actual quilt.
Quilting Designs and Patterns
The world of quilting offers a wide array of designs and patterns that can elevate the visual appeal of your quilt. Whether you prefer traditional motifs or modern geometric shapes, there is a quilting design to suit every style. Here are some popular quilting designs and patterns to consider:
- Grid or Crosshatch: This classic quilting design involves stitching parallel lines vertically and horizontally, creating a grid-like pattern. It adds a clean and polished look to your quilt.
- Feathers: Feather quilting designs create elegant and graceful motifs resembling the flowing curves of feathers. They can be stitched as a border or as individual motifs scattered throughout the quilt.
- Meandering: Meandering quilting, also known as stippling, consists of fluid and curvy lines that fill the empty spaces in your quilt. It adds texture and visual interest to both modern and traditional quilt designs.
- Swirls or Paisleys: Swirls and paisley motifs are popular choices for quilting borders and blocks. These intricate designs add a touch of whimsy and movement to your quilt.
- Starburst or Sunburst: Starburst or sunburst designs involve radiating lines extending from a central point, creating a burst of energy and dimension in your quilt. They are particularly suited for medallion-style quilts.
- Curved Lines: Quilting curved lines, such as arcs or waves, brings softness and fluidity to your quilt. These designs can be used to complement floral or organic-themed quilt patterns.
- Cross or X: This simple yet eye-catching design involves stitching diagonal lines that intersect, forming a cross or X pattern. It adds texture and geometric interest to your quilt.
These are just a few examples of quilting designs and patterns that you can incorporate into your quilting projects. Don’t be afraid to experiment and combine different designs to create a unique visual story with your quilts.
When choosing a quilting design, consider the overall theme and style of your quilt. Think about how the quilting design will enhance or complement the quilt blocks and fabric patterns. Sketching out the design on paper or using quilt design software can help you visualize the final result.
Remember, quilting is an art form, and the possibilities are endless. Let your creativity flow and enjoy the process of bringing your quilts to life with beautiful and intricate quilting designs.
In the next section, we will dive into techniques for machine quilting to help you achieve professional and stunning results.
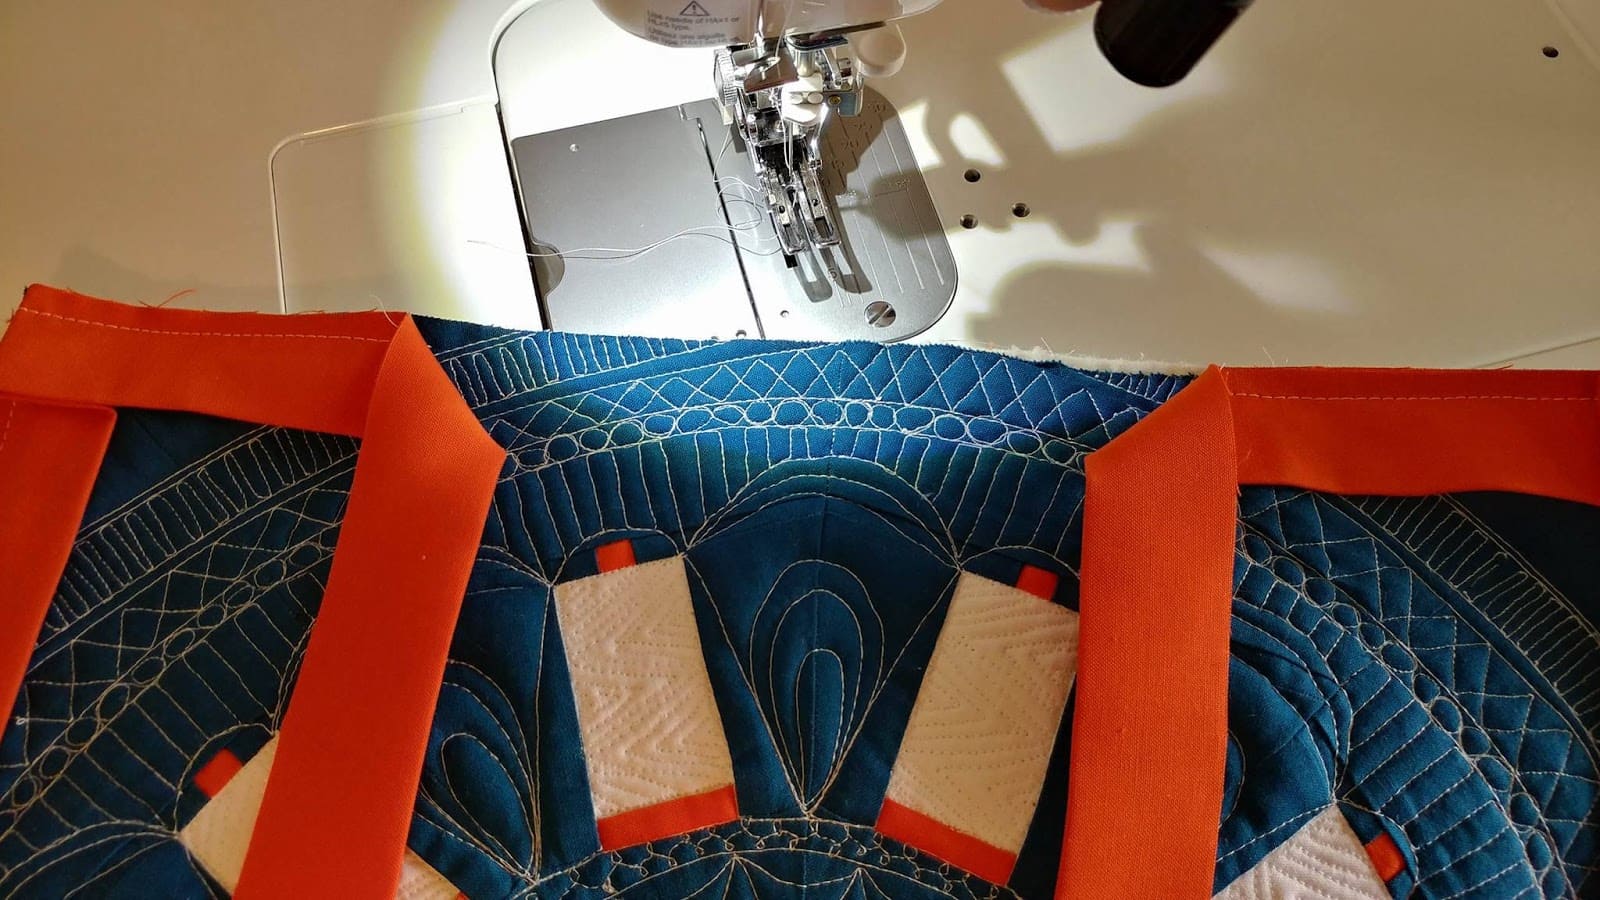
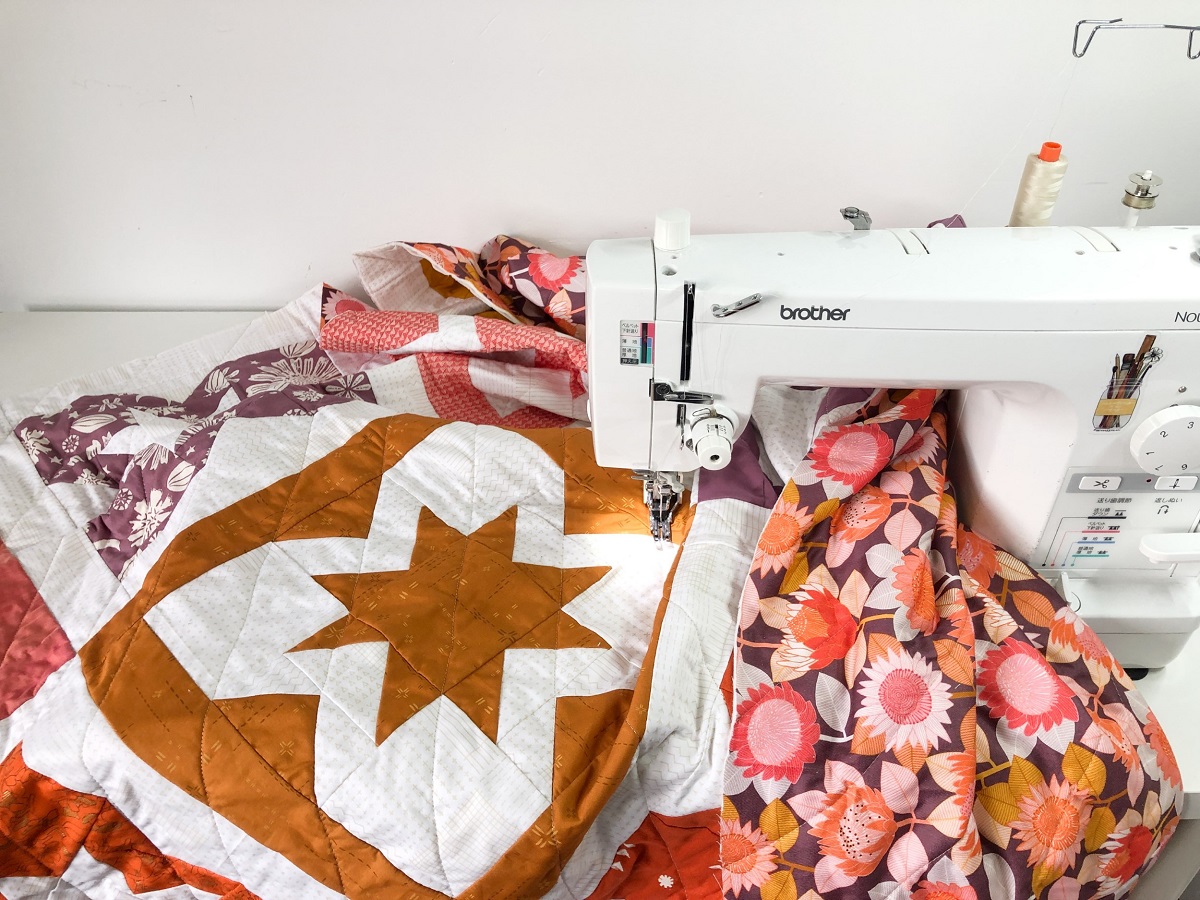
Techniques for Machine Quilting
Machine quilting offers a variety of techniques that allow you to create stunning designs and textures on your quilts. Here are some essential techniques to master for successful machine quilting:
- Walking Foot Quilting: When using a walking foot, the fabric is fed through the machine evenly from both the top and bottom. This technique is ideal for straight line quilting, stitching in the ditch, or quilting parallel lines.
- Free-Motion Quilting: Free-motion quilting gives you full control over the movement of the fabric under the machine’s needle. Lower the feed dogs or use a darning foot, and use your hands to guide the fabric in any direction to create intricate and unique designs.
- Echo Quilting: Echo quilting involves stitching parallel lines around a shape, following the contours and repeating the lines at regular intervals. This technique adds dimension and emphasis to your quilt motifs.
- Stitch-in-the-Ditch: Stitching in the ditch means quilting along the seams of your quilt blocks. This technique helps to secure the layers together and highlights the patchwork design.
- Quilting with Rulers: Quilting rulers are used to guide the stitching along straight lines or create precise shapes and designs. They can be acrylic or metal rulers specially designed for quilting.
- Thread Painting: Thread painting involves using different colors and types of thread to add texture and detail to specific areas of your quilt. This technique allows you to create realistic images or highlight specific elements.
- Edge-to-Edge Quilting: In edge-to-edge quilting, you choose a single design or pattern and quilt it continuously across the entire quilt without stopping. This technique simplifies the process and gives your quilt a cohesive look.
As you explore these quilting techniques, it’s important to practice on scrap fabric or quilt sandwich samples to gain confidence and control over your machine quilting skills. Start with simpler designs and gradually advance to more complex patterns as you become comfortable with the process.
Remember to maintain an even machine speed, take breaks if you start feeling fatigued, and use appropriate tension settings and thread for smooth and balanced stitches. You can experiment with different stitch lengths and widths to achieve your desired effect.
Machine quilting is a skill that develops over time, so be patient with yourself and enjoy the learning process. Each quilt you make will provide new opportunities to explore and improve your machine quilting techniques.
Next, let’s address some common issues that quilters may encounter during the machine quilting process and how to troubleshoot them.
Troubleshooting Common Issues
Machine quilting, like any skill, can sometimes come with its fair share of challenges. Here are some common issues that quilters may encounter during the machine quilting process, along with potential solutions:
- Uneven Stitches: Uneven stitches can occur due to inconsistent machine speed or tension. Start by ensuring your machine is set to a steady speed, and check that the tension is properly adjusted for the fabric and thread you’re using.
- Thread Breakage: Thread breakage can happen if the tension is too tight, the needle is dull, or the thread is old or of poor quality. Try adjusting the tension, replace the needle with a fresh one, and use high-quality thread suitable for quilting.
- Puckering or Fabric Bunching: Puckering or fabric bunching can be caused by improper tension or uneven fabric feeding. Check and adjust the tension as needed, and ensure that the fabric is being fed smoothly through the machine. It may also help to use quilting gloves for better fabric control.
- Skipped Stitches: Skipped stitches are often a result of using a dull needle, improper needle size, or incorrect machine settings. Replace the needle with a new one suitable for the fabric, ensure it is inserted correctly, and double-check the machine settings for stitch length and tension.
- Poor Stitch Quality: Poor stitch quality can be a result of various factors, such as incorrect tension, improper needle or thread, or an issue with the sewing machine. Check all these elements, perform regular maintenance on your machine, and consult the user manual as needed.
- Stitching Off the Quilt: Sometimes, the stitching may go off the quilt unintentionally. This can occur due to improper fabric handling or not properly securing the quilt layers. Use quilting gloves for better control and ensure the quilt layers are basted or pinned securely together.
If you encounter any of these issues, don’t get discouraged. Troubleshooting is a normal part of the quilting process, and with practice and experimentation, you’ll become more adept at resolving these challenges.
Remember to take breaks when needed, maintain a clean and well-oiled machine, and practice good quilting techniques. Don’t be afraid to seek advice or guidance from experienced quilters or consult online quilting communities for additional support.
Finally, as you gain more experience with machine quilting and overcome these common challenges, you’ll develop your own strategies and techniques for achieving beautiful and successful quilting results.
Now that we’ve covered some troubleshooting tips, let’s move on to the final section: adding the finishing touches to your quilt.
Finishing Touches
As you near the completion of your machine quilting project, it’s time to focus on the finishing touches that will give your quilt that professional, polished look. Here are some important steps to consider:
- Trimming: Begin by trimming the excess batting and backing fabric from the edges of your quilt. Use a ruler and rotary cutter for clean, straight edges.
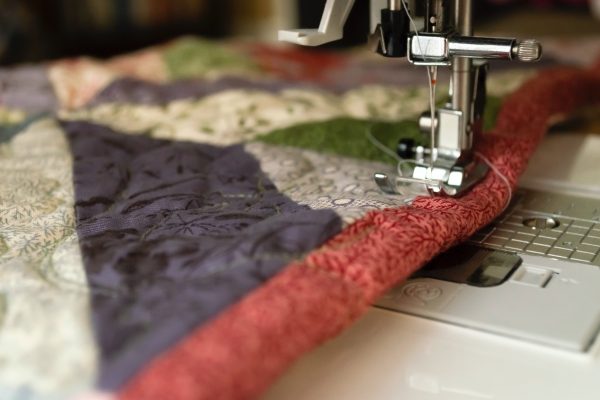
- Binding: Binding is the fabric strip that covers the raw edges of your quilt. You can create binding using coordinating fabric or a contrasting color for added visual interest. Attach the binding to the quilt using a double-fold method or machine binding technique.
- Square Up: Ensure that your quilt is square by measuring diagonally from corner to corner. Make any necessary adjustments by trimming or squaring up the corners to achieve an even shape.
- Labeling: Consider adding a label to your quilt to document important information such as the quilt name, date, your name, and any other relevant details. This personal touch adds sentimental value and makes your quilt unique.
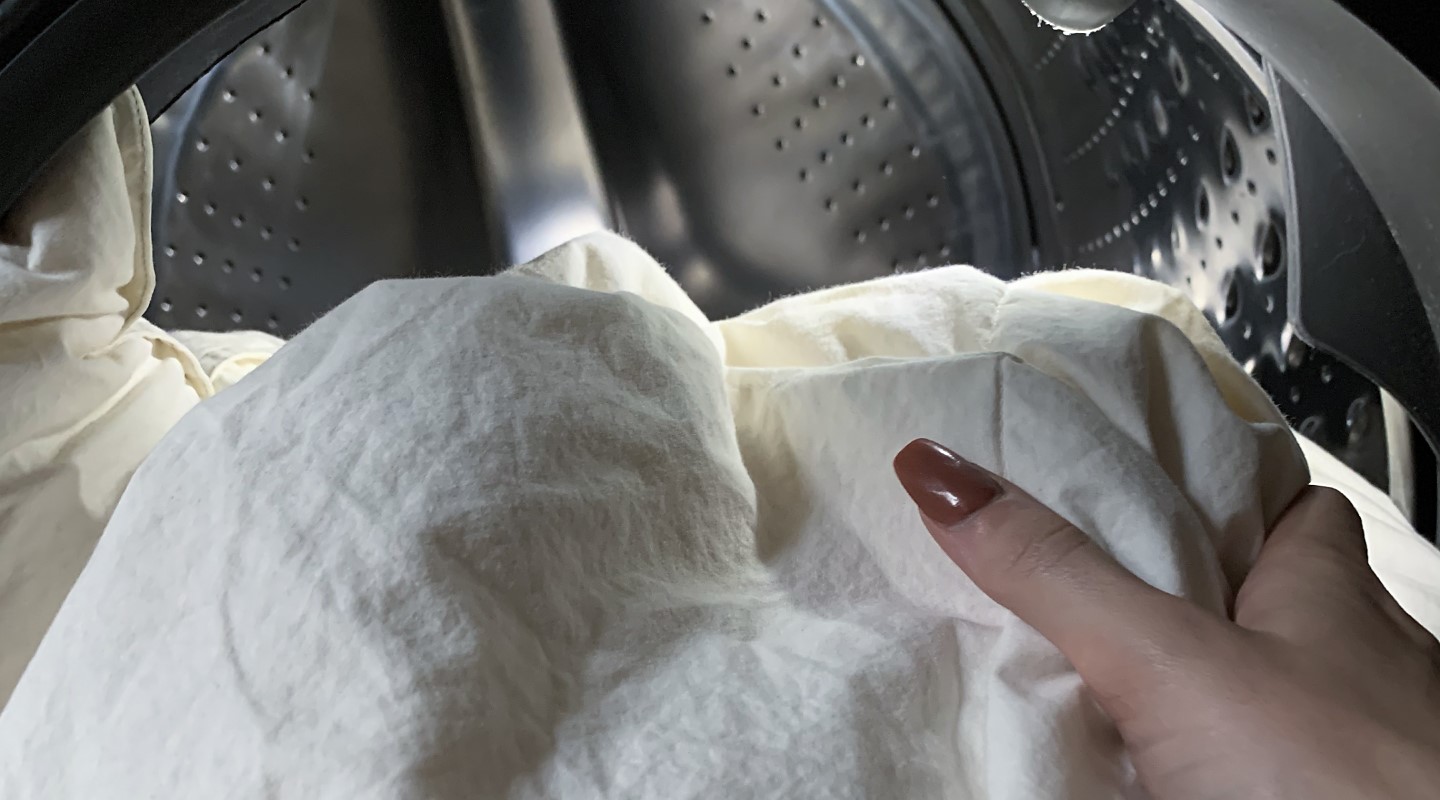
- Quilt Care: Provide care instructions with your finished quilt. Include information on how to wash, dry, and store the quilt to ensure its longevity and preserve its beauty.
- Finishing Stitch: For a professional touch, consider stitching around the outer edge of the quilt, approximately ¼ inch in from the binding. This final finishing stitch helps secure the layers together and adds a decorative detail.
- Showcasing: Once your quilt is complete, proudly display it or gift it to a loved one. You can use quilt hanging sleeves, quilt racks, or even frame it as a piece of art.
By paying attention to these finishing touches, you’ll elevate your quilt to its full potential. Capturing the essence of your hard work and creativity, these final steps will ensure that your quilt stands out as a beautiful and cherished piece.
Remember to take the time to appreciate your accomplishment and celebrate your quilting journey. Each quilt you create is a testament to your skill and artistry.
Now that you’ve learned about the essential steps, techniques, and finishing touches of machine quilting, it’s time to put your knowledge into practice. Enjoy the process, embrace your creativity, and let your quilting adventures unfold!
Happy quilting!
Conclusion
Congratulations on completing this comprehensive guide to machine quilting! You’ve explored the essential steps, techniques, and finishing touches that will help you create beautiful and professional-looking quilts using your sewing machine.
Machine quilting offers a world of possibilities, allowing you to showcase your creativity and transform fabric into stunning works of art. With the right tools, techniques, and a little bit of practice, you’ll discover the joy and satisfaction of creating unique and personalized quilts.
Remember that machine quilting is a journey, and each project is an opportunity to refine your skills and explore new designs. Don’t be afraid to experiment, try new patterns, and share your creations with fellow quilters who can offer support and inspiration.
As you continue to hone your machine quilting skills, take time to reflect on your progress and celebrate the quilts you’ve completed. Each stitch represents your dedication and passion for the craft, and every quilt is a testament to your growth as a quilter.
Whether you choose to quilt for personal enjoyment, as a form of self-expression, or to give handmade gifts to loved ones, your machine quilting journey will continue to bring you joy and satisfaction for years to come.
So gather your tools, select your fabrics, and let your sewing machine guide you as you embark on your next quilting adventure. The possibilities are endless, and there’s no limit to what you can create.
Happy machine quilting!
Frequently Asked Questions about How To Machine Quilt For Beginners
Was this page helpful?
At Storables.com, we guarantee accurate and reliable information. Our content, validated by Expert Board Contributors, is crafted following stringent Editorial Policies. We're committed to providing you with well-researched, expert-backed insights for all your informational needs.


0 thoughts on “How To Machine Quilt For Beginners”