Articles
How To Miter Corners On Quilt Binding
Modified: August 20, 2024
Learn how to perfectly miter corners on quilt binding with our informative articles. Master quilting techniques and achieve professional results.
(Many of the links in this article redirect to a specific reviewed product. Your purchase of these products through affiliate links helps to generate commission for Storables.com, at no extra cost. Learn more)
Introduction
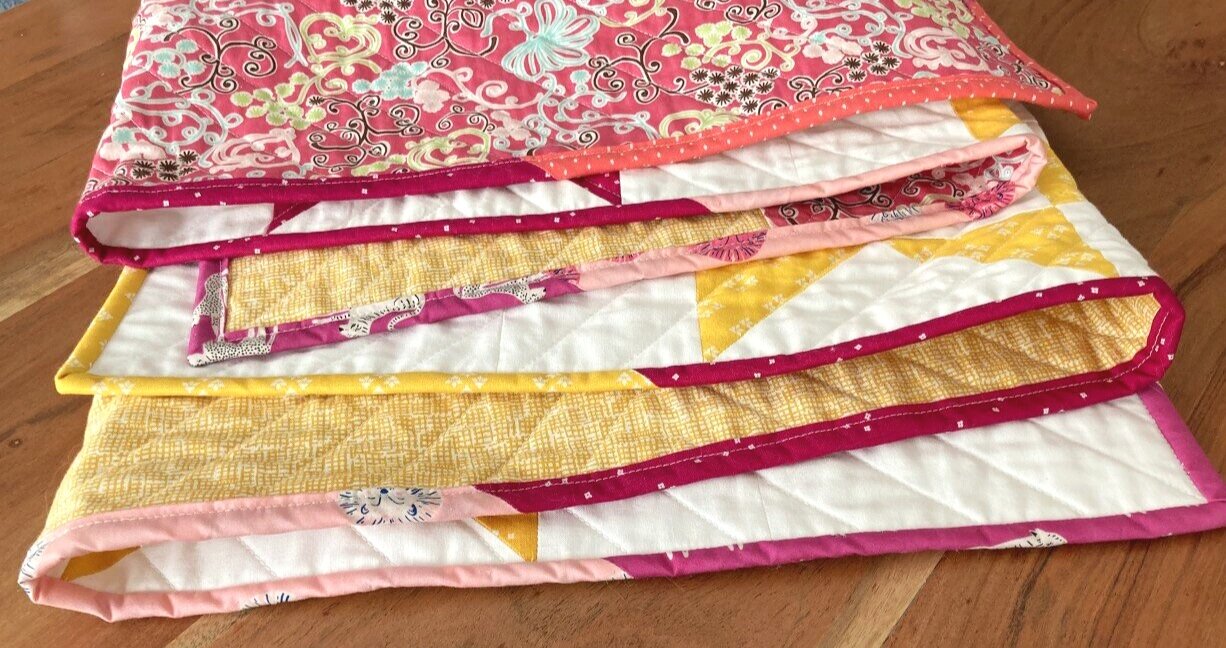
Quilt binding is an essential part of finishing a quilt, providing a neat and professional edge while also securing the layers together. When it comes to binding, one technique that can elevate the overall look of your quilt is mitering the corners. Mitered corners give the binding a polished and seamless appearance, adding a touch of sophistication to your project.
In this article, we will delve into the world of mitered corners on quilt binding. We will explore why mitered corners are a popular choice, the tools and materials needed, the step-by-step process, useful tips and tricks, common mistakes to avoid, and alternative methods for finishing quilt binding.
Whether you’re a beginner or an experienced quilter, learning how to miter corners on quilt binding will help you take your quilt projects to the next level. By mastering this technique, you’ll be able to create beautifully finished quilts that stand out with their attention to detail.
So, let’s dive in and discover the art of mitering corners on quilt binding!
Key Takeaways:
- Elevate your quilt projects by mastering the art of mitering corners on quilt binding, adding a touch of sophistication and professionalism to your finished quilts.
- Explore alternative methods for finishing quilt binding, from rounded corners to decorative stitches, to add unique charm and character to your quilt edges.
Read more: How To Miter Corners On A Quilt Border
What is quilt binding?
Quilt binding refers to the process of enclosing the raw edges of a quilt with a strip of fabric. It serves multiple purposes – it provides stability and durability to the quilt edges, preventing fraying and wear over time. Additionally, quilt binding adds a decorative finishing touch, enhancing the overall appearance of the quilt.
Traditionally, quilt binding is made from a fabric that complements the quilt top or backing. It can be made from the same fabric used in the quilt, a coordinating solid color, or even a contrasting fabric for a bold and dramatic look. Quilt binding is typically cut on the bias, which allows for more flexibility and easier manipulation around curves and corners.
There are several methods for attaching quilt binding, including hand sewing, machine stitching, or using a combination of both. Regardless of the method chosen, the binding strip is sewn onto the front of the quilt and then folded over to the back, where it is secured in place either by hand or machine stitching.
The width of quilt binding can vary depending on personal preference and the desired look. Common binding widths range from ¼ inch to ½ inch when finished.
Overall, quilt binding is an essential step in completing a quilt. It not only protects the edges but also adds a professional and polished touch to your quilt, making it ready for use or display.
Why mitered corners?
Mitered corners on quilt binding are a popular choice among quilters due to their aesthetic appeal and the professional finish they provide. Here are a few reasons why mitered corners are favored:
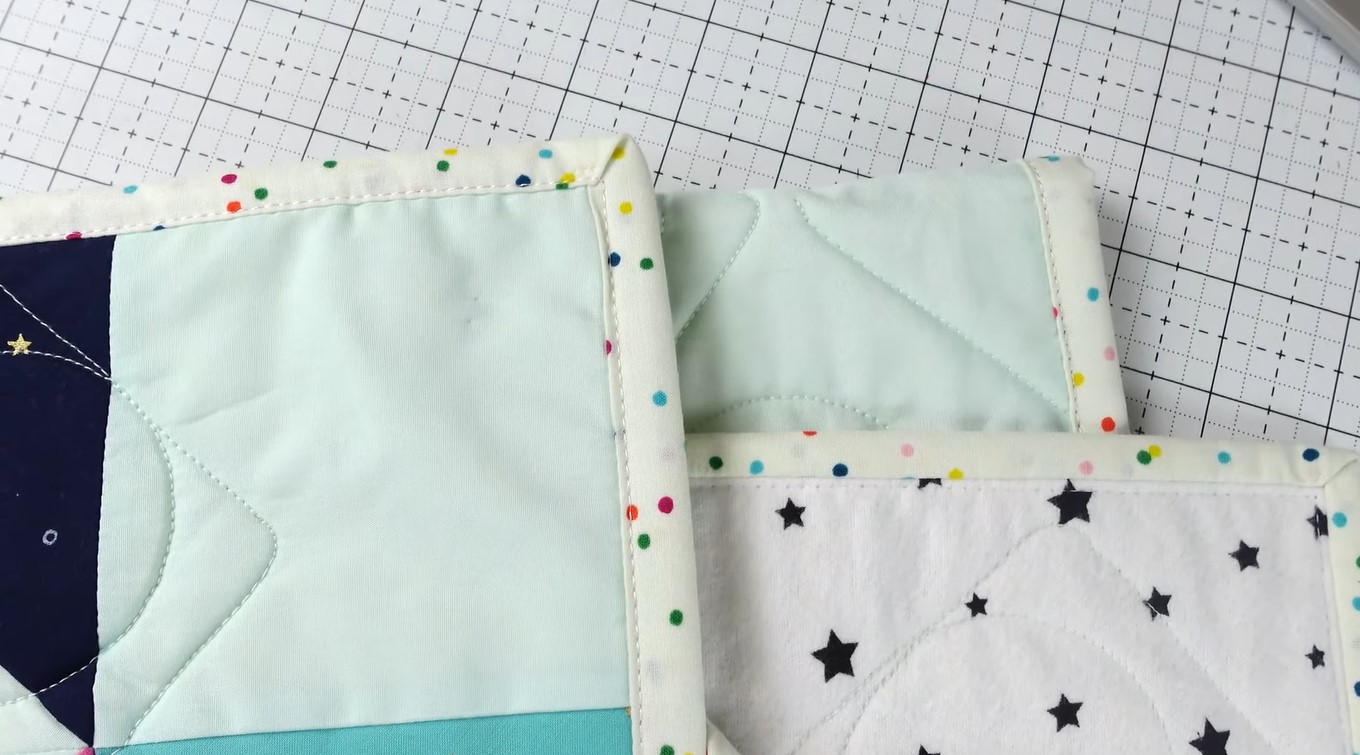
- Clean and seamless look: Mitered corners give quilt binding a clean and seamless appearance. Instead of the fabric overlapping at the corners, the binding strips meet at a diagonal angle, creating a visually pleasing and continuous line. This neat finish elevates the overall look of the quilt.
- Elimination of bulk: One advantage of mitered corners is the reduction of bulk at the corners. When the fabric is folded diagonally, it eliminates the excess fabric that would otherwise accumulate if the corners were not mitered. This results in a smoother and flatter corner that lays neatly against the quilt edge.
- Improved durability: Mitered corners provide added strength and durability to the quilt binding. The diagonal fold creates an extra layer of fabric at the corners, making them less prone to fraying or coming apart. This reinforcement ensures that the binding stays intact and withstands regular use and washing.
- Professional finish: Mitered corners give a professional and high-quality finish to your quilt. Whether you’re gifting the quilt, entering it into a competition, or simply taking pride in your work, mitered corners add that extra touch of craftsmanship and attention to detail that will impress anyone who sees your quilt.
- Versatility: Mitered corners can be applied to quilts of various shapes and sizes, accommodating both straight edges and curved edges. This versatility allows you to use mitered corners on any quilt project, whether it’s a rectangular throw quilt or a quilt with intricate borders and angles.
Overall, mitered corners bring a level of elegance, professionalism, and durability to quilt bindings. By mastering the art of mitering corners, you can elevate your quilt projects and achieve a polished and sophisticated finish that will make your quilts truly stand out.
Tools and Materials Needed
Before you can start mitering corners on quilt binding, it’s important to gather the necessary tools and materials. Having the right equipment at hand will make the process smoother and more efficient. Here are the tools and materials you’ll need:
- Quilt with unfinished edges: Start with a quilt that has been pieced, layered, and quilted, but has unfinished edges ready for binding.
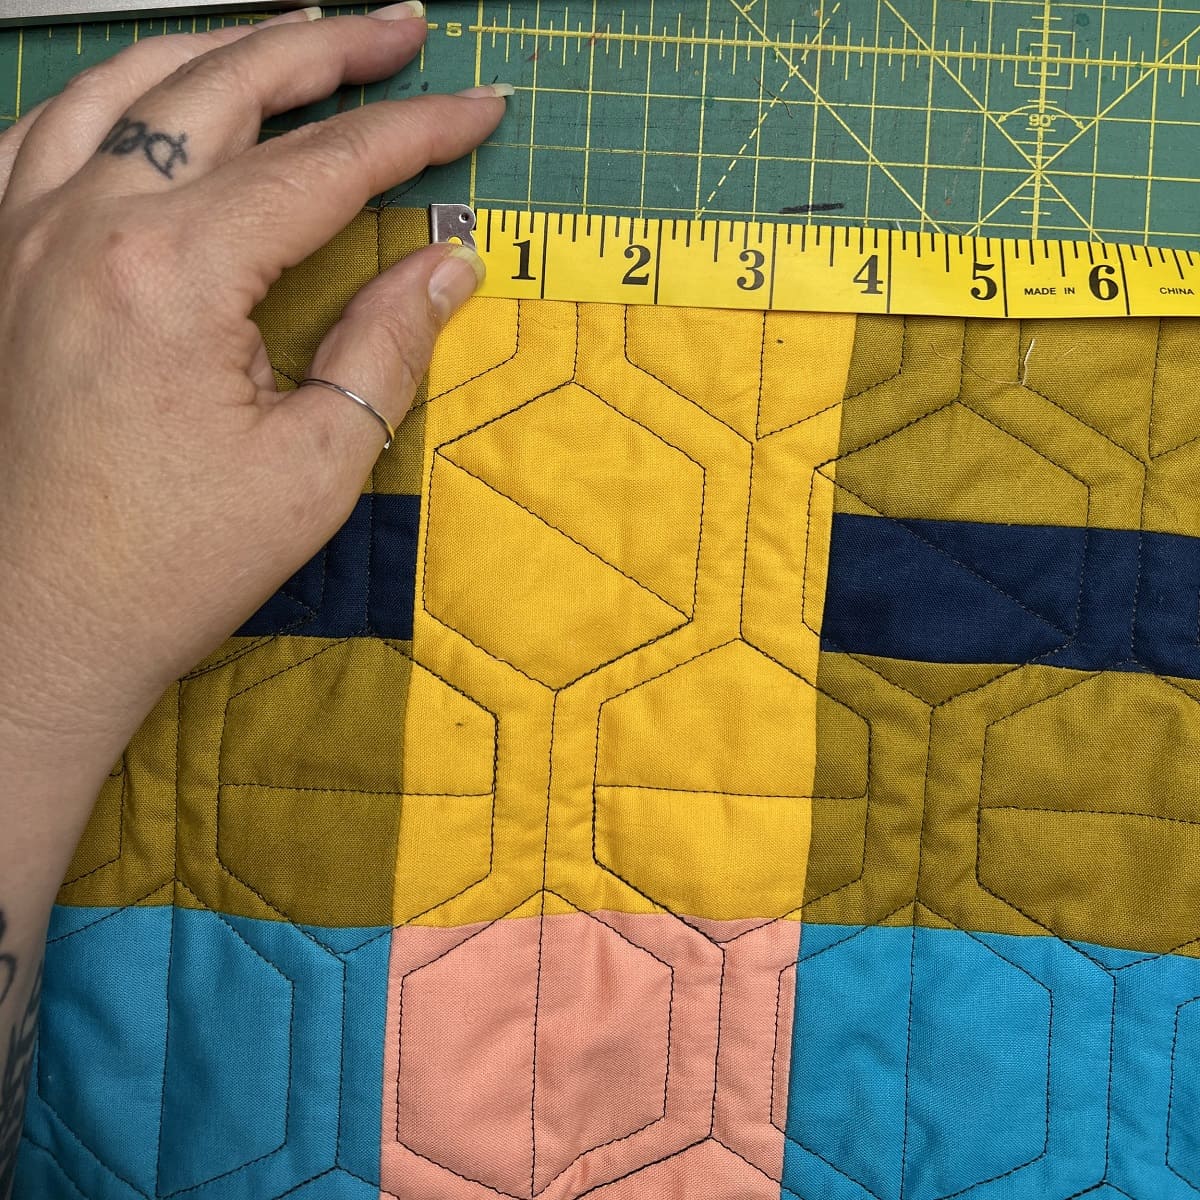
- Fabric for binding: Choose a fabric that complements your quilt and cut it into strips. The width of the strips will depend on your desired finished binding width. A rule of thumb is to cut the strips 2.5 inches wide, which will result in a finished binding of approximately ½ inch wide.
- Trimming tool: Use a rotary cutter, scissors, or a fabric cutting tool to cut your fabric into the desired binding strips. A cutting mat and ruler will also come in handy for accurate measurements.
- Sewing machine: While you can technically sew quilt binding by hand, using a sewing machine will save you time and provide a secure and consistent stitch.
- Pins or binding clips: These will be used to hold the binding strips in place as you sew them onto the quilt.
- Iron and ironing board: Pressing your fabric strips and seams as you work is essential for achieving neat and crisp mitered corners.
- Thread: Select a thread color that matches or complements your binding fabric.
- Basic sewing supplies: Don’t forget your trusty sewing needles, scissors, and thread snips for any necessary trimming, clipping, or finishing touches.
Having these tools and materials readily available will streamline the process of mitering corners on quilt binding, allowing you to focus on creating beautiful and polished results.
Step-by-Step Process for Mitering Corners on Quilt Binding
Mitering corners on quilt binding may seem intimidating at first, but with a step-by-step approach, you’ll quickly master the technique. Follow this process to achieve clean and professional mitered corners:
- Prepare your quilt: Ensure that your quilt has been layered, quilted, and has unfinished edges ready for binding.
- Prepare your binding: Cut your fabric into strips according to the desired width and length needed to go around the perimeter of your quilt. Join the strips together if necessary to create one long binding strip.
- Starting the binding: Begin sewing the binding onto the quilt, leaving a tail of a few inches unstitched. Align the raw edge of the binding strip with one edge of the quilt, right sides facing together. Use pins or binding clips to secure the binding in place.
- Sewing the binding: Using a ¼ inch seam allowance, sew the binding to the quilt. Sew along the edge, removing the pins or clips as you go. Continue sewing until you reach the first corner.
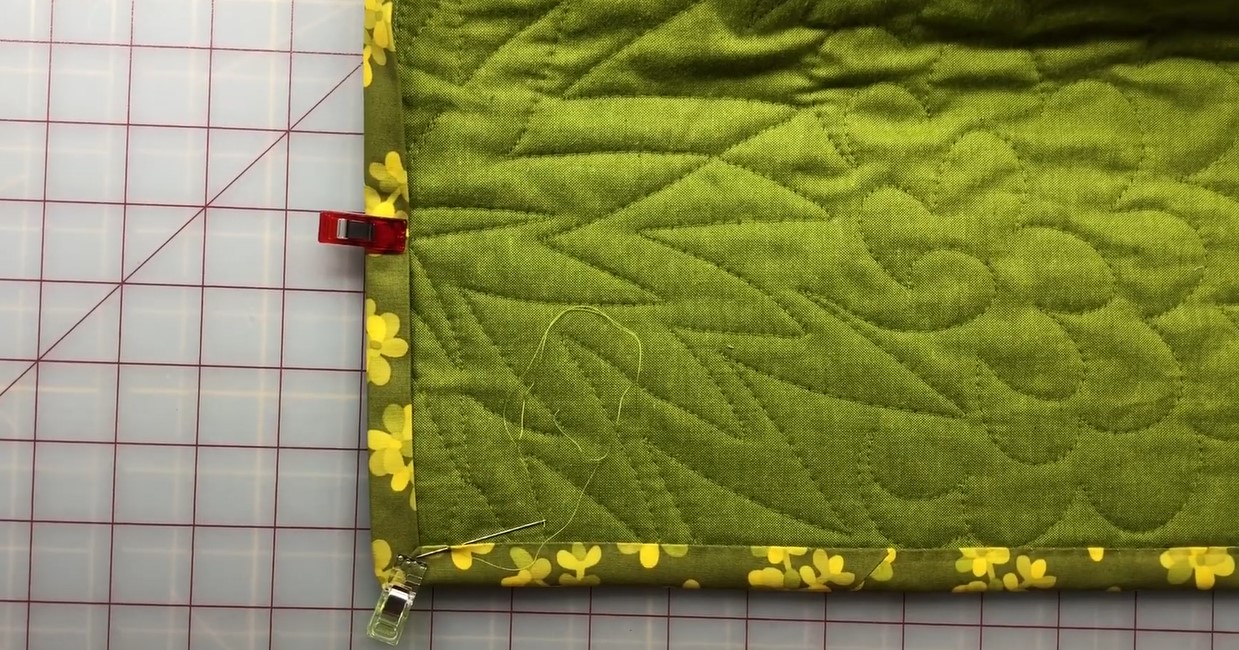
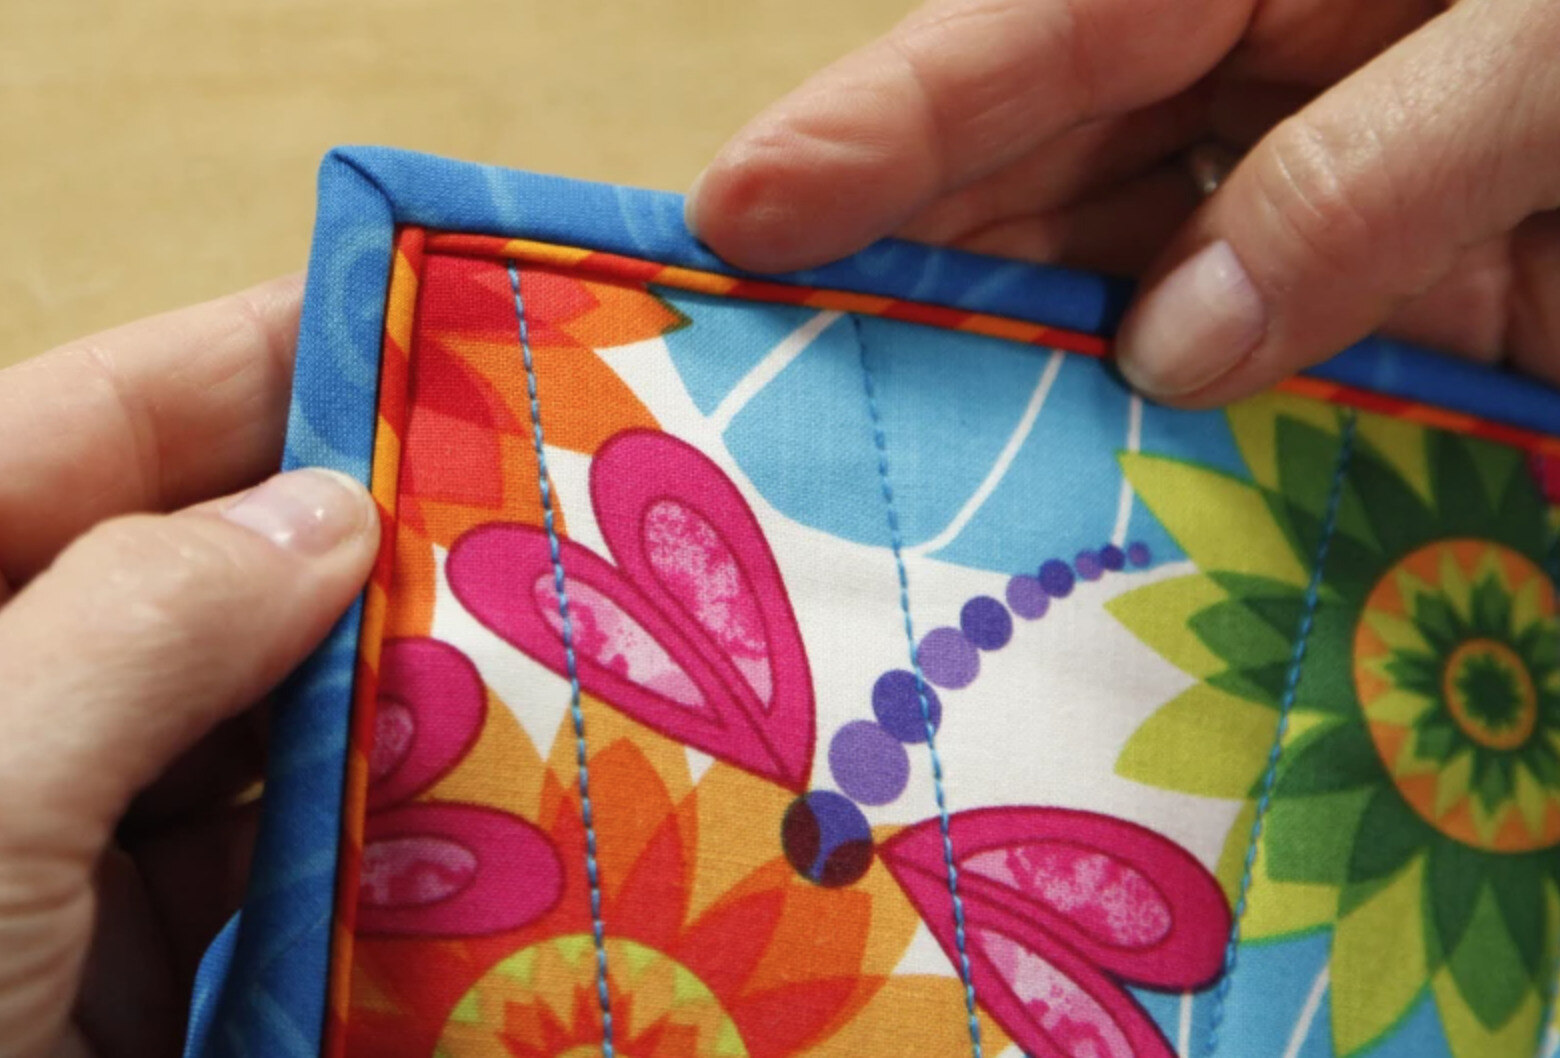
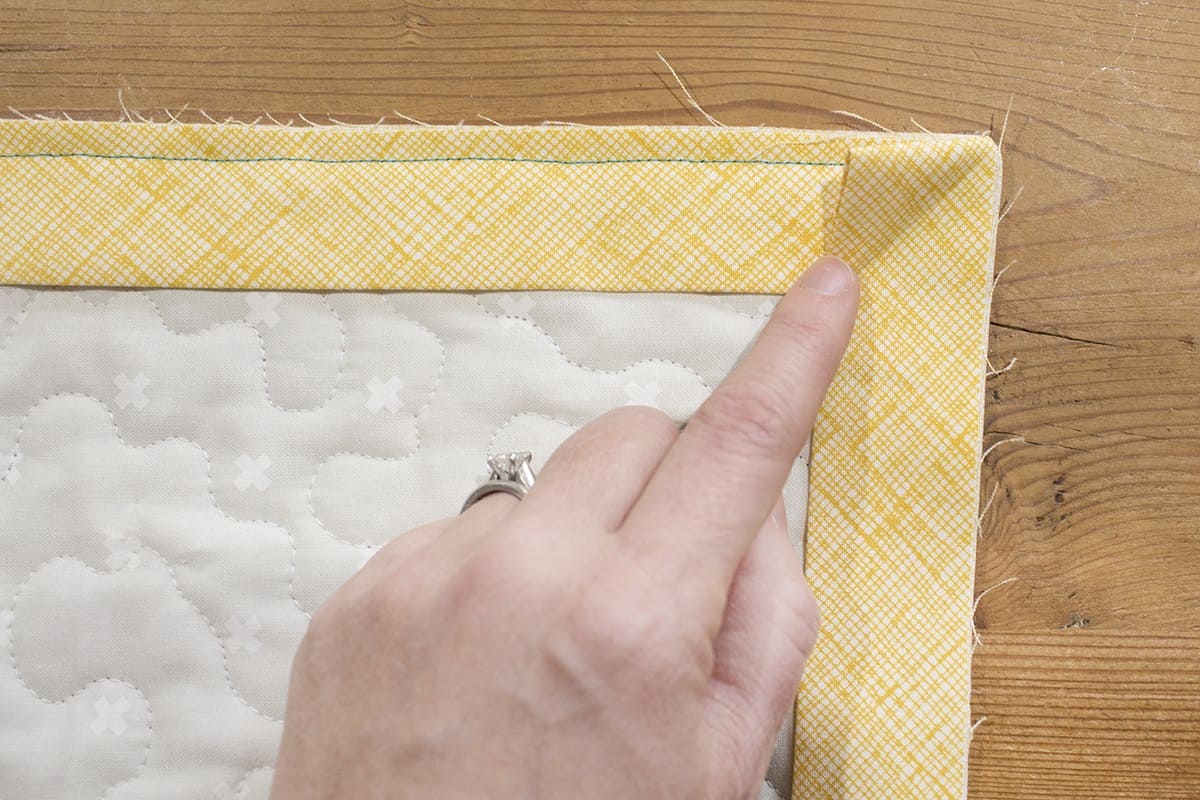
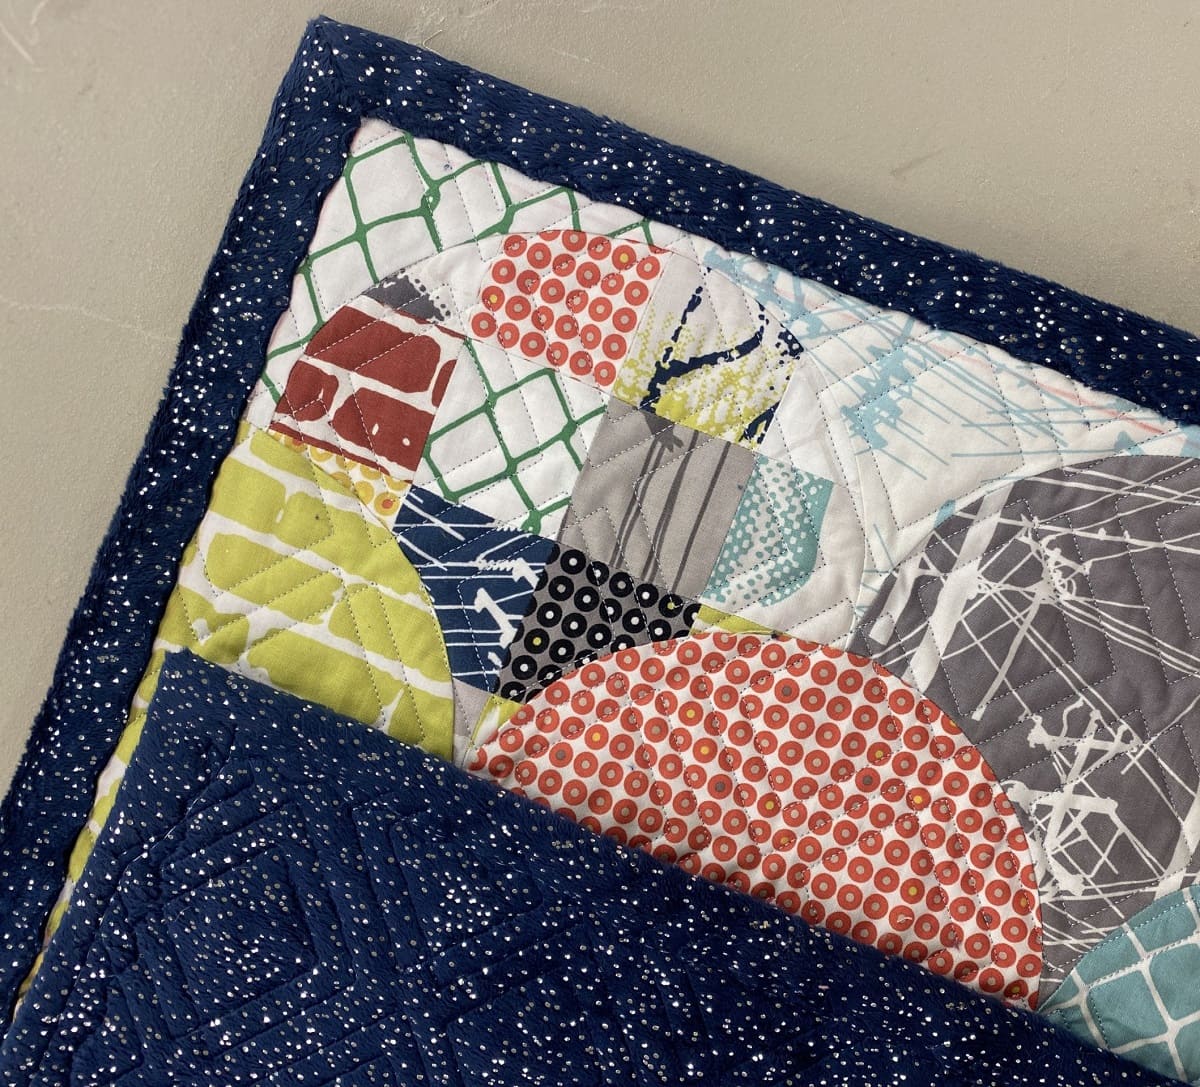
- Mitering the corner: When you reach the corner, stop sewing approximately ¼ inch away from the quilt edge. Pivot the quilt and fold the binding strip up at a 45-degree angle, creating a diagonal fold. Then, fold the binding strip back down, aligning it with the next edge of the quilt. The folded corner should form a neat and sharp point.
- Securing the mitered corner: Holding the folded corner in place, start sewing along the next edge of the quilt. Ensure that the fold is secure and lies flat against the quilt. Continue sewing until you reach the next corner and repeat the mitering process.
- Completing the binding: Continue sewing the binding around the quilt, mitering each corner as you go. When you reach the starting point, overlap the binding with the tail left at the beginning. Trim the excess binding, leaving a small overlap. Fold the end of the binding inside and sew it down to create a finished and seamless join.
- Finishing touches: Once the binding is completely sewn onto the quilt, fold it over to the back and secure it in place. You can hand stitch the binding to the back of the quilt using a slip stitch or use a decorative machine stitch for added flair.
By following these step-by-step instructions, you’ll achieve beautifully mitered corners on your quilt binding. Practice and patience will help you refine your technique, and soon you’ll be able to add this professional touch to all your quilt projects.
When mitering quilt binding corners, fold the binding at a 45-degree angle and then back down to align with the next edge. This creates a neat and professional-looking corner.
Read more: How To Join Ends Of Quilt Binding
Tips and Tricks for Getting Perfect Mitered Corners
Mitered corners on quilt binding require attention to detail and precision. Here are some helpful tips and tricks to ensure you achieve perfect mitered corners every time:
- Accurate measuring and cutting: Take the time to measure and cut your binding strips precisely. Use a ruler and rotary cutter for accurate and straight cuts. Consistent strip width will result in even mitered corners.
- Pressing is key: Before folding the corners, press your binding strip and sewn seam to ensure crisp edges and folds. Use an iron set at the appropriate temperature for your fabric.
- Create a consistent fold: When folding the corner, aim for a 45-degree angle. Use a ruler or pressing tool to achieve a sharp and consistent fold each time. This will give your mitered corners a clean and professional look.
- Pinning or clipping: Secure your binding strips in place using pins or binding clips. This will help keep the fabric in position and prevent shifting as you sew the binding onto the quilt.
- Practice on scrap fabric: If you’re new to mitered corners, practice the technique on scrap fabric first. This will allow you to gain confidence and refine your technique before working on your actual quilt.
- Take it slow: Sewing mitered corners requires careful attention to detail. Sew slowly and take your time when sewing around the corners. This will help you maintain control and achieve precise stitches.
- Test your stitches: Before sewing on your actual quilt, test your stitch length and tension on a scrap piece of fabric. This will ensure your stitches are even and balanced, preventing any puckering or unevenness in the binding.
- Clip the corners: After sewing the mitered corners, clip the excess fabric in the corner to reduce bulk. Be careful not to cut into the seam. This will help the corner lie flatter and create a neater finish.
- Check for consistency: Throughout the process, double-check that the width of your binding stays consistent. Inconsistent binding width can result in uneven mitered corners.
- Practice and patience: Like any skill, achieving perfect mitered corners takes practice. Don’t be discouraged if your first attempt isn’t flawless. Keep practicing and experimenting with different techniques and soon you’ll be able to master this skill.
By implementing these tips and tricks, you’ll increase your chances of achieving perfect mitered corners on your quilt binding. Remember, practice makes perfect, so don’t be afraid to try different methods and techniques to find what works best for you.
Common Mistakes to Avoid
Mitering corners on quilt binding can be a challenging task, especially for beginners. However, by being aware of these common mistakes, you can avoid them and achieve better results:
- Inaccurate measurements: Failing to measure and cut your binding strips accurately can lead to uneven corners. Double-check your measurements and use a rotary cutter and ruler for precise cuts.
- Rushing the folding process: Take your time when folding the corners. Rushing can result in uneven folds and corners that don’t lie flat. Make sure the fabric is folded at a true 45-degree angle for a clean and professional look.
- Poor pressing: Neglecting to press your binding strips and sewn seams can lead to untidy corners. Pressing ensures crisp edges and folds, giving your mitered corners a polished appearance.
- Stretching the fabric: Be cautious of stretching the fabric as you sew the binding onto the quilt. Excessive pulling can cause distortion and irregular corners. Use pins or binding clips to hold the fabric in place without excessive tension.
- Uneven stitches: Inconsistent stitch length or tension can result in sloppy-looking mitered corners. Test your stitches on scrap fabric before sewing on your quilt, and adjust the settings if needed.
- Not clipping the excess fabric: For a smoother corner, it’s crucial to clip the excess fabric after sewing the mitered corners. Be careful not to clip too close to the seam, as it can unravel the stitching.
- Forgetting to secure the binding: After sewing the binding onto the quilt, make sure to fold it over to the back and secure it in place. Neglecting to do so can result in loose or puckered binding.
- Ignoring the grainline: When cutting your binding strips, be mindful of the fabric’s grainline. Cutting against the grain can cause the binding to stretch and distort, leading to wavy or misshapen corners.
- Skipping the practice: Mitering corners on quilt binding requires practice and patience. Don’t skip the opportunity to practice on scrap fabrics before working on your actual quilt. This will help you refine your technique and improve your results.
- Lack of attention to detail: Mitered corners require precision and attention to detail. Take your time, be meticulous in your measurements and folds, and strive for consistency throughout the process.
By avoiding these common mistakes and staying mindful of the details, you’ll be well on your way to achieving beautifully mitered corners on your quilt binding.
Alternative Methods for Finishing Quilt Binding
While mitered corners are a popular choice for finishing quilt binding, there are alternative methods you can explore to achieve different looks and textures. Here are a few alternative methods for finishing quilt binding:
- Straight Corners: Instead of mitering the corners, you have the option to fold the binding straight across the corners. This creates a more squared-off appearance and can be a quicker alternative if you prefer a simpler finish.
- Rounded Corners: Another alternative is to round the corners of your quilt binding. With this method, you would sew the binding onto the quilt as usual and then use a round object, such as a template or a glass, to trace and cut the curves at the corners. This technique adds a softer and more whimsical touch to your quilt edges.
- Scalloped or Zigzag Edges: For a decorative and unique finish, consider using a scallop or zigzag stitch along the edge of your quilt binding. This can be done with a sewing machine that has decorative stitch options. Experiment with different stitches and thread colors to create a personalized and eye-catching border.
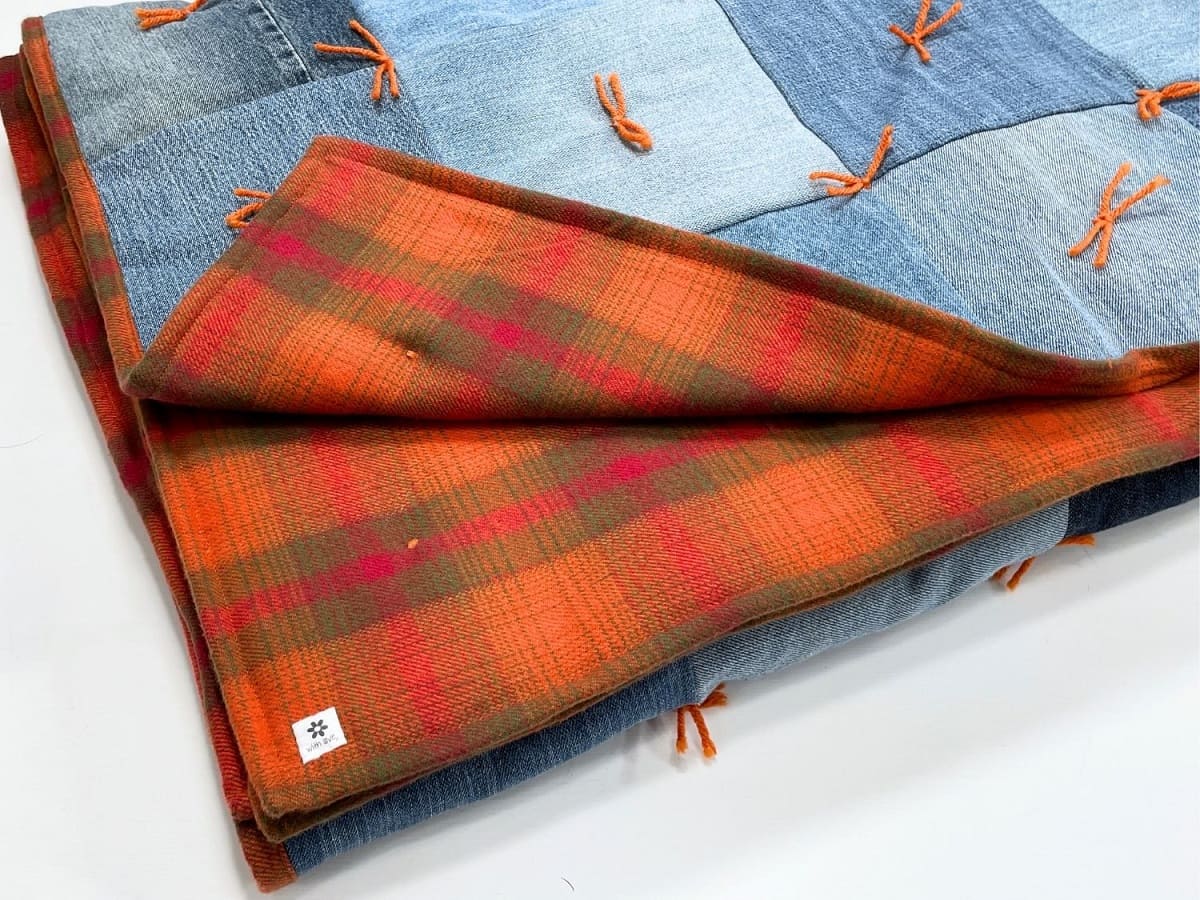
- Double-Fold Binding: If you prefer a more substantial binding or want to add a contrasting fabric to your quilt edge, consider using a double-fold binding technique. This involves folding the fabric strip in half lengthwise and then folding it over the raw edge of the quilt, enclosing it within the binding. This method results in a thicker and more durable binding that can withstand heavy use.
- Piping or Flange: Adding piping or a flange to your quilt binding can create a distinctive and decorative edge. Piping involves sandwiching a thin cord between the binding layers, while a flange is created by inserting a strip of contrasting fabric along the binding. These methods add depth and visual interest to your quilt and can be a fun way to incorporate different colors or textures.
- Exposed Raw Edge: For a modern and minimalist look, you can choose to leave the raw edges of your quilt binding exposed. This works particularly well with certain quilt designs and fabrics that have a clean and unfinished aesthetic. Keep in mind that this method may require additional care when washing and handling the quilt.
Remember, the choice of finishing method for your quilt binding is a personal preference. Consider the style and purpose of your quilt, and experiment with different techniques to find the one that best suits your vision. Whether you opt for mitered corners, alternative corners, or other unique finishes, each method can add its own charm and character to your quilt.
Conclusion
Finishing your quilt with beautifully mitered corners on the binding adds a touch of professionalism and sophistication to your quilt projects. While mitering corners may seem daunting at first, with practice and the right techniques, you can achieve perfect mitered corners that elevate the overall look of your quilts.
In this article, we explored the art of mitering corners on quilt binding, starting with an introduction to the technique and its benefits. We discussed what quilt binding is, why mitered corners are favored, and the tools and materials needed to successfully complete this process. We also provided a step-by-step guide, including helpful tips and tricks to achieve precise and polished mitered corners.
Additionally, we explored alternative methods for finishing quilt binding, offering various options to suit different styles and preferences. Whether you prefer straight corners, rounded corners, decorative stitches, or unique bindings like piping or flange, there are alternative techniques available to add a personal touch to your quilt edges.
As you continue your quilting journey, remember to take your time, practice, and pay attention to the details. Each quilt project is an opportunity to improve your skills and experiment with different techniques. Don’t be afraid to try new methods and explore your creativity.
By incorporating mitered corners or alternative binding finishes into your quilts, you will create treasured pieces that showcase your craftsmanship and attention to detail. The extra effort put into the binding will not only enhance the aesthetic appeal but also provide a durable and professional finish that will withstand the test of time.
So, embrace the art of mitering corners on quilt binding, and let your quilts shine with their beautifully finished edges!
Frequently Asked Questions about How To Miter Corners On Quilt Binding
Was this page helpful?
At Storables.com, we guarantee accurate and reliable information. Our content, validated by Expert Board Contributors, is crafted following stringent Editorial Policies. We're committed to providing you with well-researched, expert-backed insights for all your informational needs.


0 thoughts on “How To Miter Corners On Quilt Binding”