Home>Renovation & DIY>Tools & Equipment>How To Spackle An Outside Corner

Tools & Equipment
How To Spackle An Outside Corner
Modified: February 18, 2024
Learn how to spackle an outside corner with the right tools and equipment. Follow our step-by-step guide for seamless results.
(Many of the links in this article redirect to a specific reviewed product. Your purchase of these products through affiliate links helps to generate commission for Storables.com, at no extra cost. Learn more)
Introduction
Welcome to our guide on how to spackle an outside corner. Whether you’re tackling a new home improvement project or simply doing some touch-ups around the house, spackling is an essential skill to have. Spackling involves filling in gaps, cracks, and imperfections in surfaces to create a smooth and seamless finish. When it comes to outside corners, which are particularly prone to wear and tear, knowing how to properly spackle is vital to maintaining the aesthetic appeal of your walls.
This step-by-step guide will walk you through the process of spackling an outside corner, from preparing the surface to the final touches of paint. But before we dive into the details, let’s go over the tools and materials you’ll need for this project.
Key Takeaways:
- Properly preparing the outside corner is crucial for a successful spackling job. Clean the area, remove loose debris, and widen any cracks or holes for a smooth and durable finish.
- Applying thin layers of spackle and feathering the edges ensures a seamless and professional-looking result. Sanding, priming (if desired), and painting further enhance the appearance and durability of the spackled corner.
Read more: How To Spackle Corners
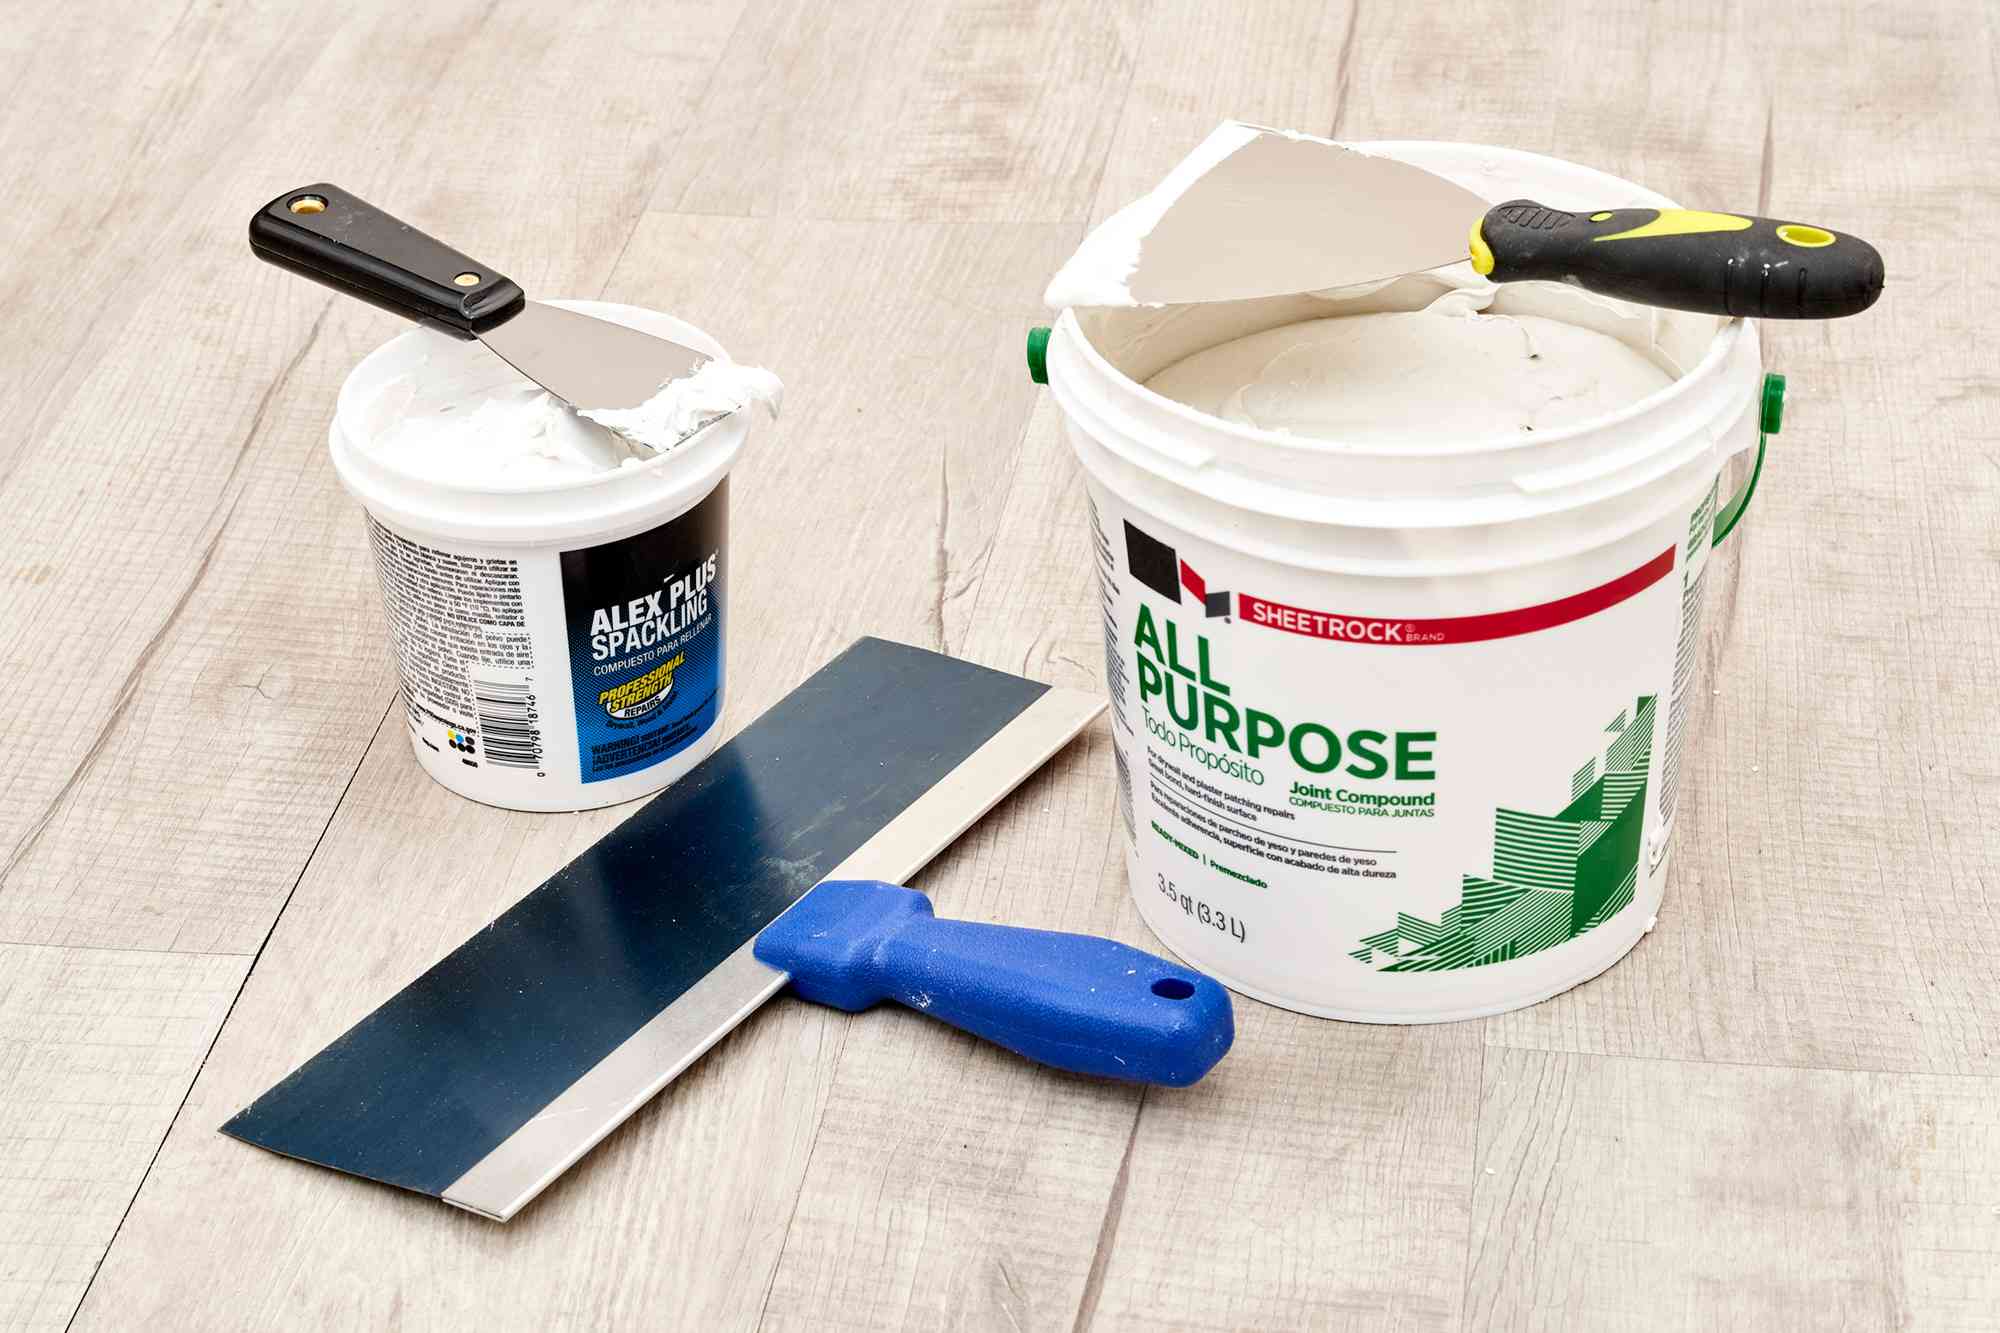
Tools and Materials Needed
Before you begin spackling an outside corner, gather the following tools and materials:
- Putty knife
- Spackle compound
- Sandpaper (medium-grit)
- Primer (optional)
- Paintbrush or roller
- Paint
- Tape
- Dust mask
- Clean cloth or sponge
Make sure you have all these items on hand before starting the project to ensure a smooth process.
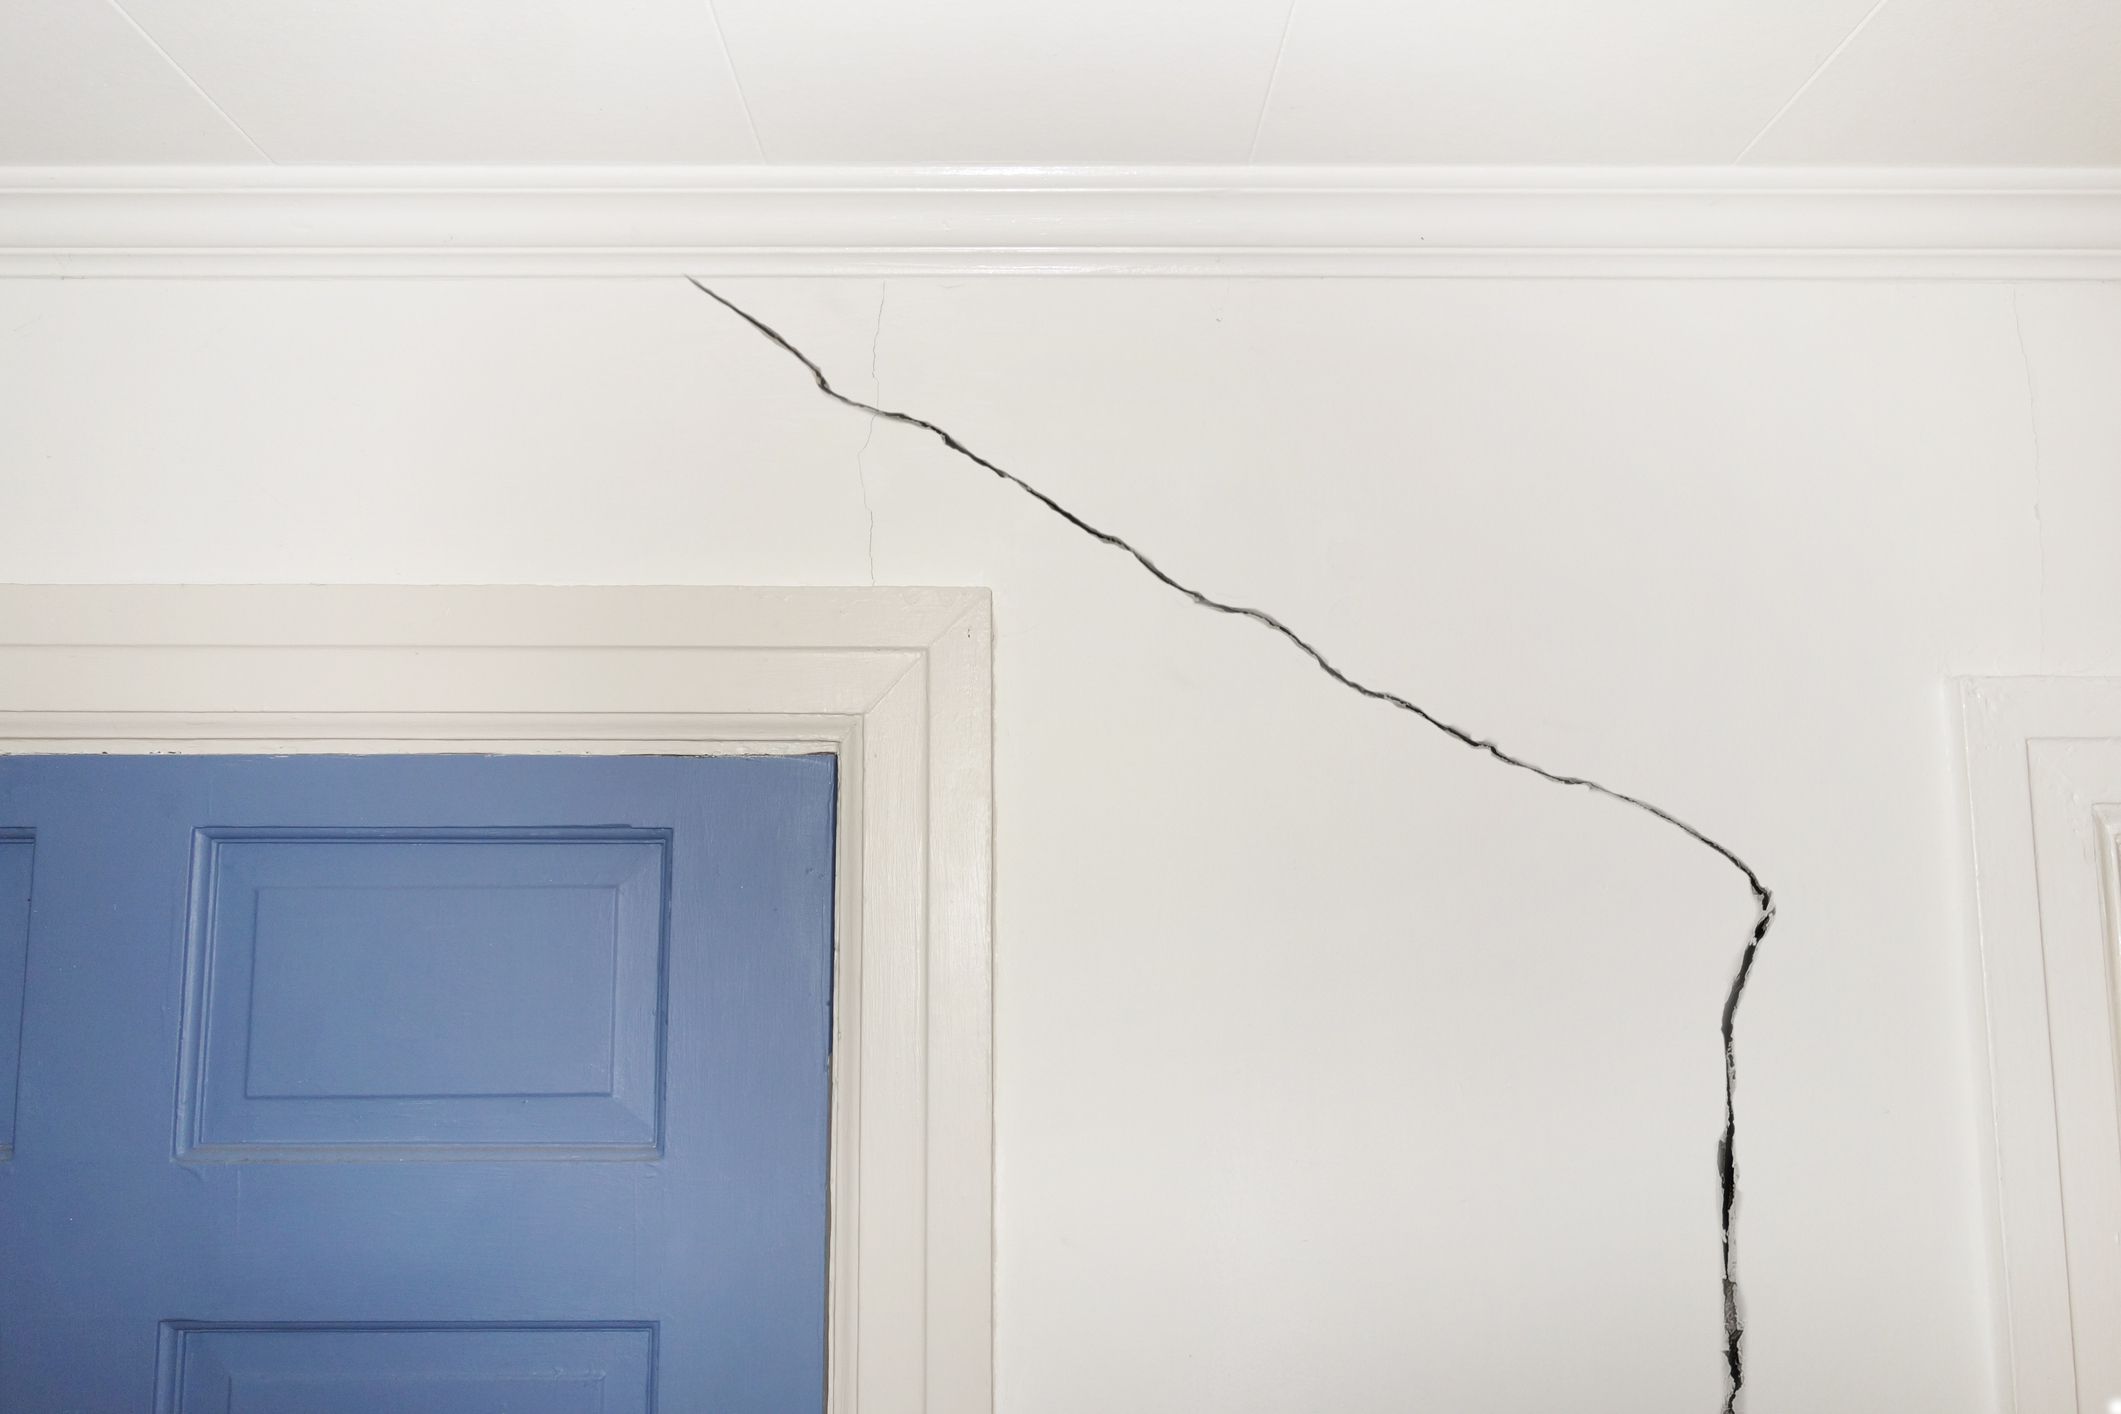
Step 1: Prepare the Corner
The first step in spackling an outside corner is to prepare the surface. This involves removing any loose paint, dirt, or debris from the area you’ll be working on. Follow these steps to properly prepare the corner:
- Start by covering the adjacent surfaces, such as the walls and floor, with tape to protect them from any accidental spackle splatters.
- Put on a dust mask to protect yourself from inhaling any dust particles that may be released during the preparation process.
- Use a clean cloth or sponge to wipe down the corner, removing any dust or dirt. This ensures that the spackle adheres well to the surface.
- If there is any loose paint or flaking, carefully scrape it off with a putty knife. Be gentle to avoid damaging the wall further.
- Inspect the corner for any cracks or holes. If you find any, use the putty knife to widen and clean them out, creating a smooth surface for the spackle to fill.
- Once the corner is clean, dry, and free of any loose debris, you’re ready to move on to the next step of applying the spackle.
By properly preparing the corner, you’ll create a clean and solid base for the spackle application, ensuring an even and durable finish.
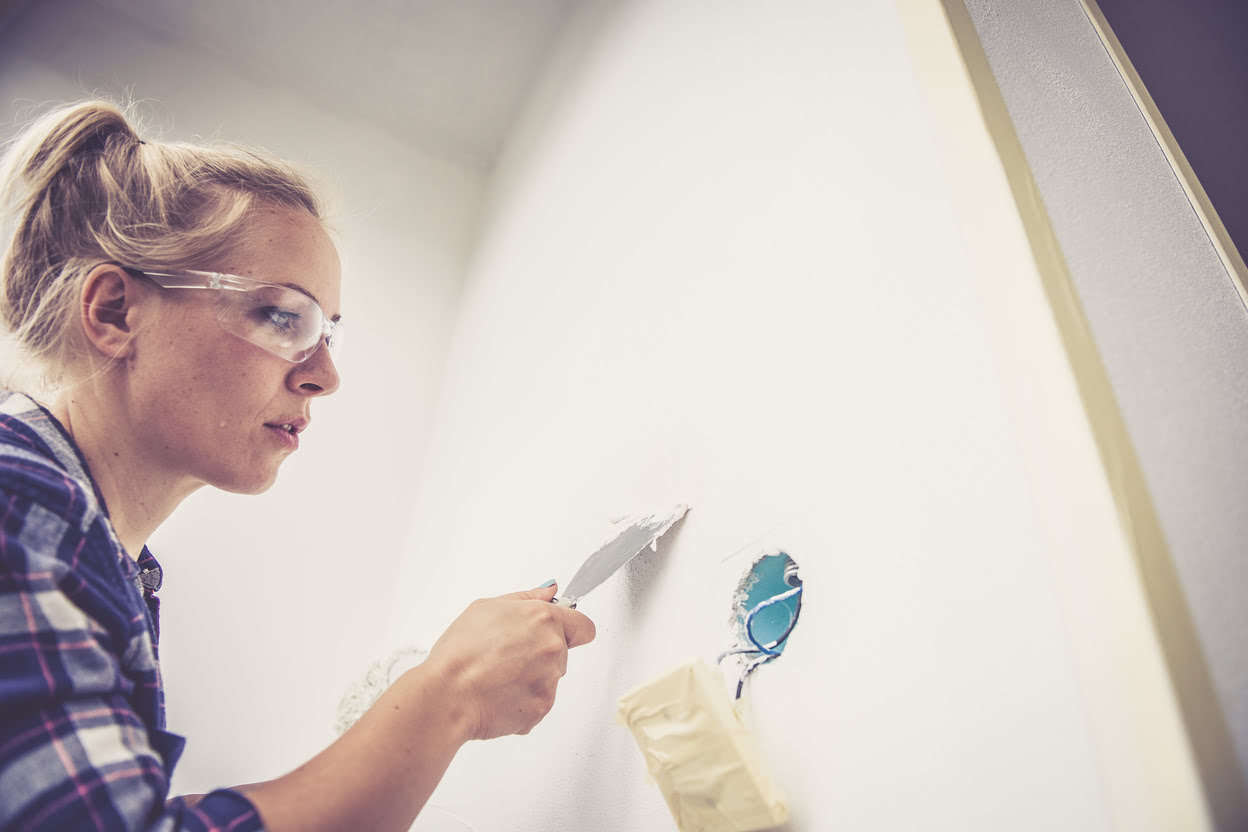
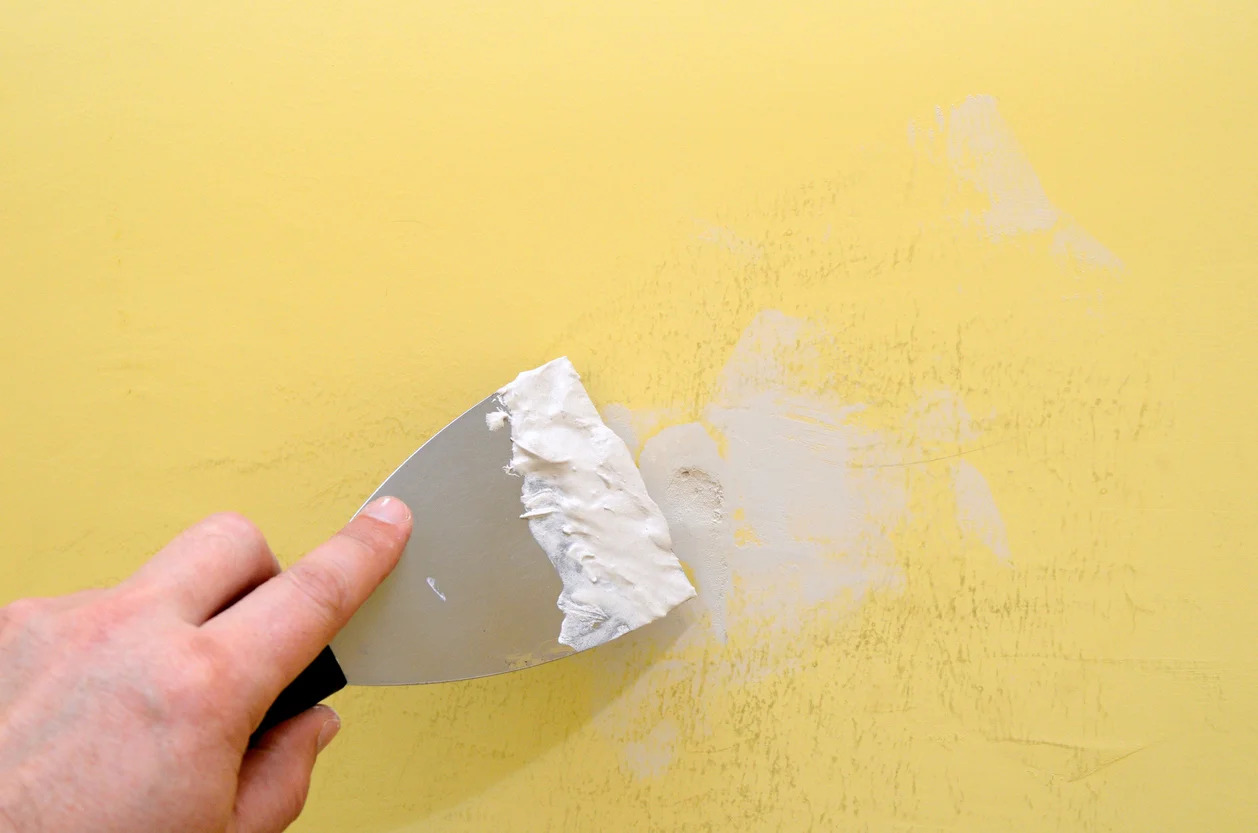
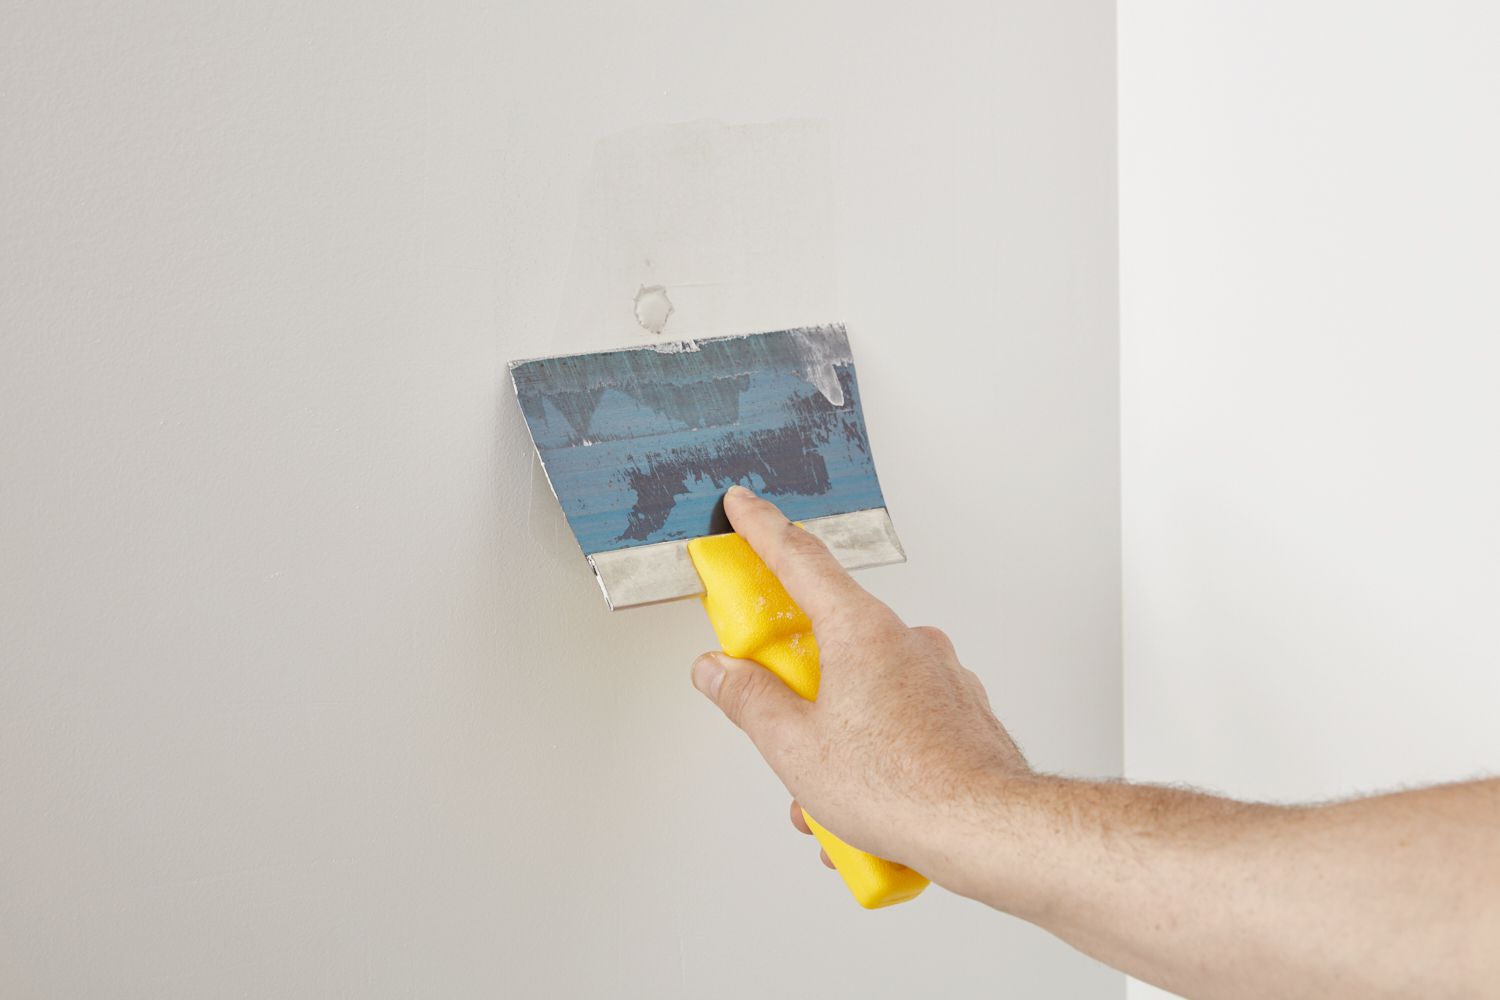
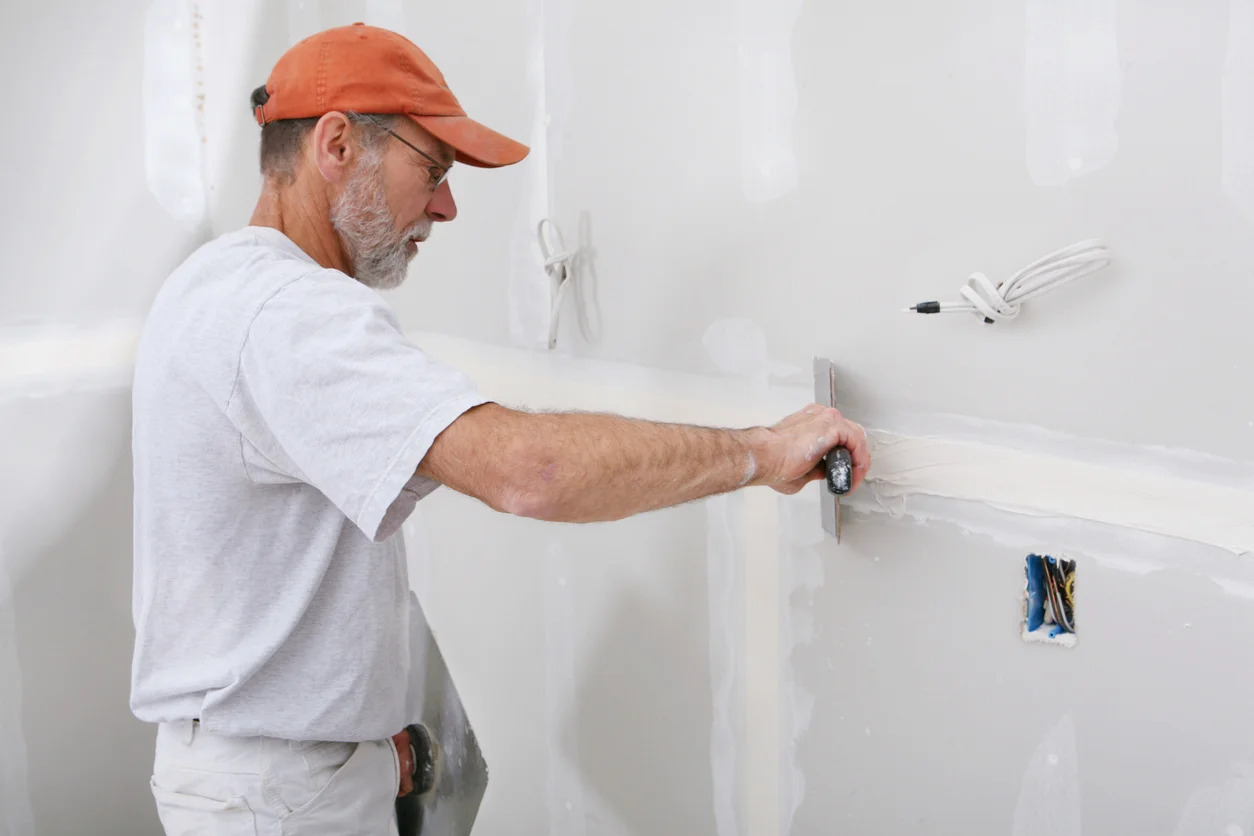
Step 2: Apply the Spackle
Now that you’ve prepared the outside corner, it’s time to apply the spackle. Follow these steps to ensure a smooth and professional-looking result:
- Using a putty knife, scoop a small amount of spackle compound onto the blade.
- Starting from the top of the corner, press the spackle into the gap or hole using the flat side of the putty knife. Try to fill the entire length of the corner with an even layer of spackle.
- For wider gaps or larger holes, you may need to apply multiple layers of spackle. Allow each layer to dry fully before applying the next. Refer to the manufacturer’s instructions for the recommended drying time.
- Smooth out the applied spackle by gently dragging the putty knife along the corner. This will help distribute the spackle evenly and remove any excess.
- Continue this process until the entire outside corner is covered with a smooth layer of spackle.
Remember, it’s better to apply thin layers of spackle and build them up gradually, rather than trying to fill the entire gap or hole with one thick layer. This will ensure proper adhesion and minimize the risk of cracking or shrinking as the spackle dries.
When spackling an outside corner, use a flexible putty knife to apply a thin layer of spackle, then smooth it out with a damp sponge for a seamless finish.
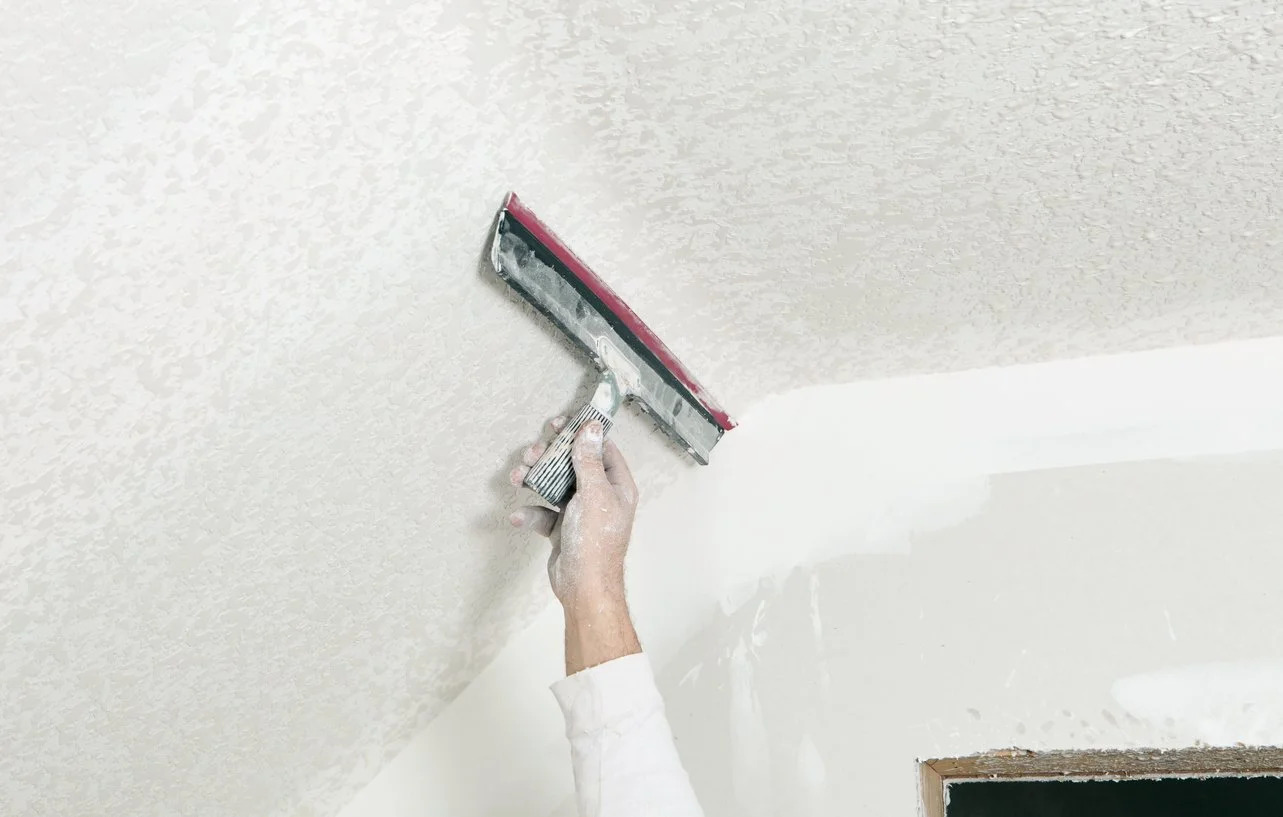
Step 3: Smooth and Feather the Spackle
After applying the spackle to the outside corner, the next step is to smooth and feather the spackle to create a seamless finish. Follow these steps for optimal results:
- Once the spackle has dried completely, use a medium-grit sandpaper to gently sand down any rough or uneven areas. This will help smooth out the surface and blend the spackle with the surrounding wall.
- Be careful not to sand too aggressively, as this can damage the wall or remove too much of the spackle. Aim for a smooth and even surface by using light circular motions.
- Wipe away any dust or debris with a clean cloth or sponge before proceeding.
- To ensure a seamless transition between the spackled area and the rest of the wall, feather the edges of the spackle by lightly extending the sanding motion beyond the spackled section. This will help create a gradual blend and prevent any noticeable lines or ridges.
- Continue sanding and feathering until you are satisfied with the smoothness and blend of the spackled outside corner.
Remember to take your time during this step, as achieving a smooth and feathered finish can greatly enhance the overall appearance of the spackled corner.
Read more: What Is A Spackle
Step 4: Sand and Prime (Optional)
While not always necessary, sanding and priming the spackled outside corner can provide additional benefits and improve the overall finish. Follow these steps if you choose to sand and prime:
- After the spackle has been smoothed and feathered, use a higher grit sandpaper, such as a fine-grit, to lightly sand the entire spackled area. This will further refine the surface and ensure it is ready for priming and painting.
- Again, be gentle and use light circular motions when sanding to avoid damaging the spackle or the surrounding wall.
- Once you’ve finished sanding, wipe away any dust or debris with a clean cloth or sponge.
- If desired, apply a primer to the spackled outside corner. Priming helps create an even base for the paint and enhances its adhesion to the spackle.
- Follow the manufacturer’s instructions for the specific primer you are using, ensuring proper drying time before proceeding to the next step.
While sanding and priming are optional, they can contribute to a smoother and more professional-looking finish, especially if you plan to paint the spackled area.
Step 5: Paint the Corner
Now that your spackled outside corner is smooth and ready, it’s time to apply the final touches by painting the corner. Follow these steps to achieve a seamless and finished look:
- Choose a paint color that matches the surrounding wall, or opt for a contrasting color to create a decorative accent.
- Start by applying painter’s tape along the edges of the adjacent surfaces to protect them from accidental paint splatters.
- Use a paintbrush or roller to carefully apply paint to the spackled corner, starting from the top and working your way down. Be mindful of any drips or excess paint, and smooth them out immediately.
- For more even coverage, apply a second coat of paint after the first coat has dried completely. Follow the drying time specified by the paint manufacturer.
- Once the paint has dried, carefully remove the painter’s tape from the adjacent surfaces.
Take a step back and admire your freshly painted outside corner. The spackling process, coupled with a flawless paint job, will seamlessly blend the repaired area with the rest of the wall, leaving a polished and professional appearance.
Remember, when it comes to painting, take your time and use smooth and even strokes to achieve the best results. Proper application and drying time will ensure a long-lasting and visually pleasing finish.
Conclusion
Congratulations! You have successfully learned how to spackle an outside corner. By following the step-by-step guide provided, you can confidently tackle any gaps, cracks, or imperfections in your walls and achieve a smooth and seamless finish.
Remember, preparation is key when it comes to spackling. Taking the time to properly clean and prepare the corner sets the foundation for a successful spackling job. Applying the spackle in thin layers and feathering the edges ensures a professional-looking result. Sanding, priming (if desired), and painting the spackled corner further enhance the appearance and durability of the finish.
With the right tools, materials, and techniques, spackling an outside corner becomes a manageable and rewarding task. By seamlessly repairing any imperfections, you can maintain the aesthetic appeal of your walls, giving your home a fresh and polished look.
Remember to always follow safety precautions, such as wearing a dust mask when working with spackle and properly ventilating the area. Additionally, be sure to read and follow the instructions provided by the manufacturers of the spackle, sandpaper, primer, and paint products you are using.
Now that you have the knowledge and confidence to spackle an outside corner, it’s time to put your skills to use and enjoy the transformed appearance of your walls. Happy spackling!
Frequently Asked Questions about How To Spackle An Outside Corner
Was this page helpful?
At Storables.com, we guarantee accurate and reliable information. Our content, validated by Expert Board Contributors, is crafted following stringent Editorial Policies. We're committed to providing you with well-researched, expert-backed insights for all your informational needs.


0 thoughts on “How To Spackle An Outside Corner”