Home>Gardening & Outdoor>Landscaping Ideas>What Is A Raised Garden Bed
Landscaping Ideas
What Is A Raised Garden Bed
Modified: October 19, 2024
Discover the benefits of raised garden beds for your landscaping ideas. Learn how to create and maintain a raised garden bed for your outdoor space.
(Many of the links in this article redirect to a specific reviewed product. Your purchase of these products through affiliate links helps to generate commission for Storables.com, at no extra cost. Learn more)
Introduction
Raised garden beds have become increasingly popular among gardening enthusiasts and homeowners looking to elevate their outdoor spaces. These versatile and practical gardening solutions offer a wealth of benefits, making them a valuable addition to any landscape. Whether you're a seasoned gardener or a novice with a green thumb, raised garden beds provide an accessible and efficient way to cultivate a thriving garden.
The concept of raised garden beds is rooted in the idea of creating a contained and elevated space for planting and nurturing various flora. By constructing a raised platform for gardening, individuals can overcome common challenges associated with traditional in-ground gardening, such as poor soil quality, drainage issues, and invasive weeds. This innovative approach to gardening not only addresses these concerns but also opens up a world of possibilities for cultivating a diverse range of plants, flowers, herbs, and vegetables.
Furthermore, raised garden beds offer a visually appealing and organized layout for your garden, adding a touch of elegance and structure to your outdoor environment. Whether you're aiming to create a vibrant floral display or grow your own organic produce, raised garden beds provide a customizable and efficient solution for bringing your gardening aspirations to life.
As we delve deeper into the world of raised garden beds, we will explore the various aspects of these elevated gardening structures, including their construction, materials, and the best plants to cultivate within them. Additionally, we will uncover the numerous benefits of raised garden beds and provide insights into their maintenance, ensuring that your gardening endeavors continue to flourish throughout the seasons.
Join us on this horticultural journey as we uncover the secrets of raised garden beds and discover how these elevated planters can transform your outdoor space into a thriving oasis of natural beauty and abundance.
Key Takeaways:
- Raised garden beds provide a contained and elevated space for gardening, overcoming common challenges like poor soil and limited space. They offer improved soil quality, drainage, and accessibility, making gardening more enjoyable and inclusive.
- By using materials like wood, metal, or stone, raised garden beds offer a visually appealing and organized layout for growing a variety of plants. They enhance the aesthetics of outdoor spaces and provide a practical solution for maximizing gardening potential.
Read more: What To Line A Raised Garden Bed With
Definition of a Raised Garden Bed
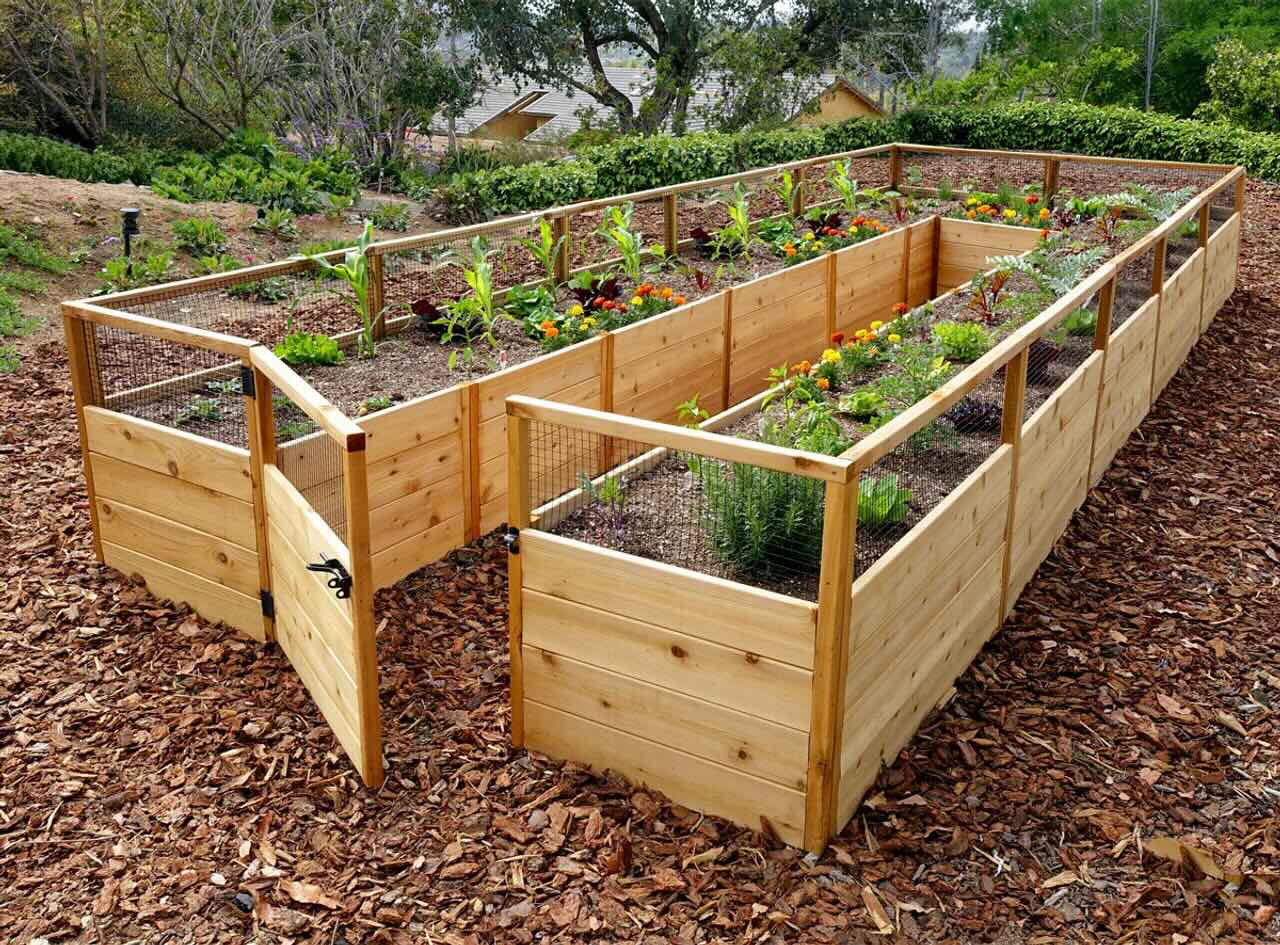
A raised garden bed, also known as a garden box or planter box, is a contained and elevated gardening structure used for cultivating plants, flowers, herbs, and vegetables. It is typically constructed above the ground level, often in the form of a rectangular or square enclosure, and is filled with soil to create a designated planting area. The defining characteristic of a raised garden bed is its raised perimeter, which can range in height from a few inches to several feet, depending on the specific design and purpose.
These elevated planters can be made from a variety of materials, including wood, composite lumber, metal, or even stone, offering flexibility in design and aesthetics. The construction of raised garden beds allows for better control over the soil quality and drainage, making them an ideal solution for areas with poor soil conditions or limited space. By containing the soil within the raised structure, gardeners can create an optimal environment for plant growth while minimizing the risk of soil compaction and erosion.
One of the key advantages of raised garden beds is their adaptability to various gardening styles, such as traditional, organic, or square foot gardening. Their raised design provides easy access for planting, watering, and harvesting, making them particularly well-suited for individuals with physical limitations or those seeking a more ergonomic gardening experience. Additionally, the elevated nature of these beds offers protection against pests and allows for better temperature regulation, extending the growing season and enhancing overall plant health.
Raised garden beds can be tailored to fit the specific needs and preferences of gardeners, whether they are looking to create a decorative floral display, grow a bountiful vegetable garden, or cultivate a diverse assortment of herbs and perennials. Their versatility and functionality make them a valuable asset for both experienced gardeners and beginners alike, providing a practical and visually appealing solution for enhancing outdoor spaces.
In essence, a raised garden bed serves as a customizable and efficient platform for gardening, offering a contained and elevated space for nurturing a wide array of plant life. Its adaptability, accessibility, and ability to overcome common gardening challenges make it a popular choice for individuals seeking to create a thriving and organized garden within a limited space or less-than-ideal soil conditions.
Benefits of Raised Garden Beds
Raised garden beds offer a multitude of advantages that make them a preferred choice for gardening enthusiasts and homeowners. These elevated planters provide a range of benefits that contribute to the overall success and enjoyment of gardening endeavors. Let's explore the numerous advantages of raised garden beds:
-
Improved Soil Quality: By using a raised garden bed, gardeners have the flexibility to fill the enclosure with high-quality soil, compost, and other organic amendments. This allows for better control over soil composition and fertility, creating an optimal environment for plant growth and development.
-
Enhanced Drainage: Raised garden beds facilitate superior drainage, preventing waterlogging and soil compaction. The elevated structure ensures that excess water can easily drain away, reducing the risk of root rot and other water-related issues that commonly affect plants in traditional in-ground gardens.
-
Weed Control: The contained nature of raised garden beds helps minimize weed growth, as the elevated structure acts as a barrier against invasive plants. This reduces the need for frequent weeding and allows gardeners to focus more on nurturing their desired plants.
-
Accessibility and Ergonomics: The raised design of these garden beds provides a comfortable working height, minimizing the need for bending or kneeling during planting, watering, and harvesting. This accessibility is particularly beneficial for individuals with physical limitations, making gardening a more enjoyable and inclusive activity.
-
Pest Protection: Raised garden beds offer a degree of protection against pests and critters that may otherwise damage or consume plants. The elevated structure can deter burrowing animals and make it more challenging for certain pests to access the garden, helping to safeguard the cultivated plants.
-
Extended Growing Season: The elevated nature of raised garden beds allows for better temperature regulation, which can extend the growing season. The soil within the raised enclosure warms up more quickly in the spring, enabling earlier planting, while the elevated position provides some insulation against frost, prolonging the harvest period in the fall.
-
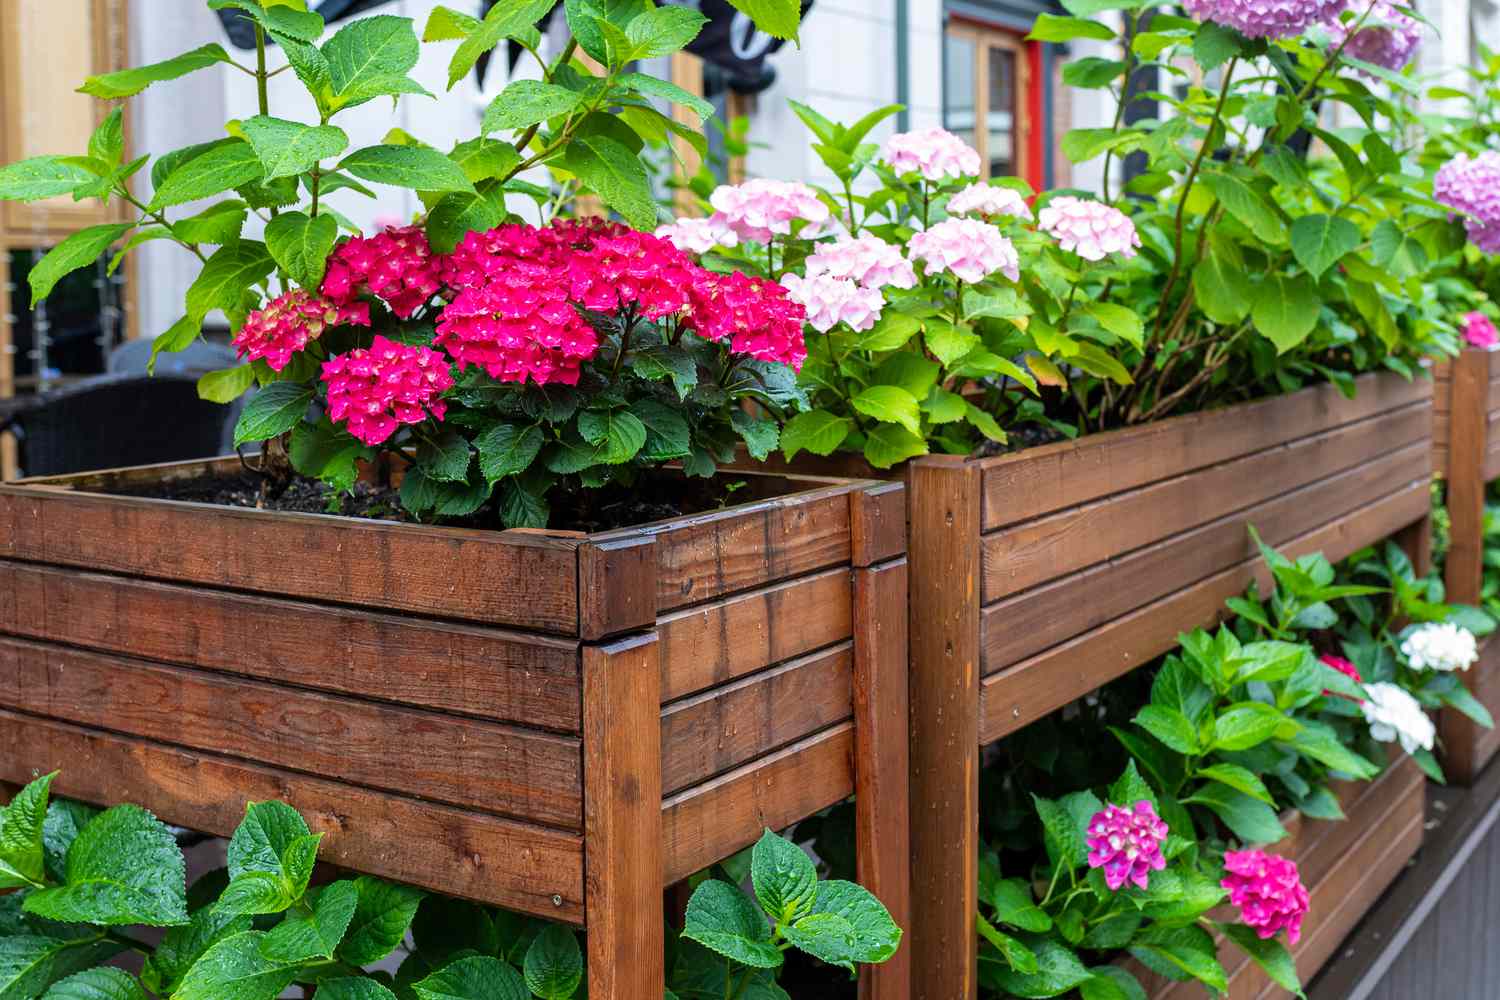
Aesthetic Appeal: Raised garden beds add visual interest and structure to outdoor spaces, enhancing the overall aesthetics of the garden. They can be designed in various shapes, sizes, and materials, allowing for creative and customizable landscaping options that complement the surrounding environment.
-
Space Optimization: In areas with limited space, raised garden beds offer a practical solution for maximizing gardening potential. Their compact and contained design makes them suitable for small yards, patios, and even urban settings, enabling individuals to create flourishing gardens in confined spaces.
-
Soil Erosion Prevention: The raised structure of these garden beds helps prevent soil erosion, especially on sloped terrain. This is particularly beneficial in areas prone to heavy rainfall or runoff, as the contained soil remains in place, reducing the risk of erosion and nutrient loss.
-
Versatile Planting Options: Raised garden beds accommodate a wide range of plants, from flowers and herbs to vegetables and ornamentals. Their adaptability allows for diverse planting arrangements, including companion planting and intensive gardening techniques, maximizing the yield and variety of cultivated crops.
In summary, raised garden beds offer a host of benefits that cater to the diverse needs and preferences of gardeners. From improved soil quality and drainage to enhanced accessibility and aesthetics, these elevated planters provide a practical and efficient solution for creating thriving gardens in various environments. Whether you're a seasoned gardener or a novice enthusiast, raised garden beds can elevate your gardening experience and yield bountiful rewards.
Materials for Building a Raised Garden Bed
When it comes to constructing a raised garden bed, the choice of materials plays a crucial role in determining the bed's durability, aesthetics, and overall functionality. Selecting the right materials is essential for creating a sturdy and long-lasting garden bed that meets the specific needs and preferences of the gardener. Here are some common materials used for building raised garden beds:
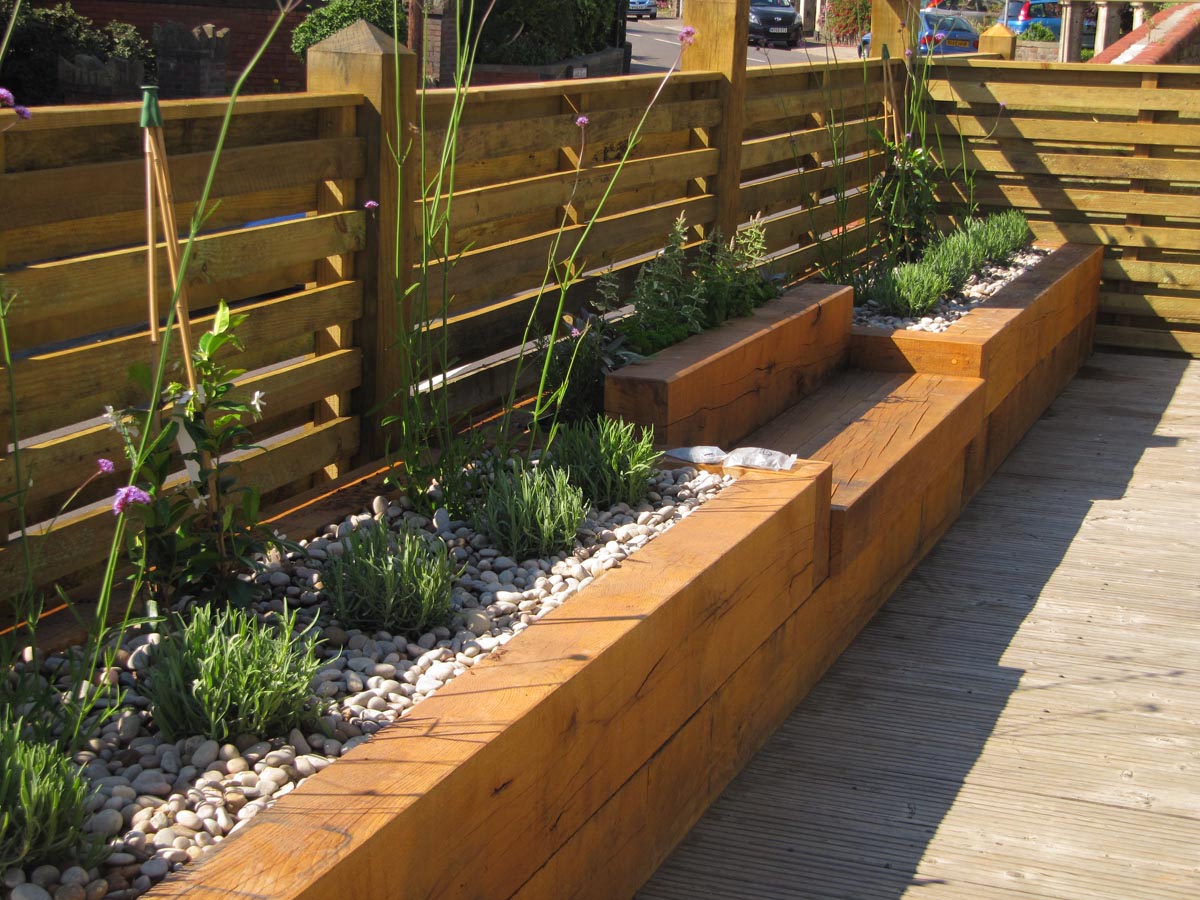
1. Wood:
Wood is a popular choice for constructing raised garden beds due to its natural aesthetic appeal, versatility, and ease of assembly. Cedar and redwood are favored for their natural resistance to rot and decay, making them ideal for outdoor use. These woods are also free from chemical treatments, ensuring a safe environment for growing edible plants. Pressure-treated lumber, although economical, should be avoided for beds intended for edible plants due to the potential leaching of chemicals into the soil.
Read more: What To Plant In Raised Garden Beds
2. Composite Lumber:
Composite lumber, made from a blend of wood fibers and recycled plastic, offers a durable and low-maintenance alternative to natural wood. It is resistant to rot, decay, and insect damage, making it a long-lasting choice for raised garden beds. Composite lumber is available in various colors and textures, allowing for customizable and modern designs.
3. Metal:
Galvanized steel and corrugated metal are sturdy options for constructing raised garden beds. Metal beds are durable, resistant to rot, and can withstand the elements, making them suitable for long-term use. They provide a sleek and contemporary look to the garden while offering excellent structural support for the soil.
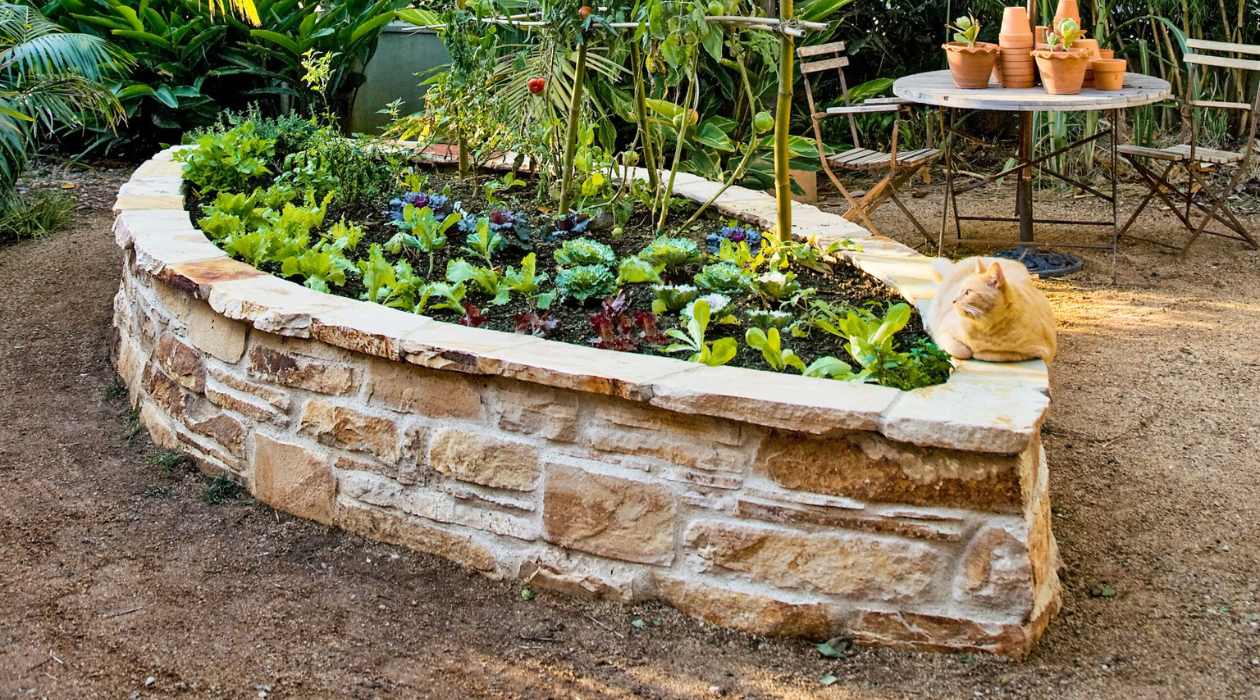
4. Stone:
Stone is a timeless and elegant choice for building raised garden beds. Whether using natural stone, such as limestone or granite, or manufactured stone blocks, these materials create a visually striking and durable garden bed. While stone beds require more labor and expertise to construct, they offer a permanent and aesthetically pleasing addition to the landscape.
5. Concrete Blocks:
Concrete blocks provide a cost-effective and durable option for constructing raised garden beds. These blocks can be stacked to create customizable bed shapes and sizes, offering a practical and long-lasting solution for gardeners. Additionally, the hollow cores of concrete blocks can be filled with soil, enhancing the bed's structural integrity and providing additional planting space.
Read more: What Size Should A Raised Garden Bed Be
6. Recycled Materials:
For eco-conscious gardeners, utilizing recycled materials such as reclaimed wood, plastic lumber, or salvaged bricks offers a sustainable approach to building raised garden beds. Repurposing materials not only reduces waste but also adds a unique and rustic charm to the garden beds.
When selecting materials for building a raised garden bed, it is essential to consider factors such as durability, aesthetics, environmental impact, and budget. By choosing the right materials, gardeners can create a functional and visually appealing raised garden bed that enhances the overall landscape and provides a conducive environment for cultivating a thriving garden.
How to Build a Raised Garden Bed
Building a raised garden bed is a rewarding and straightforward endeavor that allows individuals to create a customized and productive gardening space. Whether you're a seasoned gardener or a novice enthusiast, constructing a raised garden bed can be an enjoyable and fulfilling project. Here's a step-by-step guide on how to build a raised garden bed:
1. Select a Location:
Choose a suitable location for your raised garden bed, ensuring it receives an adequate amount of sunlight and is easily accessible for planting and maintenance. Consider the layout of your garden or outdoor space, as well as any existing landscaping features that may influence the placement of the bed.
2. Determine the Size and Shape:
Decide on the dimensions and shape of your raised garden bed based on your gardening needs and available space. Common shapes include rectangular, square, or L-shaped beds. Keep in mind that the width of the bed should allow for easy reach from both sides to facilitate planting and harvesting.
3. Gather Materials:
Collect the necessary materials for building the raised garden bed, such as wood, composite lumber, metal panels, or stone blocks, based on your preferred design and budget. Ensure that the materials are suitable for outdoor use and are resistant to decay, rot, and insect damage.
4. Prepare the Site:
Clear the chosen area of any debris, weeds, or grass. Level the ground if necessary to create a stable and even foundation for the raised garden bed. This step is crucial for ensuring the bed sits securely and uniformly on the ground.
5. Construct the Frame:
Assemble the selected materials to create the frame of the raised garden bed. If using wood, secure the boards at the corners using galvanized screws or nails to form a sturdy and stable structure. For metal or stone beds, follow the manufacturer's guidelines for assembly.
6. Install the Bed:
Position the constructed frame in the designated location and ensure it is level and properly aligned. Secure the bed in place by driving stakes into the ground along the outer edges or using anchor brackets for added stability.
Read more: Why A Raised Garden Bed
7. Fill with Soil:
Fill the raised garden bed with a high-quality soil mixture, incorporating compost and organic matter to enrich the growing medium. Ensure the soil is evenly distributed and level within the bed, providing a fertile and nutrient-rich environment for planting.
8. Begin Planting:
Once the raised garden bed is filled with soil, it's time to start planting your desired flowers, herbs, vegetables, or other plants. Follow recommended spacing and planting depths for optimal growth and yield.
By following these steps, you can create a functional and visually appealing raised garden bed that enhances your outdoor space and provides a conducive environment for cultivating a thriving garden. Whether you're aiming to grow a bountiful vegetable garden or create a vibrant floral display, a well-constructed raised garden bed can elevate your gardening experience and yield bountiful rewards.
Best Plants for Raised Garden Beds
When it comes to selecting plants for your raised garden beds, the options are abundant and varied, offering a diverse palette of flora to suit different preferences and gardening goals. The elevated and well-drained nature of raised garden beds creates an ideal environment for a wide range of plants, including flowers, herbs, vegetables, and ornamentals. Here are some of the best plants to consider for your raised garden beds:
1. Vegetables:
- Tomatoes: Well-suited for raised beds, tomatoes thrive in the loose, well-drained soil and benefit from the elevated position, which provides good air circulation and reduces the risk of soil-borne diseases.
- Peppers: Whether sweet bell peppers or spicy chili peppers, these heat-loving plants flourish in the warm and fertile soil of raised garden beds, producing abundant yields throughout the growing season.
- Lettuce and Leafy Greens: Fast-growing and shallow-rooted, lettuce, spinach, and other leafy greens are excellent choices for raised beds, allowing for easy maintenance and successive plantings.
2. Herbs:
- Basil: This aromatic herb thrives in the well-drained and fertile soil of raised garden beds, providing a bountiful harvest of flavorful leaves for culinary use.
- Rosemary: Known for its resilience and aromatic foliage, rosemary adapts well to the growing conditions of raised beds, offering a fragrant and versatile herb for cooking and ornamental purposes.
- Thyme: With its low-growing and spreading habit, thyme is a perfect addition to raised garden beds, adding a touch of fragrance and culinary versatility to the garden.
3. Flowers:
- Marigolds: These vibrant and pest-repelling flowers are well-suited for raised beds, adding a splash of color while naturally deterring common garden pests.
- Zinnias: With their bright and showy blooms, zinnias thrive in the well-drained and fertile soil of raised garden beds, attracting pollinators and enhancing the visual appeal of the garden.
- Dahlias: These striking and versatile flowers flourish in the loose and well-aerated soil of raised beds, producing an array of colorful blooms throughout the growing season.
4. Perennials:
- Lavender: Known for its aromatic foliage and vibrant blooms, lavender thrives in the well-drained and slightly alkaline soil of raised garden beds, adding a touch of fragrance and beauty to the garden.
- Sedum: These low-maintenance and drought-tolerant perennials are well-suited for raised beds, offering a variety of foliage textures and colorful blooms while requiring minimal care.
- Coreopsis: With their cheerful and long-lasting blooms, coreopsis is an excellent choice for raised garden beds, providing a burst of color and attracting beneficial pollinators.
By carefully selecting and cultivating these plants in your raised garden beds, you can create a thriving and visually captivating garden that yields an abundance of fresh produce, aromatic herbs, vibrant flowers, and resilient perennials. The elevated and well-structured environment of raised garden beds provides an optimal setting for these plants to flourish, allowing you to enjoy the rewards of a bountiful and diverse garden throughout the seasons.
Maintenance of Raised Garden Beds
Maintaining raised garden beds is essential for ensuring the continued health and productivity of the cultivated plants. Regular upkeep and care contribute to the longevity and success of the garden beds, allowing gardeners to enjoy a flourishing and visually appealing garden throughout the seasons. Here are key maintenance practices to uphold the vitality of raised garden beds:
Read more: How To Seal A Raised Garden Bed
1. Soil Management:
Regularly monitor the soil moisture levels within the raised garden beds, especially during dry periods, to ensure adequate hydration for the plants. Additionally, replenish the soil with organic matter, such as compost or well-aged manure, to enrich its fertility and promote healthy plant growth. Consider conducting soil tests to assess nutrient levels and pH balance, making necessary amendments to maintain optimal soil conditions.
2. Weed Control:
Prevent weed growth by regularly inspecting the raised garden beds and promptly removing any emerging weeds. Mulching the soil surface with organic materials, such as straw or wood chips, can help suppress weed growth while conserving soil moisture and regulating temperature. By staying vigilant against weeds, gardeners can minimize competition for nutrients and maintain a tidy and well-kept garden bed.
3. Pest and Disease Management:
Monitor the raised garden beds for signs of pests, such as aphids, caterpillars, or snails, and implement appropriate pest control measures, such as handpicking, natural predators, or organic insecticidal soaps. Additionally, practice good garden hygiene by promptly removing any diseased or infested plant material to prevent the spread of diseases within the garden beds.
4. Seasonal Care:
Adjust the maintenance routine based on seasonal requirements, such as providing frost protection for tender plants in the colder months or implementing shade structures during periods of intense heat. Regularly deadhead spent flowers, prune overgrown foliage, and conduct seasonal clean-ups to promote continuous blooming and overall garden health.
Read more: How To Cover A Raised Garden Bed
5. Irrigation and Drainage:
Ensure proper irrigation by watering the raised garden beds as needed, taking into account the specific water requirements of the cultivated plants. Additionally, inspect the drainage system to prevent waterlogging, especially after heavy rainfall, and make any necessary adjustments to maintain optimal soil moisture levels and prevent root rot.
6. Structural Integrity:
Regularly inspect the structural integrity of the raised garden beds, checking for any signs of warping, rot, or damage. Replace deteriorating materials and reinforce the bed frame as needed to ensure its stability and longevity. Address any potential safety hazards to maintain a secure and functional gardening environment.
By adhering to these maintenance practices, gardeners can preserve the health and vitality of their raised garden beds, creating an environment conducive to thriving plant growth and abundant harvests. With regular care and attention, raised garden beds can continue to serve as a productive and visually appealing gardening space, enriching outdoor environments with natural beauty and abundance.
Conclusion
In conclusion, raised garden beds offer a myriad of benefits and opportunities for gardeners to create thriving and visually captivating gardens. These elevated planters provide a versatile and practical solution for overcoming common gardening challenges, such as poor soil quality, limited space, and accessibility issues. By harnessing the advantages of raised garden beds, individuals can cultivate a diverse range of plants, from vibrant flowers and aromatic herbs to bountiful vegetables and resilient perennials, within a contained and well-structured environment.
The elevated nature of raised garden beds not only enhances the aesthetics of outdoor spaces but also contributes to the overall health and productivity of the cultivated plants. With improved soil quality, enhanced drainage, and better pest control, raised garden beds create an optimal environment for plant growth, allowing gardeners to enjoy abundant harvests and vibrant blooms throughout the seasons. Additionally, the accessibility and ergonomic design of raised garden beds make gardening a more inclusive and enjoyable activity, catering to individuals with physical limitations and diverse gardening preferences.
Furthermore, the construction and maintenance of raised garden beds offer a creative and fulfilling outlet for gardeners to express their horticultural aspirations. From selecting the right materials and building the raised beds to carefully choosing and cultivating plants, the process of creating and nurturing a raised garden bed is a rewarding journey that yields tangible and aesthetic rewards. Whether it's the satisfaction of harvesting homegrown produce, the joy of witnessing colorful blooms, or the sense of accomplishment in creating a flourishing garden, raised garden beds enrich the lives of gardeners and enhance the natural beauty of outdoor environments.
As we reflect on the numerous benefits and opportunities presented by raised garden beds, it becomes evident that these elevated planters are more than just gardening structures; they are catalysts for creativity, abundance, and natural beauty. By embracing the concept of raised garden beds, individuals can transform their outdoor spaces into thriving oases of greenery and vitality, fostering a deeper connection with nature and reaping the rewards of sustainable and fulfilling gardening practices.
In essence, raised garden beds exemplify the harmonious blend of functionality and aesthetics, offering a holistic and enriching gardening experience for enthusiasts of all levels. Whether it's the practical advantages, the visual appeal, or the joy of nurturing a flourishing garden, raised garden beds stand as a testament to the transformative power of horticulture and the boundless potential of cultivating natural beauty within our surroundings.
Frequently Asked Questions about What Is A Raised Garden Bed
Was this page helpful?
At Storables.com, we guarantee accurate and reliable information. Our content, validated by Expert Board Contributors, is crafted following stringent Editorial Policies. We're committed to providing you with well-researched, expert-backed insights for all your informational needs.


0 thoughts on “What Is A Raised Garden Bed”