Home>Gardening & Outdoor>Landscaping Ideas>How To Make A Raised Garden Bed Cheap
Landscaping Ideas
How To Make A Raised Garden Bed Cheap
Modified: August 30, 2024
Learn how to create a budget-friendly raised garden bed with our landscaping ideas. Discover cheap and easy DIY methods for a beautiful garden.
(Many of the links in this article redirect to a specific reviewed product. Your purchase of these products through affiliate links helps to generate commission for Storables.com, at no extra cost. Learn more)
Introduction
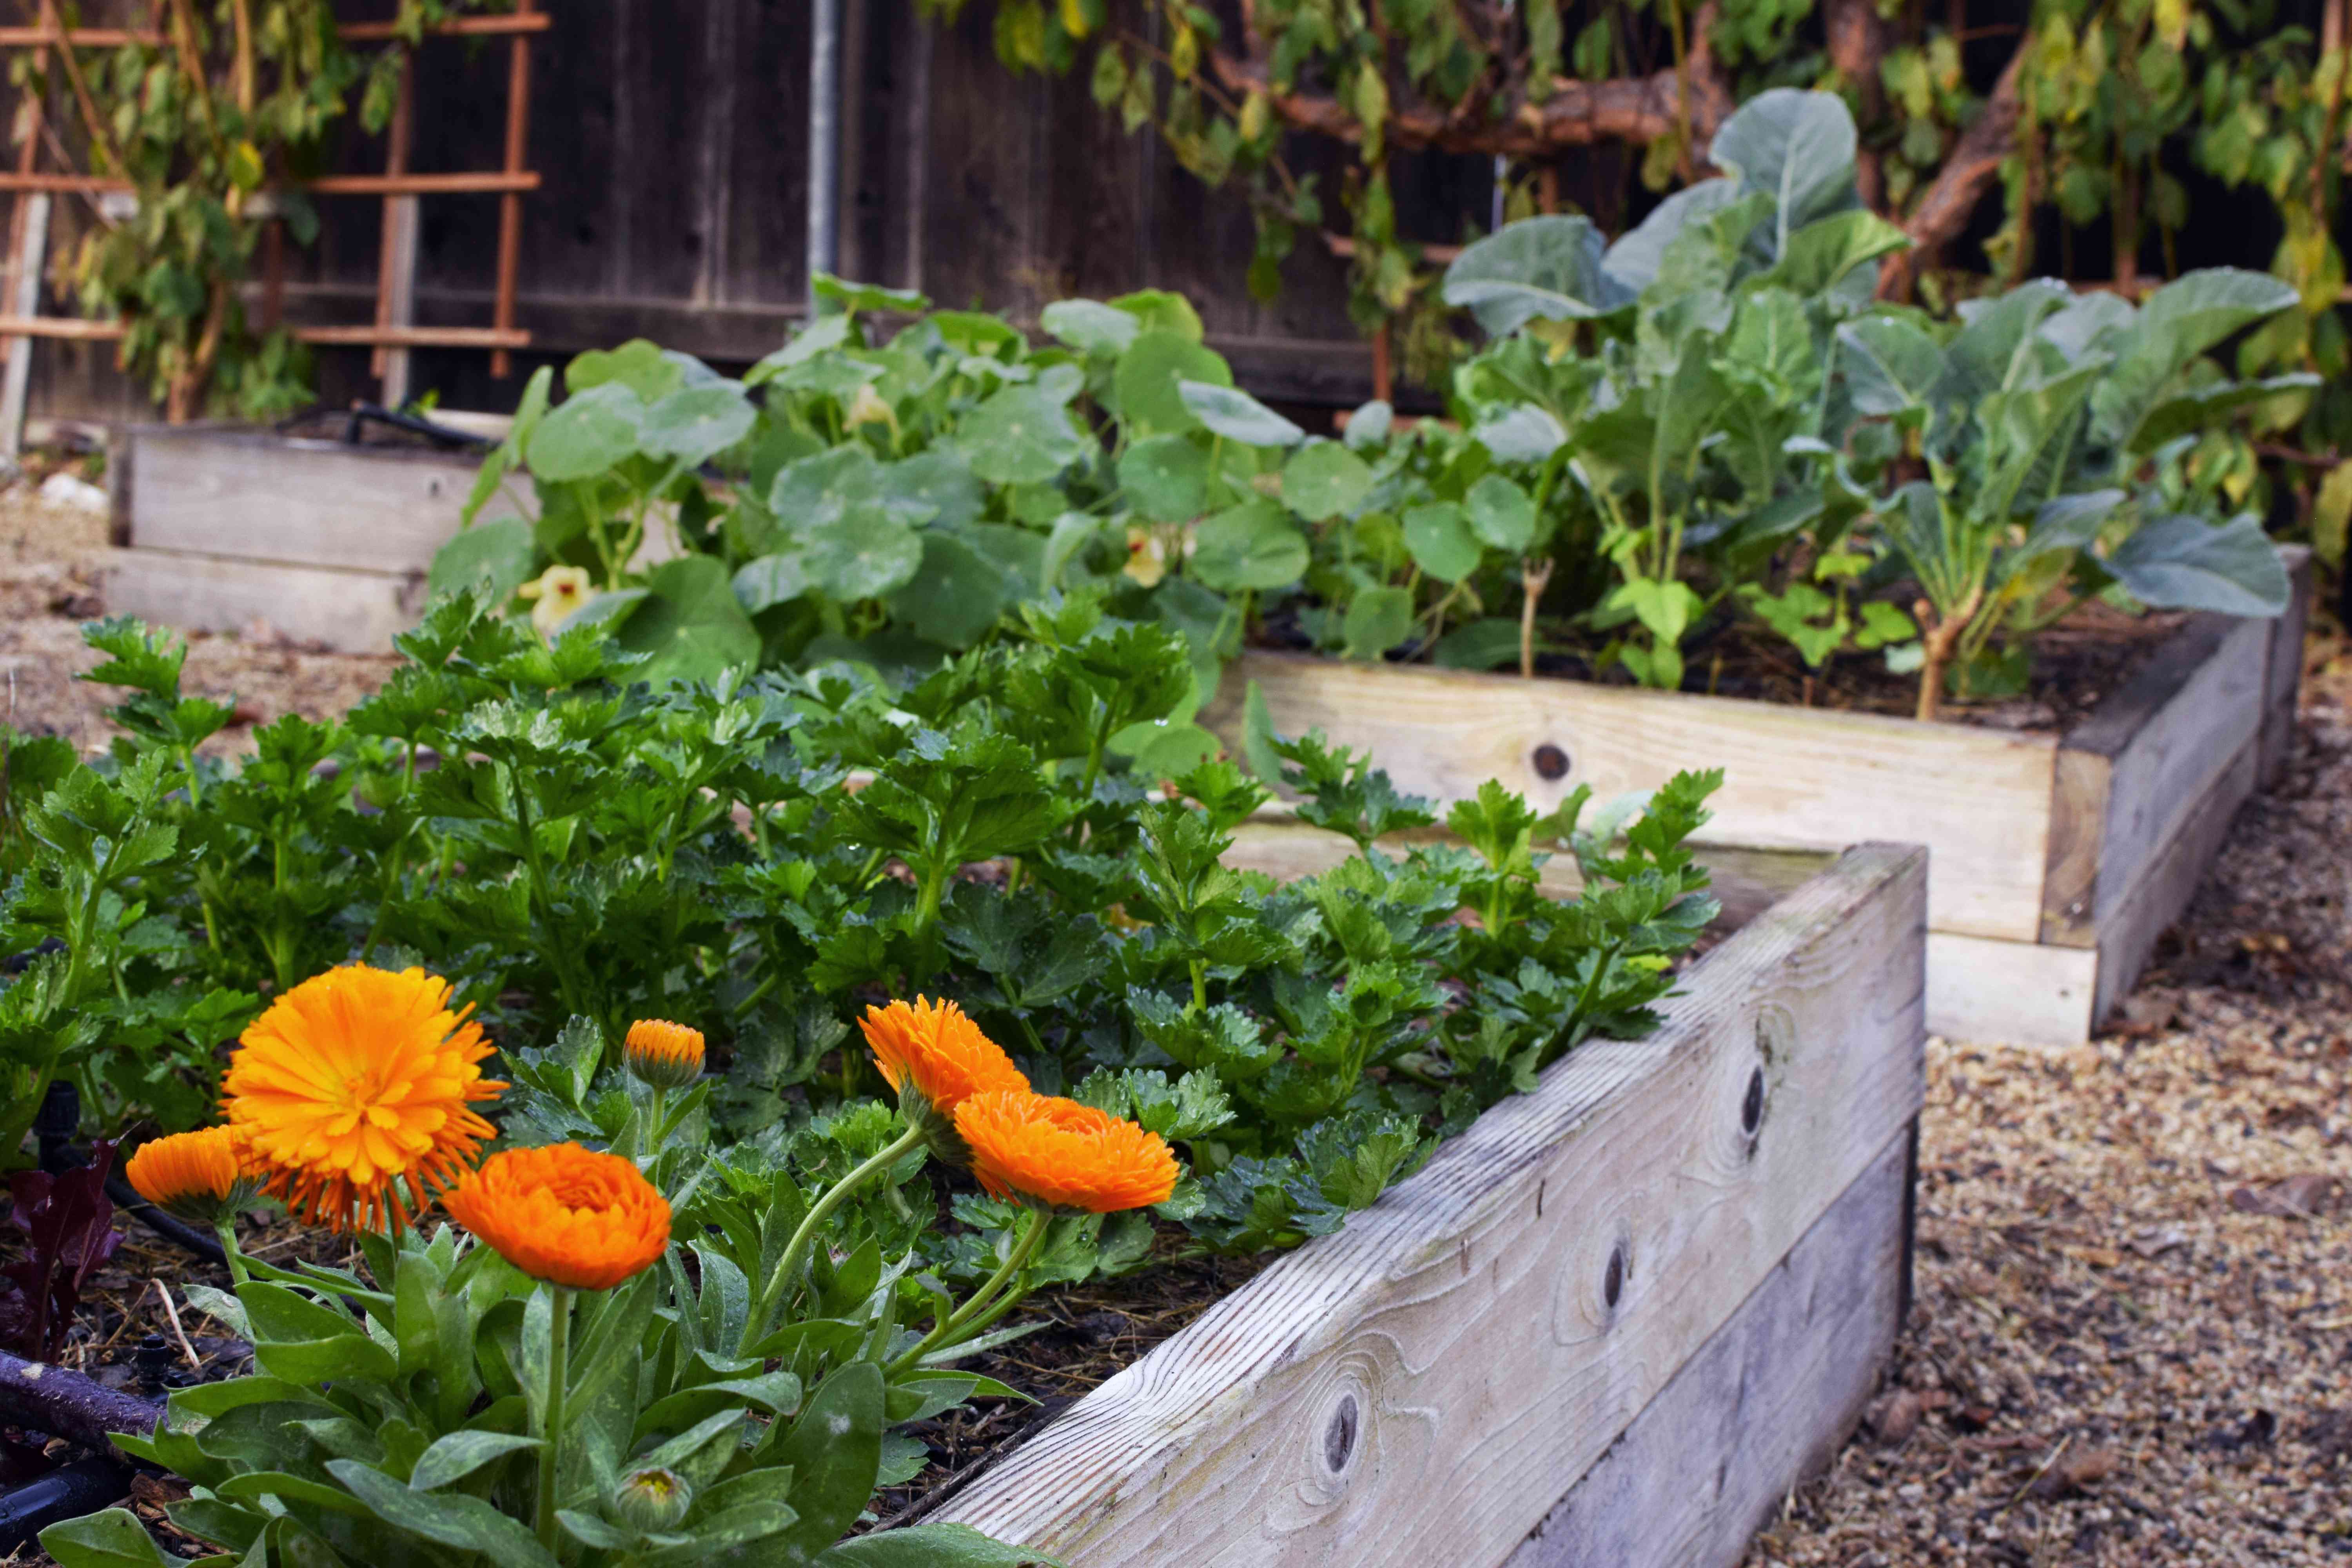
Creating a raised garden bed is an excellent way to elevate your gardening experience and enhance the aesthetic appeal of your outdoor space. Whether you're a seasoned gardener or a novice with a green thumb, a raised garden bed offers numerous benefits, including improved soil quality, better drainage, and easier access for planting, weeding, and harvesting. Additionally, it provides a cost-effective and sustainable solution for growing your favorite fruits, vegetables, herbs, and flowers.
In this comprehensive guide, we will explore the step-by-step process of building a raised garden bed using affordable materials and simple techniques. By following these instructions, you can embark on a rewarding journey of cultivating a thriving garden while adding a charming focal point to your landscape.
Let's dive into the details of how to make a raised garden bed cheap, from selecting the ideal location to filling it with nutrient-rich soil and planting a vibrant array of flora. Whether you have limited outdoor space or abundant land, this DIY project can be tailored to suit your specific needs and preferences. With a bit of creativity and resourcefulness, you can transform ordinary materials into a functional and visually appealing raised garden bed that will bring joy and abundance to your home.
Now, let's roll up our sleeves and embark on this fulfilling endeavor, where we'll combine practicality, creativity, and a touch of nature's beauty to create a budget-friendly raised garden bed that will be the envy of your neighborhood.
Key Takeaways:
- Building a raised garden bed cheaply is a fun and rewarding DIY project that enhances your gardening experience and adds beauty to your outdoor space. It’s a budget-friendly way to grow your favorite plants and enjoy the benefits of sustainable gardening.
- By carefully choosing the location, gathering affordable materials, and nurturing your garden, you’re not only creating a thriving oasis but also embracing the joy of sustainable living. It’s a small yet impactful step towards reducing your environmental footprint and nurturing a greener, more vibrant world.
Read more: How To Make Cheap Raised Garden Beds
Step 1: Choose the Right Location
Selecting the optimal location for your raised garden bed is a crucial first step in this DIY project. The right spot can significantly impact the growth and overall health of your plants. Here's a detailed guide to help you make an informed decision:
Consider Sunlight Exposure
Evaluate the sunlight patterns in your outdoor space. Most plants thrive in full sun, which typically means they need at least 6-8 hours of direct sunlight each day. However, if you plan to grow shade-loving plants such as lettuce or spinach, a partially shaded area might be more suitable. Observe the sun's movement throughout the day to identify the sunniest and shadiest spots in your yard.
Assess Drainage
Good drainage is essential for the success of your raised garden bed. Avoid low-lying areas that tend to accumulate water, as excessive moisture can lead to root rot and other issues. Instead, choose a location with well-draining soil to prevent waterlogged conditions that can harm your plants.
Accessibility
Consider the accessibility of the chosen location. Ensure it's convenient for you to tend to your garden bed, especially when it comes to watering, weeding, and harvesting. If you have limited mobility, opt for a spot that is easily reachable and doesn't require navigating through obstacles.
Read more: How To Make A Raised Garden Bed With Pallets
Soil Quality
Assess the quality of the soil in the area where you plan to install the raised garden bed. While raised beds allow you to control the soil quality to a large extent, it's still beneficial to choose a location with relatively good soil. This can minimize the need for extensive soil amendments and provide a solid foundation for your plants.
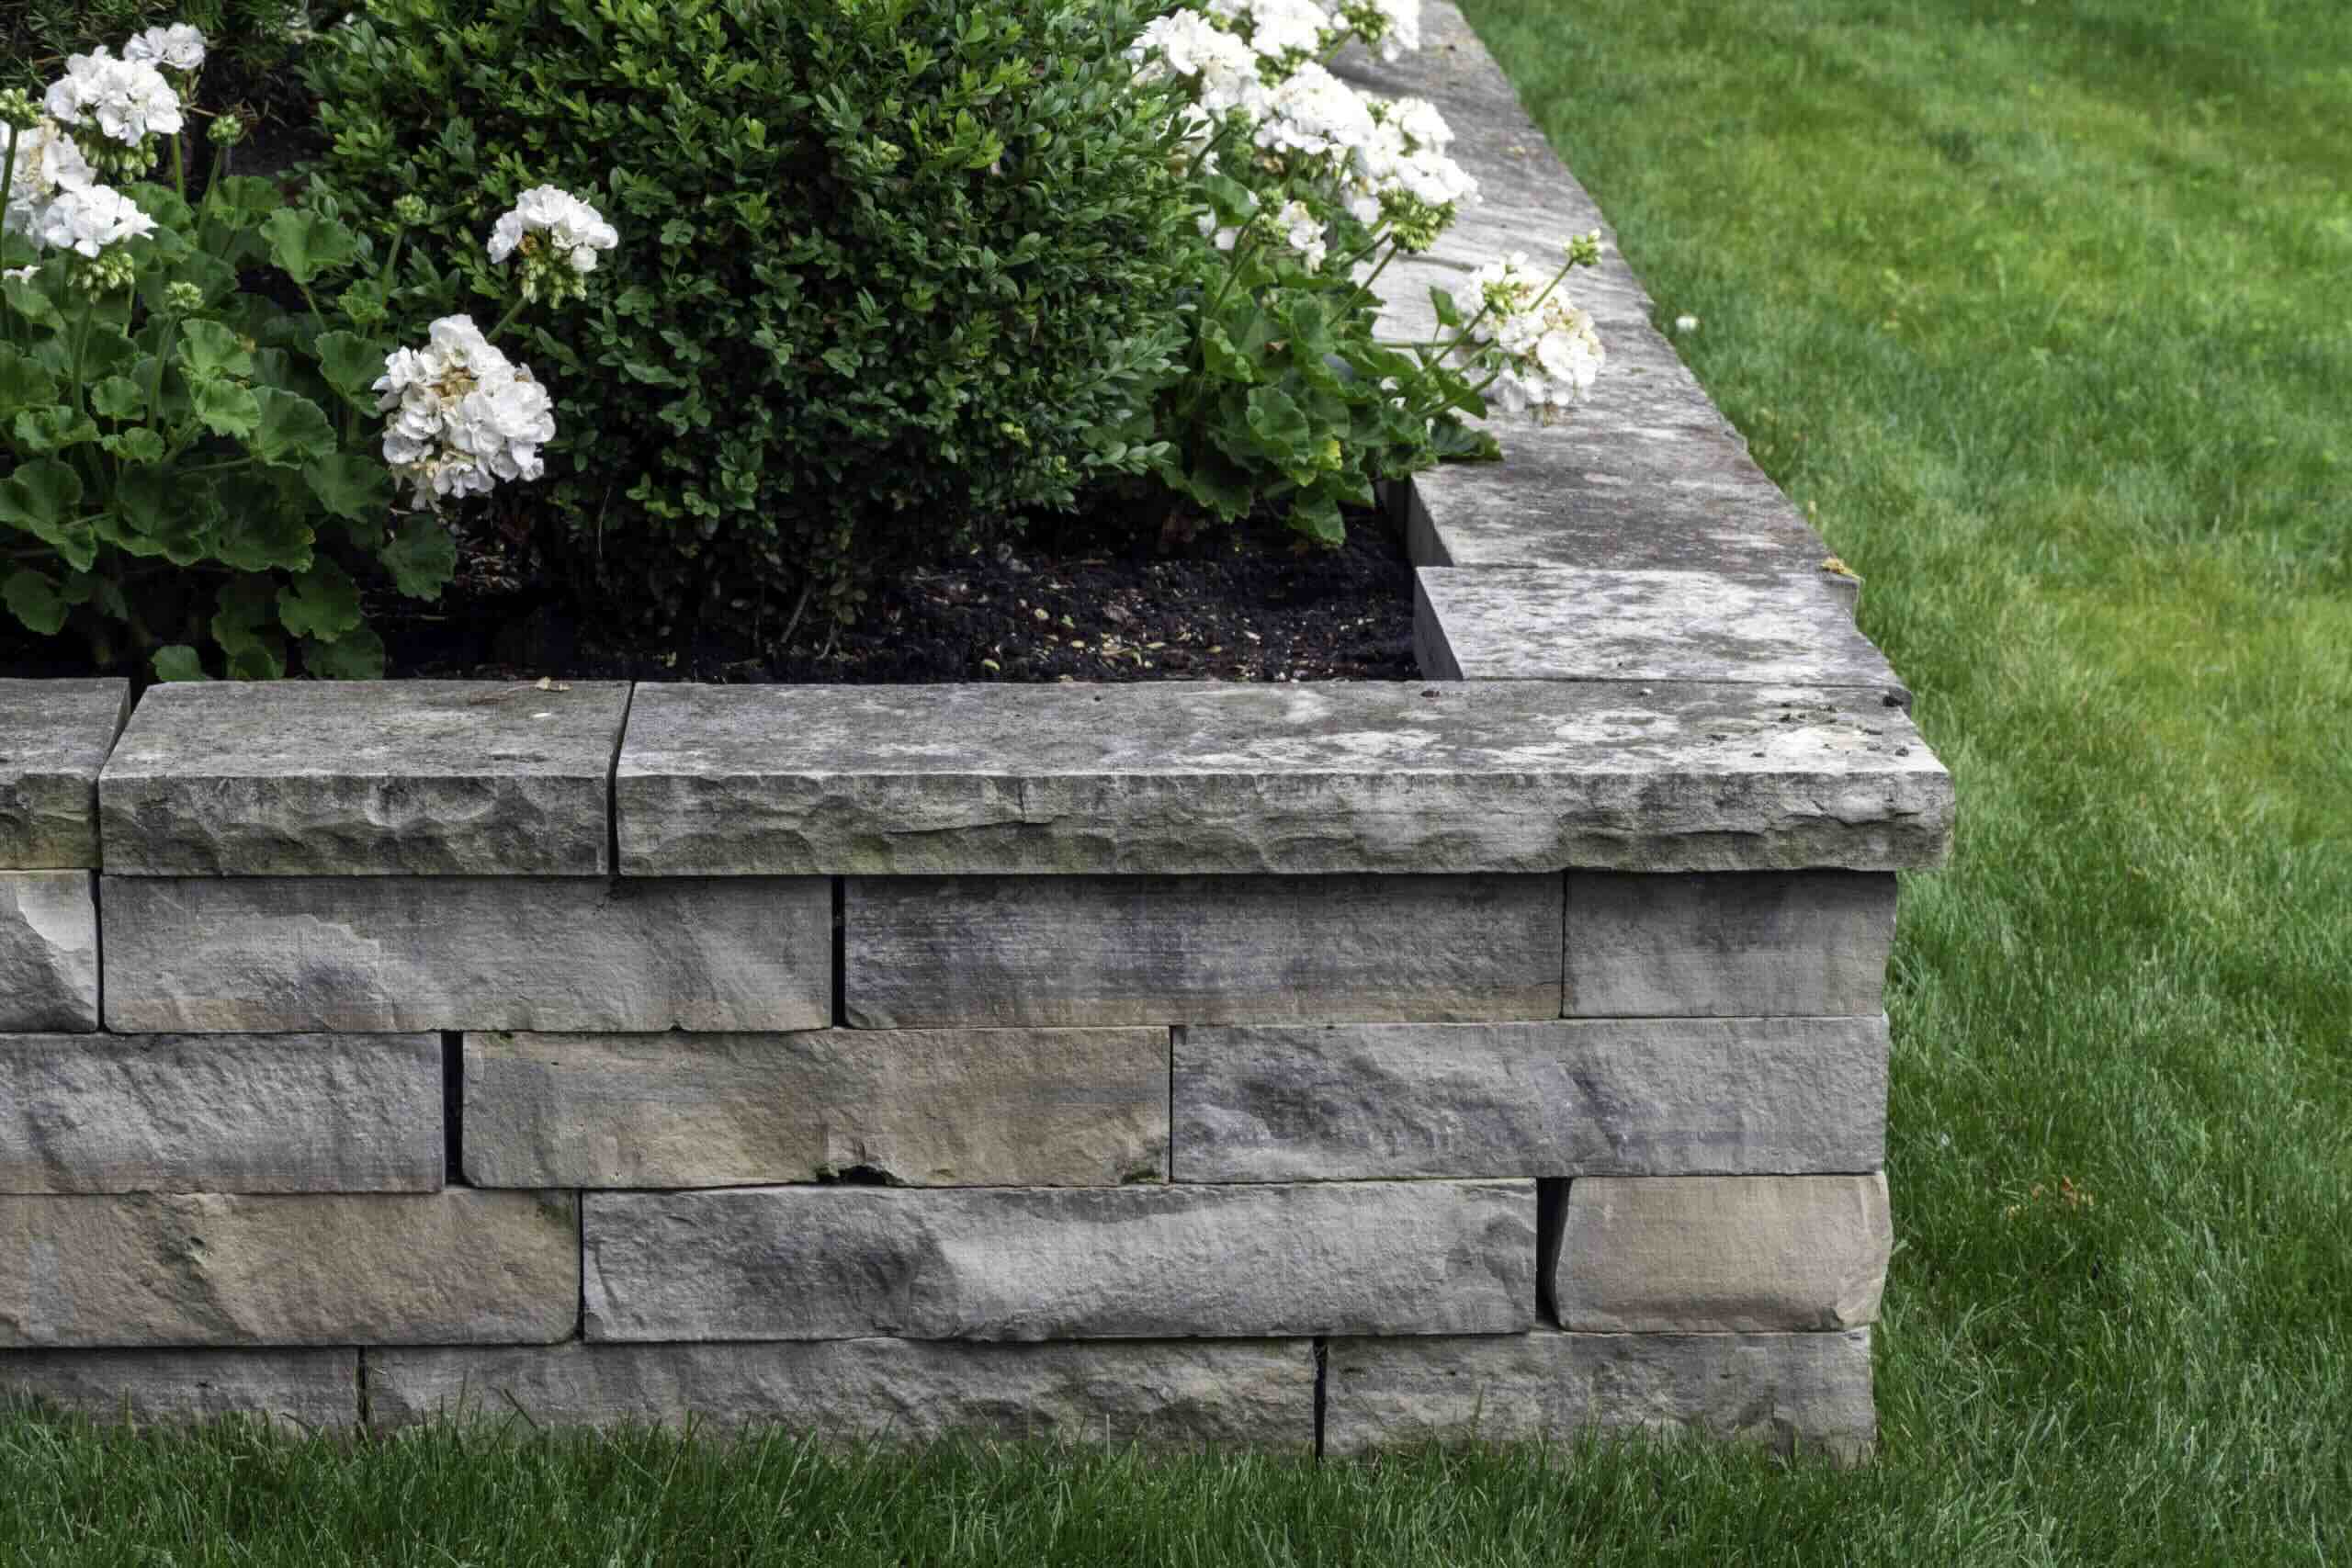
Aesthetic Appeal
Consider the visual impact of the chosen location. A raised garden bed can serve as a focal point in your landscape, so select a spot that complements the overall aesthetics of your outdoor space. Additionally, think about how the garden bed will interact with the surrounding elements, such as trees, shrubs, and other garden features.
By carefully considering these factors, you can choose a location that sets the stage for a thriving and visually appealing raised garden bed. Once you've identified the perfect spot, you can proceed to the next steps of gathering materials and building the frame for your budget-friendly garden bed.
Step 2: Gather Materials
Before diving into the construction of your raised garden bed, it's essential to gather the necessary materials. The beauty of this DIY project lies in its affordability and simplicity, as you can easily find budget-friendly items to bring your garden bed to life. Here's a comprehensive list of materials you'll need to get started:
Wood or Alternative Bed Material
The primary component of your raised garden bed is the material used to construct the frame. Opt for untreated lumber, such as cedar or redwood, which is durable and naturally resistant to decay. These options are readily available at most hardware stores and offer a charming aesthetic appeal. If you're looking for a more budget-friendly alternative, consider using reclaimed or repurposed wood, such as old pallets or discarded planks. This not only reduces costs but also adds a rustic and eco-friendly touch to your garden bed.
Read more: How To Make A Small Raised Garden Bed
Screws or Nails
To assemble the frame of your raised garden bed, you'll need screws or nails to secure the wooden components. Stainless steel or galvanized screws are ideal, as they are resistant to corrosion and provide a sturdy hold. Alternatively, if you opt for nails, choose galvanized or coated varieties to prevent rusting over time. Ensure you have the appropriate length and thickness based on the dimensions of your garden bed frame.
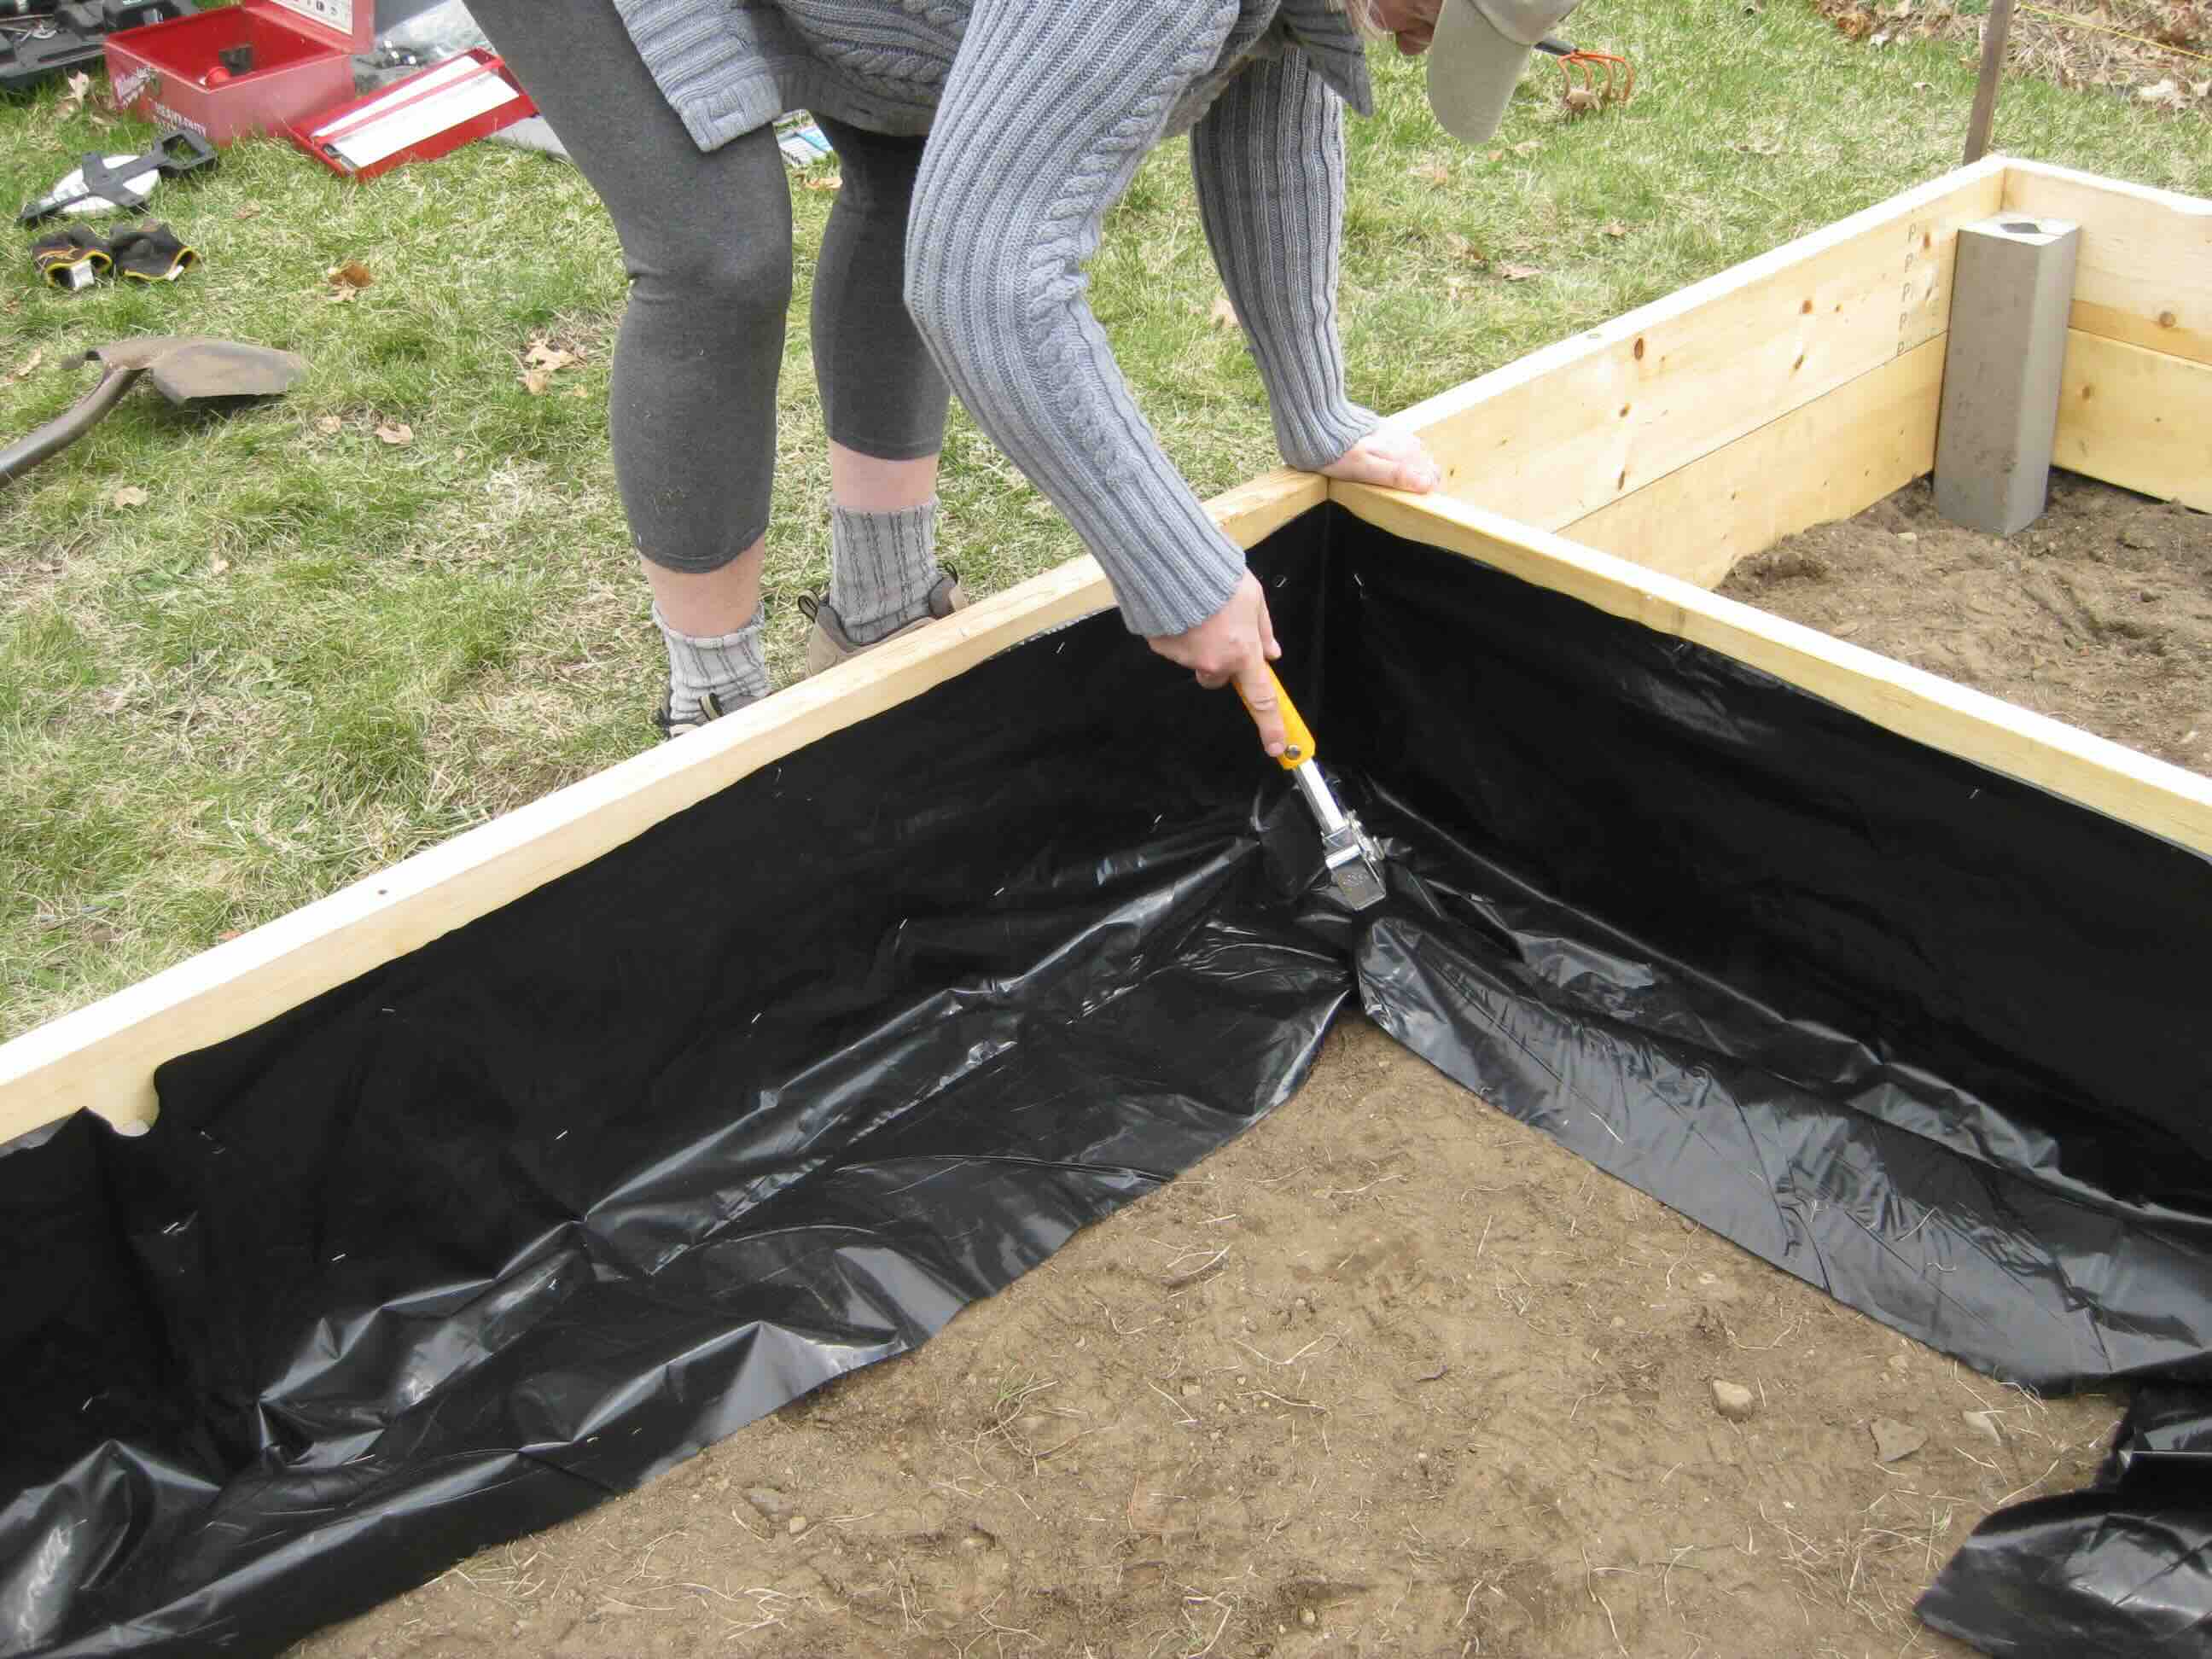
Landscape Fabric or Cardboard
To prevent weeds from infiltrating your garden bed and to maintain the integrity of the soil, consider using landscape fabric or cardboard as a barrier. This simple yet effective layer can be placed at the bottom of the bed before adding the soil, serving as a weed deterrent while allowing water to permeate through.
Soil and Compost
The success of your raised garden bed hinges on the quality of the soil. Invest in a nutrient-rich garden soil or create your own blend by combining topsoil, compost, and organic matter. If you have a compost bin, utilize the compost to enrich the soil with essential nutrients, promoting robust plant growth. Additionally, consider sourcing composted manure or other organic fertilizers to further enhance the soil's fertility.
Gardening Tools
Ensure you have the necessary gardening tools on hand, including a shovel, rake, and hand trowel. These tools will be instrumental in filling the bed with soil, leveling the surface, and planting your chosen flora. Having the right tools readily available streamlines the construction process and sets the stage for a successful gardening experience.
By gathering these materials, you're laying the groundwork for a cost-effective and rewarding raised garden bed project. With a bit of creativity and resourcefulness, you can transform these simple components into a flourishing garden oasis that reflects your passion for gardening and sustainability.
Read more: How To Make A Raised Garden Bed With Bricks
Step 3: Build the Frame
Constructing the frame of your raised garden bed is a pivotal stage that sets the foundation for a durable and visually appealing structure. Whether you're utilizing traditional lumber or repurposed materials, the process of assembling the frame requires attention to detail and a touch of creativity. Here's a detailed guide to help you navigate this essential step with confidence and efficiency.
Selecting the Right Wood
When opting for traditional lumber, consider using untreated cedar or redwood for its natural resistance to decay and durability. These options not only provide a charming aesthetic but also ensure longevity, making them ideal for outdoor use. If you're exploring budget-friendly alternatives, reclaimed wood, such as old pallets or salvaged planks, can be repurposed to create a rustic and eco-friendly frame. Regardless of your choice, ensure the wood is free from chemical treatments that could potentially leach into the soil.
Cutting and Assembling
Once you have the necessary wood or alternative materials, measure and cut the components according to your desired dimensions. Whether you're crafting a small bed for compact spaces or a larger one to accommodate a variety of plants, precision in cutting the wood is essential for a seamless assembly. Utilize a saw and measuring tools to achieve accurate cuts, ensuring that the pieces fit together snugly during assembly.
Securing the Frame
Assemble the cut pieces to form the rectangular or square shape of the garden bed. Use galvanized screws or nails to secure the corners and joints, providing structural stability to the frame. It's important to pre-drill holes to prevent the wood from splitting and to ensure a secure attachment. Additionally, consider reinforcing the corners with metal brackets for added strength, especially for larger beds that will bear the weight of the soil and plants.
Read more: How To Fill Raised Garden Beds Cheap
Adding a Protective Barrier
To safeguard the frame from moisture and prolong its lifespan, consider applying a non-toxic wood sealant or linseed oil. This protective layer helps prevent water damage and preserves the natural beauty of the wood, ensuring that your raised garden bed remains an enduring feature in your outdoor space.
By following these steps, you can build a sturdy and visually appealing frame for your raised garden bed, setting the stage for the next phase of filling it with nutrient-rich soil and bringing your garden to life. With careful attention to detail and a touch of craftsmanship, you'll create a frame that not only supports your plants but also adds a charming touch to your landscape.
Step 4: Fill with Soil
Filling your raised garden bed with high-quality soil is a critical step that directly impacts the growth and vitality of your plants. The soil serves as the lifeblood of your garden, providing essential nutrients, proper drainage, and a supportive environment for robust root development. By carefully selecting and layering the right combination of soil and organic matter, you can create an optimal growing medium that nurtures a thriving garden ecosystem.
Layering Technique
To ensure optimal soil quality and structure, consider employing a layering technique when filling your raised garden bed. This method involves strategically adding different types of soil and organic matter to create a well-balanced and nutrient-rich environment for your plants.
-
Bottom Layer: Begin by placing a layer of coarse materials at the bottom of the bed, such as small rocks or gravel. This layer facilitates drainage and prevents waterlogging, especially in areas with heavy clay soil.
-
Weed Barrier: On top of the coarse layer, add a weed barrier, such as landscape fabric or cardboard. This acts as a protective barrier, preventing weeds from infiltrating the bed while allowing water to permeate through.
-
Quality Garden Soil: The next layer consists of high-quality garden soil, which serves as the primary growing medium for your plants. Choose a nutrient-rich soil blend that provides a balanced mix of organic matter, minerals, and microbial activity to support plant growth.
-
Compost and Organic Matter: Incorporate a generous layer of compost and organic matter, such as well-rotted manure or composted kitchen scraps. This enriches the soil with essential nutrients, improves its structure, and fosters a healthy microbial community.
-
Final Topsoil Layer: Complete the layering process by adding a topsoil layer to provide a protective covering and a stable base for planting. Ensure the topsoil is of good quality and free from contaminants that could hinder plant growth.
Soil Amendments
In addition to the layering technique, consider incorporating soil amendments to further enhance the fertility and structure of the soil. This may include adding organic fertilizers, such as bone meal or fish emulsion, to provide a nutrient boost for your plants. Additionally, consider adjusting the pH level of the soil by incorporating lime or sulfur, depending on the specific requirements of the plants you intend to grow.
Read more: What Is A Raised Garden Bed
Leveling and Watering
Once the soil is in place, use a rake and hand trowel to level the surface, ensuring uniformity and stability for planting. Water the soil thoroughly to promote settling and establish proper moisture levels throughout the bed. This initial watering primes the soil for planting and sets the stage for a flourishing garden.
By meticulously filling your raised garden bed with a well-balanced and nutrient-rich soil mixture, you create an optimal environment for plant growth and vitality. This foundational step lays the groundwork for a bountiful and thriving garden, setting the stage for the final phase of planting a diverse array of flora that will transform your raised bed into a vibrant and flourishing oasis.
Step 5: Plant Your Garden
With the raised garden bed frame assembled and filled with nutrient-rich soil, it's time to bring your garden to life by planting a diverse array of flora. This step marks the culmination of your efforts, transforming the once-empty bed into a vibrant and flourishing oasis of greenery and color. Whether you're cultivating a vegetable garden, herb garden, or a mix of ornamental plants, the planting process is an opportunity to exercise your creativity and bring your gardening vision to fruition.
Selecting Plants
Before diving into the planting phase, take some time to carefully select the plants that will thrive in your raised garden bed. Consider factors such as sunlight requirements, water needs, and the mature size of the plants. If you're growing vegetables, choose varieties that suit your climate and the available space in the bed. For herb gardens, select aromatic herbs such as basil, rosemary, and mint, which not only add flavor to your culinary creations but also emit delightful fragrances.
Planting Technique
When planting in a raised garden bed, it's essential to space the plants appropriately to allow for optimal growth and airflow. Utilize a trowel to create individual planting pockets in the soil, ensuring that each plant is positioned at the correct depth and distance from its neighbors. Gently loosen the roots of the seedlings or transplants before placing them in the soil, allowing them to establish a strong foundation for growth.
Read more: Why A Raised Garden Bed
Companion Planting
Embrace the concept of companion planting to maximize the productivity and health of your garden. Pairing compatible plants together can deter pests, enhance flavor, and promote overall garden resilience. For example, interplanting aromatic herbs with vegetables can confuse pests and attract beneficial insects, creating a harmonious and balanced ecosystem within your raised bed.
Mulching and Watering
After planting, apply a layer of organic mulch, such as straw or wood chips, to conserve moisture, suppress weeds, and regulate soil temperature. This protective layer also adds a decorative touch to the garden bed while providing numerous benefits to the plants. Water the newly planted garden bed thoroughly, ensuring that the soil is evenly moist to support the establishment of the plants' roots.
Care and Maintenance
As your garden begins to flourish, regular care and maintenance are essential to ensure its continued success. Monitor the moisture levels in the soil and water as needed, especially during dry periods. Stay vigilant against weeds and promptly remove any unwanted growth to prevent competition for resources. Additionally, consider incorporating organic fertilizers or compost tea to provide ongoing nourishment to your plants.
By following these planting guidelines and infusing your garden with care and attention, you'll witness the transformation of your raised bed into a thriving and visually captivating garden. Whether you're harvesting homegrown vegetables, enjoying the fragrance of fresh herbs, or admiring the beauty of blooming flowers, your raised garden bed will serve as a testament to your dedication to sustainable gardening and the joy of cultivating a living, breathing masterpiece in your outdoor space.
Conclusion
As we conclude this journey of creating a raised garden bed on a budget, it's evident that this DIY project offers a multitude of rewards beyond the tangible beauty of the garden itself. By carefully selecting the location, gathering affordable materials, building the frame, filling it with nutrient-rich soil, and planting a diverse array of flora, you've embarked on a fulfilling endeavor that combines creativity, sustainability, and the joy of nurturing life.
The process of constructing a raised garden bed cheaply is not merely a practical task but a transformative experience that fosters a deeper connection with nature and the environment. It's a testament to resourcefulness and ingenuity, as you've repurposed simple materials to create a thriving ecosystem that will yield an abundance of fresh produce, fragrant herbs, and vibrant flowers.
Beyond the tangible benefits, such as improved soil quality, efficient drainage, and easier access for gardening tasks, the raised garden bed serves as a symbol of your commitment to sustainable living and the cultivation of a greener, more vibrant world. It's a small yet impactful step towards reducing your environmental footprint and embracing the beauty of natural, homegrown abundance.
As you witness the garden bed evolve and flourish, it becomes a living canvas that reflects your dedication to nurturing life and creating a harmonious balance between human intervention and the natural world. It's a space where you can escape the hustle and bustle of daily life, immerse yourself in the therapeutic act of gardening, and savor the fruits of your labor, quite literally.
Moreover, the raised garden bed becomes a focal point of inspiration, inviting others to embrace the beauty of sustainable gardening and the joy of cultivating a thriving ecosystem within a confined space. It's a testament to the transformative power of simple DIY projects, demonstrating that with a bit of creativity and resourcefulness, anyone can create a flourishing garden oasis that enriches their lives and the environment.
In essence, the journey of making a raised garden bed cheaply transcends the physical act of construction and gardening. It's a celebration of the human spirit's ability to nurture and create, a testament to the beauty of simplicity, and a reminder of the profound impact that small, intentional actions can have on our lives and the world around us. So, as you admire the beauty and abundance of your raised garden bed, take pride in the fact that you've not only created a thriving garden but also sown the seeds of inspiration and sustainability for generations to come.
Frequently Asked Questions about How To Make A Raised Garden Bed Cheap
Was this page helpful?
At Storables.com, we guarantee accurate and reliable information. Our content, validated by Expert Board Contributors, is crafted following stringent Editorial Policies. We're committed to providing you with well-researched, expert-backed insights for all your informational needs.


0 thoughts on “How To Make A Raised Garden Bed Cheap”