
Articles
How To Start A Raised Bed Garden
Modified: October 20, 2024
Learn how to start a raised bed garden with our comprehensive gardening guide. Get expert tips and advice for successful gardening.
(Many of the links in this article redirect to a specific reviewed product. Your purchase of these products through affiliate links helps to generate commission for Storables.com, at no extra cost. Learn more)
Introduction
Welcome to the wonderful world of raised bed gardening! Whether you’re an experienced gardener or just starting out, a raised bed can be a fantastic addition to your gardening endeavors. This method of gardening involves creating elevated planting areas that are easier to maintain and provide a multitude of benefits for your plants.
In this article, we will explore the various aspects of starting and maintaining a raised bed garden. From choosing the right location to preparing the soil, sowing seeds to harvesting, you will learn all the essential steps to create a thriving garden in a raised bed.
Raised bed gardening offers numerous advantages over traditional ground-level gardening. The customized design allows for better control of soil quality, improved drainage, and increased accessibility, making it an ideal option for urban gardens or areas with poor soil conditions. Additionally, raised beds provide a visually appealing focal point in your garden and can even serve as a decorative element for your outdoor space.
One of the key benefits of raised bed gardening is the ability to create optimal soil conditions. By using a mixture of high-quality topsoil, compost, and organic matter, you can ensure that your plants have the perfect growing medium. This is especially valuable in areas with heavy clay or sandy soil, where amending the soil can be a challenge.
Another advantage of raised beds is the reduction of weed growth. The elevated design allows for better weed control, as you can easily remove any unwanted plants that may appear. Additionally, raised beds can help prevent soil compaction, giving plant roots ample space to grow and access nutrients. This results in healthier plants with higher yields.
Furthermore, raised beds offer the opportunity to extend your gardening season. The soil in raised beds tends to warm up faster in the spring, allowing for earlier planting. Additionally, you can cover your raised bed with a protective layer or hoop structure to protect your plants from frost and prolong the growing season into the fall.
Now that you understand the many benefits of raised bed gardening, it’s time to delve into the specific details on how to get started. By following the steps outlined in this article, you’ll be well on your way to creating a beautiful and productive raised bed garden that will bring you joy and bounty for years to come.
Key Takeaways:
- Embrace the therapeutic benefits of raised bed gardening, from nurturing plants to savoring homegrown harvests. Share the joy and abundance with others, creating a haven of tranquility and community.
- Overcome common challenges in raised bed gardening with proactive troubleshooting. Reflect, plan, and celebrate the rewards of your hard work, creating a sustainable and rewarding garden oasis.
Read more: What Is A Raised Garden Bed
Benefits of Raised Bed Gardening
Raised bed gardening offers a multitude of benefits that make it a popular choice among gardeners of all levels of experience. Here are some of the key advantages of utilizing raised beds in your gardening endeavors:
- Improved Soil Quality: One of the primary benefits of raised bed gardening is the ability to create a customized soil mix. By using a blend of high-quality topsoil, compost, and organic matter, you can ensure that your plants have the ideal growing medium. This is particularly beneficial in areas with poor soil conditions or heavy clay, as it allows for better drainage and nutrient availability.
- Better Drainage: Raised beds provide excellent drainage, preventing waterlogging and root rot. The elevated design allows excess water to drain away more efficiently, keeping your plants healthy and preventing their roots from sitting in water for extended periods.
- Controlled Weed Growth: Raised beds offer better weed control compared to traditional ground-level gardening. By creating defined planting areas with clear boundaries, it is easier to identify and remove weeds as soon as they appear. This results in less competition for resources and healthier plants.
- Improved Accessibility: The elevated height of raised beds makes gardening more accessible, especially for those with physical limitations. With less bending and kneeling required, it minimizes the strain on your back and knees, allowing you to enjoy hours of gardening without discomfort.
- Optimal Plant Growth: Raised beds provide ample space for plant roots to grow and access nutrients. The loose and well-aerated soil structure promotes healthy root development, resulting in stronger and more vigorous plants. This can lead to higher yields and better overall plant health.
- Extend Growing Season: Due to their elevated design, raised beds tend to warm up faster in the spring. This allows for earlier planting and the ability to grow cool-season crops even before the ground has fully thawed. Additionally, you can protect your plants from frost in the fall by covering the bed with a protective layer or hoop structure, effectively extending your gardening season.
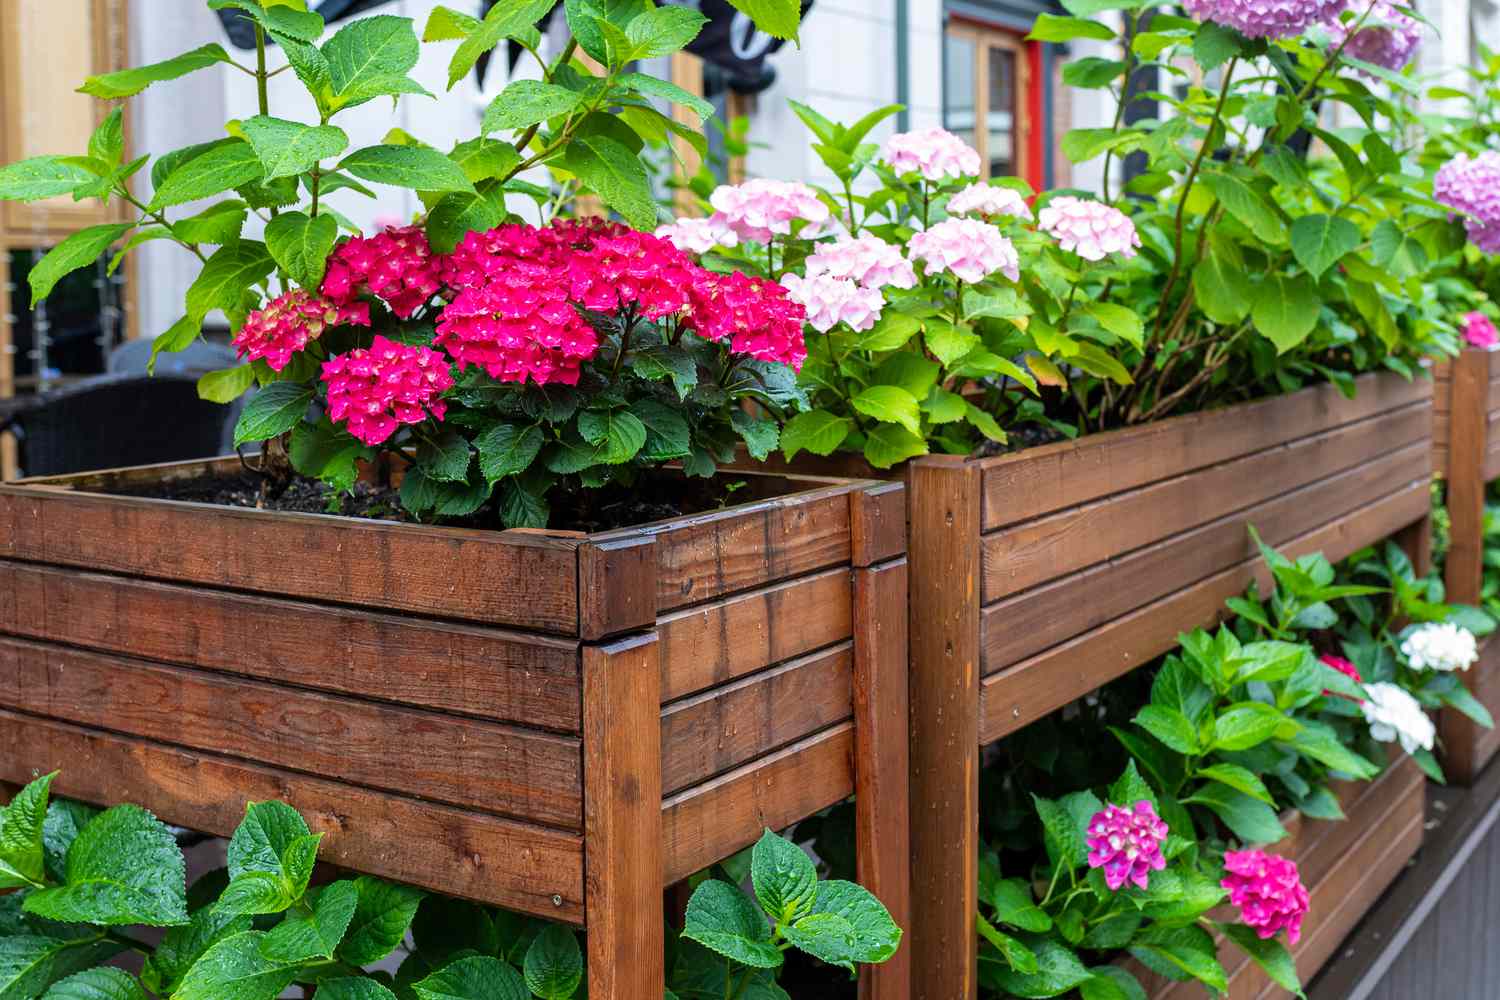
- Aesthetically Pleasing: Raised beds can serve as a visually appealing focal point in your garden. The clearly defined edges and neat arrangement of plants create a sense of organization and beauty. You can even get creative with the design, using different materials and heights to add a unique touch to your outdoor space.
These are just a few of the many benefits that raised bed gardening offers. Whether you have limited space, poor soil conditions, or physical limitations, raised beds provide a practical and efficient solution to grow a bountiful garden. Now that you understand the advantages, it’s time to discover how to create and maintain your own raised bed garden.
Choosing the Location
When it comes to creating a successful raised bed garden, choosing the right location is paramount. The location you select will play a crucial role in the productivity and overall health of your plants. Here are some key factors to consider when choosing the ideal spot for your raised bed:
- Sunlight: Most vegetables and flowers thrive in full sun, which is typically considered to be at least six hours of direct sunlight per day. Therefore, it’s important to choose a location that receives ample sunlight to ensure the optimal growth and development of your plants. Observe your garden area throughout the day to determine which spots receive the most sunlight, and select a location that offers the maximum exposure.
- Access to Water: Proximity to a water source is another crucial consideration when choosing the location for your raised bed. Plants need regular watering to thrive, so make sure your chosen spot is easily accessible to a water supply. This could be a nearby outdoor faucet, rainwater collection system, or a watering can that can be conveniently filled from your home. Avoid placing your raised bed in areas where water may pool or become stagnant as this can lead to root rot and other water-related issues.
- Level Ground: It’s essential to select a location that has level ground for your raised bed. This will ensure that your bed remains stable and doesn’t experience any shifting or tilting. Level ground also helps with water distribution, preventing any pooling or uneven drainage.
- Protection from Wind: Strong winds can cause damage to plants and hinder their growth. Choosing a location that provides some protection from wind can help prevent windburn and breakage. Consider natural wind barriers such as nearby buildings, fences, or hedges when deciding on the placement of your raised bed.
- Accessibility: Consider the accessibility of your raised bed garden. Ideally, it should be located in an area that is easy to reach and conveniently located to minimize the effort required for maintenance tasks such as weeding, watering, and harvesting. This is particularly important if you have physical limitations or mobility issues.
- Soil Quality: While raised beds allow for improved soil quality, it’s still important to consider the existing soil conditions in the chosen location. Avoid areas with compacted or poor soil, as this can impact the overall health and productivity of your plants. If necessary, you can prepare the space by removing any grass or weeds and adding a layer of landscape fabric or cardboard to suppress their growth.
By taking these factors into consideration, you can choose the perfect location for your raised bed garden. Keep in mind that the specific requirements may vary depending on the type of plants you intend to grow. Take some time to plan and assess your garden area to ensure the best possible conditions for your plants’ success.
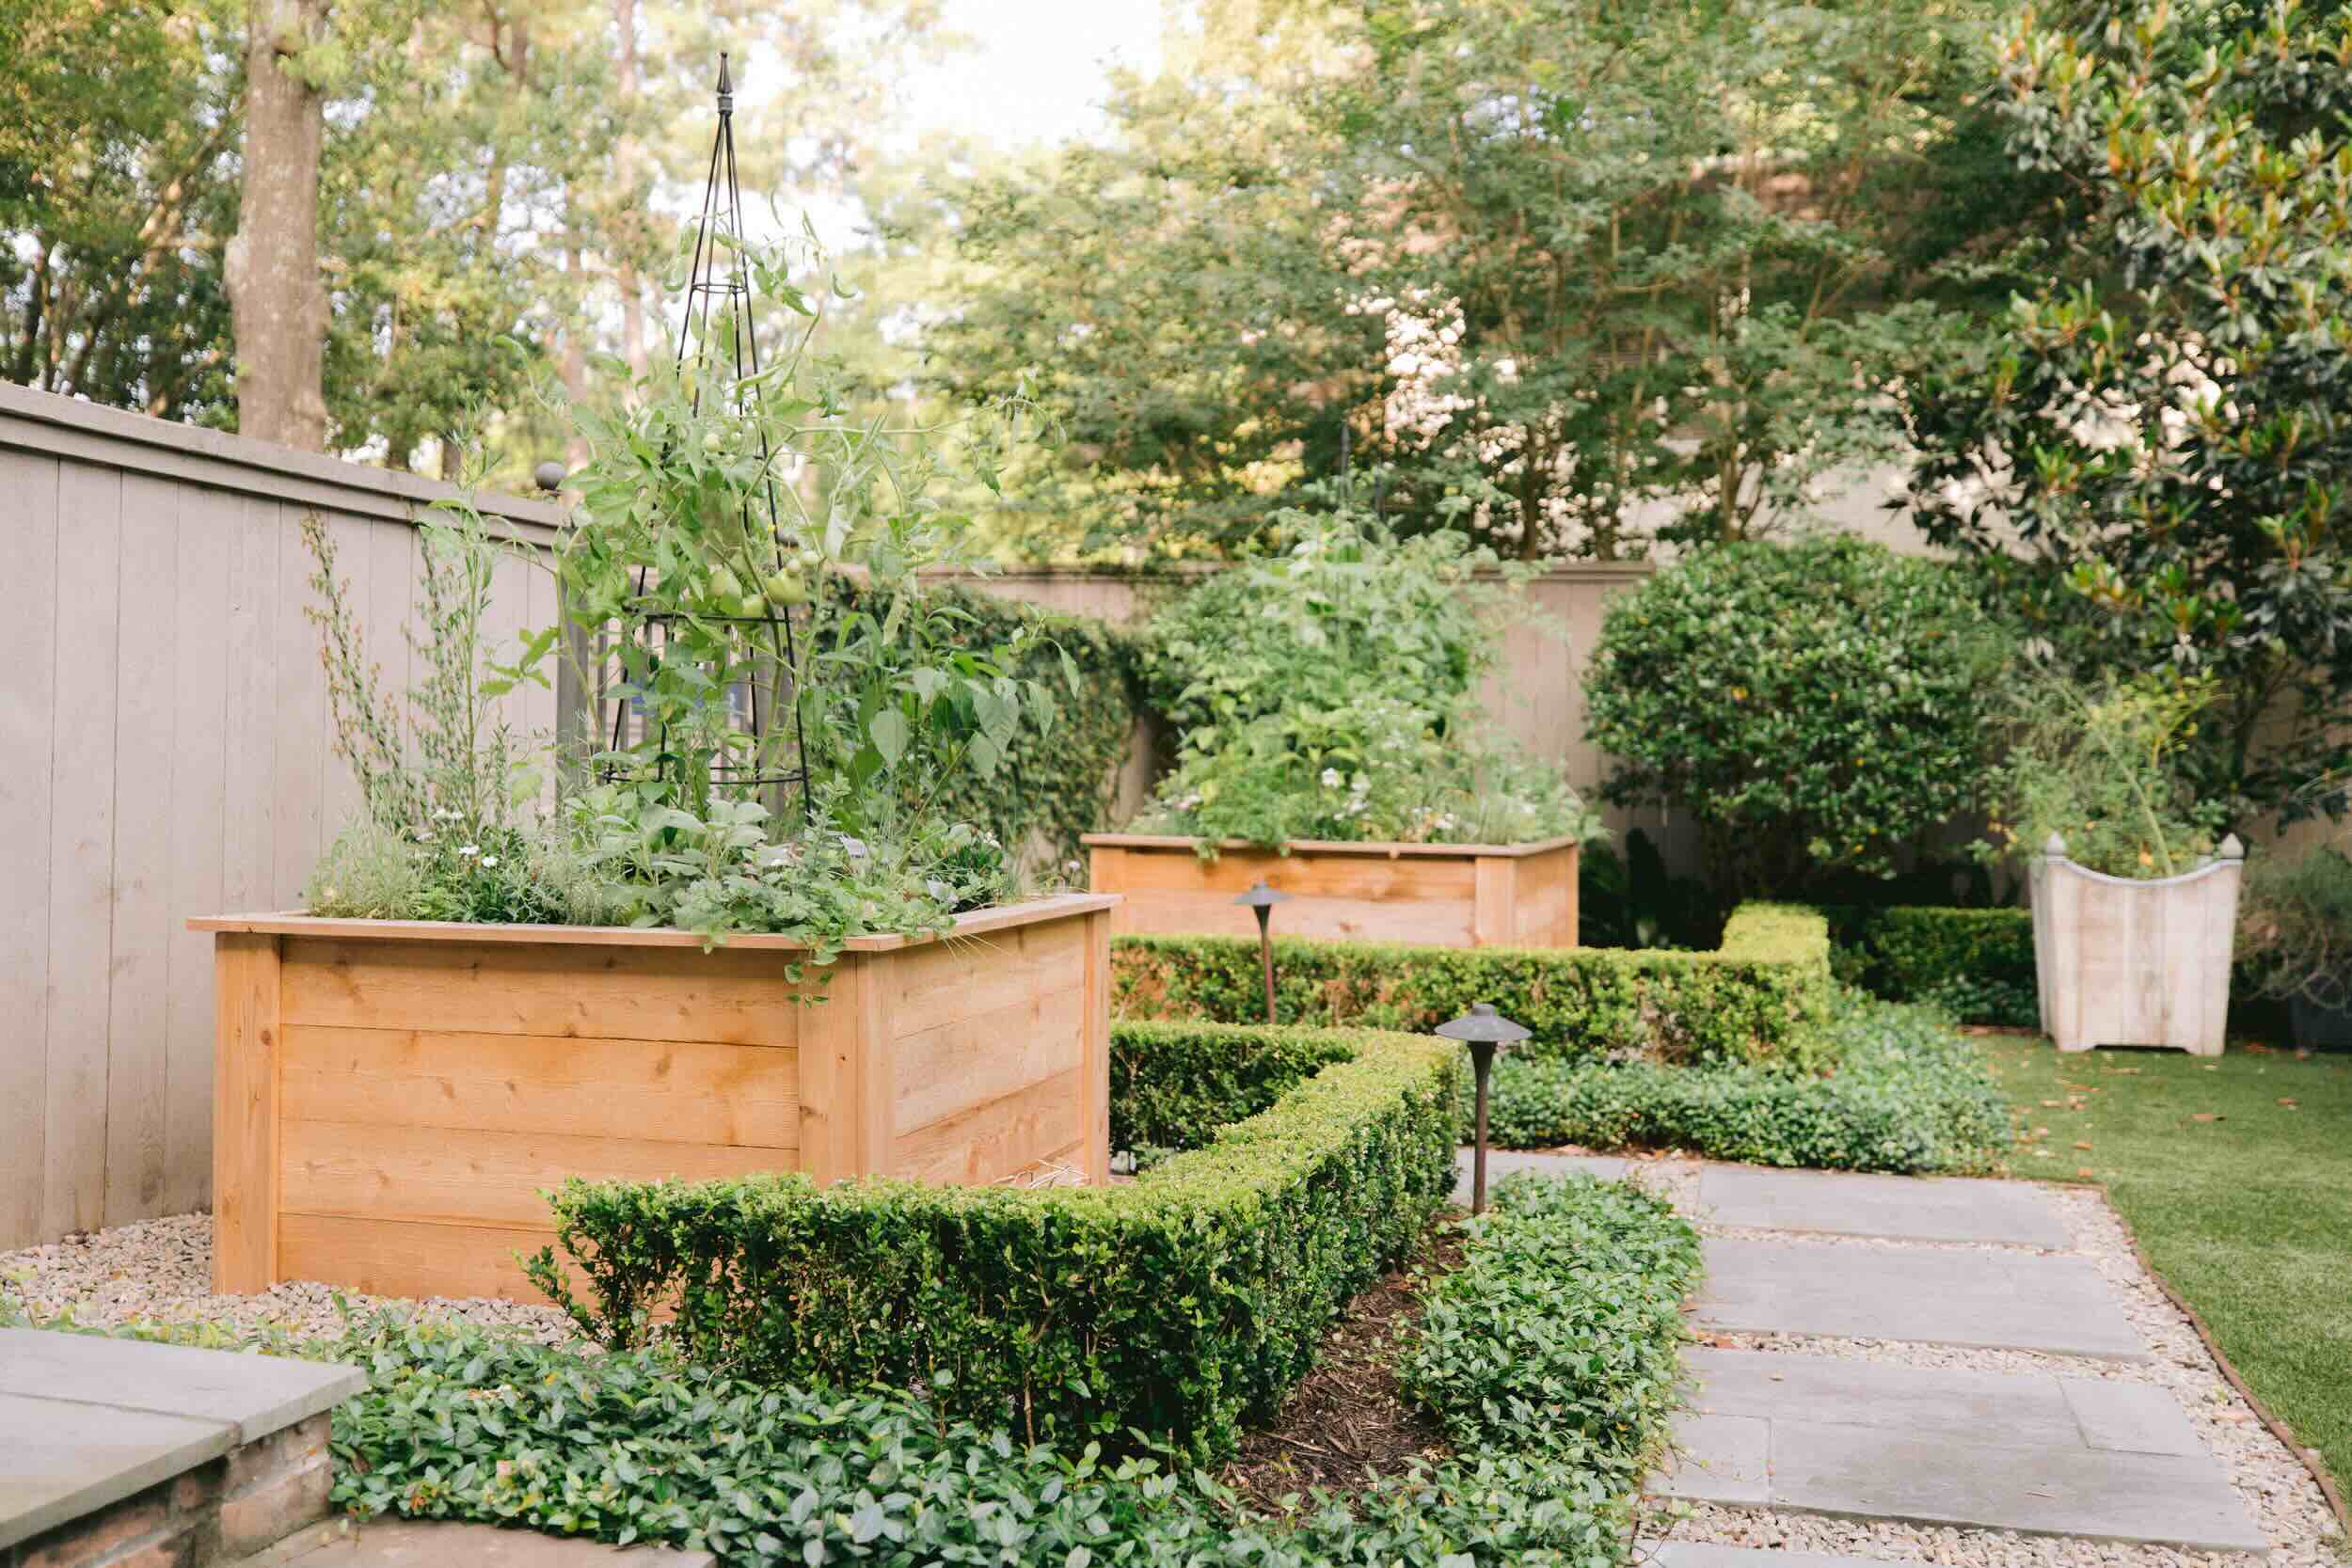
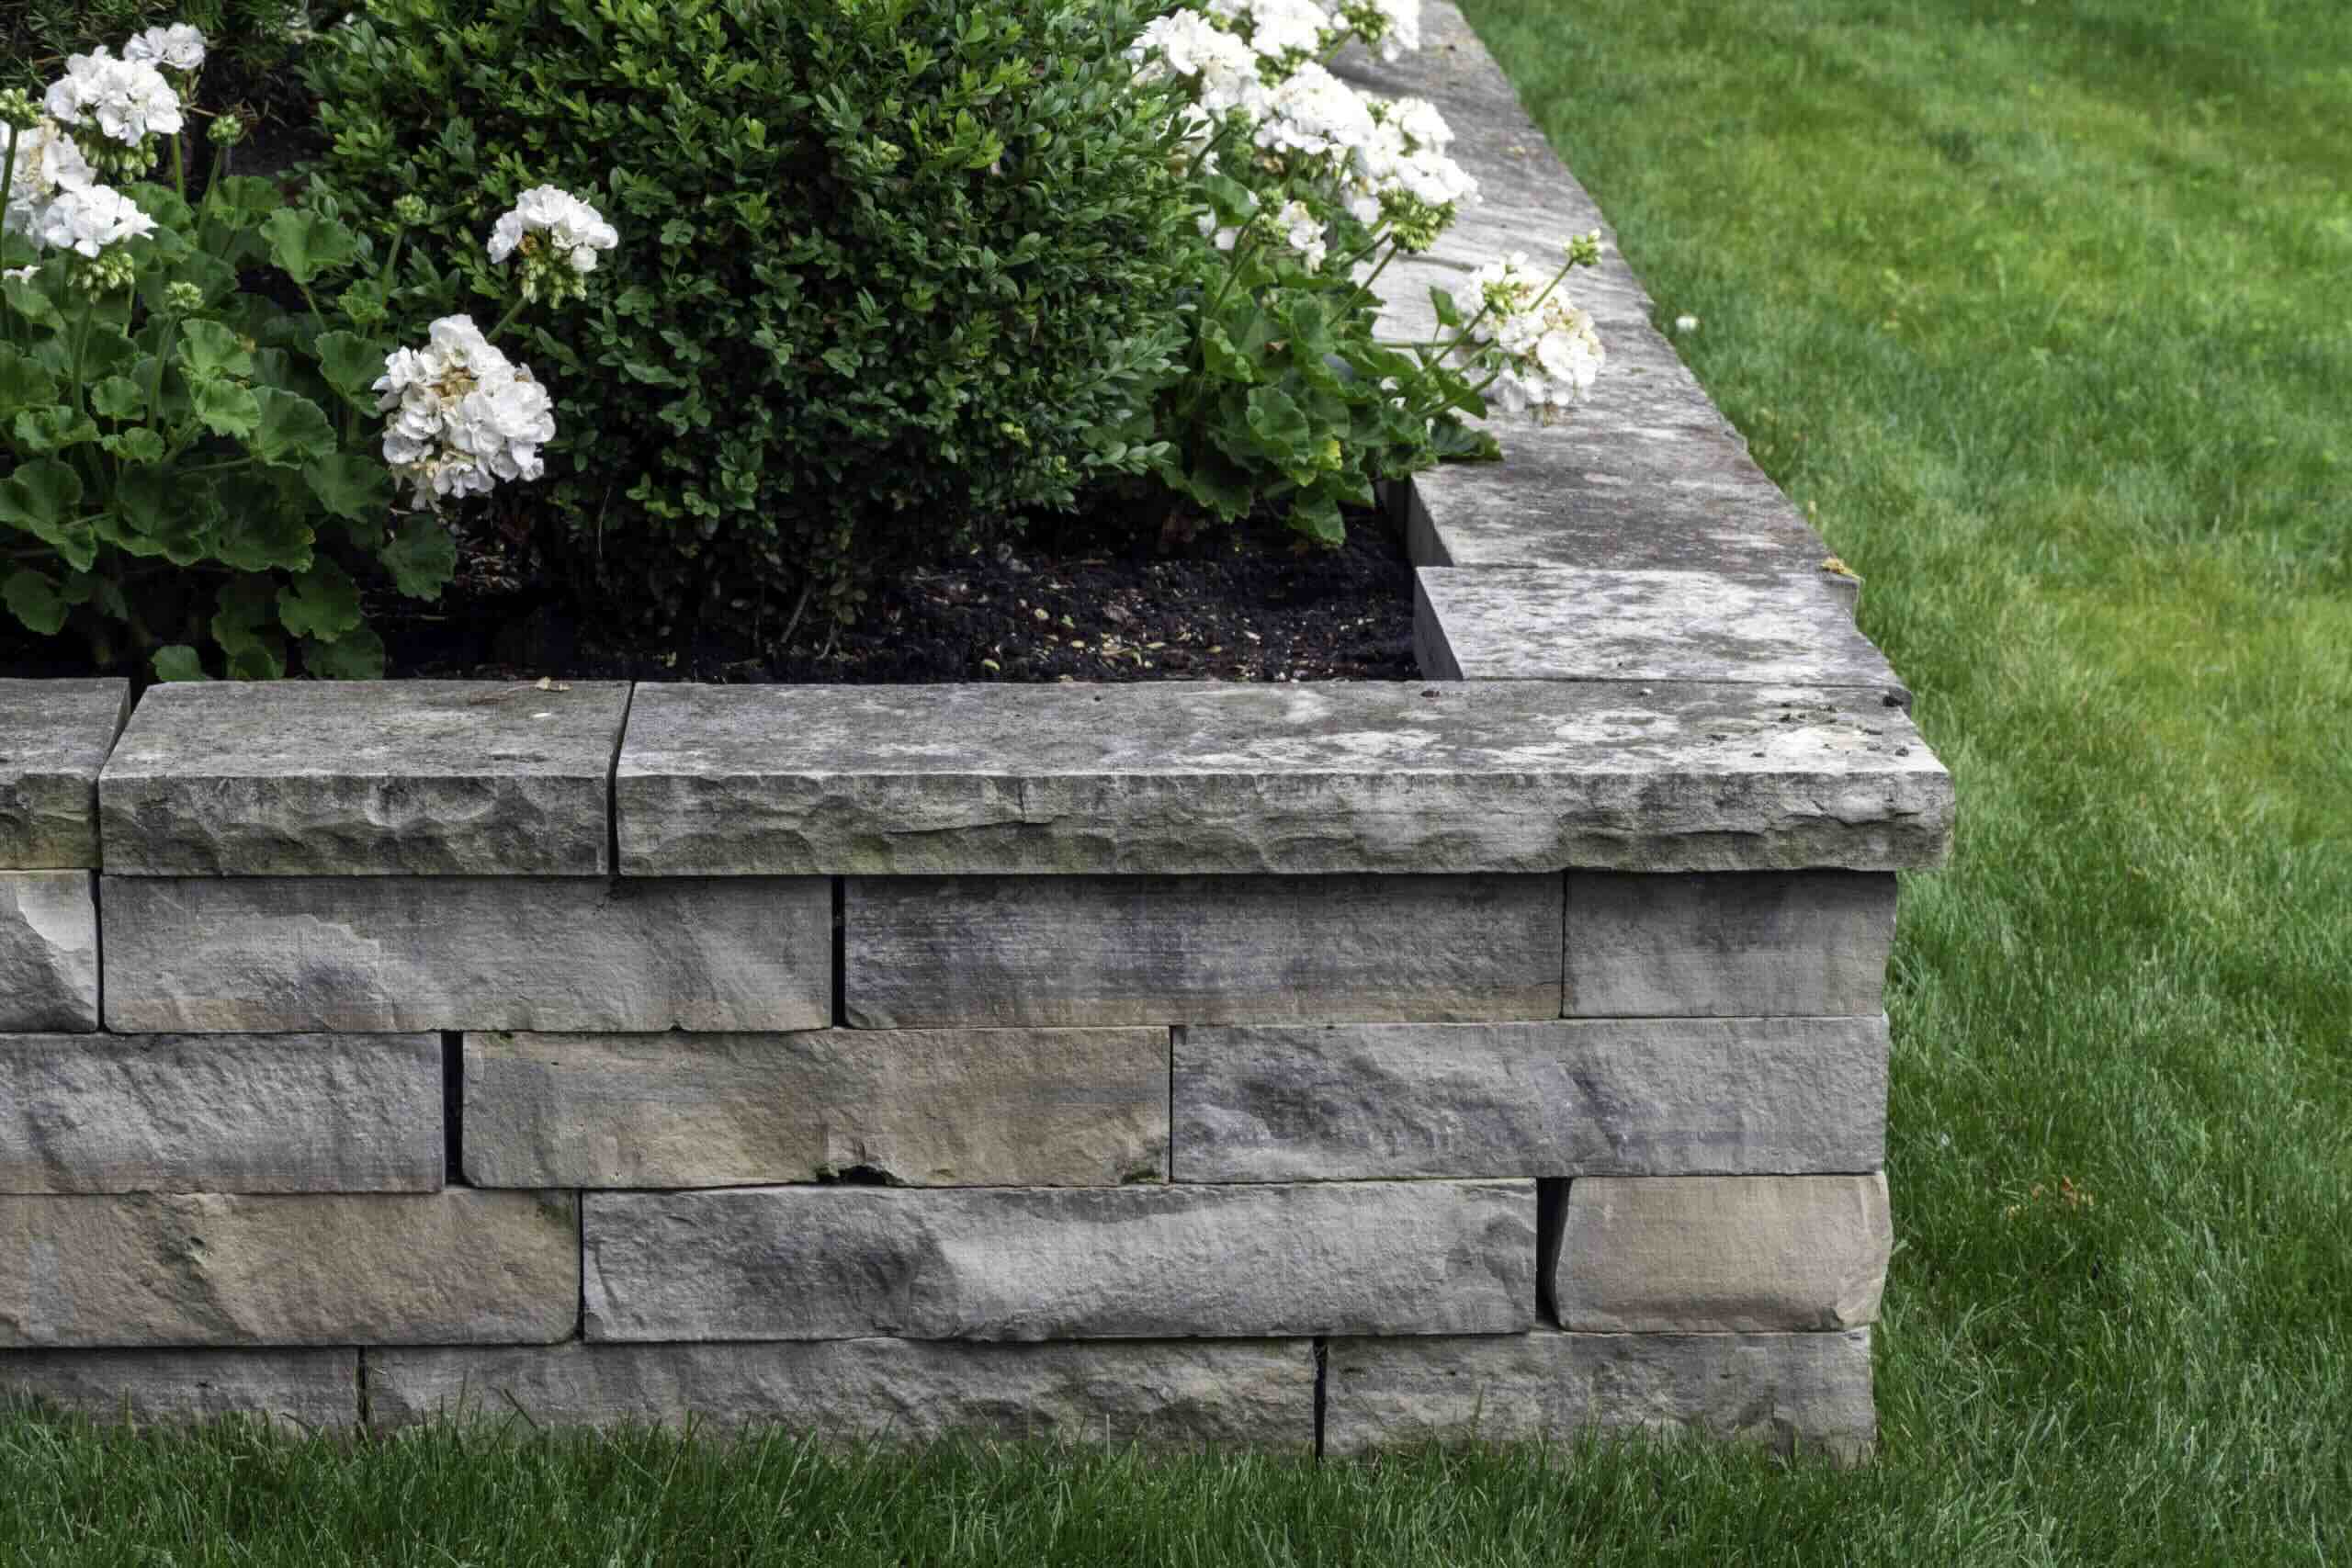
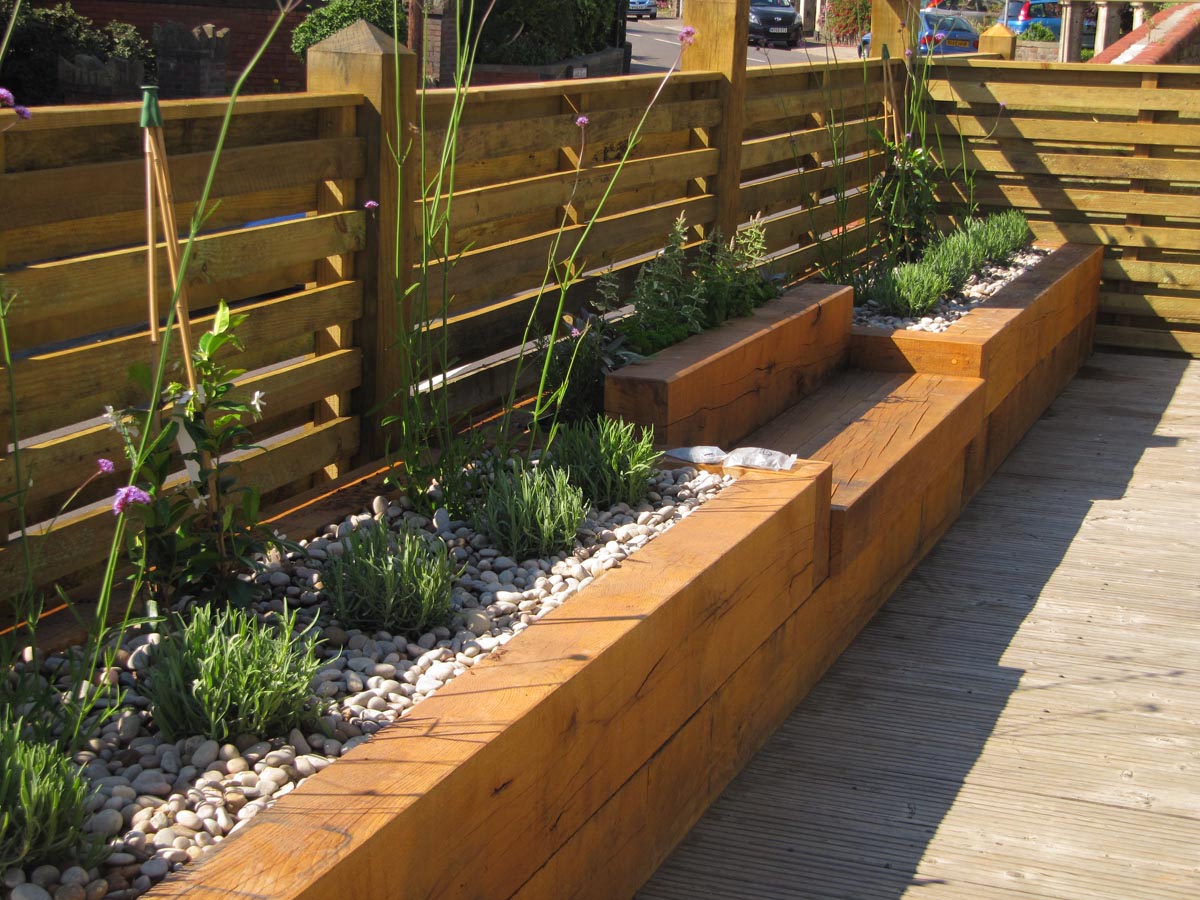
Selecting the Right Materials
Choosing the right materials for your raised bed is essential for creating a durable and functional gardening space. Selecting high-quality materials will ensure the longevity of your raised bed while providing optimal growing conditions for your plants. Here are some key factors to consider when selecting materials:
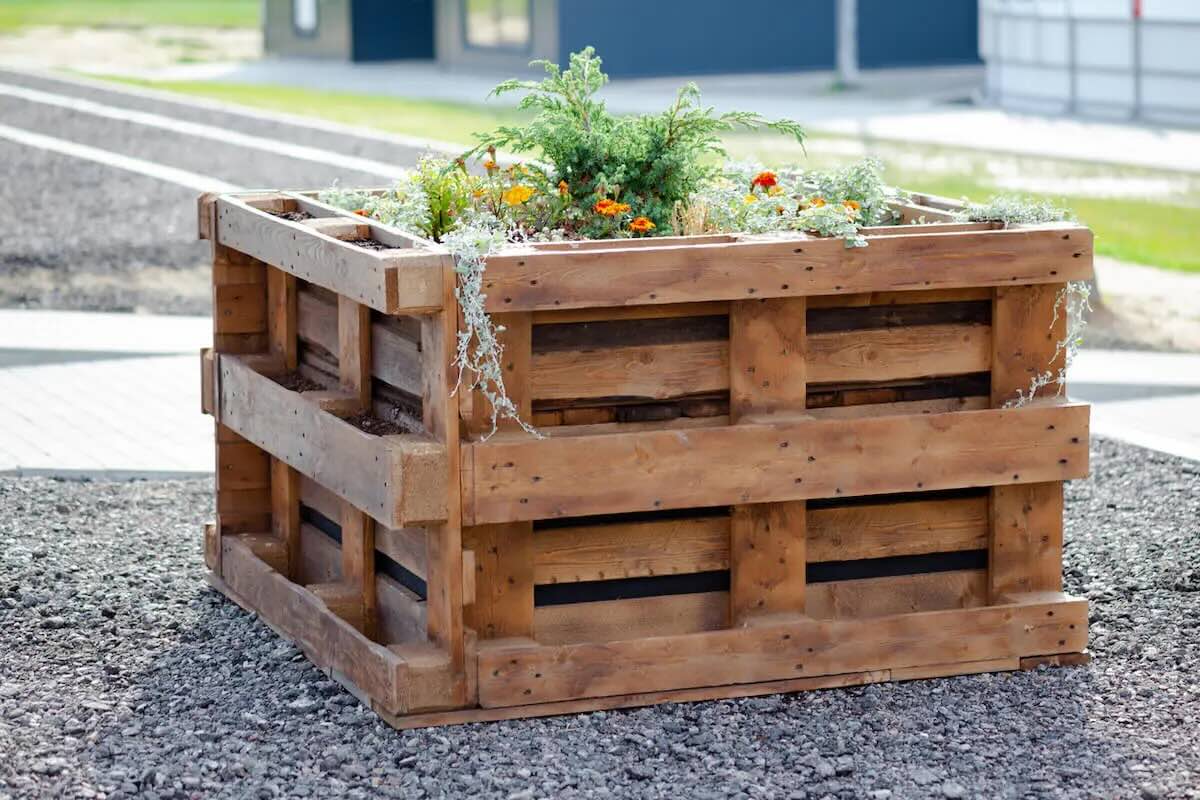
- Wood: Wood is a popular choice for building raised beds due to its natural look and versatility. Cedar and redwood are excellent options as they are naturally resistant to decay and insect damage. Avoid using treated wood or railroad ties, as they may contain chemicals that can leach into the soil and harm your plants.
- Stone or Bricks: Stone or brick materials can create a beautiful and long-lasting raised bed. They add a touch of elegance to your garden and provide excellent stability for your plants. Ensure that the stones or bricks you choose are suitable for outdoor use and can withstand the weather conditions in your area.
- Concrete Blocks: Concrete blocks are another popular choice for constructing raised beds. They are easily available and provide a sturdy structure for your garden. However, keep in mind that concrete can affect soil pH over time, so it’s important to monitor and amend the soil accordingly.
- Composite Materials: Composite materials, such as recycled plastic or composite lumber, offer a durable and environmentally-friendly option for raised beds. They are resistant to rot and insect damage, making them a low-maintenance choice. However, ensure that the composite materials you select are designed for outdoor use and are free from harmful chemicals.
- Size and Height: Consider the dimensions and height of your raised bed when selecting materials. The size should provide sufficient space for your plants to grow and accommodate their root systems. As for height, aim for a minimum of 12 inches to allow for proper root development. Taller beds can be beneficial for individuals with mobility issues or if you prefer to garden while standing.
- Drainage: Ensure that the materials you choose allow for proper drainage in your raised bed. If using wood, use untreated lumber and consider creating small drainage holes to prevent water from pooling. With other materials, ensure that there are gaps or spaces between them to allow excess water to escape.
- Sustainability: Consider the sustainability of the materials you choose. Opt for environmentally-friendly options such as sustainably harvested wood, recycled materials, or locally sourced options. By choosing sustainable materials, you can reduce your environmental impact and create a more eco-friendly garden.
By considering these factors and choosing the right materials for your raised bed, you can create a sturdy, functional, and visually appealing gardening space. Whether you prefer the warmth and natural look of wood or the durability of stone or composite materials, selecting high-quality materials is key to the success of your raised bed garden.
Building Your Raised Bed
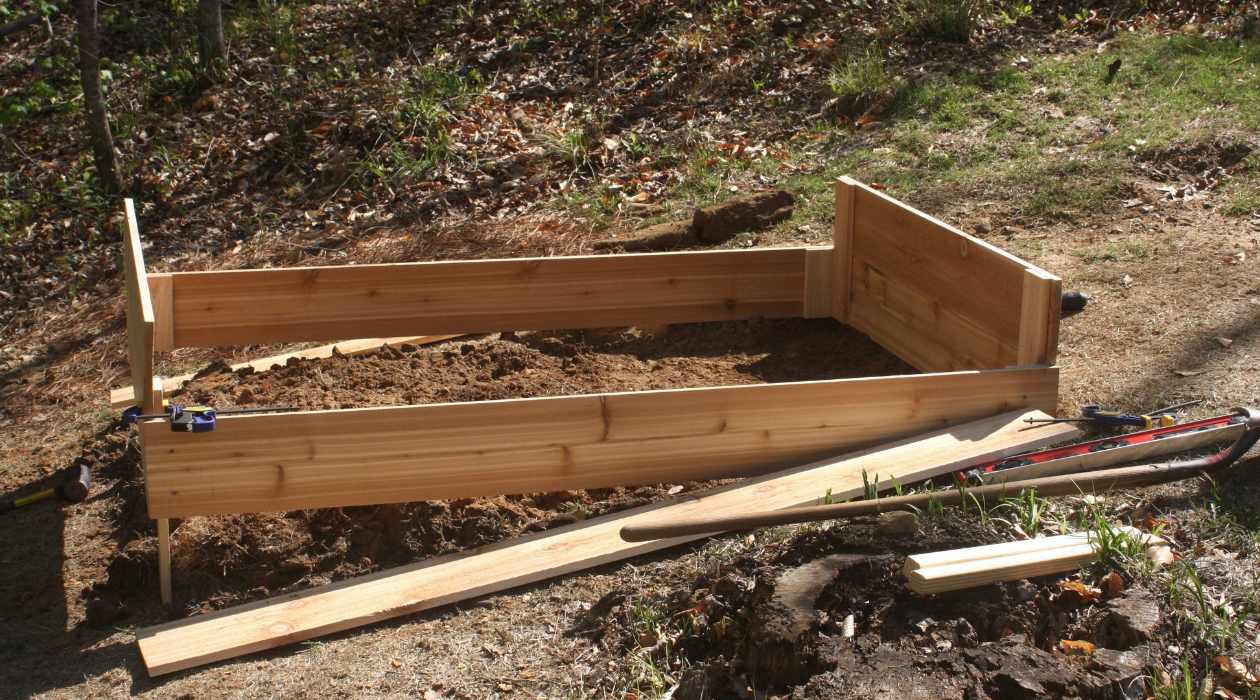
Building your raised bed is an exciting step in creating your garden oasis. Whether you’re using wood, stone, bricks, or other materials, the process is relatively straightforward. Follow these steps to construct your raised bed:
- Measure and Mark: Begin by measuring and marking the dimensions of your raised bed area. Use a tape measure or string to outline the desired shape and size of your bed. Ensure that the dimensions are well-suited for the space you have available and align with your gardening goals.
- Prepare the Ground: Clear the area of any grass, weeds, rocks, or debris. Level the ground if necessary. This will provide a stable foundation for your raised bed to rest upon. You may opt to lay down a layer of landscape fabric or cardboard to further suppress weed growth.
- Assemble the Materials: If you’re using wood, cut the boards to the desired lengths using a saw. Ensure that the boards are securely connected at the corners using screws or nails. For other materials such as bricks or stones, arrange them in the desired shape, making sure they are level and tightly fit together. If using concrete blocks, stack them in a staggered pattern for stability.
- Secure the Corners: If using wood, it’s recommended to reinforce the corners of your raised bed with corner brackets or stakes. This will add extra stability to the structure, preventing it from shifting over time. Secure the corners using screws or nails.
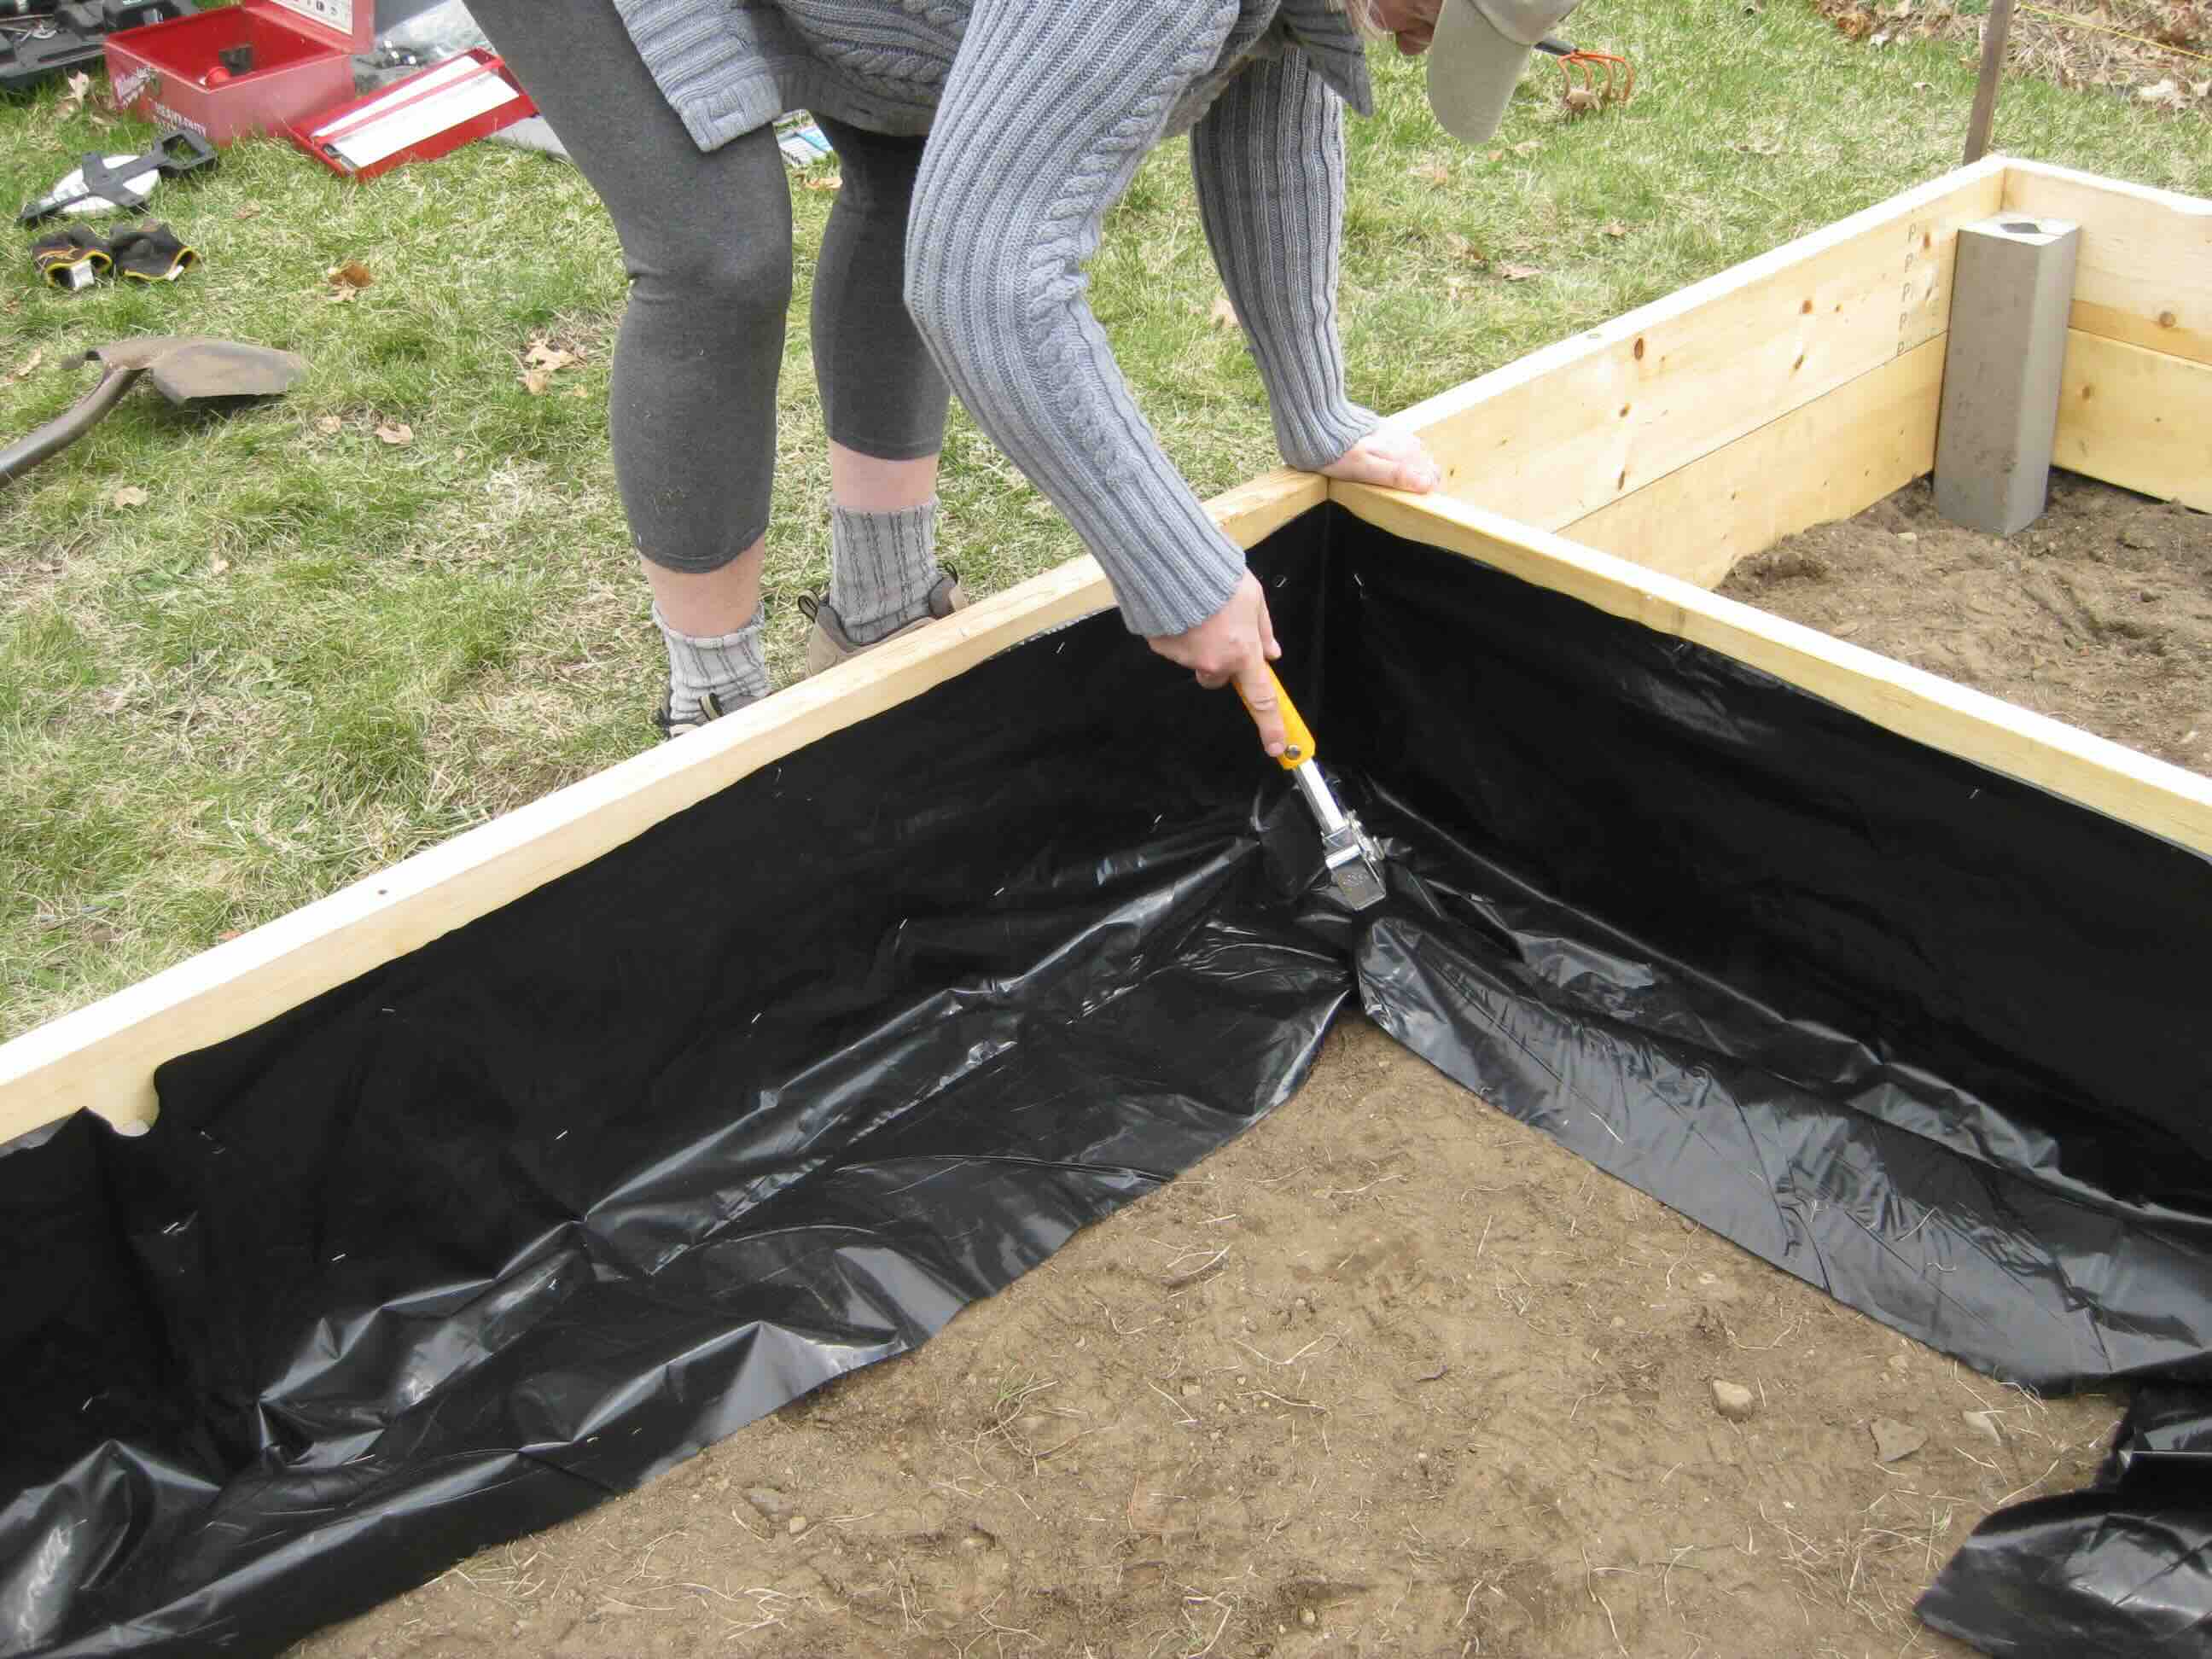
- Add a Bottom (Optional): Depending on your preference, you may choose to add a bottom to your raised bed. This can help prevent weed growth from underneath and provide additional support. Use a weed barrier fabric or hardware cloth to create the bottom, ensuring that it allows for proper drainage.
- Place the Raised Bed: Carefully lift and place the constructed raised bed onto the prepared ground. Ensure that it is level and sits securely on the surface. Make any necessary adjustments to ensure stability.
- Fill with Soil: Fill your raised bed with a mixture of high-quality soil, compost, and organic matter. This will provide the necessary nutrients for your plants to thrive. Level the soil surface and water it thoroughly to settle the soil.
Once your raised bed is built, you’re ready to move on to the next step of your gardening journey. Remember to choose plants that are well-suited to your climate and gardening goals. Consider the specific needs of each plant, such as sunlight requirements, spacing, and companion planting. With proper care and maintenance, your raised bed garden will soon flourish with vibrant foliage and bountiful harvests.
Read more: Why A Raised Garden Bed
Preparing the Soil
The success of your raised bed garden largely depends on the quality of the soil. Preparing the soil before planting is crucial to provide your plants with the necessary nutrients and optimal growing conditions. Follow these steps to prepare the soil in your raised bed:
- Remove Weeds and Debris: Start by removing any weeds, grass, or debris from the surface of the soil. This will create a clean slate for your plants and prevent competition for nutrients.
- Loosen the Soil: Using a garden fork or a tiller, loosen the soil in your raised bed. This helps to break up any compacted areas and improves aeration and drainage. Work the tool gently to avoid damaging the construction of the bed.
- Add Organic Matter: Incorporate organic matter into the soil to improve its fertility and structure. This can include compost, well-rotted manure, or leaf mold. Spread a layer of organic matter evenly over the surface of the soil and work it in with a garden fork or tiller. Organic matter enhances the soil’s ability to retain moisture, improves nutrient availability for plants, and promotes beneficial microbial activity.
- Test the Soil: Consider conducting a soil test to determine its pH level and nutrient content. This will give you valuable insights into any soil deficiencies or imbalances. Based on the test results, you can adjust the soil pH or supplement with appropriate fertilizers to ensure that your plants receive the necessary nutrients for healthy growth.
- Level the Soil: Once the organic matter has been incorporated, level the soil surface using a rake or garden tool. This provides an even planting area for your plants and helps with irrigation and water distribution.
- Water the Soil: Before planting, thoroughly water the soil to ensure that it is evenly moist. This will help settle the soil and provide a conducive environment for root growth.
By taking the time to properly prepare the soil in your raised bed, you are setting the stage for your plants to thrive. The addition of organic matter and proper soil conditioning will create a nutrient-rich and well-drained planting environment. Remember to monitor the moisture levels of the soil throughout the gardening season and make any necessary adjustments to ensure your plants receive the optimal growing conditions.
Choosing What to Plant
One of the most exciting aspects of gardening is selecting what to plant in your raised bed. The options are endless, but choosing the right plants can make a significant difference in the success and enjoyment of your garden. Consider the following factors when deciding what to plant:
- Climate: Take into account your local climate and the specific growing conditions in your area. Choose plants that are well-suited for your climate zone and can thrive in the temperatures and weather patterns of your region. Some plants are more tolerant of heat, while others prefer cooler climates. Understanding your climate will help you select plants that have a higher chance of success.
- Space and Size: Consider the size and layout of your raised bed when selecting plants. Some vegetables and plants require more space to grow, while others can be planted in closer proximity. Plan your garden layout accordingly to ensure that each plant has enough room to grow and access sunlight and nutrients.
- Companion Planting: Some plants have synergistic relationships and can benefit from being planted together. Research companion planting techniques to maximize the productivity and health of your garden. For example, planting marigolds alongside tomatoes can help deter pests, while growing herbs near vegetables can enhance flavor and repel unwanted insects.
- Personal Preferences: Consider your personal tastes and preferences when choosing what to plant. If you enjoy cooking, herbs and vegetables can be a great addition. If you’re more interested in aesthetics, flowers and ornamental plants may be a better fit. Cultivate a garden that brings you joy and aligns with your interests and preferences.
- Seasonality: Take into account the growing season and the specific requirements of each plant. Some plants thrive in cooler weather and can be planted in early spring or fall, while others require warmer temperatures and need to be planted in late spring or summer. Understanding the seasonality of different plants will help you plan and schedule your planting accordingly.
- Garden Goals: Determine your gardening goals and consider the purpose of your raised bed. Are you aiming for a bountiful harvest of homegrown vegetables? Do you want to create a tranquil oasis with vibrant flowers? Understanding your goals will help you choose plants that align with your vision and provide the desired outcome.
Additionally, it’s important to do some research on the specific care requirements and growing conditions for each plant you choose. Consider factors such as sunlight needs, watering requirements, and pest resistance. This will help you provide the optimal care and maintenance for your plants, leading to healthier and more productive growth.
Remember, gardening is a continuous learning process, and experimentation plays a vital role. Don’t be afraid to try new plants and varieties to see what works best in your raised bed. As you gain more experience, you’ll develop a better understanding of your garden’s specific needs and preferences. Enjoy the process and savor the rewards of your carefully chosen and nurtured plants.
Planting and Sowing Seeds
Now that you’ve selected the plants you want to grow, it’s time to get them into your raised bed. Whether you’re planting seeds or transplanting seedlings, proper technique and timing can greatly impact their success. Follow these steps for successful planting and sowing in your raised bed:
- Prepare the Soil: Ensure that the soil in your raised bed is moist but not waterlogged. If necessary, water the bed a day or two before planting to provide optimal conditions for seed germination.
- Sow Seeds: If you’re sowing seeds directly into your raised bed, follow the recommended seed depth and spacing for each plant variety. Create furrows or small holes in the soil using your finger or a dibber. Place the seeds in the holes or furrows and cover them gently with soil, adhering to the specific planting instructions for each type of seed.
- Transplant Seedlings: If you’re transplanting seedlings, make sure they are hardened off and ready for planting. Dig a hole in the prepared soil that is deep and wide enough to accommodate the root system of the seedling. Carefully remove the seedling from its container, gently tease out any tangled roots, and place it in the hole. Backfill the hole with soil and press it gently around the base of the seedling to secure it.
- Water Thoroughly: After planting, water your seeds or seedlings thoroughly. This helps settle the soil around the roots and provides initial moisture to promote growth. Depending on the weather conditions and the moisture requirements of your plants, adjust the watering frequency accordingly.
- Provide Support (If Necessary): Some plants, such as tomatoes or climbing vines, may require support structures like trellises or stakes. Install these structures at the time of planting or soon after to avoid damaging the roots later on. This will provide stability and prevent the plants from falling over or sprawling on the ground as they grow.
- Mulch: Apply a layer of mulch around your plants to help conserve soil moisture, suppress weed growth, and regulate soil temperature. Organic mulch, such as straw or wood chips, is ideal for raised beds. Make sure to leave a small space around the base of each plant to prevent moisture-related issues.
- Monitor and Maintain: Regularly monitor your raised bed to ensure that the soil remains consistently moist but not waterlogged. Check for signs of pests or disease and take appropriate measures to manage any issues that arise. Follow the specific care instructions for each plant, including pruning, thinning, and fertilizing.
As you sow seeds and transplant seedlings in your raised bed, remember to consider the spacing requirements of each plant. Proper spacing allows for adequate airflow, reduces the risk of disease, and prevents overcrowding. It’s also essential to read the specific planting instructions for each plant variety, as requirements may vary.
With regular care and attention, your seeds will germinate, and your seedlings will flourish, turning your raised bed into a vibrant and productive garden. Stay patient, observe the progress, and enjoy the journey of watching your plants grow and develop.
When starting a raised bed garden, be sure to choose a location with plenty of sunlight and good drainage. Building the bed with untreated wood or composite materials will help prevent rot and ensure a longer lifespan for your garden.
Watering and Irrigation
Proper watering and irrigation are essential for the health and vitality of the plants in your raised bed garden. Maintaining consistent moisture levels will help your plants thrive and produce an abundant harvest. Follow these guidelines for effective watering and irrigation:
- Watering Frequency: The frequency of watering will depend on various factors, including the weather, plant species, and soil type. As a general rule, water your raised bed when the top inch of soil feels dry to the touch. Avoid overwatering, as it can lead to root rot and other moisture-related issues. Remember, it’s better to underwater slightly than to overwater.
- Watering Depth: When watering, aim to saturate the root zone of your plants. This will encourage deeper root growth and improve the plant’s ability to extract nutrients from the soil. Water until you see moisture seep out from the drainage holes of your raised bed. This ensures that the soil is adequately moistened.
- Time of Day: Water your raised bed in the morning or early afternoon to allow excess moisture to evaporate from the foliage. Avoid watering in the evening or at night, as this can promote the growth of fungal diseases. Watering during the cooler hours of the day also reduces water loss due to evaporation.
- Irrigation Methods: There are several methods you can use to efficiently irrigate your raised bed:
- Hand Watering: Use a watering can or hose with a gentle spray nozzle to water your plants directly at the root zone. This method provides precise control and allows you to target specific areas.
- Drip Irrigation: Install a drip irrigation system in your raised bed for efficient and consistent watering. Drip lines or tubing deliver water directly to the plants’ roots, minimizing water wastage and reducing the risk of fungal diseases.
- Soaker Hoses: Lay a soaker hose along the length of your raised bed, allowing water to slowly seep into the soil. This method delivers water directly to the root zone and helps conserve water.
- Mulching: Apply a layer of mulch around your plants to help retain soil moisture and reduce water evaporation. Mulch serves as a barrier, preventing water from quickly evaporating from the soil’s surface. Organic mulches like straw or wood chips are ideal for raised beds.
- Monitor Moisture Levels: Regularly check the moisture levels in your raised bed by sticking your finger into the soil. If it feels dry, it’s time to water. Alternatively, use a moisture meter to accurately measure the moisture content of the soil. This will help you gauge when your plants need watering.
- Consistency: Consistency is key when it comes to watering. Provide a consistent amount of water to your plants, avoiding drastic fluctuations in moisture levels. Inconsistent watering can lead to stress, stunted growth, and overall poor plant health.
Remember, different plants have different water requirements, so consider the specific needs of each plant variety. Factors such as the stage of growth, weather conditions, and container size (if applicable) can also influence watering needs. Observe your plants closely and adjust your watering schedule accordingly.
By practicing proper watering and irrigation techniques, you will provide your plants with the moisture they need to thrive, resulting in healthy growth and a flourishing garden in your raised bed.
Read more: How To Seal A Raised Garden Bed
Mulching and Weed Control
Mulching and weed control are essential tasks in maintaining the health and productivity of your raised bed garden. Mulch helps to conserve soil moisture, improve soil structure, and suppress weed growth. By implementing effective mulching and weed control techniques, you can promote the growth of your desired plants while minimizing competition and the need for excessive manual weed removal. Follow these guidelines for successful mulching and weed control in your raised bed:
- Choose the Right Mulch: Select a suitable mulching material for your raised bed. Organic mulches, such as straw, wood chips, or shredded leaves, are popular choices. These materials break down over time, enriching the soil with organic matter. Ensure that the mulch is free from weed seeds to prevent unwanted growth.
- Apply a Layer of Mulch: Spread a layer of mulch around your plants, leaving a small space around the base of each plant to prevent moisture-related issues. Aim for a thickness of 2-4 inches to provide adequate coverage and weed suppression.
- Water the Soil Before Mulching: Before applying mulch, make sure the soil is adequately moistened. This helps retain moisture in the soil and ensures that the mulch adheres well to the surface. Watering also prevents the mulch from absorbing moisture from the soil upon application.
- Avoid Piling Mulch Against Plant Stems: Ensure that the mulch is kept away from direct contact with plant stems or trunks. Piling mulch against the plant base can create a favorable environment for pests, diseases, and stem rot. Leave a small gap around each plant to allow airflow and prevent moisture-related issues.
- Regularly Monitor for Weed Seedlings: Keep a close eye on your raised bed for any weed seedlings that may emerge through the mulch. Remove them promptly before they establish a strong root system and compete with your desired plants for nutrients and water.
- Use Mulch as a Weed Barrier: A layer of mulch serves as a natural barrier against weed growth by blocking sunlight and inhibiting weed germination. This helps to reduce the number of weeds that sprout in your raised bed, minimizing the need for manual weeding.
- Hand-Weed When Necessary: Despite implementing mulching, some weeds may still find their way into your raised bed. Deal with them early before they have a chance to spread and compete with your plants. Hand-weed regularly, gently pulling out the weeds from the base to remove the root system as well.
- Replenish Mulch as Needed: Over time, mulch may break down or become thinner. Replenish the mulch layer as needed to maintain an adequate thickness and ensure effective weed control. This also helps conserve soil moisture and promote a healthy growing environment.
By incorporating mulching and implementing effective weed control measures, you can create a weed-free and healthy environment for your plants in the raised bed. Regular monitoring and maintenance will help keep weeds at bay, allowing your desired plants to thrive and flourish while minimizing manual weed removal. Enjoy the benefits of reduced weed competition and improved soil moisture retention that mulching provides.
Fertilizing and Nutrient Management
Fertilizing your raised bed garden is essential for providing the necessary nutrients that your plants need to thrive and produce abundant harvests. Good nutrient management ensures healthy growth, strong root development, and increased resistance to pests and diseases. Follow these guidelines for effective fertilizing and nutrient management in your raised bed:
- Soil Test: Begin by performing a soil test to determine the nutrient levels and pH of your soil. This will help you understand which nutrients may be lacking or excessive. Based on the test results, you can make informed decisions about the specific fertilizers or amendments your soil needs.
- Organic Matter: Work organic matter into the soil regularly to improve soil fertility and structure. This can include compost, well-rotted manure, or organic fertilizers. Organic matter adds essential nutrients to the soil, improves moisture retention, and supports beneficial microbial activity.
- Slow-Release Fertilizers: Consider using slow-release fertilizers in your raised bed. These fertilizers release nutrients gradually over time, providing a continuous supply to your plants. Look for organic options or controlled-release fertilizers that match the specific nutrient requirements of your plants.
- Companion Planting: Use companion planting techniques to naturally enhance the nutrient levels in your raised bed. Some plants, such as legumes, have nitrogen-fixing abilities and can enrich the soil with this essential nutrient. Planting nitrogen-fixing plants alongside other non-legume crops helps boost overall soil fertility.
- Crop Rotation: Implement crop rotation strategies to prevent nutrient depletion and reduce the risk of pest and disease build-up. Rotating crops helps break pest cycles and allows for more balanced nutrient uptake. Different plants have varying nutrient requirements, so rotating what you plant in each bed each growing season helps maintain soil health.
- Foliar Feeding: Supplement your plants’ nutrient intake by applying liquid fertilizers directly to their leaves. Foliar feeding can be done using a spray bottle or targeted sprayer. This method allows for quick absorption of nutrients, especially micronutrients, directly through the foliage.
- Monitor Plant Health: Regularly observe the health of your plants for signs of nutrient deficiencies or excesses. Symptoms such as yellowing leaves, stunted growth, or nutrient-specific deficiencies can indicate a need for adjusting your fertilization practices. Promptly address any nutrient imbalances or deficiencies to prevent further damage to your plants.
- Follow Fertilizer Recommendations: Always follow the recommended application rates and timing provided on your chosen fertilizers. Over-fertilizing can lead to nutrient imbalances, plant stress, and environmental pollution. Proper application ensures that your plants receive the necessary nutrients without causing harm.
- Watering After Fertilizing: After applying fertilizers, water your raised bed thoroughly. This helps to dissolve and distribute the nutrients into the soil, facilitating their absorption by the plant roots.
Understanding the nutrient needs of your plants and implementing proper fertilization practices in your raised bed garden will help promote healthy growth and maximize your harvests. Remember to consider the specific requirements of each plant species and adjust your fertilization strategy accordingly. With careful nutrient management, your plants will thrive and reward you with vibrant foliage, beautiful flowers, and delicious produce.
Maintaining Your Raised Bed Garden
Maintaining your raised bed garden is essential for ensuring the long-term health and productivity of your plants. Regular care and attention will help you address potential issues, promote optimal growth, and enjoy a beautiful and bountiful garden. Follow these guidelines for maintaining your raised bed garden:
- Weeding: Regularly inspect your raised bed for any weeds that may emerge. Remove weeds promptly to prevent them from competing with your desired plants for water, nutrients, and sunlight. Use hand weeding or a small garden tool to gently remove weeds, making sure to remove the entire root system.
- Pruning and Thinning: Monitor your plants for any overgrowth or crowded areas. Prune or thin out excessive growth to improve airflow, promote better light penetration, and reduce the risk of pests and diseases. Pruning also helps shape the plants and encourages the production of more flowers or fruits.
- Supporting Plants: Some plants, such as tomatoes, beans, or peas, may require additional support as they grow taller. Install stakes, trellises, or cages to provide structural support for these plants, preventing them from bending or breaking under their own weight. Regularly check and adjust the supports as the plants grow.
- Mulch Maintenance: Monitor the mulch layer in your raised bed garden. Over time, the mulch may break down or become thinner. Add a fresh layer of mulch as needed to maintain an even thickness. This helps conserve moisture, suppress weed growth, and regulate soil temperature.
- Watering: Continue to water your raised bed garden consistently, adjusting the frequency and duration based on the specific needs of your plants and weather conditions. Monitor the moisture levels of the soil to ensure that it remains consistently moist but not saturated. Water in the morning or early afternoon to allow the foliage to dry before nighttime and reduce the risk of fungal diseases.
- Monitor for Pests and Diseases: Regularly inspect your plants for any signs of pests or diseases. Look for discoloration, wilting leaves, holes, or unusual growth patterns. If you identify any issues, take appropriate measures to manage them. This may include physical removal of pests, applying organic pest control methods, or using environmentally-friendly disease management strategies.
- Fertilizing: Monitor the nutrient levels of your soil and provide fertilizers as needed. Follow the recommended application rates and timing for your chosen fertilizers. Adjust your fertilization practices based on the specific requirements of your plants and any nutrient deficiencies or imbalances identified through regular observation and soil testing.
- Harvesting: Harvest your crops when they are ripe and ready. Regularly check for signs of readiness, such as color changes, firmness, or flavor development. Proper and timely harvesting promotes continuous plant productivity and encourages the growth of new flowers or fruits.
- Clean and Sanitize: Clean your raised bed and gardening tools regularly to prevent the build-up of pests, diseases, and debris. Remove any dead plants or decaying material from the bed to maintain a clean and tidy growing environment.
- Continuous Learning: Always be open to learning and experimenting in your raised bed garden. Stay curious, explore new plant varieties, and try different techniques to improve your gardening skills. Seek knowledge from reputable sources, books, gardening communities, and local experts to expand your understanding and enhance your gardening experience.
By consistently maintaining your raised bed garden and implementing these practices, you will create an environment that fosters healthy plant growth and abundant harvests. Regular care and attention will help you address any issues promptly, promote optimal plant health, and create a thriving garden that brings you joy and satisfaction.
Common Challenges and Troubleshooting
While raised bed gardening offers numerous benefits, it’s not exempt from certain challenges that may arise. Knowing how to identify and address these challenges promptly can help you maintain a healthy and productive garden. Here are some common challenges you may encounter in your raised bed garden and some troubleshooting tips:
- Pest Infestation: Common pests such as aphids, slugs, snails, or caterpillars can damage your plants. Monitor your garden regularly and promptly address any pest issues. Use organic pest control methods like handpicking, using insecticidal soaps, or introducing beneficial insects to control pest populations.
- Disease Outbreaks: Fungal, bacterial, or viral diseases can spread in your garden, affecting plant health. Practice good sanitation by removing and disposing of infected plant parts. Promote airflow by proper plant spacing and avoid overhead watering. Certain diseases may require treatment with organic fungicides or disease-resistant plant varieties.
- Soil Imbalances: Over time, the nutrient levels in the soil may become unbalanced, leading to deficiencies or toxicities. Regularly test your soil and amend it based on the results. Use organic fertilizers or amendments to ensure a healthy balance of nutrients.
- Weed Growth: Weeds can compete with your desired plants for nutrients, water, and light. Regularly remove weeds by hand-weeding, ensuring that you remove the entire root system. Apply a layer of mulch to smother weed growth and suppress weed germination.
- Overwatering or Underwatering: Improper watering can lead to root rot, nutrient leaching, or plant stress. Monitor soil moisture regularly and adjust your watering practices accordingly. Avoid overwatering by allowing the top few inches of soil to dry out before watering again. Conversely, prevent underwatering by ensuring that the soil remains moist, especially during hot or dry periods.
- Plant Diseases: Certain plants may be susceptible to specific diseases. Choose disease-resistant plant varieties when possible. Rotate crops and practice good sanitation to minimize the risk of disease outbreaks. Avoid working in your garden when plants are wet, as this can spread diseases.
- Environmental Factors: Extreme weather conditions, such as heatwaves or sudden temperature drops, can stress your plants. Protect your plants by using shade cloth during hot spells or covering them with row covers during cold snaps. Provide adequate ventilation and airflow to prevent moisture-related issues.
- Poor Plant Growth: If your plants are not growing as expected, consider factors such as inadequate sunlight, nutrient deficiencies, or improper planting depth. Adjust these factors accordingly and provide appropriate care to promote healthy plant growth.
- Inadequate Pollination: Some plants, like fruiting vegetables and certain flowers, rely on pollination for proper fruit or seed development. Ensure that bees and other pollinators have access to your garden. You can also manually transfer pollen between flowers using a small brush or implement companion planting techniques to attract pollinators.
- Animal Damage: Birds, rabbits, squirrels, or other animals may feed on your plants or damage them. Install physical barriers like netting or fencing to protect your garden. Alternatively, use organic repellents or deterrents to discourage animal activity.
Remember, gardening is a continuous learning experience, and each garden is unique. Adapt your strategies and troubleshooting techniques based on your specific challenges and circumstances. By staying vigilant, implementing preventative measures, and addressing issues promptly, you can overcome common challenges and enjoy a thriving and productive raised bed garden.
Read more: How To Cover A Raised Garden Bed
Harvesting and Enjoying the Fruits of Your Labor
The time has come to reap the rewards of your hard work and dedication in your raised bed garden. Harvesting your produce at the peak of ripeness ensures the freshest flavors and most nutritious yields. Follow these tips to make the most of your harvest and savor the fruits of your labor:
- Timing: Harvest your plants at the right time. Each crop has its own maturity period and signs of readiness. Refer to seed packets or gardening resources to determine the ideal harvest time for each plant variety. Pay attention to factors such as color, size, and texture to identify when your produce is at its peak.
- Gentle Handling: Handle your harvested produce with care to prevent bruising or damage. Use sharp garden shears or pruners to cut or gently twist the fruits or vegetables off the plant, avoiding excessive force. Be mindful not to tug or pull, which can harm the plant or disturb the root system.
- Harvesting Techniques: Different crops require various harvesting techniques. Some produce, such as greens, herbs, or loose-leaf lettuce, can be harvested by selectively picking the outer leaves while allowing the inner ones to continue growing. Others, like fruits or root vegetables, require harvesting the entire plant or individual fruits when they are ripe. Learn the specific techniques for each crop to ensure proper handling and extended productivity.
- Storage: Proper storage helps preserve the taste and quality of your harvested harvest. Store root vegetables like carrots or beets in a cool, dark place with high humidity. Leafy greens and herbs benefit from washing, drying, and storing them in a perforated bag in the refrigerator. Fruits like tomatoes or peppers can be stored at room temperature away from direct sunlight. Research the optimal storage conditions for each crop to maximize its shelf life.
- Enjoy Freshness: Incorporate your freshly harvested produce into your meals as soon as possible for the best flavor and nutrient content. Explore new recipes or simply enjoy the natural sweetness and crispness of your homegrown vegetables and fruits. Experiment with preserving methods like canning, pickling, or drying to extend your enjoyment of the harvest throughout the year.
- Share the Bounty: If your harvest yields more than you can consume, share your homegrown abundance with friends, family, neighbors, or local food banks. Sharing the joy and nutritious benefits of freshly harvested produce fosters a sense of community and creates connections.
- Reflect and Plan: Take time to reflect on your gardening journey and celebrate your achievements. Assess what worked well and what you would like to improve in the next growing season. Plan your future garden based on your observations and experiences. Consider crop rotation, new plant varieties, or gardening techniques to further elevate your raised bed garden.
Remember, the joy of gardening extends far beyond the act of planting and harvesting. It is a process of learning, growth, and connection with nature. Take pleasure in the flavors, colors, and aromas of your homegrown harvest, knowing that you have nurtured and cultivated each plant from seed to table. Appreciate the satisfaction of providing nourishment for yourself and your loved ones while fostering a sustainable and rewarding hobby.
Now, sit back, relax, and enjoy the delicious rewards that your raised bed garden has brought to your life.
Conclusion
Congratulations on embarking on your raised bed gardening journey! By now, you have learned the essentials of starting and maintaining a successful raised bed garden. From choosing the right location and materials to planting, watering, and harvesting, you have gained the knowledge and skills needed to create a thriving garden oasis.
Throughout this article, we discussed the numerous benefits of raised bed gardening, such as improved soil quality, controlled weed growth, and better accessibility. We explored the importance of selecting the right planting location, materials, and plant varieties to suit your climate and preferences. We also delved into the key practices of preparing the soil, watering, mulching, and managing fertilizers and nutrients for optimal plant health.
Additionally, we covered common challenges you may encounter in your raised bed garden and provided troubleshooting tips to address them effectively. By staying vigilant and proactive, you can overcome obstacles and maintain a beautiful and productive garden.
As you progress in your gardening journey, remember that gardening is a continuous learning experience. Don’t be afraid to experiment, try new plants, and adapt your techniques based on your observations and individual garden’s needs. Gardening is both an art and a science, and with each growing season, you will gain invaluable wisdom and experience.
Enjoy the process of connecting with nature, nurturing your plants, and witnessing the beauty of growth firsthand. Take pleasure in the satisfaction of harvesting your homegrown produce and savoring the flavors of your labor. Share the bounties of your garden with others, fostering a sense of community and well-being.
Above all, embrace the joy and therapeutic benefits that gardening brings. Allow your raised bed garden to be a haven of tranquility and inspiration, where you can escape the stresses of everyday life and find solace in the natural world.
So, put on your gardening gloves, grab your tools, and let your raised bed garden flourish. May it bring you endless joy, beautiful blooms, and an abundance of delicious harvests for years to come!
Frequently Asked Questions about How To Start A Raised Bed Garden
Was this page helpful?
At Storables.com, we guarantee accurate and reliable information. Our content, validated by Expert Board Contributors, is crafted following stringent Editorial Policies. We're committed to providing you with well-researched, expert-backed insights for all your informational needs.


0 thoughts on “How To Start A Raised Bed Garden”