Home>Gardening & Outdoor>Landscaping Ideas>How To Build A Stone Raised Garden Bed
Landscaping Ideas
How To Build A Stone Raised Garden Bed
Modified: September 1, 2024
Learn how to create a beautiful stone raised garden bed with our landscaping ideas. Enhance your outdoor space and elevate your gardening game today!
(Many of the links in this article redirect to a specific reviewed product. Your purchase of these products through affiliate links helps to generate commission for Storables.com, at no extra cost. Learn more)
Introduction
Creating a stone raised garden bed is a fantastic way to add visual interest and functionality to your outdoor space. Whether you're a seasoned gardener or just starting out, a stone raised garden bed offers numerous benefits. It provides better drainage, prevents soil compaction, and offers a barrier against pests. Additionally, the raised height makes it easier to tend to your plants without straining your back.
In this comprehensive guide, we will walk you through the step-by-step process of building a stone raised garden bed. From selecting the ideal location to stacking the stones and filling it with nutrient-rich soil, you'll gain the knowledge and confidence to embark on this rewarding project. By the end of this guide, you'll be well-equipped to create a stunning and productive garden bed that complements your outdoor space.
So, roll up your sleeves, grab your gardening gloves, and let's dive into the exciting world of stone raised garden beds. Whether you're aiming to grow vibrant flowers, fresh herbs, or delicious vegetables, this project will elevate your gardening experience and enhance the beauty of your outdoor sanctuary. Let's get started!
Key Takeaways:
- Building a stone raised garden bed offers benefits like better drainage, ergonomic gardening, and a natural barrier against pests. It’s a fun and rewarding project for all gardening enthusiasts!
- Selecting the right location and materials, preparing the ground, stacking the stones, filling with nutrient-rich soil, and planting your garden are the essential steps to create a stunning and productive stone raised garden bed. Happy gardening!
Step 1: Choose the Location
Selecting the ideal location for your stone raised garden bed is a crucial first step in this rewarding project. The location will significantly impact the growth and overall success of your plants. Here's a detailed guide to help you make an informed decision:
Consider Sunlight Exposure
Evaluate the sunlight patterns in your outdoor space. Most plants thrive in full sun, which typically means they need at least 6-8 hours of direct sunlight per day. Some plants, however, prefer partial shade. Take note of how the sunlight moves across your yard throughout the day to identify the best spot for your garden bed.
Assess Soil Drainage
Good soil drainage is essential for the health of your plants. Choose a location where water doesn't pool after rain and where the soil doesn't become waterlogged. Avoid areas with compacted or clayey soil, as these can hinder root growth and lead to water retention issues.
Accessibility
Consider the accessibility of the location. You'll want a spot that is easy to reach for planting, watering, and harvesting. If you plan to grow vegetables, herbs, or other frequently harvested plants, placing the garden bed near your kitchen can be convenient and encourage you to use your homegrown produce more often.
Read more: How To Build A Cedar Raised Garden Bed
Aesthetic Appeal
The location of your stone raised garden bed should complement the overall aesthetics of your outdoor space. Consider how it will blend with the existing landscape and whether it will create visual interest. Additionally, think about how the garden bed will look during different seasons to ensure year-round appeal.
Space and Future Growth
Evaluate the available space and consider the potential growth of your plants. Ensure that the location provides ample room for the garden bed and allows for proper air circulation around the plants. If you plan to expand your garden in the future, choose a location that can accommodate additional beds or planters.
By carefully considering these factors, you can choose a location that sets the stage for a thriving and visually appealing stone raised garden bed. Once you've selected the perfect spot, you'll be ready to move on to the next exciting steps in this fulfilling gardening endeavor.
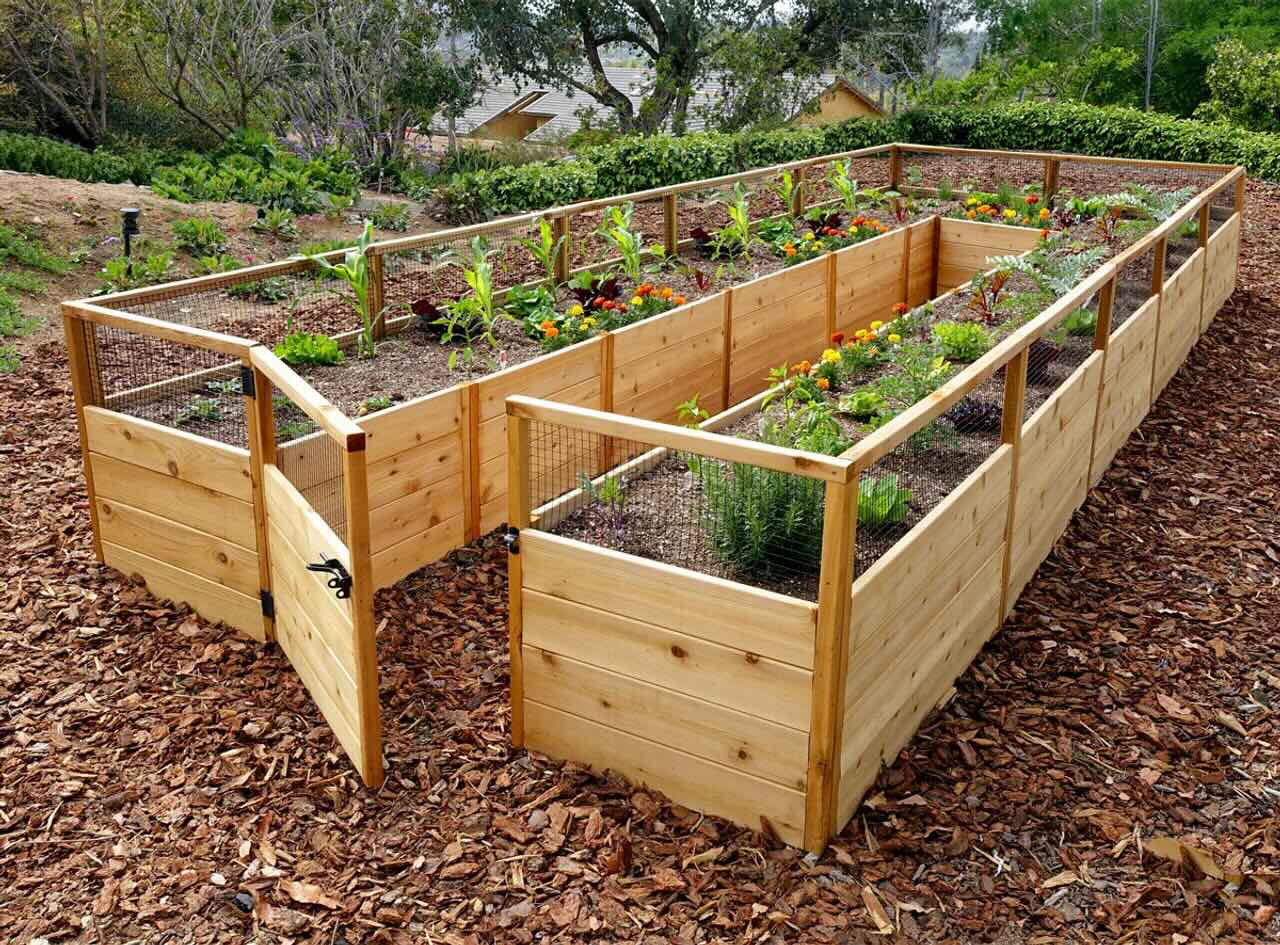
Step 2: Gather Materials
Before diving into the construction of your stone raised garden bed, it's essential to gather all the necessary materials and tools. Having everything at hand will streamline the building process and ensure a smooth and efficient workflow. Here's a comprehensive list of materials and tools you'll need to bring your garden bed to life:
Materials:
-
Stone Blocks or Bricks: Choose durable and visually appealing stone blocks or bricks to construct the walls of your raised garden bed. Opt for materials that complement the aesthetic of your outdoor space and provide a stable structure for your garden bed.
-
Landscaping Fabric: This fabric will serve as a barrier between the soil and the stone walls, preventing soil erosion and maintaining a neat appearance. It also helps with drainage while keeping the soil in place.
-
Gravel or Small Stones: These will be used for the base layer of the garden bed to improve drainage and prevent waterlogging. The gravel layer promotes healthy root growth by allowing excess water to drain away from the soil.
-
Nutrient-Rich Soil: Invest in high-quality soil to provide a fertile growing environment for your plants. Consider a mix of topsoil, compost, and organic matter to ensure optimal nutrition and moisture retention.
-
Gardening Gloves: Protect your hands during the construction process and future gardening activities with a sturdy pair of gardening gloves. They'll shield your hands from rough materials and potential splinters.
-
Shovel and Rake: These basic gardening tools are essential for preparing the ground, leveling the soil, and creating a smooth base for your raised garden bed.
-
Wheelbarrow or Garden Cart: A wheelbarrow or garden cart will come in handy for transporting heavy materials such as stone blocks, soil, and gravel to the construction site.
-
Level: Ensure the evenness and stability of your garden bed by using a level to check the alignment of the stone walls during construction.
-
Watering Can or Hose: Have a reliable watering can or hose nearby to moisten the soil as you fill the garden bed and to provide essential hydration to your plants once they're in place.
Additional Considerations:
-
Selecting the Right Stones: If you're opting for natural stone blocks, consider their size, shape, and weight. Choose stones that are uniform in height and depth to facilitate easy stacking and create a cohesive appearance.
-
Calculating the Quantity: Estimate the number of stone blocks or bricks required based on the dimensions of your planned garden bed. This will help you purchase the right amount of materials without delays or shortages during construction.
By gathering these materials and tools, you'll be well-prepared to embark on the construction of your stone raised garden bed. With everything in place, you can proceed to the next steps with confidence, knowing that you have the essentials to bring your gardening vision to fruition.
Step 3: Prepare the Ground
Preparing the ground for your stone raised garden bed is a crucial step that sets the foundation for a successful and thriving garden. Proper ground preparation ensures optimal drainage, stability, and a conducive environment for plant growth. Here's a detailed guide to help you navigate this essential phase of the construction process.
Clear the Area
Begin by clearing the designated area of any existing vegetation, debris, or obstacles. Use a shovel or garden rake to remove grass, weeds, and rocks, ensuring that the ground is level and free from obstructions. This step provides a clean canvas for building your garden bed and prevents competing vegetation from encroaching on your plants' space.
Level the Ground
Once the area is clear, use a level and a straight board to assess the evenness of the ground. Level any uneven spots by adding or removing soil as needed. A smooth and level surface is essential for the stability and uniformity of your stone raised garden bed.
Lay Landscaping Fabric
To prevent weeds from growing up into your garden bed and to maintain a neat appearance, lay landscaping fabric over the prepared ground. This fabric acts as a barrier, inhibiting weed growth while allowing water to permeate the soil. Trim the fabric to fit the dimensions of your garden bed area, ensuring complete coverage.
Add a Gravel Base
Next, add a layer of gravel or small stones to the bottom of the prepared area. The gravel serves as a drainage layer, preventing water from accumulating at the base of the garden bed and ensuring proper moisture management for your plants' roots. Spread the gravel evenly to create a stable and well-drained foundation.
Compact the Base
Using a tamper or the back of a shovel, gently compact the gravel base to enhance its stability. This step helps create a solid foundation for the stone walls of your raised garden bed and minimizes the risk of shifting or settling over time.
By meticulously preparing the ground according to these steps, you'll establish a solid and well-drained base for your stone raised garden bed. This groundwork sets the stage for the subsequent construction phases, ensuring that your garden bed is built on a stable and supportive foundation for long-term plant health and growth.
Step 4: Build the Base
With the ground meticulously prepared, it's time to embark on the exciting phase of building the base for your stone raised garden bed. The base serves as the foundation that supports the walls of the garden bed, ensuring stability and structural integrity. Here's a detailed guide to help you construct a solid and durable base for your garden bed:
Arrange the First Layer
Begin by placing the first layer of stone blocks or bricks on top of the prepared gravel base. Position the stones carefully, ensuring that they are level and tightly aligned to create a sturdy foundation. Take your time to arrange the stones, making any necessary adjustments to achieve a uniform and visually appealing base.
Check for Levelness
Use a level to verify the evenness of the first layer. Ensuring that the base is level is crucial for the overall stability and aesthetics of the garden bed. Make any adjustments as needed to maintain a consistent level throughout the base.
Stagger the Joints
When stacking the stone blocks or bricks, stagger the joints to enhance the strength and stability of the base. This involves positioning the end of each stone over the middle of the stone below it, creating a staggered pattern that distributes the weight evenly and minimizes the risk of shifting over time.
Secure the Base
As you build the base, periodically check for stability and alignment. Use a rubber mallet to gently tap the stones into place, ensuring a snug fit and solid connection between each block. This step helps secure the base and minimizes the potential for movement or displacement.
Consider Drainage Gaps
To promote proper drainage and prevent water accumulation within the garden bed, consider leaving small gaps between the stones in the base layer. These gaps allow excess water to escape, maintaining a healthy growing environment for your plants.
Verify Structural Integrity
Once the base is constructed, take a moment to assess its overall structural integrity. Ensure that the stones are firmly in place and that the base is capable of supporting the subsequent layers of the garden bed walls.
By following these steps, you'll establish a robust and level base for your stone raised garden bed. The carefully constructed base sets the stage for the next phase of stacking the stones to create the walls of the garden bed, bringing you one step closer to realizing your gardening vision.
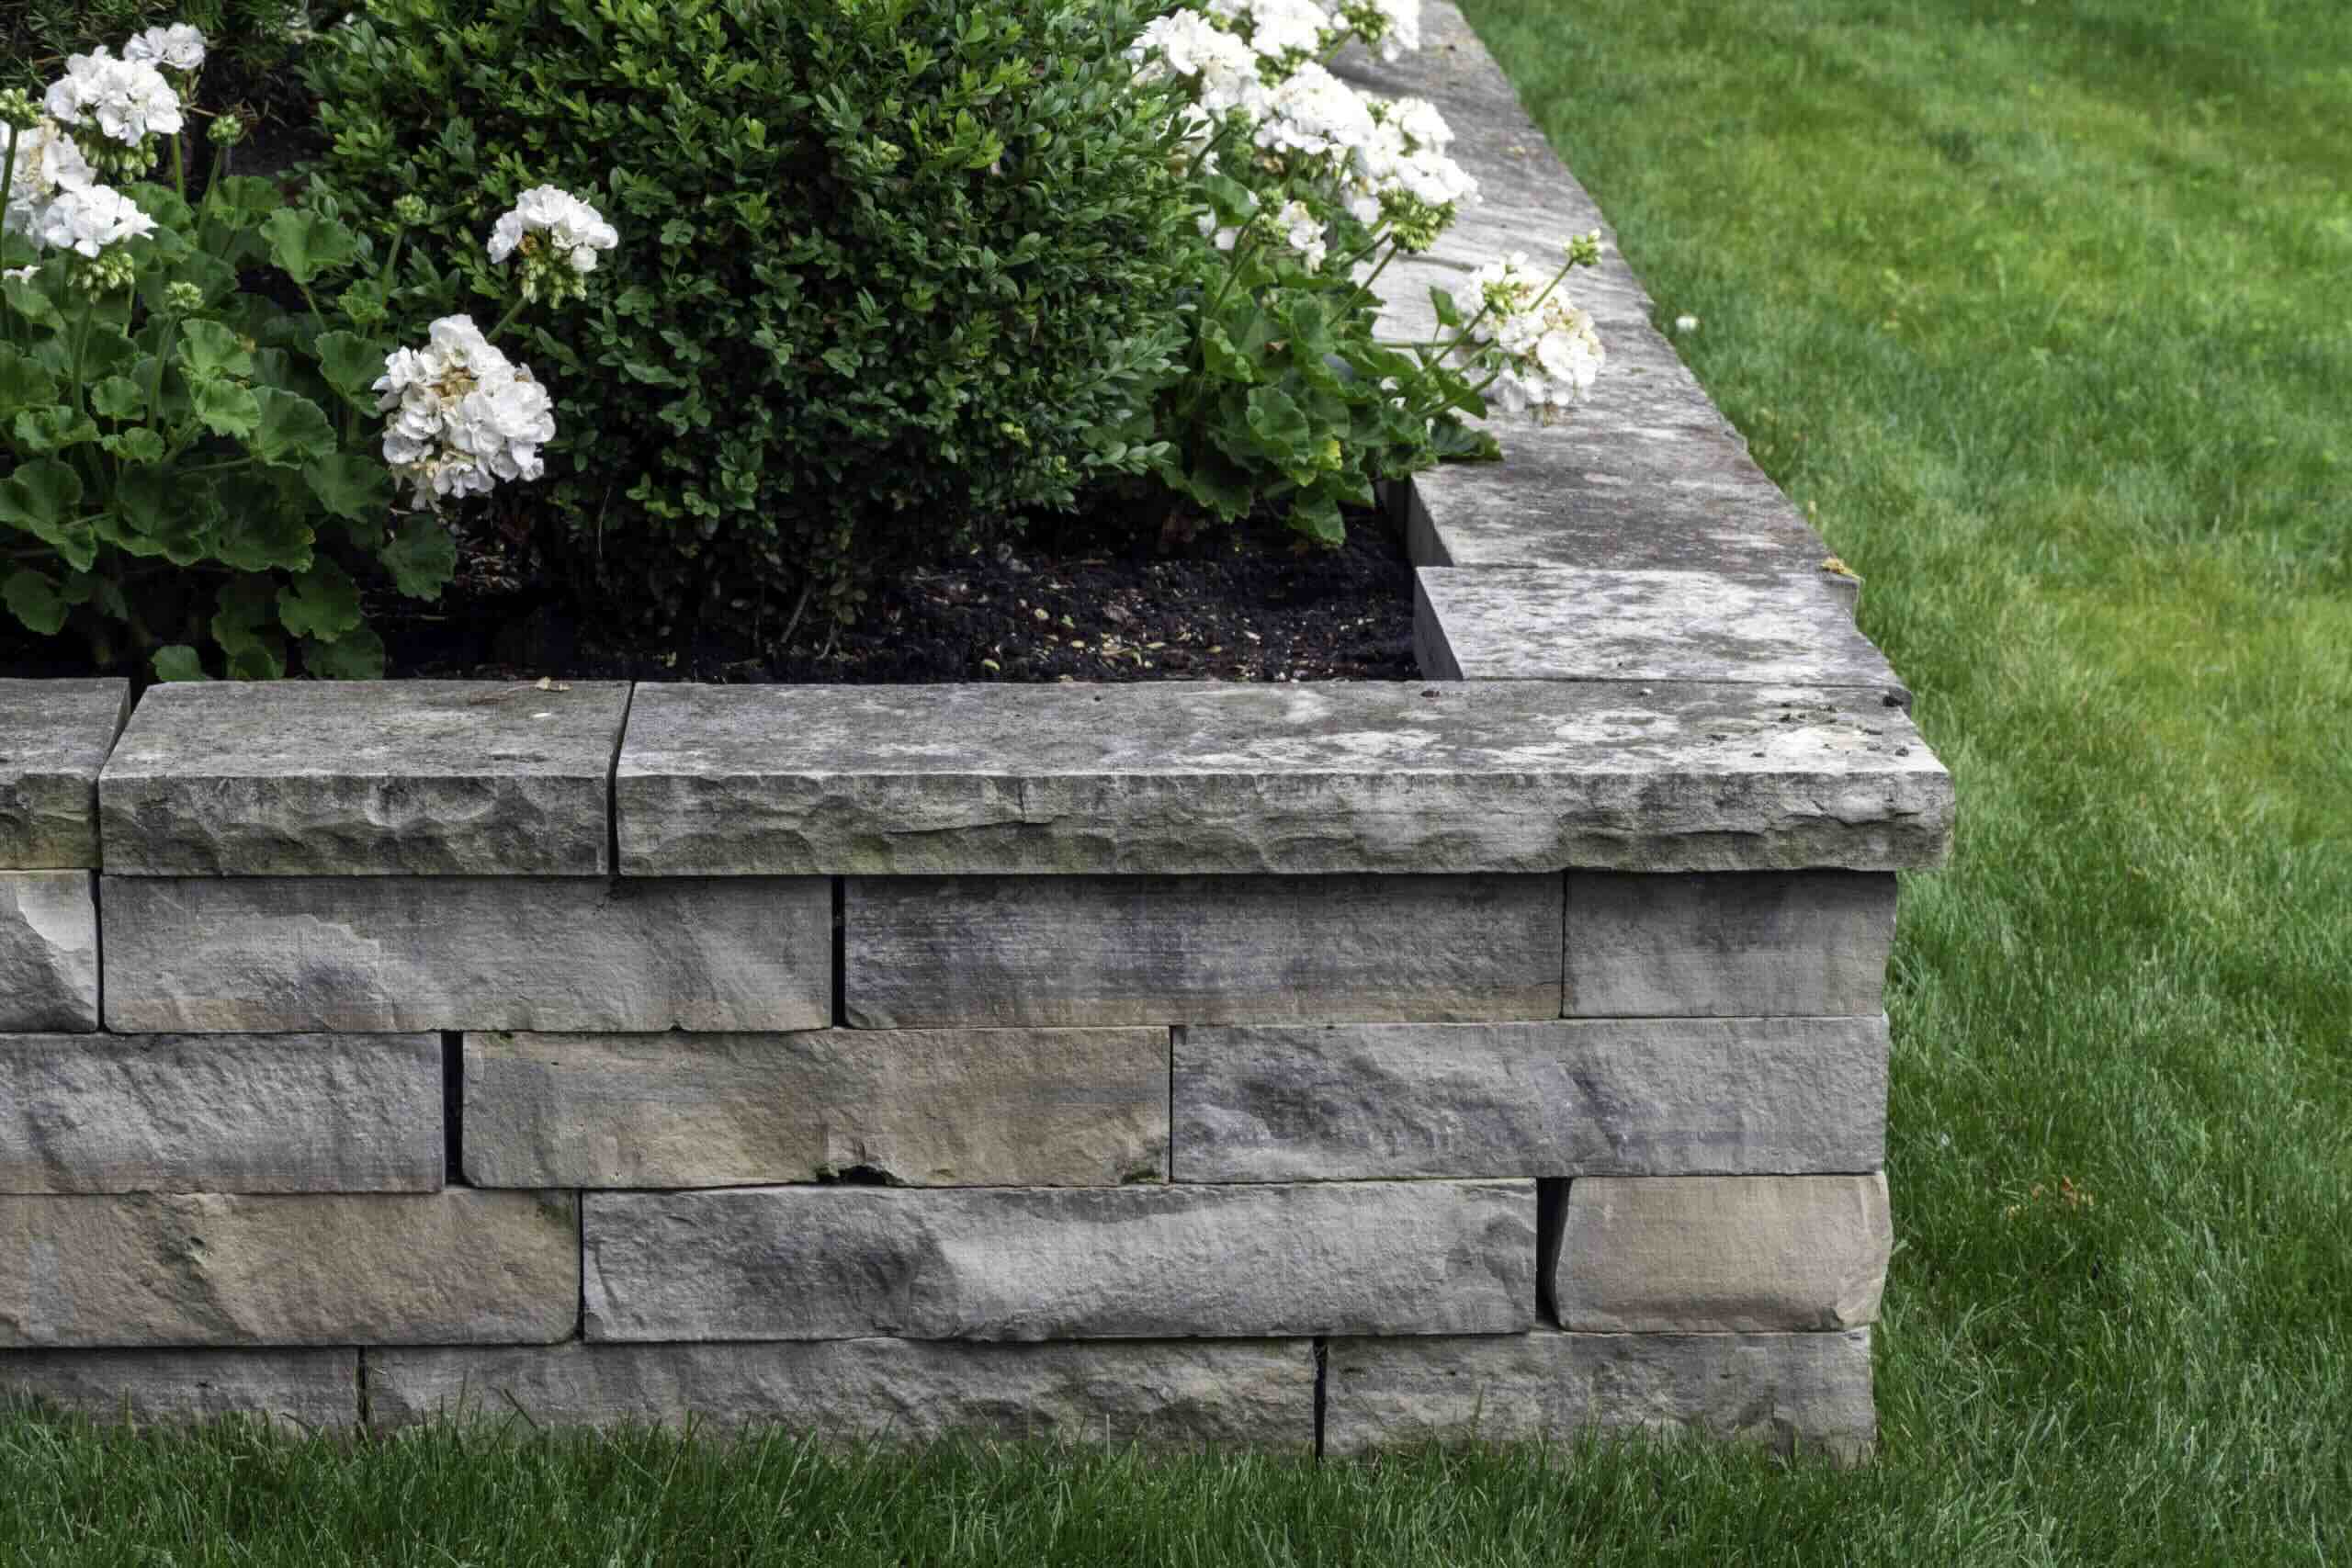
Step 5: Stack the Stones
As you transition to the pivotal phase of stacking the stones, you are poised to witness your stone raised garden bed take shape, adding a captivating and functional element to your outdoor space. This step requires precision and attention to detail to ensure the stability and visual appeal of the garden bed. Here's a comprehensive guide to help you expertly stack the stones and create the walls of your garden bed:
Selecting the Right Stones
Before stacking the stones, take a moment to assess the available stones and select those that are uniform in size, shape, and texture. Consistency in the stones will facilitate a seamless stacking process and contribute to a polished and cohesive appearance for the garden bed.
Begin Stacking
Commence the stacking process by placing the first layer of stones on top of the base, ensuring a snug fit and level alignment. As you position each stone, pay attention to its orientation and the overall symmetry of the wall. Take the time to make any necessary adjustments to maintain a uniform and visually pleasing structure.
Staggering the Stones
Similar to the base layer, stagger the joints of the stones as you stack them to enhance the strength and stability of the walls. This technique distributes the weight evenly and minimizes the risk of shifting over time, ensuring a durable and long-lasting garden bed.
Checking for Levelness
Regularly use a level to verify the evenness of the stacked stones. Ensuring that the walls are level is essential for the structural integrity and aesthetic appeal of the garden bed. Make any adjustments as needed to maintain a consistent level throughout the height of the walls.
Securing the Stones
As you progress with stacking, periodically check for the stability and alignment of the stones. Use a rubber mallet to gently tap the stones into place, ensuring a secure and tight fit. This step is crucial for fortifying the walls and minimizing the potential for movement or displacement.
Creating a Cohesive Structure
As the walls take shape, step back periodically to assess the overall cohesion and symmetry of the structure. Ensure that the stones form a cohesive and visually appealing perimeter for the garden bed, reflecting your meticulous attention to detail and craftsmanship.
By meticulously following these steps, you will expertly stack the stones to create the walls of your stone raised garden bed, bringing you closer to the realization of a stunning and functional outdoor oasis.
Step 6: Fill with Soil
With the sturdy foundation and walls of your stone raised garden bed in place, the next crucial step is to fill it with nutrient-rich soil, creating a fertile and nurturing environment for your plants to thrive. The soil you choose plays a pivotal role in the overall health and productivity of your garden, making it essential to select and fill the bed with the right type of soil. Here's a detailed guide to help you expertly fill your garden bed with soil:
Choose High-Quality Soil
Opt for a high-quality soil mix that provides essential nutrients, proper drainage, and optimal moisture retention for your plants. A well-balanced blend of topsoil, compost, and organic matter creates a fertile growing medium that supports robust plant growth and vitality. Consider sourcing soil from a reputable supplier or preparing a custom mix tailored to the specific needs of your plants.
Layer the Soil
Begin by layering the soil mix evenly within the walls of the garden bed, ensuring a uniform distribution and adequate depth to accommodate the root systems of your plants. Gradually fill the bed with soil, taking care to avoid compacting it excessively, which can hinder root development and water penetration. Aim for a level surface while maintaining a sufficient depth to support healthy plant growth.
Read more: How To Build A Raised Garden Bed On Legs
Consider Amendments
Depending on the types of plants you intend to grow, consider incorporating soil amendments such as perlite, vermiculite, or peat moss to enhance soil structure and aeration. These amendments can improve drainage, promote root health, and create an optimal growing environment, particularly for plants with specific soil requirements.
Ensure Adequate Moisture
As you fill the garden bed with soil, periodically moisten the layers to ensure proper hydration and settle the soil in place. Adequate moisture promotes the integration of the soil layers and creates an inviting environment for the roots of your plants. Be mindful of achieving the right balance, avoiding waterlogging while ensuring that the soil is sufficiently moist.
Level and Smooth the Surface
Once the bed is filled with soil, use a rake or gardening tool to level and smooth the surface, creating a uniform and inviting canvas for planting. A smooth surface facilitates even planting and watering, contributing to the overall aesthetics and functionality of the garden bed.
By meticulously following these steps, you will expertly fill your stone raised garden bed with nutrient-rich soil, laying the groundwork for a flourishing and bountiful garden. The carefully selected and layered soil sets the stage for the final phase of planting your garden, bringing you one step closer to reaping the rewards of your labor and creating a vibrant outdoor sanctuary.
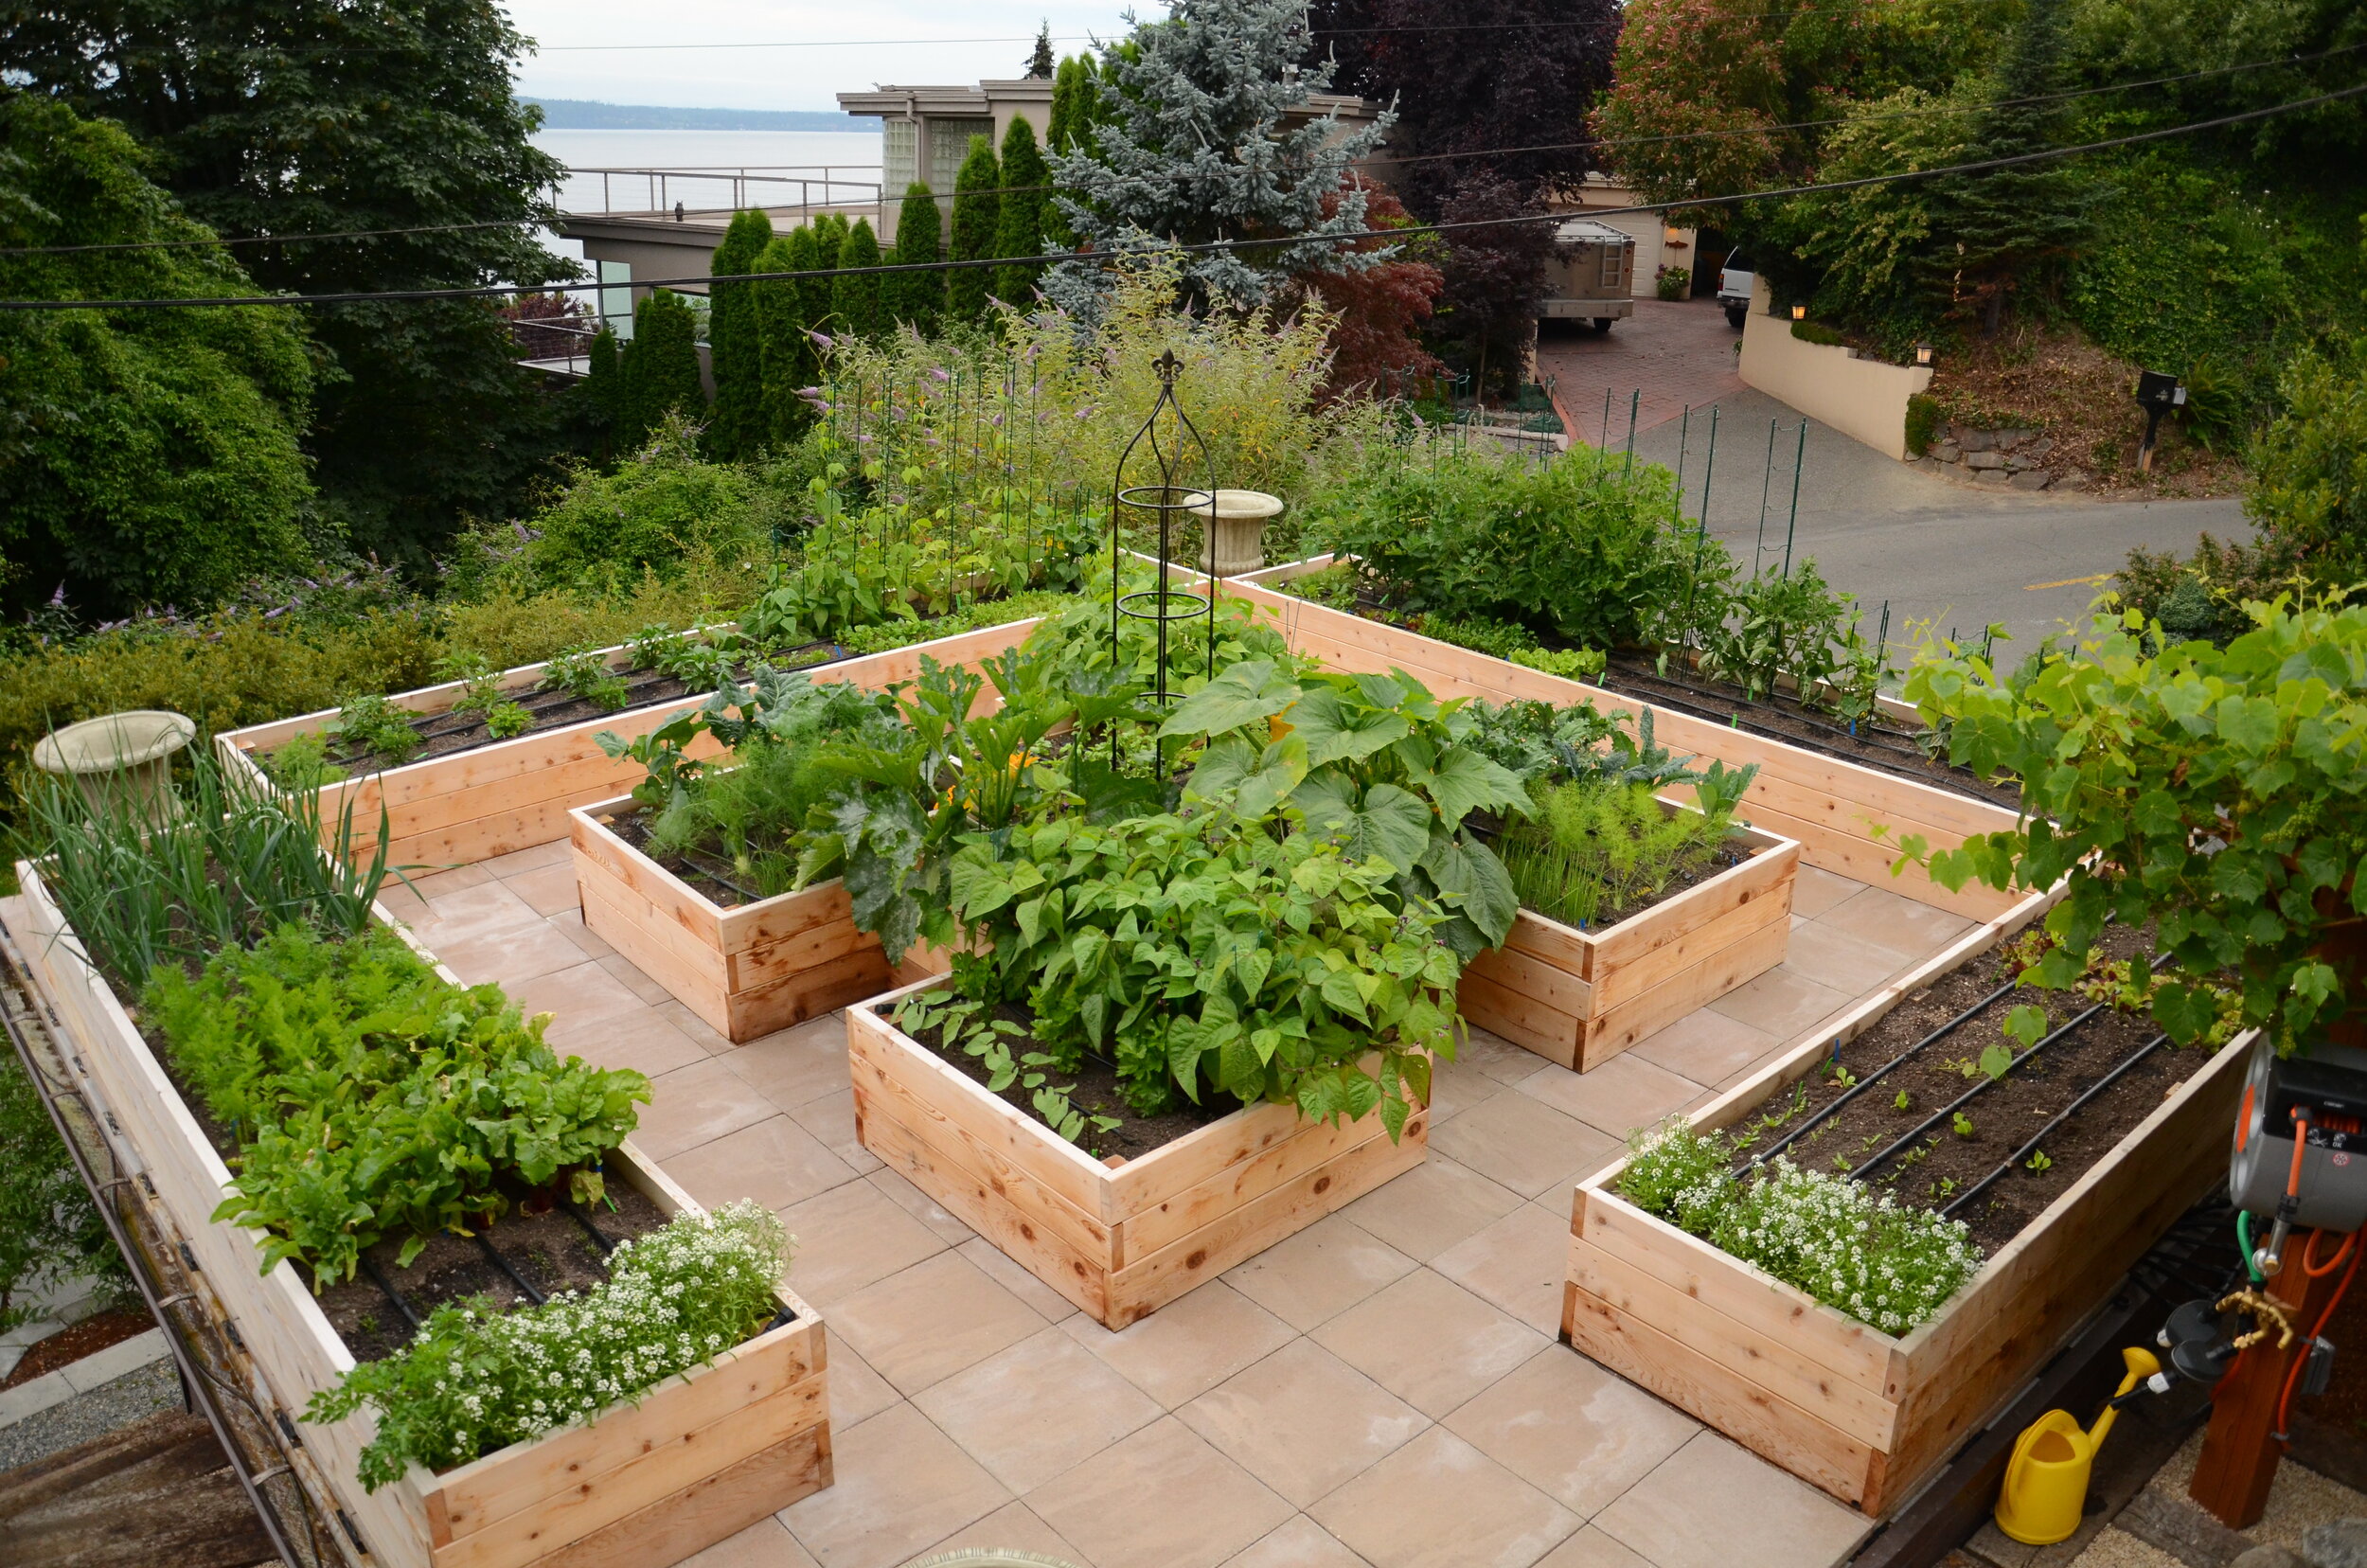
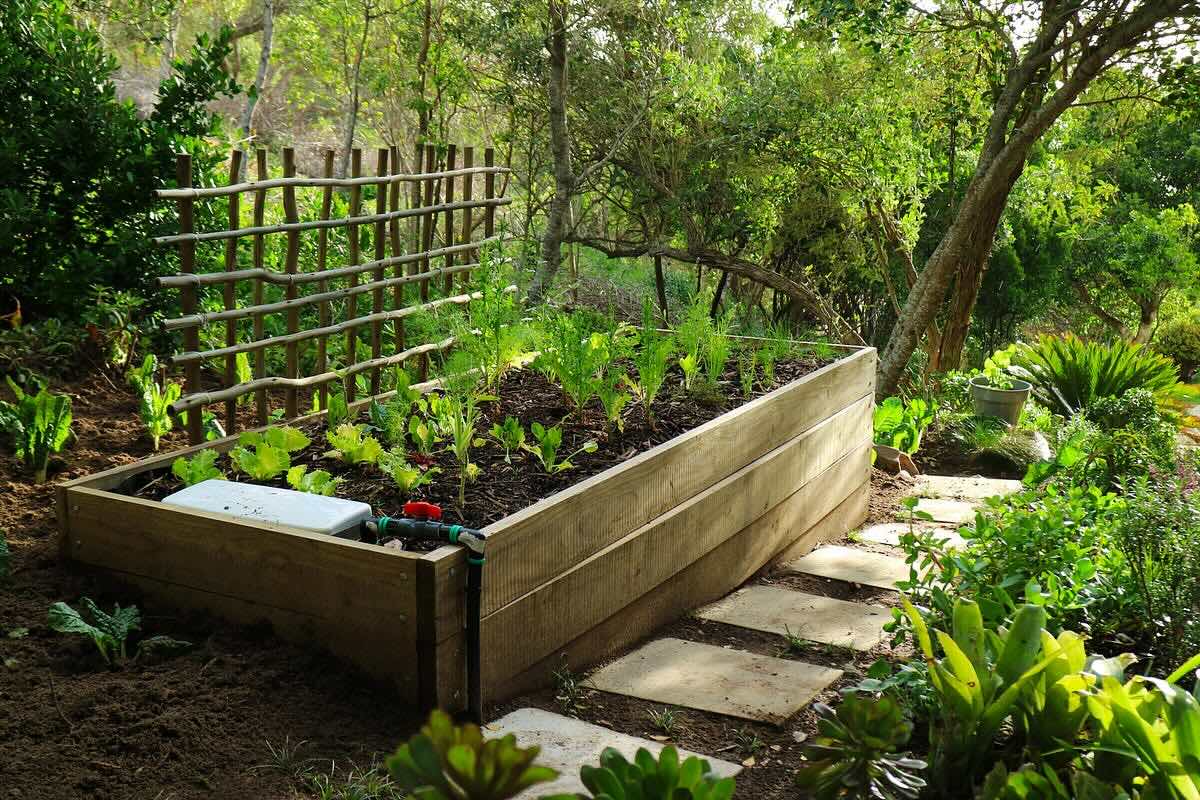
Step 7: Plant Your Garden
With the stone raised garden bed meticulously constructed and filled with nutrient-rich soil, the stage is set for the exciting and rewarding phase of planting your garden. This step marks the culmination of your efforts, as you bring life and vibrancy to the carefully prepared space. Here's a detailed guide to help you expertly plant your garden and set the wheels in motion for a flourishing outdoor oasis.
Read more: How To Build A Waist-High Raised Garden Bed
Selecting Plants
Begin by selecting a diverse array of plants that align with your gardening goals and the environmental conditions of your outdoor space. Consider factors such as sunlight exposure, soil moisture, and the mature size of the plants to ensure harmonious coexistence within the garden bed. Whether you're envisioning a colorful floral display, a bountiful vegetable garden, or a fragrant herb haven, thoughtful plant selection forms the cornerstone of a successful garden.
Planning Plant Layout
Before planting, strategize the layout of your garden bed to optimize space and visual appeal. Consider the mature size and growth habits of the selected plants, arranging them in a harmonious and balanced manner. Group plants with similar water and sunlight requirements together, creating micro-environments that cater to their specific needs. This thoughtful approach sets the stage for a well-organized and visually captivating garden.
Digging and Planting
Carefully dig individual holes for each plant, ensuring that the depth and width accommodate their root systems. Gently remove the plants from their containers, teasing the roots if necessary, and position them in the prepared holes. Backfill the holes with soil, gently firming it around the base of each plant to provide stability and promote root-to-soil contact. As you proceed, maintain proper spacing between plants to allow for healthy growth and adequate air circulation.
Watering and Mulching
After planting, thoroughly water the garden bed to settle the soil around the roots and provide essential hydration to the newly introduced plants. Consider applying a layer of organic mulch, such as wood chips or straw, to conserve moisture, suppress weed growth, and insulate the soil. Mulching also contributes to the overall aesthetics of the garden bed while providing a protective layer for the plants' root systems.
Caring for Your Garden
With the plants in place, commit to regular care and maintenance to ensure their well-being and longevity. Monitor soil moisture, adjust watering as needed, and stay vigilant against pests and diseases. Embrace the joy of nurturing your garden, tending to its evolving beauty, and witnessing the fruits of your labor as the plants thrive and flourish within the stone raised garden bed.
By following these steps, you will expertly plant your garden, infusing the stone raised bed with vitality and charm. This transformative phase marks the beginning of a dynamic and ever-changing landscape, where your gardening aspirations come to life, and the beauty of nature unfolds before your eyes.
Conclusion
Congratulations on successfully completing the construction and planting of your stone raised garden bed! This transformative journey has empowered you to create a captivating and functional outdoor space that promises to yield a bountiful harvest of beauty and sustenance. As you reflect on the culmination of this project, it's essential to appreciate the significance of your efforts and the potential impact of your stone raised garden bed on your outdoor sanctuary.
The stone raised garden bed stands as a testament to your dedication and vision, offering a harmonious blend of aesthetic allure and practicality. Its sturdy walls, meticulously stacked and secured, provide a stable and enduring framework for the flourishing garden within. The carefully selected and layered soil, enriched with nutrients and amendments, forms the nurturing foundation upon which your plants will thrive and prosper.
As you gaze upon the newly planted garden bed, envision the vibrant tapestry of colors, textures, and fragrances that will grace your outdoor space. Whether you've chosen to cultivate a symphony of blooms, a cornucopia of fresh produce, or a fragrant herb garden, the garden bed holds the promise of a dynamic and ever-changing landscape. Each plant, thoughtfully positioned and nurtured, represents a living testament to your passion for gardening and your commitment to creating a captivating outdoor oasis.
Beyond its aesthetic appeal, the stone raised garden bed embodies functionality and practicality. Its raised height offers ergonomic benefits, sparing you from the strain of bending and kneeling while tending to your plants. The enhanced drainage and soil aeration foster an environment conducive to robust plant growth, while the stone walls serve as a natural barrier against pests and provide a defined space for gardening activities.
As you embark on the journey of caring for your garden, anticipate the joy of witnessing the gradual transformation of the space. Embrace the rhythm of nature as your plants take root, grow, and evolve, infusing the garden bed with vitality and charm. The act of nurturing your garden becomes a source of fulfillment, connecting you with the cycles of growth and the beauty of the natural world.
In conclusion, the completion of your stone raised garden bed marks the beginning of an enriching and rewarding chapter in your gardening endeavors. It symbolizes the fusion of creativity, craftsmanship, and a deep-rooted appreciation for the wonders of nature. As you immerse yourself in the rhythm of the garden, may it become a source of inspiration, tranquility, and abundance, enriching your outdoor space and nurturing your connection with the natural world.
Frequently Asked Questions about How To Build A Stone Raised Garden Bed
Was this page helpful?
At Storables.com, we guarantee accurate and reliable information. Our content, validated by Expert Board Contributors, is crafted following stringent Editorial Policies. We're committed to providing you with well-researched, expert-backed insights for all your informational needs.

0 thoughts on “How To Build A Stone Raised Garden Bed”