Home>Articles>How To Repair Window Unit Air Conditioner Electrical Cord

Articles
How To Repair Window Unit Air Conditioner Electrical Cord
Modified: October 18, 2024
Learn how to repair the electrical cord of your window unit air conditioner with this helpful article. Find step-by-step instructions and expert tips to fix the issue.
(Many of the links in this article redirect to a specific reviewed product. Your purchase of these products through affiliate links helps to generate commission for Storables.com, at no extra cost. Learn more)
Introduction
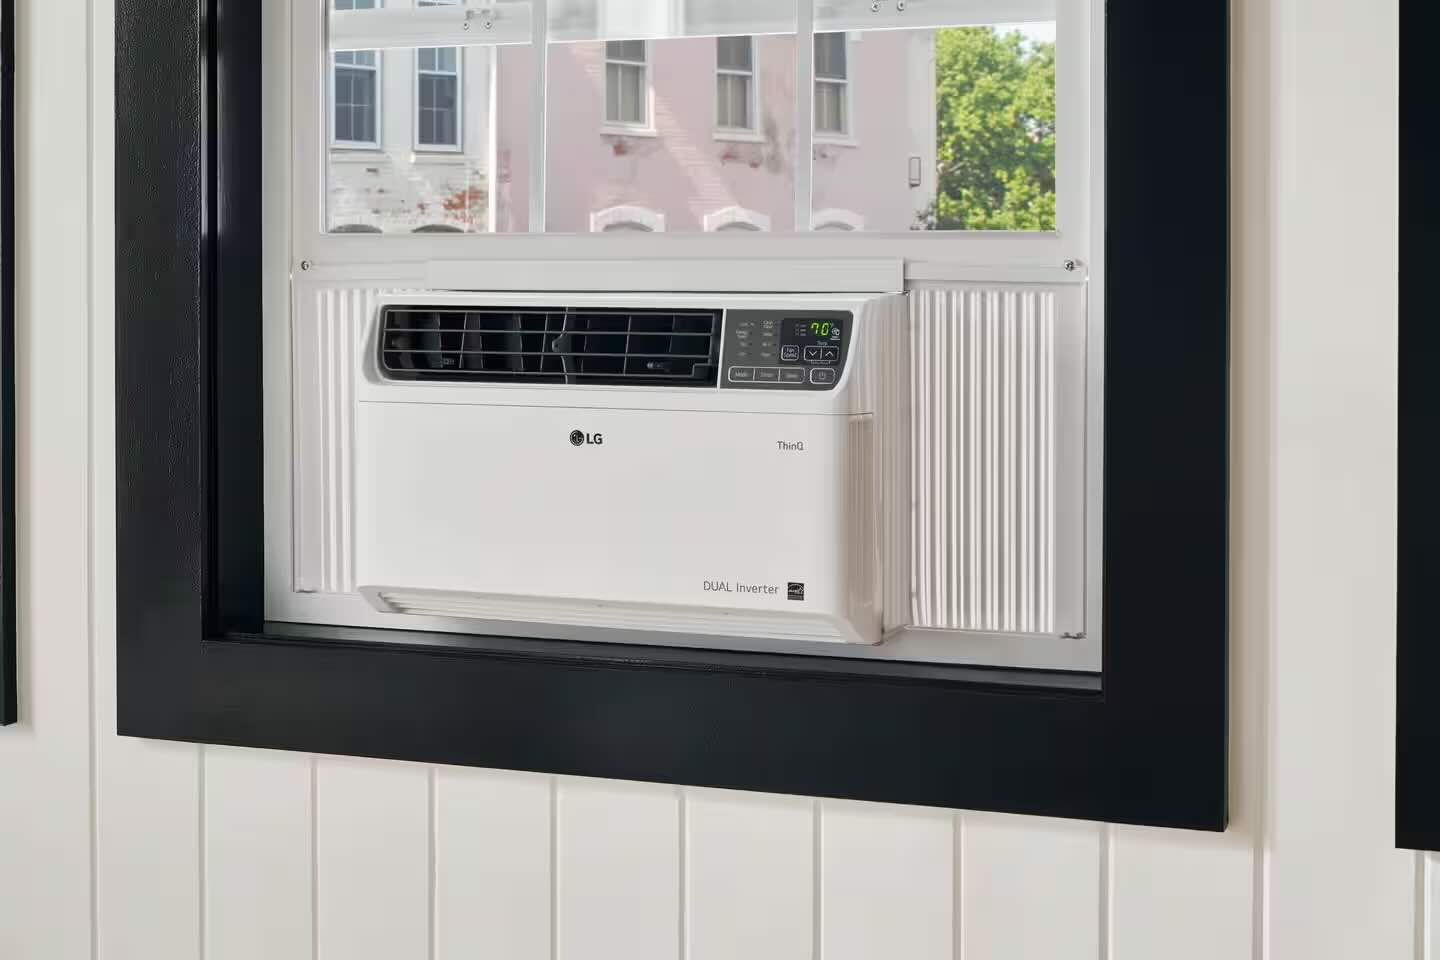
Window unit air conditioners are a popular choice for cooling individual rooms or small spaces. They are relatively easy to install, cost-effective, and efficient. However, over time, the electrical cords of these units can become damaged or worn out, posing a safety hazard. If you notice any fraying, exposed wires, or other signs of damage in the electrical cord of your window unit air conditioner, it is crucial to address the issue promptly.
In this article, we will guide you through the process of repairing a damaged window unit air conditioner electrical cord. With a few simple steps and some basic tools, you can restore your air conditioner’s cord to a safe and functional state.
Before we dive into the repair process, it is essential to prioritize safety. Always remember to disconnect the power supply before handling any electrical components. If you are unsure about any steps or don’t feel comfortable performing the repair yourself, it is best to consult a professional.
Now, let’s get started with the repair process to ensure your window unit air conditioner’s electrical cord is in optimal working condition.
Key Takeaways:
- Safety First
When repairing a damaged window unit air conditioner electrical cord, prioritize safety by disconnecting the power supply and seeking professional help if unsure. Assess, repair, and test the cord carefully to ensure a safe and functional outcome. - DIY Repair Guide
With the right tools and caution, you can effectively repair a damaged electrical cord for your window unit air conditioner. Follow the step-by-step guide to restore functionality and enjoy cool comfort without worry.
Read more: What Is A Window Air Conditioner
Step 1: Assess the Damage
The first step in repairing a window unit air conditioner electrical cord is to assess the extent of the damage. Carefully examine the cord for any visible signs of wear, including fraying, cuts, or exposed wires. It’s important to determine whether the damage is superficial or if it extends deeper into the cord.
If the damage is minimal, such as a small section of fraying, you may be able to repair it with simple solutions like electrical tape. However, if the cord has extensive damage or if the wires are exposed, it is recommended to replace the cord entirely for safety reasons.
Take note of the location of the damage on the cord. This will be helpful when cutting off the damaged section in later steps. Assessing the damage thoroughly will help you make an informed decision on whether to repair or replace the cord.
Remember, safety should always be your top priority. If the damage appears severe or if you’re unsure about the condition of the cord, it is best to consult a professional or replace the cord altogether.
Once you have assessed the damage and determined the appropriate course of action, you can move on to the next step – gathering the necessary tools and materials.
Step 2: Gather Necessary Tools and Materials
Before you begin repairing the window unit air conditioner electrical cord, it’s important to have all the necessary tools and materials on hand. Gathering these items beforehand will help ensure a smooth repair process without any interruptions. Here is a list of the tools and materials you will need:
- Wire cutters or scissors: These will be used to cut the cord and strip the insulation.
- Wire strippers: This tool is essential for safely stripping the insulation from the cord ends.
- Electrical tape: It will be used to insulate and secure the connections.
- Heat shrink tubing (optional): This tubing provides additional insulation and protection for the repaired connections.
- Screwdriver: You may need a screwdriver to disconnect the air conditioner from its mounting or access the wiring connections.
- Replacement cord (if required): If the damage to the existing cord is extensive, you may need to replace it entirely.
- Electrical gloves: These gloves provide an extra layer of protection when working with live wires.
- Safety glasses: Protect your eyes from any flying debris or particles.
Once you have gathered all the necessary tools and materials, you will be fully prepared to repair the window unit air conditioner electrical cord. Ensuring that you have everything beforehand will save you time and prevent any delays during the repair process.
With the tools and materials ready, you are now ready to move on to the next step – disconnecting the power supply.
Step 3: Disconnect the Power Supply
Prior to working on any electrical repairs, it is crucial to disconnect the power supply to ensure your safety. Unplugging the air conditioner will prevent any accidental shocks during the repair process. Follow these steps to disconnect the power supply:
- Locate the power cord of the window unit air conditioner.
- Ensure that the air conditioner is turned off, and any buttons or switches are in the “off” position.
- Unplug the power cord from the electrical outlet.
It is important to note that some window unit air conditioners may be hardwired to the electrical system, in which case it might be necessary to switch off the circuit breaker or disconnect the power source from the main electrical panel. If you’re unsure about how to disconnect the power supply, consult the manufacturer’s instructions or seek professional assistance.
Remember, working with live wires can be extremely dangerous, so it’s essential to take the necessary precautions by ensuring the power supply is completely disconnected.
Now that you have safely disconnected the power supply, you can proceed to the next step – inspecting the cord for any damage.
Step 4: Inspect the Cord for Damage
After disconnecting the power supply, it’s time to thoroughly inspect the electrical cord of your window unit air conditioner for any signs of damage. A careful inspection will help you determine the extent of the damage and decide on the appropriate repair method. Here’s how you can inspect the cord:
- Starting from the plug end, visually examine the entire length of the cord.
- Look for any visible signs of wear, such as fraying, cuts, or exposed wires.
- Feel the cord with your hands to check for any areas of weakness or irregularities.
- Inspect the connections where the cord attaches to the air conditioner unit for any signs of damage or loose connections.
During the inspection, pay close attention to areas where the cord may have been bent or twisted excessively, as these are common areas for damage to occur. If you come across any significant damage or exposed wires, it is advisable to replace the cord entirely for safety reasons. Minor damage like small areas of fraying can often be repaired with electrical tape.
Remember, repairing a damaged cord is only safe and effective if the damage is not extensive and limited to the outer insulation. If there are signs of damage to the inner wires, it is best to consult a professional and consider replacing the cord.
Once you have assessed the condition of the cord and determined the extent of the damage, you can move on to the next step – cutting off the damaged portion of the cord.
Read more: How To Insulate A Window Air Conditioner
Step 5: Cut Off the Damaged Portion
Now that you have inspected the electrical cord and identified the damaged section, it’s time to cut off the affected portion. This step ensures that you are working with a clean and undamaged section of the cord, providing a solid foundation for the repair. Follow these guidelines to cut off the damaged portion:
- Measure and mark the section of the cord that needs to be removed. Use a ruler or measuring tape to ensure accuracy.
- Make sure your wire cutters or scissors are sharp and designed for cutting electrical wires.
- Hold the cord firmly with one hand to prevent it from moving while cutting.
- Using the wire cutters or scissors, carefully cut through the cord at the marked location. Apply even pressure and make a clean, straight cut.
It’s essential to make sure that the cut is perpendicular to the cord to ensure a proper and secure connection in the next steps. Take caution not to cut too far and damage the intact wires inside the cord.
Once you have successfully cut off the damaged portion, inspect the cut ends of the cord to ensure they are clean and free from frayed or exposed wires. If necessary, use wire strippers or scissors to trim any uneven or damaged parts from the ends.
Now that you have a clean cut, you’re ready to move on to the next step – stripping the insulation from the cord ends.
When repairing a window unit air conditioner electrical cord, always unplug the unit before attempting any repairs. Use electrical tape to secure any exposed wires and consider replacing the cord if it is damaged beyond repair.
Step 6: Strip the Insulation from the Cord Ends
In this step, you will need to strip the insulation from the cut ends of the electrical cord. Stripping the insulation is necessary to expose the wires and create a clean surface for proper connection. Here’s how you can strip the insulation:
- Ensure that you have a pair of wire strippers appropriate for the gauge of your cord. Wire strippers have notches of different sizes to accommodate various wire sizes.
- Identify the gauge of your cord. This information can usually be found on the insulation of the cord itself. Alternatively, you can measure the diameter of the wires with a caliper or use a wire gauge tool.
- Select the appropriate notch on the wire strippers based on the gauge of your cord.
- Hold the cord firmly with one hand and position the wire strippers around the cut end of the cord.
- Squeeze the handles of the wire strippers firmly and apply pressure to cut through the insulation while being careful not to cut into the wires inside.
- Gently pull the wire strippers away from the cord, sliding the insulation off the wires.
Repeat this process for both cut ends of the cord. After stripping the insulation, visually inspect the exposed wires to ensure they are intact and undamaged. If any wires appear frayed or broken, you may need to consider replacing the entire cord.
Stripping the insulation provides a clean surface, allowing for a secure and reliable connection in the next step. Now that you have stripped the insulation, you’re ready to move on to the next step – connecting the wires.
Step 7: Connect the Wires
Now that you have stripped the insulation from the cut ends of the electrical cord, it’s time to connect the wires. This step will ensure a proper electrical connection and restore the functionality of your window unit air conditioner. Follow these guidelines to connect the wires:
- Identify the color-coding of the wires. In most cases, electrical cords have two wires – a black or brown wire (hot) and a white or blue wire (neutral). If your cord has different color-coding, refer to the manufacturer’s instructions or consult a professional for guidance.
- Twist the exposed wires together based on their color-coding. Twist the corresponding hot wires together and the neutral wires together.
- For added security and electrical conductivity, you can use wire connectors or wire nuts. Simply slide the twisted wires into the connector and twist it clockwise until it is securely fastened. Make sure there are no exposed wires outside of the connector.
- t is important to ensure a tight and secure connection. Tug on the wires gently to make sure they are properly connected and won’t come loose.
If your electrical cord doesn’t have color-coded wires, you can use other methods to identify the hot and neutral wires. One common method is to look for a rib or ridge mark on the insulation of one wire. This mark indicates the neutral wire, while the other wire is the hot wire.
When connecting the wires, it’s crucial to ensure that there are no loose strands or exposed wires. Exposed wires can lead to electrical shorts or shocks, so double-check the connections to guarantee their integrity.
Now that you have successfully connected the wires, you’re ready to move on to the next step – insulating the connections to ensure safety and durability.
Step 8: Insulate the Connections
Insulating the connections is a critical step in the repair process to ensure the safety and reliability of your window unit air conditioner’s electrical cord. Proper insulation prevents exposed wires, electrical shorts, and potential hazards. Follow these steps to effectively insulate the connections:
- Start by wrapping each individual wire connection with electrical tape. Begin a few inches away from the connection and wrap towards the end of the stripped wire, overlapping the tape with each turn. Make sure to cover the entire exposed wire and a small portion of the insulated cord.
- Tightly wrap multiple layers of electrical tape around each connection to ensure a secure and durable insulation. The layers of tape will provide additional protection against potential wear and tear.
- Once you have securely wrapped each individual connection, proceed to wrap both connections together with electrical tape. This will create a unified, protected connection.
- Check that there are no exposed wires or loose tape ends. Trim any excessive tape, if necessary, to create a neat and secure insulation.
In addition to electrical tape, you may also choose to utilize heat shrink tubing for enhanced insulation. Heat shrink tubing is a thin plastic tube that shrinks when heat is applied, creating a tight seal around the connection. If you opt for heat shrink tubing, slide the tubing onto the wires before making the connections, and then use a heat source, such as a heat gun or lighter, to shrink the tubing around the connections.
Remember, the goal is to provide a robust and reliable insulation that will protect the connections from moisture, electrical arcing, and accidental contact. Take your time to ensure the connections are properly insulated to maintain the safety and functionality of your repaired electrical cord.
Now that you have diligently insulated the connections, you’re ready to proceed to the next step – reconnecting the power supply.
Read more: How To Remove A Window Air Conditioner
Step 9: Reconnect the Power Supply
After successfully repairing and insulating the electrical cord of your window unit air conditioner, it’s time to reconnect the power supply. This step will allow you to test the repaired cord and ensure that everything is functioning correctly. Follow these steps to reconnect the power supply:
- Make sure the electrical outlet or power source is readily accessible and in the “off” position.
- Take the repaired end of the cord and insert it securely into the corresponding electrical outlet or power source.
- Ensure that the cord is fully inserted and that there are no loose connections or exposed wires visible.
- If your air conditioner has a switch or power button, set it to the “on” position to activate the unit.
- Observe the air conditioner to see if it powers on and runs as expected.
Keep in mind that it may take a few moments for the air conditioner to start up once it is plugged in. If the unit fails to turn on or you notice any abnormal behavior, immediately unplug the cord and reassess the connections. Double-check that the insulation is intact and the wires are securely connected.
During the reconnection process, it is important to be cautious and attentive. Always ensure that your hands are dry and free from moisture, and avoid touching any exposed wires or connections. If you encounter any issues or have concerns about the cord or unit’s performance, consult a professional electrician or the manufacturer for assistance.
Now that you have successfully reconnected the power supply, it’s time for the final step – testing the repaired cord.
Step 10: Test the Repaired Cord
Now that you have completed the repair process and reconnected the power supply, it’s crucial to test the repaired cord to ensure its functionality and safety. Testing will help you verify that the repair was successful and that the window unit air conditioner is operating as it should. Follow these steps to test the repaired cord:
- Ensure that the air conditioner is still in the “off” position, and the power supply is connected.
- Switch the air conditioner’s control panel or power button to the “on” position to activate the unit.
- Listen for any unusual sounds or vibrations coming from the air conditioner. A properly repaired cord should allow the unit to run smoothly without any issues.
- Monitor the air conditioner’s performance and check if cool air is being circulated effectively throughout the room. Confirm that the unit is functioning as it did before the cord repair.
- Observe the power cord for any signs of overheating, such as burning smells, excessive heat, or melting insulation. If you notice any of these signs, immediately unplug the cord and discontinue use. There may be underlying electrical issues that require professional attention.
If the repaired cord passes the test and the air conditioner functions as expected, then congratulations! You have successfully repaired your window unit air conditioner’s electrical cord. The repaired cord should now provide a safe and reliable power supply to keep your space cool and comfortable.
However, if the air conditioner does not function correctly or exhibits any issues during testing, it is possible that there may be other underlying problems or the repair was not successful. In such cases, it is recommended to consult a professional electrician or contact the manufacturer for further assistance and guidance.
Remember, safety should always be a top priority. If you have any doubts or concerns about the repaired cord or the performance of the air conditioner, it’s best to seek professional help to avoid any potential risks or hazards.
With the repaired cord tested and confirmed to be in proper working condition, you can now enjoy the cool comfort provided by your window unit air conditioner!
Conclusion
Repairing a damaged electrical cord for your window unit air conditioner is a relatively simple process that can be accomplished with the right tools and a bit of caution. By following the step-by-step guide outlined in this article, you can safely and effectively repair the cord, restoring the functionality of your air conditioner and ensuring your comfort during hot summer months.
Remember that safety should always be your top priority when working with electrical components. Before beginning the repair process, be sure to disconnect the power supply to prevent any accidents or injuries. If you’re unsure about any steps or uncomfortable working with electrical components, it is always best to consult a professional for assistance.
Throughout the repair process, it is crucial to assess the extent of the cord damage, gather the necessary tools and materials, and carefully cut off the damaged portion. Stripping the insulation, connecting the wires properly, and insulating the connections are vital steps that guarantee a secure and reliable repair.
Once you have reconnected the power supply and tested the repaired cord, you can be confident in the safety and functionality of your window unit air conditioner. However, if any issues persist or you have concerns about the repaired cord, do not hesitate to seek professional help.
Now that you have the knowledge and skills to repair a damaged electrical cord for your window unit air conditioner, you can save time and money by addressing the issue yourself. By taking the necessary precautions and following the steps outlined in this guide, you can enjoy the cool comfort of your air conditioner without worry.
Frequently Asked Questions about How To Repair Window Unit Air Conditioner Electrical Cord
Was this page helpful?
At Storables.com, we guarantee accurate and reliable information. Our content, validated by Expert Board Contributors, is crafted following stringent Editorial Policies. We're committed to providing you with well-researched, expert-backed insights for all your informational needs.


0 thoughts on “How To Repair Window Unit Air Conditioner Electrical Cord”