
Articles
How To Remove The Low-Flow From A Showerhead
Modified: August 30, 2024
Learn how to remove the low flow from your showerhead with our informative articles. Improve your shower experience today!
(Many of the links in this article redirect to a specific reviewed product. Your purchase of these products through affiliate links helps to generate commission for Storables.com, at no extra cost. Learn more)
Introduction
Having a low flow in your showerhead can be frustrating. It not only reduces your showering experience but also wastes water. If you’re tired of dealing with weak water pressure and want to remove the low flow from your showerhead, you’ve come to the right place!
In this article, we will guide you through the step-by-step process of removing the low flow from your showerhead. By following these simple instructions, you can improve the water pressure and enjoy a more satisfying shower experience.
Before we dive into the steps, let’s first understand why showerheads have low flow in the first place.
Understanding Low Flow in Showerheads
Low flow in showerheads is usually caused by a device called a flow restrictor. Flow restrictors are designed to limit the amount of water that flows through the showerhead in order to conserve water. While this may be beneficial for water conservation, it can often result in inadequate water pressure, leaving you feeling unsatisfied during your showers.
To remove the low flow from your showerhead, you will need a few tools and equipment. Let’s take a look at what you’ll need.
Key Takeaways:
- Say goodbye to low water pressure in your showerhead by removing the flow restrictor and cleaning the components. Enjoy a revitalized shower experience with improved water pressure and satisfaction.
- Gather the right tools and follow step-by-step instructions to remove low flow from your showerhead. Clean, check, and reassemble for a satisfying shower experience.
Read more: What Is Considered A Low Flow Showerhead
Understanding Low Flow in Showerheads
Low flow in showerheads is a common issue that many people face. It occurs when the water pressure from the showerhead is weaker than desired, resulting in a less satisfying shower experience. Understanding the causes of low flow can help you troubleshoot and eliminate this problem.
One of the main reasons for low flow in showerheads is the presence of a flow restrictor. A flow restrictor is a device that is installed in the showerhead to limit the amount of water that flows through it. It is designed to promote water conservation by reducing water usage during showers.
While flow restrictors are environmentally friendly and can help reduce water consumption, they can also significantly impact the water pressure. Manufacturers often install flow restrictors in showerheads to meet water efficiency regulations and standards. However, these regulations can result in a lackluster showering experience for individuals who prefer higher water pressure.
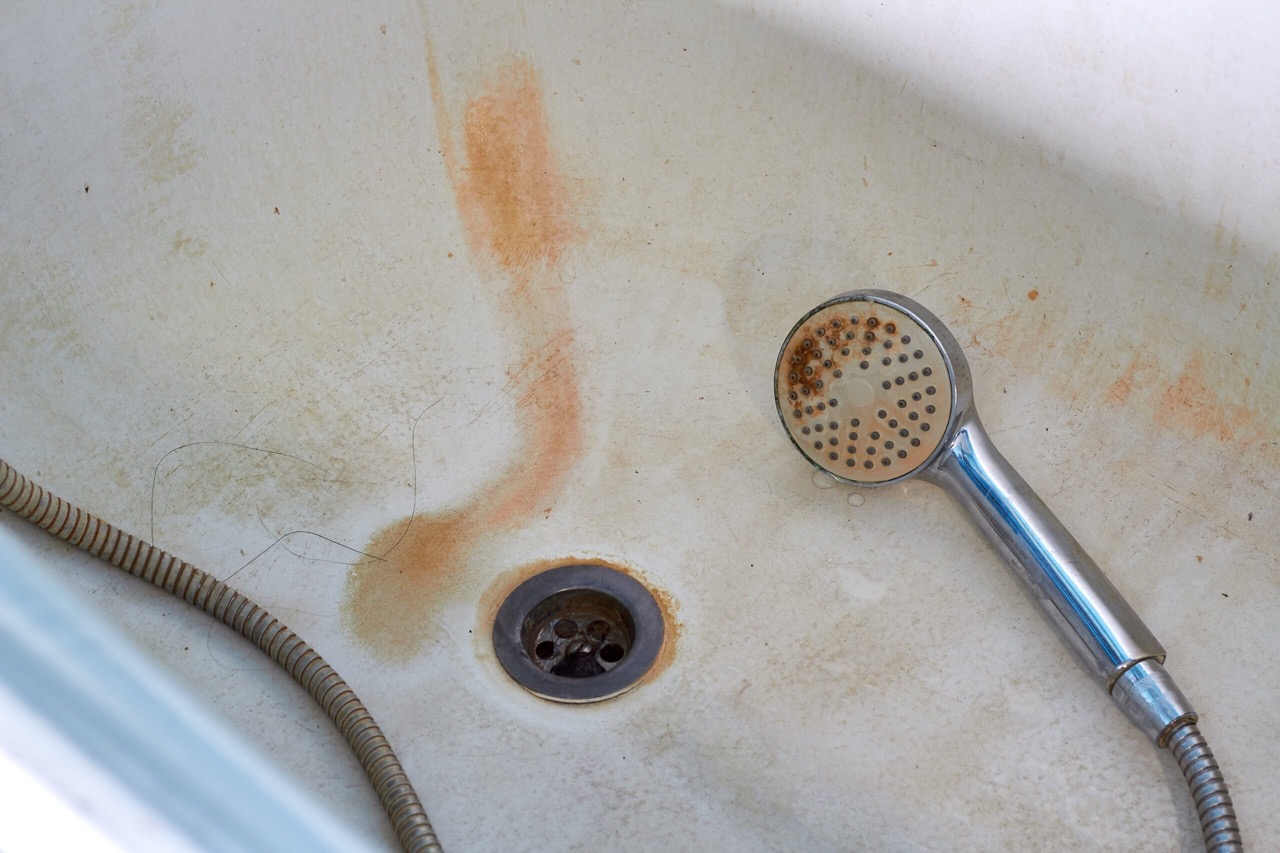
In addition to flow restrictors, other factors can contribute to low flow in showerheads. These include mineral buildup, clogged nozzles, or faulty showerhead components. Over time, minerals and debris can accumulate in the showerhead, obstructing the flow of water and causing low water pressure.
If you live in an area with hard water, mineral deposits can be a common problem. The minerals in the water, such as calcium and magnesium, can build up in the showerhead, restricting the flow of water. Regular maintenance and cleaning can help prevent or remove these mineral deposits.
Another factor that can affect water flow is the design and quality of the showerhead itself. Some showerheads are designed with small or narrow water channels, which can restrict the flow of water even without a flow restrictor. Additionally, older or worn-out showerheads may have internal components that are damaged or malfunctioning, leading to reduced water pressure.
By understanding the causes of low flow in showerheads, you can take appropriate measures to address the issue and restore a more enjoyable shower experience. In the next section, we will discuss the tools and equipment you will need to remove the low flow from your showerhead.
Tools and Equipment Needed
Before you begin removing the low flow from your showerhead, it’s important to gather the necessary tools and equipment. Having the right tools will make the process much easier and ensure a successful outcome. Here are the items you will need:
- Adjustable wrench: This tool will be used to loosen and tighten the showerhead connections.
- Bucket: You will need a bucket to catch any water that may spill during the process.
- Soft cloth or brush: A soft cloth or brush will come in handy for cleaning the showerhead and removing any mineral deposits.
- Vinegar or lime-dissolving cleaner: These cleaning solutions can help dissolve mineral buildup inside the showerhead.
- Pliers: Pliers may be required to remove any stubborn or tight connections.
- Teflon tape: Teflon tape is used to create a watertight seal when reassembling the showerhead.
These tools and equipment are readily available at hardware stores or online. Make sure you have them on hand before you start the process of removing the low flow from your showerhead.
Now that you have all the necessary tools, let’s move on to the step-by-step instructions for removing the low flow from your showerhead. Take your time and follow each step carefully for the best results.
Step 1: Remove the Showerhead
The first step in removing the low flow from your showerhead is to remove the showerhead itself. Follow these instructions to complete this step:
- Locate the showerhead connection. This is the point where the showerhead is connected to the shower arm, which extends from the wall.
- Using an adjustable wrench, grip the showerhead connection firmly. Turn it counterclockwise to loosen it.
- Continue turning the connection until it is completely loose. You should be able to remove the showerhead by pulling it away from the wall gently.
- If the showerhead is stubborn or tightly secured, you may need to use pliers for additional leverage. Wrap a cloth around the showerhead connection before using the pliers to avoid damage.
- Once the showerhead is removed, inspect the shower arm for any debris or mineral buildup. Clean the shower arm if necessary, using a soft cloth or brush.
By following these steps, you have successfully removed the showerhead from its connection. Now, let’s move on to the next step – disassembling the showerhead.
Step 2: Disassemble the Showerhead
Now that you have removed the showerhead from the shower arm, it’s time to disassemble it. This step will allow you to access the internal components of the showerhead and identify the flow restrictor. Follow these instructions to disassemble the showerhead:
- Inspect the showerhead for any visible screws or fasteners. Some showerheads have removable faceplates or panels that can be unscrewed.
- If there are screws or fasteners, use a screwdriver or wrench to loosen and remove them. Keep the screws or fasteners in a safe place, as you will need them later for reassembly.
- If the showerhead doesn’t have visible screws, it may be held together by friction or clips. Gently pry the showerhead apart using your fingers or a small flathead screwdriver. Be careful not to damage the showerhead during this process.
- As you disassemble the showerhead, pay attention to the different components and how they fit together. Take note of the position and orientation of each component for easy reassembly later.
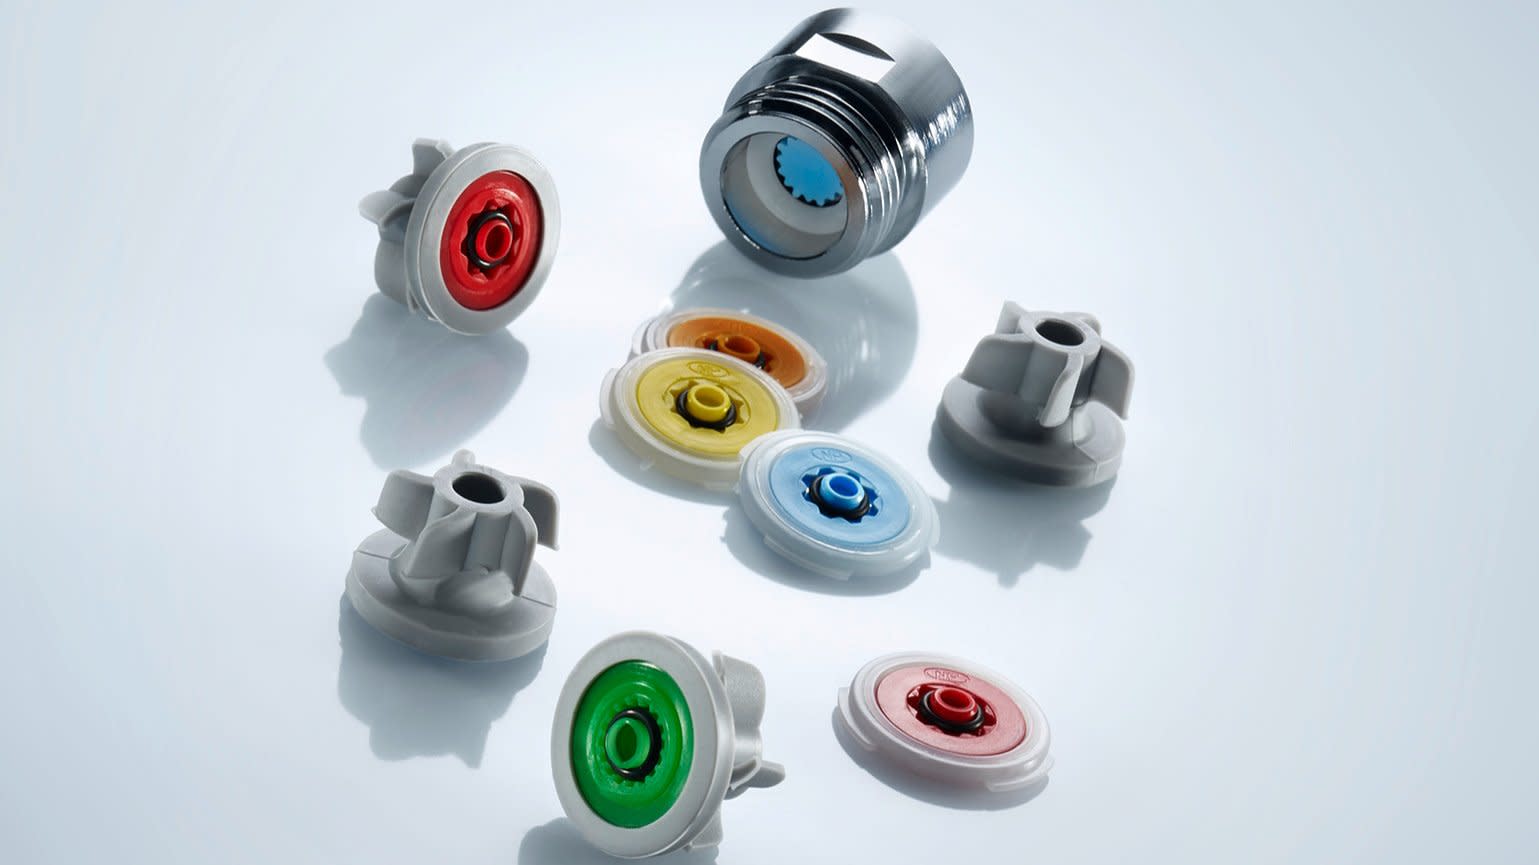
- Once the showerhead is fully disassembled, you should be able to see the flow restrictor. The flow restrictor is a small plastic or metal disc that is usually located near the inlet of the showerhead.
By disassembling the showerhead, you have gained access to the internal components and identified the flow restrictor. In the next step, we will discuss how to clean the showerhead to improve water flow.
Step 3: Clean the Showerhead
After disassembling the showerhead, it’s time to clean it thoroughly. Over time, mineral deposits, debris, and sediment can accumulate inside the showerhead, causing low flow and reduced water pressure. Follow these instructions to clean the showerhead and improve water flow:
- Fill a bucket or basin with equal parts vinegar and water. Alternatively, you can use a lime-dissolving cleaner recommended for removing mineral deposits.
- Place the disassembled showerhead components into the vinegar-water solution or lime cleaner. Make sure all the parts are fully submerged, and allow them to soak for at least 30 minutes. This will help dissolve and loosen any mineral buildup.
- While the components are soaking, use a soft cloth or brush to clean the surface of the showerhead. Scrub away any external dirt or grime to ensure a thorough cleaning.
- After the soaking time has elapsed, remove the showerhead components from the solution. Use a brush or cloth to gently scrub the individual parts, paying special attention to the nozzles and small openings where water flows.
- Rinse each component with clean water to remove any remaining cleaning solution or debris.
- Inspect each component for any stubborn mineral deposits or debris that may still be present. If necessary, use a toothpick or small brush to clean out the nozzles or small openings.
By following these steps, you have successfully cleaned the showerhead and removed any mineral deposits or debris that may have been causing low flow. In the next step, we will discuss how to check and clean the flow restrictor, which plays a crucial role in regulating water flow.
To remove the low flow from a showerhead, you can try soaking the showerhead in vinegar to remove any mineral deposits that may be causing the restriction. Simply remove the showerhead, place it in a bowl of vinegar, and let it soak for a few hours before rinsing it thoroughly.
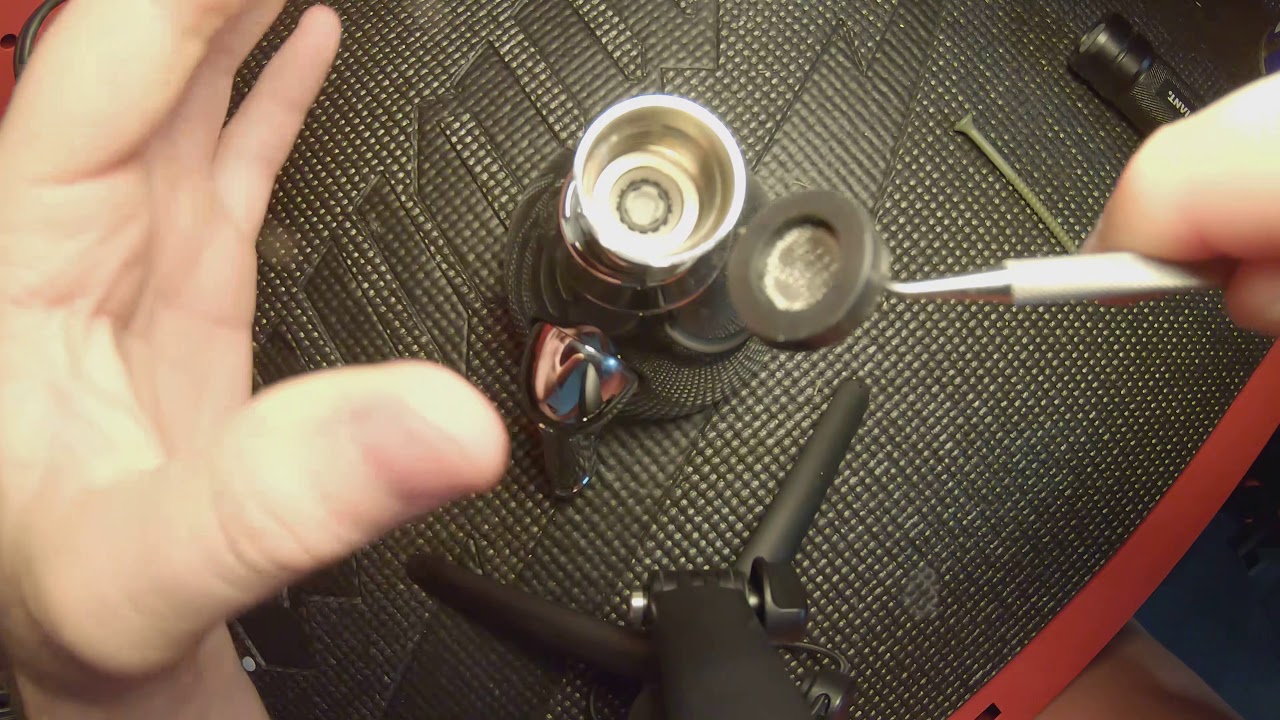
Step 4: Check and Clean the Flow Restrictor
Now that you have cleaned the showerhead, it’s time to focus on the flow restrictor. The flow restrictor is a small device that controls and limits the amount of water that flows through the showerhead. Sometimes, the flow restrictor can become clogged or blocked, leading to decreased water flow. Follow these instructions to check and clean the flow restrictor:
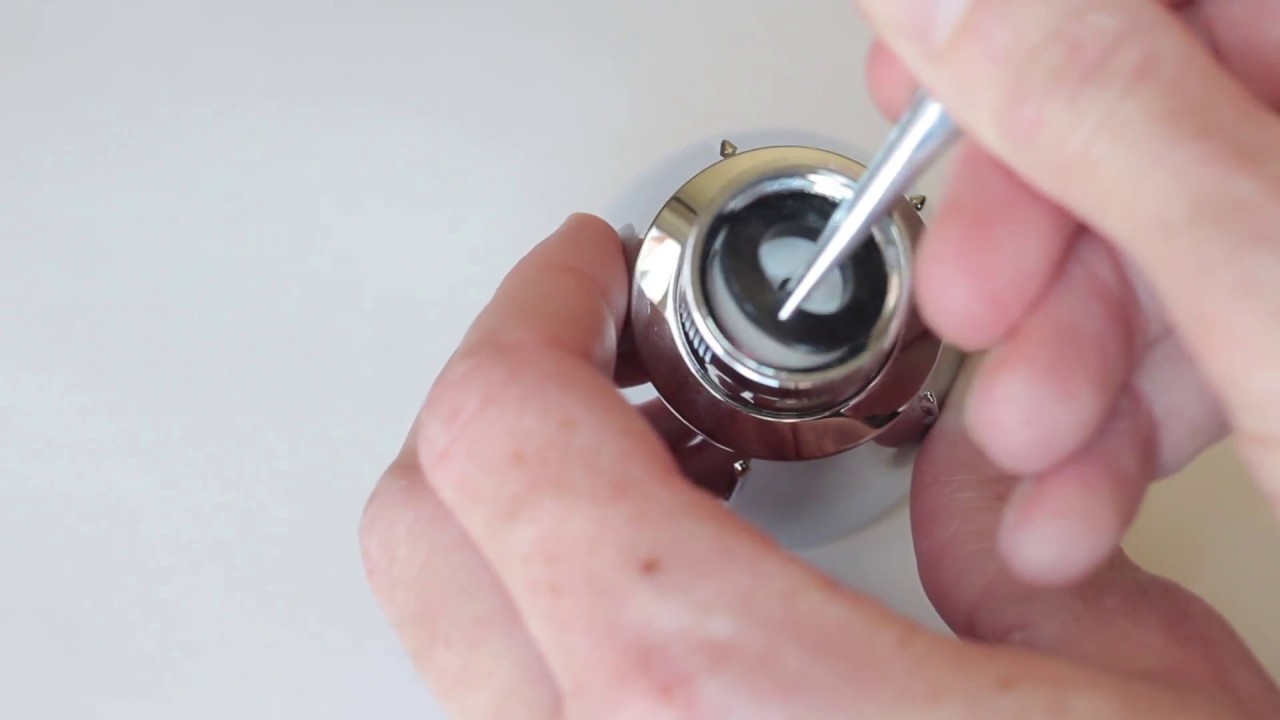
- Locate the flow restrictor within the showerhead. It is typically a small, round disk made of plastic or metal. The flow restrictor is often situated near the inlet of the showerhead.
- Gently remove the flow restrictor from the showerhead. You may need to use a pair of tweezers or a toothpick to carefully pry it out.
- Inspect the flow restrictor for any visible debris or mineral buildup. If you notice any blockages, use a toothbrush or a toothpick to clean it carefully. Be gentle to avoid damaging the flow restrictor.
- If the flow restrictor is severely clogged and cannot be cleaned, you may consider replacing it with a new one. Contact the manufacturer or visit a hardware store to find a suitable replacement flow restrictor.
- Once the flow restrictor is clean or replaced, reinsert it back into the showerhead in its original position. Ensure that it fits snugly and securely.
By checking and cleaning the flow restrictor, you have addressed one of the main causes of low flow in your showerhead. In the next step, we will guide you through the process of reassembling the showerhead.
Step 5: Reassemble the Showerhead
Now that you have cleaned the showerhead components and checked the flow restrictor, it’s time to reassemble the showerhead. Follow these instructions to put all the components back together:
- Start by reattaching any removable faceplates or panels to the main showerhead assembly. Use the screws or fasteners that were removed earlier to secure them in place.
- Take the cleaned flow restrictor and carefully insert it back into its original position within the showerhead. Ensure that it fits securely and snugly.
- Next, align the other components of the showerhead, such as the nozzle plate and showerhead body. Make sure they are properly oriented and fit together seamlessly.
- If there are any additional parts or accessories that were disassembled, such as a water-saving filter or trim ring, reattach them according to the manufacturer’s instructions.
- Double-check that all the components are properly aligned and fitted together. This will avoid any leaks or misalignment when the showerhead is reattached.
- Refer to any marked or noted positions from when you initially disassembled the showerhead to ensure correct assembly.
By following these steps, you have successfully reassembled the showerhead. The next step is to reattach the showerhead to the shower arm and test the water flow.
Step 6: Reattach the Showerhead
Now that you have reassembled the showerhead, it’s time to reconnect it to the shower arm. Follow these instructions to properly reattach the showerhead:
- Take the showerhead and align the threading on the showerhead connection with the shower arm.
- Gently hand-tighten the showerhead connection by turning it clockwise. Make sure it is securely and snugly attached.
- Use an adjustable wrench to give the connection a final firm twist, ensuring that it is tightened properly. Be careful not to overtighten and damage the showerhead or shower arm.
- Check for any leaks around the connection. If there are any leaks, try tightening or repositioning the showerhead for a better seal.
By following these steps, you have successfully reattached the showerhead to the shower arm. The final step is to test the water flow and observe the improvement in water pressure.
Read also: 9 Best Low Flow Handheld Showerhead for 2025
Step 7: Test the Water Flow
After reattaching the showerhead, it’s time to test the water flow and see if the steps you’ve taken have successfully removed the low flow. Follow these instructions to test the water flow:
- Turn on the water supply to the showerhead by adjusting the shower handle or valves.
- Step into the shower and let the water flow freely for a few minutes.
- Observe the water flow and check if there is a noticeable improvement in water pressure. Pay attention to the strength and consistency of the water flow.
- If the water flow is still weak or if you are not satisfied with the results, you may need to repeat the previous steps or consider contacting a professional plumber for further assistance.
- Make any necessary adjustments or further cleaning if you notice any issues with the water flow.
By testing the water flow, you can determine if the steps you have taken to remove the low flow from your showerhead have been successful. If you’re satisfied with the improved water pressure, congratulations! You can now enjoy a more satisfying shower experience.
Before we conclude, let’s go over some additional tips and considerations to keep in mind when dealing with low flow in showerheads.
Additional Tips and Considerations
When dealing with low flow in showerheads, there are some additional tips and considerations that can help you achieve the best results. Take note of these suggestions to enhance your experience:
- Regular maintenance: To prevent mineral buildup and keep your showerhead performing optimally, it’s recommended to clean it regularly. Depending on your water quality, a monthly or quarterly cleaning may be necessary.
- Check your water pressure: Low water pressure may not always be attributed to the showerhead alone. It’s advisable to check the overall water pressure in your home. If the water pressure is consistently low throughout the house, you may need to consult a professional plumber to address the issue.
- Consider a different showerhead: If you’ve followed the steps outlined in this article and are still not satisfied with the water flow, you may want to consider purchasing a different showerhead. Look for showerheads specifically designed for higher water pressure to ensure a more enjoyable shower experience.
- Be careful with adjustments: While trying to remove the low flow, avoid making unnecessary adjustments to the showerhead or plumbing connections. Improper adjustments can lead to leaks or damage to the showerhead and surrounding fixtures.
- Explore water-saving alternatives: If water conservation is a top priority, there are water-saving showerheads available on the market. These showerheads are designed to provide a satisfying shower experience while using less water. Consider researching and investing in a water-saving showerhead as an alternative to removing the low flow entirely.
Remember, patience and careful execution of the steps outlined in this article are key to successfully removing the low flow from your showerhead. Enjoy your revitalized shower experience!
Now that you have a better understanding of how to remove the low flow from your showerhead, you are equipped with the knowledge and tools to improve water pressure and enjoy a more satisfying shower. Follow the steps outlined in this article and don’t hesitate to seek professional help if needed. Happy showering!
Conclusion
Dealing with low flow in your showerhead can be a frustrating experience. Luckily, by following the steps outlined in this article, you can remove the low flow and enjoy a more satisfying shower. From removing the showerhead and disassembling it to cleaning the components and checking the flow restrictor, each step is crucial in restoring proper water pressure.
Remember to gather the necessary tools and equipment before starting the process. Using an adjustable wrench, bucket, soft cloth or brush, vinegar or lime-dissolving cleaner, pliers, and Teflon tape will make the job easier and more efficient.
Understanding why showerheads have low flow due to flow restrictors, mineral build-up, or faulty components is important in troubleshooting and finding the best solution. By disassembling the showerhead and cleaning each component, you can remove any debris or mineral deposits that may be obstructing the water flow.
Checking and cleaning the flow restrictor is another critical step in restoring water pressure. A clogged or blocked flow restrictor can significantly contribute to low flow. If necessary, consider replacing the flow restrictor with a new one to ensure proper functioning.
After reassembling the showerhead and reattaching it to the shower arm, it’s essential to test the water flow. Observe the improvement in water pressure and make any necessary adjustments or further cleaning if needed.
Keep in mind the additional tips and considerations mentioned in this article, such as regular maintenance, checking overall water pressure, considering a different showerhead, and exploring water-saving alternatives. These suggestions can further enhance your showering experience.
By following these steps and implementing these tips, you can successfully remove the low flow from your showerhead and enjoy invigorating and satisfying showers once again. Remember to be patient, meticulous, and mindful of any adjustments made to prevent leaks or damage.
Now that you have the knowledge and tools at your disposal, it’s time to take action and say goodbye to low flow in your showerhead. The revitalized water pressure will make your showers a delightful and rejuvenating experience.
So go ahead, follow the steps, and embark on a new journey of blissful showers. You deserve it!
Frequently Asked Questions about How To Remove The Low-Flow From A Showerhead
Was this page helpful?
At Storables.com, we guarantee accurate and reliable information. Our content, validated by Expert Board Contributors, is crafted following stringent Editorial Policies. We're committed to providing you with well-researched, expert-backed insights for all your informational needs.


0 thoughts on “How To Remove The Low-Flow From A Showerhead”