Articles
How To Remove Wall Art Stickers
Modified: December 7, 2023
Looking to remove wall art stickers? Find out the best methods and tips in our comprehensive articles to easily remove wall art stickers without damaging your walls.
(Many of the links in this article redirect to a specific reviewed product. Your purchase of these products through affiliate links helps to generate commission for Storables.com, at no extra cost. Learn more)
Introduction
Wall art stickers can be a great way to add personality and style to any space. Whether you’re looking to update your home decor or add some flair to your office, these adhesive decorations offer an easy and affordable solution. However, there may come a time when you want to remove these stickers and refresh your walls with a new design. In this article, we will guide you through the process of removing wall art stickers safely and effectively.
Removing wall art stickers requires a few simple tools and careful handling to avoid damaging the underlying surface. It’s important to follow the proper steps and take your time to ensure a clean removal without any residue left behind. With the right techniques and a little patience, you can have a blank canvas ready for a new design in no time.
Before we delve into the step-by-step process of removing wall art stickers, let’s take a look at the tools and materials you will need:
Key Takeaways:
- Easily refresh your space by safely removing wall art stickers using simple tools and techniques. Take your time, follow the steps, and unleash your creativity for a fresh new design!
- Prepare, peel, heat, clean, and add finishing touches to achieve a smooth removal process. With patience and the right tools, you can transform your walls with confidence.
Read also: 10 Superior Wall Art Stickers for 2024
Tools and Materials Needed
Before you begin removing wall art stickers, it’s important to gather all the necessary tools and materials to ensure a smooth removal process. Here’s a list of items you will need:
- Heat source (hairdryer or heat gun)
- Plastic scraper or credit card
- Adhesive remover (optional)
- Microfiber cloth or sponge
- Mild soap or cleaning solution
- Bucket or basin
- Warm water
The heat source, such as a hairdryer or heat gun, will help loosen the adhesive on the wall sticker, making it easier to remove. The plastic scraper or credit card will be used to gently lift the sticker from the surface without causing any damage. If needed, an adhesive remover can aid in dissolving any leftover residue. The microfiber cloth or sponge, along with a mild soap or cleaning solution, will help clean the surface after the sticker is removed.
Having a bucket or basin filled with warm water nearby is also recommended, as it will be used to dampen the cloth or sponge during the cleaning process. Ensure that you have all these tools and materials readily available before starting the removal process to avoid any unnecessary interruptions or delays.
Now that you have everything you need, let’s move on to the step-by-step process of removing wall art stickers.
Step 1: Preparation
Before diving into the actual removal process, it’s important to prepare the area and gather your tools to ensure a smooth and efficient process. Here’s what you need to do:
- Clean the surrounding area: Begin by cleaning the area around the wall art sticker. Dust, dirt, or grime can affect the adhesive’s removal, so use a damp cloth or sponge with mild soap to clean the surface. Allow it to dry completely before proceeding.
- Protect the surrounding surfaces: Using painter’s tape or masking tape, cover any adjacent surfaces or objects that you want to protect from heat or potential damage.
- Test the heat source: If you’re using a hairdryer or heat gun, test it on a low setting to ensure it’s working properly. Keep it at a safe distance from the wall to prevent any damage or discoloration.
By cleaning the area and protecting surrounding surfaces, you’ll create an optimal environment for a successful sticker removal. Additionally, testing your heat source will prevent any unexpected issues during the process.
Once you’ve completed these preparatory steps, you’re ready to move on to the next step: peeling off the wall art sticker.
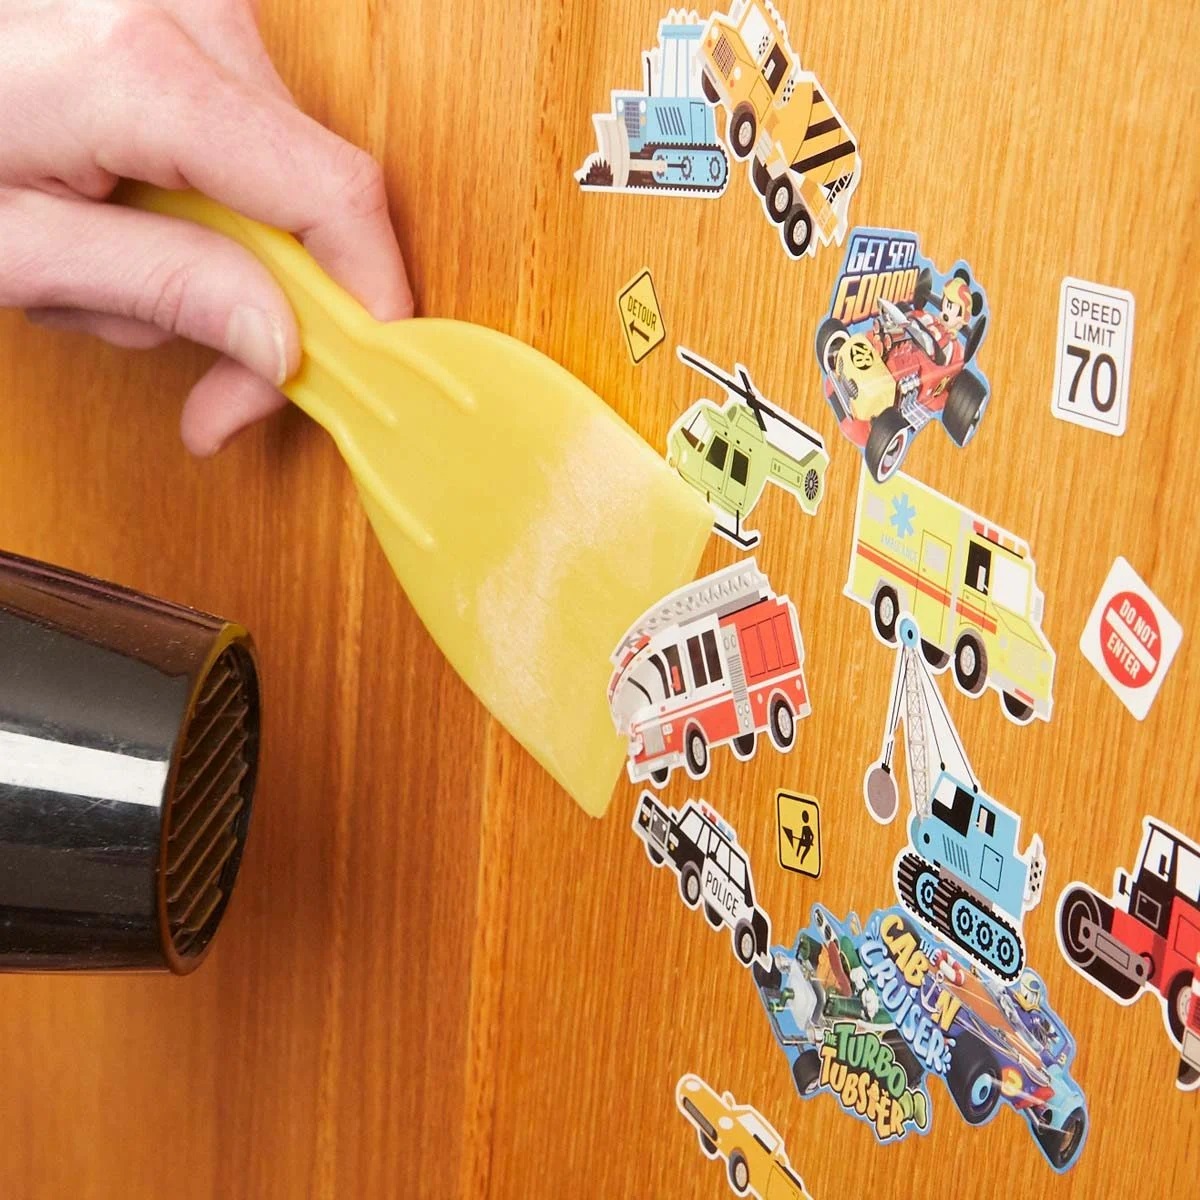
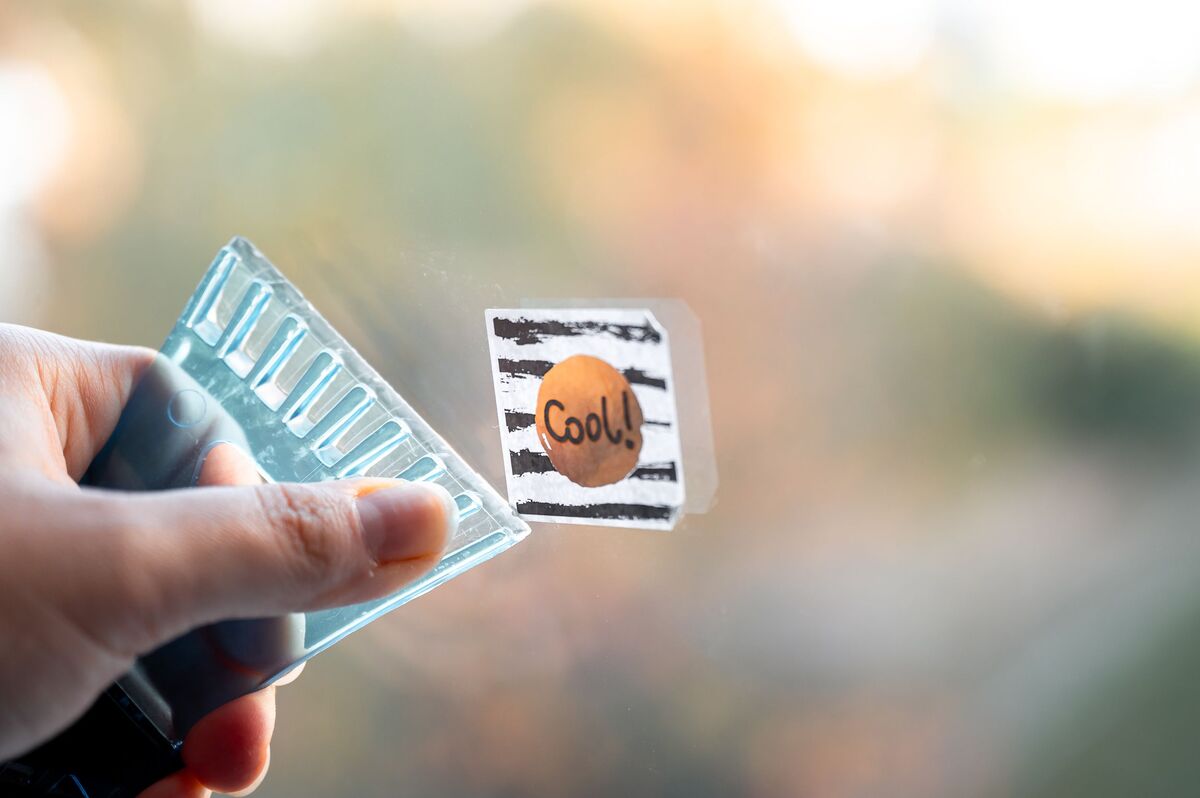
Step 2: Peeling off the Sticker
Now that you’ve prepared the area, it’s time to start peeling off the wall art sticker. Follow these steps:
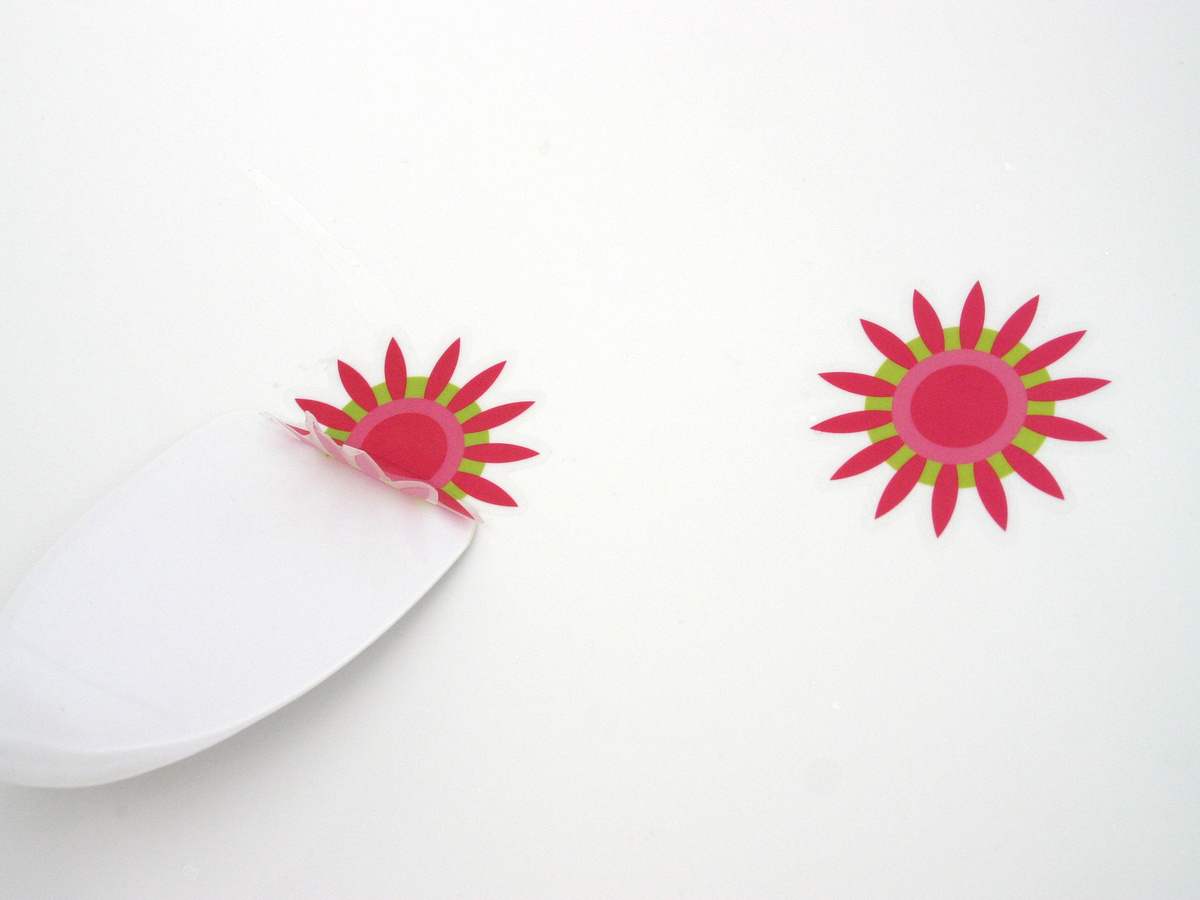
- Locate a corner or edge: Begin by finding a corner or edge of the sticker. It’s usually best to start from the top corner or edge.
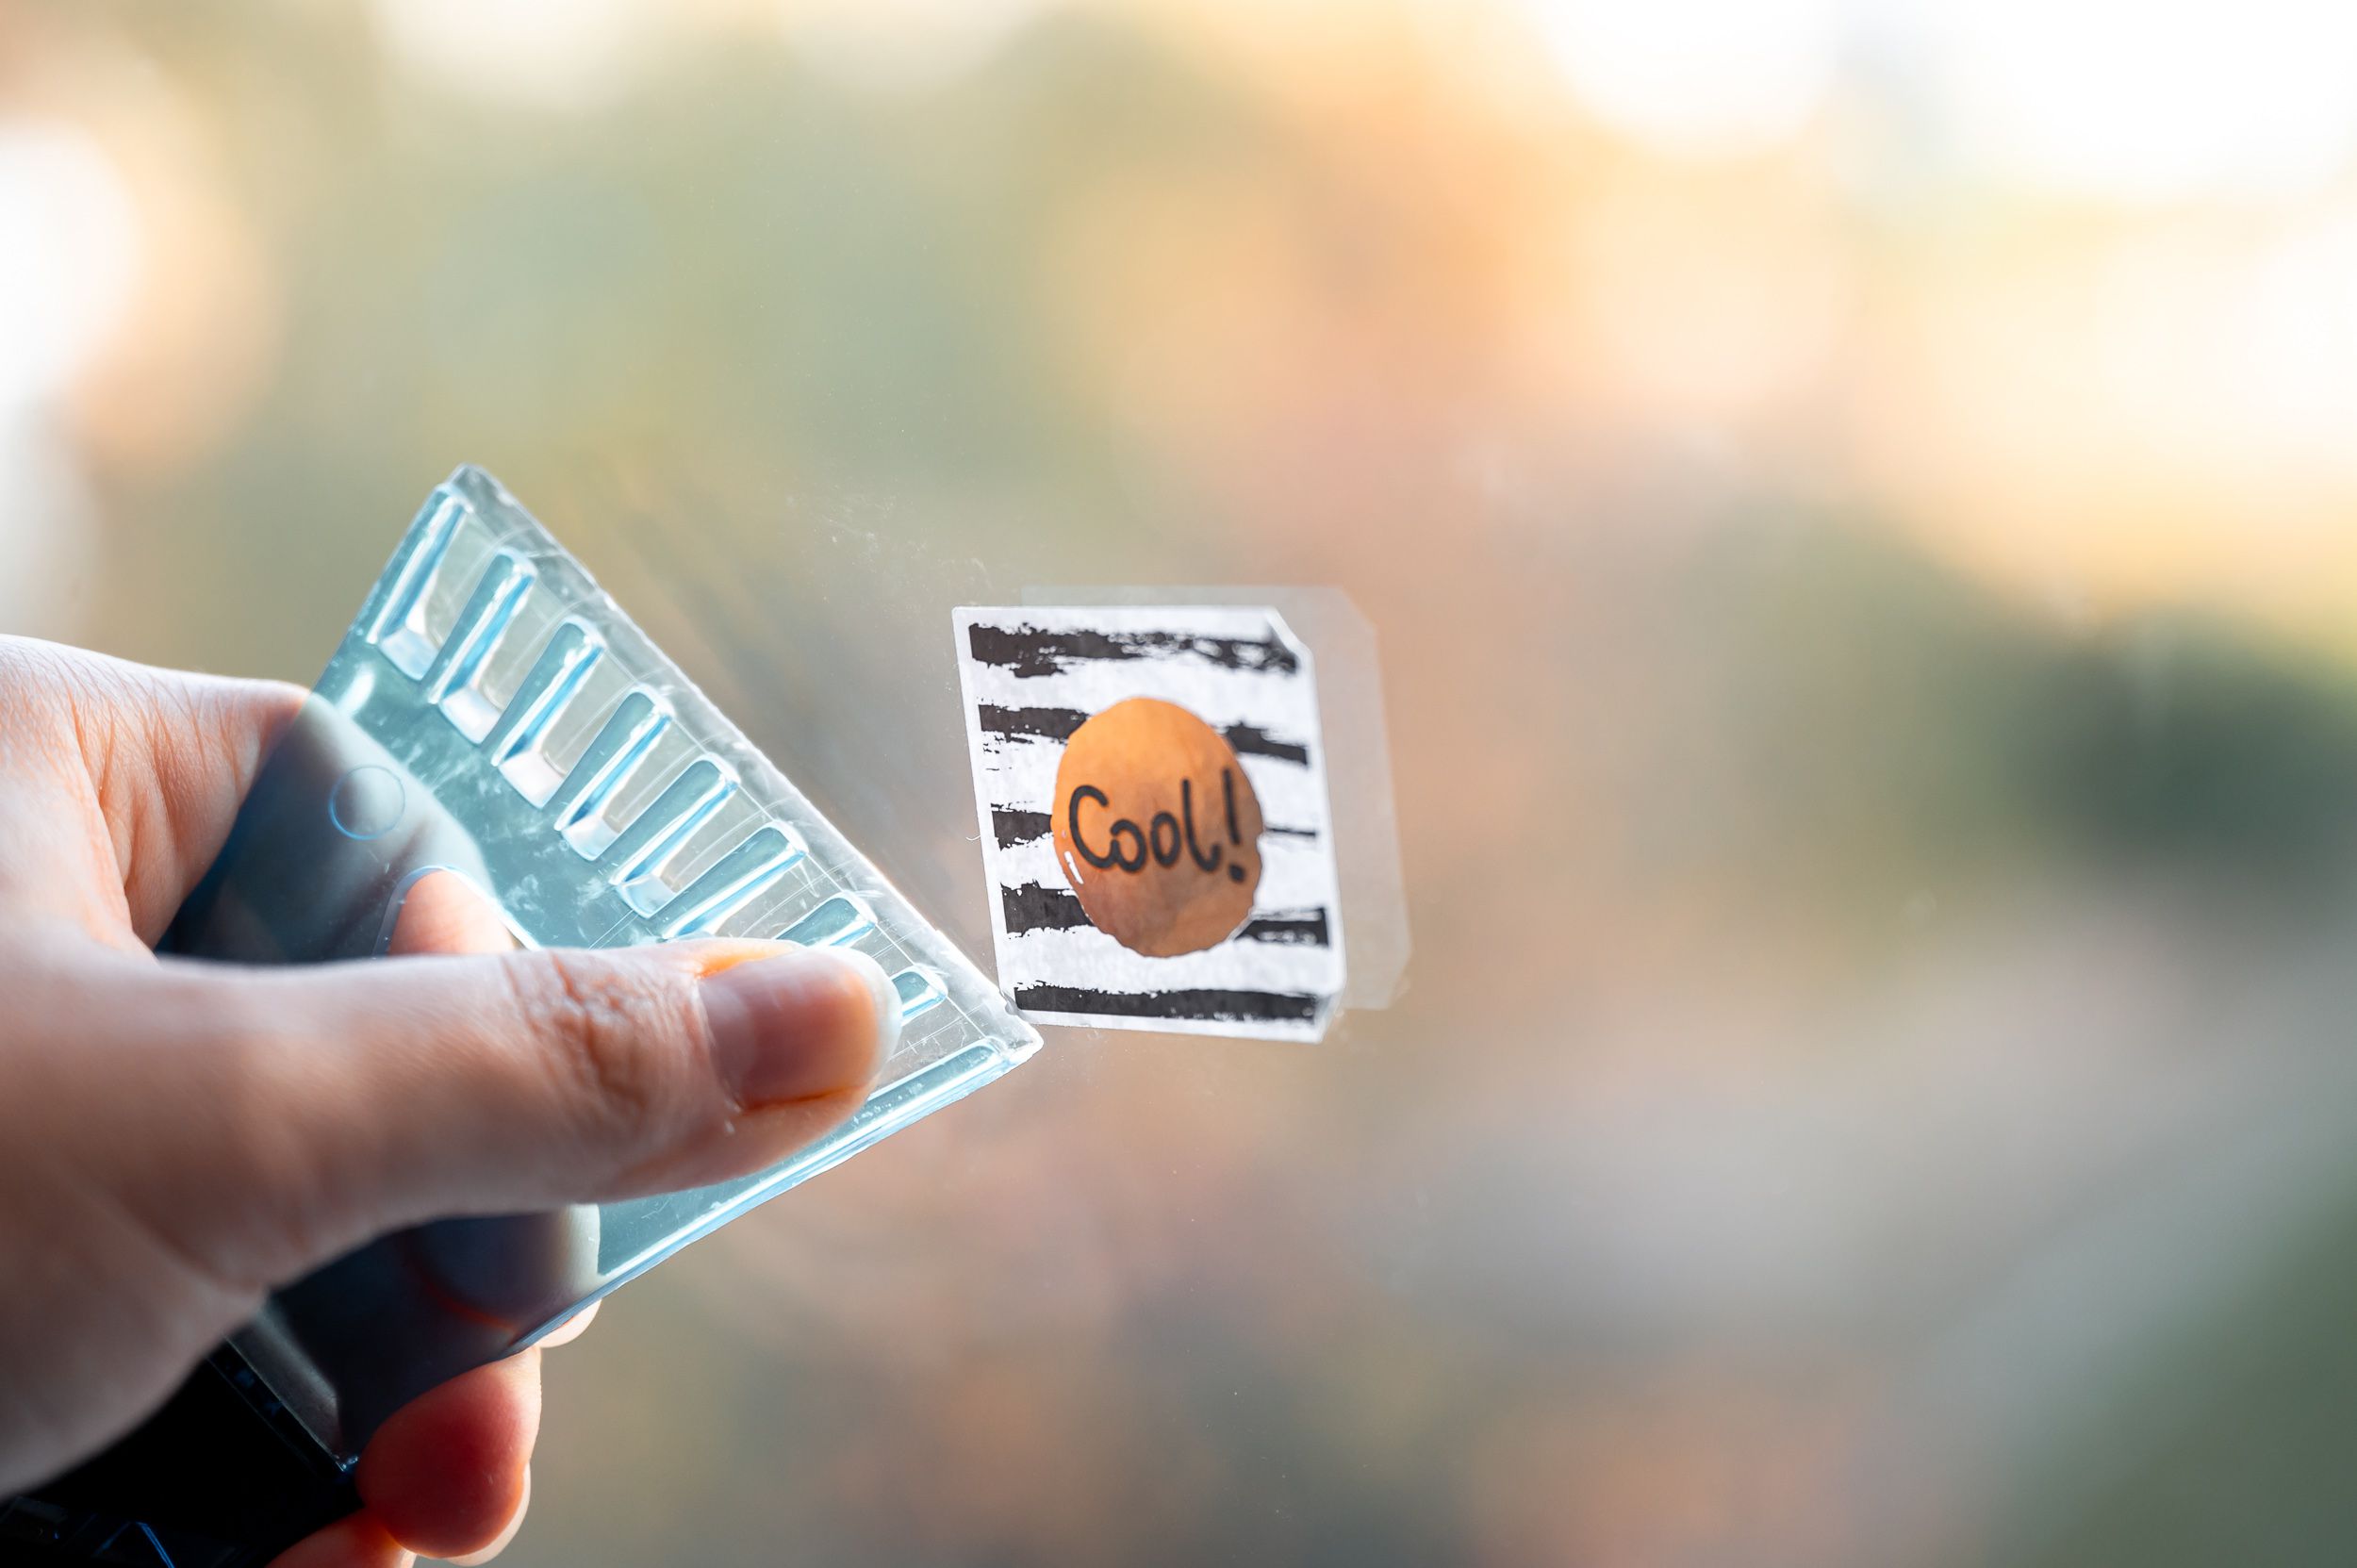
- Gently lift the sticker: Using your fingernail or a plastic scraper, carefully lift the corner of the sticker. Be cautious not to apply too much pressure, as it may damage the wall surface.
- Slowly peel the sticker: Once the corner is lifted, start peeling the sticker slowly. Gradually work your way across, parallel to the wall surface. Apply even pressure while pulling the sticker away from the wall.
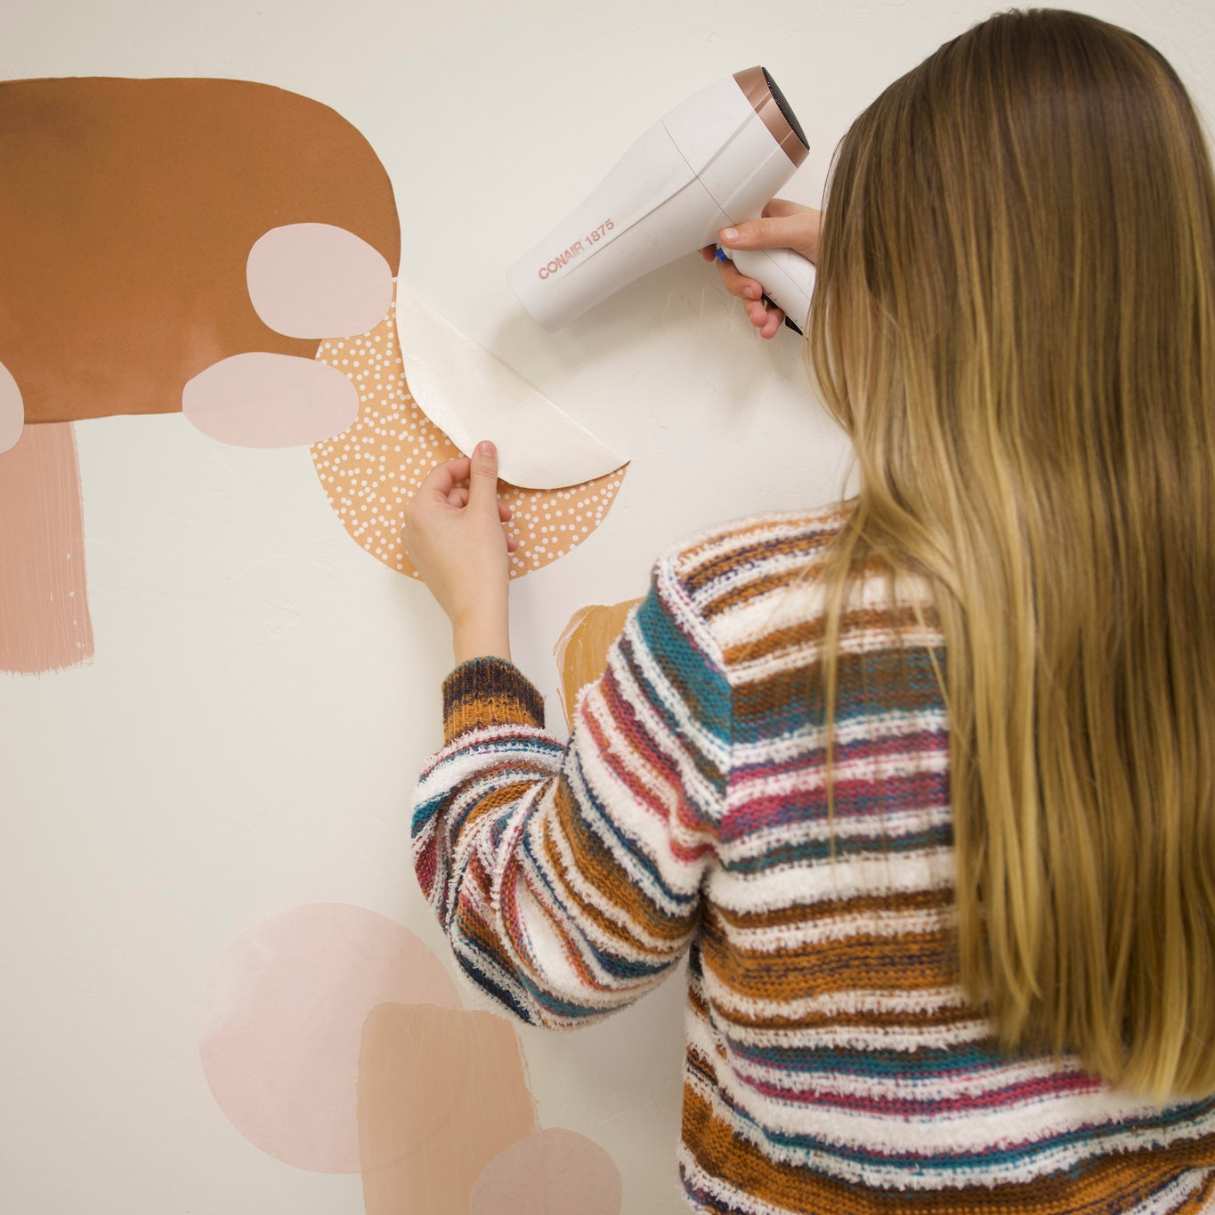
- Use heat if necessary: If the sticker is stubborn or doesn’t come off easily, apply heat to soften the adhesive. Hold the heat source a few inches away from the sticker and move it back and forth to warm the area. This will make the sticker more pliable and easier to peel off.
- Repeat the process: Continue peeling off the rest of the sticker, always starting from the corner or edge and gradually working across.
Remember to take your time and be patient during this process. Rushing may cause the sticker to tear or leave adhesive residue on the wall. If necessary, reapply heat to stubborn areas and gently peel off the sticker in smaller pieces.
Once you’ve successfully peeled off the wall art sticker, it’s time to move on to step 3: heating the sticker to remove any residue that may be left behind.
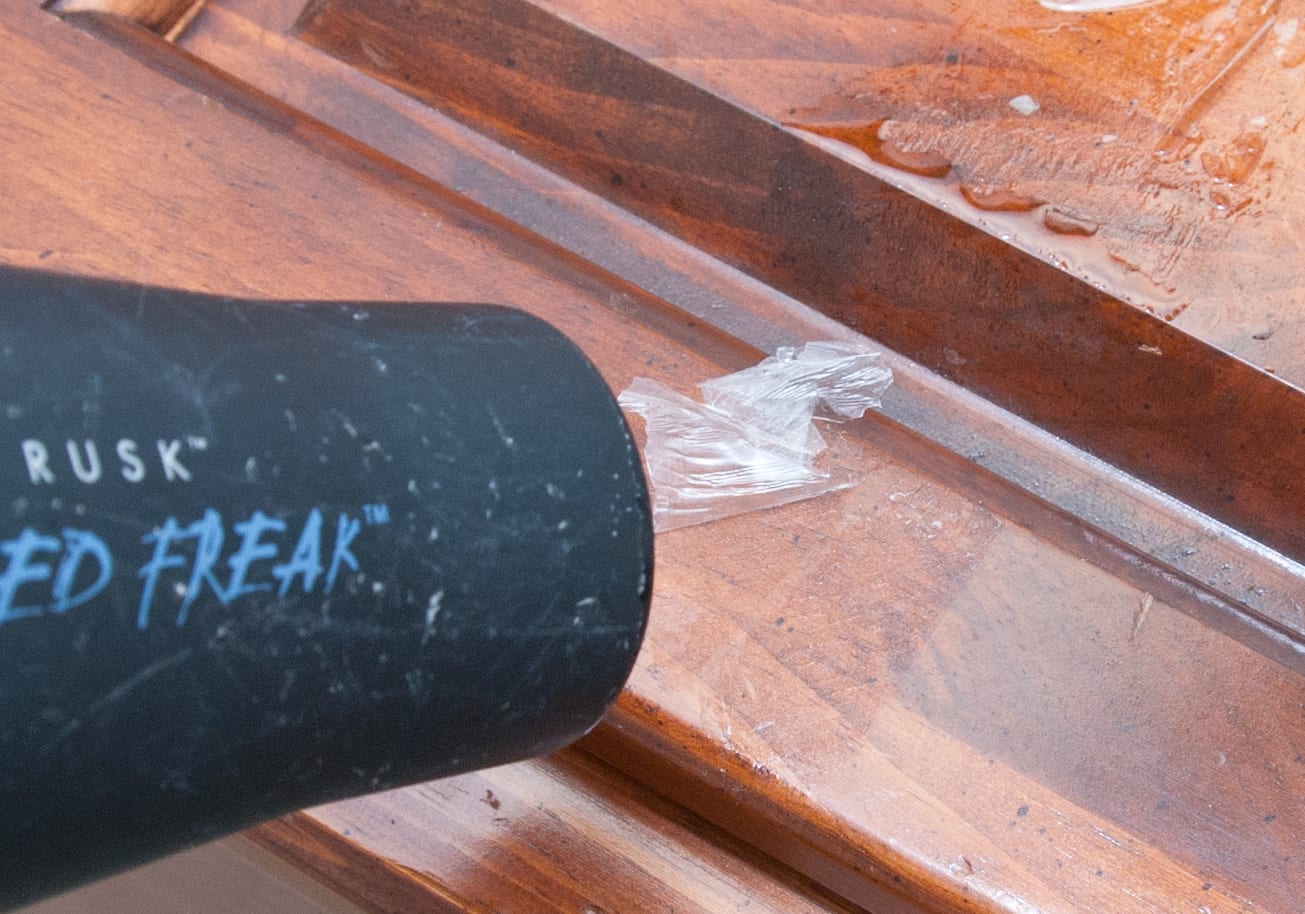
Step 3: Heating the Sticker
After peeling off the wall art sticker, there may still be some adhesive residue left on the wall. In step 3, we’ll use heat to soften and remove this residue. Here’s what you need to do:
- Prepare your heat source: If you were using a hairdryer or heat gun during the peeling process, continue using the same heat source. Ensure it’s set on a low to medium heat setting.
- Heat the residue area: Hold the heat source a few inches away from the residue area and move it in a back-and-forth motion. The heat will soften the adhesive residue, making it easier to remove.
- Monitor the temperature: Be careful not to overheat the wall. Keep the heat source moving and avoid prolonged exposure to a single spot to avoid damaging the paint or surface.
- Test removal with a scraper: After heating the residue, test its softness by gently scraping it with a plastic scraper or credit card. If it easily lifts off the wall, proceed with removing the residue. If it’s still stubborn, continue applying heat and testing until it softens.
It’s important to note that not all stickers will leave behind adhesive residue. Some stickers are designed to be easily removable without leaving any marks. However, if you do encounter residue, using heat in this step will significantly aid in its removal.
Once you’ve successfully softened the adhesive residue, it’s time to move on to step 4: removing the sticker residue from the wall.
Use a hairdryer to gently heat the sticker, then peel it off slowly. Any residue can be removed with a mild adhesive remover or soapy water.
Read more: How To Remove Stickers From Glassware
Step 4: Removing the Sticker
Now that you’ve softened the adhesive residue with heat, it’s time to remove the remaining sticker residue from the wall. Follow these steps:
- Scrape off the residue: Using a plastic scraper or credit card, gently scrape off the softened residue from the wall’s surface. Start from one side and work your way across, applying moderate pressure to remove the residue.
- Be cautious with delicate surfaces: If you’re working on a delicate surface, such as painted or wallpapered walls, be extra careful while scraping to avoid any damage. Test a small area first to ensure there is no damage or discoloration.
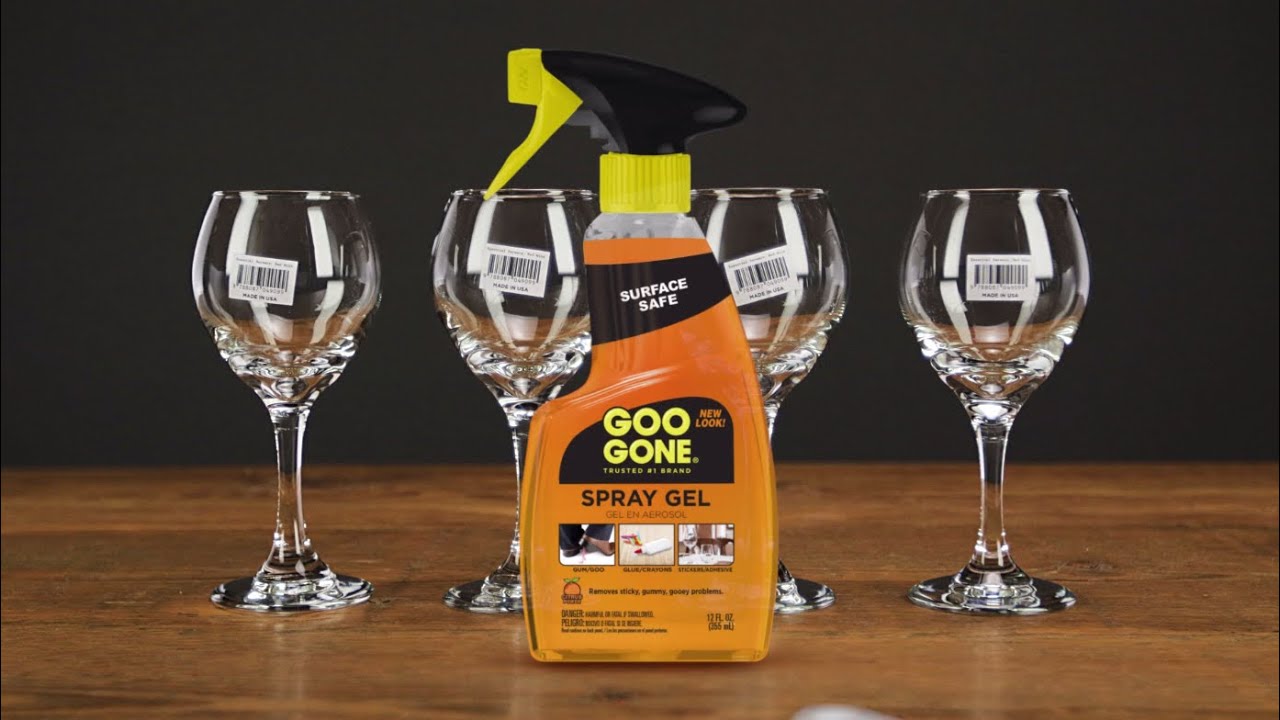
- Use adhesive remover if necessary: If there are stubborn residue spots that do not come off with scraping alone, you can use an adhesive remover. Apply a small amount of adhesive remover to a cloth or sponge and gently rub the residue until it dissolves. Be sure to follow the instructions on the adhesive remover product.
- Continue until the residue is gone: Repeat the scraping and adhesive remover process as needed until all the sticker residue is removed. Take your time and be patient, especially with stubborn spots.
It’s important to exercise caution while removing the sticker residue to prevent any damage to the wall. If you encounter resistance or notice any damage occurring, stop immediately and reevaluate your approach.
Once all the residue is successfully removed, let’s move on to step 5: cleaning the surface to ensure a smooth and pristine finish.
Step 5: Cleaning the Surface
After removing the sticker residue, it’s important to clean the surface to remove any remaining dirt, adhesive, or cleaning solutions. Here’s how you can effectively clean the wall:
- Prepare a cleaning solution: In a bucket or basin, mix a mild soap or cleaning solution with warm water. Ensure that the solution is not too strong to avoid damaging the wall.
- Dampen a microfiber cloth or sponge: Dip a clean microfiber cloth or sponge into the cleaning solution. Wring out any excess liquid to avoid soaking the wall.
- Gently clean the wall: Starting from the top and working your way down, gently wipe the wall surface with the damp cloth or sponge. Use gentle circular motions to remove any remaining residue or dirt from the sticker removal process.
- Rinse with fresh water: Once you’ve cleaned the wall, rinse the cloth or sponge with fresh water and wipe the wall again to remove any soap or cleaning solution residue.
- Allow the wall to dry: Give the wall enough time to air dry naturally. Avoid using a hairdryer or other sources of heat as it may cause damage to the freshly cleaned surface.
By following these steps, you’ll ensure that your wall is left clean and ready for a new design or decoration. Keep in mind that the cleaning process may vary depending on the type of wall surface and any specific cleaning instructions provided by the manufacturers.
Now that you’ve successfully cleaned the surface, let’s move on to step 6: finishing touches to complete the sticker removal process.
Step 6: Finishing Touches
Now that you’ve completed the sticker removal and cleaning process, it’s time to add some finishing touches to make your wall look fresh and ready for a new design. Follow these final steps:
- Inspect the wall: Take a close look at the wall to ensure that all sticker residue has been removed and the surface is clean. If you notice any remaining residue, repeat the cleaning process in those specific areas.
- Touch up the paint if needed: In some cases, peeling off a wall art sticker may cause minor damage to the paint. If you notice any areas where the paint has chipped or peeled, consider touching up those spots with a matching paint color to restore the wall’s appearance.
- Apply a primer if necessary: If you’re planning to paint or apply another wall art sticker, it may be beneficial to apply a primer to the wall. This will create a smooth and even surface for your new design and improve its longevity.
- Get creative with your new design: With the old sticker removed, it’s time to unleash your creativity and explore new design possibilities. Consider adding a fresh wall art sticker, painting a mural, or simply rearranging your decor to give the space a new look and feel.
By paying attention to these finishing touches, you can ensure that your wall is in pristine condition and ready for any new design or decoration you have in mind.
With these six steps, you now have a comprehensive guide on how to remove wall art stickers. Remember to take your time, follow the instructions carefully, and be gentle to avoid any damage to the wall’s surface. With patience and the right techniques, you can achieve a clean and smooth removal process.
Now go ahead and give your walls a fresh start with your newfound knowledge!
Conclusion
Removing wall art stickers doesn’t have to be a daunting task. With the right tools, techniques, and a little bit of patience, you can easily remove these adhesive decorations and refresh your walls with a new design. By following the step-by-step process outlined in this article, you can ensure a safe and effective removal process while maintaining the integrity of your wall surfaces.
Remember to start with preparation, ensuring the area is clean and protected. Use a heat source to peel off the sticker and soften any residue. Take your time and be cautious to avoid damage to delicate surfaces. Scrub off any remaining residue and clean the wall surface with a mild soap solution. Finish off by inspecting the wall, touching up the paint if needed, and getting creative with your new design.
By following these steps, you can remove wall art stickers and prepare your walls for a fresh start. Whether you’re redecorating your home, office, or any other space, this process will give you the freedom to update your surroundings and express your personal style.
Remember to always consider the specific recommendations provided by the sticker manufacturer and adjust the process accordingly for any unique or delicate surfaces. Safety should be a priority throughout the removal process.
Now that you have the knowledge and tools to remove wall art stickers, it’s time to unleash your creativity and transform your walls with ease and confidence. Enjoy the process and have fun redecorating!
Frequently Asked Questions about How To Remove Wall Art Stickers
Was this page helpful?
At Storables.com, we guarantee accurate and reliable information. Our content, validated by Expert Board Contributors, is crafted following stringent Editorial Policies. We're committed to providing you with well-researched, expert-backed insights for all your informational needs.


0 thoughts on “How To Remove Wall Art Stickers”