
Articles
How To Make Glass Wall Art
Modified: October 19, 2024
Learn how to create stunning glass wall art with our informative articles. Discover the techniques and inspiration you need to bring your artistic vision to life.
(Many of the links in this article redirect to a specific reviewed product. Your purchase of these products through affiliate links helps to generate commission for Storables.com, at no extra cost. Learn more)
Introduction
Glass wall art adds a touch of elegance and sophistication to any space. Whether it’s in your home, office, or a commercial establishment, a beautiful glass artwork can become the focal point that enhances the overall aesthetic appeal. Creating your own glass wall art allows you to showcase your creativity and personal style, while also providing a unique piece of decor.
In this article, we will guide you through the step-by-step process of making your own glass wall art. From choosing the right glass to designing and painting your artwork, we will cover all the essential aspects to help you create a stunning piece of art.
Before we dive into the process, let’s take a look at the materials you will need for this project.
Key Takeaways:
- Creating glass wall art is a multi-step process that involves choosing the right glass, designing, painting, and sealing the artwork. It’s a unique way to express creativity and add elegance to any space.
- From selecting materials to mounting the finished piece, making glass wall art is a rewarding journey that allows for personal expression and the creation of a stunning, one-of-a-kind decor.
Read more: How To Make Plaster Wall Art
Materials Needed
Before you begin creating your glass wall art, it’s important to gather all the necessary materials. Here’s a list of items you will need:
- Glass: Choose a suitable piece of glass for your artwork. Consider the size, shape, and thickness based on your design preferences.
- Glass cutter: A glass cutter will be required to cut the glass into your desired shape.
- Safety goggles and gloves: Protect your eyes and hands while working with glass.
- Design template: Create or find a design template that will serve as the basis for your artwork.
- Acrylic paints: Invest in high-quality acrylic paints in various colors to bring your design to life.
- Paintbrushes: Different sizes and types of paintbrushes will allow you to create fine details and brush strokes.
- Sealer: A sealer will protect your artwork and enhance its durability.
- Mounting hardware: Depending on the size and weight of your artwork, you may need mounting hardware to secure it to the wall.
Make sure to gather all these materials before you start, as they are essential for the successful completion of your glass wall art.
Step 1: Choosing the Glass
The first step in creating your glass wall art is selecting the right type of glass. There are various options available, each with its own unique characteristics.
When choosing the glass, consider the size and shape of your artwork. If you have a specific design in mind, make sure the glass can accommodate it. You can find glass in different thicknesses, such as float glass or tempered glass, depending on the level of durability you desire.
Another aspect to consider is the finish of the glass. You can choose from options like clear glass, frosted glass, or textured glass. Each finish gives a different aesthetic appeal to your artwork, so select one that complements your design.
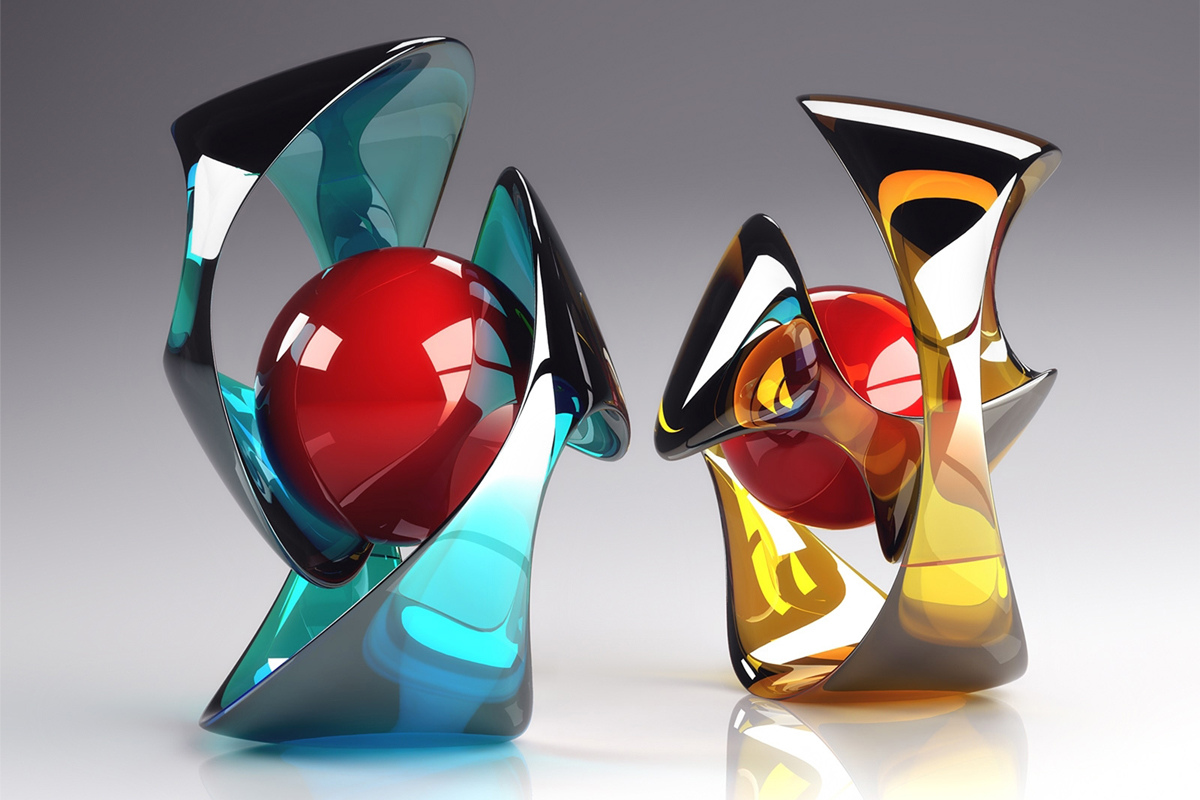
Additionally, think about how the glass will interact with light. Some types of glass, like stained glass or colored glass, can create stunning effects when light passes through them. This can add an extra element of beauty to your artwork.
If you want a more unique and personalized touch, you can also consider using recycled glass or repurposing materials like old windows or glass panels. This not only adds an eco-friendly element to your creation but also adds character and history to your artwork.
Take your time in choosing the right glass for your project. Consider your design, style preferences, and the overall look you want to achieve. Once you have selected the glass, you are ready to move on to the next step: preparing the glass.
Step 2: Preparing the Glass
Once you have chosen the perfect glass for your wall art, the next step is to prepare it for the design and painting process. This involves cleaning the glass and ensuring its surface is smooth and free of any imperfections.
Start by cleaning the glass thoroughly using a glass cleaner or a solution of warm water and mild soap. Use a lint-free cloth or sponge to wipe away any dirt, dust, or fingerprints. It’s crucial to have a clean surface to work on, as any particles or smudges can interfere with the adhesion of paints or other materials.
After cleaning, inspect the glass for any scratches or imperfections. If you notice any minor flaws, you can try to buff them out using a glass polishing compound. For deeper scratches or damages, it may be necessary to sand them down or consider using a different piece of glass.
Next, ensure that the edges of the glass are smooth. You can use a glass grinder or a sanding block to carefully smooth out any rough edges. This not only makes the glass safer to handle but also provides a clean and professional-looking finish to your artwork.
Once the glass is cleaned and prepped, make sure to handle it with care to avoid any smudges or fingerprints. Use gloves or hold the glass by the edges to minimize contact with the surface.
With the glass now prepared, it’s time to move on to the next step: designing your artwork.
Step 3: Designing the Artwork
Designing your artwork is an exciting and creative step in the glass wall art process. This is where you can let your imagination run wild and create a design that reflects your personal style and aesthetic preferences.
Start by brainstorming ideas and gathering inspiration. Look for reference images, patterns, or themes that resonate with you. You can sketch out your ideas on paper or use design software to create a digital mock-up of your artwork.
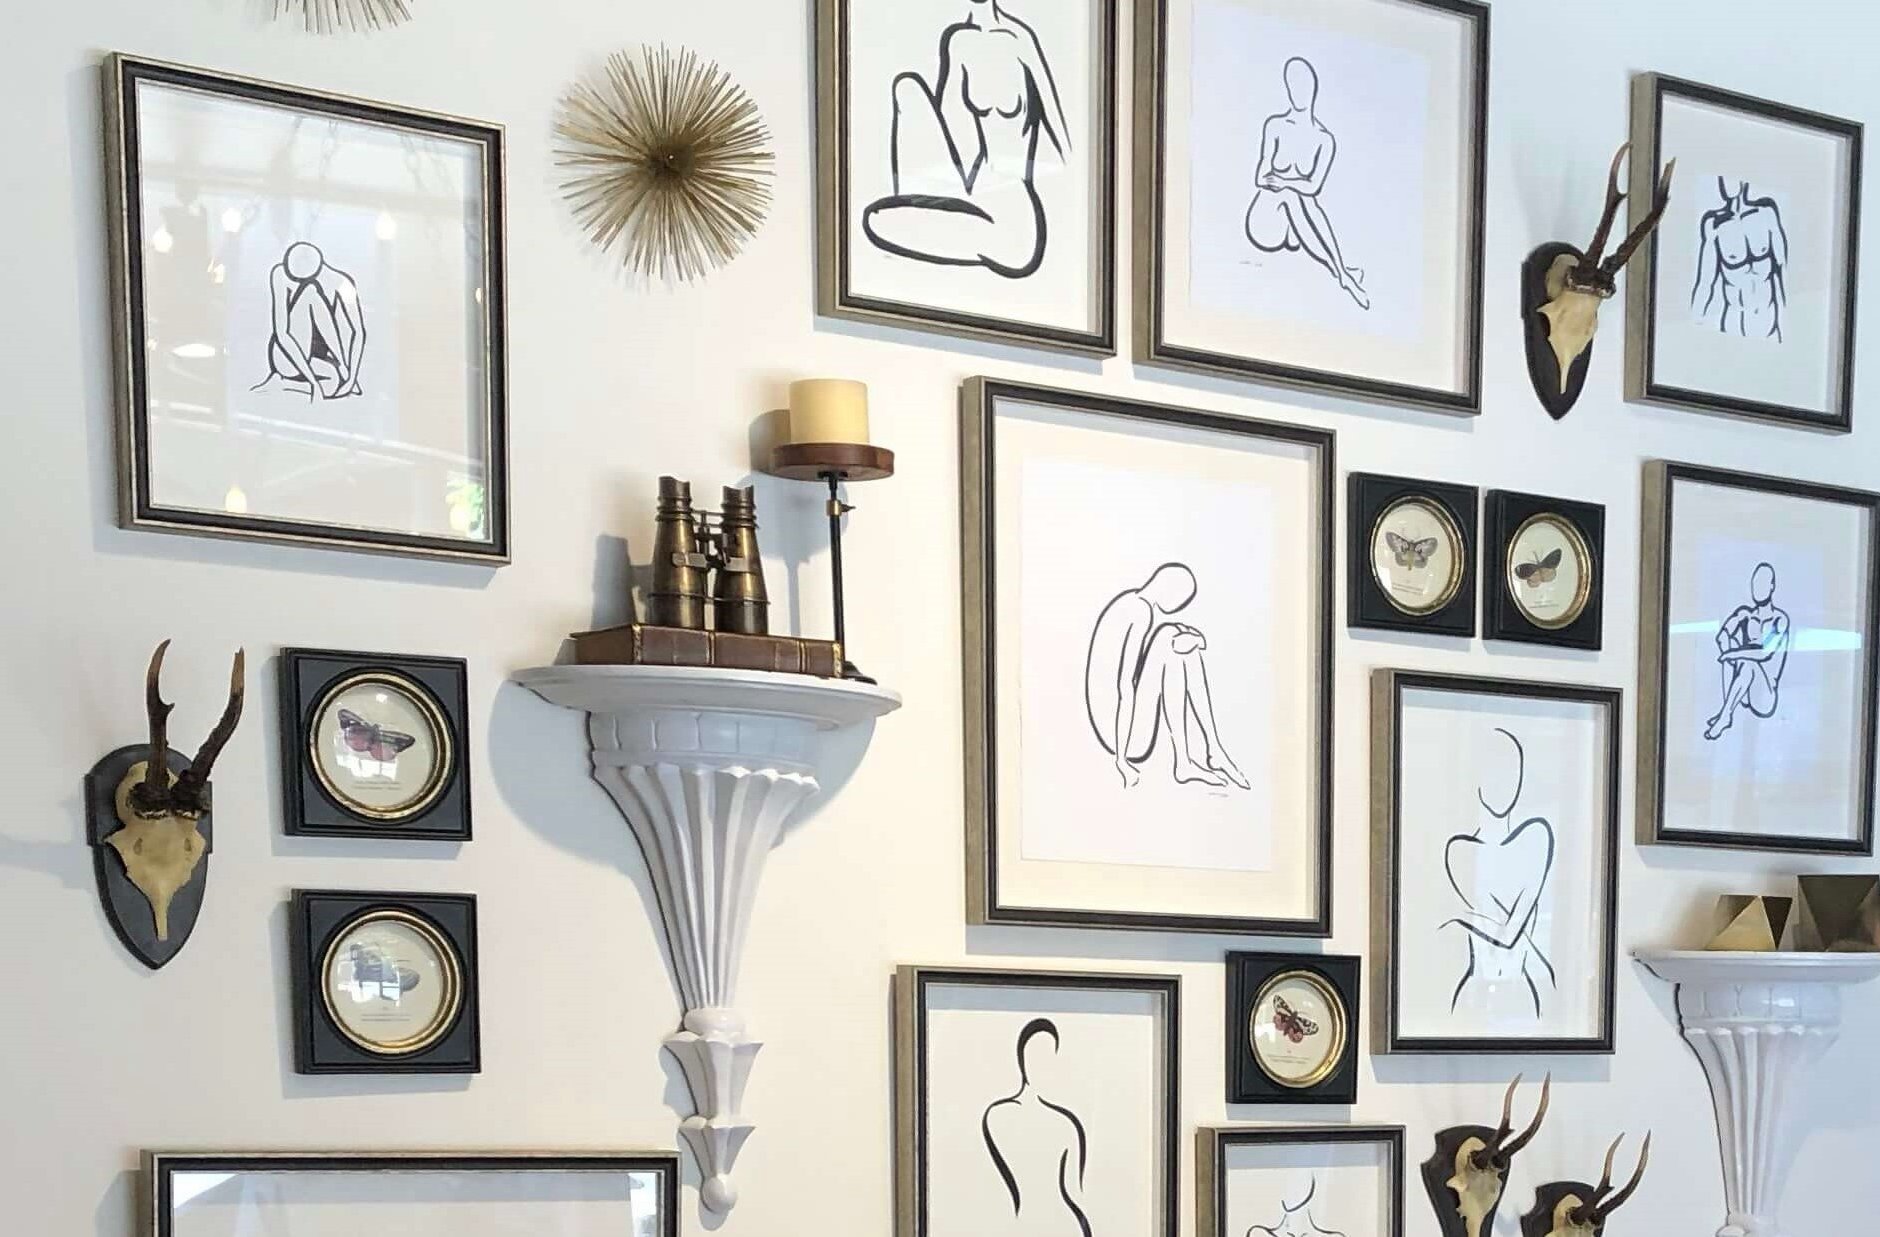
Consider the placement of your glass wall art. Will it be a standalone piece or part of a larger composition? Take into account the dimensions and shape of the glass, as well as any specific areas or focal points you want to highlight.
When designing, keep in mind the characteristics and limitations of the medium. Glass has a translucent quality, so think about how light will interact with your artwork. You can incorporate elements like gradients, textures, or layering to create depth and visual interest.
Experiment with different shapes, lines, and forms to create a visually appealing composition. Remember that simplicity can often be more impactful, so don’t feel the need to overcrowd the design. Give your artwork room to breathe and allow the beauty of the glass to shine through.
Once you have finalized your design, you can transfer it onto the glass. This can be done using various methods such as tracing, stenciling, or using adhesive templates. Choose the technique that works best for your design and comfort level.
With your design transferred, you are now ready to move on to the next step: painting the glass.
Read more: How To Make Metal Wall Art
Step 4: Transferring the Design onto the Glass
Now that you have finalized your design, it’s time to transfer it onto the glass. This step ensures that you have a clear outline to work with when you begin painting.
There are several methods you can use to transfer your design onto the glass:
- Tracing: Place your design template underneath the glass and trace the outline using a marker or a glass paint pen. This method is straightforward and great for simple designs.
- Stenciling: Cut out your design from a stencil material, such as acetate or cardboard. Secure the stencil onto the glass and use a sponge or brush to apply paint through the cut-out areas. This allows for precise and consistent results.
- Adhesive templates: Create or purchase adhesive templates that are specifically designed for glass painting. Stick the template onto the glass and carefully peel away the backing, leaving the design in place. This method provides clean edges and allows for intricate designs.
Choose the method that best suits your design and comfort level. Remember to handle the glass with care during the transfer process, as any smudges or mistakes can be difficult to remove later on.
Once you have successfully transferred the design onto the glass, it’s time to unleash your creativity and start painting!
Edit: wrap the paragraphs with
. Keep the rest as is.
When creating glass wall art, be sure to use a strong adhesive specifically designed for glass to ensure that your pieces stay securely in place.
Step 5: Painting the Glass
Now comes the fun part – painting your design onto the glass! This step allows you to bring your artwork to life and add vibrant colors and textures to your glass wall art.
Before you begin painting, ensure that you have all the necessary materials, including high-quality acrylic paints, paintbrushes of various sizes, and a palette or mixing surface for your paints.
Start by applying a base coat of paint to the areas of the design that you want to fill in with color. Use a larger brush for larger areas and a smaller brush for more detailed sections. Be gentle and avoid applying too much pressure on the glass to prevent any smudging or distortion of the design.
Once the base coat is applied, you can move on to adding layers and details. Experiment with different painting techniques such as blending, shading, and layering to add depth and dimension to your artwork. Allow each layer to dry before applying additional coats of paint.
If you make any mistakes or want to make changes to your design, don’t worry! Acrylic paints are forgiving and can be easily corrected. Simply wipe away the paint with a damp cloth or cotton swab before it dries, and you can start again.
Remember to take breaks and step back to observe your progress. This will help you evaluate the composition and make any necessary adjustments. Don’t be afraid to let your creativity take the lead and explore different techniques or color combinations.
Once you are satisfied with your painted design, let it dry completely before moving on to the next step.
Step 6: Adding Details and Enhancements
With the base painting complete, it’s time to add the finishing touches and enhancements to your glass wall art. This step allows you to add intricate details, textures, or special effects that will elevate the overall look of your artwork.
Consider the elements of your design that could benefit from additional details. This could include highlights, shadows, texture lines, or any other embellishments that will make your artwork stand out.
Use a smaller paintbrush or a fine-tip paint pen to carefully add these details. Take your time and work with precision to ensure that the lines are clean and the details are well-executed.
Explore different techniques such as stippling, cross-hatching, or dry brushing to create interesting textures and visual effects. These can add depth and dimension to your artwork, making it more visually captivating.
In addition to painting, you can also consider incorporating other materials into your glass wall art. These can include items like glass beads, sequins, glitter, or even small pieces of mirror. These embellishments can be carefully glued onto the glass using a clear adhesive and can enhance the overall look of your artwork.
Remember to step back and evaluate your artwork as you add these details and enhancements. Consider the overall composition and ensure that the added elements complement the existing design.
Once you are satisfied with the added details, allow any glue or additional paint layers to dry completely before moving on to the next step.
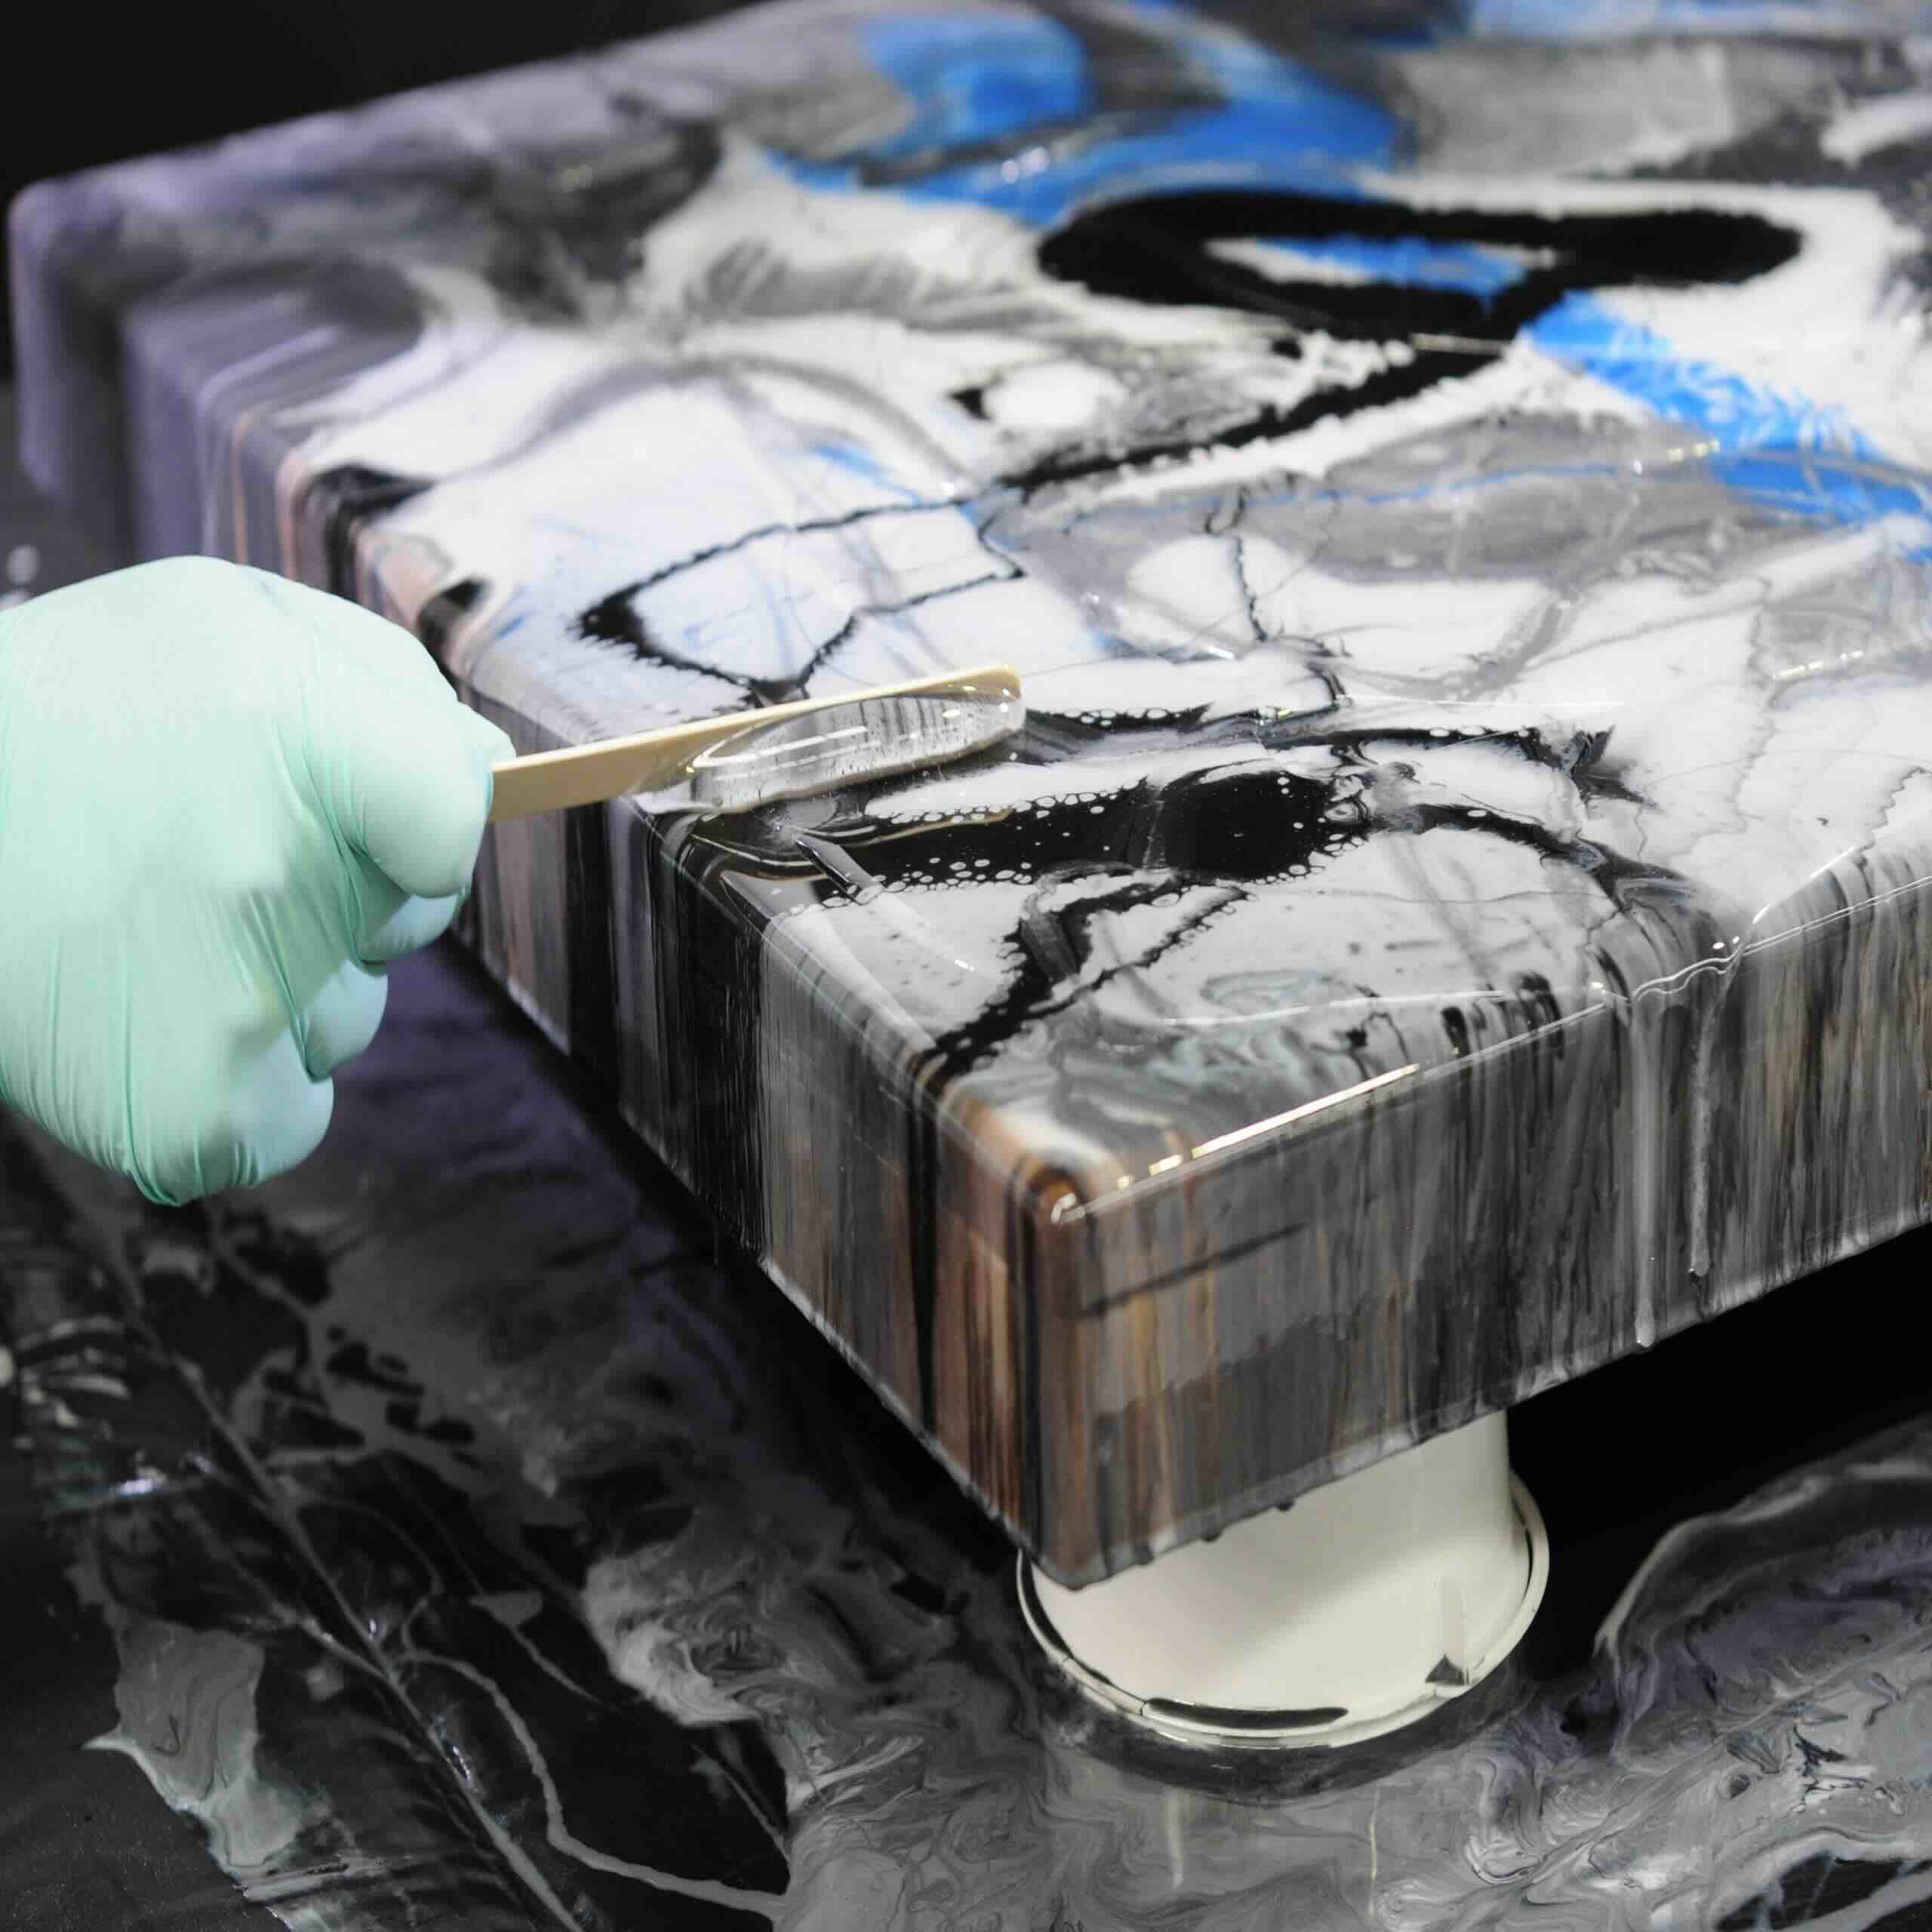
Step 7: Sealing the Artwork
After putting in all the hard work to create your glass wall art, it’s important to protect and preserve it for years to come. This is where sealing the artwork comes into play.
Sealing your glass wall art not only enhances its durability but also provides a protective barrier against dust, dirt, and moisture. It helps to prevent any fading or peeling of the paint over time.
There are various sealers available specifically designed for glass art. Look for a sealer that is compatible with acrylic paints and is non-yellowing to ensure the longevity of your artwork.
Before applying the sealer, make sure that the painted surface is clean and free of any dust or debris. Use a soft, lint-free cloth to gently wipe off any loose particles.
Follow the instructions on your chosen sealer, as application methods and drying times may vary. It’s important to apply the sealer evenly and avoid any pooling or excessive coating, as this could affect the clarity of your artwork.
Once the sealer is applied, allow it to dry completely according to the manufacturer’s instructions. This may take a few hours or even overnight, so be patient and avoid touching or moving the artwork during this time.
After the sealer has dried, inspect your artwork for any areas that may need touch-ups or additional layers of sealer. If necessary, apply another coat of sealer to ensure thorough coverage and protection.
Once the sealer is completely dry, your glass wall art is ready to be displayed and enjoyed!
Read more: How To Make Textured Wall Art
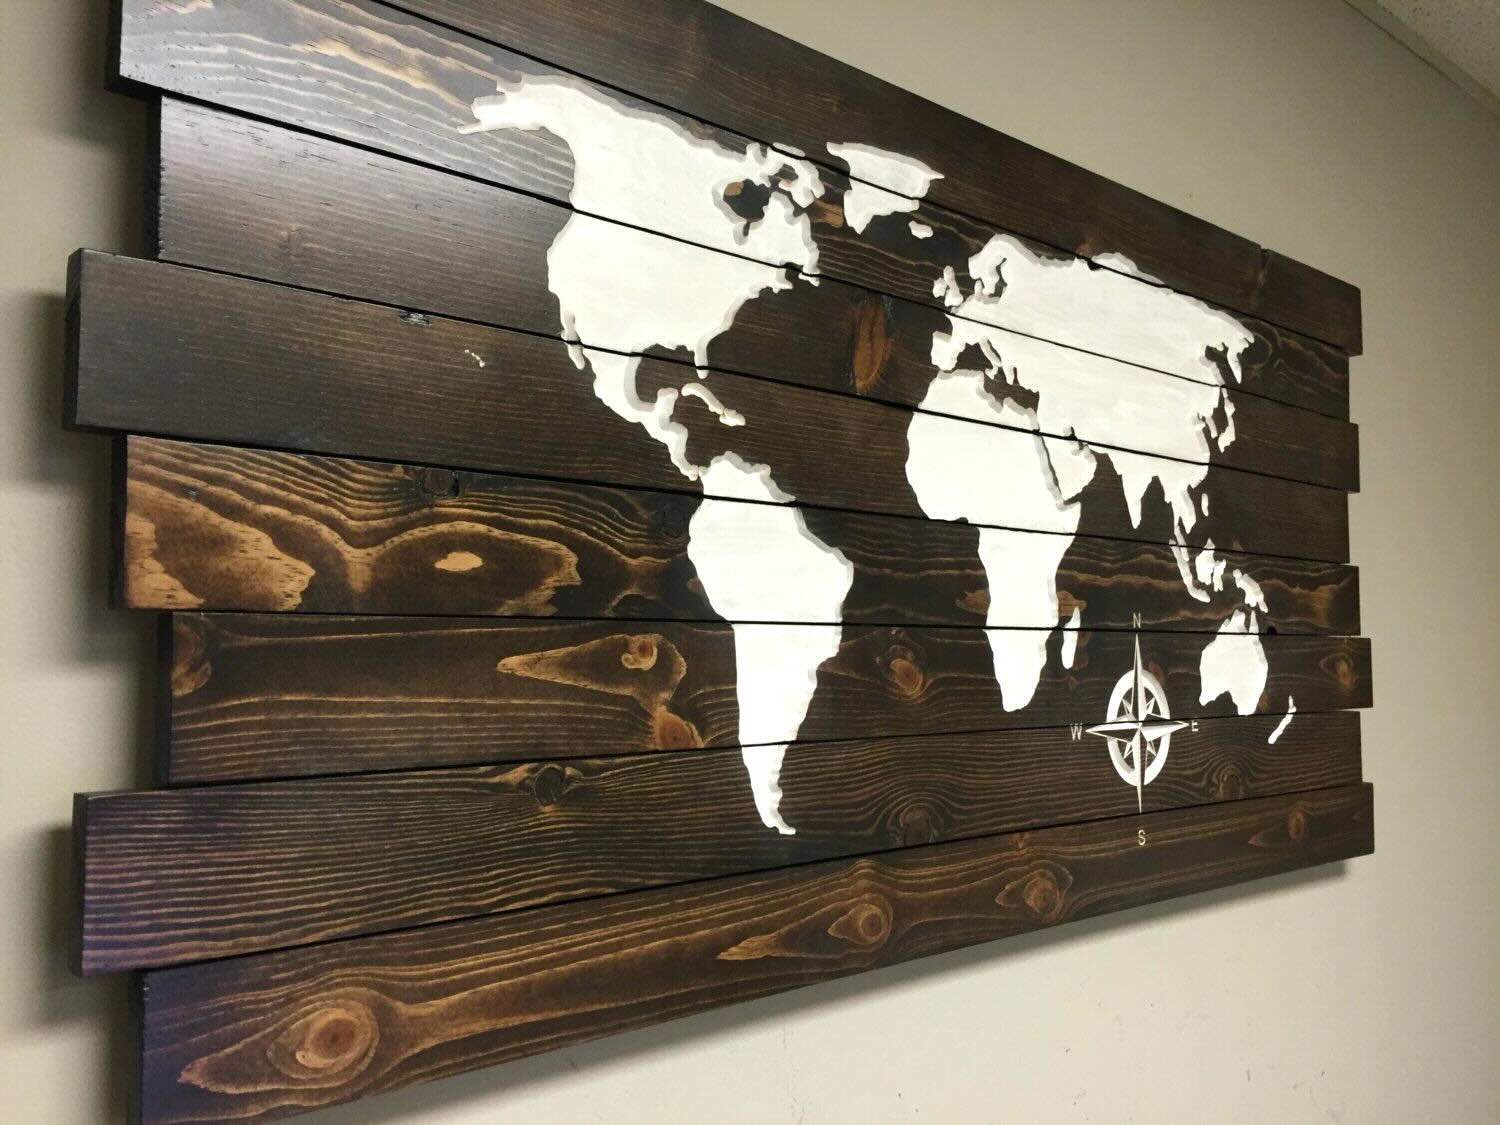
Step 8: Mounting the Glass Wall Art
Now that your glass wall art is complete and protected, it’s time to mount it on the wall and showcase it for everyone to admire. Mounting your artwork properly ensures that it is securely held in place and displayed in the best way possible.
Begin by measuring and marking the desired placement of your artwork on the wall. Take into consideration the size and weight of the glass, as well as the overall aesthetics and balance of the space.
Depending on the size and weight of your artwork, you may need to use appropriate mounting hardware. This can include picture hanging hooks, wall anchors, or specialized glass mounting brackets.
For smaller and lighter pieces, picture hanging hooks or adhesive hooks can suffice. Make sure to follow the product instructions for proper installation and weight capacity.
If your glass wall art is larger or heavier, it’s recommended to use wall anchors or specialized glass mounting brackets. These provide added stability and support, ensuring that your artwork remains securely in place.
Consider seeking professional assistance if you are unsure about the best mounting solution for your specific piece of glass wall art. Handling and mounting larger, heavier glass pieces can be challenging, and it’s important to prioritize safety.
Once you have determined the appropriate mounting method, carefully hang your glass wall art on the wall. Use a level to ensure that it is straight and aligned with your desired positioning.
Stand back and admire your work of art on display! Your glass wall art is now ready to enhance the beauty and ambiance of your space.
Conclusion
Congratulations! You have successfully learned the step-by-step process of creating your own glass wall art. By choosing the right glass, preparing it carefully, designing your artwork, transferring the design onto the glass, painting with creativity, adding details and enhancements, sealing the artwork, and finally mounting it on the wall, you have created a unique and stunning piece of décor.
Creating glass wall art allows you to express your creativity, showcase your personal style, and add a touch of elegance to any space. The materials and techniques used in this art form provide endless possibilities for design, color combinations, and textures.
Remember to experiment and have fun throughout the process. Let your imagination guide you as you explore different painting techniques, add intricate details, and incorporate unique elements into your artwork.
As you display your glass wall art, take pride in the creation you have accomplished. It becomes a statement piece that can spark conversations, evoke emotions, and bring beauty to any interior.
So, gather your materials, let your creativity flow, and embark on the journey of making your very own glass wall art. Enjoy the process, and may your artistic endeavors bring joy and inspiration to you and those who appreciate your unique creations.
Frequently Asked Questions about How To Make Glass Wall Art
Was this page helpful?
At Storables.com, we guarantee accurate and reliable information. Our content, validated by Expert Board Contributors, is crafted following stringent Editorial Policies. We're committed to providing you with well-researched, expert-backed insights for all your informational needs.


0 thoughts on “How To Make Glass Wall Art”