Articles
How To Repair Broken Blinds
Modified: October 20, 2024
Learn effective strategies and techniques from our articles on how to repair broken blinds. Discover expert tips for fixing blinds and restoring their functionality.
(Many of the links in this article redirect to a specific reviewed product. Your purchase of these products through affiliate links helps to generate commission for Storables.com, at no extra cost. Learn more)
Introduction
Blinds are a popular choice for window coverings, offering privacy, light control, and added style to any room. However, over time, blinds can become damaged due to wear and tear, accidents, or simply aging. Broken blinds not only hinder their functionality but can also diminish the overall aesthetic appeal of your space.
Fortunately, repairing broken blinds can be a simple and cost-effective solution. With the right tools and a little know-how, you can easily fix various types of damages, from broken slats to malfunctioning cords or brackets.
In this article, we will guide you through the process of repairing broken blinds. Whether you have vertical blinds, horizontal blinds, or even mini blinds, we will cover the essential steps to get your blinds back in working order. So, let’s grab our tools and dive into the world of blind repair!
Note: The specific repair techniques may vary depending on the type and brand of blinds you have. It’s always a good idea to consult the manufacturer’s instructions for any specific recommendations they might have.
Key Takeaways:
- Repairing broken blinds is a manageable task with the right tools and know-how. From fixing slats to replacing cords and lubricating mechanisms, you can restore functionality and aesthetics to your blinds while saving money.
- Regular cleaning and maintenance, along with prompt repairs, are essential for prolonging the lifespan of your blinds. By following these steps, you can keep your blinds in top condition and enhance the ambiance of your space.
Read more: How To Repair Broken Pipe Plumbing
Tools and Materials Needed
Before you begin repairing your broken blinds, it’s important to gather the necessary tools and materials to ensure a smooth and efficient process. Here are the essential items you will need:
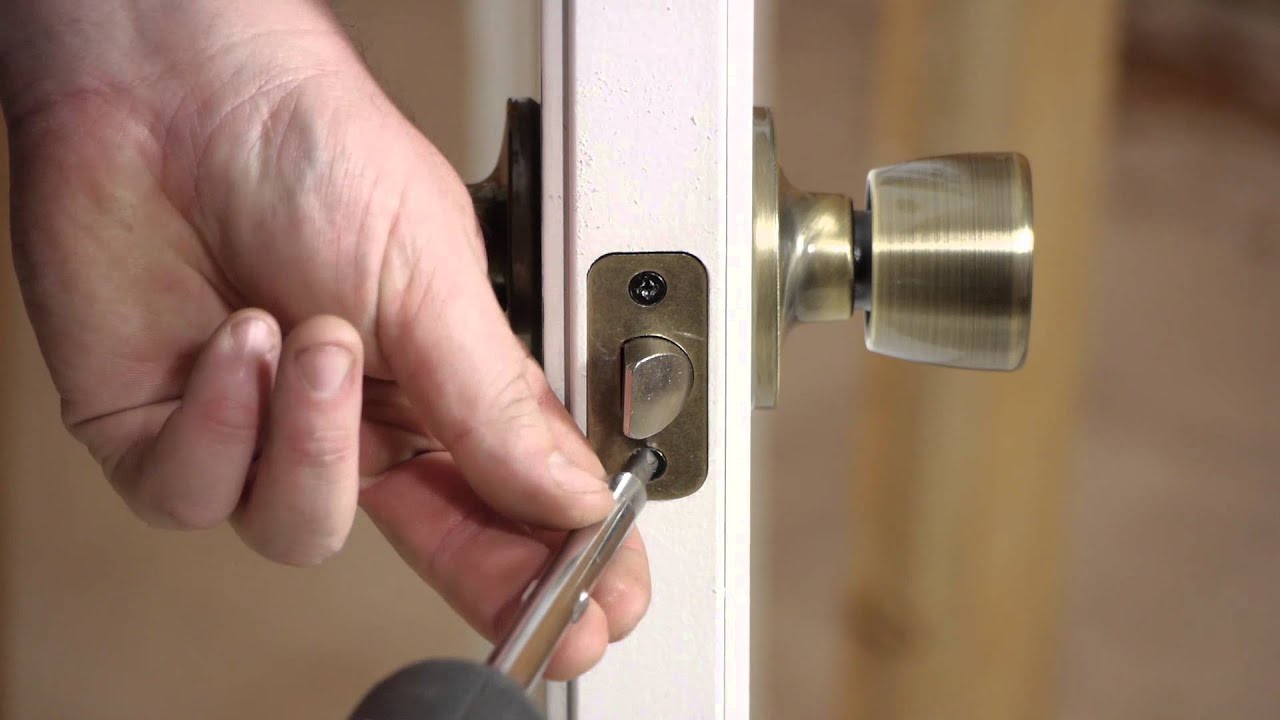
1. Screwdriver: A screwdriver will be necessary to remove any screws holding the blinds together or to access certain components.
2. Pliers: Pliers will come in handy for bending or straightening metal parts, such as brackets or slats.
3. Scissors or Utility Knife: You may need scissors or a utility knife to trim or cut cords, as well as repair any frayed edges.
4. Replacement Parts: Depending on the type and extent of the damage, you may need to purchase replacement slats, cords, or brackets.
5. Lubricant: A silicone-based lubricant can be useful for lubricating mechanisms to ensure smooth operation.
6. Measuring Tape: A measuring tape is essential when replacing slats or cords to ensure accurate sizing.
7. Cleaning Supplies: You may want to have some cleaning supplies handy to give your blinds a thorough cleaning before or after the repair process.
8. Safety Equipment: Depending on the specific repair task, you might need gloves, safety glasses, or other protective equipment to ensure your safety.
Remember to always prioritize your safety when working with tools and equipment. Use caution and follow the manufacturer’s instructions for any additional tools or precautions specific to your blinds.
Understanding the Types of Blinds
Before you can effectively repair your broken blinds, it’s important to have a basic understanding of the different types of blinds available. Each type has its own unique design and mechanisms, which may affect the repair process. Here are a few common types of blinds:
1. Venetian Blinds: Venetian blinds are made up of horizontal slats that are connected with strings or cords. They can be made from various materials, such as wood, aluminum, or PVC. Venetian blinds are often controlled with a tilt wand to adjust the angle of the slats and a lift cord to raise or lower the blinds.
2. Vertical Blinds: Vertical blinds consist of vertical slats that can be tilted or drawn aside for light control and privacy. They are commonly used for large windows or sliding glass doors. Vertical blinds typically have a track at the top that allows for smooth movement.
3. Roller Blinds: Roller blinds are made from a single piece of fabric that rolls up or down, offering simplicity and versatility. They are often operated with a spring mechanism or a chain control.
4. Roman Blinds: Roman blinds are fabric blinds that fold up in horizontal pleats when raised. They can create an elegant and sophisticated look in any room.
5. Mini Blinds: Mini blinds are similar to Venetian blinds but have smaller slats, typically measuring around one inch in width. They are commonly used in offices or small windows and are controlled with a tilt wand and lift cord.
It’s important to note that each type of blind may have unique repair requirements. Some repairs, such as fixing broken slats or replacing cords, may be applicable to multiple types, while others may be specific to a particular type of blind.
In the next sections, we will explore the common types of damages that can occur to blinds and guide you through the repair process for each. So, let’s dive in and start repairing your broken blinds!
Assessing the Damage
Before you begin any repairs, it’s important to assess the extent of the damage to your blinds. This will help you determine the necessary repair techniques and materials needed. Here are a few key points to consider when assessing the damage:
1. Broken Slats: Examine the slats of your blinds to see if any are cracked, bent, or completely broken. Take note of the number of damaged slats and their specific locations. If only a few slats are damaged, you may be able to replace them individually. However, if a large number of slats are broken, it may be more practical to replace the entire blind.
2. Malfunctioning Cords: Check the cords and strings of your blinds to see if they are tangled, frayed, or no longer functioning properly. Ensure that the lift cord and the tilt control mechanism are operating smoothly. If there are issues with the cords, you may need to replace them entirely or make repairs to restore functionality.
3. Broken Brackets or Mounting Hardware: Inspect the brackets and mounting hardware that hold your blinds in place. Look for any signs of damage, such as cracks or loose screws. If the brackets are broken or damaged, they may need to be replaced or repaired to ensure that your blinds are securely and safely installed.
4. Mechanism Issues: Test the mechanisms used to adjust the slats or raise/lower the blinds. If you notice any stiffness, resistance, or lack of responsiveness, it could indicate a problem with the internal mechanisms. In such cases, lubrication or minor adjustments may be necessary to restore proper functionality.
By thoroughly assessing the damage to your blinds, you can determine the appropriate repair techniques and materials needed. Remember to take measurements and gather any replacement parts or tools required before proceeding with the repairs. With a clear understanding of the damage, you can now tackle the specific repairs to restore your blinds to their former glory.
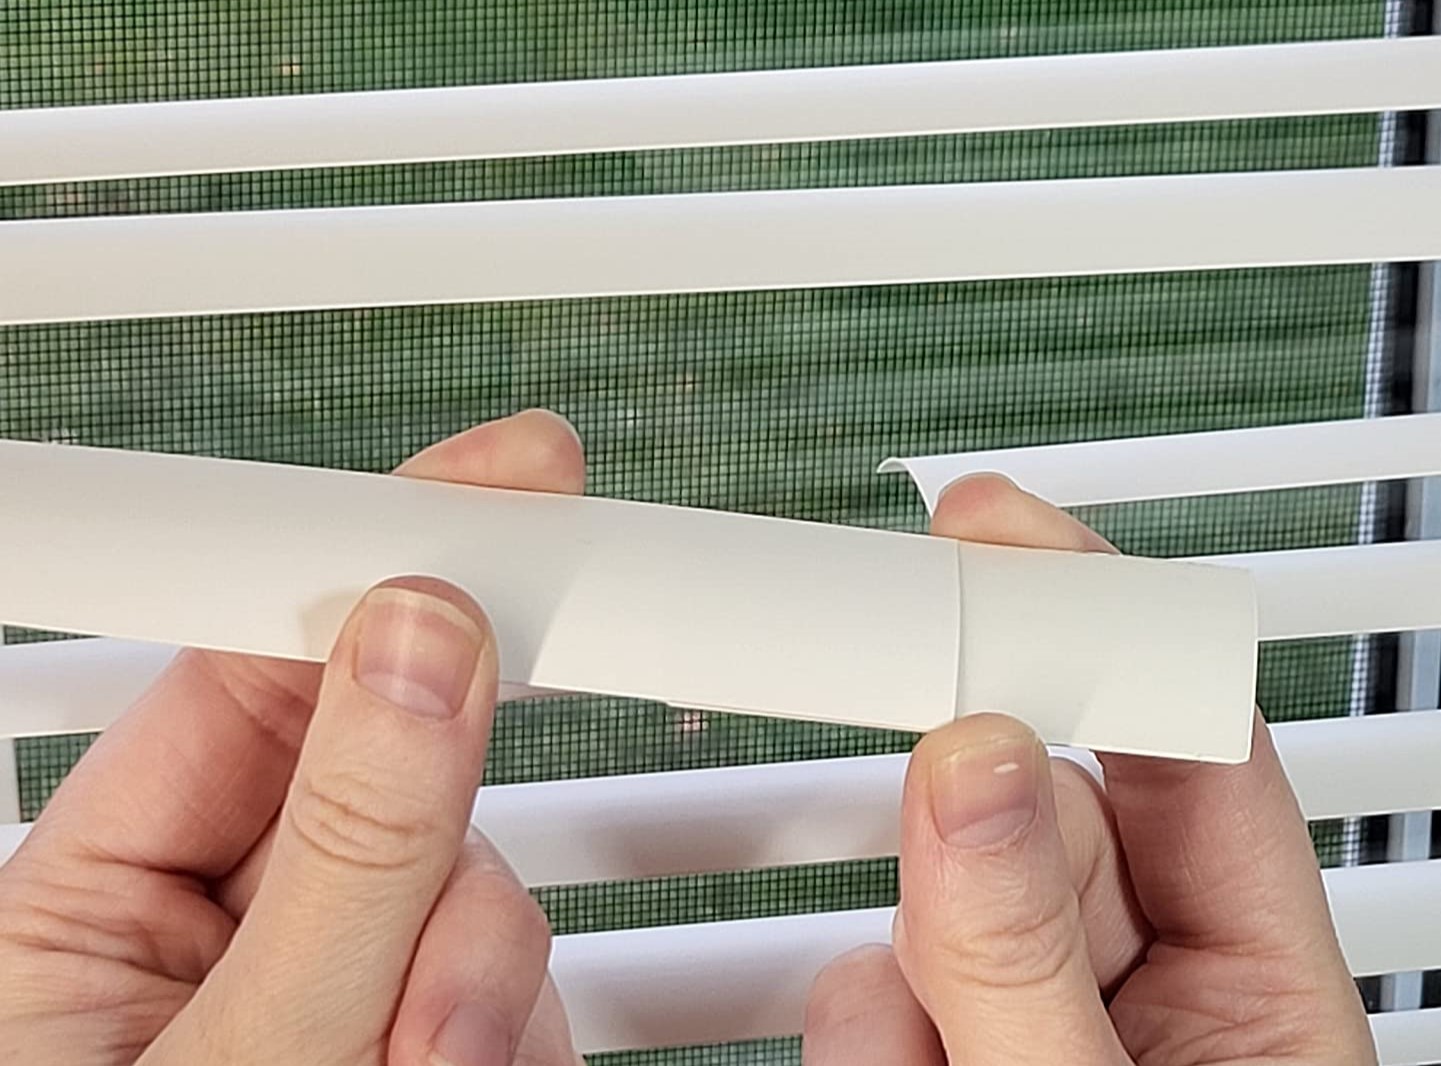
Fixing Broken Slats
Broken slats are a common issue with blinds, but fortunately, they can be easily repaired or replaced. Here’s a step-by-step guide to fixing broken slats:
1. Remove the blind: Start by removing the blind from the window. Depending on the type of blind, this may involve detaching it from the mounting brackets or simply unhooking it from the track.
2. Identify the broken slats: Inspect the slats and identify the ones that are broken or damaged. Take note of their positions in the blind.
3. Purchase replacement slats: Measure the length and width of the broken slats and purchase replacement slats of the same size. Many blind manufacturers offer replacement slats that match their product lines. If you can’t find an exact match, look for slats that closely resemble the original style.
4. Remove the broken slats: To remove the broken slats, gently slide them out of the string ladder or detach them from the bottom bar of the blind. Take care to avoid damaging the neighboring slats or cords.
5. Insert the replacement slats: Slide the replacement slats into place, making sure they are aligned properly with the ladder string or bottom bar. Depending on your blind design, you may need to secure the slats with small clips or connectors.
6. Reattach the blind: Once the replacement slats are in place, reattach the blind to the window, following the manufacturer’s instructions or reinserting it into the mounting brackets or track.
7. Test the repaired blind: Gently tilt the slats and raise/lower the blinds to ensure they are operating smoothly and the repaired slats are functioning correctly.
Fixing broken slats is a relatively straightforward process that can be completed with basic tools and replacement slats. However, if you have multiple broken slats or extensive damage, it may be more practical to replace the entire blind.
Now that you’ve learned how to fix broken slats, let’s move on to repairing another common issue: replacing broken cords.
When repairing broken blinds, start by identifying the specific issue, such as a broken slat or a malfunctioning cord. Once identified, you can then purchase the necessary replacement parts or tools to fix the problem.
Read more: How To Repair Broken Extension Cord
Replacing Broken Cords
When the cords of your blinds become frayed, tangled, or no longer function properly, it’s time to replace them. Here’s a step-by-step guide to replacing broken cords:
1. Remove the blind: Start by removing the blind from the window. This may involve unhooking it from the track or removing it from the mounting brackets.
2. Identify the broken cords: Inspect the cords and identify the ones that are broken or damaged. Note the number of cords and their specific positions in the blind.
3. Purchase replacement cords: Measure the length of the broken cords and purchase replacement cords of the same size and material. It’s important to use cords that are specifically designed for blinds to ensure proper functionality.
4. Remove the old cords: Carefully remove the old cords by detaching them from the cord lock or cord connector, and from the bottom rings or slats. Take note of how the cords were threaded through the blind mechanism for future reference.
5. Thread the new cords: Begin by threading the new cords through the bottom rings or slats, following the original cord path. Use a needle or another small tool to help guide the cords through any tight spaces or openings.
6. Attach the cords to the cord lock or connector: Once the cords are threaded through the blind mechanism, reattach them to the cord lock or cord connector. Make sure the cords are securely fastened and properly aligned.
7. Tie off the cords: Tie off the cords at the desired length, leaving enough slack for smooth operation. You can use cord condensers or cord cleats to neatly secure and manage the excess cord length.
8. Reattach the blind: With the new cords in place, reattach the blind to the window by following the manufacturer’s instructions or reinserting it into the mounting brackets or track.
9. Test the repaired blind: Gently raise and lower the blind using the new cords to ensure they are operating smoothly and that the repaired cords are functioning correctly.
Replacing broken cords can restore the functionality and longevity of your blinds. However, if you are unsure about navigating the intricate cord systems or if you have motorized blinds, it may be best to seek professional assistance.
Now that you know how to replace broken cords, let’s move on to the next step: repairing broken brackets.
Repairing Broken Brackets
Broken brackets are a common issue with blinds, especially when they are subject to excessive force or wear over time. Here’s a step-by-step guide to repairing broken brackets:
1. Remove the blind: Start by removing the blind from the window. This may involve unhooking it from the track or removing it from the mounting brackets.
2. Inspect the brackets: Examine the brackets and assess the extent of the damage. Look for cracks, loose screws, or any other signs of wear or breakage. If the brackets are beyond repair, you may need to purchase replacement brackets.
3. Repair small cracks: If the brackets have small cracks, you may be able to repair them using a strong adhesive or epoxy. Apply the adhesive or epoxy to the cracks and press the broken pieces together firmly. Allow the adhesive to dry or cure according to the manufacturer’s instructions.
4. Reinforce with metal plates: For more severe damage or to provide added support, consider reinforcing the brackets with metal plates. Measure the size of the brackets and purchase metal plates that fit securely over the damaged areas. Attach the metal plates using screws or fasteners, ensuring a secure and stable connection.
5. Replace the brackets: If the brackets are beyond repair or you prefer a more durable solution, remove the damaged brackets and replace them with new ones. Measure the size and spacing of the existing brackets and purchase replacement brackets that match these specifications. Install the new brackets following the manufacturer’s instructions.
6. Reattach the blind: With the repaired or replaced brackets in place, reattach the blind to the window by following the manufacturer’s instructions or reinserting it into the mounting brackets or track.
7. Test the repaired blind: Gently tilt the slats and raise/lower the blinds to ensure they are operating smoothly and that the repaired brackets are securely holding the blind.
Repairing broken brackets is essential to ensure the stability and proper functioning of your blinds. By addressing broken brackets promptly, you can prolong the lifespan of your blinds and prevent further damage.
Now that you know how to repair broken brackets, let’s move on to the next step: lubricating the blind mechanisms to ensure smooth operation.
Lubricating Mechanisms
Lubricating the mechanisms of your blinds is an important step in maintaining their smooth operation. Over time, the moving parts of blinds can become stiff or sticky, hindered by dust, debris, or lack of proper lubrication. Here’s a step-by-step guide to lubricating the mechanisms:
1. Identify the mechanisms: Take a close look at your blinds and identify the specific mechanisms that require lubrication. Common mechanisms include tilt controls, lift cords, pulleys, and tracks.
2. Clean the mechanisms: Before applying lubricant, it’s crucial to clean the mechanisms to remove any dirt, dust, or debris that may have accumulated. Use a soft cloth or a brush to gently clean the surfaces, ensuring that no particles remain that could interfere with the lubrication process.
3. Choose the right lubricant: Select a suitable lubricant for the specific mechanisms of your blinds. Silicone-based lubricants are generally recommended as they are long-lasting, non-staining, and effective in reducing friction. Avoid using oil-based lubricants as they can attract dust and lead to sticky residue.
4. Apply the lubricant: Use a small amount of lubricant and apply it directly to the moving parts of the mechanisms. Be sure to follow the manufacturer’s instructions and apply the lubricant sparingly to prevent any excess from dripping onto the blind material.
5. Work the mechanisms: After applying the lubricant, work the mechanisms back and forth to distribute the lubrication evenly. This will help ensure that all parts are properly coated for improved functionality.
6. Wipe away any excess: Use a clean cloth to wipe away any excess lubricant that may have accumulated during the application process. This will prevent it from attracting dust and keeping the mechanisms in optimal condition.
7. Test the lubricated mechanisms: Test the lubricated mechanisms by adjusting the slats, tilting the blinds, and raising or lowering them. Observe the smoothness of the operation and make any necessary adjustments or additional lubrication as needed.
Lubricating the mechanisms of your blinds on a regular basis, at least once or twice a year, can help maintain their proper functioning and extend their lifespan. By keeping the moving parts well-lubricated, you can ensure smooth operation and avoid unnecessary wear and tear.
Now that you have learned how to lubricate the mechanisms, let’s move on to important cleaning and maintenance tips to keep your blinds in excellent condition.
Cleaning and Maintenance Tips
Regular cleaning and maintenance are key to keeping your blinds looking their best and functioning properly. Here are some essential cleaning and maintenance tips to help you maintain your blinds:
1. Dusting: Dust your blinds regularly using a soft cloth, feather duster, or a vacuum cleaner with a brush attachment. Start from the top and work your way down, making sure to clean both sides of the slats or fabric thoroughly. This will prevent dust buildup and help maintain a clean appearance.
2. Deep cleaning: For a more thorough cleaning, you can wash your blinds using a gentle solution of warm water and mild soap. Dip a soft cloth or sponge in the soapy water, wring it out, and gently wipe down the slats or fabric. Rinse with clean water and allow the blinds to air dry completely before reattaching them to the window.
3. Avoid harsh chemical cleaners: Avoid using harsh chemical cleaners or abrasive materials, as they can damage the blinds’ surface or fabric. Stick to mild soaps or designated blind cleaning solutions that are safe for the specific material of your blinds.
4. Avoid excessive moisture: While some blinds can handle being lightly dampened for cleaning, make sure to avoid excessive moisture, especially for wooden blinds. Moisture can cause warping, bending, or mold growth. Always follow the manufacturer’s recommendations for cleaning and caring for your specific type of blinds.
5. Repair damaged parts promptly: As soon as you notice any damages, such as broken slats, malfunctioning cords, or loose brackets, take immediate action to repair or replace them. Addressing small issues promptly can prevent further damage and extend the lifespan of your blinds.
6. Regular inspections: Periodically inspect your blinds for any signs of wear, damage, or loose components. Check the control mechanism, brackets, and cords to ensure they are in good condition. If you notice any issues, address them as soon as possible to prevent further damage.
7. Keep blinds raised when not in use: If you have blinds that are not frequently used, consider keeping them raised or in the fully open position when not in use. This will help minimize dust accumulation and prevent unnecessary wear on the mechanisms.
By following these cleaning and maintenance tips, you can keep your blinds looking beautiful and functioning properly year-round. Regular care and upkeep will help extend their lifespan and ensure that they continue to enhance the aesthetics and functionality of your space.
With proper cleaning and maintenance covered, we have reached the end of our guide on repairing and maintaining blinds. By following the steps and suggestions outlined in this article, you will be able to repair broken blinds and keep them in top condition for years to come.
Remember, if you encounter any difficulties or have specific concerns about your blinds, it’s always best to consult the manufacturer’s instructions or seek professional assistance.
Read more: How To Fix Broken Tile On Floor
Conclusion
Repairing broken blinds doesn’t have to be a daunting task. With the right tools, materials, and knowledge, you can easily fix various types of damages and keep your blinds in great condition. Throughout this article, we’ve covered the essential steps to repair broken slats, replace broken cords, fix broken brackets, lubricate mechanisms, and provided cleaning and maintenance tips to ensure the longevity of your blinds.
Remember, when it comes to repairing blinds, it’s important to assess the damage, gather the necessary tools and materials, and follow the manufacturer’s instructions whenever possible. Whether you have venetian blinds, vertical blinds, roller blinds, or other types, understanding their specific mechanisms will help you tackle repairs more effectively.
By taking the time to perform regular cleaning and maintenance, you can prevent unnecessary damage and keep your blinds looking their best. Dusting regularly, deep cleaning when needed, and addressing any repairs promptly will contribute to their longevity.
Don’t hesitate to seek professional assistance if you’re unsure about any repair process or if you have motorized blinds or complex mechanisms. They have the expertise and experience to handle more intricate repairs or provide guidance based on your specific blinds’ requirements.
Remember, repairing your blinds can save you money compared to replacing them entirely. Additionally, well-maintained blinds can enhance the ambiance of your space, offer privacy, and control the amount of light that enters your rooms.
We hope this comprehensive guide has provided you with the information and confidence to repair your broken blinds and maintain them properly. Enjoy the process of restoring functionality and aesthetics to your blinds and enjoy the benefits they bring to your home or office space.
Now it’s time to grab your tools, assess your blinds, and embark on the journey of restoring them to their former glory. Happy repairing!
Frequently Asked Questions about How To Repair Broken Blinds
Was this page helpful?
At Storables.com, we guarantee accurate and reliable information. Our content, validated by Expert Board Contributors, is crafted following stringent Editorial Policies. We're committed to providing you with well-researched, expert-backed insights for all your informational needs.