Articles
How To Repair Broken Extension Cord
Modified: May 6, 2024
Learn how to repair a broken extension cord with step-by-step articles. Fix your wiring easily and safely with our expert guidance.
(Many of the links in this article redirect to a specific reviewed product. Your purchase of these products through affiliate links helps to generate commission for Storables.com, at no extra cost. Learn more)
Introduction
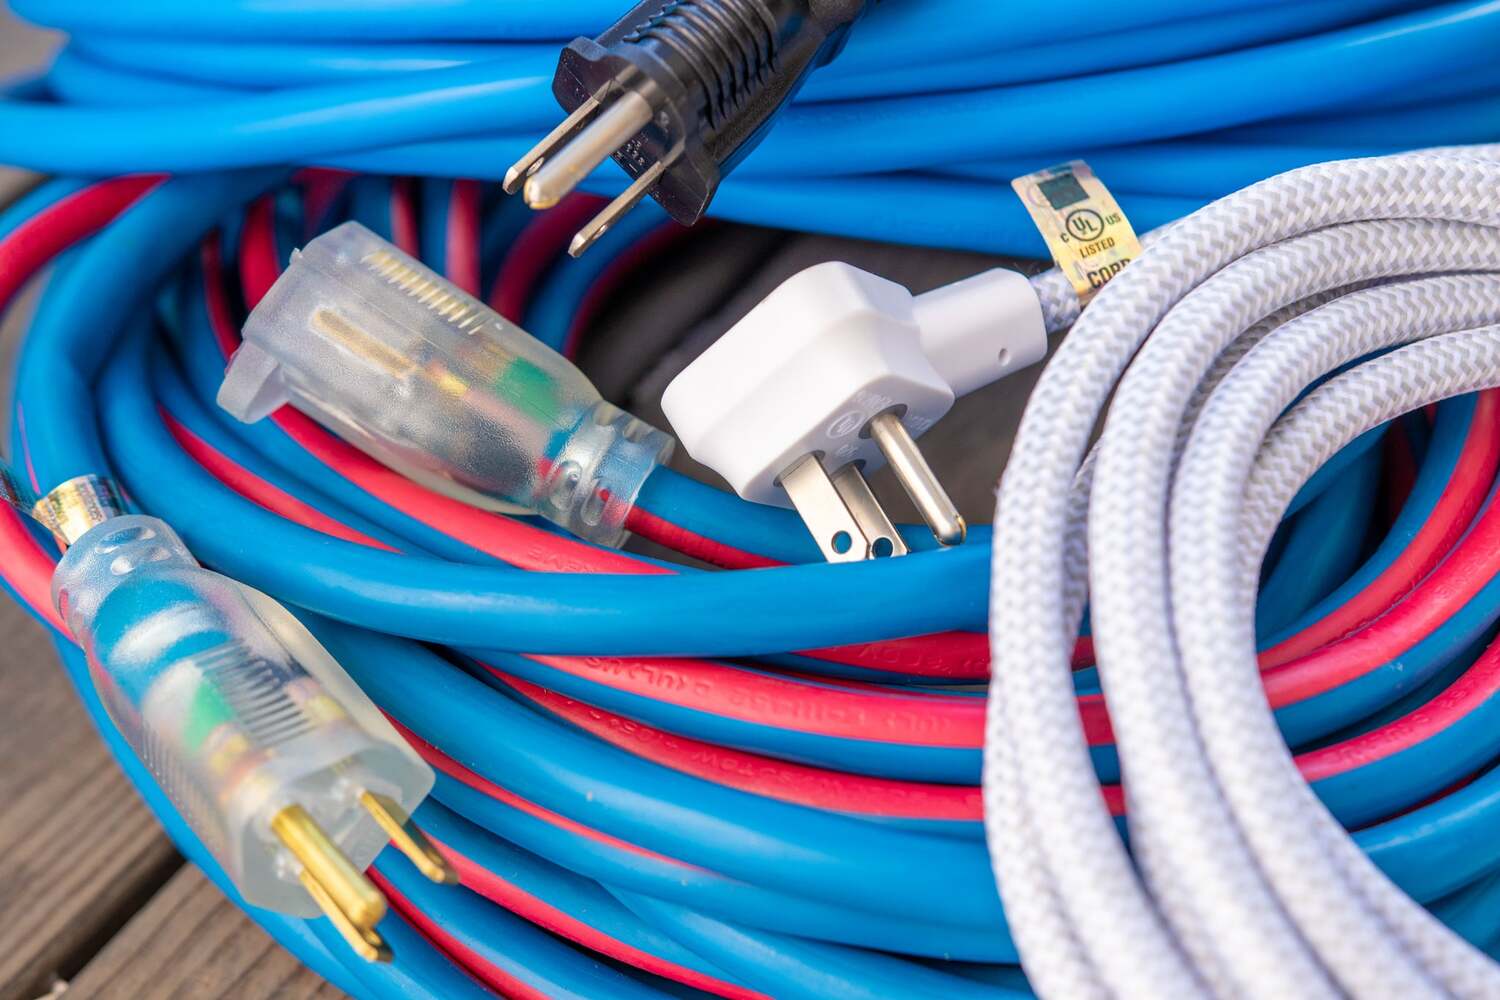
Extension cords are a common household item used to provide electricity to devices and appliances that are located far away from power outlets. However, over time, these cords can become damaged and pose potential hazards. A broken extension cord not only renders it ineffective but also creates safety risks such as electrical shocks and fire hazards. Fortunately, repairing a broken extension cord is a relatively simple process that can save you from needing to purchase a new one. In this article, we will guide you through the steps to repair a broken extension cord so you can safely restore its functionality.
Before we begin, it is important to note that working with electricity can be dangerous. Always prioritize safety by wearing protective gear, ensuring the cord is unplugged, and double-checking the power source before proceeding with any repairs. If you are unsure or uncomfortable with repairing the extension cord yourself, it is recommended to seek professional assistance.
Now, let’s gather the necessary tools and materials to start the repair process.
Key Takeaways:
- Repairing a broken extension cord is a practical and cost-effective solution that can be safely achieved at home with the right tools and materials, ensuring a reliable power supply for devices and appliances.
- Prioritizing safety and taking necessary precautions, such as testing the repaired extension cord for proper functionality, is crucial to ensure a successful repair and maintain a safe electrical environment in your home.
Read more: How To Splice Extension Cord
Tools and Materials Needed
Before you start repairing your broken extension cord, you will need the following tools and materials:
- Wire strippers
- Utility knife or wire cutters
- Electrical tape
- Heat shrink tubing or electrical connectors
- Heat gun or lighter
- Marker or pen
- Gloves (optional, but recommended for additional safety)
These tools and materials are essential for a successful repair. Wire strippers are used to remove the insulation from the wires, while a utility knife or wire cutters can be used to cut the cord. Electrical tape is used to insulate the repaired area, and heat shrink tubing or electrical connectors provide a more secure connection. A heat gun or lighter is necessary to shrink the heat shrink tubing, and a marker or pen is used for marking and labeling the wires.
Once you have gathered all the necessary tools and materials, it’s time to assess the damage of your extension cord. Read on to learn how to identify the problem and determine the best course of action.
Step 1: Assess the Damage
Before diving into the repair process, it’s important to assess the damage of your broken extension cord. This will help you determine the extent of the repair required and the best approach to fix it.
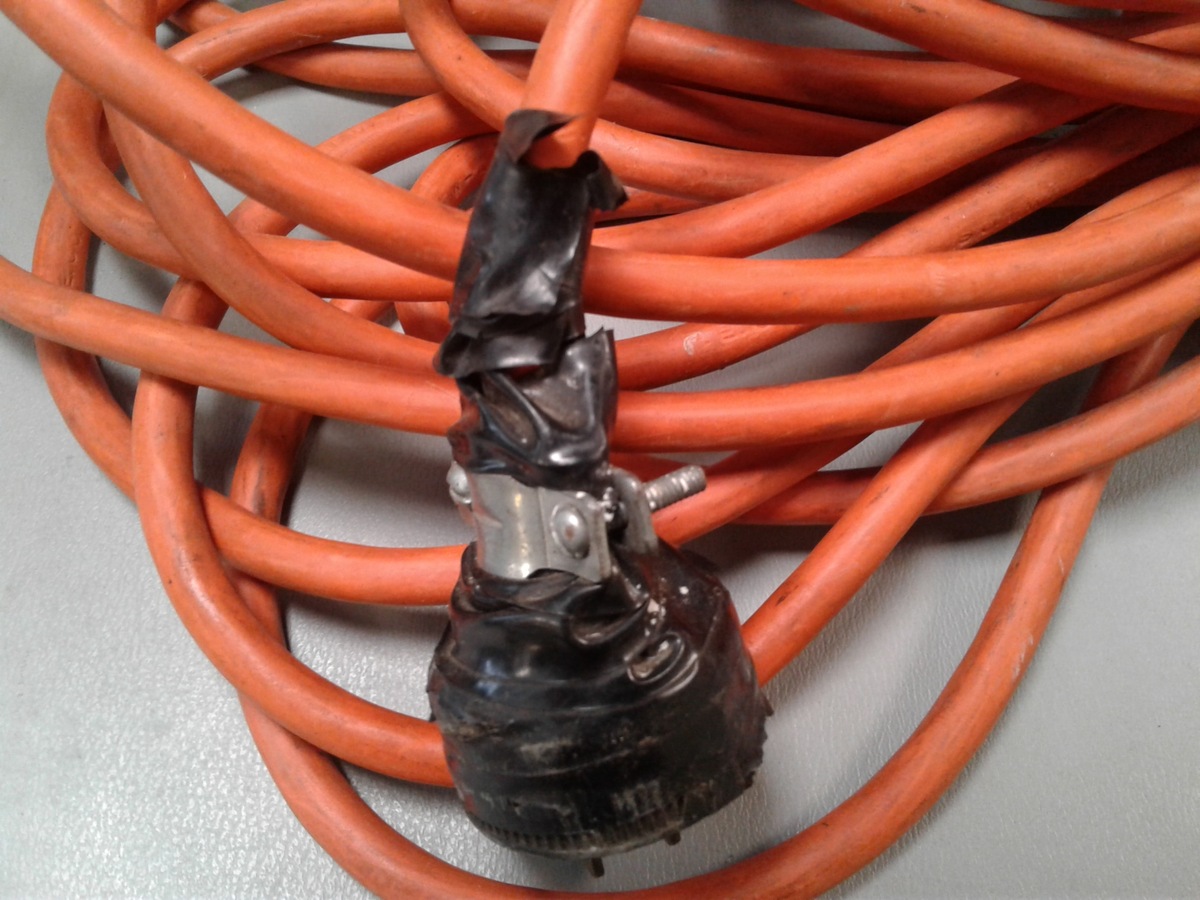
Start by inspecting the cord for any visible signs of damage, such as cuts, tears, or exposed wires. Pay close attention to the ends of the cord where it connects to the plug or socket. Look for any fraying or loose connections. If the damage is limited to just one end, you may only need to repair or replace that specific part.
Next, check if the inner wires of the cord are intact. Gently flex the cord in various places to see if there are any breaks or interruptions in the wiring. This can be indicated by flickering or intermittent power when the cord is plugged in. If you suspect there are damaged wires inside, the repair process may involve cutting and splicing the cord to ensure proper functionality.
It’s worth mentioning that not all damages are repairable. If the cord has extensive damage, such as severe cuts or multiple breaks in the wires, it may be safer and more cost-effective to replace the entire cord. Safety should always be your top priority when working with electrical appliances.
Once you have assessed the extent of the damage, you can move on to gathering the necessary supplies for the repair. Keep in mind the materials mentioned earlier in the article, such as wire strippers, electrical tape, and heat shrink tubing or connectors.
Now that you have a clear understanding of the damage, let’s proceed to the next step and gather the tools and materials needed for the repair process.
Step 2: Gather the Necessary Supplies
Now that you have assessed the damage of your broken extension cord, it’s time to gather all the necessary supplies for the repair process. Having everything you need on hand will make the process smoother and more efficient.
Here is a list of the supplies you will need:
- Wire strippers
- Utility knife or wire cutters
- Electrical tape
- Heat shrink tubing or electrical connectors
- Heat gun or lighter
- Marker or pen
- Gloves (optional)
Wire strippers are essential for removing the insulation from the wires, allowing you to make proper connections. A utility knife or wire cutters can be used to cut the cord if necessary. Electrical tape is used to insulate the repaired area, ensuring safety and preventing any potential electrical hazards.
Heat shrink tubing or electrical connectors provide a more secure and professional connection. Heat shrink tubing is heated with a heat gun or lighter to shrink and create a tight seal around the wires. Alternatively, electrical connectors can be used to join the wires together securely.
A marker or pen is useful for labeling the wires, ensuring proper connections and avoiding confusion. Lastly, gloves are optional but recommended for additional safety while handling the wires and working with electrical components.
Before you begin the repair process, double-check to ensure that you have all the necessary supplies. Having everything readily available will save you time and make the repairing process much more convenient.
Now that you have gathered all the tools and materials, it’s time to move on to the next step where you will learn how to cut and prepare the cord ends.
Step 3: Cut and Prepare the Cord Ends
With the necessary supplies at hand, it’s time to move on to cutting and preparing the cord ends for repair. This step involves removing the damaged portion of the cord and preparing it for the connection process.
Here’s how to cut and prepare the cord ends:
- Start by unplugging the extension cord from the power source to ensure your safety throughout the process.
- Using a utility knife or wire cutters, carefully cut the cord at the point where the damage ends. Make a clean cut, ensuring that the remaining cord is free from any frays or loose strands.
- Inspect the cut ends of the cord to ensure that the internal wires are not damaged or exposed. If you notice any signs of damage or exposed wires, you may need to trim the cord further until you reach a clean section.
- Once you have a clean cut, use wire strippers to remove approximately 1 inch of the outer insulation from each end of the cord. Be careful not to nick the inner wires during this process.
- Next, examine the individual wires inside the cord. Each wire will consist of a colored plastic insulation and a metallic core. Gently twist the strands of each wire together to ensure they are securely held.
- If the wires are frayed or damaged, use wire strippers to remove the damaged section and expose a fresh, clean length of wire. Make sure to strip only the necessary amount of insulation, leaving the core wires intact.
By cutting the damaged portion of the cord and preparing both ends, you are ensuring a clean and secure connection for the repair. Now, it’s time to move on to the next step of the process: stripping the wire insulation.
When repairing a broken extension cord, make sure to cut out the damaged section and use a splice kit to reconnect the wires. Insulate the connection properly to prevent any electrical hazards.
Read more: How To Repair Broken Pipe Plumbing
Step 4: Strip the Wire Insulation
Once you have cut and prepared the cord ends, the next step is to strip the insulation from the individual wires. This process will expose the metallic core, allowing for proper connection and conductivity.
Follow these steps to strip the wire insulation:
- Take the wire strippers and select the appropriate gauge size for your wires. The gauge size will typically be marked on the insulation or specified in the user manual of your wire strippers.
- Hold one end of the cord firmly and position the wire strippers about 1 inch from the end. Make sure the cutting blades are aligned with the insulation.
- Apply gentle pressure and squeeze the wire strippers together, allowing the cutting blades to pierce the insulation.
- Once the blades are in, rotate the wire strippers around the cord to cut through the insulation completely.
- With the insulation cut, gently pull it away from the wires to expose the metallic cores. Be cautious not to tug too forcefully, as this may damage the delicate wires.
- Repeat this process for each individual wire within the cord, ensuring that all the wires are properly stripped and exposed.
When stripping the wire insulation, it is crucial to strip only the necessary length, leaving the exposed metallic core intact. Stripping too much insulation may result in bare wires touching each other, leading to short circuits and potential safety hazards.
After successfully stripping the wire insulation from both ends of the cord, you are ready to proceed to the next step: connecting the wires together to repair the extension cord.
Step 5: Connect the Wires
Now that the wire insulation has been stripped, it’s time to connect the wires together to repair your extension cord. This step involves joining the corresponding wires from each end of the cord securely to restore electrical conductivity.
Follow these steps to connect the wires:
- Begin by identifying the corresponding wires from each end of the cord. Typically, the wires will be color-coded. The most common colors are black, white, and green, representing the hot, neutral, and ground wires, respectively.
- Take the wire from one end of the cord and align it with the corresponding wire from the other end. If needed, twist the individual wires together to ensure a tight connection.
- For added security, you can use either electrical connectors or heat shrink tubing to create a more secure connection. Simply slide the connector or tubing over the joined wires, ensuring that it covers the entire exposed section.
- If using electrical connectors, follow the manufacturer’s instructions to crimp or twist the connectors over the wires for a secure connection. If using heat shrink tubing, make sure it is long enough to cover the entire joint when heated.
- If using heat shrink tubing, use a heat gun or a lighter to apply heat evenly to the tubing. As the tubing heats up, it will shrink and create a tight seal around the wires. Make sure the tubing is fully shrunk and sealed before moving on to the next step.
By properly connecting the corresponding wires, you are restoring the electrical conductivity of your extension cord. This ensures a safe and reliable power supply to your devices or appliances.
Now that you have connected the wires, it’s time to proceed to the next step: securing the connection to ensure it stays in place.
Step 6: Secure the Connection
After connecting the wires together, it is essential to secure the connection to ensure it stays in place and maintains electrical conductivity. This step is crucial to prevent any accidental disconnections or exposed wires, which can lead to electrical hazards.
Follow these steps to secure the connection:
- If you used electrical connectors to join the wires, ensure they are properly crimped or twisted, providing a secure and tight connection. Double-check that the connectors are firmly attached to the wires and there is no exposed metal.
- If you opted for heat shrink tubing, inspect the tubing to ensure it has fully shrunk around the wires and created a tight seal. Check for any gaps or openings where the tubing did not shrink properly.
- Once you have confirmed the connection is secure and the protective covering is in place, use electrical tape to wrap and insulate the repaired area. Begin by wrapping a few overlapping layers of electrical tape around the connection, extending beyond the area where the wires are joined.
- Make sure the electrical tape covers the exposed metal, providing insulation and protection against moisture or accidental contact. Pull the tape tightly and smooth out any wrinkles or gaps as you wrap it around the repaired section.
- Continue wrapping the electrical tape a few inches past the joined wires to ensure a sufficient amount of coverage. This extra length adds an additional layer of protection against any potential stress or strains on the repaired area.
Securing the connection with electrical tape provides added insulation and protection to the repaired area. It helps keep the wires in place and prevents any accidental exposure or disconnection.
With the connection securely sealed and insulated, you are almost ready to test the repaired extension cord. However, before plugging it in, it’s essential to perform a safety check.
Now that you have secured the connection, let’s move on to the final step: testing the repaired extension cord to ensure it functions safely and correctly.
Step 7: Test the Repaired Extension Cord
After completing the repair process and securing the connection, it’s crucial to test the repaired extension cord to ensure it functions safely and correctly. Proper testing will help you identify any remaining issues and ensure that the repaired cord is ready for use.
Follow these steps to test the repaired extension cord:
- Ensure that the repaired extension cord is unplugged from the power source.
- Double-check all the connections and ensure that the electrical tape is tightly wrapped and covering the repaired area.
- Plug the extension cord into a power outlet.
- Connect a device or appliance into the other end of the cord.
- Turn on the device or appliance and verify that it is receiving power. Check if it operates properly without any flickering or intermittent power.
- Observe the repaired area for any signs of unusual heat, sparks, or smoke. If any such signs occur, immediately unplug the extension cord and reevaluate the repair.
- If the device or appliance functions properly and there are no issues or abnormalities, you can consider the repair successful.
Testing the repaired extension cord is a critical step to ensure your safety and the proper functioning of your devices or appliances. If you encounter any problems during the testing process, such as flickering power or the device not working correctly, it may indicate additional repairs or professional assistance is needed.
Finally, once you have successfully tested the repaired extension cord and confirmed its functionality, you can use it with confidence. However, it’s important to periodically inspect the cord for any signs of damage or wear and repair or replace it as necessary to maintain electrical safety.
Congratulations! You have now completed the repair process for your broken extension cord. By following these steps and taking the necessary precautions, you have successfully restored your extension cord’s functionality and made it safe for use once again.
Remember, always prioritize safety when working with electricity and consider seeking professional assistance if you are unsure or uncomfortable with the repair process.
Read more: How To Test Extension Cord With Multimeter
Conclusion
Repairing a broken extension cord is a practical and cost-effective solution that enables you to restore its functionality and avoid the need for purchasing a new one. By following the steps outlined in this article, you can safely and effectively repair your extension cord at home with just a few tools and materials.
Throughout the repair process, it is vital to prioritize safety and take the necessary precautions. Always ensure the cord is unplugged before starting any repairs, and wear protective gear if necessary. If you are uncertain or uncomfortable with the repair process, it is best to seek professional assistance.
We started by assessing the damage of the extension cord and gathering the necessary tools and materials, including wire strippers, utility knife or wire cutters, electrical tape, heat shrink tubing or electrical connectors, a heat gun or lighter, and a marker or pen. Then, we proceeded to cut and prepare the cord ends, stripping the wire insulation carefully.
Next, we connected the wires securely, whether by twisting and using electrical connectors or by sliding heat shrink tubing over the connection. To ensure a stable repair, we then secured the connection with multiple layers of electrical tape, providing insulation and protection.
Finally, we tested the repaired extension cord by plugging it in, connecting a device or appliance, and verifying its proper functioning while observing for any signs of overheating, sparks, or smoke. This step ensures the repair has been successful and that the extension cord is safe to use.
Remember to regularly inspect your extension cord for any signs of damage and address repairs promptly to maintain electrical safety. If in doubt, it is always advisable to consult a professional electrician.
By following these guidelines, you can repair your broken extension cord with confidence, ensuring a reliable power supply for your devices and appliances while maintaining a safe electrical environment in your home.
Now that you've tackled fixing an extension cord, why stop there? Keeping your home in top shape involves regular upkeep. Dive into our guide on routine home maintenance to keep every corner looking sharp. If you're feeling a bit more adventurous, why not take on a new project? Our detailed tutorial on running electrical wiring to your garage could be just the challenge you're looking for. Both guides offer practical advice to enhance your DIY skills and ensure your space functions beautifully.
Frequently Asked Questions about How To Repair Broken Extension Cord
Was this page helpful?
At Storables.com, we guarantee accurate and reliable information. Our content, validated by Expert Board Contributors, is crafted following stringent Editorial Policies. We're committed to providing you with well-researched, expert-backed insights for all your informational needs.


0 thoughts on “How To Repair Broken Extension Cord”