Home>Home Appliances>Home Automation Appliances>How To Fix A Broken Thermostat
Home Automation Appliances
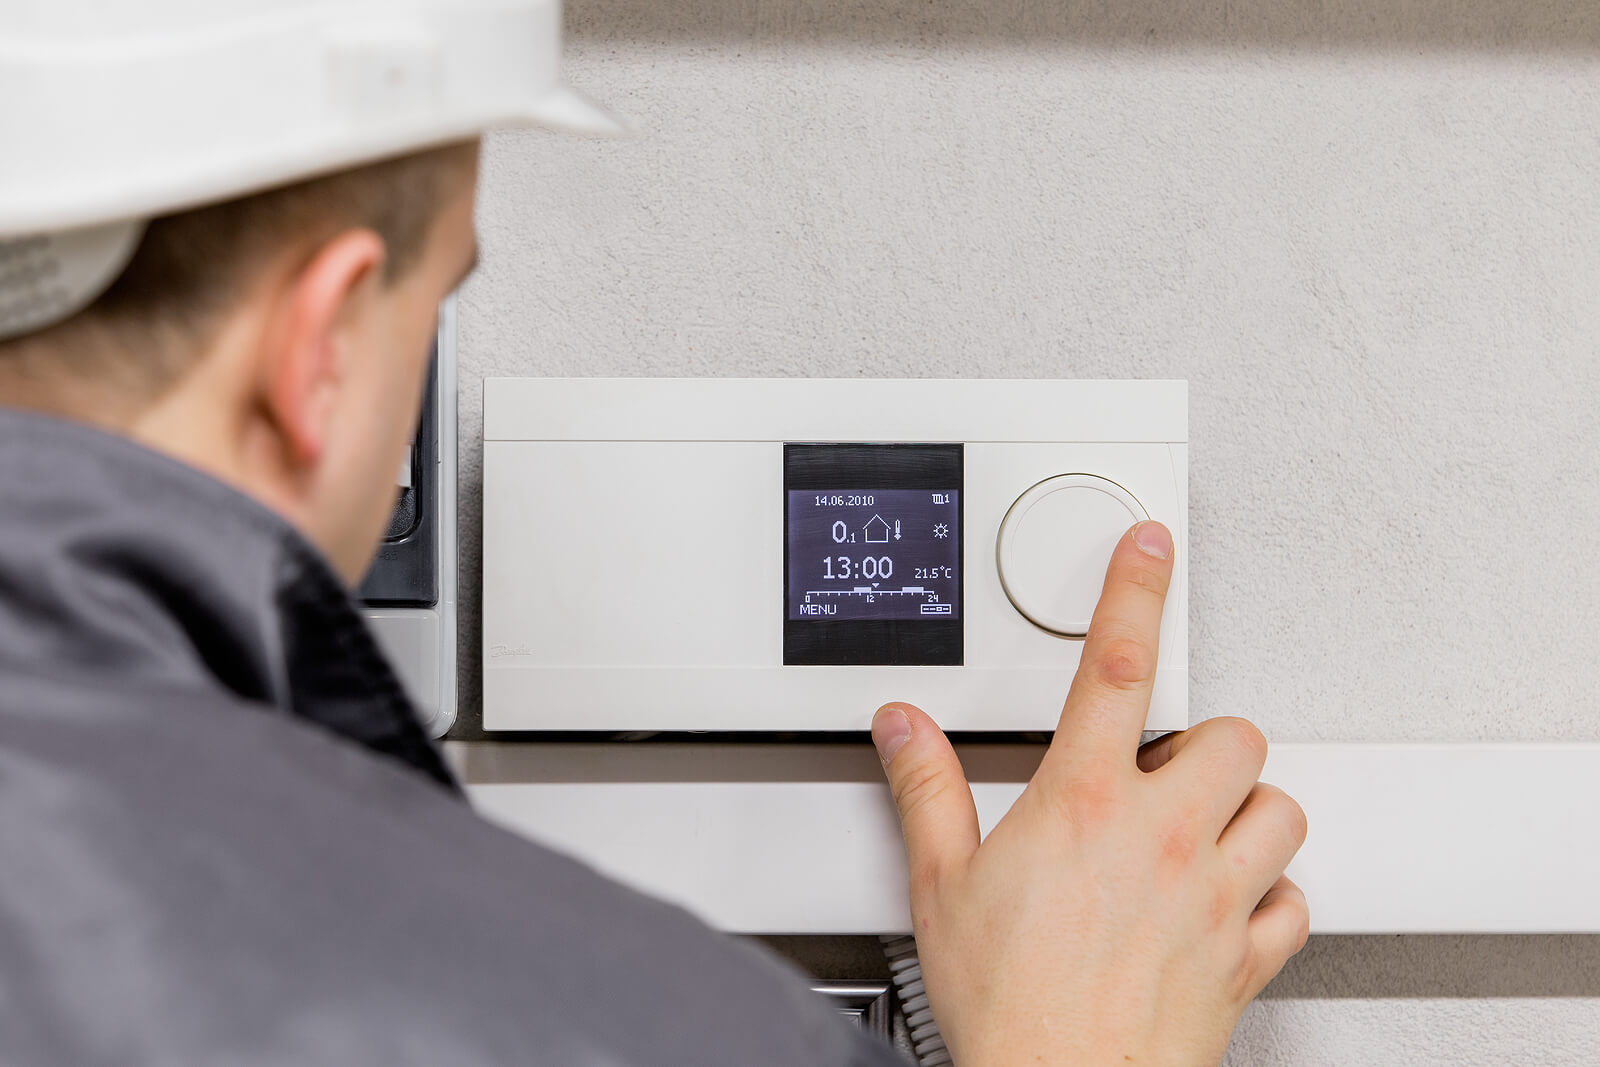
How To Fix A Broken Thermostat
Modified: January 9, 2024
Learn how to fix a broken thermostat and regain control of your home automation appliances. Get expert tips and step-by-step instructions.
(Many of the links in this article redirect to a specific reviewed product. Your purchase of these products through affiliate links helps to generate commission for Storables.com, at no extra cost. Learn more)
**
Introduction
**
The thermostat is the unsung hero of your home's heating and cooling system. It quietly regulates the temperature, ensuring your comfort while saving energy. However, when a thermostat malfunctions, it can disrupt your indoor climate and lead to energy inefficiency. Knowing how to troubleshoot and repair a broken thermostat can save you time and money. In this comprehensive guide, we will explore common thermostat issues, the tools needed for repair, and step-by-step instructions to fix a malfunctioning thermostat. By the end, you'll have the knowledge and confidence to tackle thermostat repairs like a pro. Let's dive in and unravel the mysteries of thermostat troubleshooting and repair!
**
Key Takeaways:
- Troubleshoot and clean your thermostat regularly to maintain a comfortable home temperature and save energy.
- Be prepared with the right tools and follow safety precautions when fixing a broken thermostat to ensure a smooth and efficient repair process.
Read more: How To Fix A Broken Lock On A Door
Common Issues with Thermostats
**
Thermostats, like any electrical device, can experience a range of issues that affect their functionality. Understanding these common problems is the first step in diagnosing and resolving thermostat issues.
- Inaccurate Temperature Readings: One of the most prevalent issues is when the thermostat displays incorrect temperature readings. This can lead to discomfort and energy waste, as the heating or cooling system may run unnecessarily.
- Thermostat Not Responding: A thermostat that fails to respond to temperature adjustments or does not turn the HVAC system on or off as expected is a frustrating issue. It can disrupt the comfort of your home and lead to energy inefficiency.
- Short Cycling: Short cycling occurs when the HVAC system turns on and off frequently, potentially causing wear and tear on the equipment and leading to energy wastage.
- Dead Batteries: Many modern thermostats are powered by batteries, and when the batteries are depleted, the thermostat may cease to function properly.
- Dust and Debris: Over time, dust and debris can accumulate inside the thermostat, affecting its sensors and overall performance.
- Wiring Issues: Faulty or loose wiring can lead to communication problems between the thermostat and the HVAC system, resulting in malfunctions.
- Age and Wear: Like any device, thermostats can deteriorate with age, leading to a decline in performance and accuracy.
Recognizing these common issues is essential for effectively troubleshooting and addressing thermostat problems. In the next section, we will explore the tools needed to tackle thermostat repairs.
**
Tools Needed for Repair
**
Before embarking on the repair of a malfunctioning thermostat, it’s crucial to have the right tools at your disposal. Here are the essential tools you may need:
- Screwdriver Set: A set of screwdrivers, including flathead and Phillips head varieties, will be necessary for accessing the thermostat and, if required, the HVAC system.
- Wire Strippers: In cases where wiring adjustments or replacements are necessary, wire strippers will be invaluable for preparing the wires for proper connections.
- Multimeter: This tool is essential for testing the voltage and continuity of electrical circuits, aiding in diagnosing wiring issues and ensuring proper electrical connections.
- Cleaning Supplies: Dust and debris can affect the performance of a thermostat. Having cleaning supplies such as compressed air and a soft brush will help in removing any accumulated dirt.
- Replacement Batteries: If your thermostat is battery-powered, it’s wise to have replacement batteries on hand in case the existing ones are depleted.
- Replacement Thermostat: In some cases, repairing a thermostat may not be feasible, and a replacement may be necessary. Having a replacement thermostat available can expedite the repair process.
- Documentation: It’s essential to have the user manual for your specific thermostat model. Additionally, labeling the wires during disconnection and taking note of the wiring configuration will aid in the reinstallation process.
Equipping yourself with these essential tools will empower you to address a wide range of thermostat issues effectively. With the tools in hand, let’s delve into the step-by-step process of fixing a broken thermostat in the next section.
**
Check the thermostat batteries and replace them if necessary. If the issue persists, try resetting the thermostat by turning off the power and removing the cover to locate the reset button. If these steps don’t work, it may be time to call a professional for further assistance.
Steps to Fix a Broken Thermostat
**
Repairing a malfunctioning thermostat can be a manageable task with the right approach. Follow these step-by-step instructions to troubleshoot and fix common thermostat issues:
- Turn Off Power: Before beginning any work, turn off the power to your heating, ventilation, and air conditioning (HVAC) system at the circuit breaker to ensure safety.
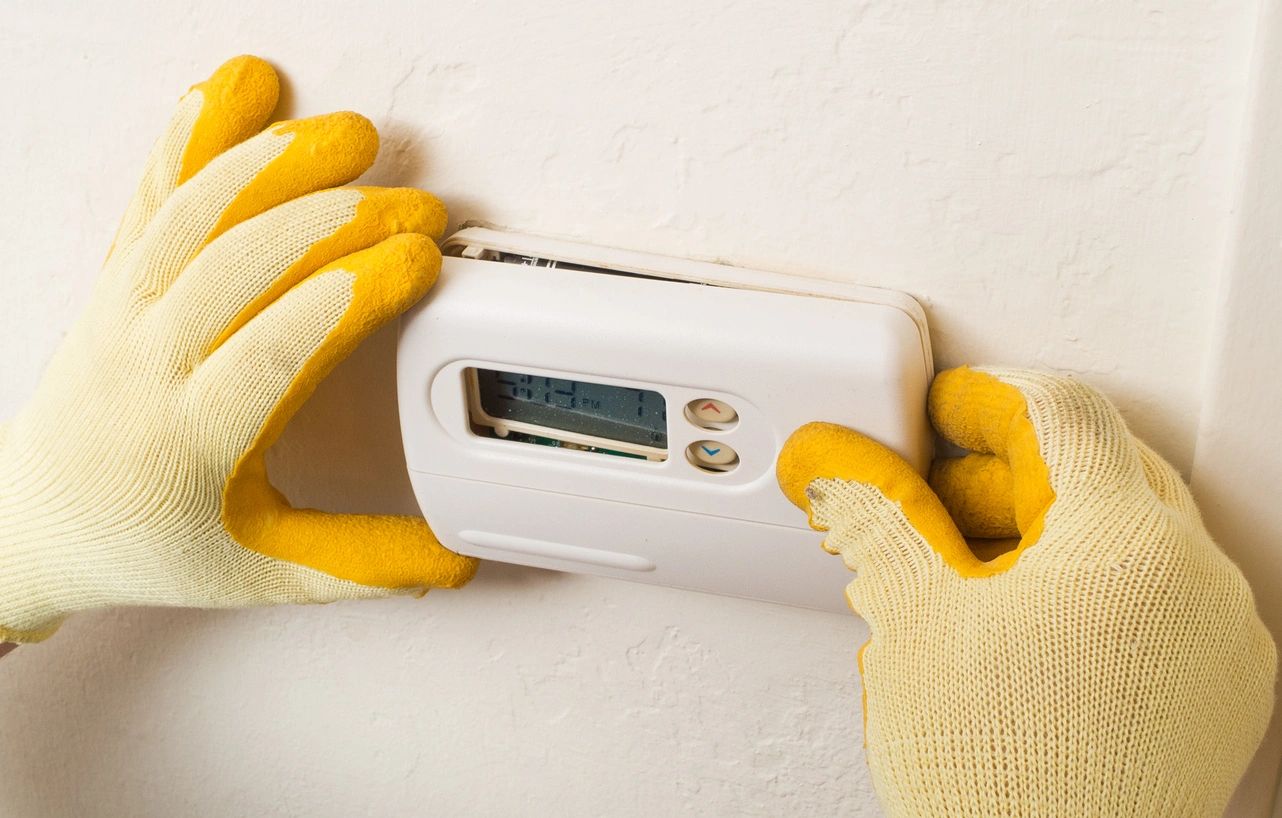
- Remove the Thermostat Cover: Use a screwdriver to remove the cover of the thermostat, exposing the wiring and internal components.
- Inspect and Clean: Inspect the thermostat for any visible dust, debris, or corrosion. Use compressed air and a soft brush to gently clean the components, including the contacts and sensors.
- Check Wiring Connections: Ensure that the wiring connections are secure and free of damage. If any wires appear loose or frayed, use wire strippers to trim the ends and create clean connections.
- Test Voltage: Use a multimeter to test the voltage at the thermostat terminals. This will help identify any wiring issues or power supply problems.
- Replace Batteries: If your thermostat is battery-powered, replace the batteries with fresh ones to ensure proper functionality.
- Reset and Recalibrate: Some thermostats may require a reset or recalibration to restore proper operation. Refer to the user manual for specific instructions related to your thermostat model.
- Check for Firmware Updates: If your thermostat is programmable or smart, check for available firmware updates that may address known issues or improve performance.
- Restore Power and Test: After completing the necessary checks and repairs, restore power to the HVAC system and test the thermostat to verify that it is functioning correctly.
- Monitor Performance: Observe the thermostat’s performance over the next few heating or cooling cycles to ensure that the issues have been successfully resolved.
By following these steps, you can effectively diagnose and address common thermostat issues, restoring comfort and efficiency to your home’s heating and cooling system. Remember to prioritize safety and refer to professional assistance if you encounter complex problems beyond your expertise.
**
Conclusion
**
Understanding how to troubleshoot and repair a malfunctioning thermostat empowers homeowners to maintain a comfortable indoor environment while promoting energy efficiency. By recognizing common thermostat issues, equipping yourself with the necessary tools, and following a systematic repair process, you can address a wide range of problems that may arise with your thermostat.
Regular maintenance, including cleaning and inspecting the thermostat, can help prevent issues before they occur. Additionally, staying informed about firmware updates and advancements in thermostat technology can contribute to improved performance and energy savings.
While many thermostat issues can be resolved through DIY efforts, it’s essential to prioritize safety and seek professional assistance for complex problems or if you are unsure about any aspect of the repair process. Professional HVAC technicians have the expertise and tools to address intricate thermostat issues and ensure the optimal functioning of your heating and cooling system.
By taking a proactive approach to thermostat maintenance and repair, you can enhance the comfort and efficiency of your home, ultimately contributing to a more sustainable and enjoyable living environment. With the knowledge gained from this guide, you are well-equipped to tackle thermostat issues with confidence and precision, ensuring that your home’s climate control system operates at its best.
Remember, a well-maintained thermostat is the cornerstone of a comfortable and energy-efficient home, and your efforts in troubleshooting and repair play a significant role in achieving this goal.
Frequently Asked Questions about How To Fix A Broken Thermostat
Was this page helpful?
At Storables.com, we guarantee accurate and reliable information. Our content, validated by Expert Board Contributors, is crafted following stringent Editorial Policies. We're committed to providing you with well-researched, expert-backed insights for all your informational needs.


0 thoughts on “How To Fix A Broken Thermostat”