Articles
How To Repair Extension Cord
Modified: February 22, 2024
Learn how to repair extension cords with step-by-step articles. Extend the lifespan of your cords and ensure safe electrical connections.
(Many of the links in this article redirect to a specific reviewed product. Your purchase of these products through affiliate links helps to generate commission for Storables.com, at no extra cost. Learn more)
Introduction
Extension cords are an essential part of our daily lives. We rely on them to power various electrical devices, from lamps to power tools, and everything in between. However, over time, extension cords can become damaged, posing a safety hazard and rendering them ineffective. Instead of throwing away a damaged extension cord and buying a new one, why not consider repairing it yourself? With a few simple steps and the right tools, you can bring your extension cord back to life.
In this article, we will guide you through the process of repairing an extension cord. Whether it’s a minor cut or a complete break, we’ll show you how to identify the problem and safely make the necessary repairs. By following these steps, you can save money, reduce waste, and ensure the longevity of your extension cords.
Before we begin, it’s important to note that safety should always be the top priority when dealing with electrical repairs. Make sure to unplug the extension cord from the power source before attempting any repairs. If you are unsure or uncomfortable with handling electrical work, it’s best to consult a professional electrician.
Now, let’s gather the supplies we’ll need for the repair.
Key Takeaways:
- Save money and reduce waste by repairing your damaged extension cord at home. Follow the step-by-step guide to ensure safety, longevity, and environmental sustainability.
- Prioritize safety, gather the necessary tools, and confidently repair your extension cord. Enjoy the satisfaction of bringing it back to life and contributing to electronic waste reduction.
Read more: How To Repair Broken Extension Cord
Supplies Needed
Before getting started with the repair process, it’s essential to have the necessary supplies at hand. Here’s a list of items you’ll need to complete the repair:
- Wire cutters or scissors: These will be used to cut the damaged section of the extension cord.
- Wire strippers: These specialized tools will help you remove the outer insulation from the wire ends.
- Electrical tape: This will be used to insulate the repaired area and ensure a safe connection.
- Heat shrink tubing: An alternative to electrical tape, heat shrink tubing provides a more secure and professional-looking insulation.
- Wire connectors: These will be necessary to reconnect the wires once the damaged section is removed.
- Heat gun or lighter (for heat shrink tubing): If you opt to use heat shrink tubing, you’ll need a heat source to shrink it and provide a tight seal.
- Marker or label stickers: These can be used to mark or label the repaired section for future reference.
Having these supplies readily available will ensure a smooth repair process without any interruptions or delays. Now that we have our supplies, let’s move on to the first step: assessing the damage.
Step 1: Assess the Damage
The first step in repairing an extension cord is to assess the extent of the damage. Carefully examine the cord for any visible cuts, breaks, or frayed areas. Look for any signs of exposed wires or damage to the insulation. It’s important to identify the problem area before proceeding with the repair.
If the damage is limited to a small section of the cord, it’s typically easier and more cost-effective to repair it rather than replacing the entire cord. However, if the damage is extensive or the cord has been damaged near the plug or socket, it may be safer to replace the cord altogether.
Once you’ve assessed the damage, make sure to unplug the extension cord from the power source. This will prevent any accidental shocks or short circuits during the repair process. And remember, if you’re unsure about the severity of the damage or uncomfortable with electrical work, it’s always best to consult a professional.
Now that we’re aware of the damage, let’s move on to gathering the necessary tools for the repair.
Step 2: Gather the Necessary Tools
Before diving into the repair process, it’s essential to have all the necessary tools at your disposal. Here are the tools you’ll need:
- Wire cutters or scissors: These will be used to cut the damaged section of the extension cord.
- Wire strippers: This tool will help you remove the outer insulation from the wire ends.
- Electrical tape: It serves as insulation and ensures a safe connection.
- Heat shrink tubing: An alternative to electrical tape, it provides a more secure and professional-looking insulation.
- Wire connectors: These will be necessary to reconnect the wires once the damaged section is removed.
- Heat gun or lighter (for heat shrink tubing): If you opt to use heat shrink tubing, you’ll need a heat source to shrink it and provide a tight seal.
- Marker or label stickers: These can be used to mark or label the repaired section for future reference.
Having all these tools readily available will make the repair process smoother and more efficient. Before starting the repair, ensure that your tools are in good working condition and that you have a well-lit and well-ventilated workspace.
It’s important to prioritize safety during the repair process. Ensure that the extension cord is unplugged from the power source to avoid any accidents or electrical shocks. If you’re unsure or uncomfortable with handling electrical work, it’s always best to seek the assistance of a professional electrician.
Now that we have all the necessary tools, let’s move on to the next step: identifying the problem area.
Step 3: Identify the Problem Area
Once you have gathered all the necessary tools, the next step in repairing an extension cord is to identify the specific area that needs to be repaired. This is crucial in order to accurately remove the damaged portion and ensure a successful repair.
Start by visually inspecting the entire length of the extension cord. Look for any signs of cuts, breaks, or frayed areas in the cord’s outer insulation. These are usually the areas where the damage occurs.
Once you locate the damaged area, carefully examine it to determine the extent of the damage. Check for exposed wires, loose strands, or any other signs of wear and tear. This assessment will help you decide how much of the cord needs to be removed and replaced.
If the damage is minor and limited to a small section, you can simply remove that portion and proceed with the repair. However, if the damage is severe or extends to multiple sections of the cord, it may be better to consider replacing the entire cord to ensure safety and longevity.
It’s important to note that repairing an extension cord may not be possible or safe in certain situations. If the damage is near the plug or socket, the connector may be compromised, and it’s best to replace the cord entirely.
Once you have identified the problem area and assessed the damage, it’s time to move on to the next step: cutting and stripping the cord.
Read more: How To Test Extension Cord With Multimeter
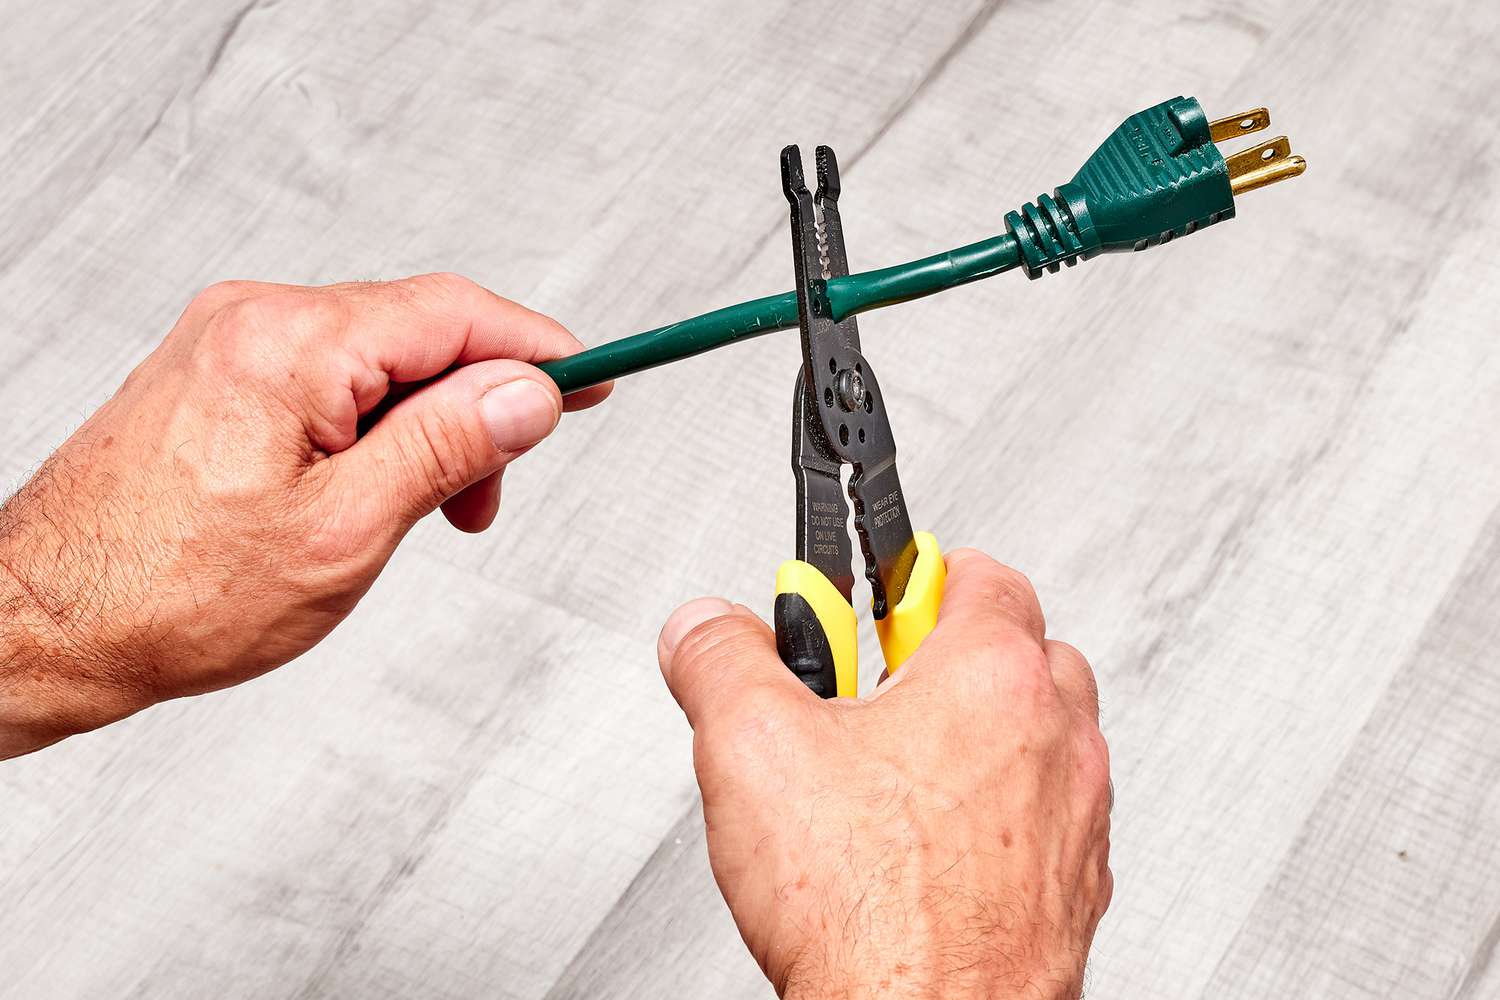
Step 4: Cut and Strip the Cord
Now that you have identified the problem area, it’s time to cut and strip the extension cord. This step will remove the damaged portion and prepare the wires for reconnection.
Before you begin, make sure the extension cord is unplugged to avoid any risk of electric shock. Additionally, ensure that your work area is well-ventilated and well-lit.
Here’s how you can proceed:
- Measure the damaged section: Use a measuring tape or ruler to determine the length of the damaged area. Make a mental note or mark the cord to indicate where you will be making the cut.
- Cut the cord: Using wire cutters or scissors, carefully cut through the cord at the marked location. Ensure that you make a clean and straight cut, avoiding any jagged edges.
- Strip the wires: Once the cord is cut, you will need to strip the insulation from the wire ends. Use wire strippers to remove approximately 1 inch of the outer insulation from both cut ends. Be careful not to cut into the inner wires during this process.
- Separate the wires: After stripping the insulation, you will notice two or three wires inside, depending on the type of cord. Separate these wires so that they are ready for reconnection.
Once you have cut and stripped the cord, you are now prepared to move on to the next step: reconnecting the wires.
When repairing an extension cord, always make sure to use the correct gauge of wire for the cord and to properly insulate and secure all connections to prevent any electrical hazards.
Step 5: Reconnect the Wires
With the damaged section of the extension cord removed and the wires stripped, the next step is to reconnect the wires. This process involves establishing a secure and reliable connection to restore the functionality of the cord.
Follow these steps to reconnect the wires:
- Matching the wires: Take a close look at the exposed wires on both ends of the cord. You will likely see different colored wires. It’s important to match the corresponding wires together. For example, if you have a black wire on one end, connect it to the black wire on the other end.
- Twist the wires: Once you have identified the matching wires, twist them together in a clockwise direction. This twisting motion helps to create a secure bond between the wires.
- Wire connectors: To ensure a strong and stable connection, slide a wire connector over the twisted wires. This connector not only holds the wires together but also prevents them from coming into contact with each other, reducing the risk of a short circuit.
- Secure the wire connectors: With the wire connectors in place, twist them securely onto the wires. This ensures that the connection is tight and reliable. Make sure the wire connectors are properly fastened to avoid any loose connections.
It’s important to note that if you have a third wire (usually green or bare copper) in your extension cord, it is the ground wire. This wire is crucial for safety purposes and should be connected appropriately. If you’re unsure about grounding or any specific wire connections, consult an electrician for guidance.
Now that the wires are connected, it’s time to move on to the next step: insulating the connection.
Step 6: Insulate the Connection
After reconnecting the wires, it is crucial to insulate the connection to ensure safety and prevent any electrical hazards. Proper insulation will protect the wires from exposure and reduce the risk of shocks or short circuits.
Follow these steps to effectively insulate the connection:
- Electrical tape: One common method of insulation is using electrical tape. Start by wrapping several layers of electrical tape tightly around the exposed wires and the wire connectors. Ensure that the entire connection is covered and there are no gaps or exposed areas.
- Heat shrink tubing: Another option for insulation is heat shrink tubing. Slide a suitable-sized heat shrink tubing over the connection until it completely covers the taped area. Use a heat gun or lighter to apply heat evenly to the tubing. As the tubing heats up, it will shrink and form a tight seal around the connection.
- Inspect the insulation: After applying the insulation, visually inspect the connection to ensure that there are no exposed wires or gaps in the insulation. Confirm that the insulation is secure and tightly sealed.
Proper insulation is crucial to maintain the integrity and safety of the repaired extension cord. It provides protection against moisture, accidental contact, and potential damage from everyday use.
Once you have successfully insulated the connection, it’s time to move on to the next step: testing the repaired extension cord.
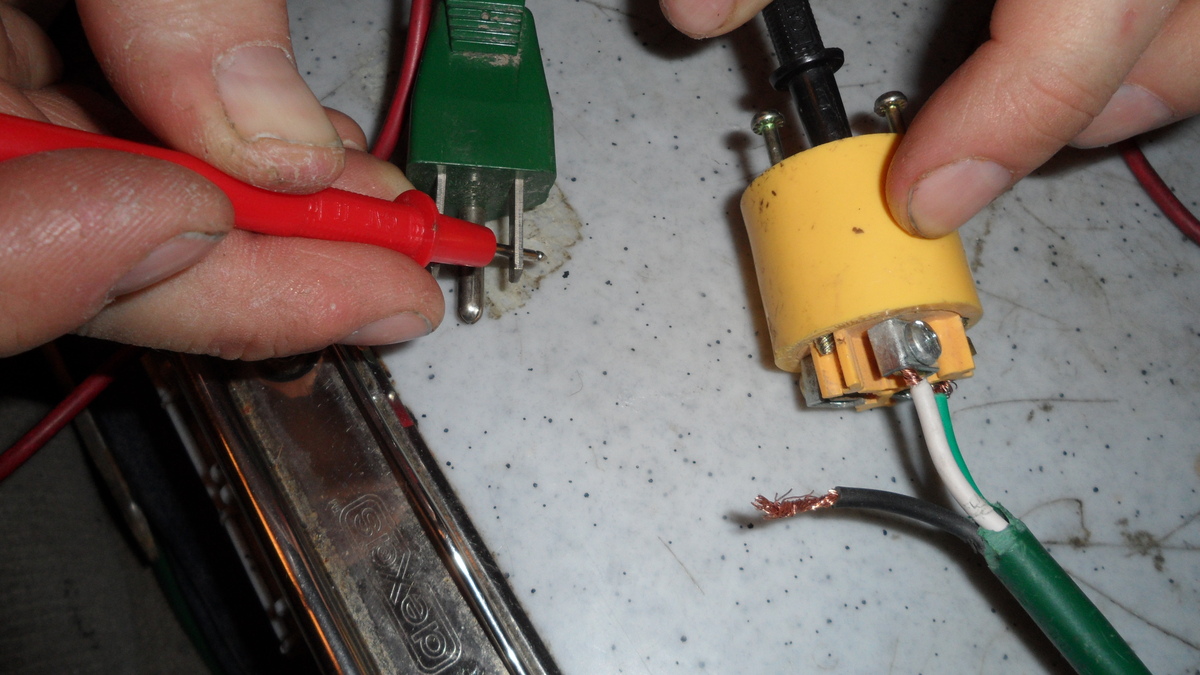
Step 7: Test the Repaired Extension Cord
Now that you have repaired and insulated the extension cord, it’s essential to test it before putting it back into regular use. Testing the cord will help ensure that the repair was successful and that the cord is functioning correctly.
Here’s how you can test the repaired extension cord:
- Plug it in: Plug in the repaired extension cord into a working power outlet or power source.
- Power on: Turn on the device or appliance that you will be using with the extension cord.
- Observe functionality: Check if the device or appliance is receiving power and functioning properly. Ensure that there are no electrical sparks or unusual sounds coming from the cord.
- Check for overheating: Monitor the extension cord during use to ensure it is not overheating. If you notice any excessive heat or burning smells, immediately unplug the cord and inspect it for any faults.
If the repaired extension cord passes these tests and functions as expected, you can consider the repair successful. It means the wires are securely connected and that the insulation is providing sufficient protection.
However, if the cord is not functioning properly or if you notice any issues during the testing phase, it’s advisable to discontinue use and consult a professional electrician. They can provide further guidance or make any necessary repairs.
Now that you have tested the repaired extension cord and ensured its functionality, let’s move on to the final step: safely storing the cord for future use.
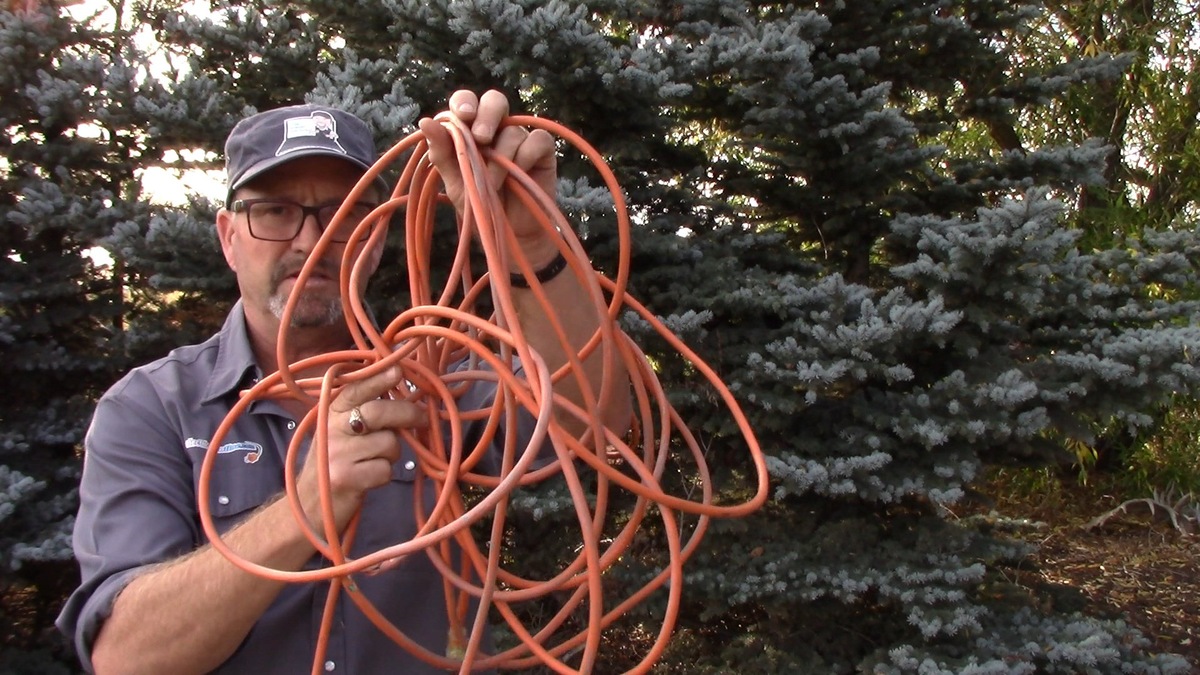
Read more: How To Keep Extension Cord From Tangling
Step 8: Safely Store the Repaired Cord
Once you have successfully repaired and tested your extension cord, it’s important to take proper measures to safely store it for future use. Proper storage ensures that the cord remains in good condition and doesn’t become tangled, damaged, or pose a safety risk.
Here are some steps to safely store your repaired cord:
- Unplug the cord: Before storing the cord, make sure to unplug it from the power source.
- Remove any twists or knots: Straighten out the cord and remove any twists or knots. This helps prevent the cord from tangling or getting tangled with other items.
- Secure the cord: Bundle the cord neatly using a cable tie, twist tie, or cord wrap. This helps keep the cord organized and prevents it from unravelling or getting damaged.
- Protect the ends: To protect the exposed ends of the repaired cord, you can use plastic end caps or wrapping them with a layer of electrical tape.
- Store in a dry and safe location: Choose a dry and secure location to store the repaired cord. Avoid exposing it to excessive moisture or extreme temperatures.
By following these storage practices, you can ensure that your repaired extension cord remains in good condition and is readily available for future use.
It’s essential to periodically check the stored cord for any signs of damage or wear. If you notice any issues, such as frayed insulation or loose connections, it’s advisable to repair or replace the cord before using it again.
Congratulations! You have successfully repaired your extension cord and learned how to store it safely. By recycling and repairing instead of replacing, you’re not only saving money but also reducing waste and promoting environmental sustainability.
Remember, safety should always be a priority when dealing with electrical repairs. If you are unsure about any aspect of the repair process or uncomfortable with handling electrical work, it’s best to seek the assistance of a professional electrician.
With your newly repaired extension cord, you can confidently power your devices and tools, knowing that you have taken the necessary steps to maintain its functionality and safety.
Thank you for following this step-by-step guide. Happy repairing!
Conclusion
Repairing a damaged extension cord can save you money, reduce waste, and ensure the longevity of your electrical equipment. With a few simple steps and the right tools, you can safely and effectively repair your extension cord at home.
In this comprehensive guide, we have walked you through the process of assessing the damage, gathering the necessary tools, identifying the problem area, cutting and stripping the cord, reconnecting the wires, insulating the connection, testing the repaired cord, and safely storing it for future use.
Throughout the repair process, it’s essential to prioritize safety. Always remember to unplug the cord before starting any repairs and, if needed, consult a professional electrician for guidance or complex repairs.
By repairing your extension cord instead of replacing it, you not only save money but also contribute to minimizing electronic waste. This small step towards sustainability helps protect our environment and conserve valuable resources.
Remember, a well-maintained and properly repaired extension cord ensures the continuous power supply to your devices and tools, ensuring their optimal performance and increasing their lifespan.
So, next time you come across a damaged extension cord, don’t rush to throw it away. Take the opportunity to repair it yourself and enjoy the satisfaction of bringing it back to life!
We hope this guide has been helpful to you in repairing your extension cord. Now you are equipped with the knowledge and skills to handle future cord repairs with confidence.
Happy repairing!
Frequently Asked Questions about How To Repair Extension Cord
Was this page helpful?
At Storables.com, we guarantee accurate and reliable information. Our content, validated by Expert Board Contributors, is crafted following stringent Editorial Policies. We're committed to providing you with well-researched, expert-backed insights for all your informational needs.


0 thoughts on “How To Repair Extension Cord”