Home>Articles>How To Repair A Broken Electrical Cord On An Iron
Articles
How To Repair A Broken Electrical Cord On An Iron
Modified: December 7, 2023
Discover helpful articles on how to easily repair a broken electrical cord on an iron. Save money and fix it yourself with our step-by-step guides.
(Many of the links in this article redirect to a specific reviewed product. Your purchase of these products through affiliate links helps to generate commission for Storables.com, at no extra cost. Learn more)
Introduction
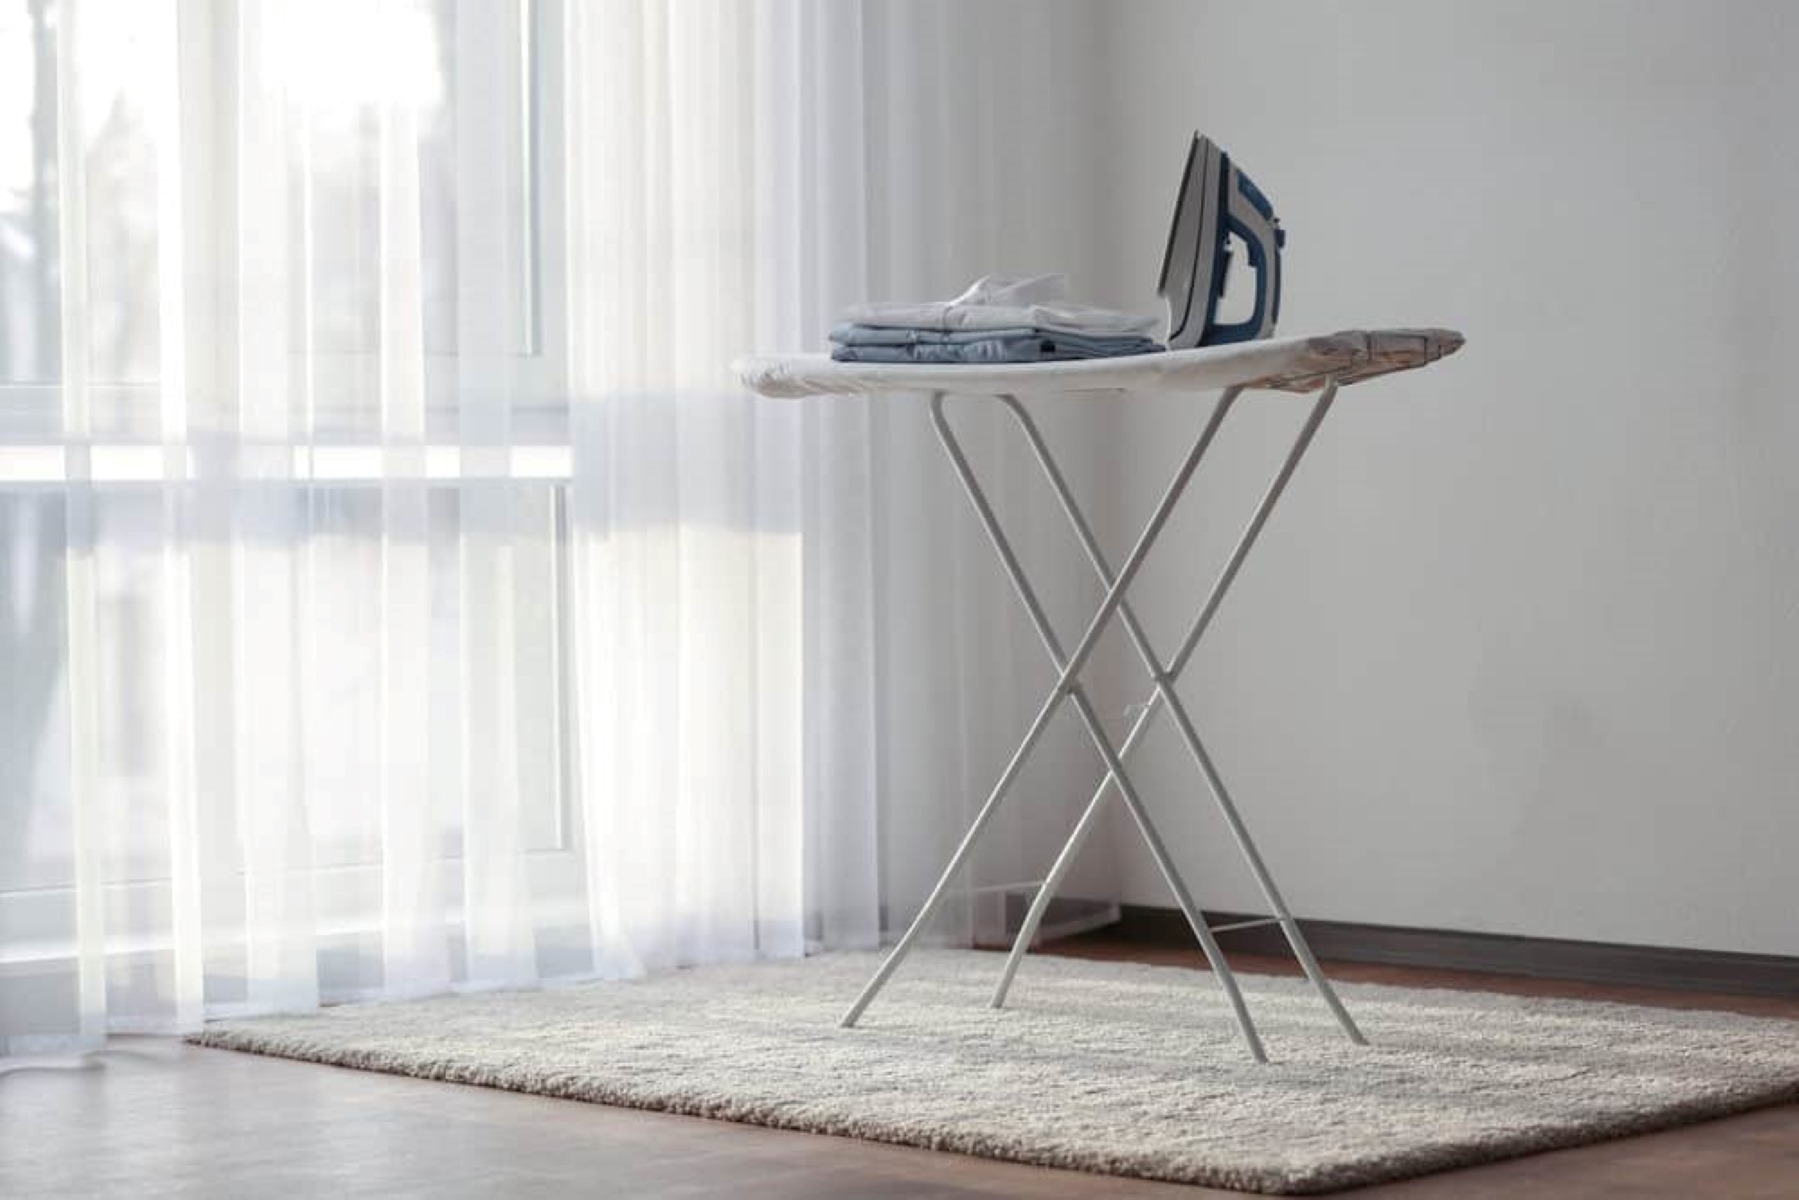
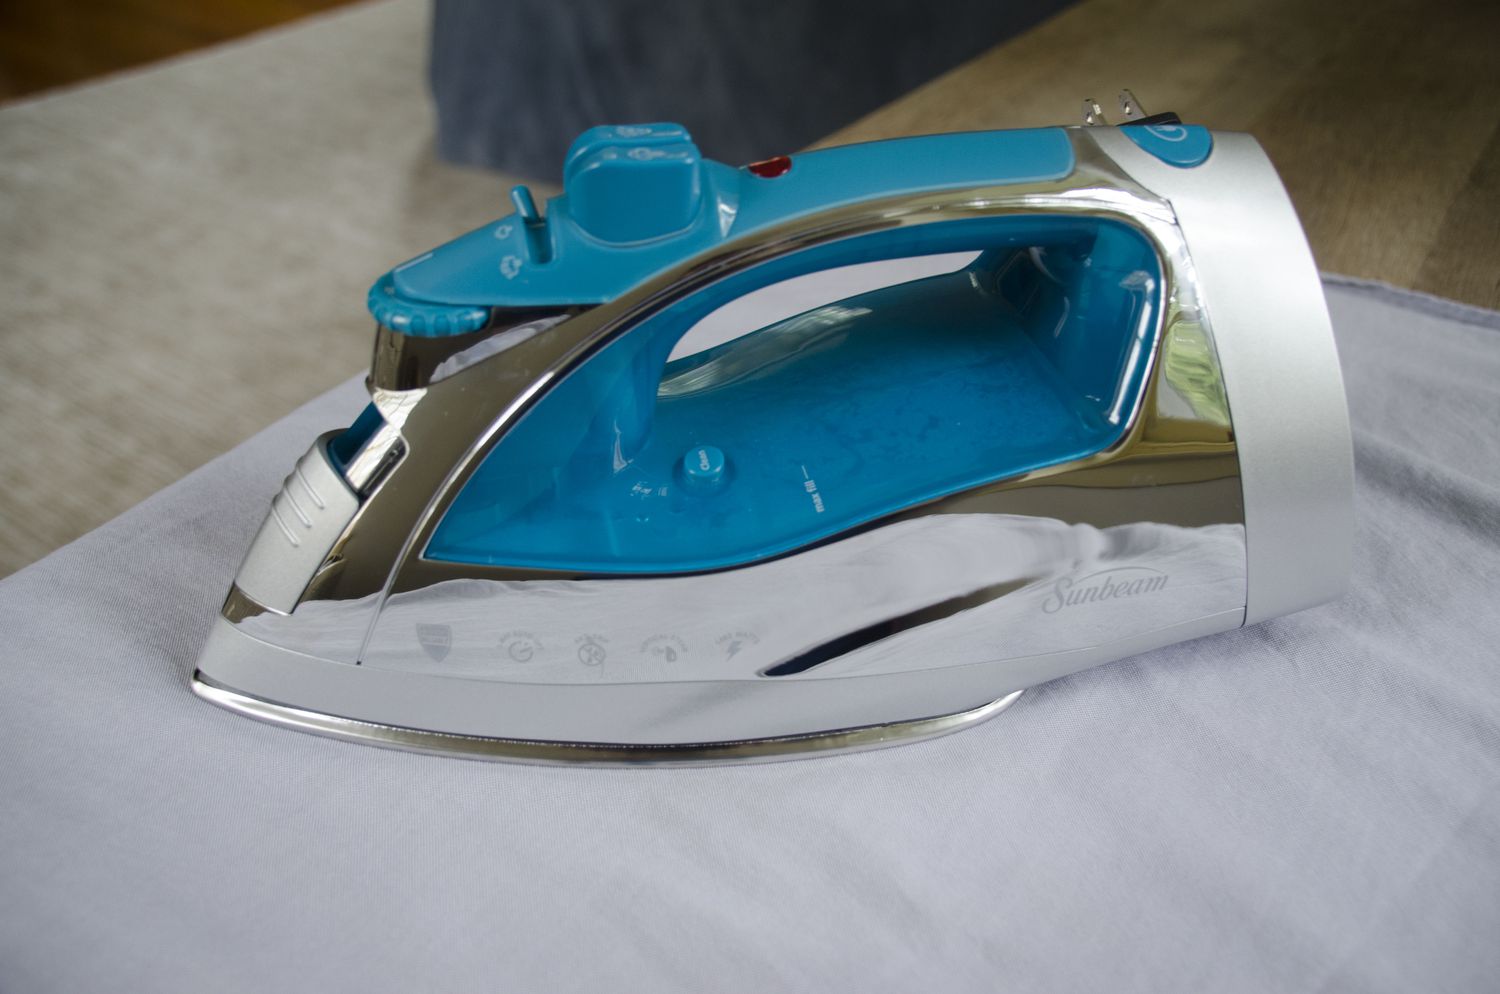
Electrical cords are prone to wear and tear over time, and it’s not uncommon to find a broken cord on household appliances like irons. When your iron’s electrical cord gets damaged, it can be frustrating and inconvenient, but the good news is that repairing it is often a simple task that you can do on your own.
In this article, we will guide you through the step-by-step process of repairing a broken electrical cord on an iron. By following these instructions, you can save money on buying a new iron and ensure the safe and proper functioning of your appliance.
Before we dive into the repair process, it’s important to note that safety should always be your top priority. Make sure to unplug the iron from the power source and avoid working with any live wires. If you’re unsure or uncomfortable with any step, it’s best to consult a professional electrician.
Now, let’s gather the necessary materials and get started with repairing the broken electrical cord on your iron.
Key Takeaways:
- Repairing a broken electrical cord on an iron is a simple and cost-effective DIY task that can save money and reduce waste. Prioritize safety, gather materials, and follow the step-by-step process for a successful repair.
- By safely disconnecting, assessing, and testing the repair, you can restore your iron to full functionality. Embrace the satisfaction of tackling a DIY home repair project while contributing to sustainability.
Step 1: Gather necessary materials
Before you begin repairing the broken electrical cord on your iron, it’s important to have the right tools and materials on hand. This will ensure a smooth and successful repair. Here are the materials you’ll need:
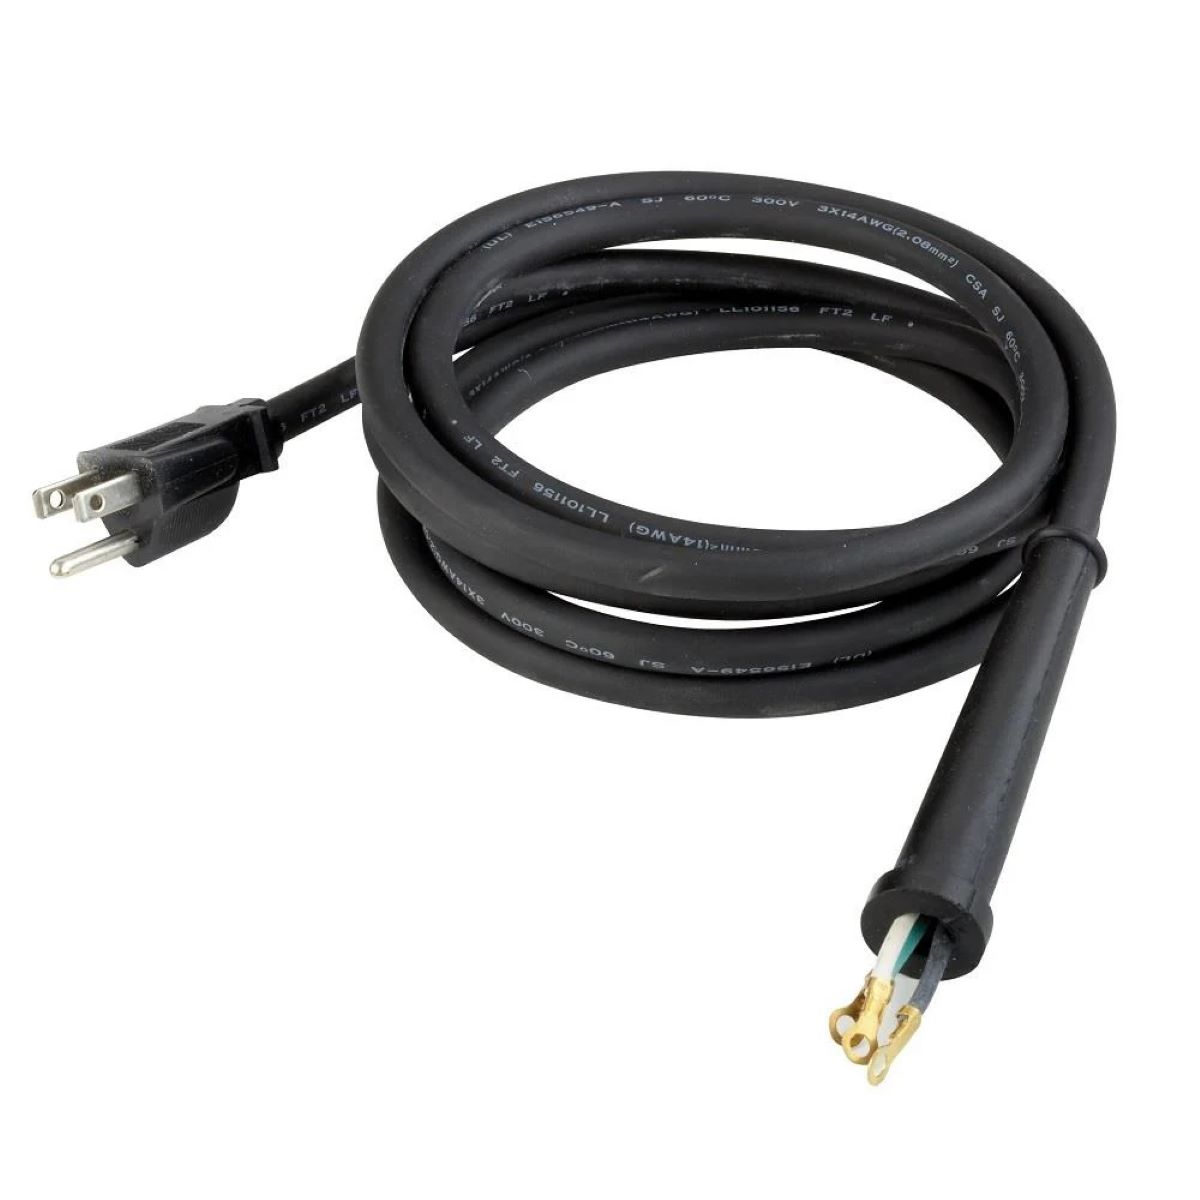
- Replacement Cord: In order to repair the broken cord, you’ll need a replacement cord that matches the specifications of your iron. This can be purchased from a hardware store or online.
- Wire Strippers: Wire strippers are essential for removing the outer insulation from the damaged cord and exposing the wire underneath. Make sure to use wire strippers that are appropriate for the gauge of your cord.
- Electrical Tape: Electrical tape is used to secure the wires together and provide insulation. Choose a high-quality electrical tape that is suitable for electrical repairs.
- Scissors: You’ll need a pair of scissors to cut the replacement cord and trim the excess electrical tape.
- Marker or Label: It’s a good idea to label the wires or mark them with a marker so that you can easily identify which wire goes where during the repair process.
- Screwdriver: Depending on the design of your iron, you may need a screwdriver to open up the casing and access the internal components. Make sure you have the appropriate screwdriver for your specific iron model.
Once you have gathered all the necessary materials, you’re ready to move on to the next step: assessing the damage to the electrical cord.
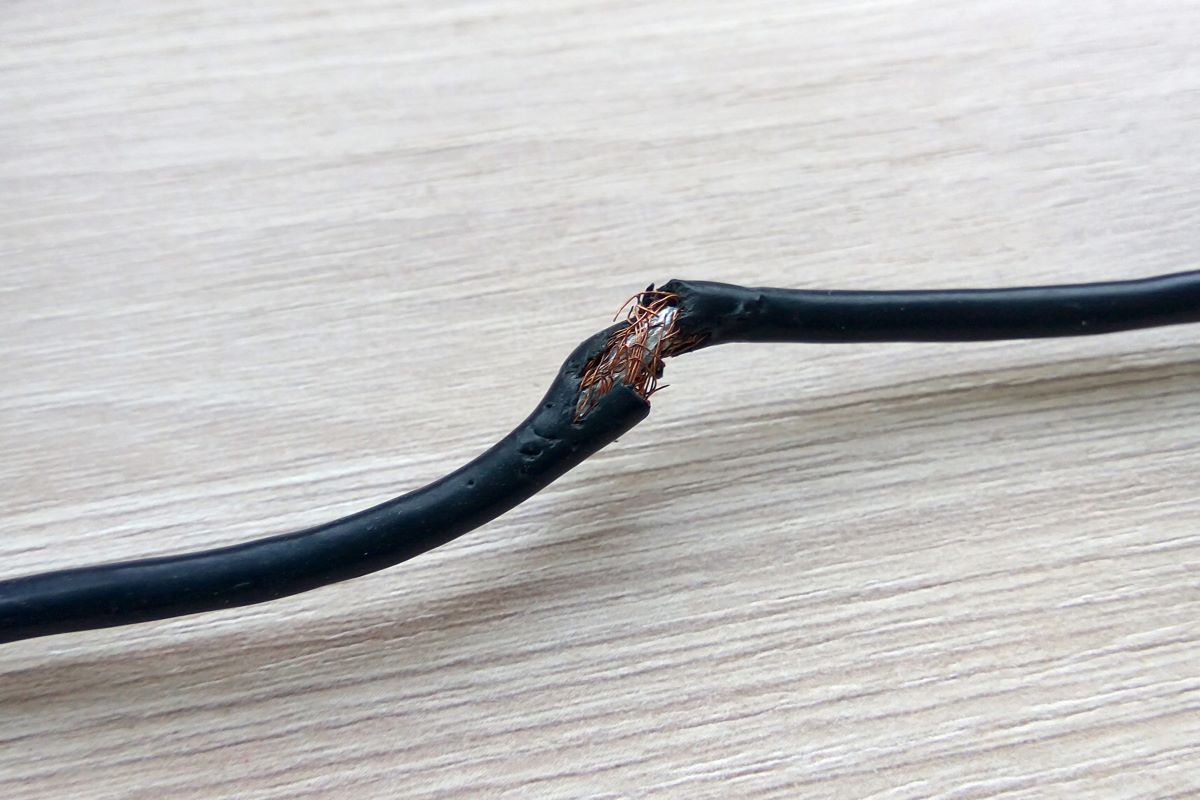
Step 2: Assess the damage
After gathering the necessary materials, it’s time to assess the damage to the electrical cord on your iron. This will help you determine the extent of the repair and whether or not it’s feasible to fix it yourself. Here’s what you need to do:
- Visually inspect the cord: Carefully examine the cord for any visible signs of damage, such as cuts, frayed wires, or exposed conductors. Pay close attention to areas near the plug and where the cord enters the iron.
- Gently bend the cord: If the damage is not readily visible, gently bend the cord along its length. Listen for any crackling sounds or observe any brief flickering of the iron’s power. These could be indicators of internal wire damage.
- Check for flexibility: A damaged cord may feel stiff or rigid in certain areas, indicating weakened or broken wires inside. Flex the cord gently to see if it remains flexible or if it feels stiff in certain spots.
Based on your assessment, you can determine whether the damage is minor and easily repairable, or if it’s more extensive and requires more complicated repairs or professional assistance. If the damage is severe or the internal wires are significantly damaged, it’s generally best to replace the entire cord for safety reasons.
Once you have assessed the damage, you can move on to the next step: safely disconnecting the iron from the power source.
Step 3: Safely disconnect the iron
Before you begin working on the broken electrical cord of your iron, it’s crucial to ensure your safety by disconnecting it from the power source. Here’s what you need to do:
- Unplug the iron: Locate the power outlet or power strip where your iron is plugged into, and gently unplug it. Ensure that the iron is completely disconnected from the electrical supply.
- Move to a well-lit area: Find a well-lit and spacious area to work on the repair. This will minimize the chances of accidents and make it easier to handle the iron and the tools.
- Additional safety measures: It’s a good idea to wear safety glasses and protective gloves to protect your eyes and hands throughout the repair process. This will guard against any potential hazards such as small metal fragments or exposed wires.
By safely disconnecting the iron from the power source and taking necessary safety precautions, you can proceed with confidence to the next step: cutting off the damaged section of the electrical cord.
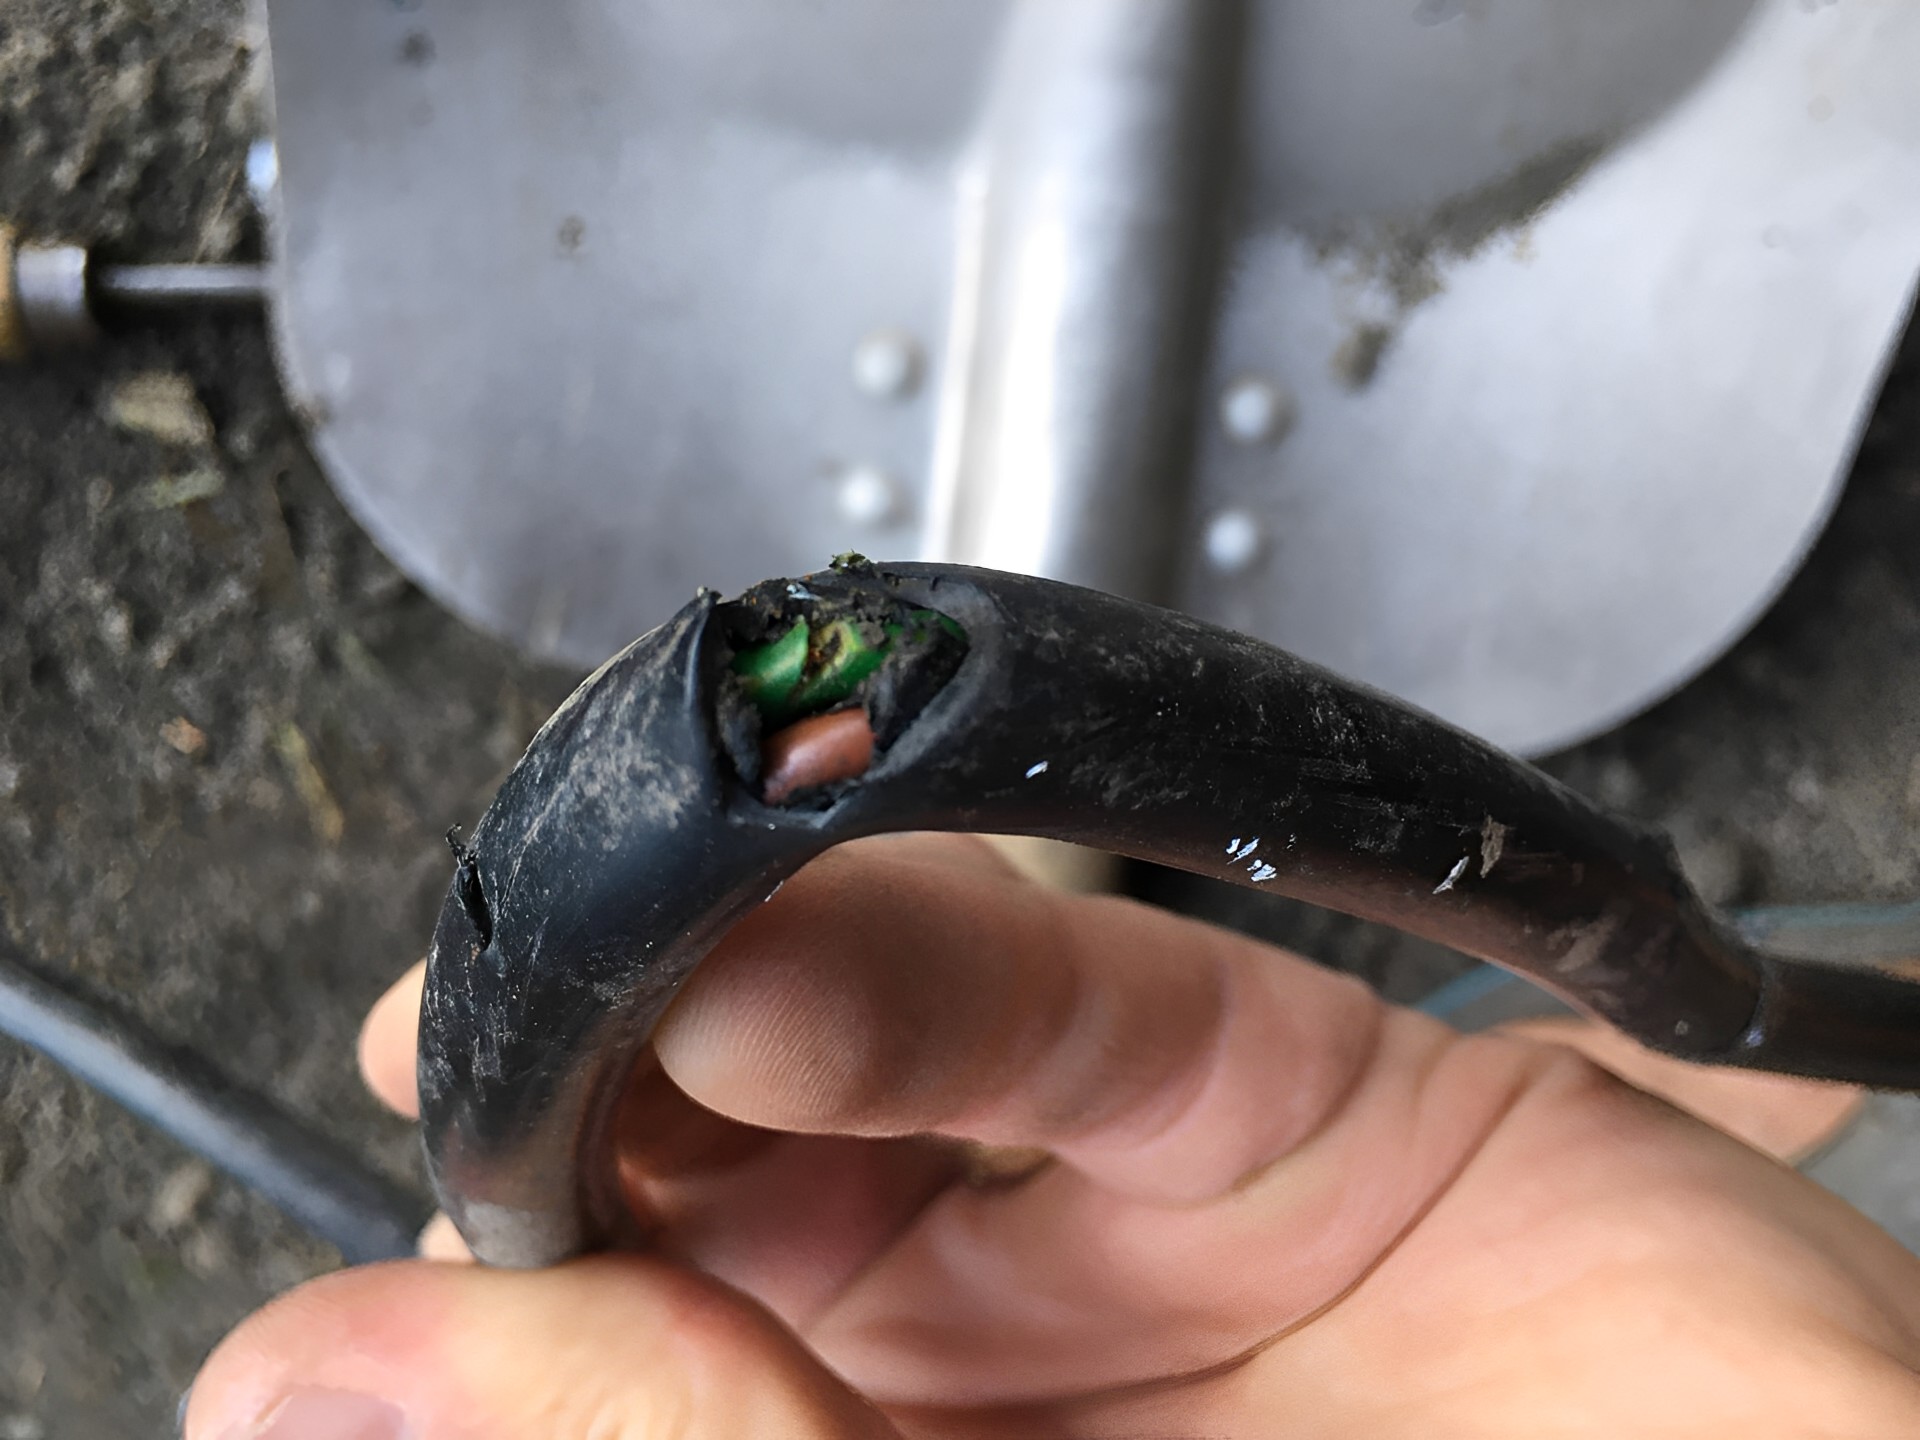
Step 4: Cut off the damaged section
After safely disconnecting the iron and taking necessary safety measures, it’s time to cut off the damaged section of the electrical cord. Follow these steps to proceed:
- Identify the damaged area: Locate the portion of the cord that is damaged or frayed. Make sure to mark it with a pen or label to clearly identify the section you will be cutting off.
- Measure and mark the cut: Use a measuring tape or ruler to determine how much of the cord needs to be removed. Make a mark on both sides of the damaged area to serve as your cutting points.
- Cut the cord: Using a pair of scissors or wire cutters, carefully cut through the cord at the marked points. Ensure that you make clean and straight cuts to avoid any further damage.
- Discard the damaged portion: Once you have cut off the damaged section, dispose of it properly. Remember to handle it with caution and avoid touching any exposed wires.
By cutting off the damaged portion of the cord, you are preparing it for the next step: stripping the wire ends to expose fresh wire for the repair.
Read more: How To Repair Broken Extension Cord
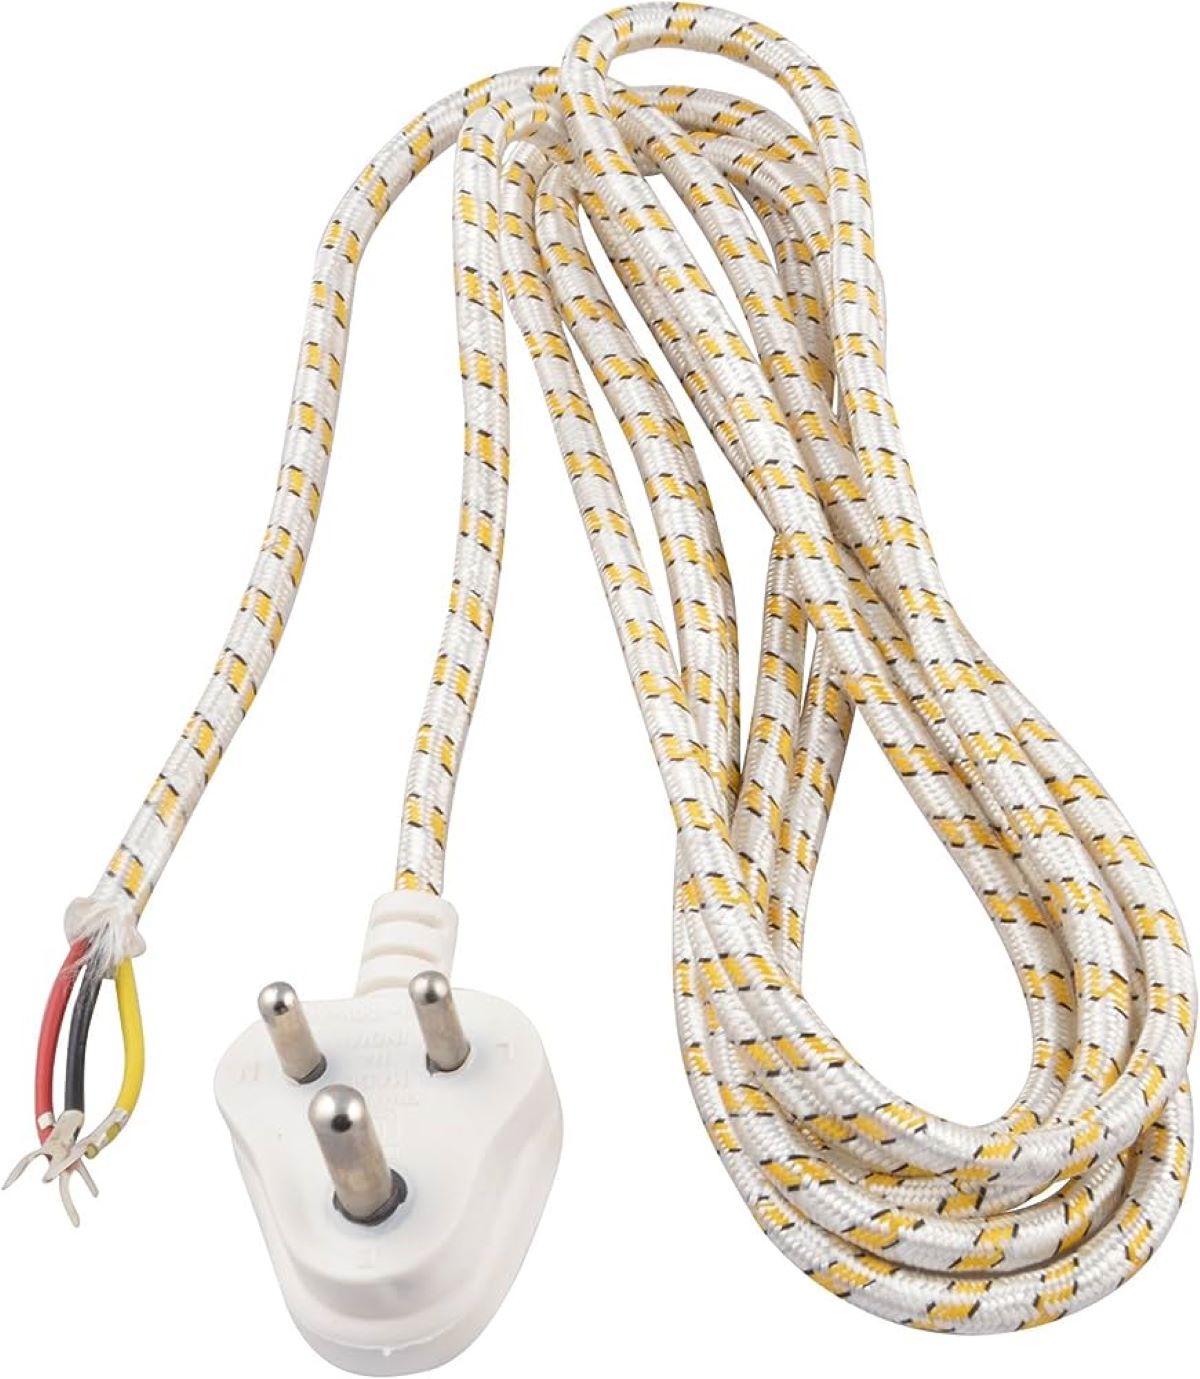
Step 5: Strip the wire ends
With the damaged section of the electrical cord removed, it’s time to strip the wire ends to expose fresh wire for the repair. Follow these steps to strip the wire ends:
- Gather your wire strippers: Choose a wire stripper that is appropriate for the gauge of your cord. This will ensure precise and clean stripping without damaging the wire.
- Adjust the wire stripper: Most wire strippers have adjustable settings to accommodate different wire gauges. Set the stripper to the appropriate gauge size for your cord.
- Position the wire: Hold the cord firmly and position it within the wire stripper so that the damaged end is placed between the jaws of the stripper.
- Strip the wire: Squeeze the handles of the wire stripper firmly to cut through the outer insulation of the cord. Pull the stripper towards the end of the cord to remove the insulation, exposing the fresh wire underneath.
- Inspect the wire ends: After stripping, inspect the wire ends to ensure that the insulation has been completely removed. Make sure that the exposed wire is clean and free from any frayed ends.
- Repeat for the other wire: If there are multiple wires within the cord, repeat the stripping process for each of them, following the same steps.
By properly stripping the wire ends, you are preparing them for the next step: twisting the wires together for the repair.
When repairing a broken electrical cord on an iron, make sure to unplug the iron before attempting any repairs. Use electrical tape to cover any exposed wires, and consider replacing the entire cord if the damage is extensive.
Step 6: Twist the wires together
With the wire ends stripped and exposed, it’s time to twist them together to ensure a secure electrical connection. Follow these steps to twist the wires together:
- Identify the wires: Take a moment to identify the different wires within the cord. Most electrical cords have two or three wires – typically a black (hot) wire, a white (neutral) wire, and sometimes a green or bare copper (ground) wire.
- Match the wires: Align the corresponding wires from both ends of the cord. For example, match the black wire from one end with the black wire from the other end.
- Hold the wires together: Hold the matched wires between your fingers, ensuring that they are firmly aligned and in contact with each other.
- Twist the wires: Using your thumb and forefinger, twist the wires together in a clockwise direction. This will create a tight and secure connection between the wires.
- Continue twisting: Continue twisting the wires until you have about 2-3 inches of tightly twisted wire.
- Inspect the connection: After twisting, inspect the twisted portion to ensure that the wires are securely connected. There should be no gaps or loose wires.
By properly twisting the wires together, you are establishing a solid electrical connection. This prepares you for the next step: securing the connection with electrical tape.
Step 7: Secure the connection with electrical tape
Now that the wires are properly twisted together, it’s important to secure the connection to ensure safety and prevent any potential electrical hazards. Follow these steps to secure the connection with electrical tape:
- Prepare the electrical tape: Cut a strip of electrical tape that is long enough to cover the twisted portion of the wires. Make sure the tape is wide enough to completely wrap around the wires.
- Position the tape: Place one end of the electrical tape against the cord, just above the twisted portion of the wires. Press firmly to ensure it adheres securely.
- Wrap the tape: Begin wrapping the electrical tape tightly around the twisted portion of the wires. Ensure that the tape overlaps with each turn to create a tight seal.
- Continue wrapping: Continue wrapping the tape until you have covered the entire twisted portion of the wires. Make sure there are no exposed wires visible.
- Secure the end: Once you reach the end of the twisted portion, press the end of the electrical tape firmly against the cord to secure it in place.
- Trim any excess tape: Using a pair of scissors, carefully trim any excess tape to create a neat and tidy finish.
By securing the connection with electrical tape, you provide insulation and protection for the twisted wires. This brings you one step closer to completing the repair process for your broken electrical cord.
Step 8: Test the repair
With the connection secure and the electrical tape in place, it’s time to test the repair and ensure that your iron is functioning properly. Follow these steps to test the repair:
- Reconnect the iron: Plug the iron back into the power outlet, ensuring that it is securely connected.
- Observe the power indicator: Check if the power indicator on the iron turns on when you switch it on. This indicates that the repaired cord is successfully delivering power to the appliance.
- Check for any sparks or flickering: While the iron is on, observe the cord and its connection for any signs of sparks, flickering, or unusual behavior. If you notice any of these, immediately switch off the iron and unplug it.
- Test the iron’s functionality: Heat up the iron and test its functionality by ironing a small piece of fabric or clothing. Check if the iron heats up properly and if all the features and settings function as expected.
- Monitor for any issues: Keep an eye on the iron during use to ensure that there are no unusual heating, electrical, or performance issues. If you notice anything out of the ordinary, stop using the iron and seek professional assistance.
Testing the repair allows you to verify that the broken electrical cord of your iron has been successfully repaired and that it is safe and fully functional for everyday use.
Read more: How Can You Repair An Electrical Cord That Has Been Broken Near The Entry To The Vibrator
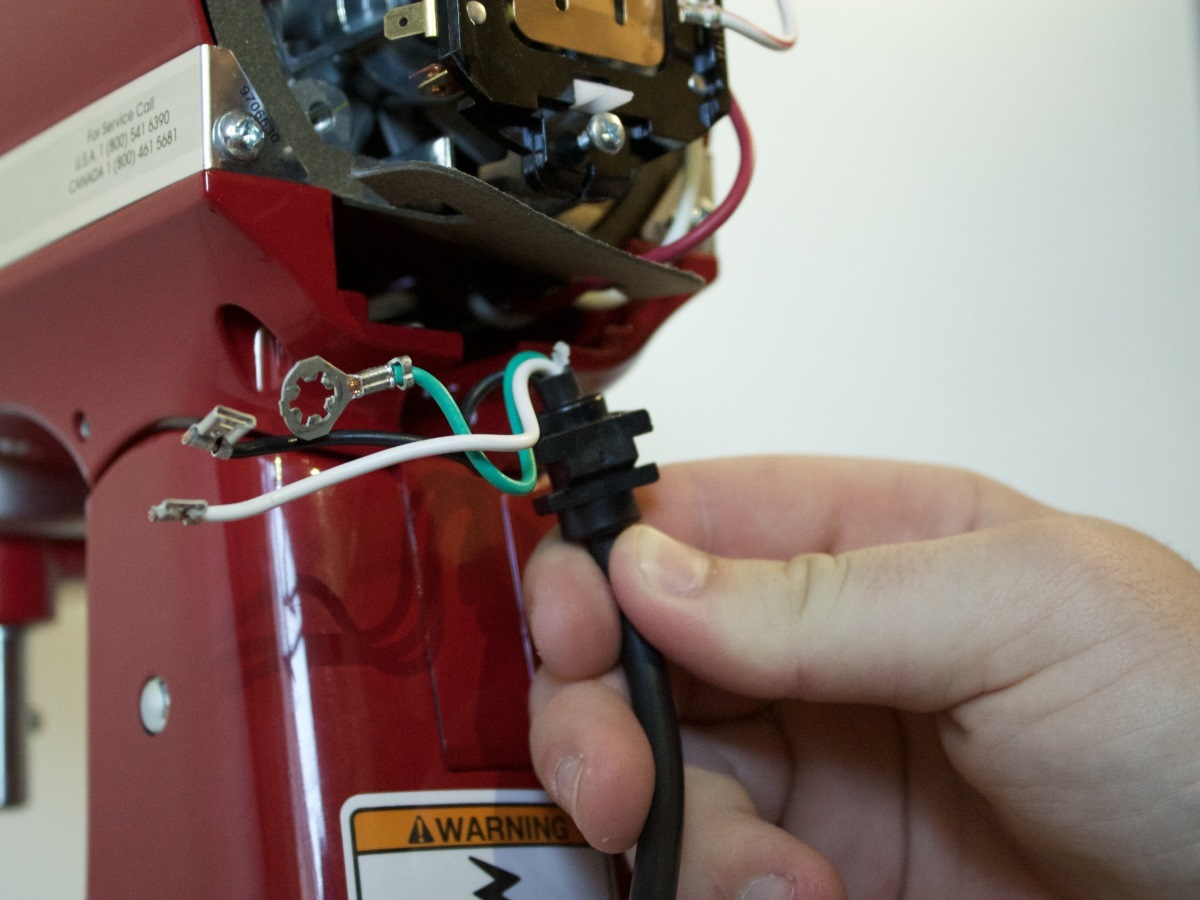
Step 9: Reconnect the iron
Once you have tested the repair and ensured that your iron is functioning properly, it’s time to safely reconnect the iron for regular use. Here’s how you can do it:
- Switch off the iron: If the iron is still powered on, switch it off to ensure safety.
- Unplug the iron: Gently unplug the iron from the power outlet or power strip.
- Inspect the cord: Take a final look at the repaired cord to make sure the electrical tape is securely in place and that there are no signs of damage or loose connections.
- Position the cord: Depending on the design of your iron, carefully position the cord so that it is not twisted or bent in a way that may cause strain.
- Plug in the iron: Slowly and firmly insert the plug into the power outlet until it is fully connected.
- Switch on the iron: If your iron has an on/off switch or temperature control, switch it on to begin using the iron.
By reconnecting the iron in a safe and secure manner, you can now enjoy using your iron again, knowing that the broken electrical cord has been successfully repaired.
Conclusion
Repairing a broken electrical cord on an iron is a relatively simple task that can save you the cost of buying a new appliance. By following the step-by-step process outlined in this article and taking necessary safety precautions, you can successfully repair the cord and restore your iron to full functionality.
Throughout the repair process, it’s essential to prioritize safety. Always unplug the iron from the power source before starting any repairs, and consider wearing protective gear such as safety glasses and gloves. If you feel unsure or uncomfortable with any step of the process, it’s best to consult a professional electrician.
Remember to gather the necessary materials, assess the damage, safely disconnect the iron, cut off the damaged section of the cord, strip the wire ends, twist the wires together, secure the connection with electrical tape, test the repair, and finally reconnect the iron for regular use.
By taking the time to repair a broken electrical cord, you not only save money but also contribute to reducing waste and promoting sustainability. Plus, you gain the satisfaction of knowing that you’ve successfully tackled a DIY home repair project.
As always, if you encounter any difficulties or uncertainties during the repair process, consider seeking professional assistance. The safety of yourself and your household should always be the top priority when dealing with electrical repairs.
Now that you have the knowledge and steps needed to repair a broken electrical cord on an iron, go ahead and give it a try. With some basic tools and a little bit of patience, you can extend the life of your iron and keep your clothes wrinkle-free for years to come.
Frequently Asked Questions about How To Repair A Broken Electrical Cord On An Iron
Was this page helpful?
At Storables.com, we guarantee accurate and reliable information. Our content, validated by Expert Board Contributors, is crafted following stringent Editorial Policies. We're committed to providing you with well-researched, expert-backed insights for all your informational needs.


0 thoughts on “How To Repair A Broken Electrical Cord On An Iron”