Home>Articles>How To Repair Ice Maker In Whirlpool Refrigerator
Articles
How To Repair Ice Maker In Whirlpool Refrigerator
Modified: January 6, 2024
Learn how to repair the ice maker in your Whirlpool refrigerator with these helpful articles. Get step-by-step instructions and troubleshooting tips.
(Many of the links in this article redirect to a specific reviewed product. Your purchase of these products through affiliate links helps to generate commission for Storables.com, at no extra cost. Learn more)
Introduction
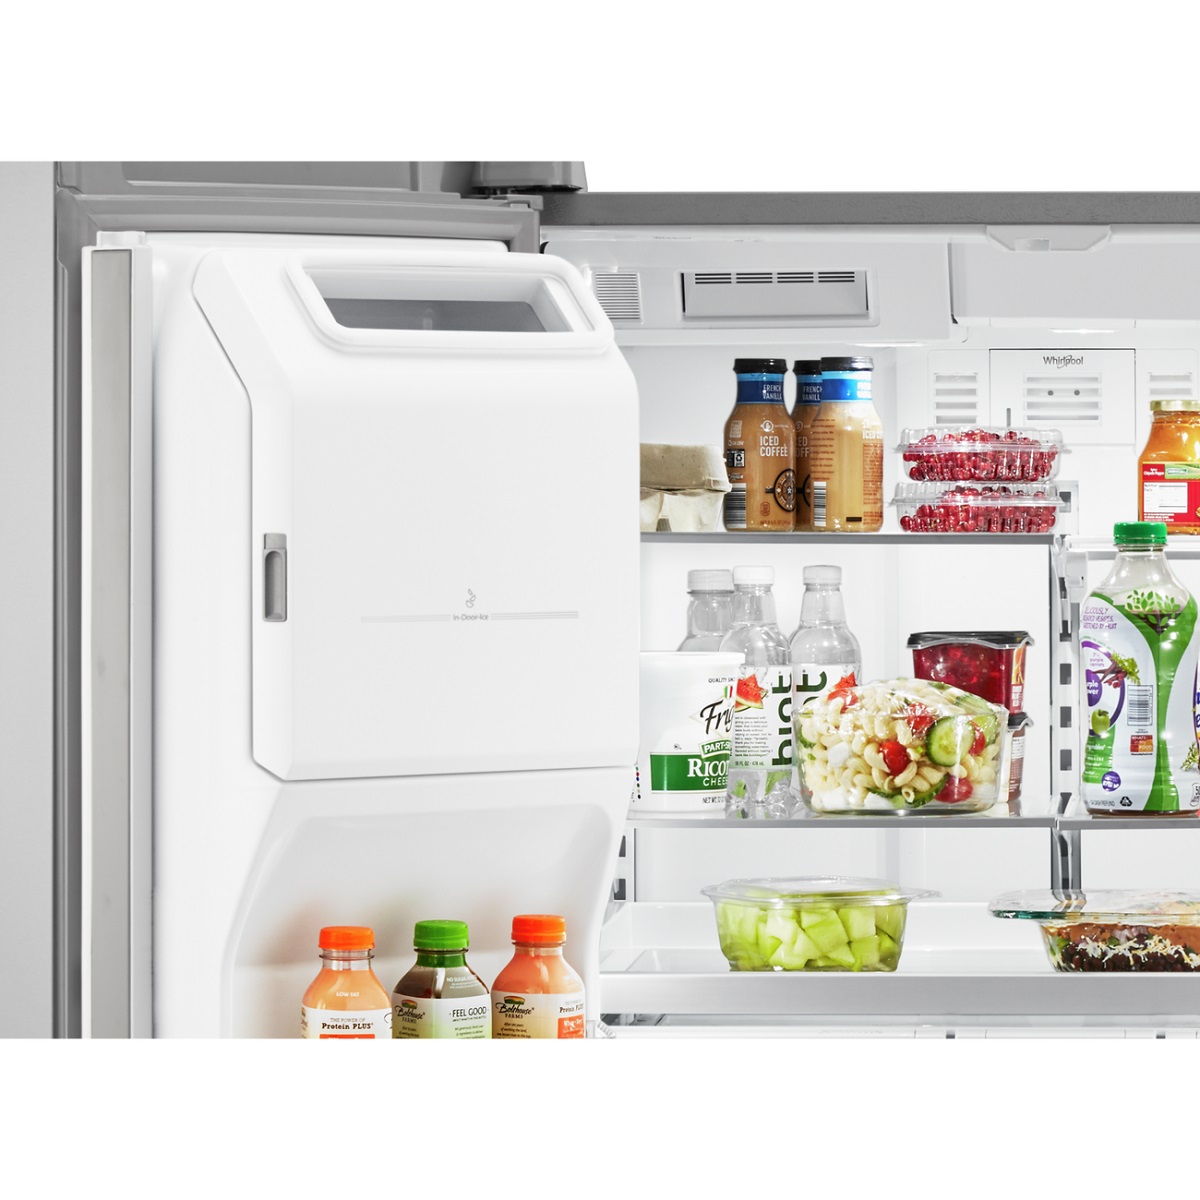
Having an ice maker in your Whirlpool refrigerator is a convenient feature that allows you to enjoy ice cubes whenever you need them. However, like any other appliance, ice makers can sometimes encounter problems and stop working properly. If you find yourself with a malfunctioning ice maker, don’t worry! In this article, we will guide you through the process of repairing the ice maker in your Whirlpool refrigerator.
Before we begin, it’s important to note that if your refrigerator is still under warranty, it’s best to contact Whirlpool or a certified technician for assistance. However, if your warranty has expired or you prefer to try fixing the ice maker yourself, this step-by-step guide will help you troubleshoot and repair common issues.
We’ll start by identifying common ice maker problems, then outline the tools and materials you’ll need for the repair. Next, we’ll guide you through each step of the repair process, from disconnecting the power to reinstalling the ice maker unit. By following these instructions, you’ll be able to get your Whirlpool refrigerator’s ice maker back up and running in no time! So, let’s dive in and address those ice maker issues.
Key Takeaways:
- Repairing the ice maker in your Whirlpool refrigerator is a manageable task that can save you time and money. By following the step-by-step guide, you can troubleshoot and fix common issues, ensuring a reliable supply of ice whenever you need it.
- Prioritizing safety, having the right tools and materials, and thorough inspection and cleaning are essential for successful ice maker repair. If unsure, consult a professional technician for assistance to ensure continued performance.
Common Ice Maker Problems
Before we jump into the repair process, let’s familiarize ourselves with some common ice maker problems you may encounter. By understanding these issues, you’ll be better equipped to diagnose and fix the problem at hand.
1. No Ice Production: One of the most common problems is when your ice maker stops producing ice altogether. This could be due to a variety of reasons, such as a clogged water line, a malfunctioning water inlet valve, or a faulty ice maker assembly.
2. Low Ice Production: If your ice maker is producing a smaller or irregular amount of ice cubes, it may be experiencing a decrease in water flow. This could be caused by a partially clogged water filter or a malfunctioning water inlet valve.
3. Manual Ice Release Button Not Working: The manual ice release button, also known as the “test button,” is used to manually fill the ice tray with water to check the ice maker’s functionality. If this button fails to work, it may indicate an issue with the ice maker’s motor or electronic controls.
4. Noisy Operation: If your ice maker is making unusual noises during the ice-making cycle, it could be due to a variety of factors, such as a faulty motor, a misaligned ice tray, or a malfunctioning water valve.
5. Overfilling: Sometimes, the ice maker may produce excessive ice cubes, causing them to overflow and spill inside the freezer. This could be a result of a malfunctioning water inlet valve or a faulty ice maker control module.
Understanding these common ice maker problems will help you narrow down the possible causes and troubleshoot effectively. In the next section, we will discuss the tools and materials you’ll need to repair your Whirlpool refrigerator’s ice maker.
Tools and Materials Needed
Before you start repairing the ice maker in your Whirlpool refrigerator, it’s essential to gather the necessary tools and materials. Having everything prepared ahead of time will ensure a smooth and efficient repair process. Here’s a list of what you’ll need:
1. Screwdriver: A Phillips-head screwdriver is typically the most common type of screwdriver needed for removing screws holding the ice maker unit in place. Make sure you have the appropriate size for your specific model.
2. Adjustable Wrench: An adjustable wrench will come in handy for tasks such as disconnecting the water supply line and loosening connections.
3. Bucket or Towel: Have a bucket or towel ready to catch any water that may leak out during the repair process.
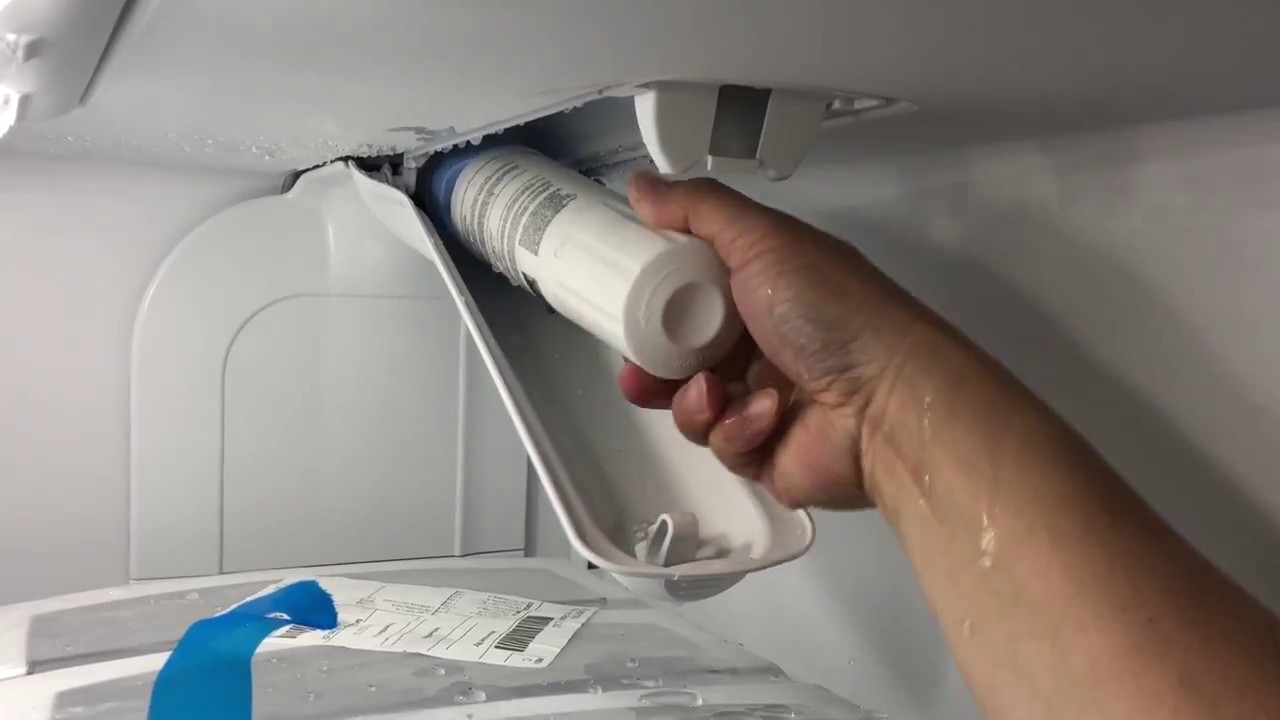
4. Replacement Parts: Depending on the issue you’re facing, you may need some replacement parts like a water inlet valve, ice maker control module, or water filter. Identify the specific part you need before starting the repair.
5. Cleaning Solution: Prepare a mild cleaning solution, such as a mixture of warm water and mild dish soap, to clean the ice maker and remove any debris or residue.
6. Safety Gloves: It’s always a good idea to protect your hands with safety gloves, especially when working with electrical components.
7. Safety Glasses: Protect your eyes by wearing safety glasses to prevent any debris or water from splashing.
8. Owner’s Manual: Keep the owner’s manual for your Whirlpool refrigerator handy. It will provide specific instructions and diagrams for your particular model, which can be helpful during the repair process.
It’s crucial to have all the necessary tools and materials readily available before you begin the repair. This will save you time and prevent any unnecessary interruptions during the process. Once you have everything at hand, you’re ready to move on to the step-by-step repair process.
Step 1: Disconnect the Power
Safety should always be a top priority when repairing any appliance, including your Whirlpool refrigerator’s ice maker. Before you start working on the unit, it’s crucial to disconnect the power to ensure your safety and prevent any damage to the ice maker or other electrical components. Follow these steps to disconnect the power:
1. Locate the power cord: Start by locating the power cord of your refrigerator. It is typically located at the back near the bottom of the unit.
2. Unplug the refrigerator: Gently pull the power cord out of the electrical outlet to disconnect the power supply. Make sure the cord is fully removed from the socket to prevent any accidental reconnection.
3. Confirm power disconnection: Double-check that the refrigerator is no longer receiving power by checking if the lights and other electrical functions are off.
By disconnecting the power, you’ll avoid the risk of electric shock and ensure a safe working environment. Remember to exercise caution throughout the repair process and keep the power disconnected until instructed otherwise. With the power safely disconnected, you can proceed to the next step: removing the ice maker unit.
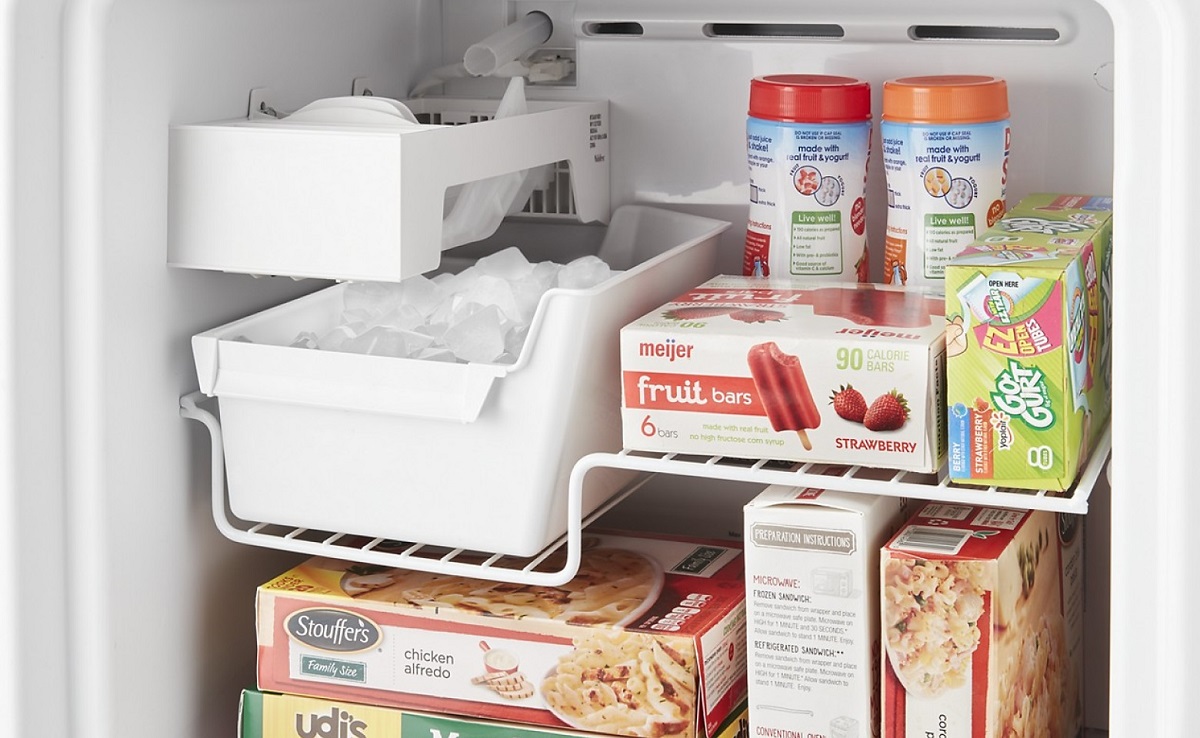
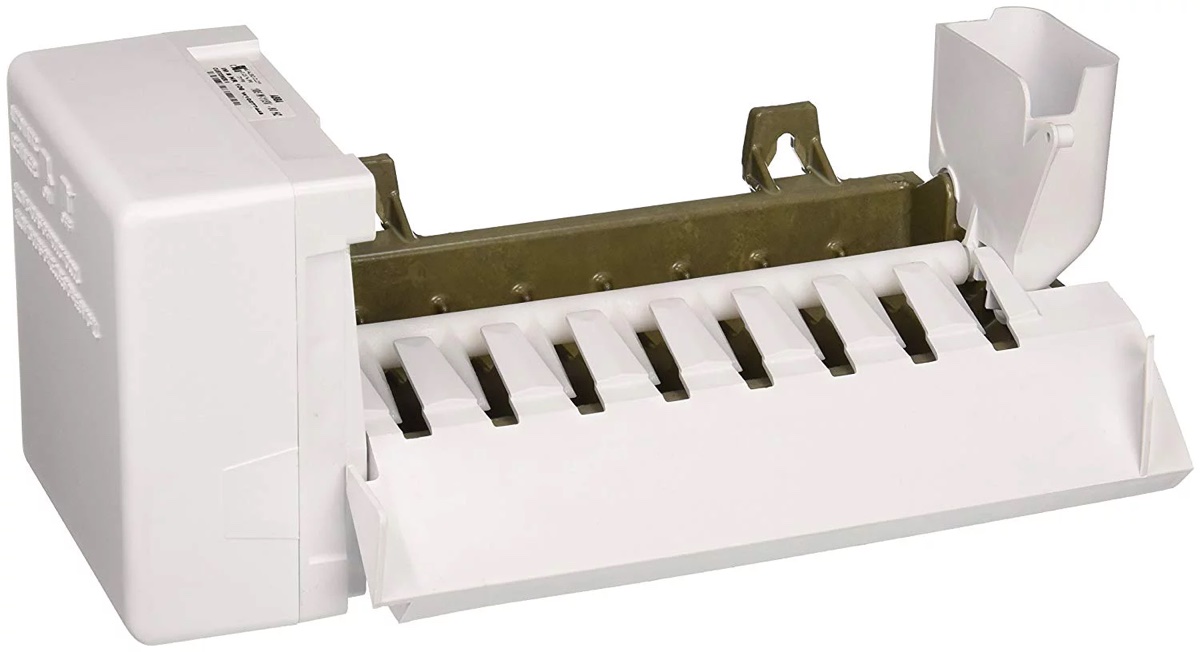
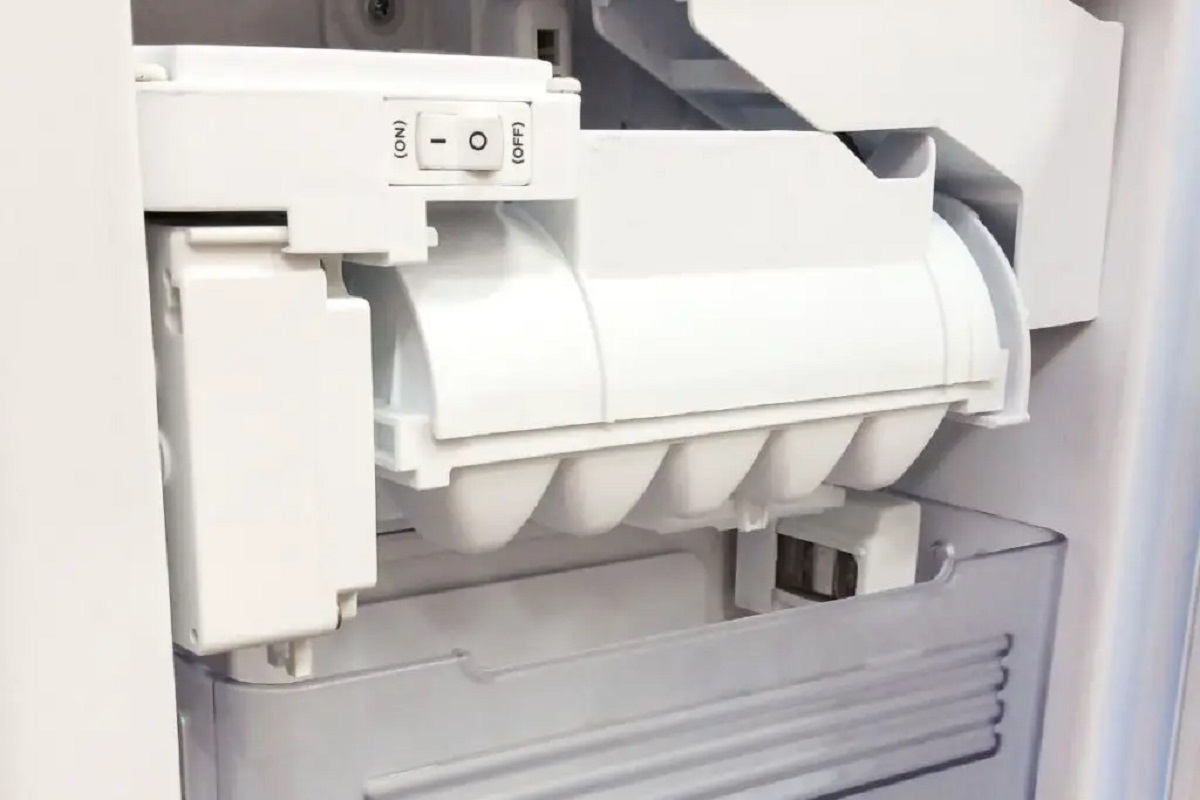
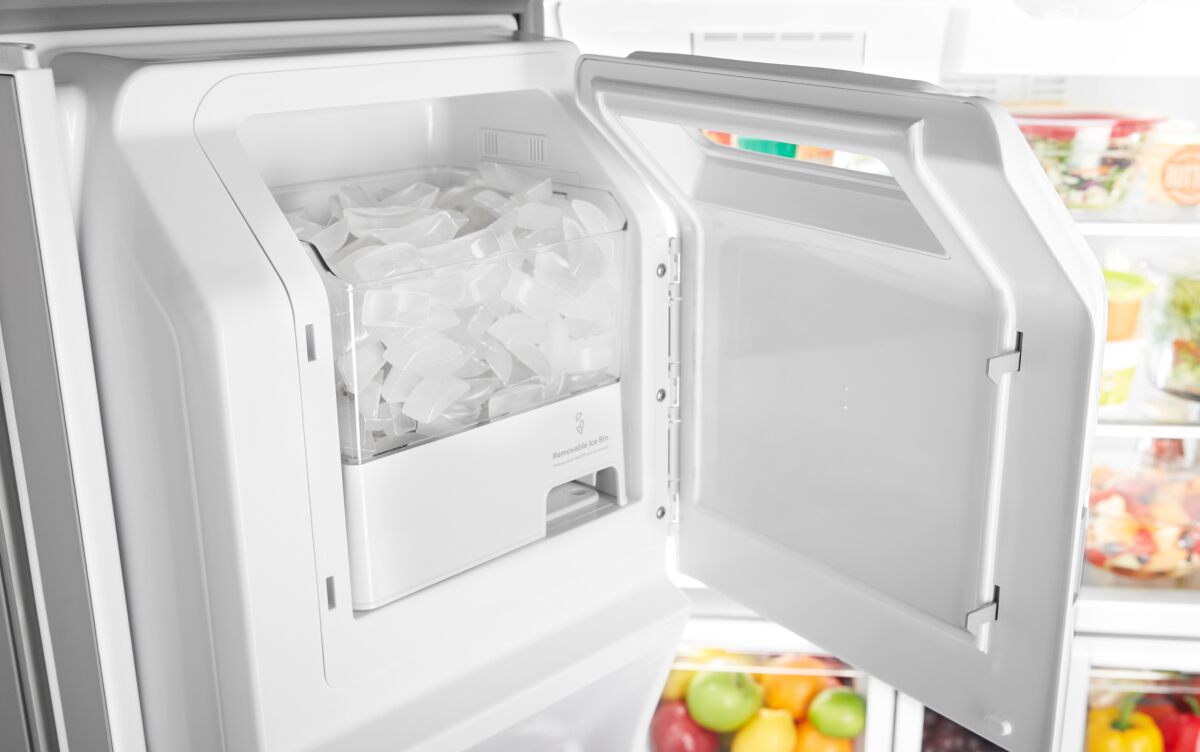
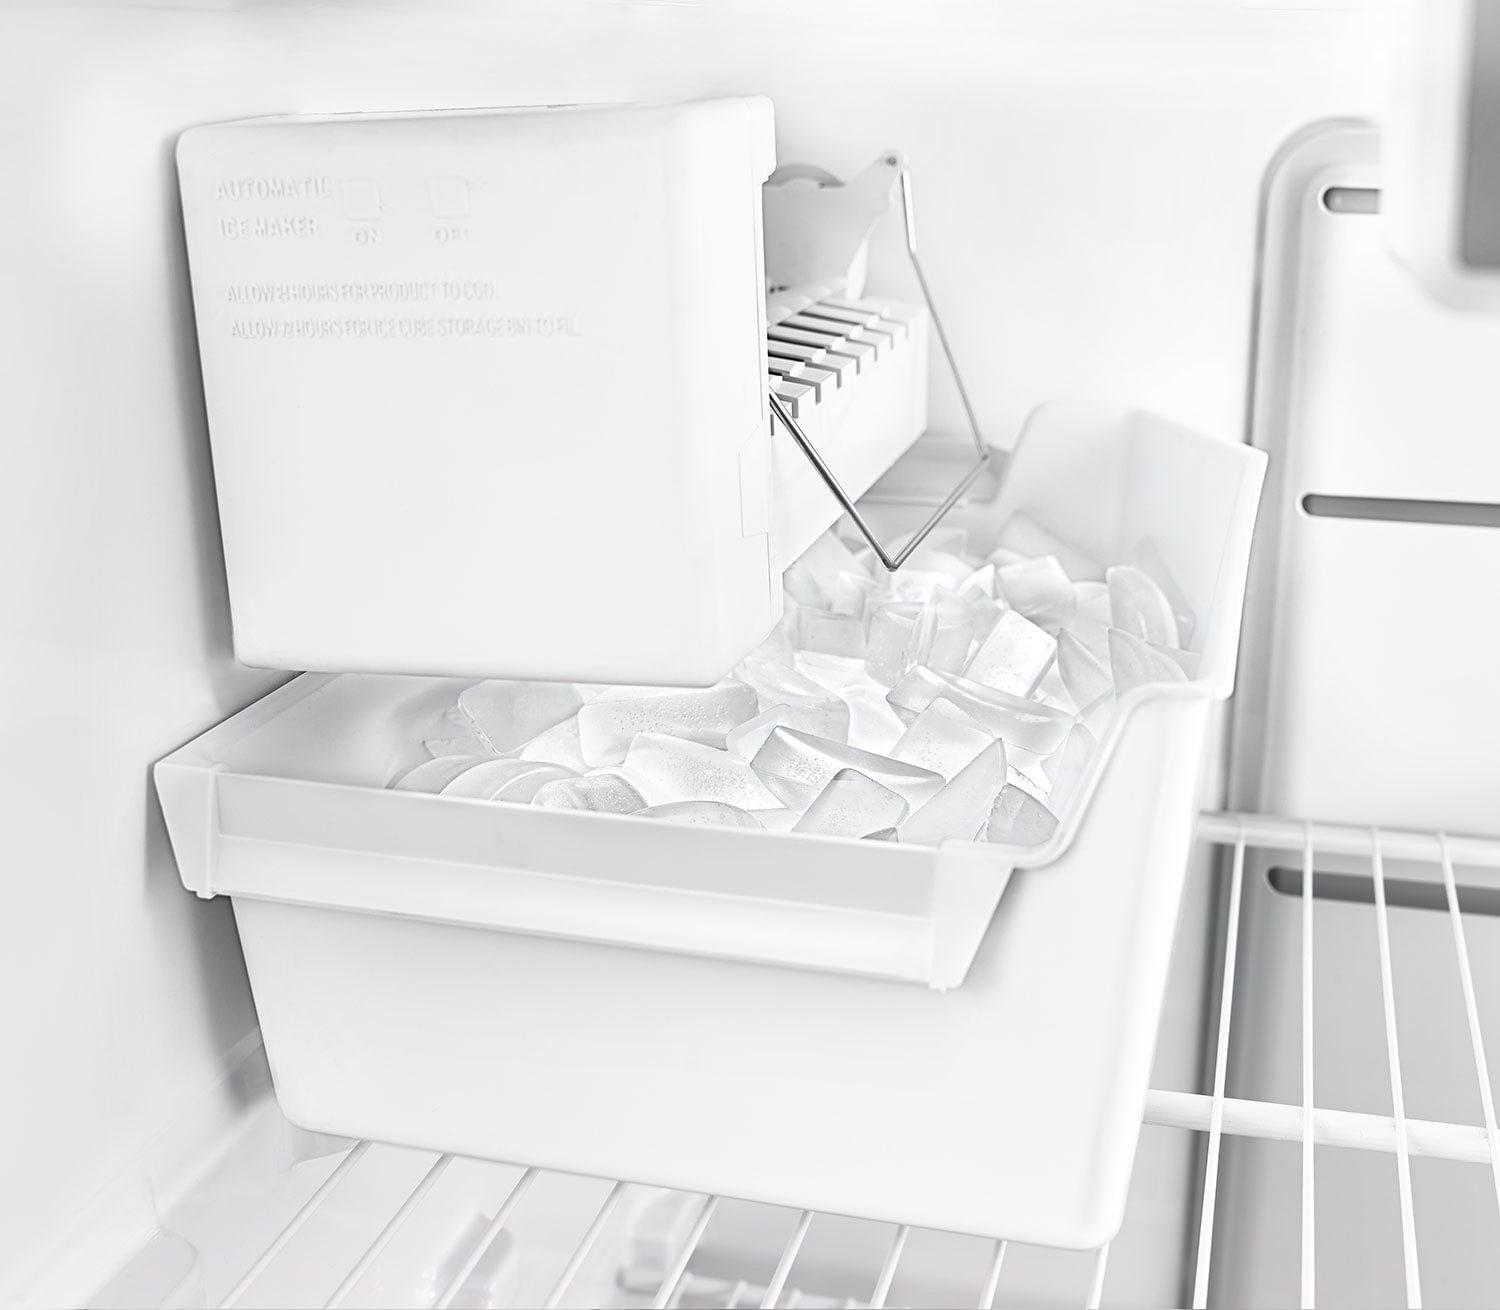
Step 2: Remove the Ice Maker Unit
Once you have disconnected the power, it’s time to remove the ice maker unit from your Whirlpool refrigerator. Removing the ice maker will give you better access to diagnose and repair any issues. Follow these steps to remove the ice maker unit:
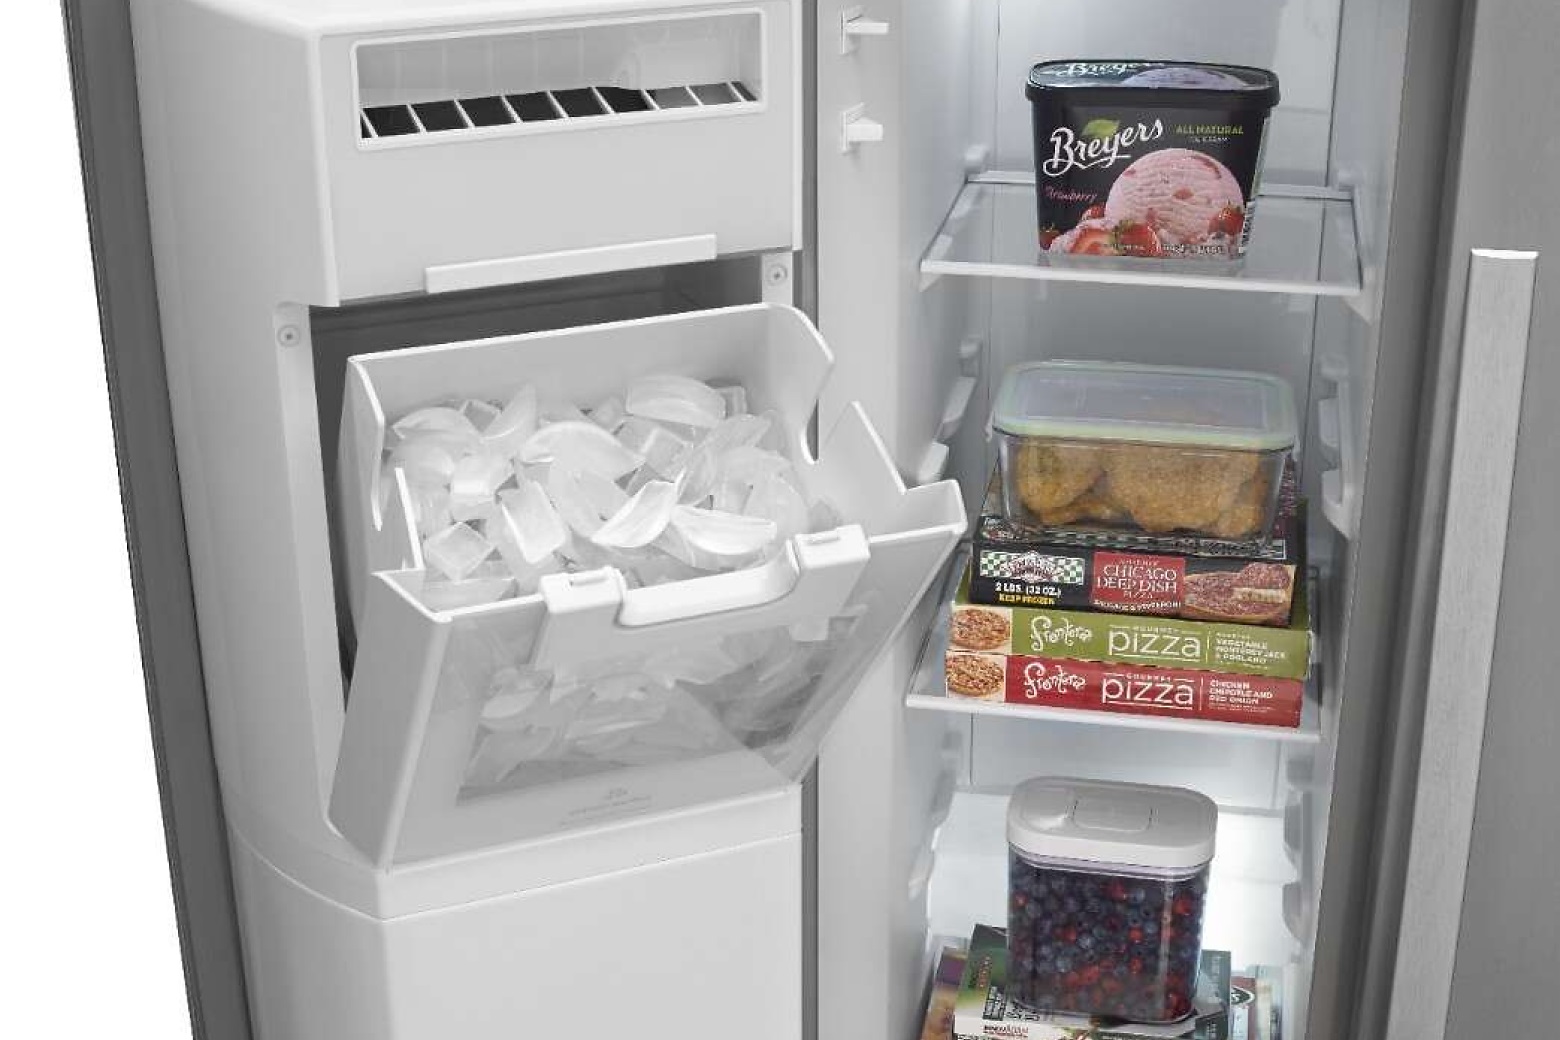
1. Locate the ice maker: Depending on your refrigerator model, the ice maker may be located in different areas, such as the freezer compartment or the top left corner of the refrigerator. Refer to your owner’s manual for the specific location.
2. Disconnect the water supply line: Locate the water supply line that connects to the ice maker. It is usually a flexible plastic or metal tube. Use an adjustable wrench to loosen the connection and disconnect it from the ice maker.
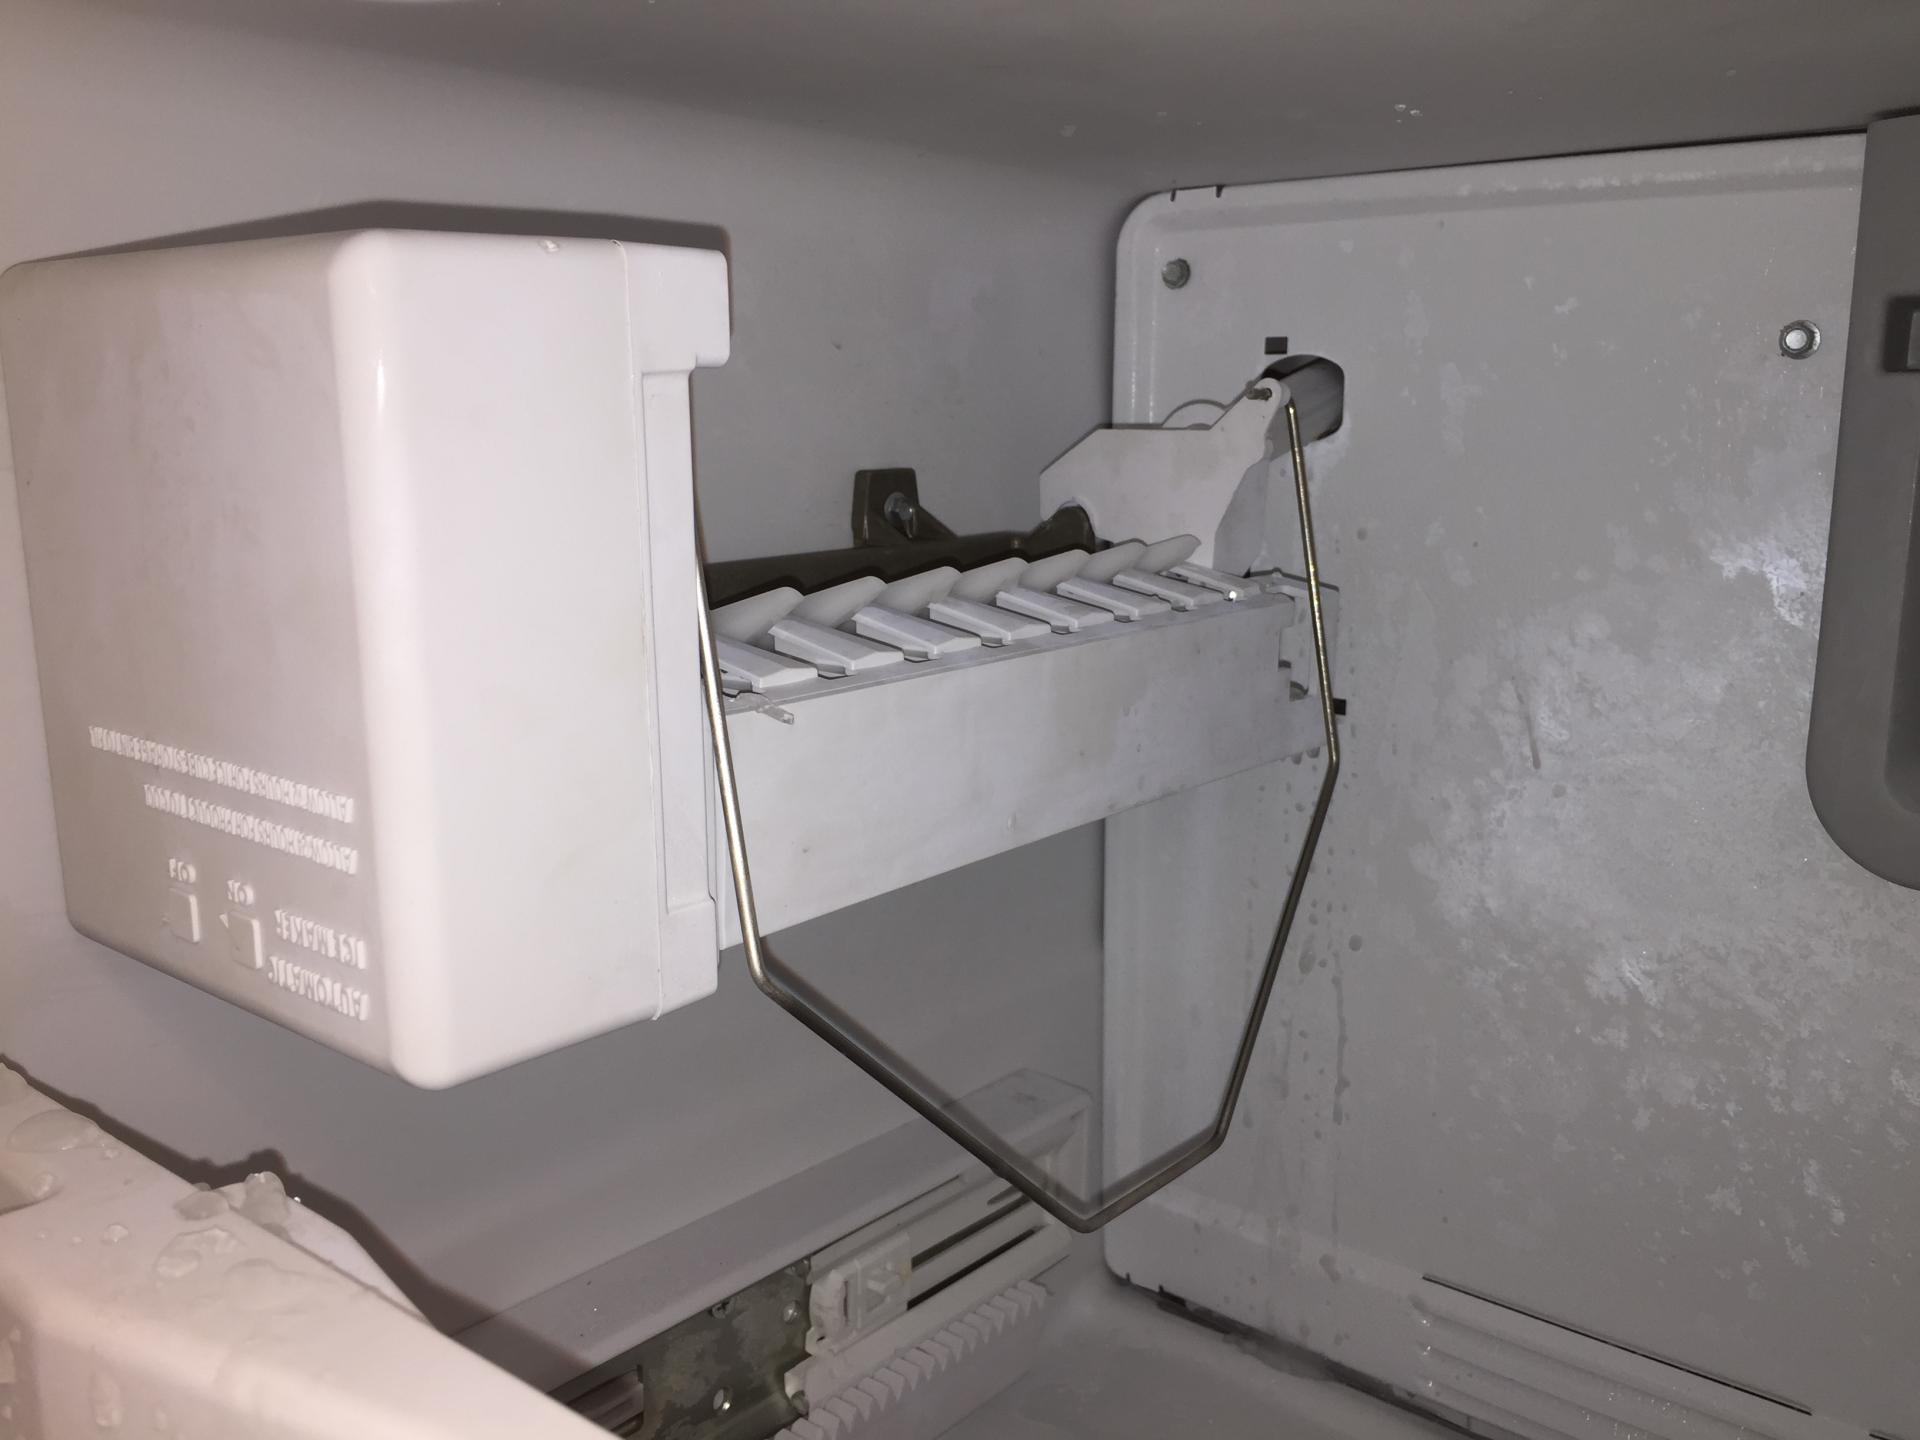
3. Remove ice maker mounting screws: Look for the mounting screws that hold the ice maker in place. They are typically located on the side or at the bottom of the ice maker unit. Use a Phillips-head screwdriver to unscrew and remove these mounting screws.
4. Slide out the ice maker unit: Carefully slide the ice maker unit out of its position. If necessary, gently tilt the unit to release it from any clips or brackets that may be holding it in place. Be cautious not to damage any wiring or components during the removal process.
5. Disconnect electrical connections (if applicable): Some ice maker units may have electrical connections that need to be disconnected. If your ice maker has any electrical connectors, carefully disconnect them by gently pulling them apart. Take note of the orientation and placement of the connectors for reinstallation later.
By removing the ice maker unit, you’ll have easier access to inspect and repair the ice maker components. Keep the mounting screws and any electrical connectors in a safe place to ensure you can easily reinstall the ice maker later. In the next step, we will delve into the inspection and cleaning process for the ice maker unit.
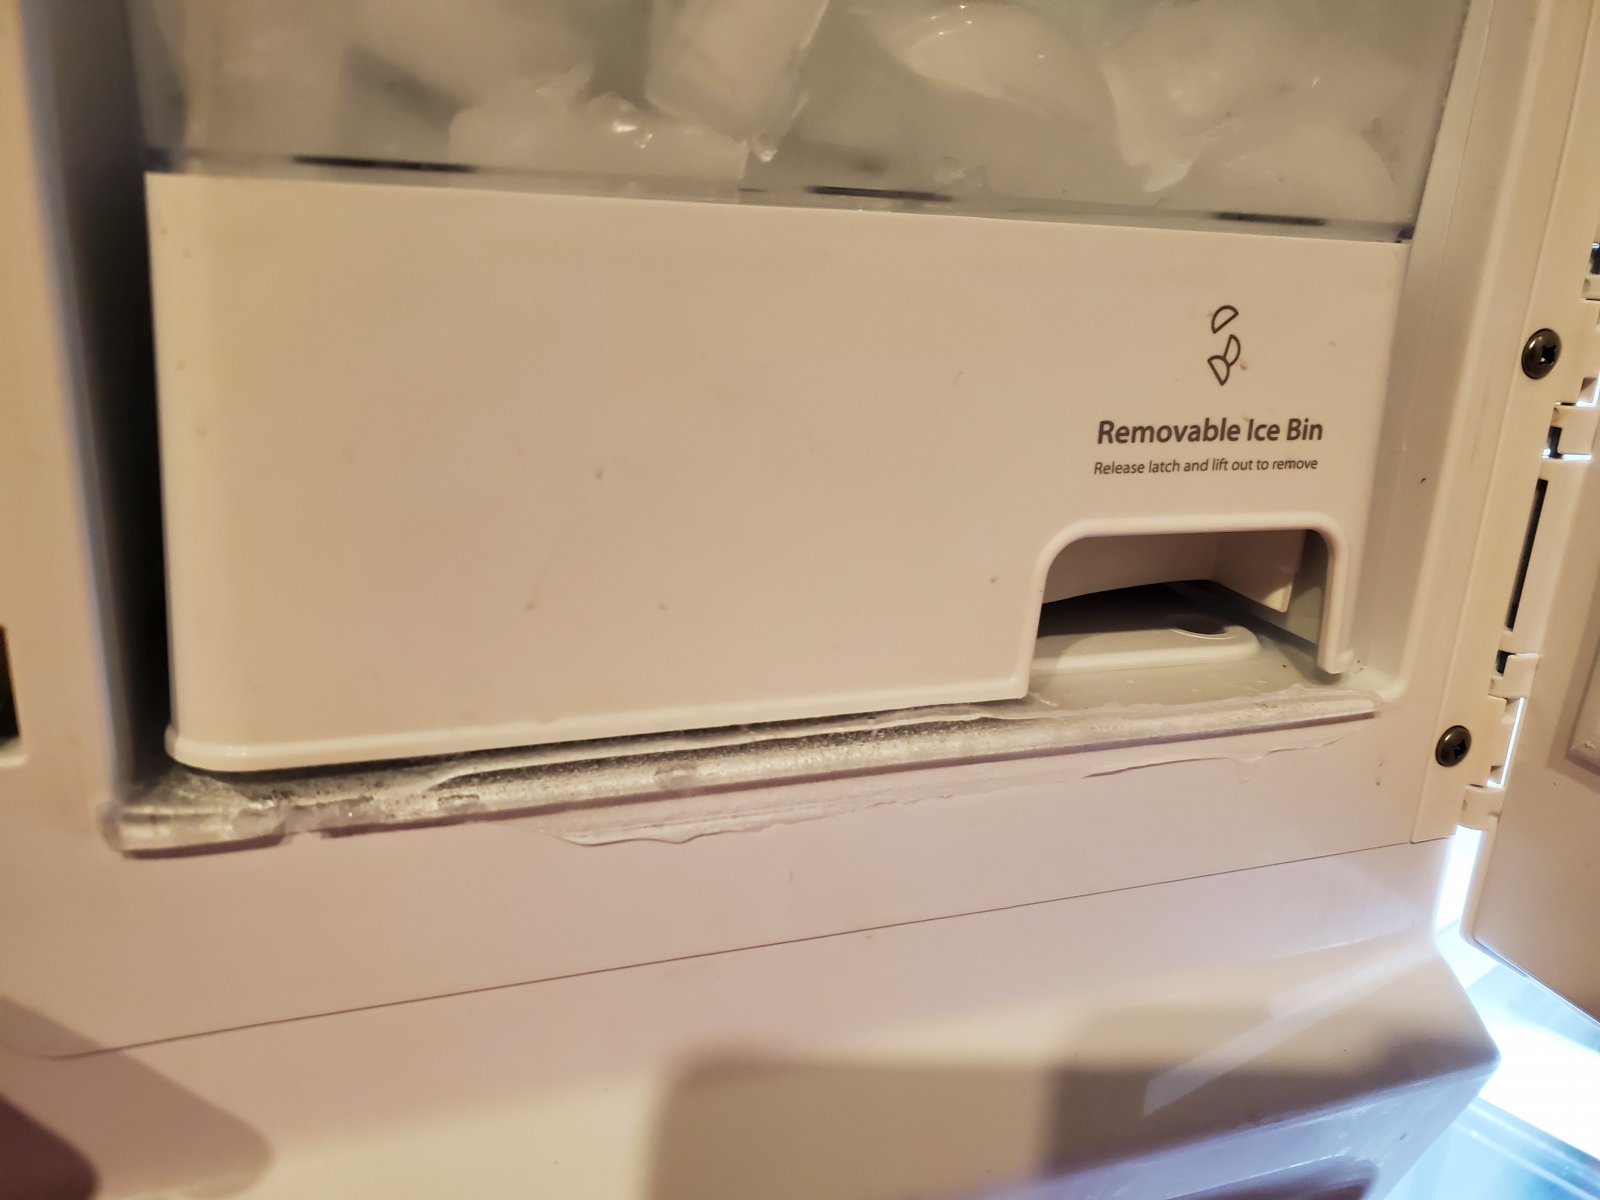
Step 3: Inspect and Clean the Ice Maker
Now that you have removed the ice maker unit from your Whirlpool refrigerator, it’s time to inspect and clean it. Over time, ice makers can accumulate debris, mineral deposits, and mold, leading to various issues. Follow these steps to inspect and clean the ice maker:
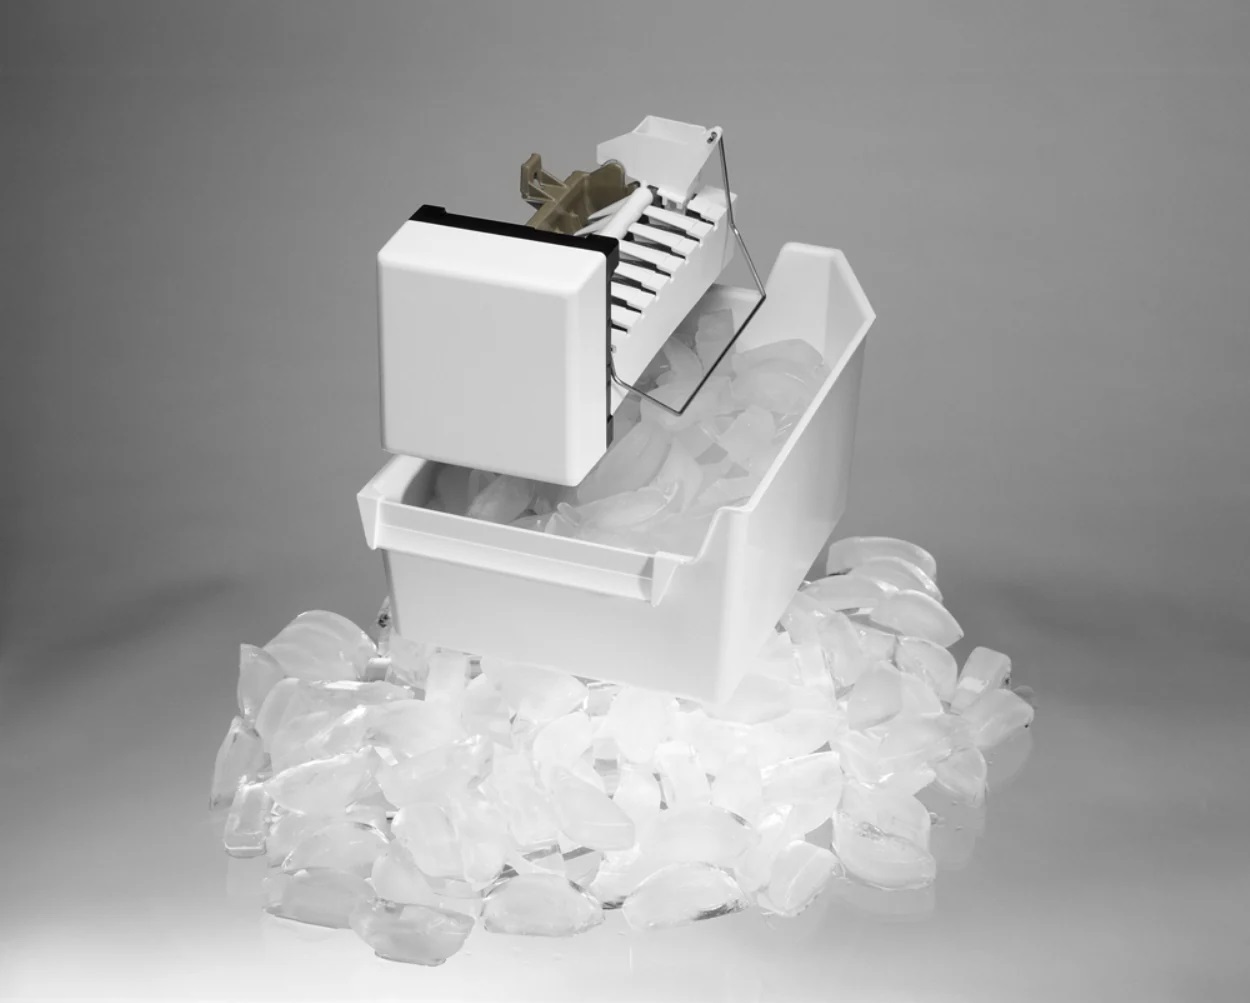
1. Visual Inspection: Carefully examine the ice maker for any visible signs of damage or worn-out components. Look for cracked or broken parts, such as the ice mold, ice rake, or motor assembly. Check for any loose connections or wiring issues as well.
2. Clean the Ice Mold: The ice mold is the component responsible for producing ice cubes. Use a mild cleaning solution, such as warm water mixed with a small amount of dish soap, to clean the ice mold and remove any mineral deposits or debris. Avoid using abrasive materials or harsh chemicals that could damage the mold.
3. Remove Ice Build-Up: If there is any ice build-up or frost inside the ice maker unit, carefully chip away at it using a plastic utensil or a wooden dowel. Be gentle to avoid damaging the ice maker components.
4. Clean the Water Inlet Tube: The water inlet tube is responsible for supplying water to the ice maker. Inspect the tube for any blockages or clogs. Use a small brush or a pipe cleaner to gently clean out any debris or mineral deposits.
5. Check the Water Level: While inspecting the ice maker, take note of the water level. It should be at the correct height to ensure proper ice production. If the water level is too low or too high, it may indicate a problem with the water inlet valve.
6. Dry and Reassemble: After cleaning the ice maker components, make sure to dry them thoroughly to prevent any moisture-related issues. Once dry, reassemble the ice maker unit by following the reverse order of the removal process.
By inspecting and cleaning the ice maker, you can remove any potential obstructions and ensure that it is in good working condition. In the next step, we will focus on checking and testing the water inlet valve.
To repair the ice maker in a Whirlpool refrigerator, start by checking the water supply and ensuring the ice maker is turned on. Clean the ice maker and check for any clogs or blockages in the water line. If the issue persists, consider replacing the ice maker unit.
Step 4: Check the Water Inlet Valve
The water inlet valve is a crucial component of your Whirlpool refrigerator’s ice maker. It controls the flow of water into the ice maker to produce ice cubes. If the water inlet valve is malfunctioning or blocked, it can lead to issues with ice production. Follow these steps to check the water inlet valve:
1. Locate the Water Inlet Valve: The water inlet valve is typically located at the back of the refrigerator near the bottom. It is connected to the water supply line that feeds water to the ice maker.
2. Shut off the Water Supply: Before checking the water inlet valve, it’s important to shut off the water supply to the refrigerator. Locate the shut-off valve connected to the water supply line and turn it clockwise to stop the water flow.
3. Inspect for Blockages: Check the water inlet valve for any visible blockages or debris. Look for any sediment or mineral deposits that may be hindering the water flow. Use a flashlight to get a clear view of the valve.
4. Test the Valve Solenoids: The water inlet valve has two solenoids—one for the ice maker and one for the water dispenser. Use a multimeter set to the ohms setting to test the solenoids for continuity. Place the multimeter probes on the solenoid terminals. If there is no continuity, it indicates a faulty solenoid, and the valve needs to be replaced.
5. Check Valve for Leaks: Inspect the water inlet valve for any signs of leaks. Look for water stains or puddles around the valve. A leaking valve will need to be replaced as well.
By checking the water inlet valve, you can identify any blockages or malfunctions that may be affecting the water flow to the ice maker. If you find any issues with the valve, it may need to be replaced. In the next step, we will guide you through testing the water inlet valve to determine its functionality.
Step 5: Test the Water Inlet Valve
After checking the water inlet valve in your Whirlpool refrigerator, it’s time to test its functionality. Testing the valve will help determine if it is working properly or if it needs to be replaced. Follow these steps to test the water inlet valve:
1. Turn on the Water Supply: Ensure the water supply to the refrigerator is turned on. Flip the shut-off valve connected to the water supply line counterclockwise to allow water flow.
2. Disconnect the Water Tube: Locate the water tube that connects the water inlet valve to the ice maker. Gently disconnect the tube from the valve. Be prepared for some water to spill out, so have a towel or bucket ready to catch any excess water.
3. Activate the Ice Maker: The ice maker has a fill cycle that can be manually activated. Locate the ice maker’s fill tube protruding from the back of the freezer compartment. Insert a small jumper wire into the tube’s fill terminal to manually initiate the ice maker’s fill cycle.
4. Observe the Water Flow: During the ice maker’s fill cycle, observe the water inlet valve to see if water flows into the tube. If water does not flow or only flows in a weak stream, it indicates that the water inlet valve is faulty and needs to be replaced.
5. Reconnect the Water Tube: Once you have completed the testing, reattach the water tube to the water inlet valve. Make sure it is securely connected to prevent any leaks.
By testing the water inlet valve, you can determine if it is functioning properly and supplying water to the ice maker as needed. If the valve fails to deliver water or if the flow is insufficient, it is a clear indication that the valve needs to be replaced. In the next step, we will cover the process of replacing the water inlet valve if necessary.
Step 6: Replace the Water Inlet Valve (if necessary)
If testing the water inlet valve in your Whirlpool refrigerator has revealed that it is faulty or not functioning as it should, it may be necessary to replace the valve. Replacing the water inlet valve will restore proper water flow to the ice maker, resolving any issues with ice production. Follow these steps to replace the water inlet valve:
1. Refer to Your Owner’s Manual: Consult your owner’s manual or search for the specific instructions for replacing the water inlet valve on your Whirlpool refrigerator model. Different models may have slight variations in the replacement process.
2. Locate the Water Inlet Valve: The water inlet valve is typically located at the back of the refrigerator, near the bottom. It is connected to the water supply line.
3. Disconnect the Water Supply: Before replacing the water inlet valve, shut off the water supply to the refrigerator. Twist the shut-off valve clockwise to stop the water flow. Place a bucket or towel underneath the valve to catch any remaining water.
4. Disconnect the Water Tubes: Disconnect the water tubes from the water inlet valve. Depending on your specific model, this may require using a wrench or pliers to loosen the connections.
5. Remove the Mounting Hardware: Locate the mounting hardware that secures the water inlet valve to the refrigerator. This can include screws, brackets, or clips. Use a screwdriver or the appropriate tool to remove the hardware and detach the valve from the refrigerator.
6. Install the New Water Inlet Valve: Take the new water inlet valve and position it in place of the old valve. Secure it with the mounting hardware, making sure it is tightly fastened.
7. Reconnect the Water Tubes: Connect the water tubes to the corresponding outlets on the new water inlet valve. Tighten the connections, ensuring there are no leaks.
8. Restore the Water Supply: Turn the shut-off valve counterclockwise to restore the water supply to the refrigerator. Check for any leaks around the water inlet valve connections.
By following these steps, you can replace the water inlet valve in your Whirlpool refrigerator, restoring proper water flow to the ice maker. If you’re unsure about the replacement process, it’s always beneficial to refer to your owner’s manual or seek assistance from a professional technician. In the next step, we will guide you through testing the ice maker to confirm that the repair has been successful.
Step 7: Test the Ice Maker
After replacing the water inlet valve in your Whirlpool refrigerator, it’s important to test the ice maker to ensure that the repair has been successful. Here’s how you can test the ice maker:
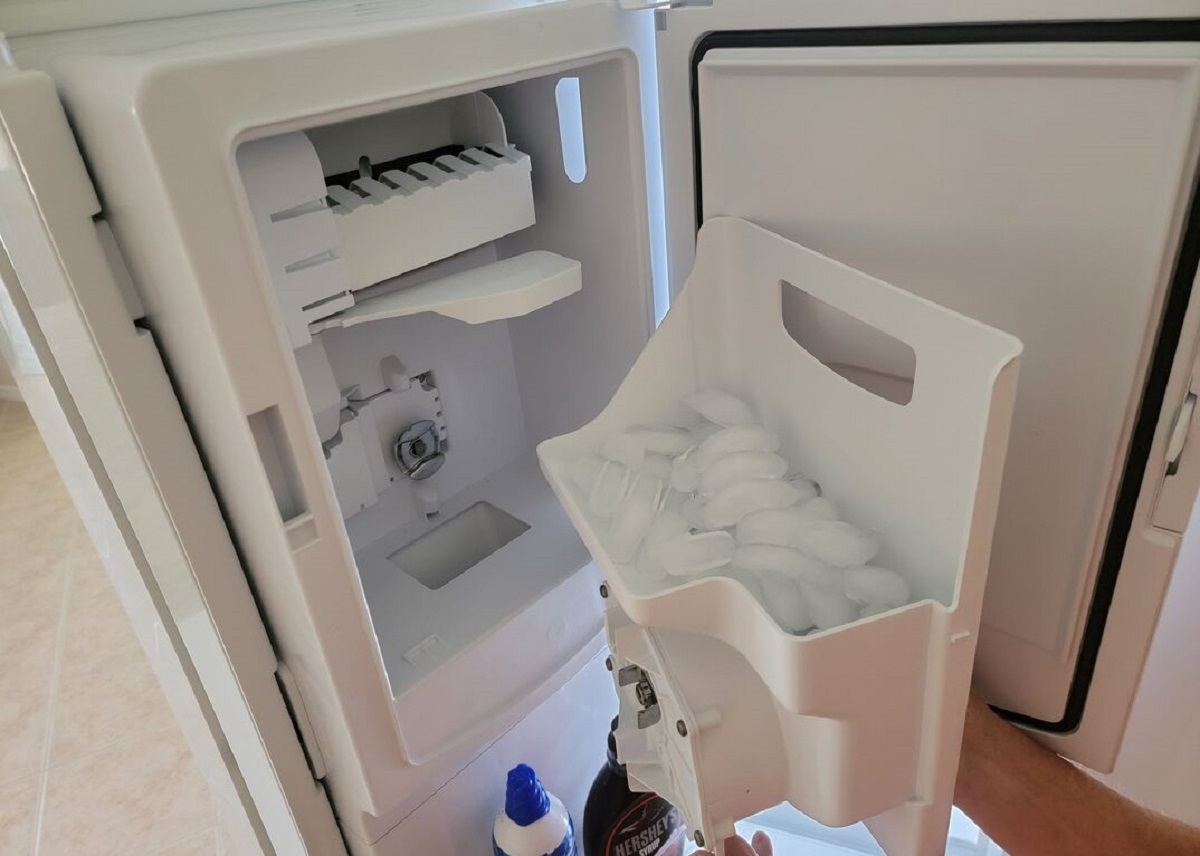
1. Reinstall the Ice Maker: First, reinstall the ice maker unit in the same location from which you removed it. Make sure it is securely in place and reattach any mounting screws or brackets.
2. Reconnect the Water Supply Line: Reconnect the water supply line to the water inlet valve. Use an adjustable wrench to tighten the connection and ensure it is secure. Double-check for any leaks around the connection.
3. Restore Power: Plug the refrigerator’s power cord back into the electrical outlet to restore power to the unit.
4. Allow Time for Ice Production: It may take a few hours for the ice maker to cycle and start producing ice. Allow sufficient time for the ice maker to fill with water and freeze the first batch of ice cubes.
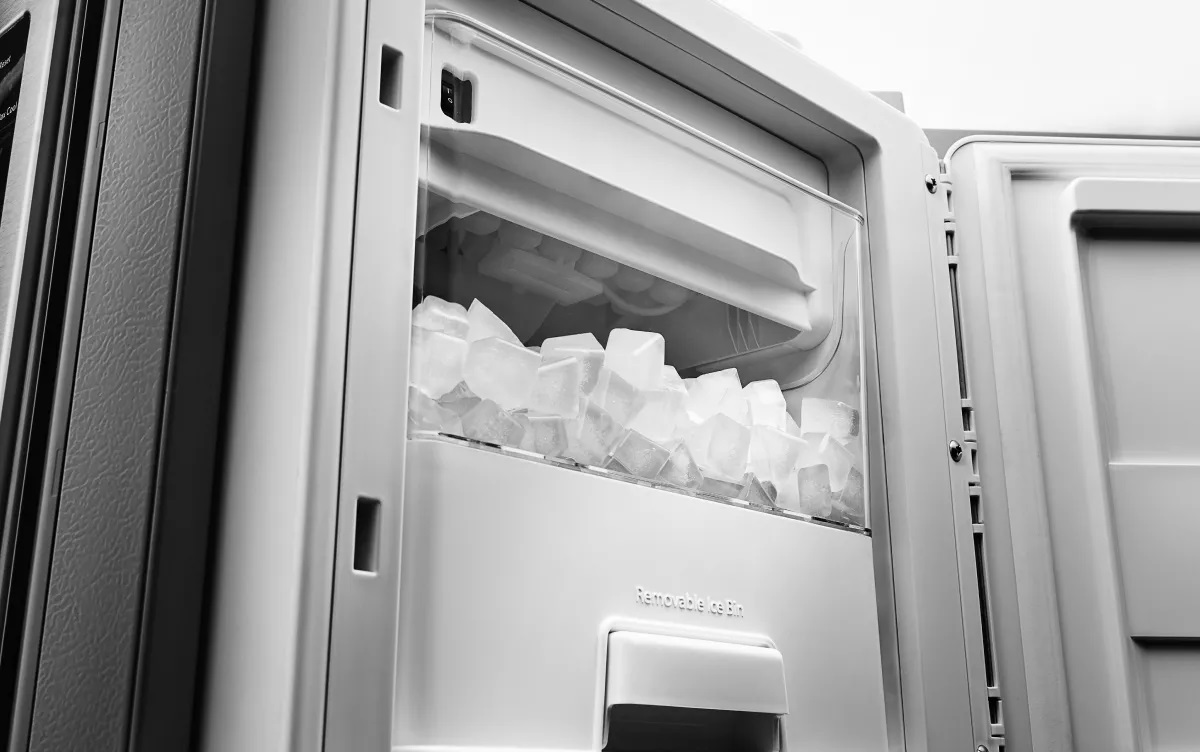
5. Monitor Ice Production: Keep an eye on the ice maker to monitor its performance. Check for the production of ice cubes, ensuring they are of the proper size and shape.
6. Test Ice Dispensing (if applicable): If your Whirlpool refrigerator has a built-in ice dispenser, test its functionality to ensure that ice is dispensed properly. Check for any unusual noises or erratic behavior during the ice dispensing process.
7. Check for Leaks: Examine the area around the water inlet valve and the ice maker for any signs of water leaks. If you notice any leaks, tighten the connections or replace any faulty components as necessary.
By testing the ice maker and monitoring its performance, you can verify that the repair has addressed the issues with ice production. If the ice maker is functioning properly and producing ice cubes consistently, then the repair has been successful. However, if you encounter any further issues or if the ice maker still doesn’t work as expected, it may be necessary to contact a professional technician for further assistance.
In the final step, we will guide you through reinstalling the ice maker unit in your Whirlpool refrigerator.
Step 8: Reinstall the Ice Maker Unit
After testing the ice maker and ensuring that it is functioning properly, it’s time to reinstall the ice maker unit in your Whirlpool refrigerator. Proper installation will ensure that the ice maker is securely in place and that all connections are properly reestablished. Follow these steps to reinstall the ice maker unit:
1. Align the Ice Maker: Carefully align the ice maker unit with its designated location in the freezer compartment or the top left corner of the refrigerator, depending on your model. Make sure it is positioned correctly before proceeding.
2. Insert Mounting Screws: Insert the mounting screws into their corresponding holes on the side or bottom of the ice maker unit. Use a Phillips-head screwdriver to tighten the screws, ensuring that the ice maker is securely fastened. Refer to your owner’s manual for the specific screw placement and recommended tightness.
3. Reconnect the Water Supply Line: Locate the water supply line that was disconnected earlier from the water inlet valve. Insert the end of the water supply line into the inlet valve’s connection port and tighten it using an adjustable wrench. Ensure the connection is secure and leak-free.
4. Connect Electrical Connections (if applicable): If your ice maker unit has electrical connections, such as wiring or connectors, carefully reconnect them. Refer to any labels or markings to ensure proper orientation and alignment. Gently push the connectors together until they are securely joined.
5. Double-Check Connections and Alignment: Take a moment to double-check all the connections, including the water supply line and electrical connections. Ensure everything is properly aligned and securely fastened.
6. Restore Power: Plug the refrigerator’s power cord back into the electrical outlet to restore power to the unit. Make sure the power cord is fully inserted and that there are no exposed or damaged wires.
7. Allow Time for Ice Production: Give the ice maker some time to cycle and produce a fresh batch of ice. It may take a few hours for the ice maker to fill with water and freeze the ice cubes.
By following these steps, you will successfully reinstall the ice maker unit in your Whirlpool refrigerator. Ensure that all connections are secure and tight to prevent any leaks or malfunctions. If you experience any issues or if the ice maker doesn’t work as expected after reinstalling, it may be necessary to seek professional assistance. With the ice maker unit securely in place, you can now enjoy the convenience of having a fully functional ice maker in your Whirlpool refrigerator.
Conclusion
Repairing the ice maker in your Whirlpool refrigerator is a manageable task that can save you time and money. By following each step of the process outlined in this guide, you can diagnose and fix common issues that may be preventing your ice maker from working properly. From disconnecting the power to reinstalling the ice maker unit, each step is designed to help you troubleshoot and repair the ice maker effectively.
Throughout the repair process, it’s important to prioritize safety and take necessary precautions. Disconnecting the power and wearing safety gloves and glasses will help ensure a safe working environment. Additionally, having the right tools and materials at hand will make the process smoother and more efficient.
Remember to thoroughly inspect and clean the ice maker, check the water inlet valve, and replace it if necessary. Testing the ice maker after completing the repair will confirm whether the issues have been resolved and if the ice maker is functioning properly.
If at any point you feel unsure or uncomfortable with performing the repair yourself, it’s always advisable to consult a professional technician or contact Whirlpool for assistance, especially if your refrigerator is still under warranty. They have the expertise and knowledge to diagnose and resolve more complex issues.
By successfully repairing your Whirlpool refrigerator’s ice maker, you can enjoy a reliable supply of ice whenever you need it. Proper maintenance, such as regular cleaning and filter replacements, will help prolong the ice maker’s lifespan and ensure continued performance.
We hope this guide has been helpful in guiding you through the process of repairing your Whirlpool refrigerator’s ice maker. Good luck with your repair and may you soon have a fully functional ice maker!
Frequently Asked Questions about How To Repair Ice Maker In Whirlpool Refrigerator
Was this page helpful?
At Storables.com, we guarantee accurate and reliable information. Our content, validated by Expert Board Contributors, is crafted following stringent Editorial Policies. We're committed to providing you with well-researched, expert-backed insights for all your informational needs.
0 thoughts on “How To Repair Ice Maker In Whirlpool Refrigerator”