Articles
How To Fix Ice Maker Ge Refrigerator
Modified: October 19, 2024
Learn how to fix the ice maker in your GE refrigerator with our comprehensive articles. Get step-by-step instructions and troubleshooting tips for a quick and easy repair.
(Many of the links in this article redirect to a specific reviewed product. Your purchase of these products through affiliate links helps to generate commission for Storables.com, at no extra cost. Learn more)
Introduction
Welcome to our comprehensive guide on how to fix the ice maker in your GE refrigerator. If you’re experiencing issues with your ice maker, you’re not alone. Many GE refrigerator owners encounter problems with their ice makers at some point, and it can be frustrating to deal with. However, with a little troubleshooting and some basic maintenance, you can often fix the problem yourself and have your ice maker producing ice again in no time.
In this article, we will walk you through the most common problems that can occur with GE refrigerator ice makers and provide step-by-step instructions on how to troubleshoot and fix them. Whether your ice maker is not producing any ice, producing small or misshapen ice cubes, or experiencing other issues, we’ve got you covered.
Before getting started, it’s important to mention that while many ice maker problems can be resolved without the need for professional help, there may be instances where you need to seek the assistance of a qualified technician. If you’re uncomfortable or unsure about performing any of the troubleshooting steps outlined in this article, it’s always best to consult your refrigerator’s user manual or contact GE customer support for further guidance.
With that said, let’s dive into the common problems and solutions for GE refrigerator ice makers. By following our guide, you’ll be well-equipped to diagnose and fix the issue, saving you time, money, and the headache of dealing with a malfunctioning ice maker.
Key Takeaways:
- Troubleshoot and Maintain: Learn how to diagnose and fix common GE refrigerator ice maker issues with basic troubleshooting, water supply checks, and regular cleaning to ensure a steady supply of ice for your convenience.
- DIY Ice Maker Replacement: If basic troubleshooting fails, follow step-by-step instructions to safely replace your GE refrigerator’s ice maker, restoring functionality and ensuring a continuous ice supply for your needs.
Common Problems with GE Refrigerator Ice Makers
GE refrigerators are known for their reliability and advanced features, but like any appliance, their ice makers can encounter issues. Here are some of the most common problems that GE refrigerator owners may face with their ice makers:
- No ice production: One of the most frustrating issues is when your GE refrigerator ice maker stops producing ice altogether. This could be due to a variety of reasons, such as a blocked water supply line, a malfunctioning water inlet valve, or a faulty ice maker control module.
- Small or misshapen ice cubes: If you’re noticing that the ice cubes produced by your GE refrigerator are smaller than usual or are coming out misshapen, the issue may lie with the water inlet valve or a clogged water filter.
- Leaking water: Another common problem is when your ice maker is leaking water. This can be caused by a cracked or damaged water supply line, a faulty water inlet valve, or a clogged or improperly installed drain line.
- Ice buildup: Over time, ice can accumulate and build up within the ice maker assembly, affecting its performance. This can cause issues such as reduced ice production or jammed ice cubes.
- Strange noises: If you’re hearing unusual noises coming from your GE refrigerator’s ice maker, such as grinding, clicking, or buzzing sounds, it could be an indication of a faulty component or a problem with the ice maker motor.
These are just a few examples of the possible problems you may encounter with your GE refrigerator ice maker. The good news is that most of these issues can be resolved with some basic troubleshooting and maintenance. In the next sections, we will guide you through the steps to diagnose and fix these problems, allowing you to enjoy a fully functioning ice maker once again.
Basic Troubleshooting Steps
When your GE refrigerator ice maker is not working properly, it’s essential to start with some basic troubleshooting steps before moving on to more advanced solutions. These initial steps will help you identify any simple issues and rule out any minor problems that can be easily fixed. Here are the basic troubleshooting steps to follow:
- Check the power supply: Make sure that your refrigerator is properly plugged into a working electrical outlet. Sometimes, a loose or disconnected power cord can cause the ice maker to stop working.
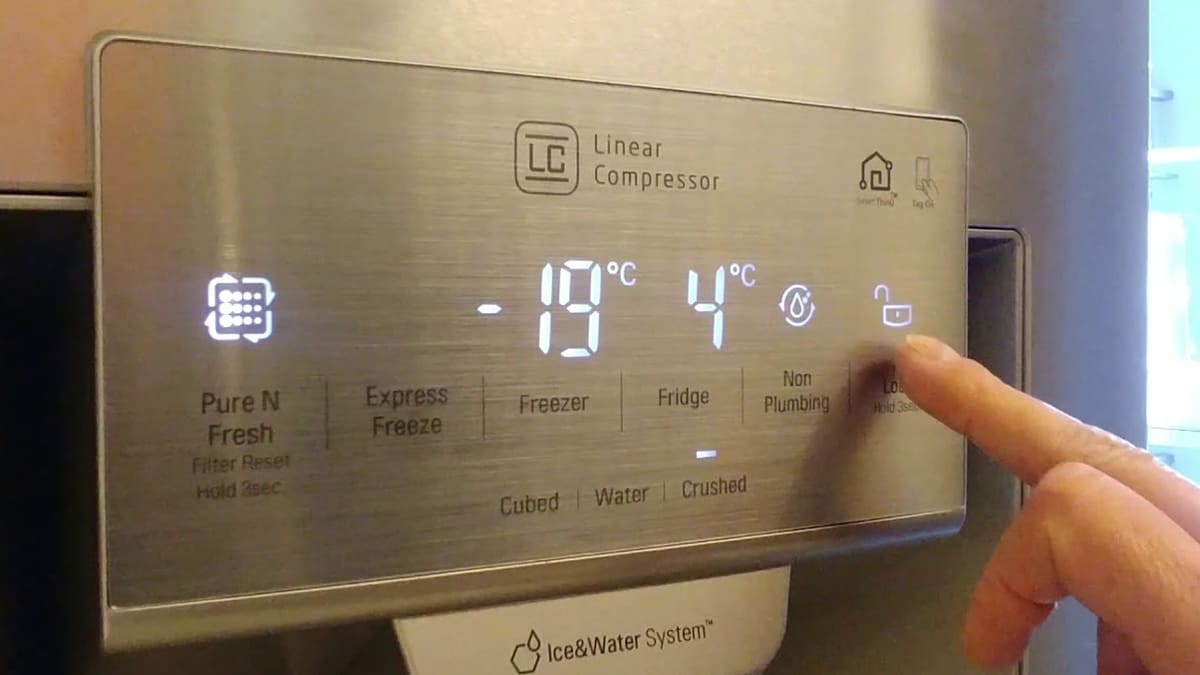
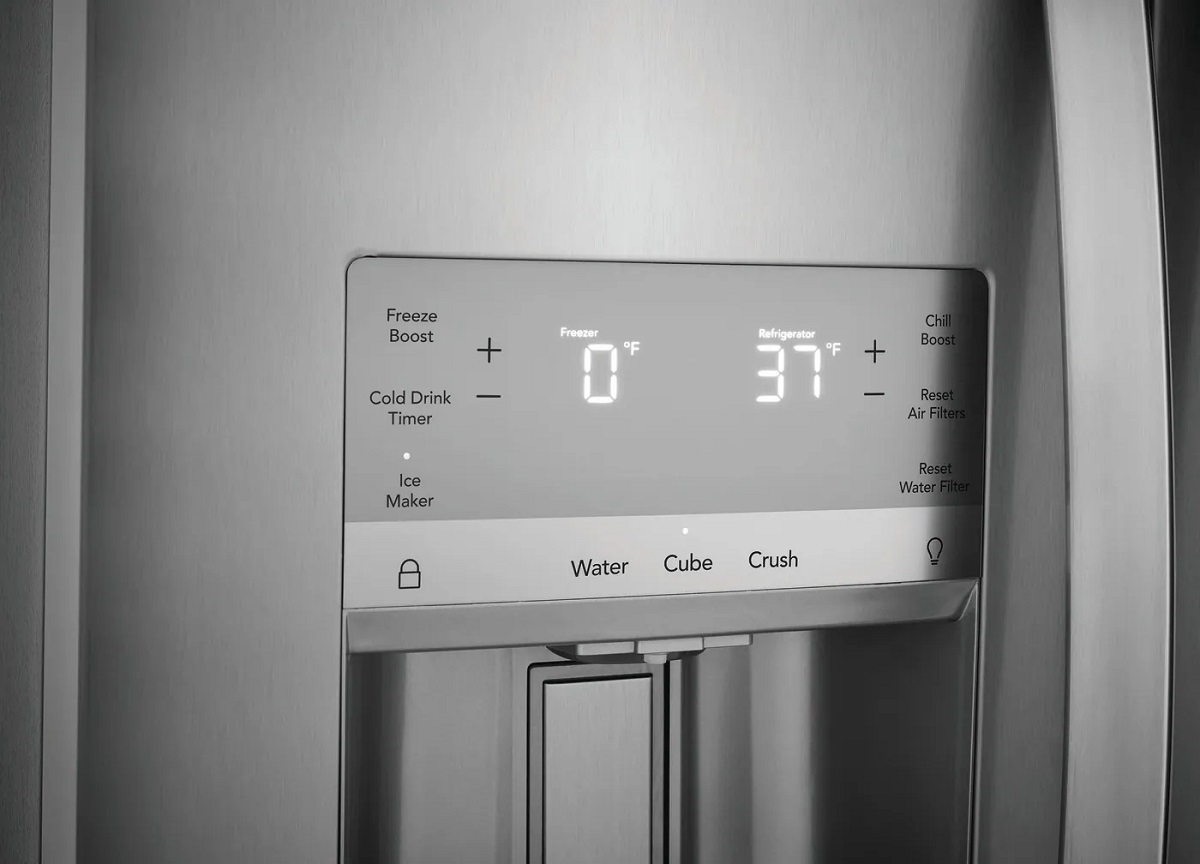
- Verify the freezer temperature: Ensure that your freezer is set to the correct temperature. The ideal temperature for the freezer section of a refrigerator is typically between 0 and 10 degrees Fahrenheit (-18 to -12 degrees Celsius). If the temperature is set too high, it may prevent the ice maker from functioning properly.
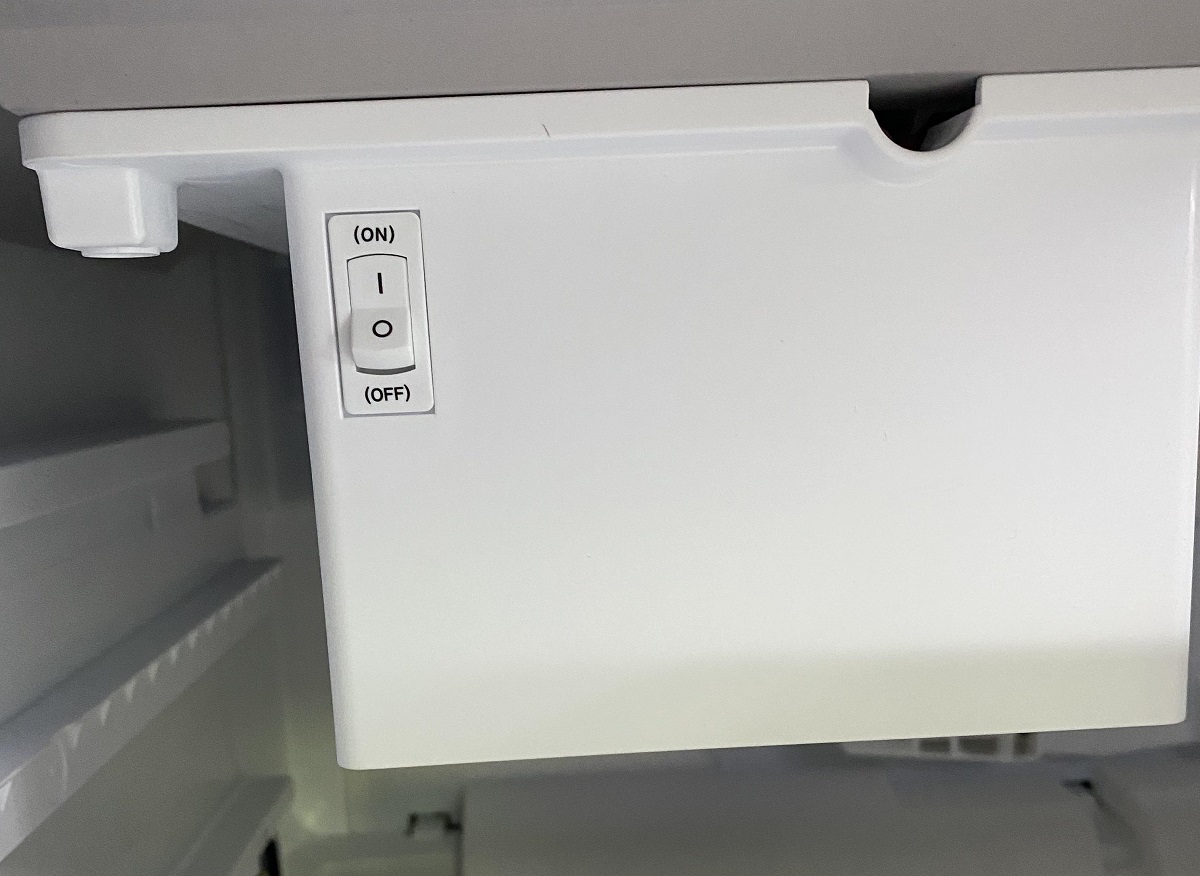
- Inspect the ice maker on/off switch: Check if the ice maker on/off switch is turned on. It’s usually located on the side or front of the ice maker. If it’s off, simply toggle the switch to the “On” position.
- Clear any ice blockages: Look inside the ice maker and remove any ice cubes or obstructions that may be preventing the ice maker from cycling and producing ice. Sometimes, ice cubes can get stuck, causing the ice maker to cease operation.
- Reset the ice maker: Many GE refrigerator models have a reset button or switch specifically for the ice maker. Consult your refrigerator’s user manual to locate the reset feature and follow the instructions to reset the ice maker. This can often resolve minor issues and get the ice maker working again.
These basic troubleshooting steps should be your first line of defense when your GE refrigerator ice maker is not functioning properly. By checking the power supply, verifying the freezer temperature, inspecting the on/off switch, clearing ice blockages, and resetting the ice maker, you may be able to resolve the problem without any further intervention. However, if these steps don’t fix the issue, it’s time to move on to more specific troubleshooting techniques.
Checking the Water Supply
One of the common causes of ice maker problems in GE refrigerators is an issue with the water supply. If the ice maker is not receiving an adequate supply of water, it won’t be able to produce ice. Here are the steps to check the water supply:
- Locate the water supply line: Find the water supply line that connects to the back of your GE refrigerator. It’s usually a flexible plastic or copper tube.
- Check for any kinks or blockages: Inspect the water supply line for any kinks, twists, or bends that may be restricting the water flow. If you find any, gently straighten the line to allow a proper water flow.
- Ensure the water valve is open: Locate the water supply valve behind the refrigerator or under your kitchen sink. Make sure it is fully open to allow water to flow to the ice maker. If it’s partially or completely closed, turn it counterclockwise to open it.
- Test the water pressure: Check the water pressure coming into your refrigerator. You can do this by disconnecting the water supply line from the refrigerator and placing the open end into a bucket or sink. Turn on the water supply valve and observe the water flow. If the water pressure is low, you may need to contact a plumber to address the issue.
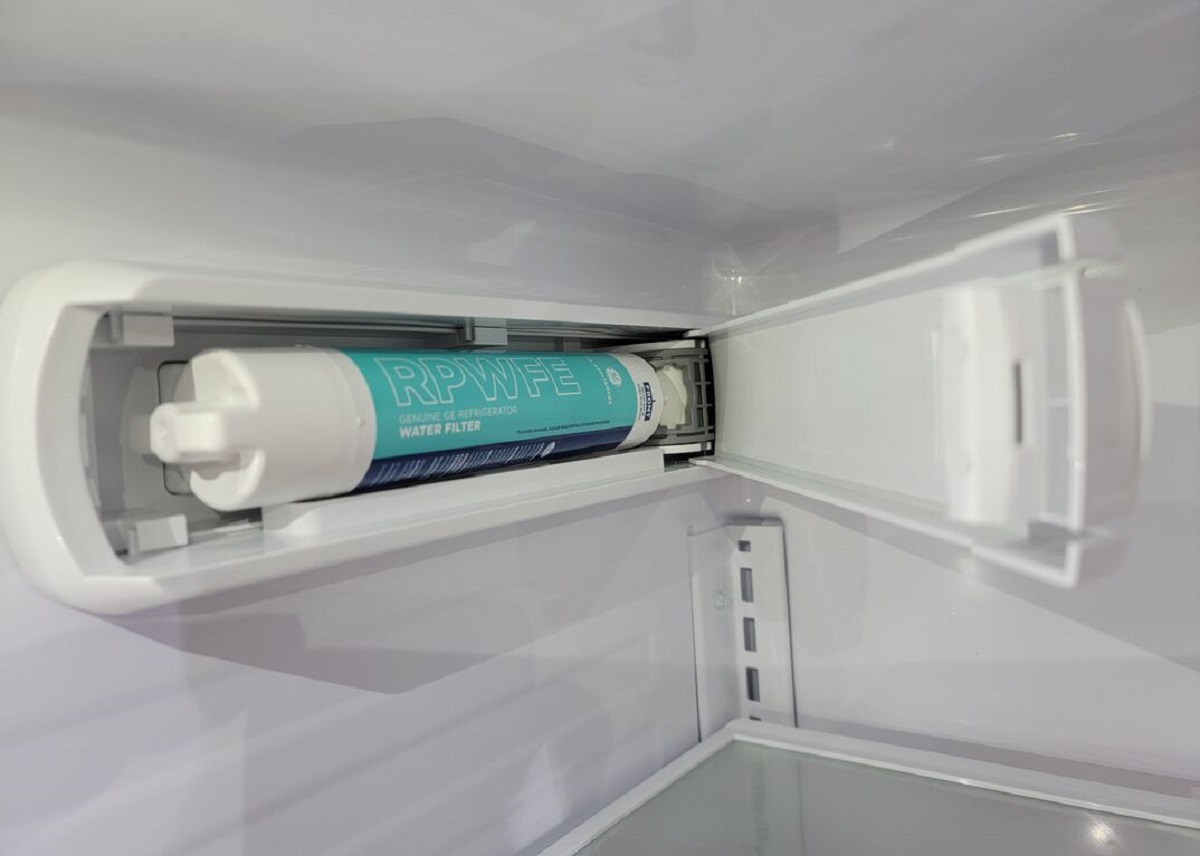
- Inspect the water filter: If your GE refrigerator has a water filter, check if it is clogged or past its recommended lifespan. A dirty or expired filter can reduce water flow to the ice maker. Follow the manufacturer’s instructions to replace the water filter if necessary.
By checking the water supply line for any kinks or blockages, ensuring the water valve is open, testing the water pressure, and inspecting the water filter, you can address common water supply issues that may be affecting the performance of your GE refrigerator’s ice maker. Remember to refer to your refrigerator’s user manual for specific instructions and diagrams related to your model’s water supply system.
Inspecting the Water Inlet Valve
The water inlet valve is an essential component of the ice maker in your GE refrigerator. It controls the flow of water into the ice maker, and if it’s malfunctioning, it can lead to issues with ice production. Here’s how you can inspect the water inlet valve:
- Locate the water inlet valve: The water inlet valve is usually located at the back of the refrigerator, near the bottom. It’s connected to the water supply line and has electrical wires attached to it.
- Shut off the water supply: Before inspecting the water inlet valve, ensure that you shut off the water supply to the refrigerator. This will prevent any water leaks during the inspection process.
- Remove the cover panel: If there’s a cover panel or access panel in front of the water inlet valve, remove it to gain access to the valve itself.
- Check for water leaks: Visually inspect the water inlet valve and the surrounding area for any signs of water leakage. If you notice any leaks, it’s an indication that the valve may be faulty and needs to be replaced.
- Test the valve’s electrical connections: Gently disconnect the electrical wires from the water inlet valve. Use a multimeter to check for continuity between the terminals on the valve. If there is no continuity, it suggests that the valve is defective and needs to be replaced.
- Clean or replace the water inlet valve: If you suspect that the water inlet valve is clogged or malfunctioning, you can try cleaning it using a solution of vinegar and water. Soak the valve in the solution for a few minutes, then rinse it thoroughly. If cleaning doesn’t resolve the issue, you may need to replace the water inlet valve.
Inspecting the water inlet valve is crucial in diagnosing ice maker problems in your GE refrigerator. By checking for water leaks, testing the valve’s electrical connections, and cleaning or replacing the valve if necessary, you can ensure that water is flowing properly into the ice maker, thus improving its performance.
Note that if you’re uncomfortable performing these inspection steps or if you’re unsure about working with electrical components, it is advisable to seek professional assistance from a qualified technician.
Read more: How Does A Refrigerator Ice Maker Work
Testing the Ice Maker Control Module
The ice maker control module is responsible for the overall operation and function of the ice maker in your GE refrigerator. If the control module is faulty, it can cause various issues with ice production. Here’s how you can test the ice maker control module:
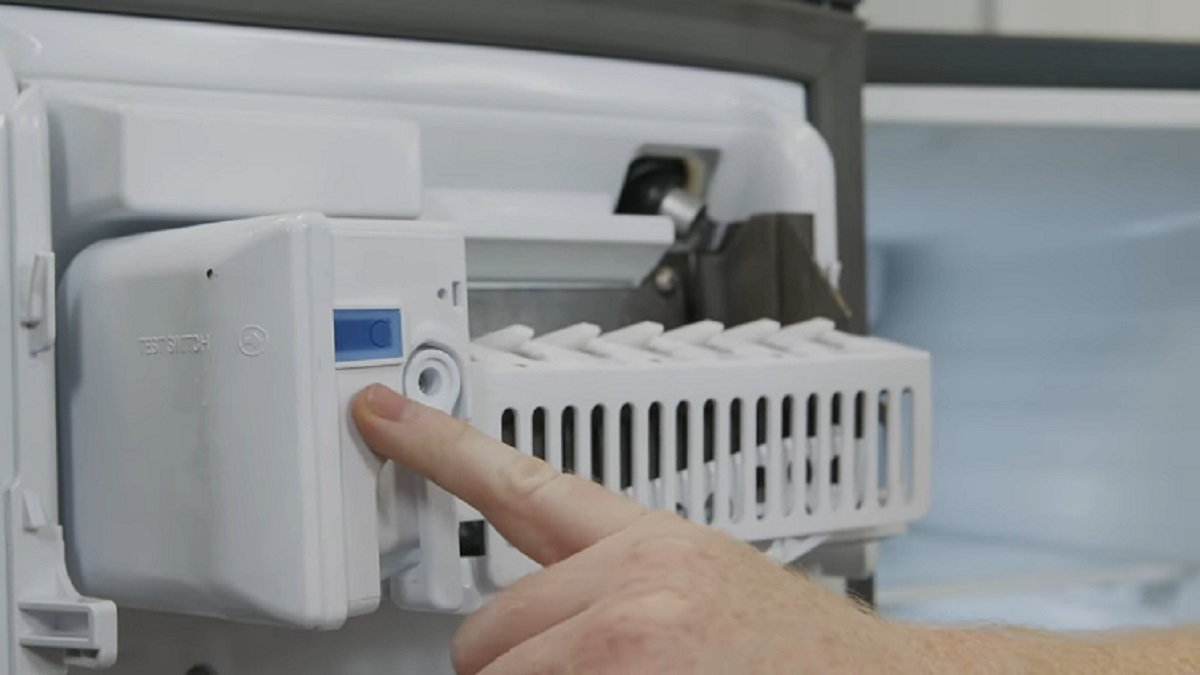
- Locate the ice maker control module: The ice maker control module is typically located inside the freezer compartment, near the ice maker itself. It is a small rectangular box with electrical connections.
- Identify the test points: Look for the test points on the control module. These are usually labeled T and H or L and N, indicating the test and neutral points respectively.
- Jump the test points: Using an insulated jumper wire, carefully jump the test points by connecting the T and H (or L and N) terminals. This will simulate a harvest cycle and initiate the ice maker to start producing ice.
- Observe the ice maker’s response: Pay attention to the ice maker’s response after jumping the test points. You should hear a motor running, indicating that the ice maker is in the harvest cycle. If you don’t hear any motor sound or see any movement, it suggests that the control module may be defective and needs to be replaced.
- Check for voltage: Use a multimeter set to the appropriate voltage range to test for voltage at the ice maker control module’s electrical connections. This will help determine if the module is receiving the necessary power supply. If there’s no voltage present, it may indicate a problem with the power supply or wiring.
- Consult the user manual: Refer to your GE refrigerator’s user manual for specific instructions and diagrams related to your model’s ice maker control module. It may provide additional troubleshooting steps or indicate the proper voltage and continuity readings for a functioning module.
Testing the ice maker control module can help identify whether it’s the culprit behind ice maker issues. By jumping the test points, observing the ice maker’s response, checking for voltage, and referring to the user manual for guidance, you can determine if the control module needs to be replaced to restore proper ice production.
If you’re unsure about performing these testing steps or if you don’t have experience working with electrical components, it’s best to consult a professional technician to ensure proper diagnosis and repair.
Check the water supply line for any kinks or blockages. Also, make sure the freezer temperature is set between 0-5 degrees Fahrenheit for optimal ice production.
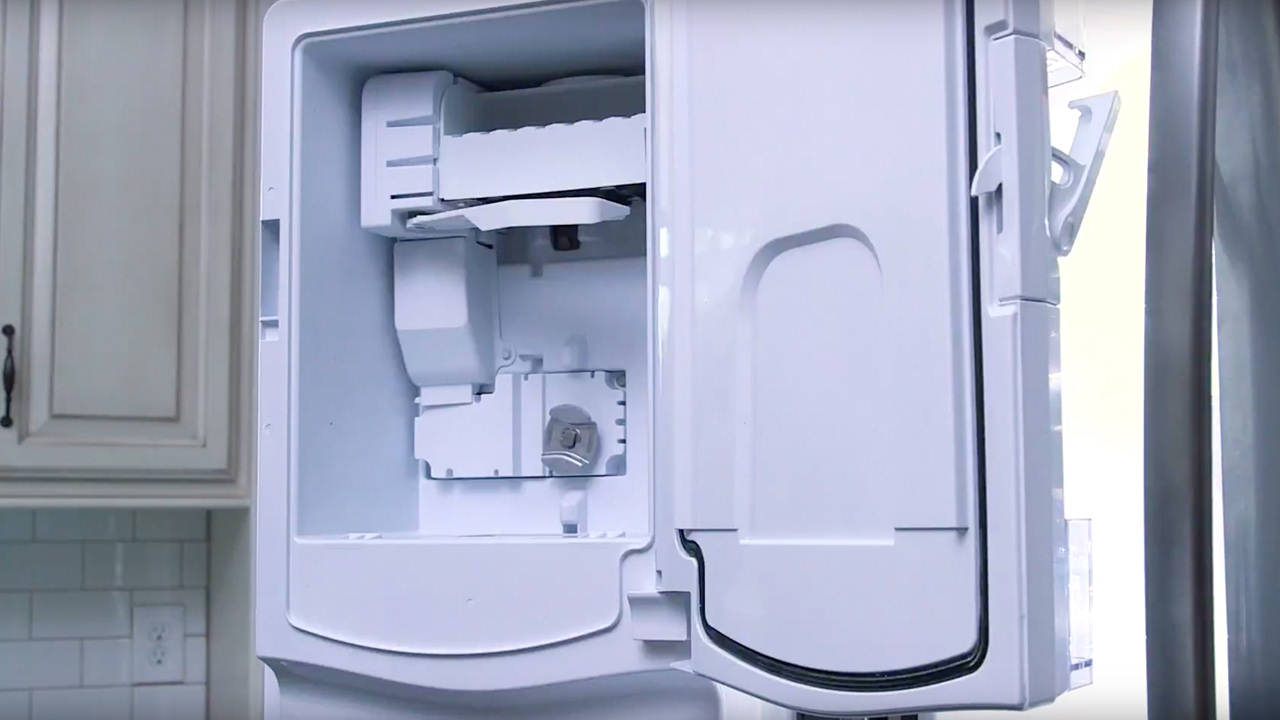
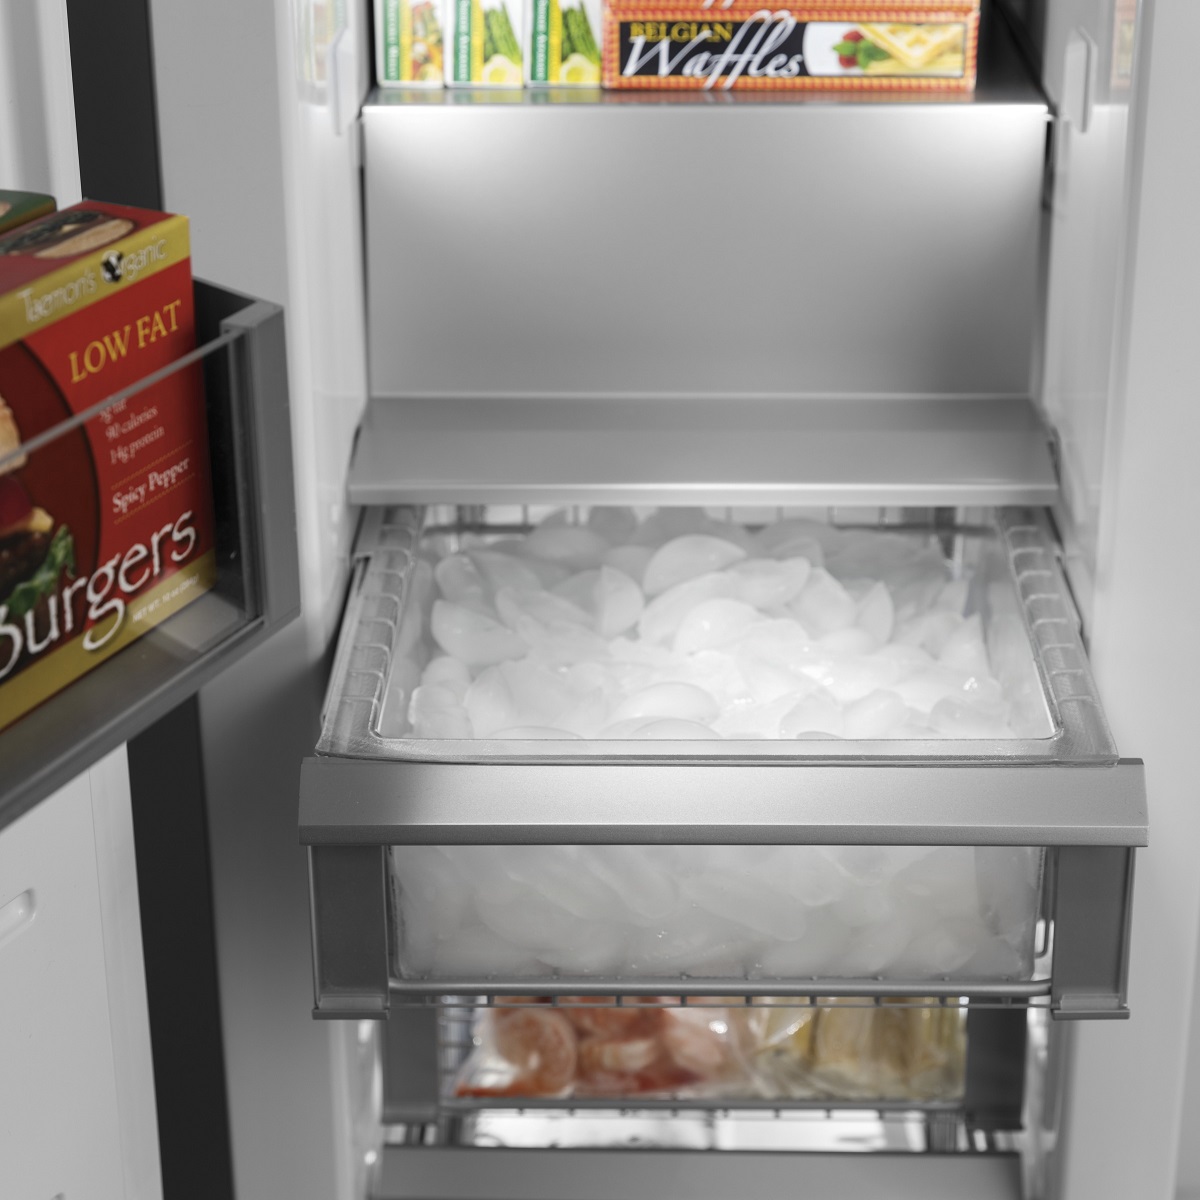
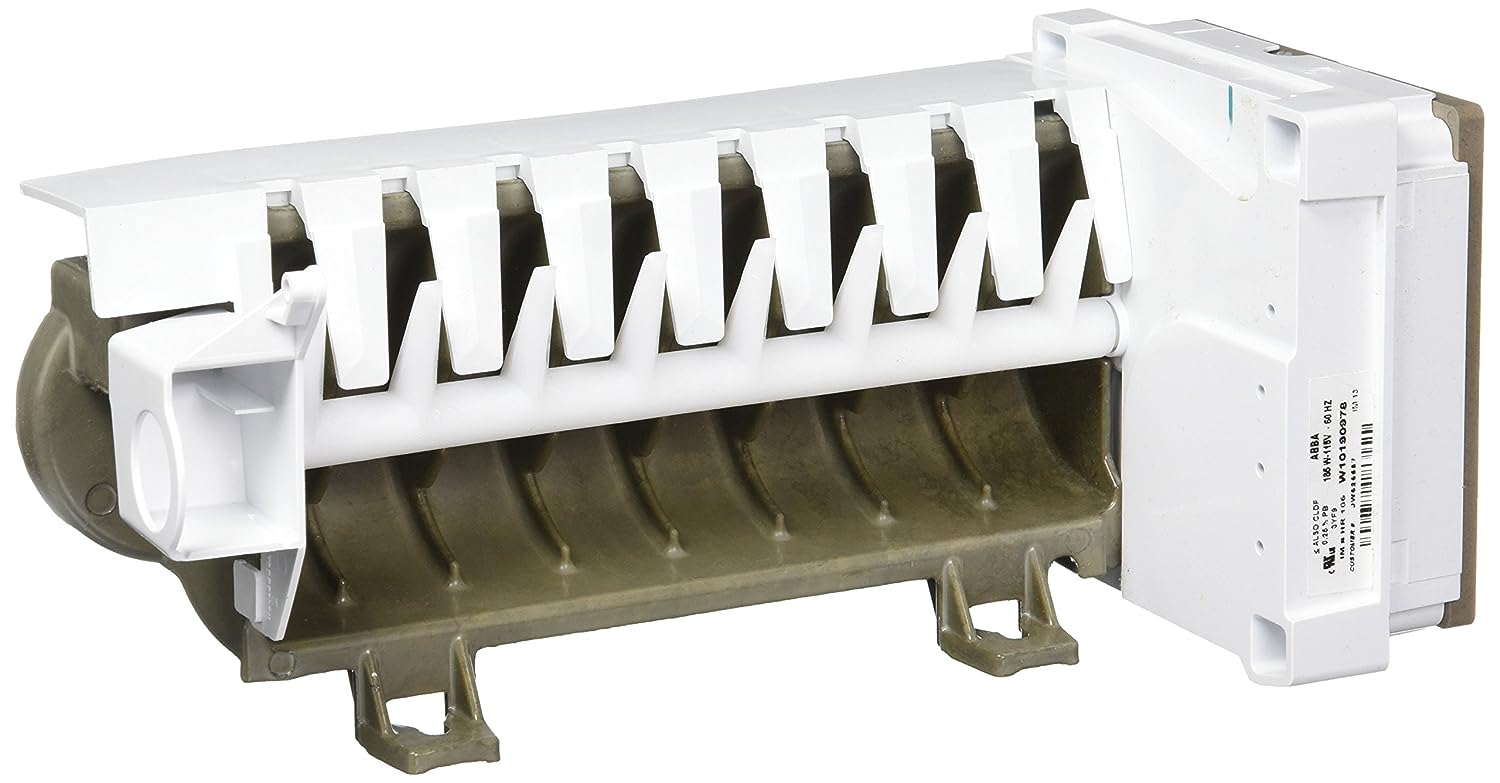
Checking the Ice Maker Assembly
The ice maker assembly plays a vital role in the production and dispensing of ice in your GE refrigerator. If there are any issues with the assembly, it can affect the performance of the ice maker. Here’s how you can check the ice maker assembly:
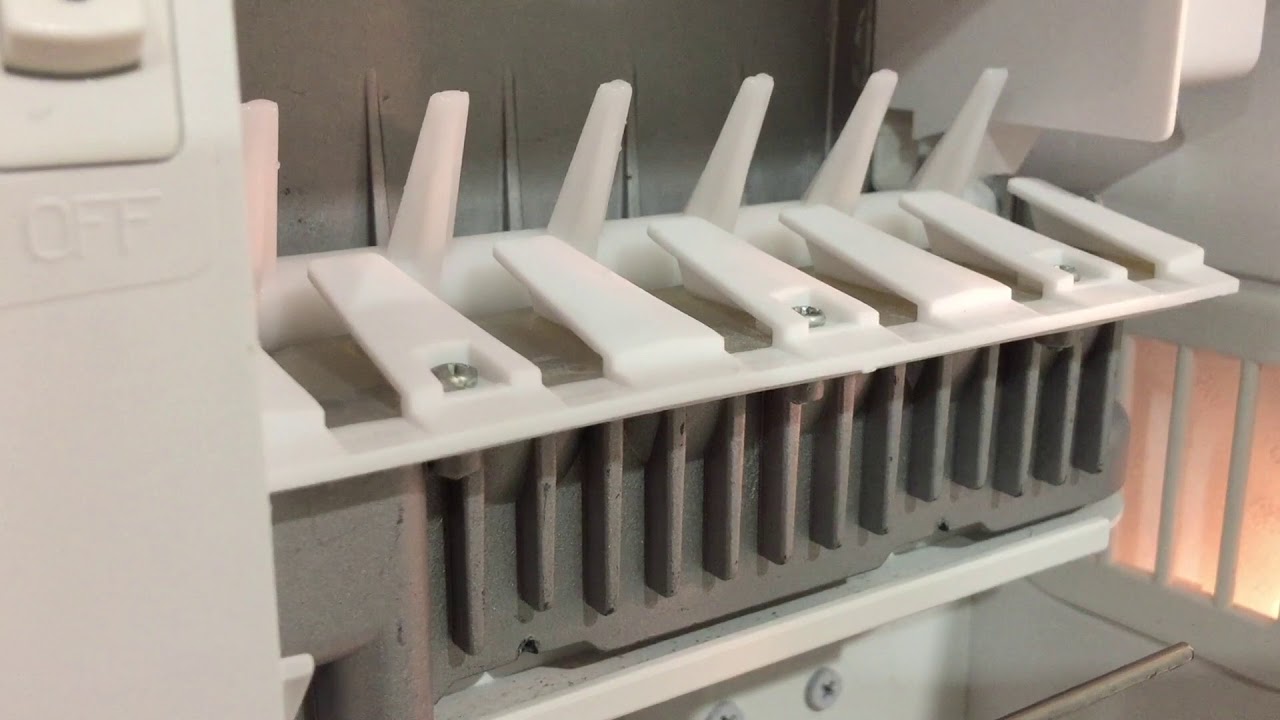
- Locate the ice maker assembly: The ice maker assembly is typically located inside the freezer compartment, near the top or side. It’s a plastic unit with an ice mold and a motor.
- Inspect the ice mold: Take a close look at the ice mold for any cracks, damage, or signs of mold or residue buildup. A damaged or dirty ice mold can hinder proper ice production. If you notice any issues, you may need to replace the ice mold.
- Examine the motor and gears: Check the motor and gears of the ice maker assembly for any visible damage or wear. Malfunctioning or worn-out components can prevent the ice maker from functioning correctly. If you identify any issues with the motor or gears, you may need to replace them.
- Look for ice blockages: Inspect the ice maker assembly for any ice blockages or obstructions. Sometimes, ice cubes can get stuck or jammed in the assembly, preventing the ice maker from cycling and producing ice. If you find any blockages, remove them carefully to restore proper operation.
- Check the bail arm or shut-off switch: If your GE refrigerator’s ice maker has a bail arm or shut-off switch, make sure it is in the correct position. The bail arm should be in the down position, and the shut-off switch should be in the “On” position. Incorrect positioning can halt ice production.
- Test the motor: If you suspect that the motor is not functioning correctly, you can test it using a multimeter set to the appropriate setting. Check for continuity and ensure that the motor is receiving the proper voltage. If there’s no continuity or insufficient voltage, it may indicate a faulty motor that needs to be replaced.
By thoroughly inspecting the ice maker assembly, examining the ice mold, motor, and gears, looking for ice blockages, and checking the bail arm or shut-off switch, you can identify potential issues that may be hindering the performance of your GE refrigerator’s ice maker. Correcting these issues by replacing damaged components or removing blockages can help restore proper ice production.
If you’re unsure about performing these inspection steps or if you’re uncomfortable working with mechanical components, it’s best to seek professional assistance from a qualified technician.
Cleaning the Ice Maker
Regular cleaning is essential to maintain the performance and longevity of your GE refrigerator’s ice maker. Over time, mineral deposits, mold, and other debris can accumulate, leading to reduced ice production and poor ice quality. Here’s how you can clean the ice maker:
- Turn off the ice maker: Before cleaning the ice maker, make sure to turn it off. Look for the on/off switch, usually located beside or inside the ice maker, and switch it to the “Off” position.
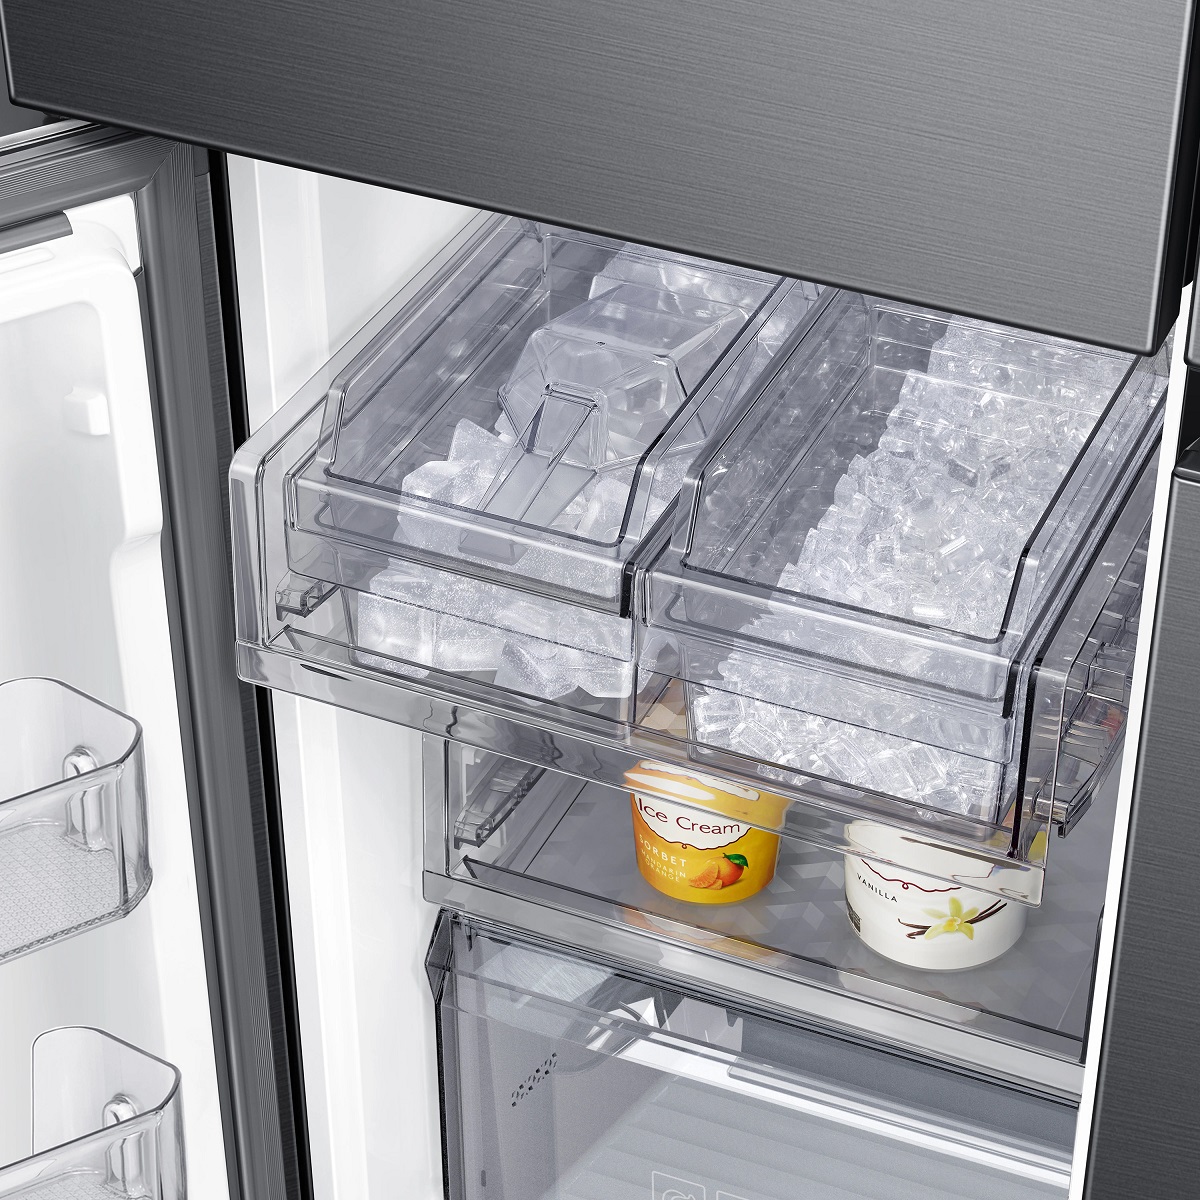
- Remove the ice bin: Take out the ice bin or ice storage container from your refrigerator. Inspect it for any remaining ice cubes and discard them if necessary. Rinse the ice bin with warm water to remove any residue.
- Prepare a cleaning solution: Create a solution of mild detergent or ice maker cleaner and warm water. Follow the instructions on the cleaner’s packaging for the appropriate ratio. Avoid using harsh chemicals or abrasive cleaners, as they can damage the ice maker.
- Clean the ice mold: Dip a soft cloth or sponge into the cleaning solution and gently scrub the ice mold, removing any mineral deposits or mold growth. Pay special attention to hard-to-reach areas and corners. Rinse the ice mold thoroughly with warm water.
- Wipe down other surfaces: Use the cleaning solution and cloth to wipe down other surfaces of the ice maker, such as the ice chute, dispenser, and interior walls. Remove any debris or residue that may have accumulated.
- Rinse and dry: After cleaning, rinse all surfaces and components of the ice maker with clean water to remove any remaining cleaning solution. Dry everything thoroughly with a clean towel or allow them to air dry completely.
- Reassemble and reactivate the ice maker: Once the ice maker is completely dry, reassemble the ice bin and place it back into the refrigerator. Turn on the ice maker by switching the on/off switch to the “On” position.
Regularly cleaning the ice maker helps maintain its efficiency and ensures that the ice produced is clean and fresh. Aim to clean the ice maker at least every three to six months or as needed, depending on usage and water quality in your area.
If your ice maker has a water filter, follow the manufacturer’s instructions to replace the filter periodically. A clean water filter helps prevent mineral buildup and improves the overall quality of the ice.
By incorporating regular cleaning into your refrigerator maintenance routine, you can enjoy a well-functioning and hygienic ice maker for years to come.
Resetting the Ice Maker
If your GE refrigerator’s ice maker is experiencing issues such as not producing ice or not functioning properly, resetting the ice maker can often help resolve the problem. Resetting the ice maker essentially restarts its operation and can clear any minor glitches that may be causing the issue. Here’s how you can reset the ice maker:
- Locate the reset button or switch: Look for the reset button or switch on the ice maker. The location can vary depending on the model of your GE refrigerator. Consult the user manual or check the manufacturer’s website for specific instructions related to your model.
- Press and hold the reset button or switch: Once you’ve located the reset button or switch, press and hold it for approximately 10-15 seconds. This duration may vary depending on the model. The purpose of holding the button or switch is to initiate the reset process.
- Release the reset button or switch: After the designated time, release the reset button or switch. The ice maker will now go through a reset process, and the indicator light (if present) may blink or change color during this time.
- Wait for the ice maker to complete the reset: Give the ice maker a few minutes to complete the reset process. During this time, it will perform a self-check and reconfigure its settings.
- Check for proper operation: Once the reset process is complete, check if the ice maker is now functioning properly. It should start producing ice within the next few hours. Monitor the ice production to ensure consistent operation.
Resetting the ice maker is a simple yet effective troubleshooting step that can often resolve minor issues. It’s important to note that the reset process may vary slightly depending on your GE refrigerator model. Always refer to the user manual or contact the manufacturer for specific instructions if needed.
If resetting the ice maker doesn’t solve the problem or if issues persist, you may need to perform further troubleshooting steps or consider contacting GE customer support or a professional appliance repair technician for assistance.
Remember, resetting the ice maker is a beneficial troubleshooting technique that can save you time and unnecessary repairs in many cases, so it’s always worth trying before seeking outside help.
Read more: What Is A Dual Ice Maker Refrigerator
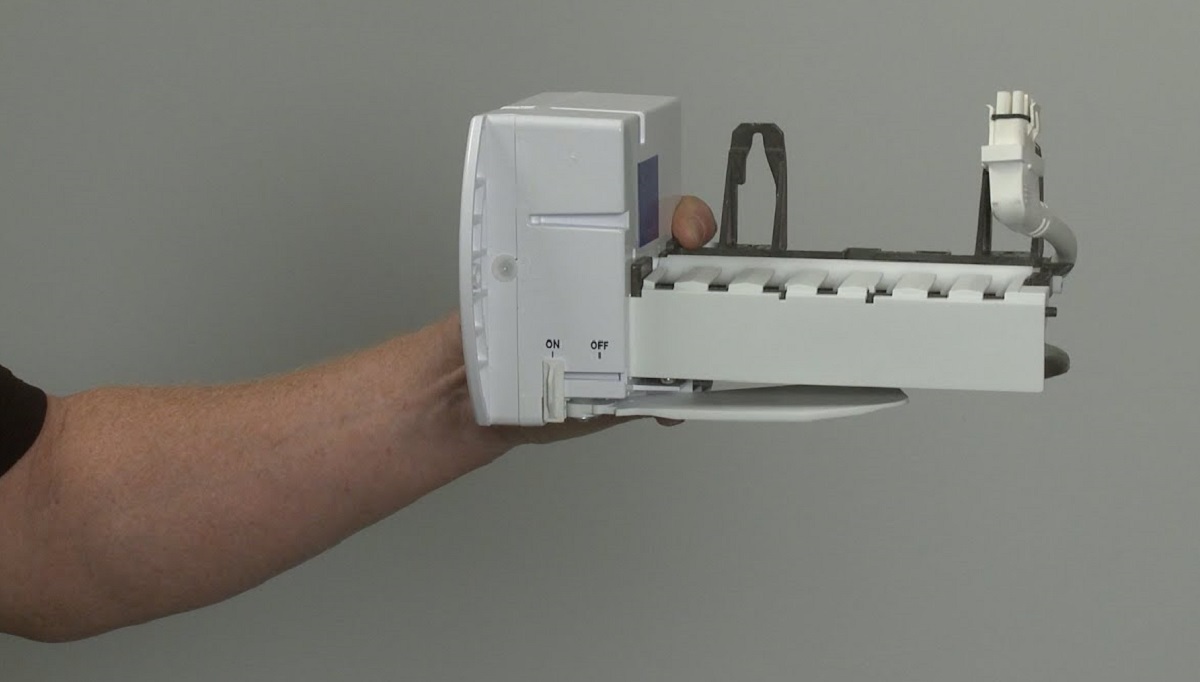
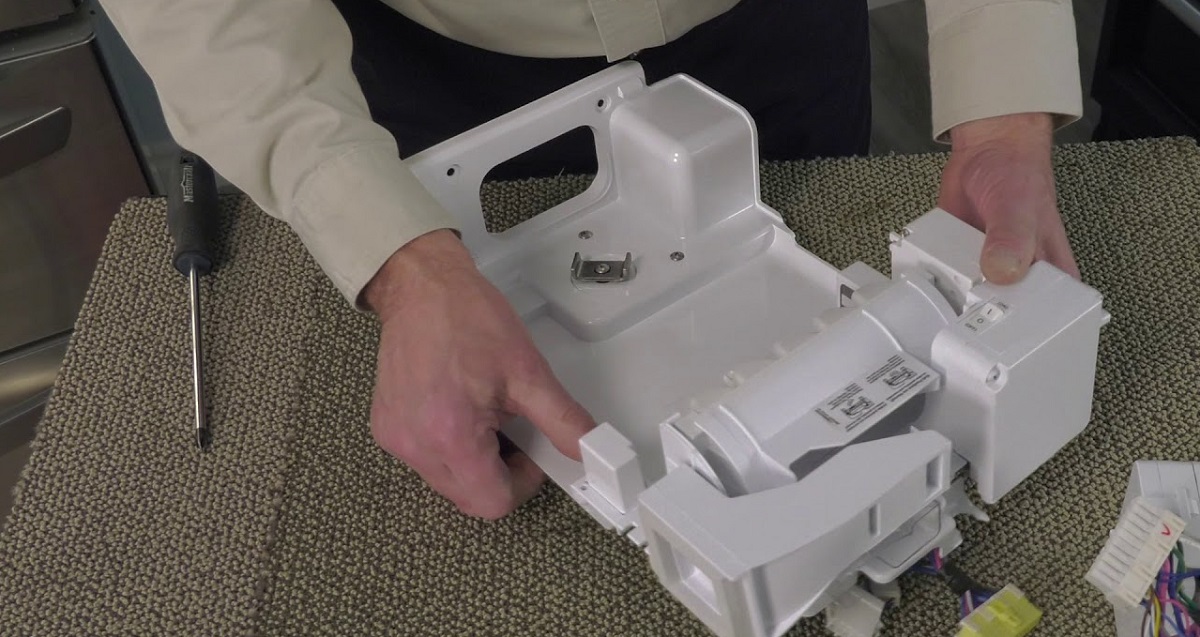
Replacing the Ice Maker
If you’ve tried all the troubleshooting steps and your GE refrigerator’s ice maker is still not working properly, it may be necessary to replace the ice maker unit. Here’s a step-by-step guide on how to replace the ice maker:
- Obtain a compatible replacement: Purchase a new ice maker that is compatible with your GE refrigerator model. You can find the appropriate replacement ice maker through authorized GE dealers, appliance parts stores, or online retailers.
- Turn off the water supply: Before attempting to replace the ice maker, locate the water supply valve to the refrigerator and turn it off. This will prevent any water leakage during the replacement process.
- Disconnect the power supply: Unplug the refrigerator from the electrical outlet or switch off the circuit breaker that supplies power to the unit. This will ensure your safety during the replacement process.
- Remove the ice maker: Open the freezer door and locate the ice maker assembly. Depending on your GE refrigerator model, you may need to remove screws or clips holding the ice maker in place. Carefully detach the connections between the ice maker and the refrigerator, such as electrical wires and the water supply line.
- Install the new ice maker: Take the new ice maker and align it with the mounting holes in the freezer compartment. Secure the ice maker in place using screws or clips. Connect the electrical wires and the water supply line to the appropriate ports on the new ice maker.
- Turn on the water supply and power: Turn on the water supply valve to allow the water to flow to the new ice maker. Plug the refrigerator back into the electrical outlet or switch on the circuit breaker to restore power.
- Test the new ice maker: Wait for a few hours to allow the new ice maker to cycle and begin producing ice. Monitor its operation to ensure that it is functioning correctly and producing ice as expected.
Replacing the ice maker can be a more complex task compared to basic troubleshooting steps. If you’re unsure about performing the replacement yourself, it’s advisable to seek the assistance of a qualified technician or contact GE customer support for guidance.
Keep in mind that the specific steps for replacing the ice maker may vary depending on your GE refrigerator model. Always refer to the user manual or contact the manufacturer for model-specific instructions.
By following this guide and replacing the ice maker with a compatible unit, you can restore the functionality of your GE refrigerator’s ice maker and enjoy a steady supply of ice once again.
Conclusion
Dealing with ice maker issues in your GE refrigerator can be frustrating, but with the right knowledge and troubleshooting techniques, most problems can be resolved without the need for professional help. Throughout this comprehensive guide, we have covered common problems with GE refrigerator ice makers and provided step-by-step instructions for basic troubleshooting, checking the water supply, inspecting the water inlet valve, testing the ice maker control module, checking the ice maker assembly, cleaning the ice maker, resetting the ice maker, and replacing the ice maker.
By following these troubleshooting and maintenance steps, you can often diagnose and fix the issues affecting your ice maker’s performance. From ensuring proper power supply and freezer temperatures to checking for water supply issues and cleaning the ice maker components, each step plays a crucial role in restoring the functionality of your GE refrigerator’s ice maker.
However, it’s important to remember that appliance repairs can sometimes require specialized expertise. If you’re uncomfortable or unsure about performing any of the troubleshooting or replacement steps outlined in this guide, it’s best to consult your refrigerator’s user manual or contact a qualified technician or GE customer support for assistance. They can provide expert guidance tailored to your specific GE refrigerator model.
Regular maintenance, such as cleaning the ice maker and replacing water filters as recommended by the manufacturer, can help prevent issues and ensure optimal performance of your ice maker in the long run.
We hope that this guide has equipped you with the knowledge and tools to diagnose and resolve ice maker problems in your GE refrigerator. By following these steps and being proactive in maintaining your ice maker, you can enjoy a continuous supply of ice, keeping your drinks cool and your guests satisfied.
Once you've mastered fixing your GE refrigerator's ice maker, why stop there? Maintaining your appliance is just as crucial. Dive into our guide on how to clean a refrigerator ice maker to ensure your device runs smoothly and efficiently. Regular cleaning not only prevents mechanical failures but also keeps your ice tasting fresh. Don't miss out on these essential tips that could save you time and hassle.
Frequently Asked Questions about How To Fix Ice Maker Ge Refrigerator
Was this page helpful?
At Storables.com, we guarantee accurate and reliable information. Our content, validated by Expert Board Contributors, is crafted following stringent Editorial Policies. We're committed to providing you with well-researched, expert-backed insights for all your informational needs.

0 thoughts on “How To Fix Ice Maker Ge Refrigerator”