Home>Articles>How To Remove Ice Maker From Whirlpool Refrigerator
Articles
How To Remove Ice Maker From Whirlpool Refrigerator
Modified: May 6, 2024
Learn how to remove the ice maker from your Whirlpool refrigerator with this step-by-step guide. Check out our informative articles to make the process hassle-free.
(Many of the links in this article redirect to a specific reviewed product. Your purchase of these products through affiliate links helps to generate commission for Storables.com, at no extra cost. Learn more)
Introduction
Having an ice maker in your Whirlpool refrigerator can be a convenient feature, providing you with a steady supply of ice cubes for your beverages. However, there may come a time when you need to remove the ice maker, either for maintenance or to replace it with a new one. Removing the ice maker from your Whirlpool refrigerator is a relatively straightforward process that can be completed with a few basic tools. In this article, we will guide you through the step-by-step process of how to remove the ice maker from your Whirlpool refrigerator.
Before we begin, it is important to note that safety should always be your top priority when working with any electrical or mechanical components. Always make sure to disconnect the power and water supply before attempting any repairs or removal procedures to avoid any potential injuries or damage to your appliance.
Now let’s get started with the necessary safety precautions to ensure you have a smooth and hassle-free experience removing the ice maker from your Whirlpool refrigerator.
Key Takeaways:
- Removing the ice maker from your Whirlpool refrigerator is a straightforward process that requires basic tools and safety precautions. By following the step-by-step guide, you can safely and efficiently remove the ice maker for maintenance or replacement.
- Prioritize safety by disconnecting the power and water supply before starting the removal process. Use the appropriate tools and materials, such as a Phillips screwdriver and an adjustable wrench, to ensure a smooth removal experience.
Safety Precautions
Before you begin the process of removing the ice maker from your Whirlpool refrigerator, it is essential to take the following safety precautions:
- Disconnect the power: To avoid any risk of electric shock, make sure to unplug your refrigerator from the power source. Alternatively, you can turn off the circuit breaker for your refrigerator to ensure no power is flowing to the appliance during the removal process.
- Shut off the water supply: If your ice maker is connected to a water supply line, it is crucial to turn off the water supply before removing the ice maker. Locate the shut-off valve for your refrigerator’s water line and turn it clockwise to shut off the water flow.
- Protect your hands: Wear protective gloves to prevent any injuries while handling the ice maker or any sharp objects.
- Work in a well-lit area: Ensure that you have sufficient lighting in your workspace to clearly see the components and avoid any accidents during the removal process.
- Follow the manufacturer’s instructions: While this guide provides general instructions for removing the ice maker from a Whirlpool refrigerator, it is always advisable to consult your appliance’s user manual for specific instructions and guidelines.
By following these safety precautions, you can minimize the risk of accidents or damage to your refrigerator and ensure a safe and successful removal of the ice maker.
Tools and Materials Required
Before you begin removing the ice maker from your Whirlpool refrigerator, gather the necessary tools and materials to ensure a smooth and efficient process. Here are the tools and materials you will need:
- Phillips screwdriver: This type of screwdriver is typically used for removing screws.
- Adjustable wrench: An adjustable wrench will come in handy for disconnecting the water supply line.
- Bowl or container: You will need a bowl or container to collect any water that may drip out during the removal process.
- Towel or rag: Keep a towel or rag nearby to wipe up any spills or excess water.
These tools and materials are common household items that can easily be found in most toolboxes or kitchen drawers. By having them prepared beforehand, you will be equipped to tackle the ice maker removal process without any interruptions.
Now that you are aware of the necessary tools and materials, let’s move on to the step-by-step process of removing the ice maker from your Whirlpool refrigerator.
Step 1: Turn off the Power
The first step in removing the ice maker from your Whirlpool refrigerator is to turn off the power. This ensures your safety while working with electrical components. Follow these steps to turn off the power:
- Locate the power cord at the back of your refrigerator.
- Gently unplug the power cord from the electrical outlet. Alternatively, you can switch off the circuit breaker that supplies power to your refrigerator.
- Verify that the refrigerator is no longer receiving power by checking if the lights inside the fridge are off.
Turning off the power is essential to prevent any electric shock or injury while handling the ice maker. Make sure to keep the power off throughout the entire removal process.
Now that you have successfully turned off the power, you can proceed to the next step of emptying the ice bin before removing the ice maker from your Whirlpool refrigerator.
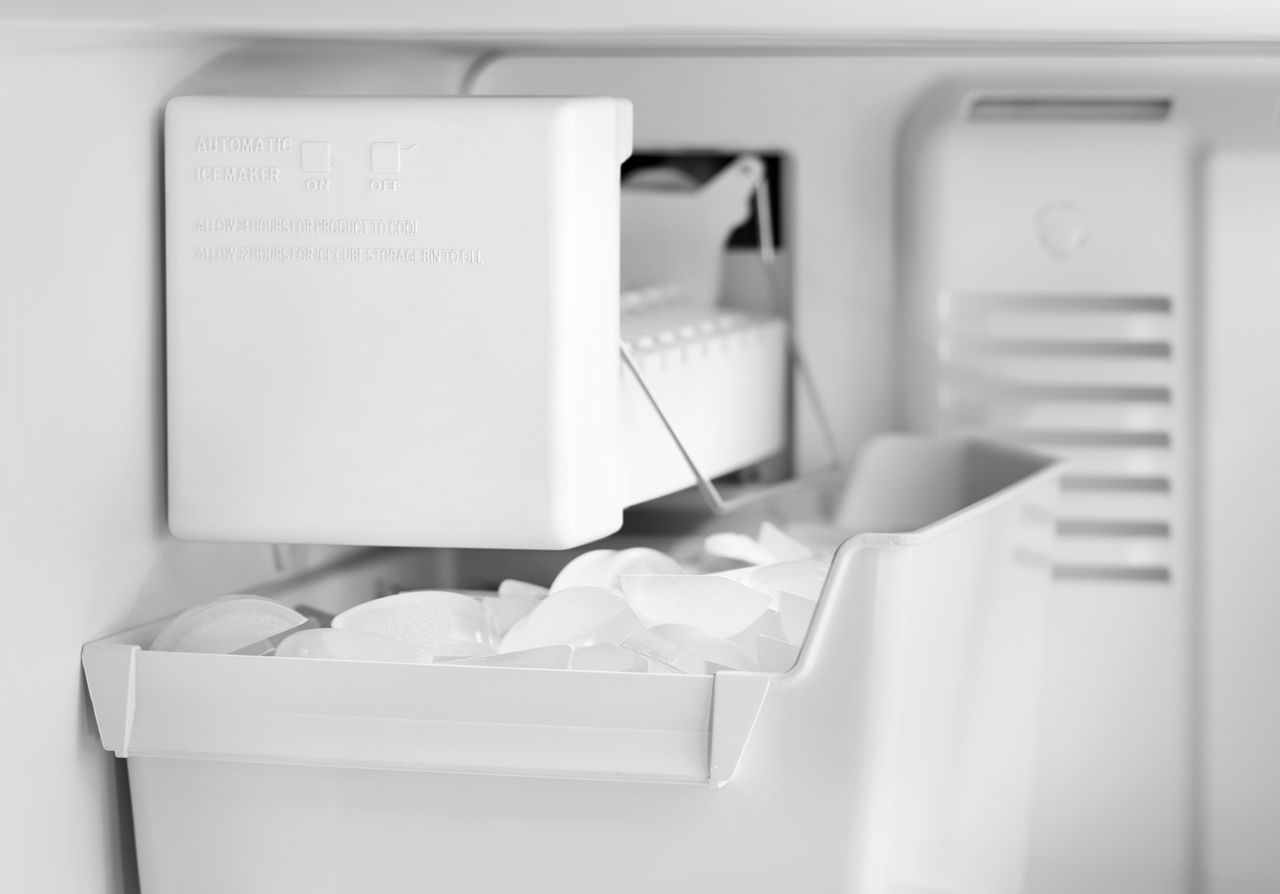
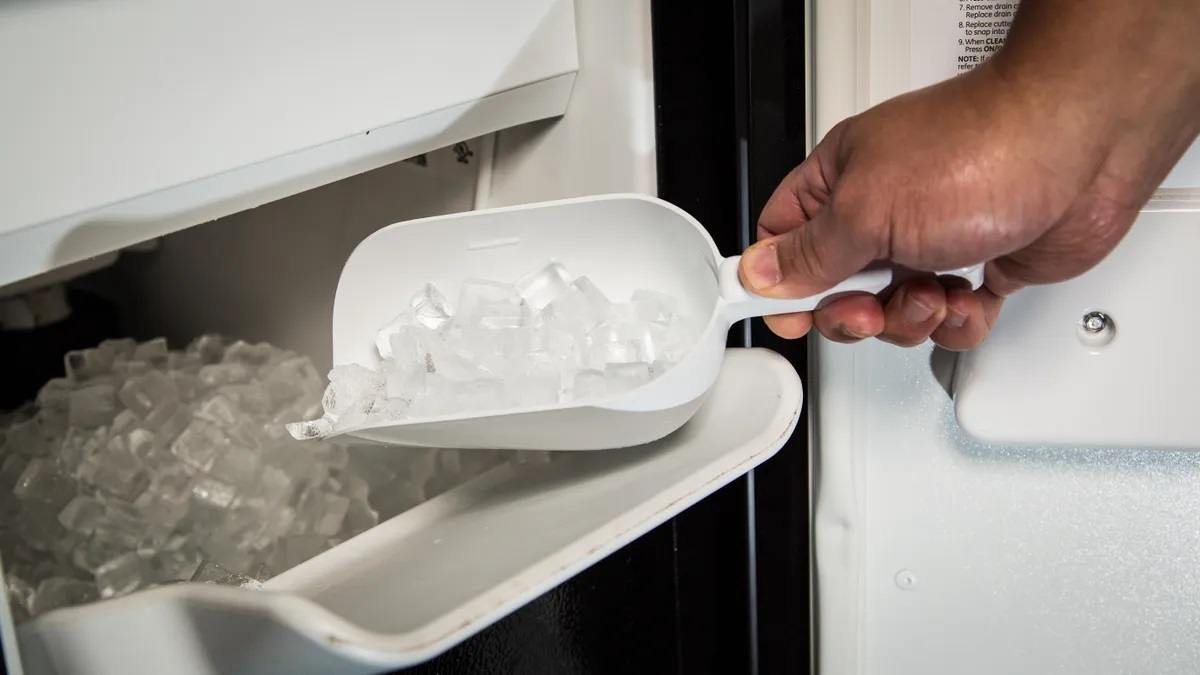
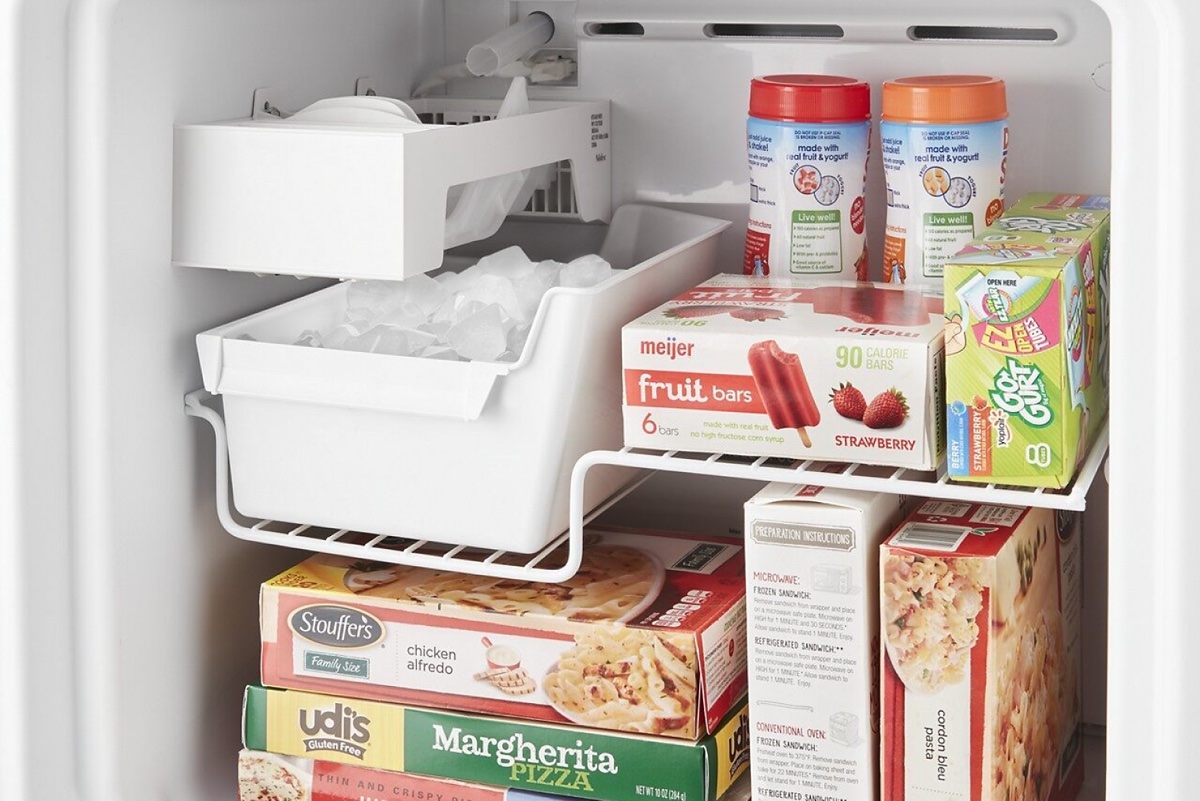
Step 2: Empty the Ice Bin
Before you can remove the ice maker from your Whirlpool refrigerator, you need to empty the ice bin to prevent any water or ice from spilling during the removal process. Follow these steps to empty the ice bin:
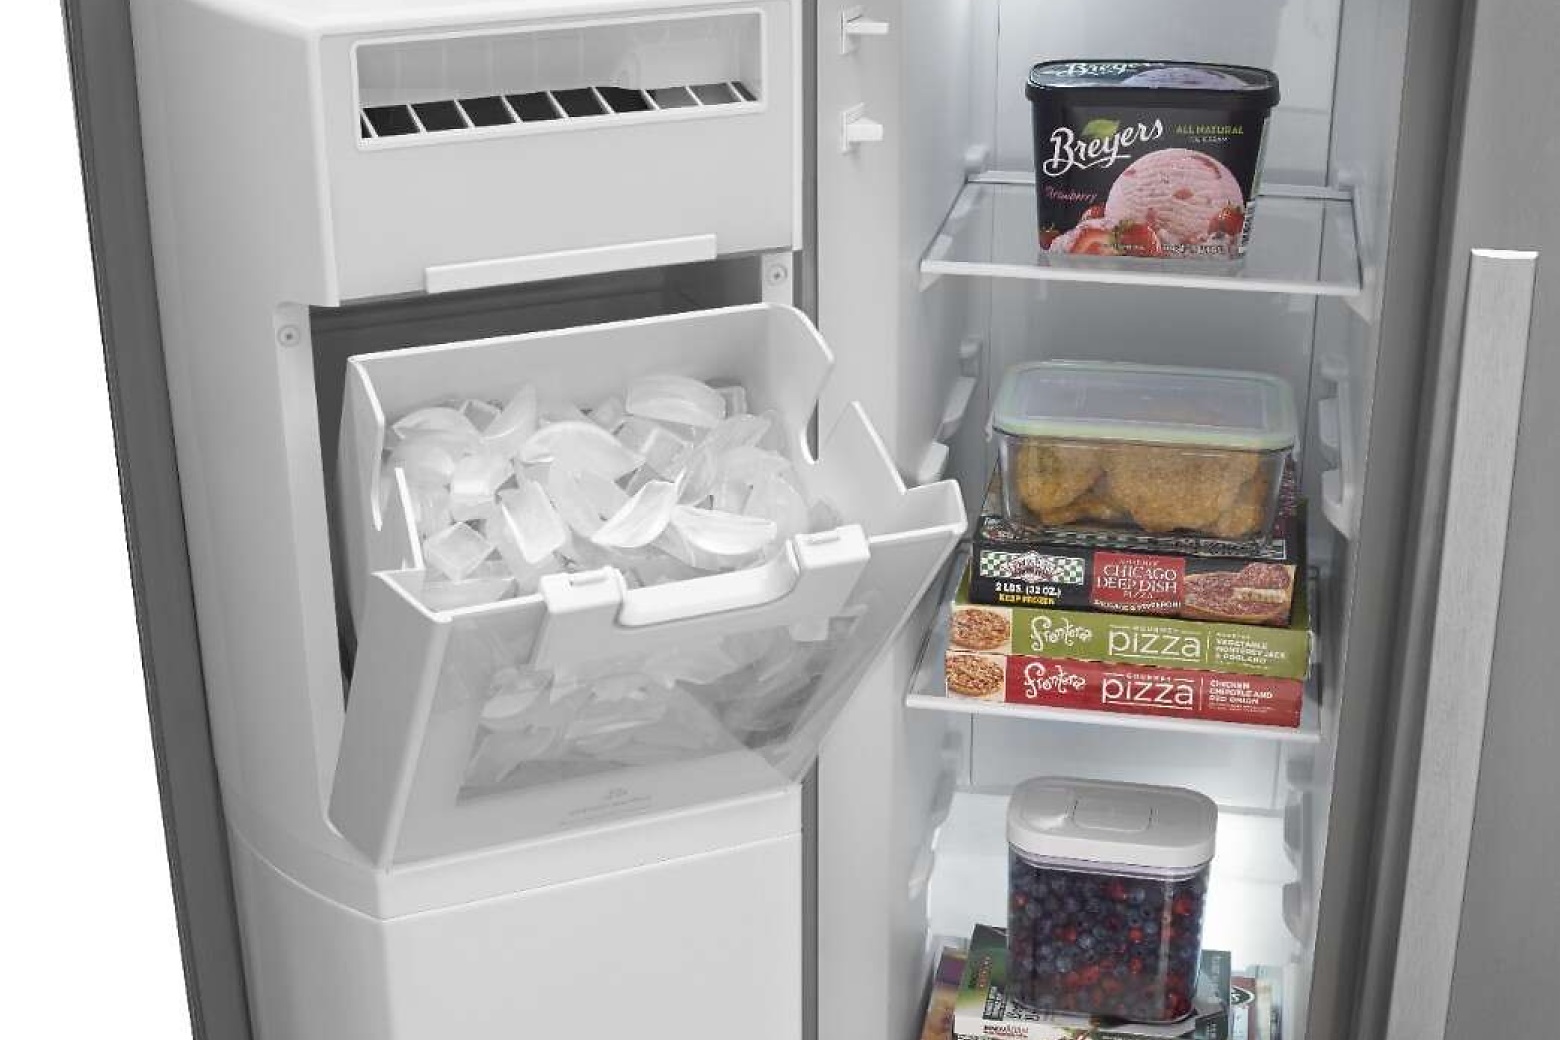
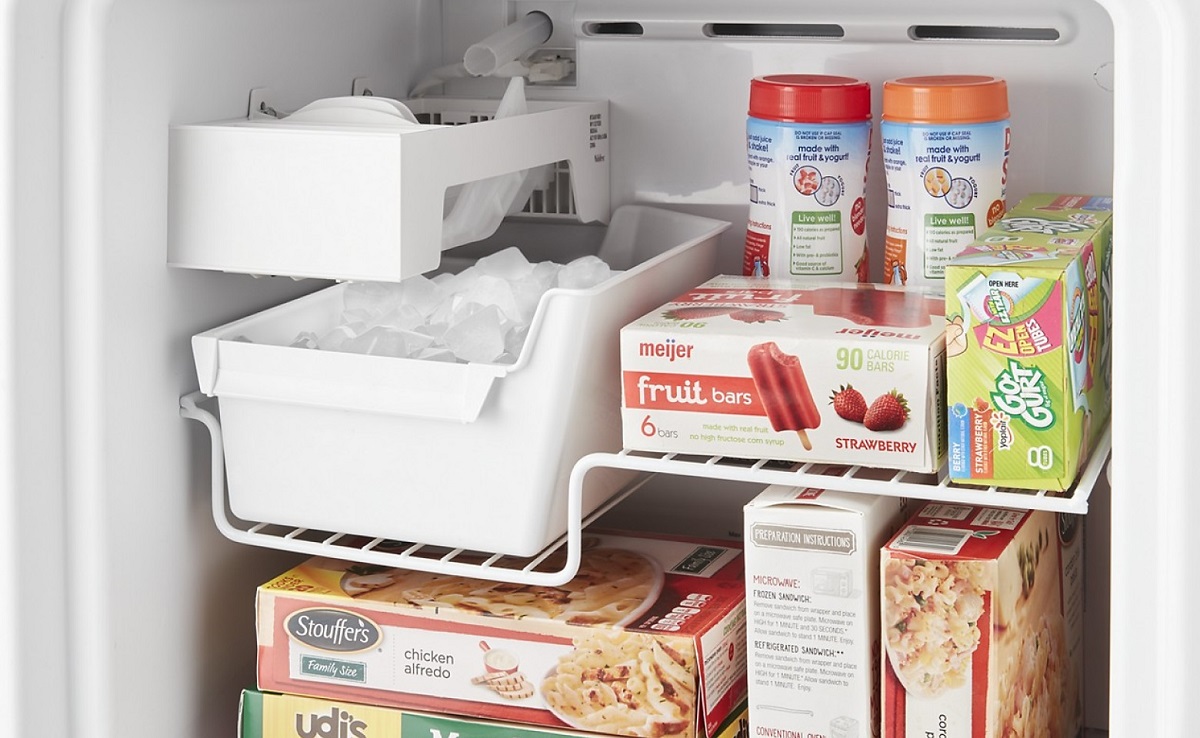
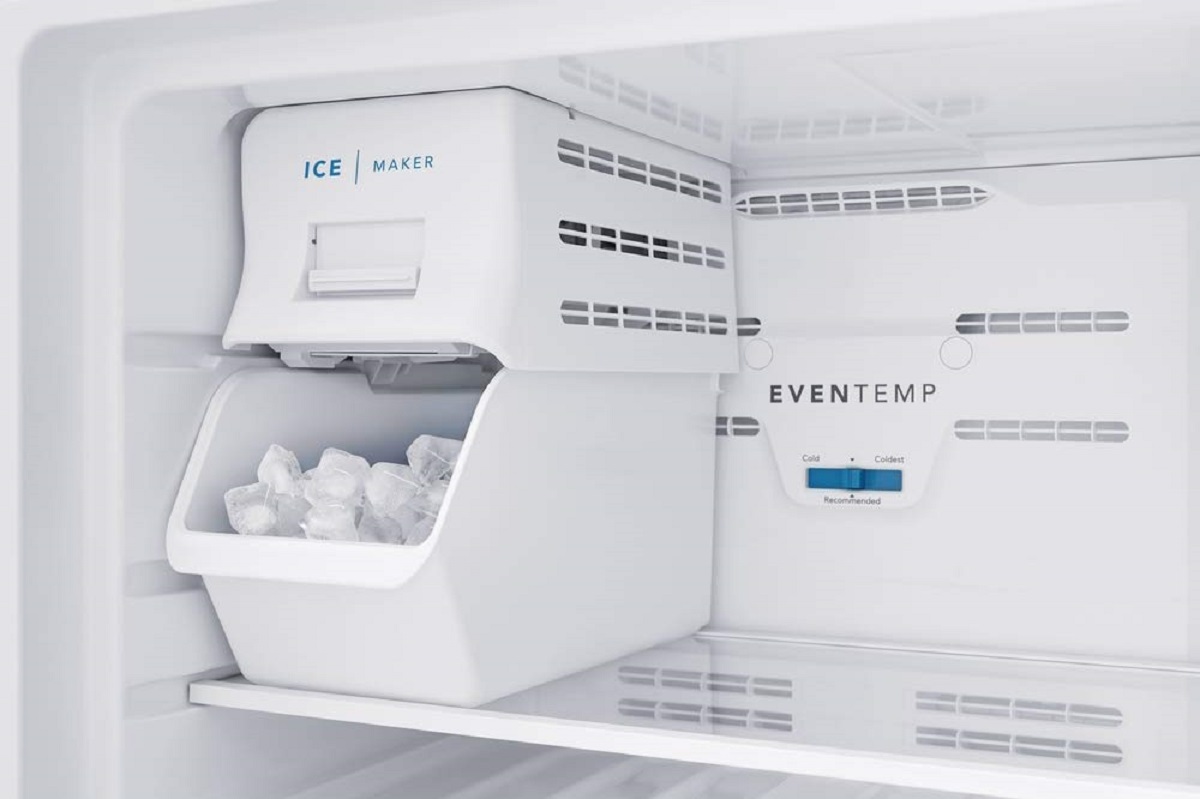
- Open the freezer door on your refrigerator.
- Locate the ice bin, which is usually located in the top or bottom section of the freezer.
- Carefully lift the ice bin out of the freezer compartment, taking care not to spill any ice cubes.
- If needed, transfer the ice cubes to a suitable container or bag to keep them frozen.
- Once the ice bin is empty, set it aside in a safe place.
By emptying the ice bin, you ensure a clean and unobstructed path for removing the ice maker from your Whirlpool refrigerator. It also prevents any water or ice from accidentally spilling and causing a mess during the removal process.
Now that the ice bin is empty, you are ready to move on to the next step of removing the ice bin itself before disconnecting the water supply line.
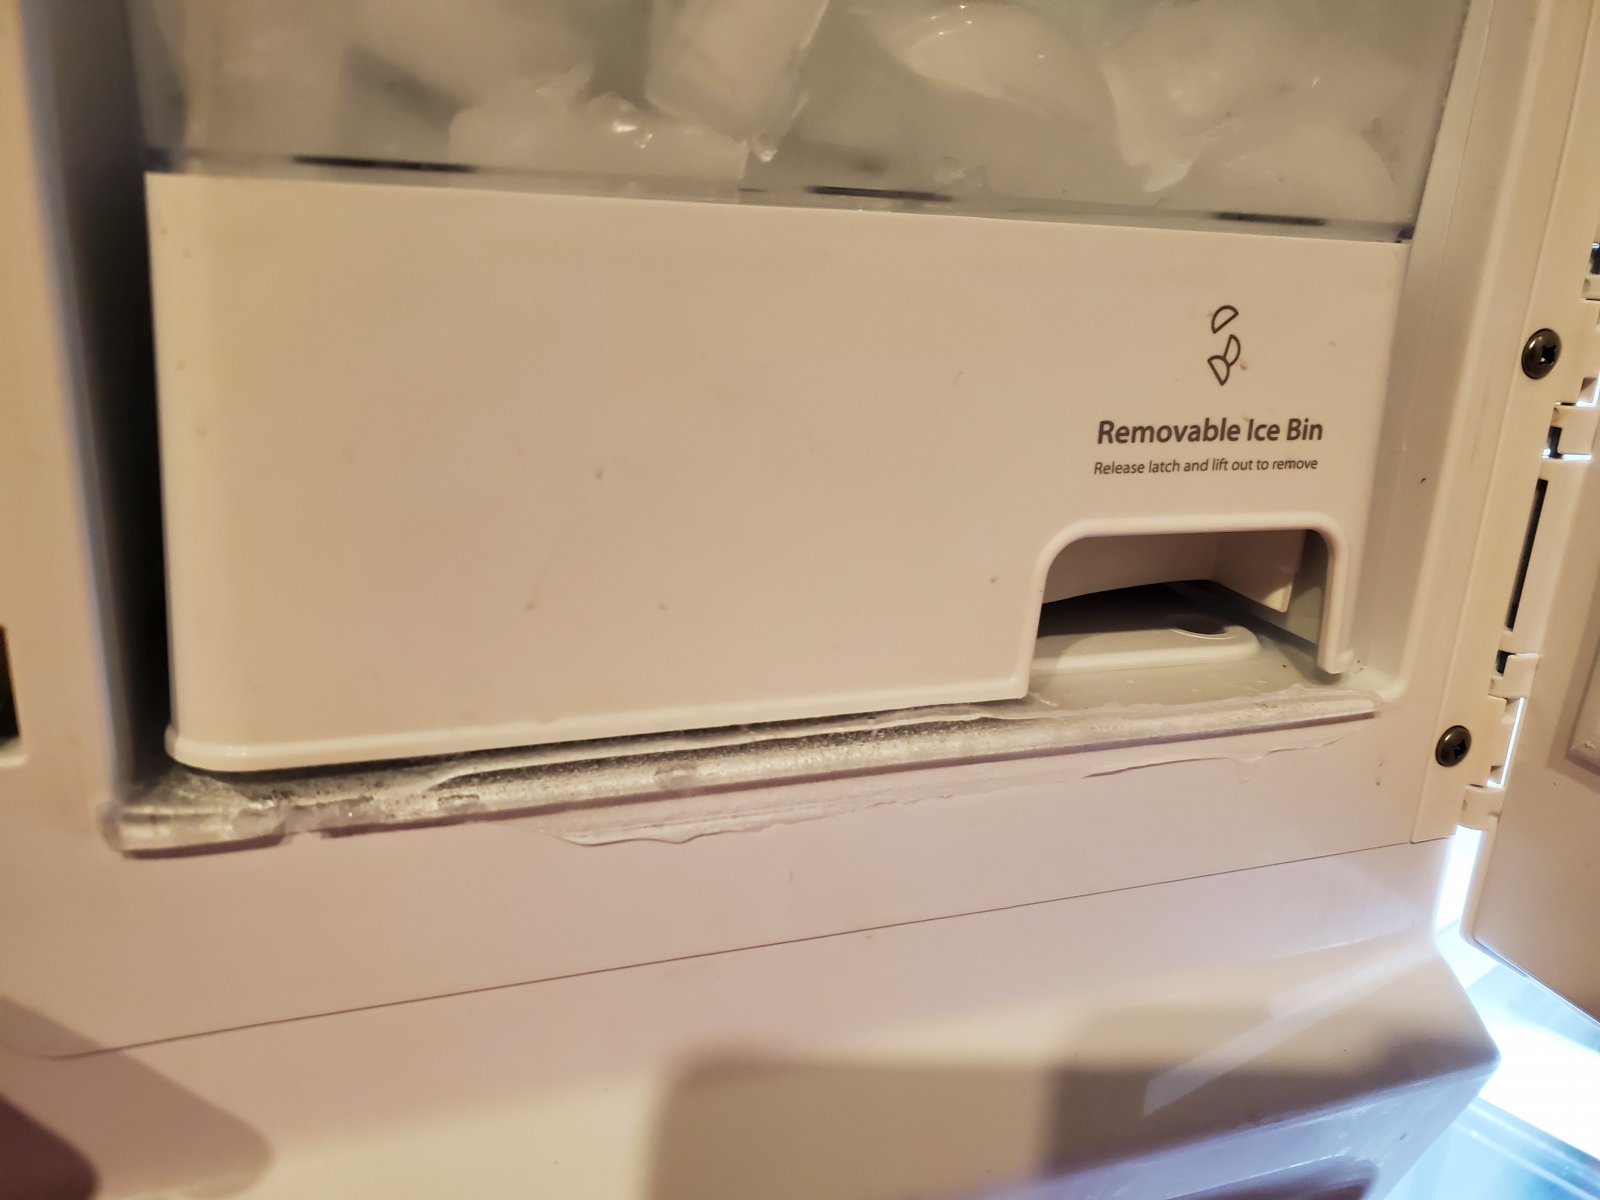
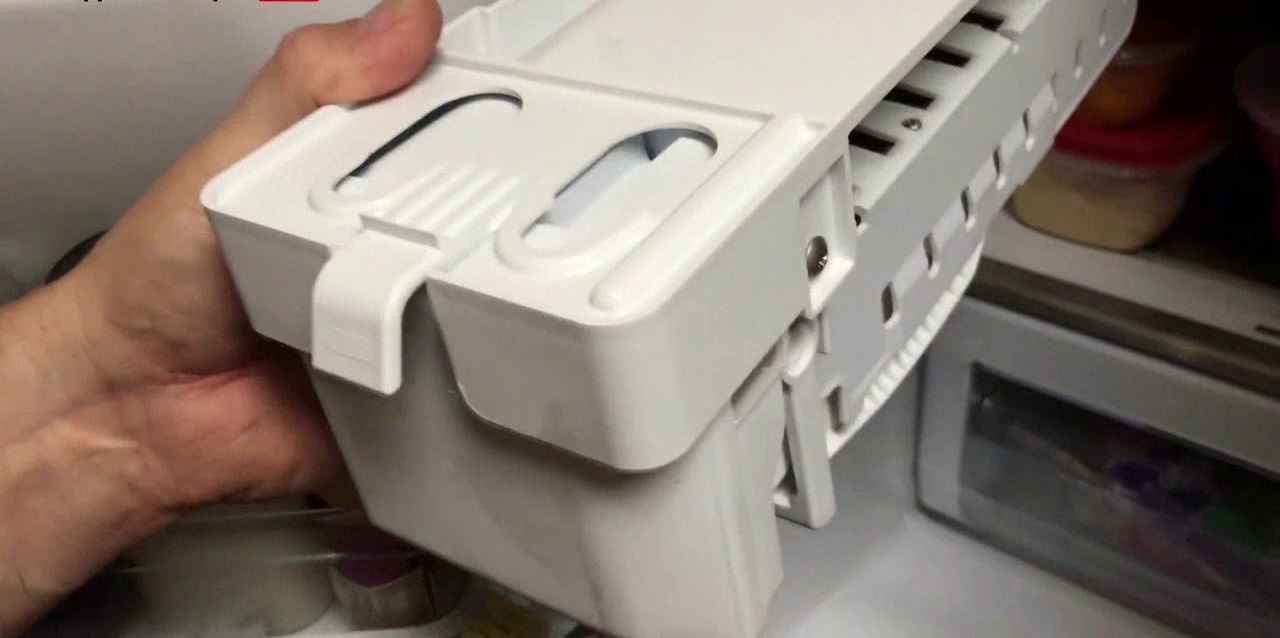
Step 3: Remove the Ice Bin
With the ice bin empty, it is time to remove it from your Whirlpool refrigerator. Follow these steps to remove the ice bin:
- Locate the release mechanism for the ice bin. This may be a button or lever that needs to be pressed or pulled.
- Engage the release mechanism and gently pull the ice bin out of the freezer compartment.
- If there is resistance, check for any ice or debris that may be obstructing the bin from sliding out. Clear any obstructions before continuing.
- Carefully place the ice bin on a stable surface to avoid any damage or spills.
Removing the ice bin allows for better access to the ice maker and makes it easier to disconnect the water supply line. Ensure that the ice bin is placed in a safe location where it will not tip over or be damaged.
Now that the ice bin is removed, you can proceed to the next step of disconnecting the water supply line before removing the ice maker from your Whirlpool refrigerator.
Before removing the ice maker from your Whirlpool refrigerator, make sure to unplug the refrigerator and turn off the water supply. Follow the manufacturer’s instructions for removing the ice maker, which typically involves locating and removing a few screws and disconnecting the wiring harness. Be sure to handle the ice maker carefully to avoid damaging any components.
Step 4: Disconnect the Water Supply Line
Before removing the ice maker from your Whirlpool refrigerator, it is necessary to disconnect the water supply line. Follow these steps to disconnect the water supply line:
- Locate the water supply line connection at the back of the refrigerator. It is typically located near the bottom.
- Using an adjustable wrench, grip the nut that secures the water supply line to the refrigerator.
- Turn the nut counterclockwise to loosen it. You may encounter some resistance due to the tightness of the connection.
- Once the nut is loose, continue turning it by hand until it is completely detached from the refrigerator.
- Place a towel or rag underneath the disconnected end of the water supply line to catch any water that may drip out.
- Allow any remaining water in the line to drain into the towel or rag.
By disconnecting the water supply line, you ensure that no water will flow into the ice maker when it is removed, preventing any potential leaks or spills. It is important to have the towel or rag ready to catch any water that may escape during the disconnection process.
Now that the water supply line is disconnected, you can proceed to the next step of unplugging the ice maker before removing it from your Whirlpool refrigerator.
Step 5: Unplug the Ice Maker
Before removing the ice maker from your Whirlpool refrigerator, you need to disconnect it from the power source. Follow these steps to unplug the ice maker:
- Locate the electrical plug that connects the ice maker to the refrigerator.
- Gently grasp the plug and firmly pull it out from the outlet on the refrigerator.
- Ensure that the plug is completely disconnected and set it aside.
Unplugging the ice maker ensures that no power is being supplied to the unit, making it safe to handle during the removal process. It also prevents any potential electrical issues and allows for a seamless removal of the ice maker.
Now that the ice maker is unplugged, you can move on to the next step of removing the mounting screws that secure the ice maker in place.
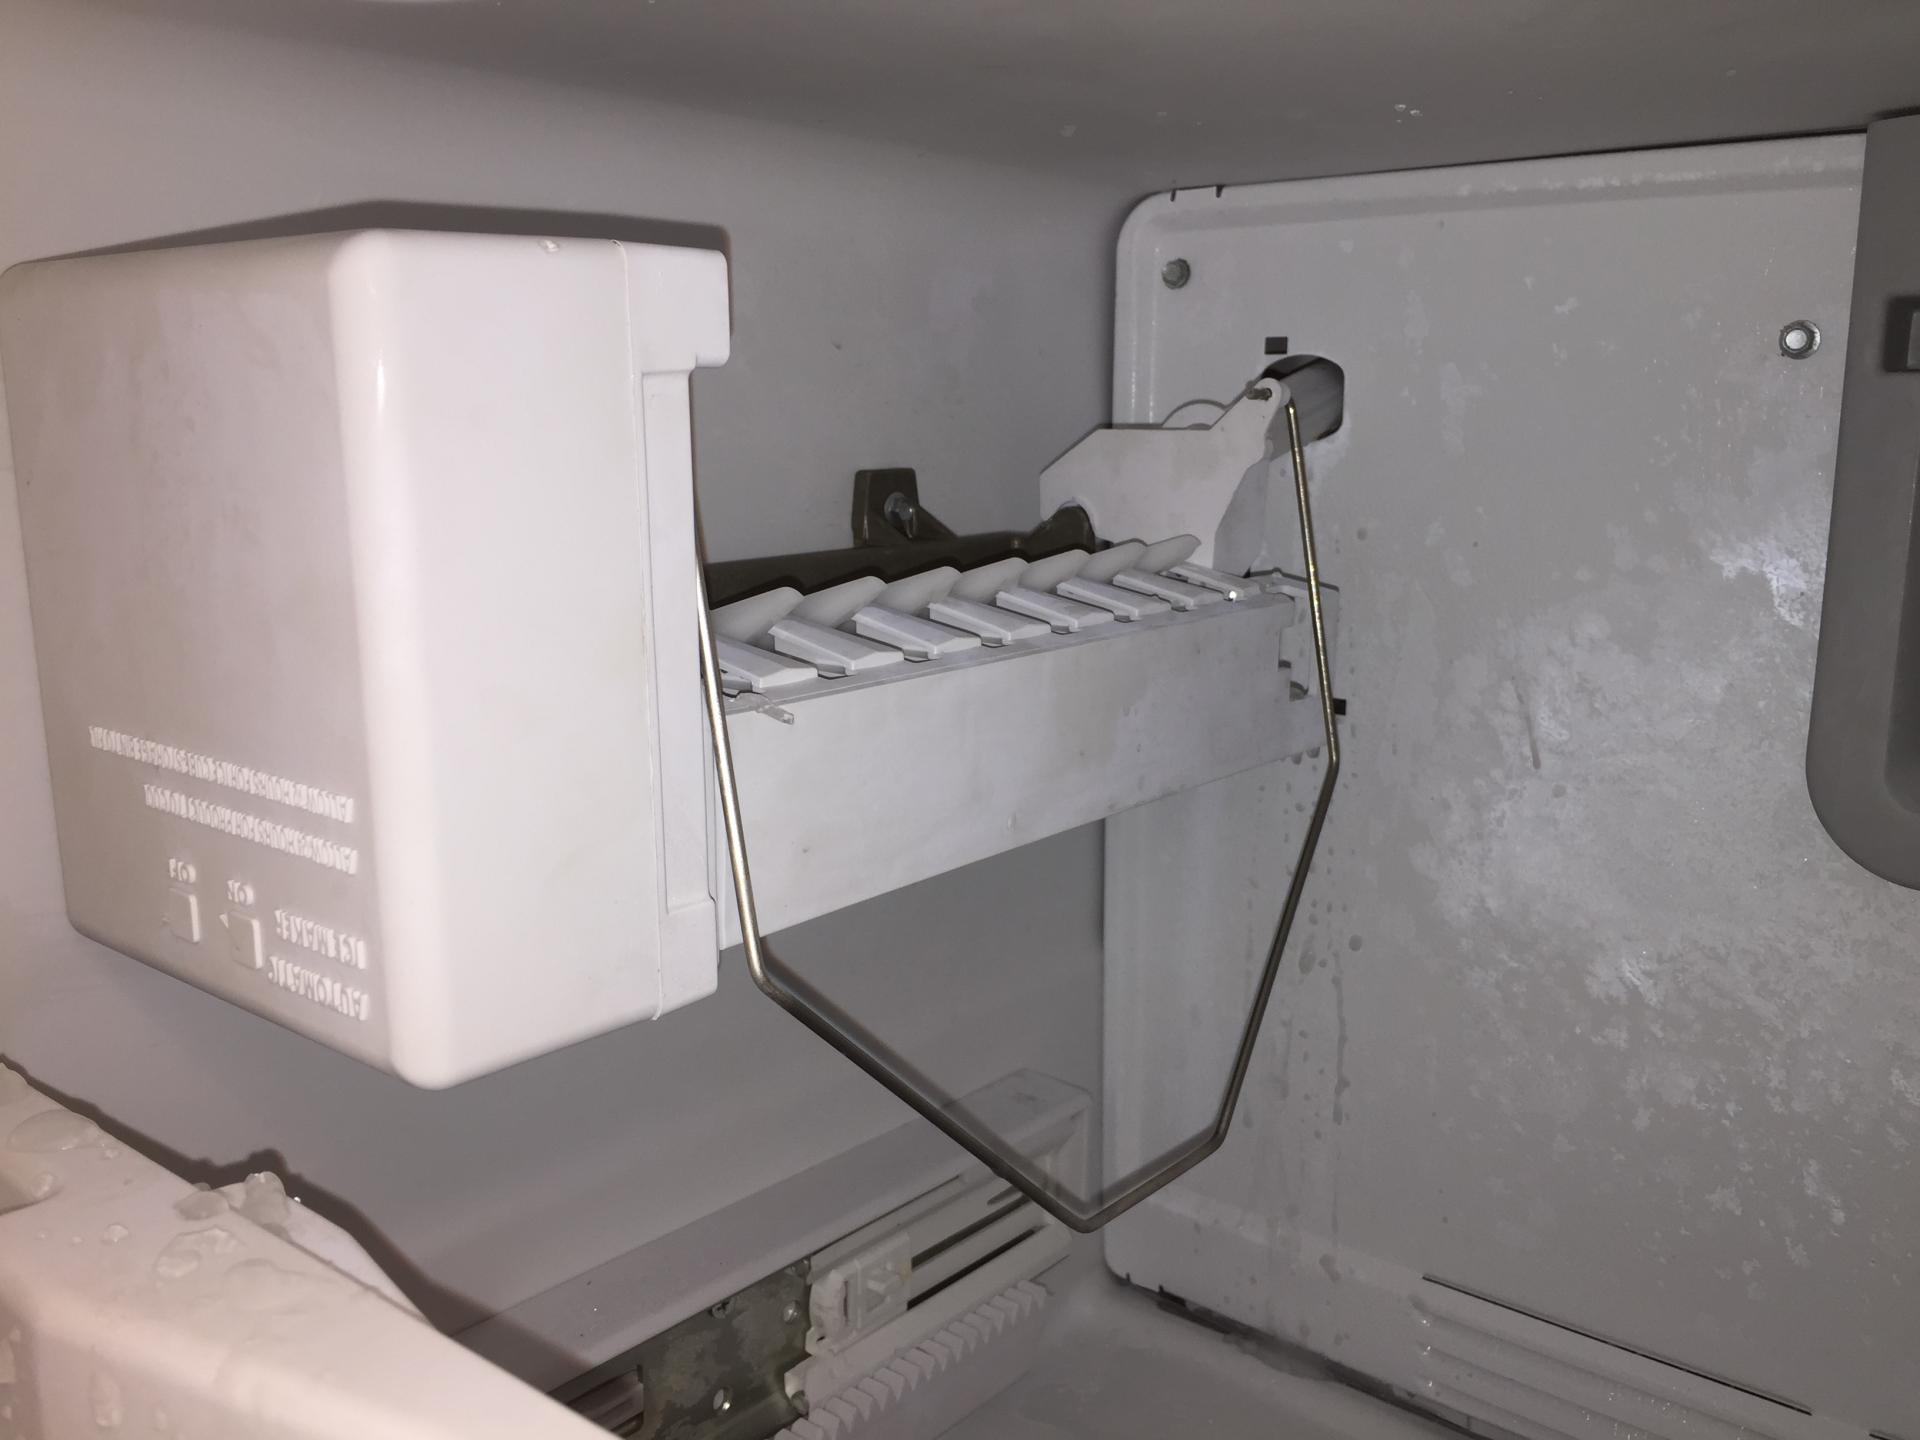
Step 6: Remove the Mounting Screws
With the ice maker unplugged, it is time to remove the mounting screws that secure it in place inside your Whirlpool refrigerator. Follow these steps to remove the mounting screws:
- Locate the mounting screws that are holding the ice maker in place. These screws are usually located on the sides or top of the ice maker.
- Using a Phillips screwdriver, carefully loosen and remove the mounting screws one by one.
- Set aside the screws in a safe place to prevent them from getting lost or misplaced.
- Once all the mounting screws are removed, carefully lift the ice maker off its mounting brackets.
Removing the mounting screws allows you to detach the ice maker from the refrigerator. Make sure to keep the screws in a safe place, as you will need them when reinstalling the ice maker or installing a new one in the future.
Now that the mounting screws are removed, you can proceed to the next step of disconnecting the wiring harness from the ice maker before fully removing it from your Whirlpool refrigerator.
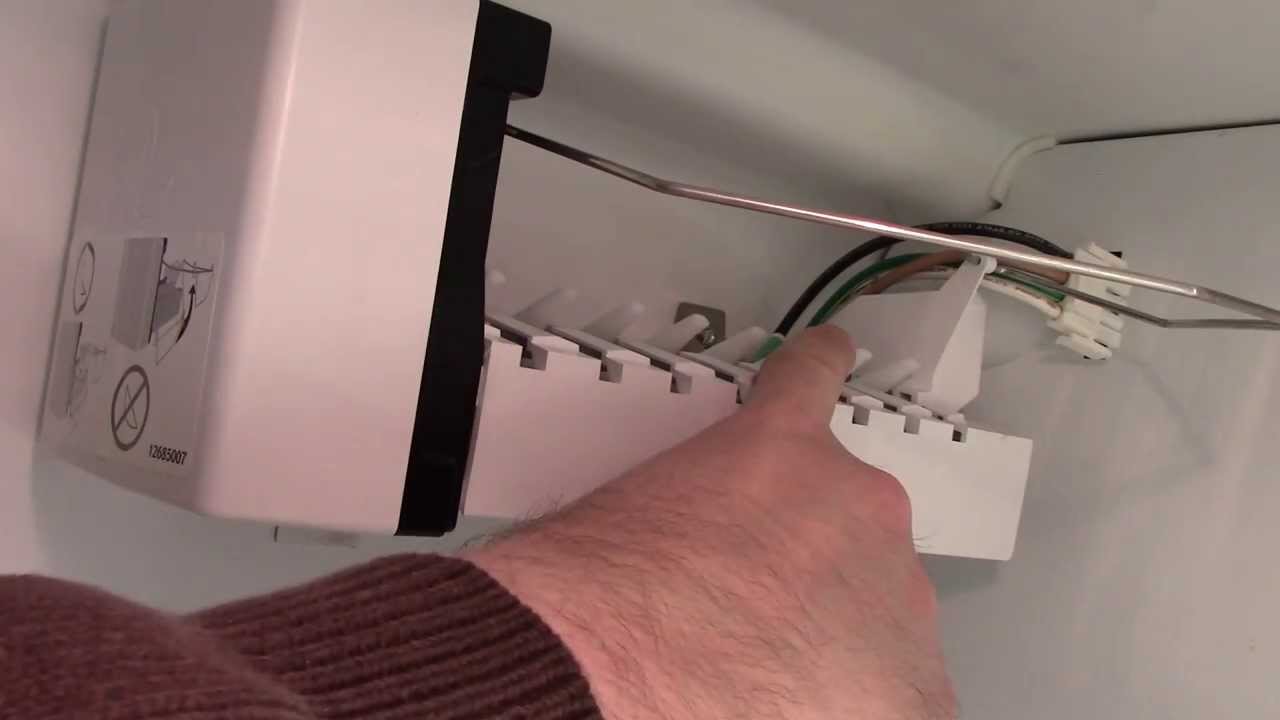
Step 7: Disconnect the Wiring Harness
Before you can fully remove the ice maker from your Whirlpool refrigerator, you need to disconnect the wiring harness that connects it to the appliance. Follow these steps to disconnect the wiring harness:
- Locate the wiring harness that is connected to the ice maker. It is typically located at the back of the unit.
- Gently grasp the wiring harness connector and firmly pull it apart to disconnect it from the ice maker.
- Ensure that the wiring harness is fully detached and set it aside.
Disconnecting the wiring harness ensures that there is no electrical connection between the ice maker and the refrigerator, allowing for a safe and smooth removal. Take care not to force the connector apart, as it may be delicate. If needed, wiggle the connector gently while pulling to detach it from the ice maker.
Now that the wiring harness is disconnected, you can proceed to the final step of removing the ice maker from your Whirlpool refrigerator.
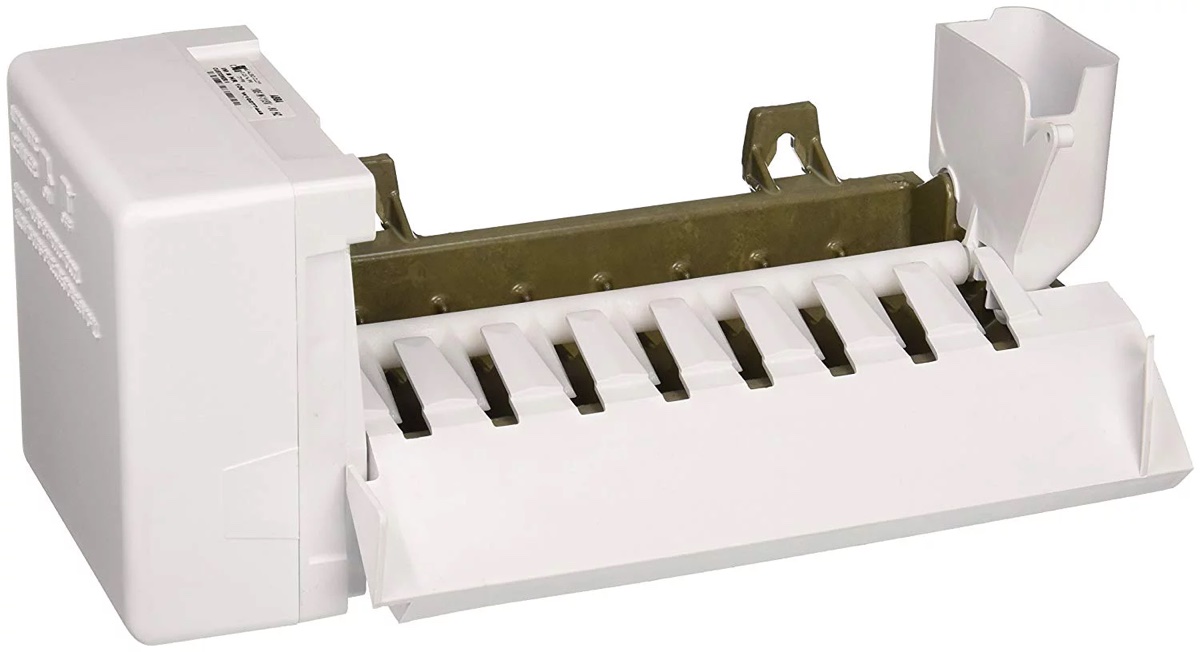
Step 8: Remove the Ice Maker
You have reached the final step of removing the ice maker from your Whirlpool refrigerator. Follow these steps to remove the ice maker:
- Gently pull the ice maker away from the mounting brackets.
- Check for any additional screws or attachments securing the ice maker in place. If present, carefully remove them.
- Once all attachments are removed, lift the ice maker out of its position.
- Set the ice maker aside in a safe location.
With the ice maker successfully removed, you can now proceed with any necessary maintenance or replacement. If you are replacing the ice maker, make sure to follow the manufacturer’s instructions when installing the new unit.
Remember to keep the removed ice maker in a safe place in case you need it in the future. If the ice maker requires repair, consult a professional or refer to the manufacturer’s service manual for assistance.
By following these steps, you have successfully removed the ice maker from your Whirlpool refrigerator. Congratulations!
Conclusion
Removing the ice maker from your Whirlpool refrigerator is a simple process that can be completed with just a few basic tools and some careful steps. By following the step-by-step guide provided in this article, you can safely and efficiently remove the ice maker for maintenance or replacement.
Remember to always prioritize your safety by disconnecting the power and water supply before starting the removal process. Use the appropriate tools and materials, such as a Phillips screwdriver and an adjustable wrench, to ensure a smooth removal experience.
Throughout the process, take care to empty the ice bin, disconnect the water supply line, unplug the ice maker, remove the mounting screws, disconnect the wiring harness, and finally, remove the ice maker itself. Keep track of any screws or attachments that are removed to ensure they are properly reinstalled if needed.
Once the ice maker is removed, you can proceed with any necessary maintenance or replacement. If you encounter any difficulties or feel unsure about any step, consult the manufacturer’s instructions or seek professional assistance.
By following the steps outlined in this article, you have acquired the knowledge and skills to confidently remove the ice maker from your Whirlpool refrigerator. Whether you are looking to perform maintenance, upgrade to a new ice maker, or simply need to access the components of your appliance, you can now do so with ease.
Remember to refer back to this guide whenever you need to reinstall the ice maker or install a new one in the future. With proper care and maintenance, your refrigerator will continue to provide you with refreshing ice for years to come.
Having mastered removing your ice maker, you might now be curious about upgrading. Our detailed review on the most reliable Whirlpool refrigerator ice makers for the upcoming year can guide you in choosing the perfect model for your needs. For those keen on keeping their home in tip-top shape, our comprehensive insights on necessary home maintenance routines will prove invaluable. Also, don't miss out on learning efficient methods to keep your ice maker in pristine condition with our easy steps on how to clean a refrigerator ice maker.
Frequently Asked Questions about How To Remove Ice Maker From Whirlpool Refrigerator
Was this page helpful?
At Storables.com, we guarantee accurate and reliable information. Our content, validated by Expert Board Contributors, is crafted following stringent Editorial Policies. We're committed to providing you with well-researched, expert-backed insights for all your informational needs.

0 thoughts on “How To Remove Ice Maker From Whirlpool Refrigerator”