Articles
How To Replace A Carpet In A Car
Modified: September 1, 2024
Learn how to replace the carpet in your car with our informative articles. Improve the look and comfort of your vehicle with our step-by-step guides.
(Many of the links in this article redirect to a specific reviewed product. Your purchase of these products through affiliate links helps to generate commission for Storables.com, at no extra cost. Learn more)
Introduction
Welcome to the comprehensive guide on how to replace a carpet in a car. Over time, car carpets can become worn, stained, or damaged, detracting from the overall aesthetic and comfort of the vehicle’s interior. However, fear not! With a bit of patience, some basic tools, and a can-do attitude, you can transform your car’s interior by replacing the old carpet with a fresh and clean one.
Whether you’re a car enthusiast looking to upgrade your ride or simply someone who wants to give their car a fresh makeover, this step-by-step guide will walk you through the process of replacing your car’s carpet.
Before we dive into the details, it’s important to note that each car model may have unique requirements and variations in the carpet replacement process. Therefore, it’s crucial to consult your car’s manual or seek guidance from a professional if you encounter any difficulties along the way.
Now, let’s roll up our sleeves and get started on this DIY car carpet replacement adventure!
Key Takeaways:
- Transform your car’s interior by replacing the old carpet with a fresh one, following a step-by-step guide. Gather tools, remove old carpet, clean the interior, and install and secure the new carpet for a professional finish.
- Prioritize safety, consult your car’s manual, and consider professional installation for complex interiors. Enjoy a fresh and revamped car interior, and continue to enhance and personalize your vehicle.
Read more: How To Install A Carpet In A Car
Preparing for the Replacement
Before you begin the carpet replacement process, it’s essential to gather all the necessary tools and materials. Here’s a list of what you will need:
- Replacement carpet – make sure it is designed for your specific car model.
- Utility knife or carpet cutters – for cutting and trimming the new carpet.
- Screwdriver set – to remove screws and panels.
- Trim removal tools – to safely pry off trims and moldings.
- Vacuum cleaner – for cleaning the car interior.
- Cleaning supplies – such as upholstery cleaner and brushes.
- Adhesive spray or carpet tape – to secure the new carpet.
- Protective gloves – to avoid injuries and keep your hands clean.
Once you have gathered all the necessary tools and materials, it’s time to prepare the car for the carpet replacement. Here are the steps to follow:
- Clear out the car interior: Remove all personal items, floor mats, and any other objects from the car. This will provide you with a clean and empty canvas to work with.
- Disconnect the battery: For safety reasons, it’s recommended to disconnect the car’s battery before starting any interior work. This will prevent any electrical mishaps or short circuits.
- Prepare the workspace: Find a well-lit and well-ventilated space to work in, preferably a garage or an open area. Lay down a drop cloth or some cardboard to protect the floor from any dirt or scratches.
- Take reference photos: Before removing anything, take photos of the car interior from multiple angles. These photos will serve as a useful reference during the reassembly process.
- Consult the car manual: Read through the car manual specific to your model, if available. It may provide additional guidance or specific instructions for removing certain parts of the interior.
By properly preparing for the carpet replacement, you will ensure a smooth and efficient process. Taking the time to gather the necessary tools and materials, clearing out the car interior, and referencing the car manual will set you up for success in the subsequent steps.
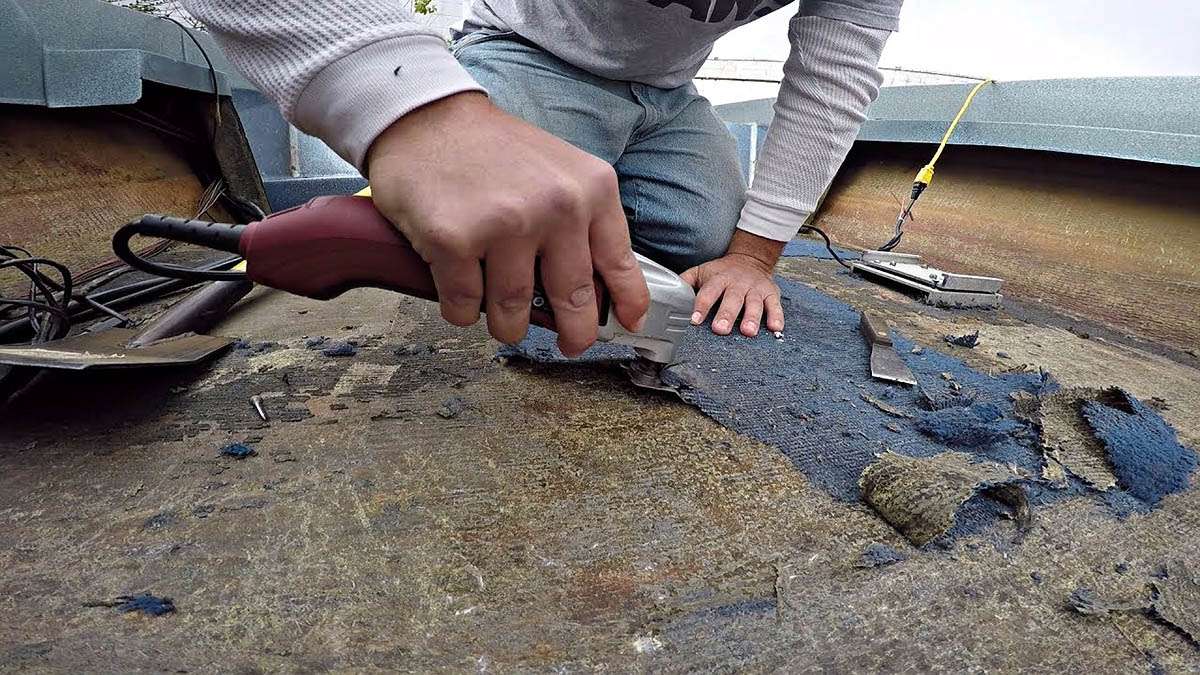
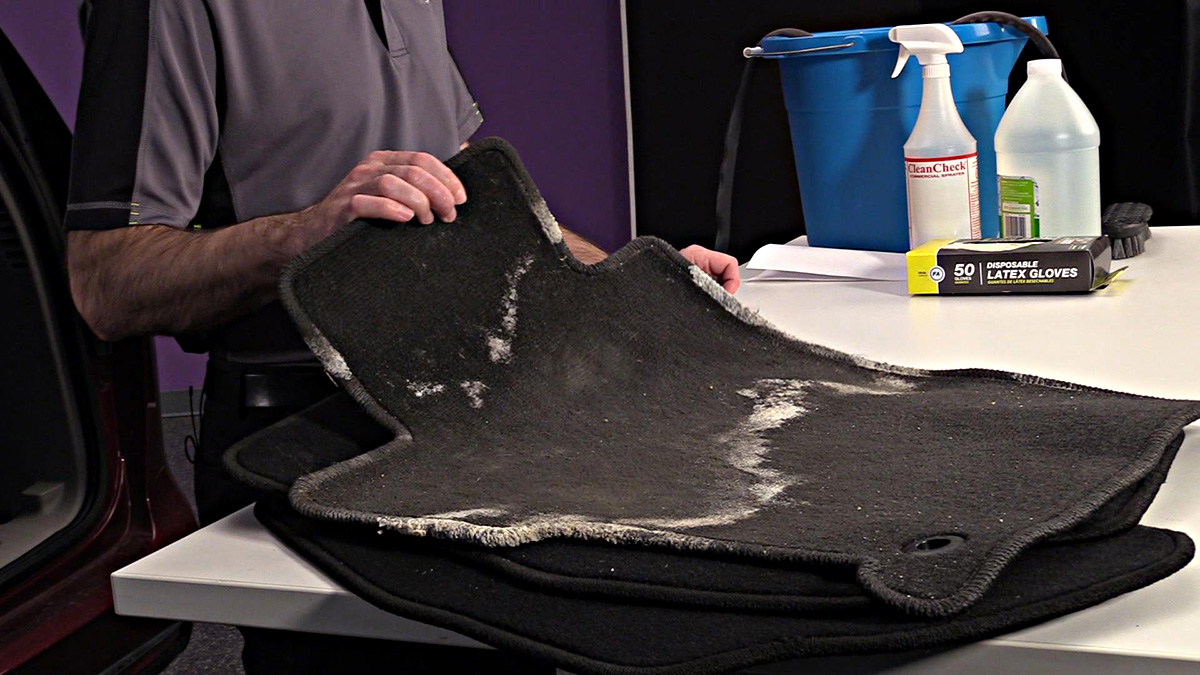
Removing the Old Carpet
Now that you have prepared the car and gathered the necessary tools, it’s time to remove the old carpet. Follow these step-by-step instructions:
- Start with the seats: Begin by removing the seats from the car. Depending on your car model, you may need to detach bolts or screws to release the seats. Store the bolts and screws in a secure place for later reassembly.
- Remove the center console: If your car has a center console, carefully detach it. This may involve removing screws, clips, or pry-off trims. Take your time and be gentle to avoid damaging any components.
- Detach the door sills: Locate the door sills inside the car, which are the strips along the bottom of the door openings. Use a trim removal tool to pry them off gently. This will expose the edges of the carpet beneath.
- Remove the kick panels: Kick panels are the panels located at the lower portion of the interior walls near the driver and passenger seats. Use a trim removal tool to carefully detach them and set them aside.
- Pull back the carpet: Starting from one side of the car, pull back the carpet slowly and gradually. Use a utility knife or carpet cutters to cut any adhesive or fasteners that are holding the carpet in place. Be cautious not to cut into any wires or connectors.
- Continue to the other side: Once you have successfully pulled back the carpet on one side, repeat the process on the other side of the car. Take your time to ensure the carpet is fully detached from the floor.
- Remove any remaining carpet sections: In some cases, there may be additional carpet sections, such as in the trunk or under the rear seats. Remove these sections using the same method described above.
As you remove the old carpet, be mindful of any wires, cables, or connectors that may be attached to it. Take note of their location and be careful not to damage them during the removal process.
Once you have successfully removed the old carpet, you are one step closer to giving your car’s interior a fresh and updated look. In the next section, we will cover how to clean the car interior in preparation for the new carpet installation.
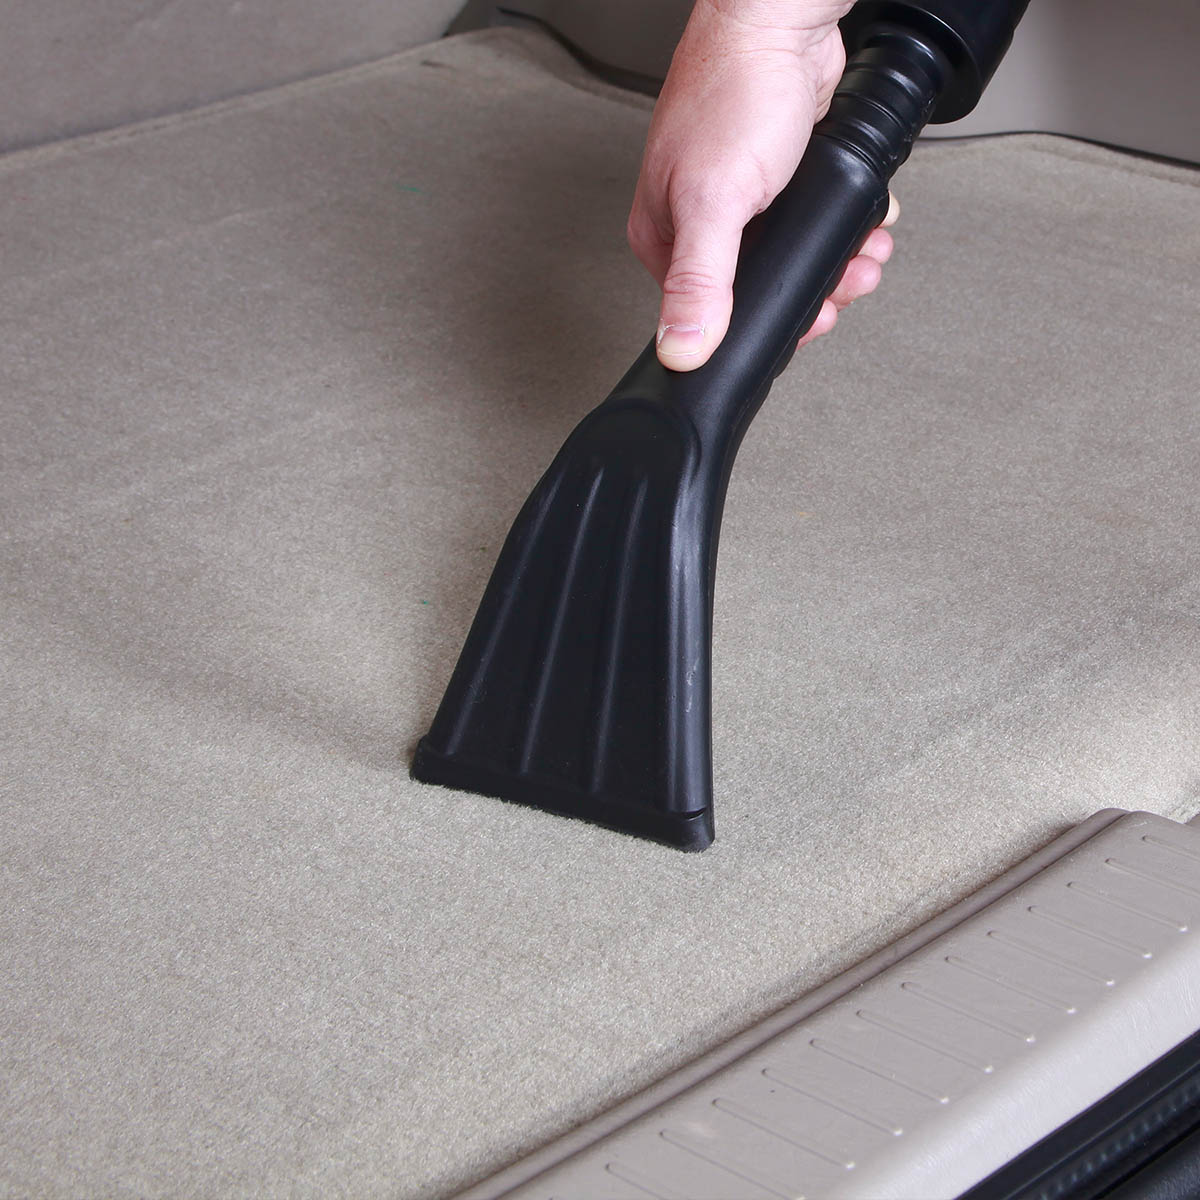
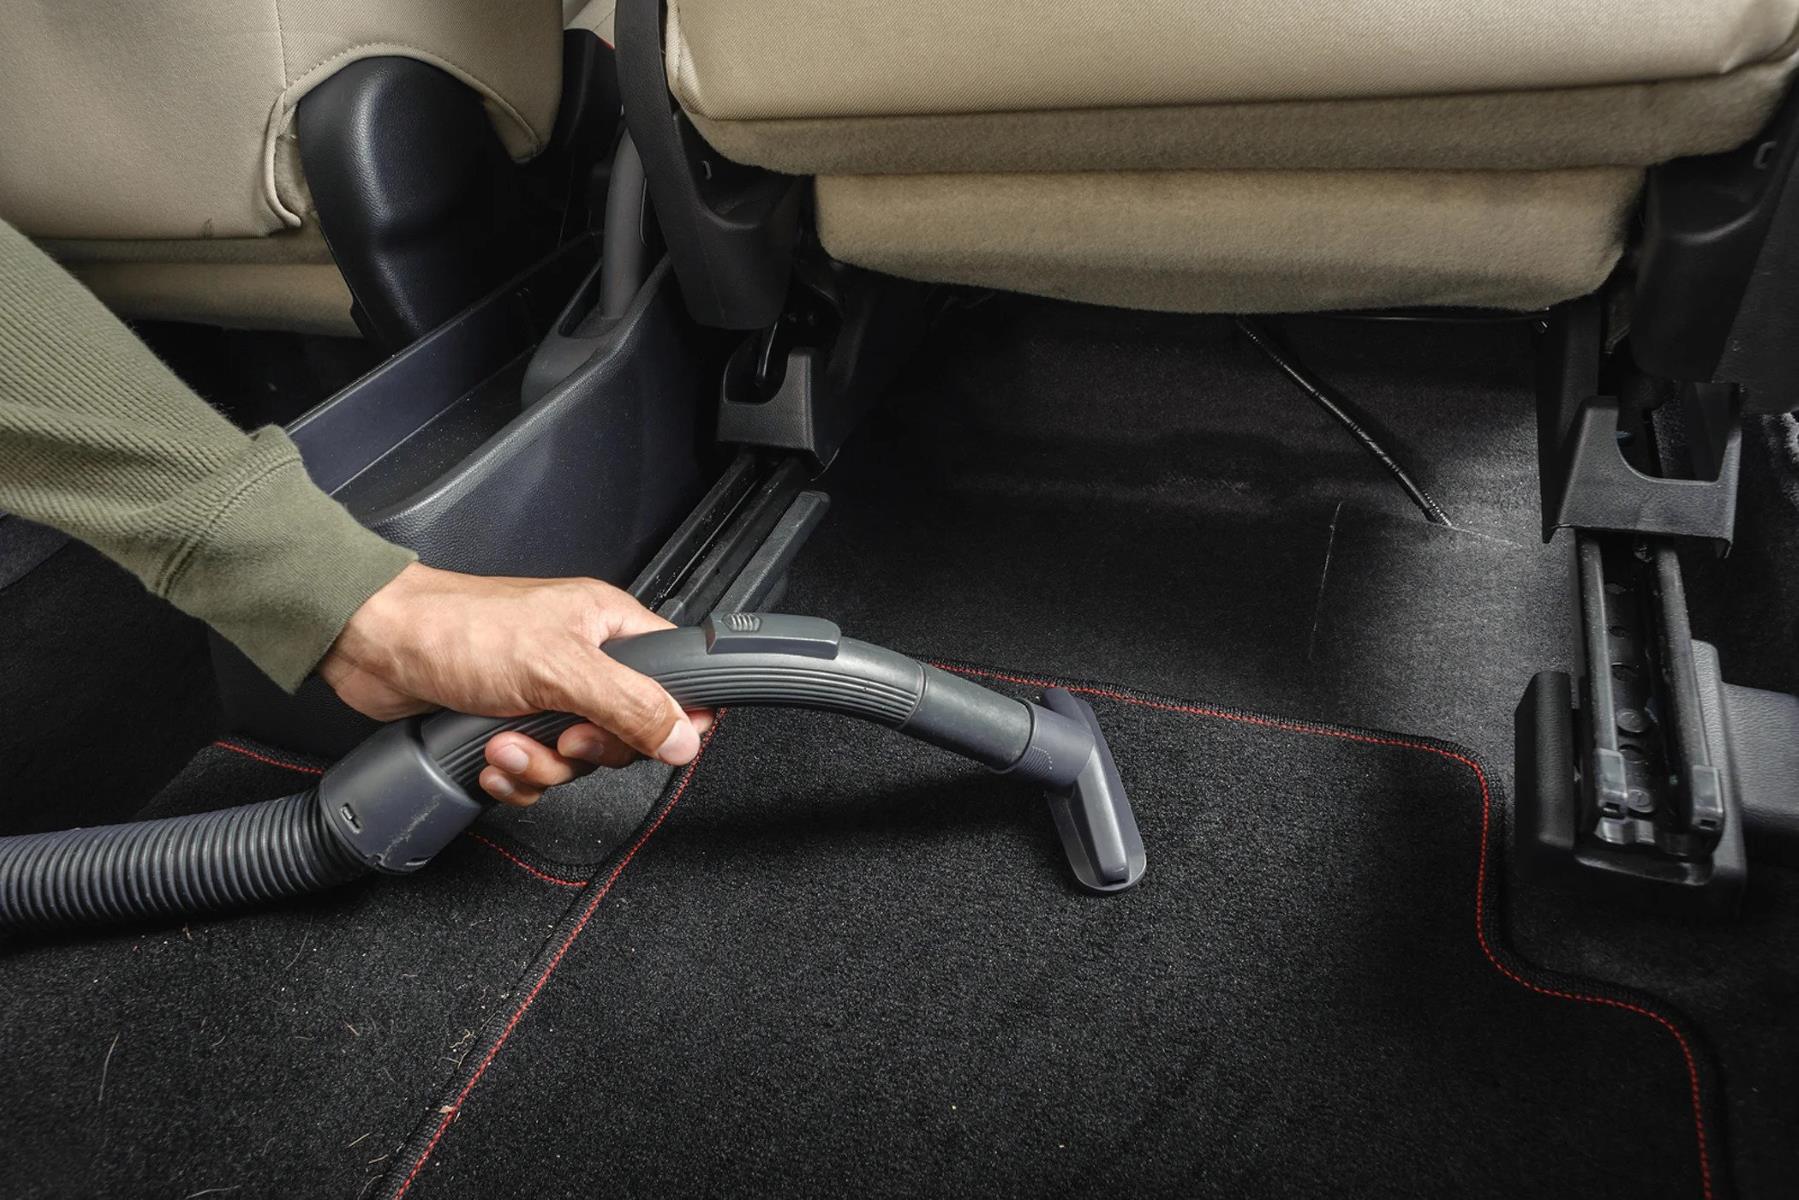
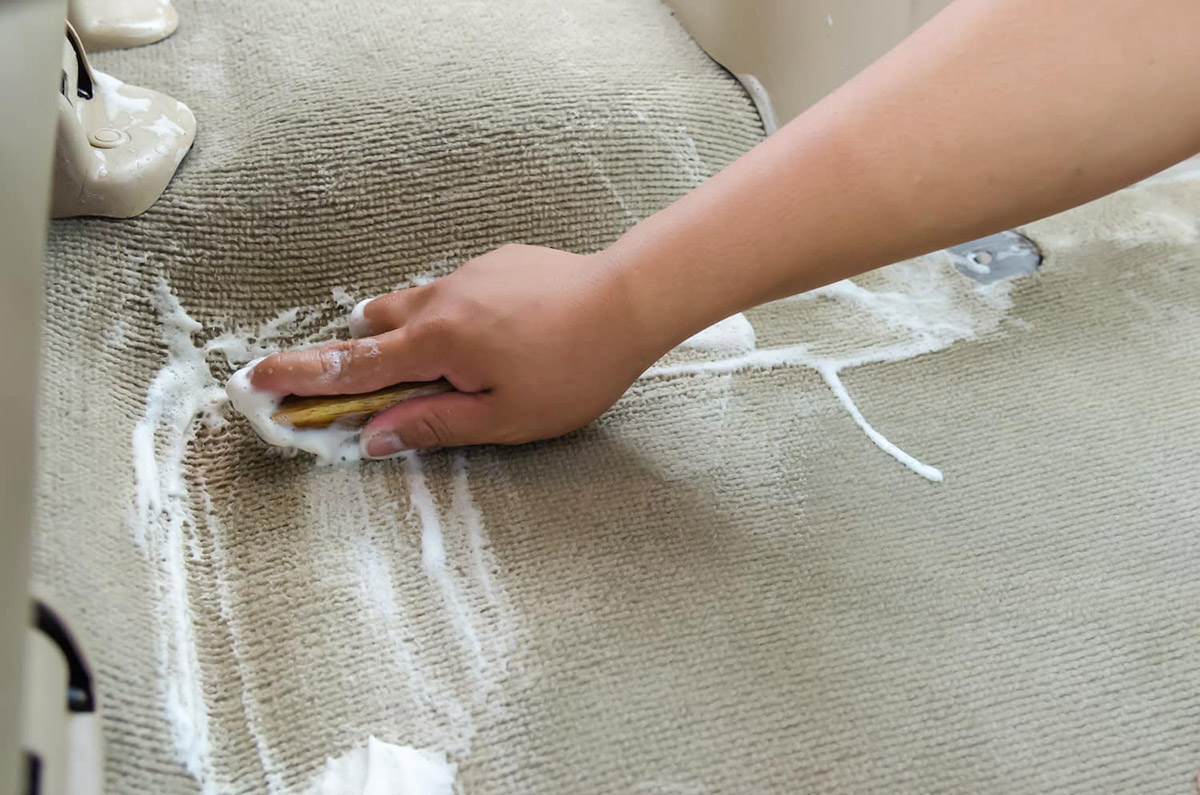
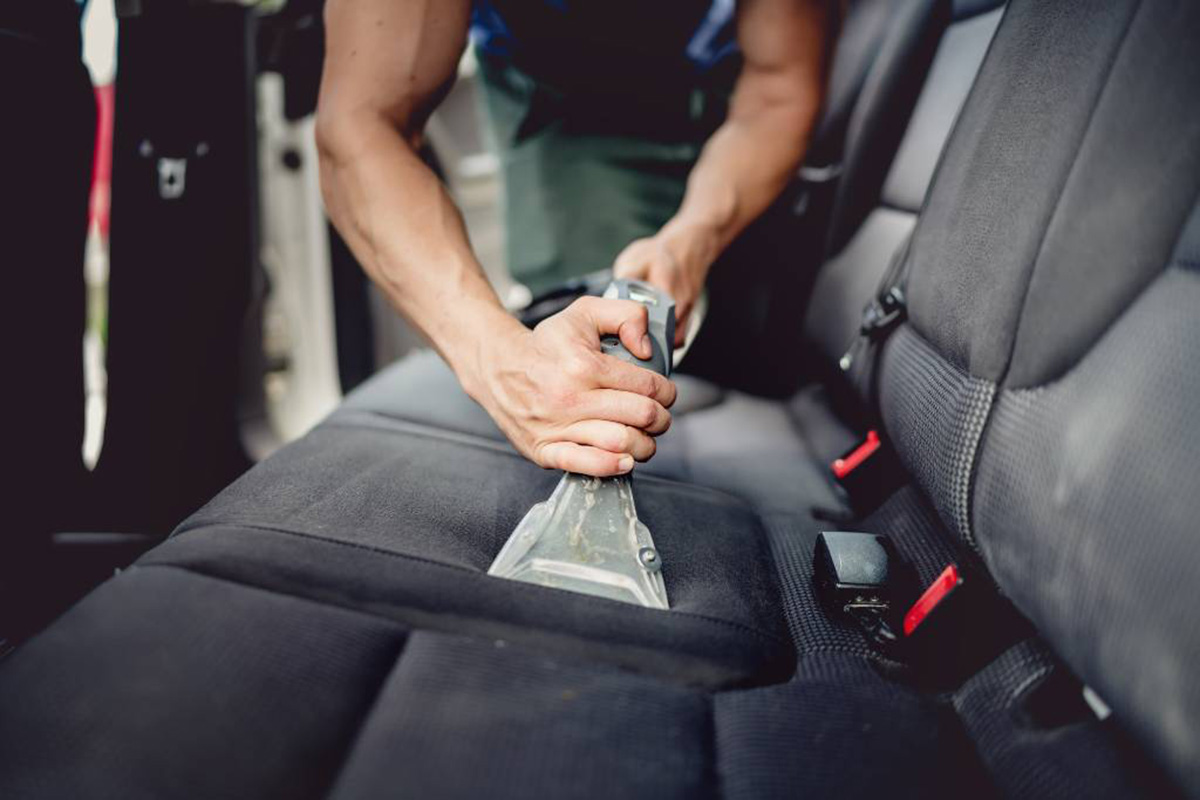
Cleaning the Car Interior
With the old carpet now removed, it’s time to clean the car interior to ensure a fresh and hygienic foundation for the new carpet. Follow these steps to clean the car interior effectively:
- Vacuum the interior: Use a vacuum cleaner with a brush attachment to thoroughly vacuum the entire car interior. Pay special attention to the floor area, removing any debris, dirt, and loose particles.
- Spot clean stains: Inspect the car floor for any stubborn stains. Use an appropriate upholstery cleaner or a mixture of mild detergent and water to spot clean the stains. Gently scrub the stained area with a soft brush or sponge and blot any excess moisture with a clean cloth.
- Clean the door panels and trims: Use a damp microfiber cloth and an all-purpose cleaner to wipe down the door panels and trims. Remove any dirt, fingerprints, or grime, ensuring a clean and refreshed look.
- Clean the dashboard and console: Wipe down the dashboard and center console with a microfiber cloth and an appropriate cleaner. Remove dust, smudges, and fingerprints, restoring a polished appearance to these areas.
- Address unpleasant odors: If there are any lingering odors in the car interior, consider using an odor eliminator or a fabric freshener spray. Follow the instructions provided on the product and ensure proper ventilation during and after application.
- Dry the interior: Allow the car interior to air dry for a while. You can also use fans or leave the car doors open to expedite the drying process. Make sure the interior is completely dry before proceeding to the next steps.
Cleaning the car interior not only ensures a sanitary environment but also helps in creating a smooth and pristine surface for the new carpet installation. Taking the time to remove stains, clean the trims, and eliminate odors will enhance the overall look and feel of your car’s interior.
Now that the car interior is clean and ready, let’s move on to preparing the new carpet in the next section.
Preparing the New Carpet
Now that you have a clean car interior, it’s time to prepare the new carpet for installation. Here are the steps to follow:
- Unroll the new carpet: Carefully unroll the new carpet in a spacious and clean area. Make sure you have enough room to work comfortably.
- Compare with the old carpet: Place the old carpet on top of the new one and align them. Check if the size and shape of the new carpet match the old one. Trim any excess material if needed.
- Test the fit: Lay the new carpet loosely in the car to check the fit and alignment. Make any necessary adjustments before proceeding.
- Trim holes for accessories: If your car has floor accessories such as hooks or seat bolts, mark their locations on the new carpet and use a utility knife to carefully cut holes for them.
- Apply adhesive: Apply adhesive spray or carpet tape to the floor of the car. Follow the manufacturer’s instructions for the recommended application method and coverage.
- Place the new carpet: Carefully place the new carpet in the car, ensuring it aligns with the seat bolts and other accessories. Press the carpet firmly to secure it to the adhesive or tape.
- Smooth out wrinkles and bubbles: Use your hands or a carpet roller to smooth out any wrinkles or bubbles in the carpet. Work from the center outward to distribute the pressure evenly.
- Trim excess carpet: Using a utility knife or carpet cutters, trim any excess carpet along the edges, leaving a clean and neat finish.
Make sure to follow the manufacturer’s recommendations for the specific adhesive or tape you are using. Allow the adhesive to cure or the carpet tape to fully adhere as per the instructions before proceeding to the next steps.
With the new carpet prepared and installed, it’s time to secure the edges and ensure a long-lasting and professional-looking result, which we will cover in the next section.
When replacing a carpet in a car, make sure to thoroughly clean and vacuum the floor before installing the new carpet to ensure a smooth and clean fit.
Read more: How To Replace Carpet In An RV
Installing the New Carpet
Now that you have prepared the new carpet, it’s time to install it in your car. Follow these steps for a successful installation:
- Start from one side: Begin by aligning one side of the carpet with the corresponding edge of the car floor. Make sure it fits properly and is centered.
- Press down and smooth: Press down on the carpet firmly, starting from the center and moving towards the edges. Smooth out any wrinkles or bubbles as you go along.
- Move to the other side: Once the first side is securely in place, repeat the process on the opposite side of the car, aligning the carpet and pressing it down firmly.
- Continue with the front and rear: Move to the front and rear portions of the carpet, aligning them with the respective edges of the car floor. Press and smooth the carpet as you go.
- Check for proper fit: Check that the carpet is properly aligned and fits snugly in all areas of the car. Make any necessary adjustments before moving on.
- Secure any loose areas: If you encounter any loose areas or corners that are not staying in place, apply additional adhesive spray or carpet tape underneath to secure them.
- Smooth out the entire carpet: Use a carpet roller or your hands to smooth out the entire carpet once again, ensuring it is firmly adhered to the floor and all edges are neatly in place.
During the installation process, make sure to take your time and pay attention to detail. Ensuring a proper fit and smooth installation will result in a professional-looking finish.
With the new carpet securely installed, it’s time to move on to the next step of securing the carpet edges for a seamless and long-lasting result.
Securing the Carpet Edges
Securing the edges of the new carpet is an important step in ensuring its longevity and a neat appearance. Here are the steps to follow:
- Trim excess carpet: Use a utility knife or carpet cutters to trim any excess carpet along the edges, leaving a clean and even edge that aligns with the contours of the car floor.
- Tuck the carpet under trims: Locate the trims and moldings along the edges of the car interior. Use a trim tool or a plastic pry bar to gently lift the trims and tuck the carpet underneath. This will create a clean and finished look.
- Apply adhesive or carpet tape: Apply adhesive spray or carpet tape to the edges of the carpet where necessary. This will provide additional security and prevent the edges from coming loose over time.
- Press down firmly: After applying adhesive or carpet tape, firmly press down on the edges to ensure they adhere properly to the floor. Use a carpet roller or your hands to smooth out any wrinkles or bubbles.
- Reinstall trims and moldings: Once the carpet edges are secured, carefully reattach the trims and moldings along the edges of the car interior. Make sure they align properly and are securely in place.
- Check for any loose areas: Inspect the carpet edges and the overall installation for any looseness or areas that may need additional attention. If necessary, add more adhesive or tape to secure any loose areas.
By securing the carpet edges, you ensure that the carpet remains in place and maintains its pristine appearance. Taking the time to trim, tuck, and secure the edges will result in a seamless integration of the new carpet with the car interior.
With the carpet edges secured, it’s time to move on to reassembling the car interior in the next section.
Reassembling the Car Interior
Now that the new carpet is securely installed and the edges are properly secured, it’s time to reassemble the car interior. Follow these steps to put everything back in place:
- Reattach the kick panels: Begin by reattaching the kick panels, which are the panels located at the lower portion of the interior walls near the driver and passenger seats. Align them properly and push them into place.
- Replace the center console: If you removed the center console, now is the time to put it back in place. Align it with the mounting points and secure any screws or clips that hold it in place.
- Reinstall the seats: Carefully reattach the seats to their respective positions, ensuring that they align properly with the seat rails. Secure the bolts or screws tightly but be cautious not to overtighten them.
- Attach the door sills: Place the door sills back in their respective locations. Gently press them down to secure them in place.
- Reinstall any removed panels or trims: If you removed any additional panels or trims during the carpet replacement process, now is the time to put them back in place. Make sure they align properly and securely snap or screw them into position.
- Double-check for proper fit: Once everything is reassembled, step back and inspect the car interior. Check for any loose components or misaligned parts. Make any necessary adjustments to ensure a proper fit and finish.
During the reassembly process, refer to the reference photos you took earlier to ensure that everything is returned to its original position. Take your time to ensure a thorough and accurate reassembly of the car interior.
With the car interior reassembled, all that’s left to do is add some final touches and follow a few tips to complete the car carpet replacement process.
Final Touches and Tips
Congratulations! You have successfully replaced the carpet in your car. To add the finishing touches and ensure the best results, consider the following final touches and tips:
- Inspect for any loose components: Take a final look at the car interior to ensure that all components are securely in place. Check for any loose trims, panels, or screws, and tighten them as needed.
- Give the new carpet time to settle: After the installation, give the new carpet some time to settle in. Allow a few days for it to adjust and acclimate to the car interior, especially in warmer climates.
- Clean and maintain the new carpet: Regularly clean and maintain the new carpet to keep it looking fresh and prolong its lifespan. Vacuum it regularly and address any stains promptly to prevent them from setting in.
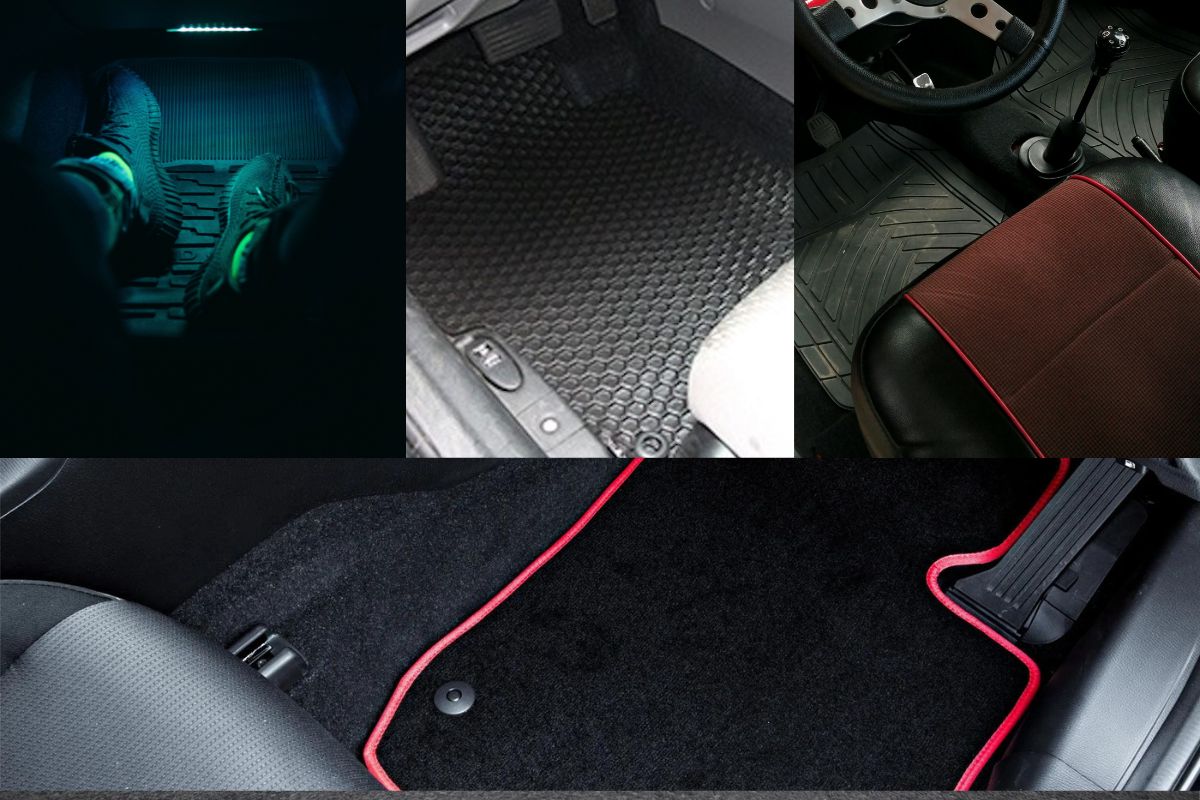
- Protect the carpet: Consider using floor mats or protective covers to prevent dirt, spills, and wear on the new carpet. This will help maintain its appearance and make cleaning easier.
- Consider professional installation: If you are unsure about your DIY skills or if your car has complex interior components, it may be worth considering professional installation for the new carpet. They have the experience and expertise to ensure a seamless and professional-looking result.
- Consult the car manual for specific instructions: Always refer to your car’s manual for any specific instructions or recommendations regarding carpet replacement or interior assembly. This will ensure that you follow the manufacturer’s guidelines for your particular car model.
By paying attention to these final touches and tips, you will ensure that your newly replaced car carpet looks great and stands the test of time. Enjoy your fresh and revamped car interior!
Always remember to prioritize safety during the carpet replacement process. Use caution when handling tools and be mindful of any sharp edges or electrical components. If you run into any difficulties or feel unsure, seek professional assistance.
With your newfound knowledge and skills, you can tackle other DIY projects and continue to enhance and personalize your car. Happy driving!
Read more: How To Replace Baseboards With Carpet
Conclusion
Congratulations on successfully completing the replacement of the carpet in your car! By following the step-by-step guide in this comprehensive article, you have transformed the look and feel of your car’s interior. The process of replacing a car carpet can be a rewarding DIY project that not only improves the aesthetics of your vehicle but also enhances your overall driving experience.
Throughout this guide, we have covered the crucial steps involved in replacing a car carpet, from preparing for the replacement to reassembling the car interior. We have discussed the importance of gathering the necessary tools and materials, removing the old carpet, cleaning the car interior, preparing the new carpet, and finally installing and securing it. Additionally, we provided final touches and valuable tips to help you maintain and protect the new carpet for years to come.
Remember, each car model may have unique requirements and variations, so consulting your car’s manual or seeking professional assistance when needed is highly recommended. Safety should always be a priority, so exercise caution when working with tools and handling any electrical components.
Replacing the carpet in your car not only improves its appearance but also allows you to create a space that reflects your personal style and preferences. Whether you’re upgrading an older vehicle or giving a new vehicle your personal touch, the process of replacing the carpet can be both fulfilling and satisfying.
Now that you have successfully completed this project, you can enjoy a fresh and revitalized car interior. Take pride in your DIY accomplishments and continue to explore other projects to further enhance your car’s look and functionality.
We hope that this comprehensive guide has provided you with the knowledge and confidence to tackle the task of replacing a car carpet. Thank you for taking the time to read this article, and we wish you the best of luck in all your future car-related endeavors!
Frequently Asked Questions about How To Replace A Carpet In A Car
Was this page helpful?
At Storables.com, we guarantee accurate and reliable information. Our content, validated by Expert Board Contributors, is crafted following stringent Editorial Policies. We're committed to providing you with well-researched, expert-backed insights for all your informational needs.