Articles
How To Change An Ice Maker Water Filter
Modified: September 2, 2024
Learn how to change an ice maker water filter with our informative articles. Find step-by-step instructions and tips to ensure clean and fresh ice for your drinks.
(Many of the links in this article redirect to a specific reviewed product. Your purchase of these products through affiliate links helps to generate commission for Storables.com, at no extra cost. Learn more)
Introduction
Welcome to our guide on how to change an ice maker water filter! If you own a refrigerator with an ice maker, you know how important it is to maintain clean and fresh-tasting ice. The ice maker water filter plays a crucial role in removing impurities and ensuring that your ice is safe to consume. Over time, these filters can become clogged or lose their effectiveness, so it’s essential to know how to replace them.
In this article, we will provide you with a step-by-step guide to changing an ice maker water filter. Whether you’re a DIY enthusiast or a homeowner looking to save on service costs, following these simple steps will help you maintain the quality and purity of your ice supply.
Before we dive into the process, it’s important to note that each refrigerator model may have slight variations in the filter installation process. Therefore, it’s always a good idea to consult your refrigerator’s user manual for specific instructions. However, the following general steps will give you a good starting point for replacing your ice maker water filter.
Key Takeaways:
- Regularly changing the water filter in your ice maker ensures clean, fresh-tasting ice and prevents sediment buildup and bacterial growth, contributing to better overall performance and peace of mind.
- By following a simple step-by-step guide, you can easily replace the water filter in your ice maker, maintaining a continuous supply of high-quality ice and ensuring the ongoing health and efficiency of your appliance.
Read more: How To Change Ice Maker Filter On Whirlpool
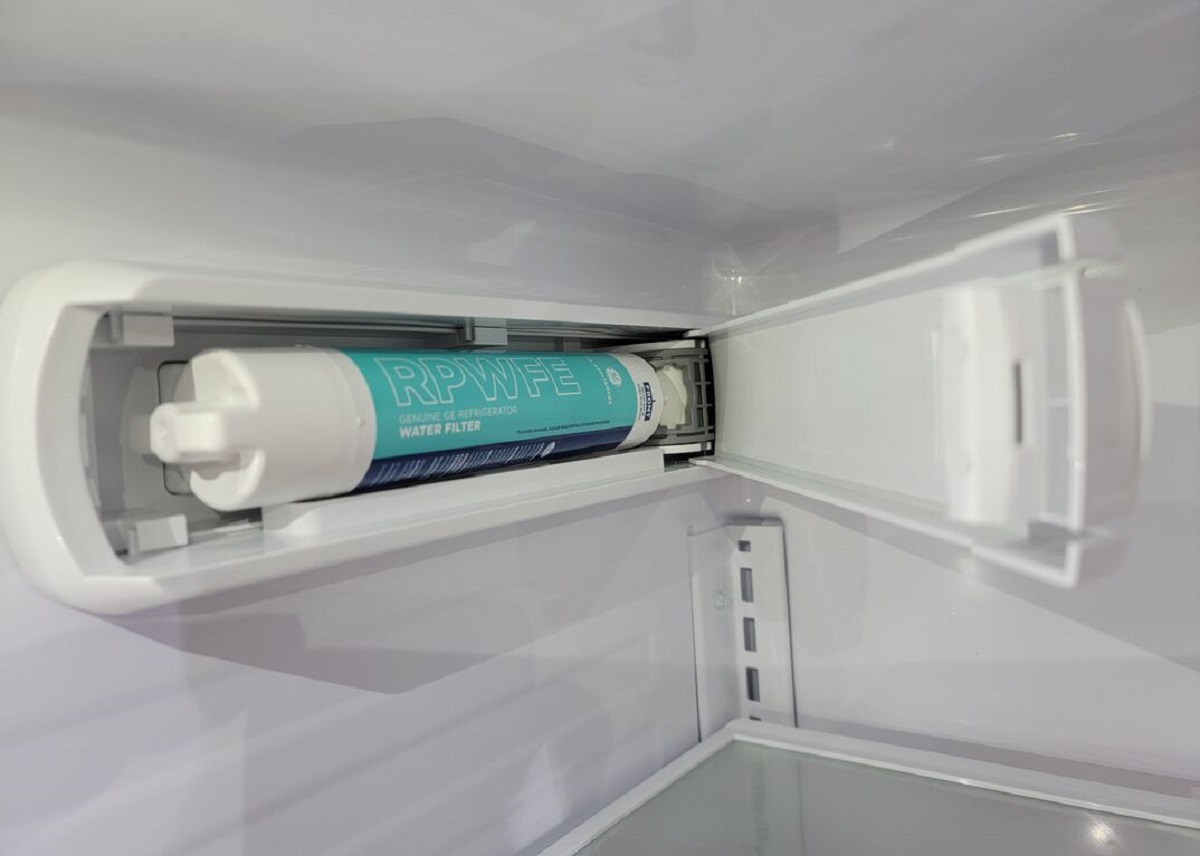
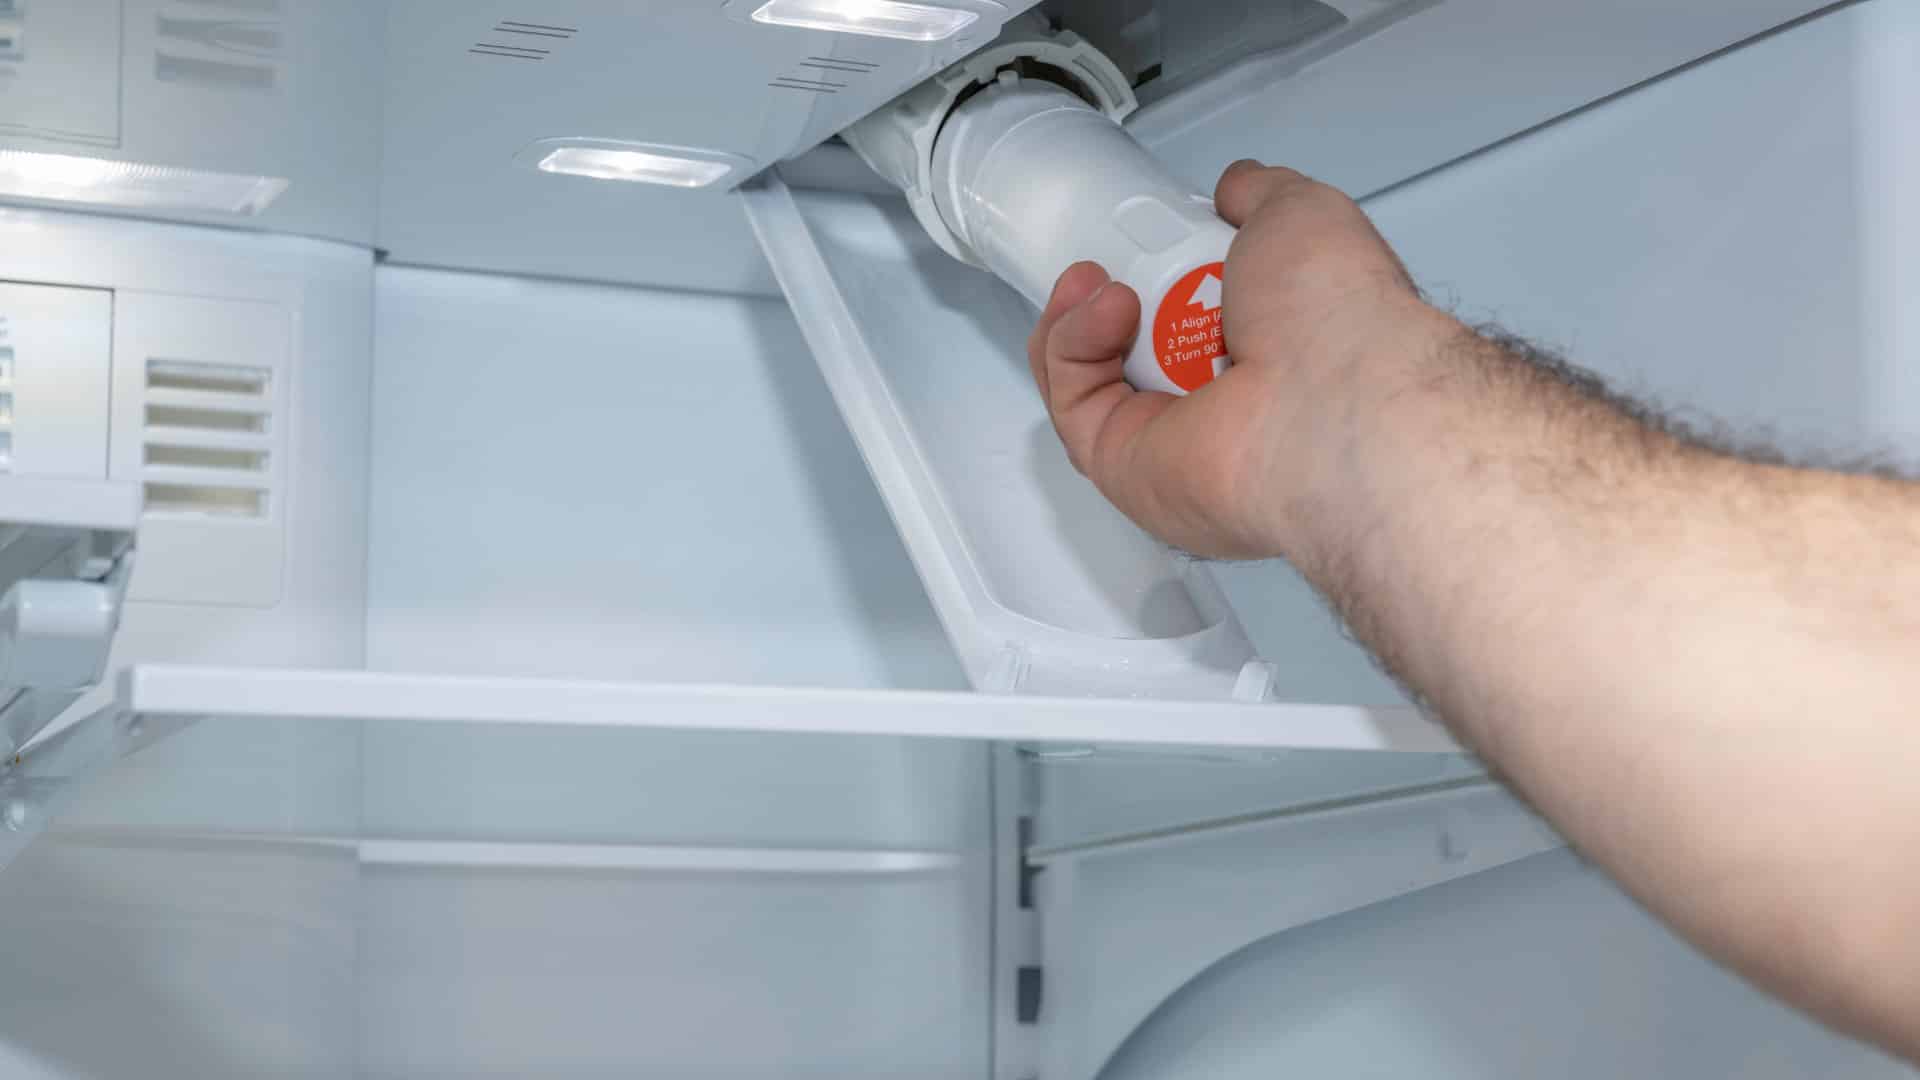
Step 1: Locate the Ice Maker Water Filter
The first step in changing an ice maker water filter is to locate its position in your refrigerator. While the location may vary depending on the model and brand of your refrigerator, there are a few common places where the filter is typically located.
One common location is inside the refrigerator compartment. Look for a small cover or housing that can be easily removed. This cover is usually located near the top or back wall of the refrigerator. In some cases, you may need to remove a shelf or drawer to access the filter.
Another common location for the ice maker water filter is on the outside of the refrigerator. Many modern refrigerators have a filter housing unit located at the bottom or front of the appliance. This housing unit typically has a release button or latch that allows you to open it and access the filter.
If you’re having trouble locating the filter, consult your refrigerator’s user manual or contact the manufacturer for assistance.
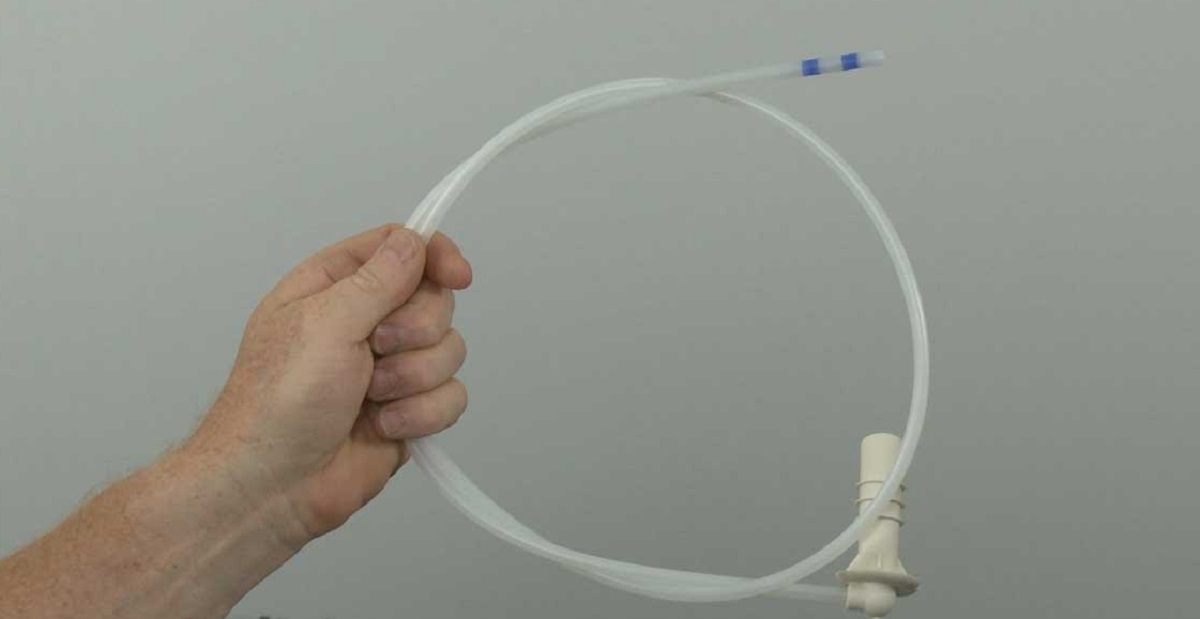
Once you have located the filter, take note of how it is positioned and connected to the water supply. This will be helpful when installing the new filter later on. If there are any tubes or connections attached to the filter, take a moment to familiarize yourself with their arrangement.
Now that you have successfully located the ice maker water filter, you’re ready to move on to the next step.
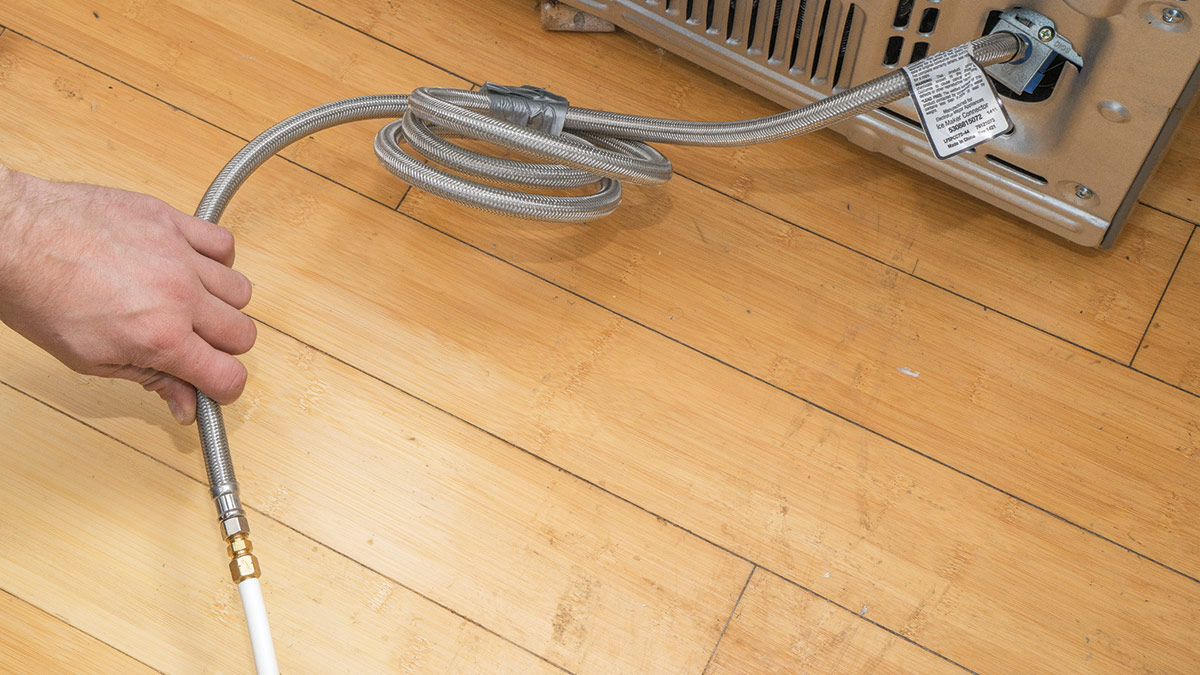
Step 2: Shut off Water Supply
Before you begin the process of changing the ice maker water filter, it’s important to shut off the water supply to your refrigerator. This step ensures that water won’t flow while you’re removing the old filter and installing the new one.
To shut off the water supply, you may need to locate the shut-off valve located behind your refrigerator. This valve is usually connected to the water supply line that runs to your refrigerator. Turn the valve clockwise until it is fully closed.
If you are having trouble finding the shut-off valve, you can consider shutting off the main water supply line to your home. The main shut-off valve is typically located near the water meter or where the main water line enters your property. Closing this valve will ensure that no water flows to any part of your home, including the refrigerator.
Once you have shut off the water supply, it’s a good idea to dispense any remaining water in the refrigerator’s water dispenser. This will relieve any pressure and prevent water from leaking when you remove the old filter.
You’re now ready to move on to the next step and replace the old water filter.
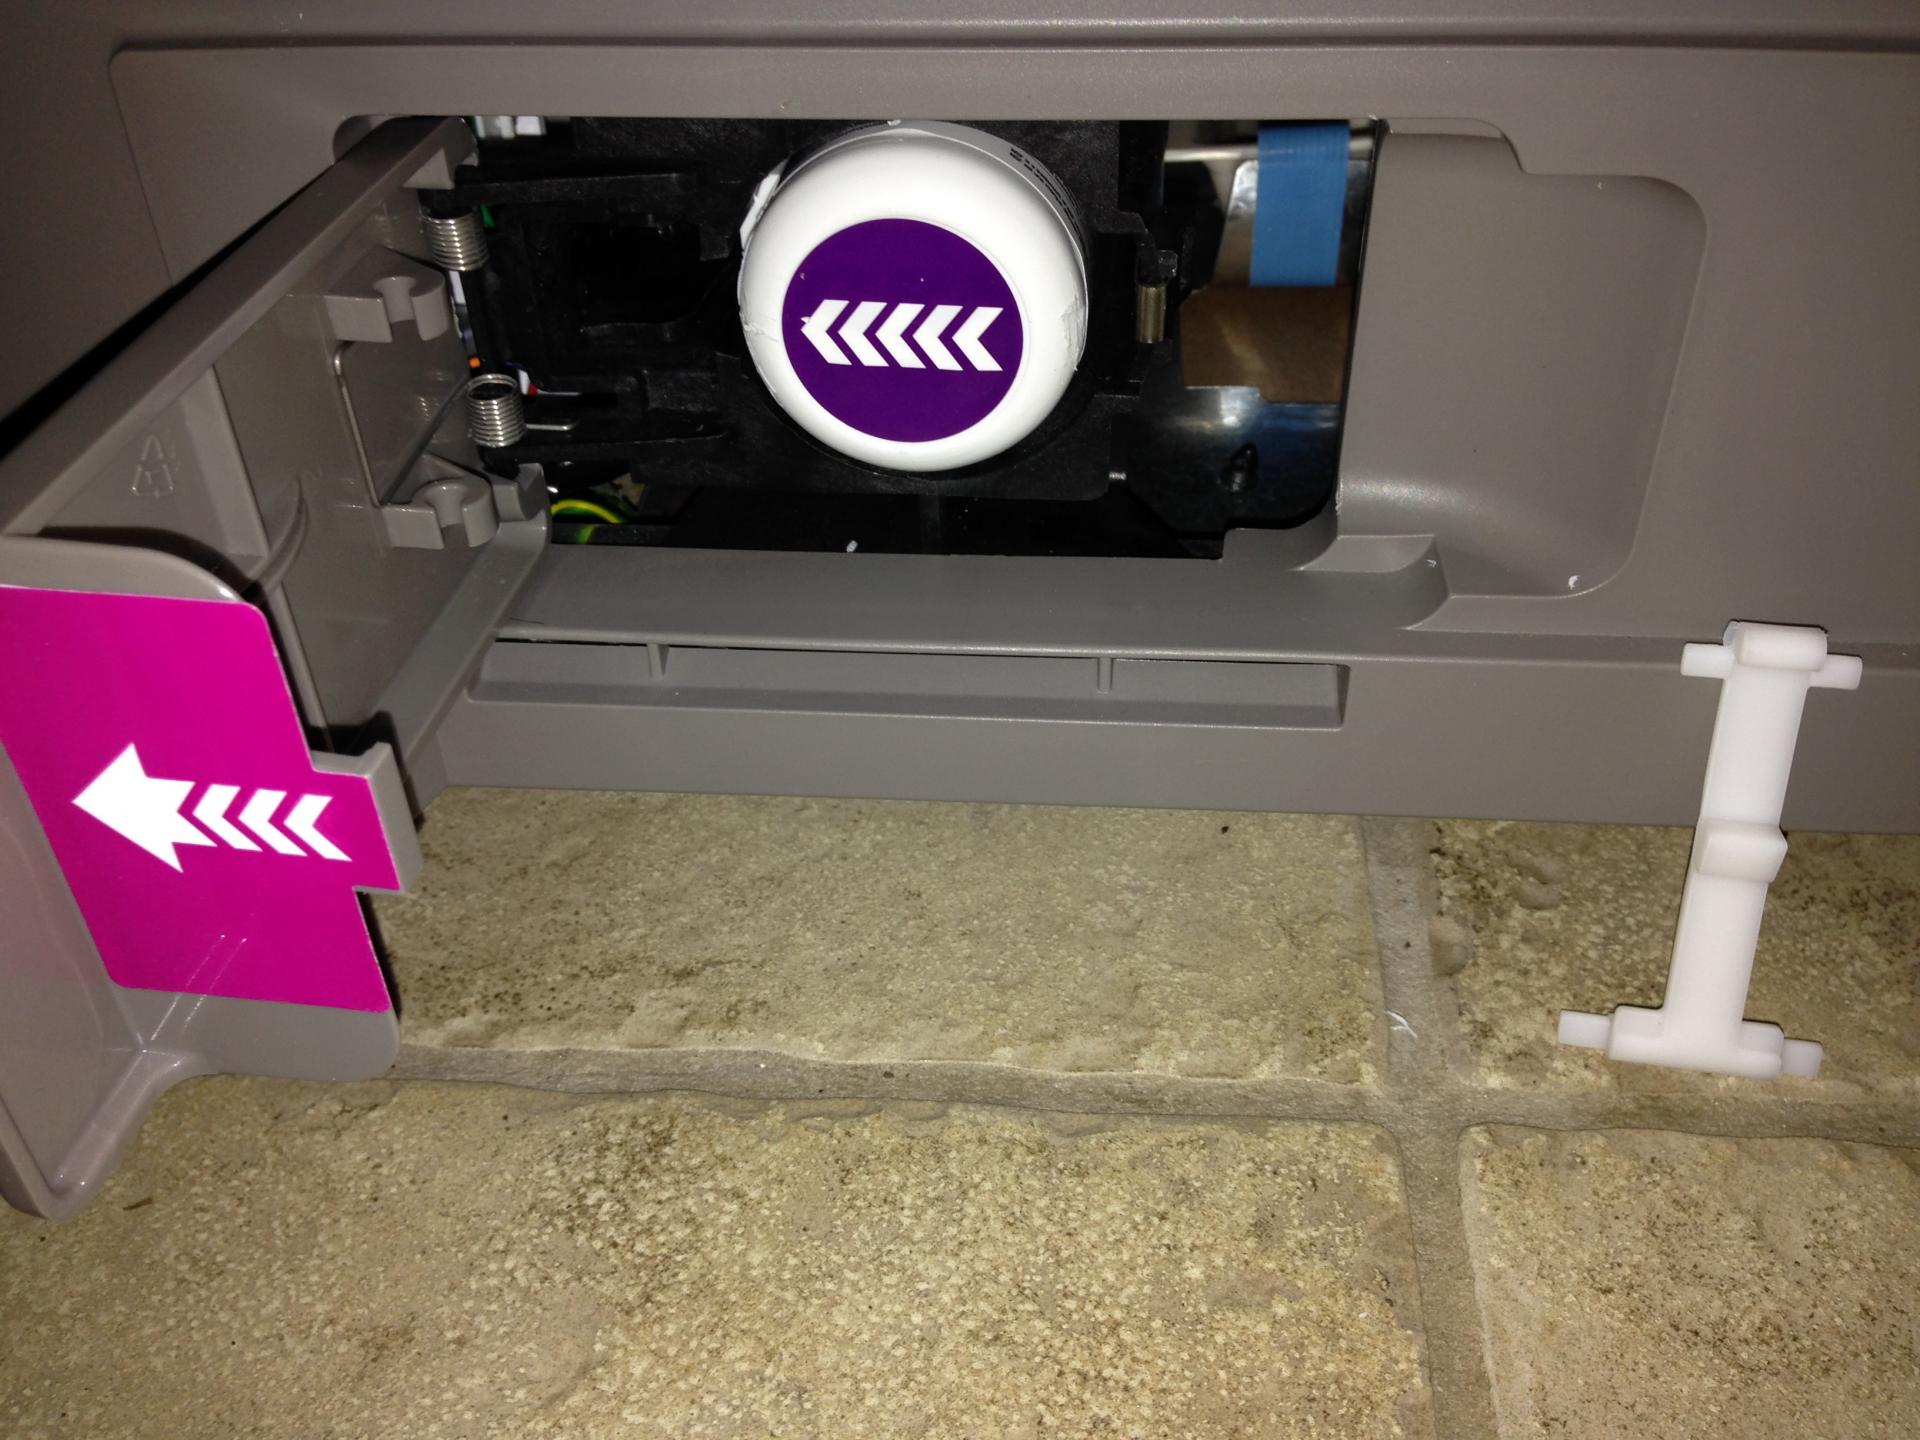
Step 3: Remove the Old Water Filter
With the water supply shut off, it’s time to remove the old water filter from your refrigerator. Follow these steps to safely remove the filter:
- Depending on the location of your filter, you may need to remove a cover or housing before accessing the filter. Carefully remove any screws or clips that secure the cover in place.
- If the filter is inside the refrigerator compartment, gently push the release button or pull the latch to open the cover. If the filter is located outside the refrigerator, open the housing unit by pressing the release button or lifting the latch.
- Once the cover or housing is open, you’ll see the old water filter. To remove it, turn it counterclockwise until it detaches from the filter housing. Some filters may have a pull tab or handle that makes it easier to grip and twist.
- As you remove the old filter, be prepared for some water to drip out. Keep a towel or a shallow pan handy to catch any spills.
- Once the old filter is removed, inspect it closely. Look for signs of sediment build-up or discoloration. If the filter is visibly dirty or damaged, it’s definitely time for a replacement.
- Dispose of the old filter properly according to your local regulations. Some communities have recycling programs for water filters, so be sure to check if this option is available.
With the old water filter successfully removed, you’re ready to move on to the next step of the process.
Step 4: Prepare the New Water Filter
Now that you have removed the old water filter, it’s time to prepare the new filter for installation. Follow these steps to get the new filter ready:
- Before handling the new water filter, make sure to read the manufacturer’s instructions and any accompanying documentation. This will ensure that you are familiar with any specific requirements or recommendations for your particular filter model.
- Remove the new water filter from its packaging. Take a moment to inspect it for any visible damage or defects. If you notice any issues, contact the manufacturer for a replacement.
- If your new filter has protective caps on both ends, remove them before installation. These caps prevent any contaminants from entering the filter during transportation and storage.
- Some filters require pre-soaking in water before installation. Refer to the instructions provided with your filter to determine if this step is necessary. If pre-soaking is required, follow the recommended duration provided by the manufacturer.
- Inspect the new filter’s label for any additional instructions or reminders. Some filters come with a reminder sticker that you can attach to the refrigerator or calendar to help you remember the next replacement date.
By correctly preparing the new water filter, you’ll ensure a smooth installation process and optimal filtration performance. Once you have completed these steps, you’re ready to move on to the next step and install the new water filter.
When changing an ice maker water filter, be sure to turn off the water supply and release any built-up pressure before removing the old filter. This will prevent any water from leaking or spraying out during the replacement process.
Read also: 8 Best Ice Maker Water Filter for 2025
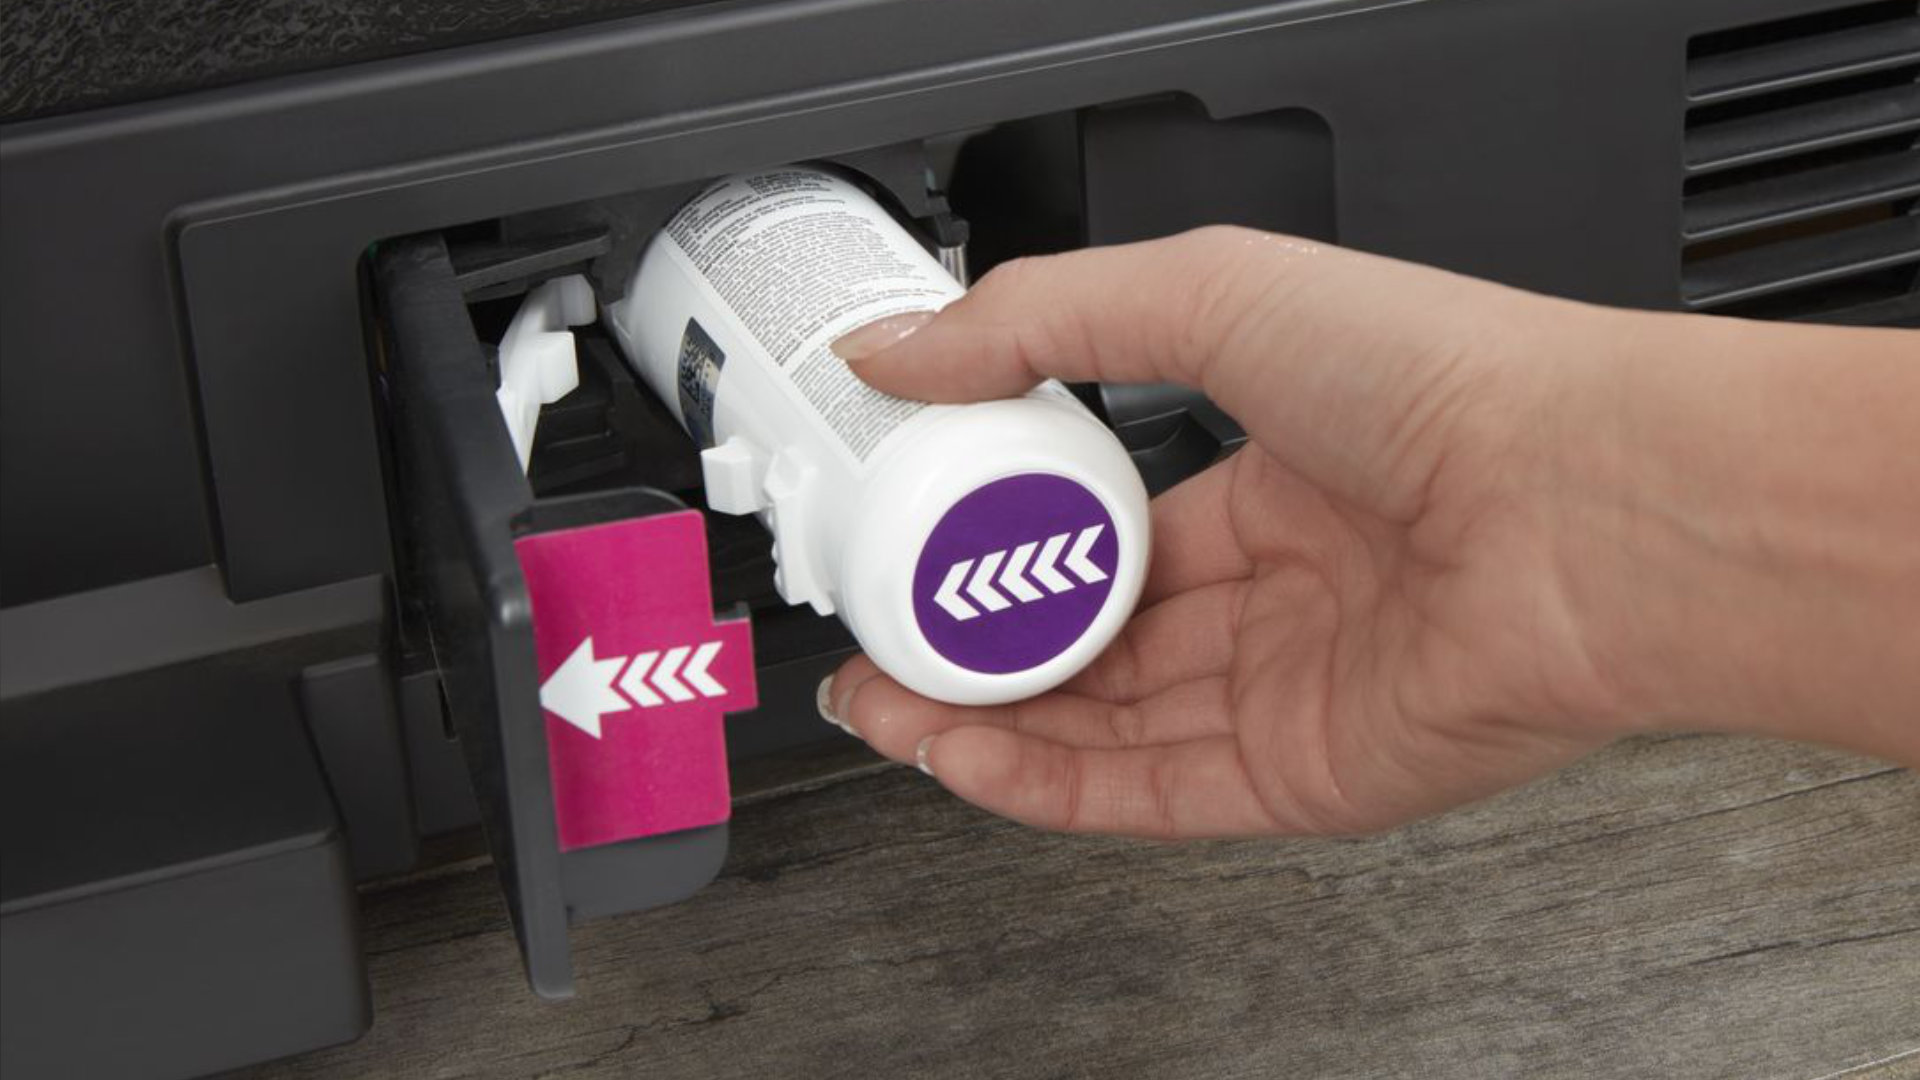
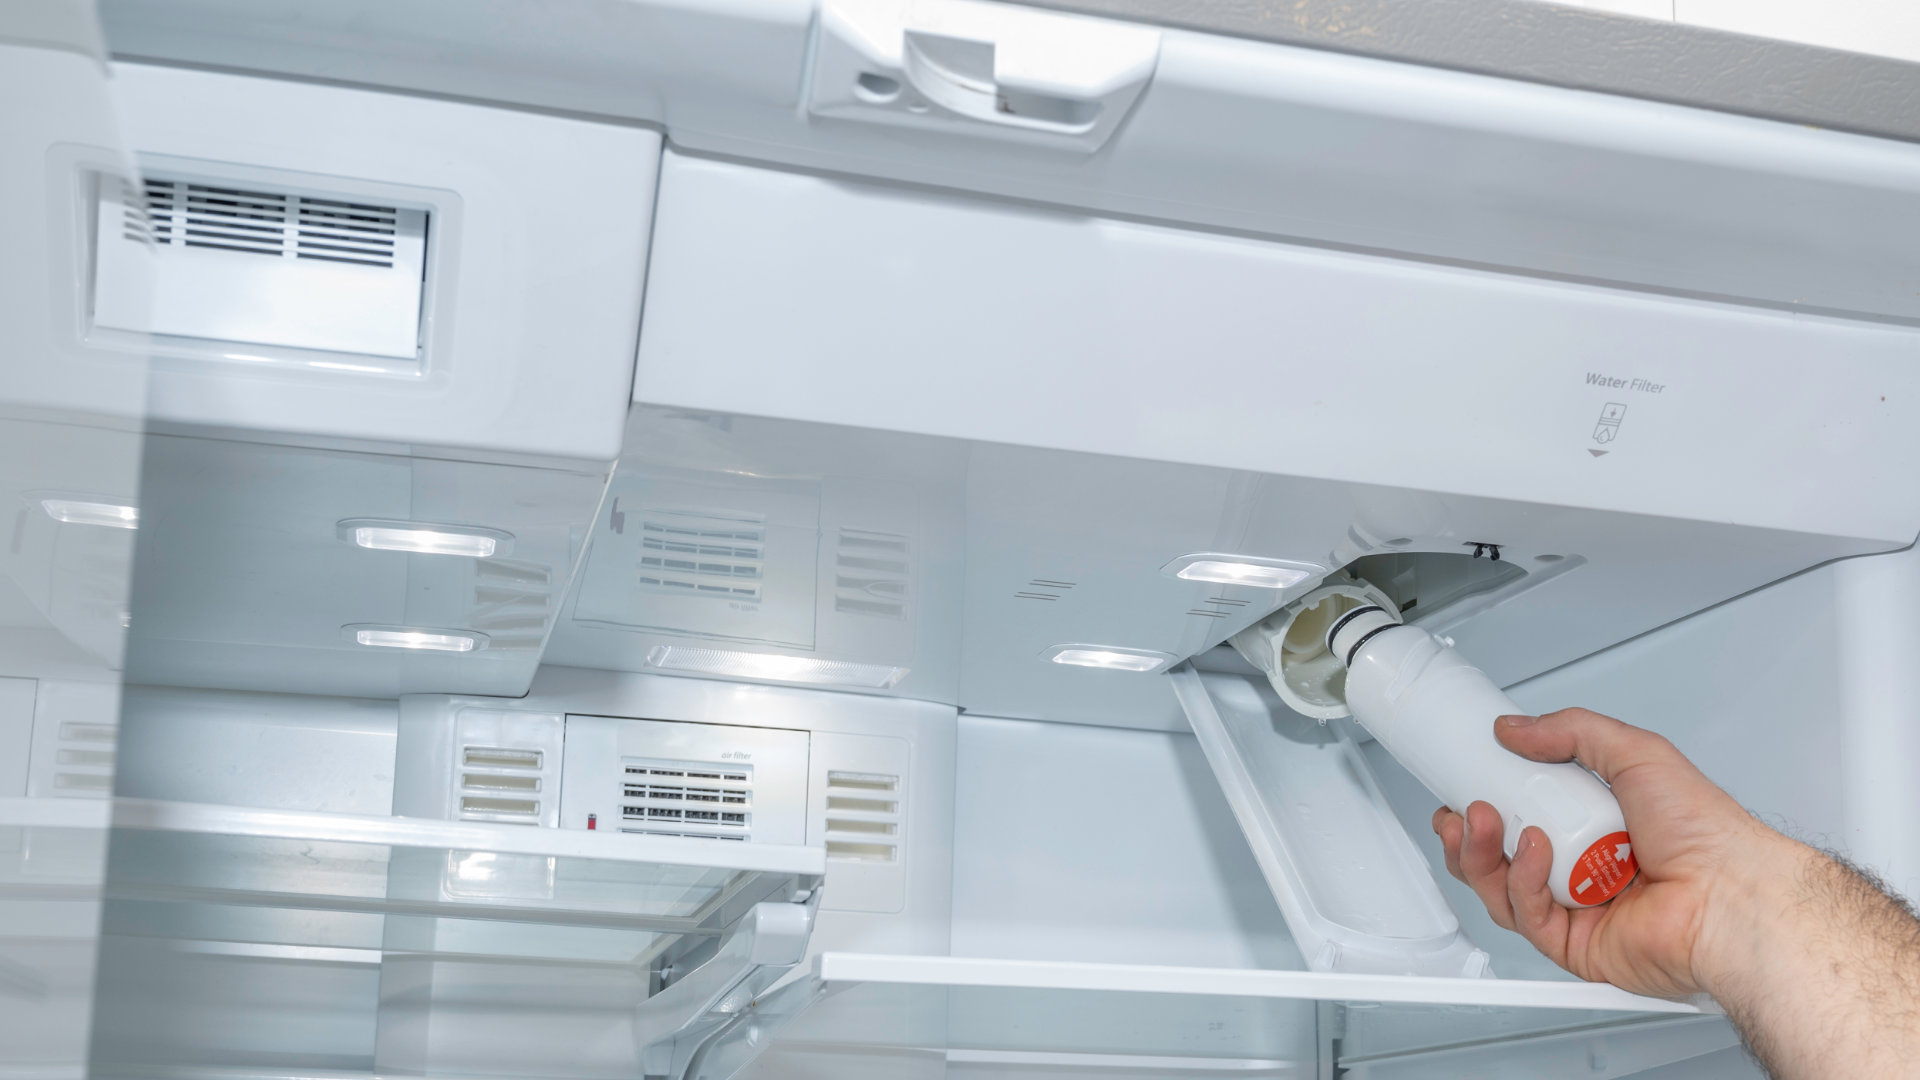
Step 5: Install the New Water Filter
With the new water filter prepared, it’s time to install it in your refrigerator. Follow these steps for a successful installation:
- Refer to your refrigerator’s user manual or the manufacturer’s instructions to determine the correct orientation of the new filter. Some filters have arrows or markings indicating the flow direction, so make sure to align them properly.
- In most cases, the installation process involves reversing the steps you took to remove the old filter. Insert the new filter into the filter housing and turn it clockwise until it is firmly seated. You may feel some resistance as you twist the filter into place.
- Continue twisting the filter until you hear a click or it locks into position. This ensures that the filter is securely installed and will not leak.
- If your filter has any plastic tabs or handles, make sure they are positioned correctly and fully engaged. This will help with removal when it’s time to replace the filter again.
- Double-check all connections and make sure there are no visible leaks around the filter housing. If you notice any leaks, tighten the filter or connections as necessary or consult the manufacturer for troubleshooting guidance.
- Close the filter housing or replace the cover that you removed earlier. Secure it in place using any screws or clips that were removed during the removal process.
Now that the new water filter is properly installed, you’re ready to move on to the next step and turn on the water supply.
Step 6: Turn on Water Supply
After successfully installing the new water filter, the next step is to turn on the water supply to your refrigerator. Follow these steps to ensure a proper water flow:
- Locate the shut-off valve that you previously closed in Step 2. Turn the valve counterclockwise to reopen the water supply. If you shut off the main water supply, make sure to turn it back on as well.
- Once the water supply is turned on, give it a few moments to allow the water to flow through the system and fill the new water filter.
- While the water is flowing, check around the filter housing for any leaks. If you notice any leaks, ensure that the connections are tight and properly sealed. If the leaks persist, contact the manufacturer for further assistance.
- If your refrigerator has a water dispenser or ice dispenser, give it a test run to ensure proper water flow. This will help flush out any air bubbles or impurities that may have entered the system during the installation process.
By confirming that the water supply is turned on and functioning properly, you can ensure that your ice maker will be supplied with clean and filtered water. Now that you have completed this step, it’s time to move on to the final step: testing the ice maker.
Step 7: Test the Ice Maker
Now that you have installed the new water filter and turned on the water supply, it’s time to test your ice maker to ensure that it is functioning correctly. Follow these steps to test the ice maker:
- Allow the refrigerator and ice maker to run for at least one hour to ensure that the new filter is fully primed and ready for use.
- Open the freezer compartment and locate the ice maker. Depending on your refrigerator model, it may be situated in different areas, such as the top, bottom, or side of the freezer.
- If your ice maker has an on/off switch, make sure it is turned on. This switch is usually located near the ice maker or on the control panel of the refrigerator.
- Wait for the ice maker to begin the ice-making cycle. This process may take a few minutes, so be patient. As the ice maker starts to produce ice, you may hear the sound of water flowing into the ice mold.
- Observe the ice maker as it produces ice cubes. Ensure that the ice cubes are being formed properly and there are no visible leaks or abnormalities in the ice-making process.
- Check the taste and quality of the ice cubes. If you notice any unusual taste or odor, it’s possible that the new water filter needs additional flushing. Run a few cycles of ice production and discard the initial batches of ice to ensure the best quality.
If you encounter any issues during the testing process or notice any problems with the ice maker, consult your refrigerator’s user manual or contact the manufacturer for troubleshooting assistance.
Congratulations! You have successfully changed the water filter in your ice maker. By regularly replacing the water filter as recommended by the manufacturer, you can continue to enjoy clean, fresh-tasting ice for months to come.
Remember to keep track of the recommended replacement schedule and follow the manufacturer’s guidelines for maintenance and care. This will ensure optimal performance and longevity of your ice maker and water filtration system.
Conclusion
Changing the water filter in your ice maker is a simple yet important task that ensures the quality and purity of your ice. By following the step-by-step guide provided in this article, you can easily replace the water filter and maintain a continuous supply of clean and fresh-tasting ice.
Remember to consult your refrigerator’s user manual for specific instructions and to familiarize yourself with the filter’s location and connections unique to your appliance. Take the time to properly prepare the new filter and ensure it is securely installed to avoid any leaks or malfunctions.
By regularly changing the water filter according to the manufacturer’s recommendations, you can prevent sediment buildup and the growth of bacteria, resulting in better-tasting ice and improved overall performance of your ice maker.
Additionally, don’t forget to test the ice maker after the installation to confirm that it’s functioning properly. This will give you peace of mind and allow you to address any issues before they become more significant problems.
With each successful water filter replacement, you contribute to the ongoing health and efficiency of your ice maker and enjoy the benefits of clean and refreshing ice for you and your family. So, keep up the good work and stay cool with the confidence that comes from knowing you have a well-maintained ice maker!
Frequently Asked Questions about How To Change An Ice Maker Water Filter
Was this page helpful?
At Storables.com, we guarantee accurate and reliable information. Our content, validated by Expert Board Contributors, is crafted following stringent Editorial Policies. We're committed to providing you with well-researched, expert-backed insights for all your informational needs.

0 thoughts on “How To Change An Ice Maker Water Filter”