Articles
How To Turn Off An Ice Maker
Modified: August 28, 2024
Learn how to turn off an ice maker with our informative articles.
(Many of the links in this article redirect to a specific reviewed product. Your purchase of these products through affiliate links helps to generate commission for Storables.com, at no extra cost. Learn more)
Introduction
Welcome to this comprehensive guide on how to turn off an ice maker. Whether you are looking to temporarily deactivate your ice maker or shut it off permanently, this article will provide you with step-by-step instructions to successfully accomplish your goal.
An ice maker is a convenient appliance that produces ice cubes or crushed ice on demand. However, there are situations where you may want to turn it off. This could be to conserve energy, prevent ice buildup, or simply to clean and maintain the ice maker.
Before we dive into the details, it is important to note that different ice makers may have varying design and functionalities. Therefore, it is essential to consult your ice maker’s manual for specific instructions if available. Additionally, ensure that you follow all safety precautions when performing any maintenance on your ice maker.
Now, let’s explore the steps to effectively turn off an ice maker.
Key Takeaways:
- Takeaway 1: Safely and effectively turn off your ice maker by following simple steps, including locating the on/off switch or control arm, confirming deactivation, and maintaining cleanliness for future use.
- Takeaway 2: By mastering the process of turning off and restarting your ice maker, you can control ice production, conserve energy, and ensure a constant supply of refreshing ice whenever needed.
Read more: How To Turn Off Ice Maker on Samsung Fridge
Safety Precautions
Before you begin the process of turning off your ice maker, it is crucial to keep the following safety precautions in mind:
- Ensure that the ice maker is unplugged or disconnected from the power source before proceeding with any maintenance. This will prevent any accidental electrical shocks or injuries.
- If your ice maker is connected to a water supply, turn off the water valve to prevent any leaks or water damage during the deactivation process.
- Wear protective gloves to safeguard your hands from any sharp edges or potential injury while handling the ice maker or its components.
- Read and follow the manufacturer’s instructions and guidelines for your specific ice maker model.
- Avoid using sharp objects or excessive force when performing any tasks on the ice maker to prevent damage to the appliance or personal injury.
- If you are unsure about any steps or encounter any difficulties during the process, it is advisable to consult a professional or contact the manufacturer for assistance.
By adhering to these safety precautions, you can effectively minimize any potential risks and ensure a safe environment while turning off your ice maker.
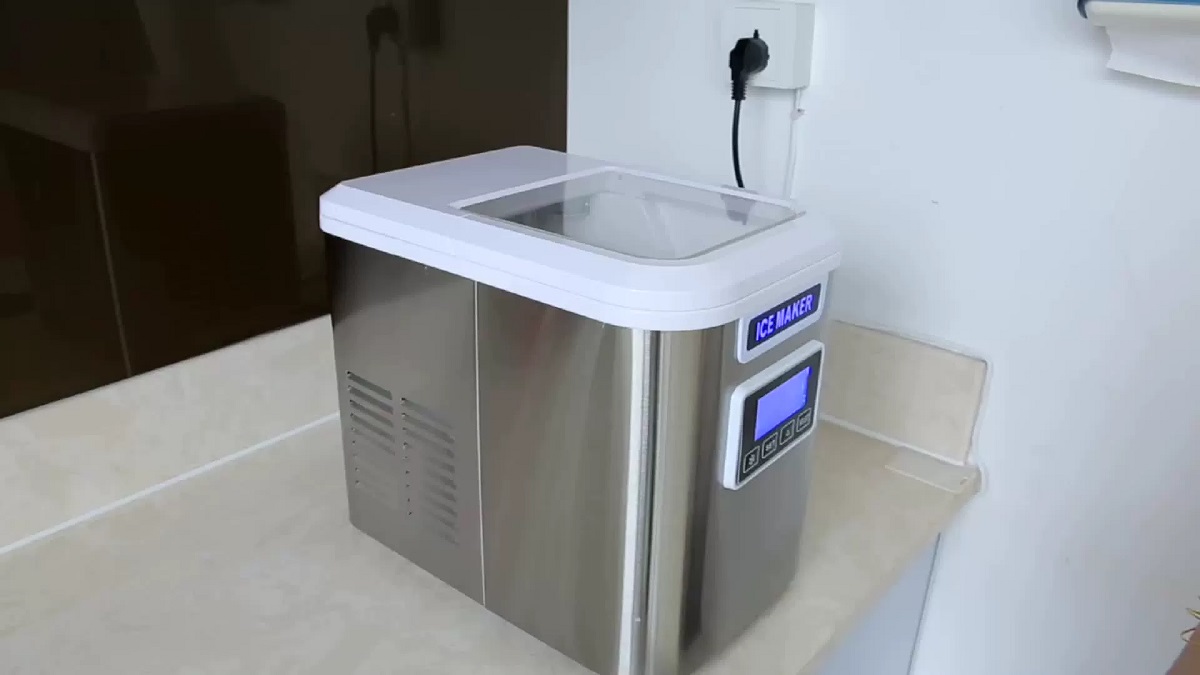
Step 1: Locate the Ice Maker
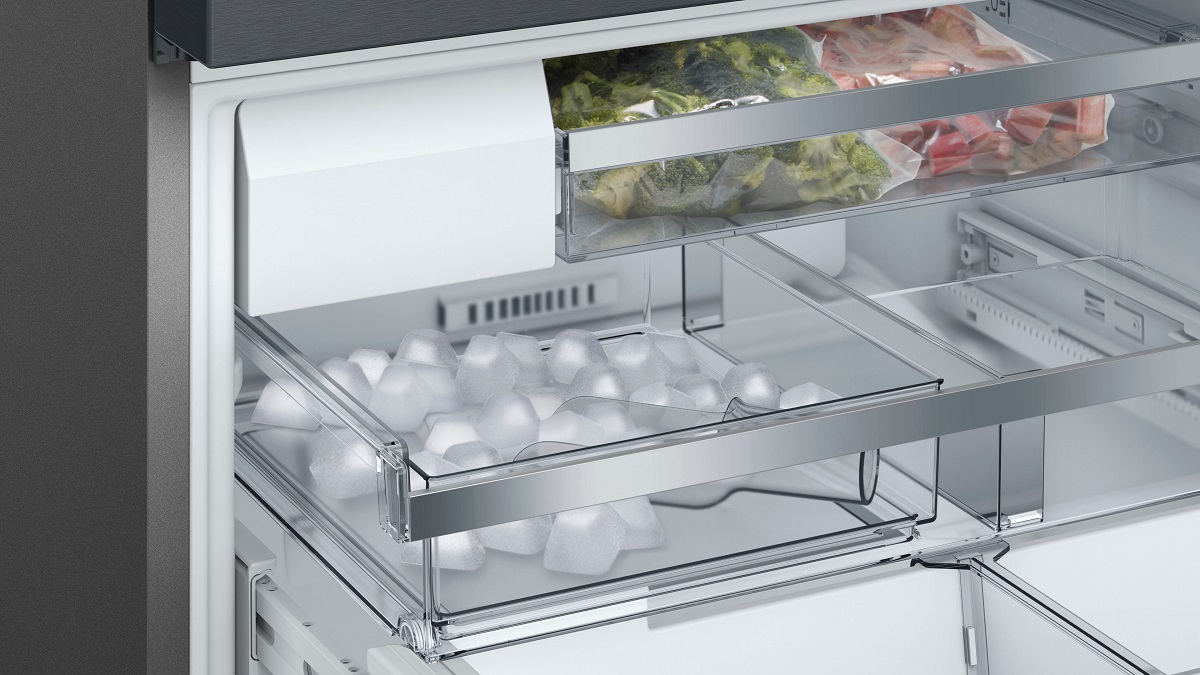
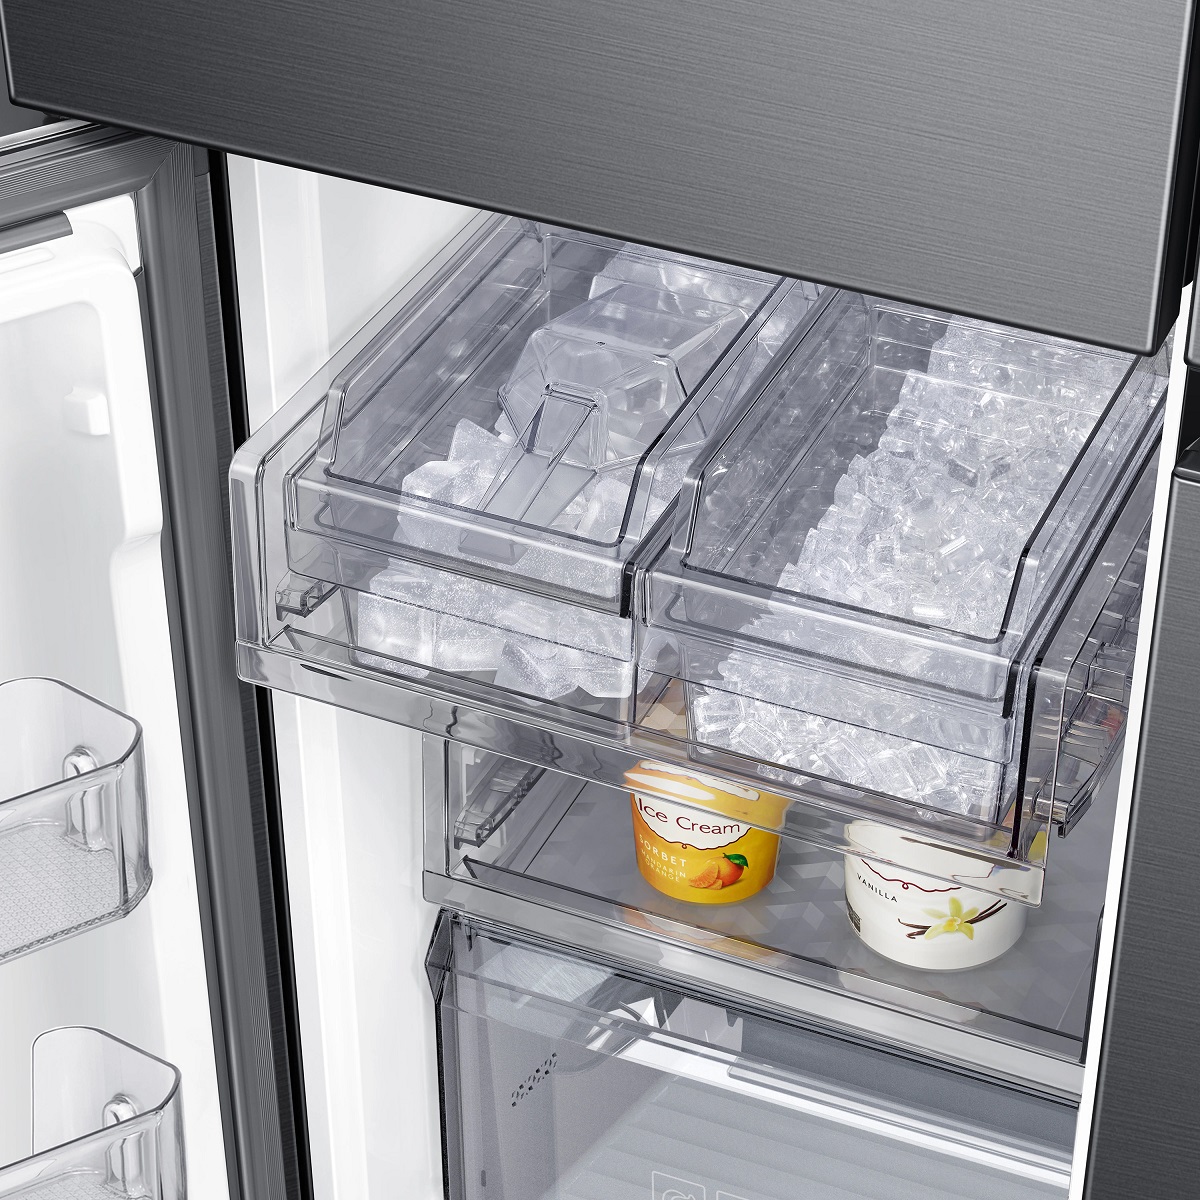
The first step in turning off your ice maker is to locate its position in your refrigerator or freezer. The ice maker is typically situated in the freezer compartment, either on the top or side, depending on your appliance’s design.
Open the freezer door and look for a plastic or metal device attached to the wall, ceiling, or side panel. This device contains the ice maker components, including the ice bin, water supply line, and control mechanisms.
In some models, the ice maker may be located behind a removable plastic panel or cover. If this is the case, gently remove the panel by unscrewing or unlatching it to access the ice maker.
If you are unable to locate the ice maker by visual inspection, refer to your refrigerator’s manual or consult the manufacturer’s website for detailed instructions and diagrams specific to your appliance model.
Once you have located the ice maker, make a mental note of its position and proceed to the next step.
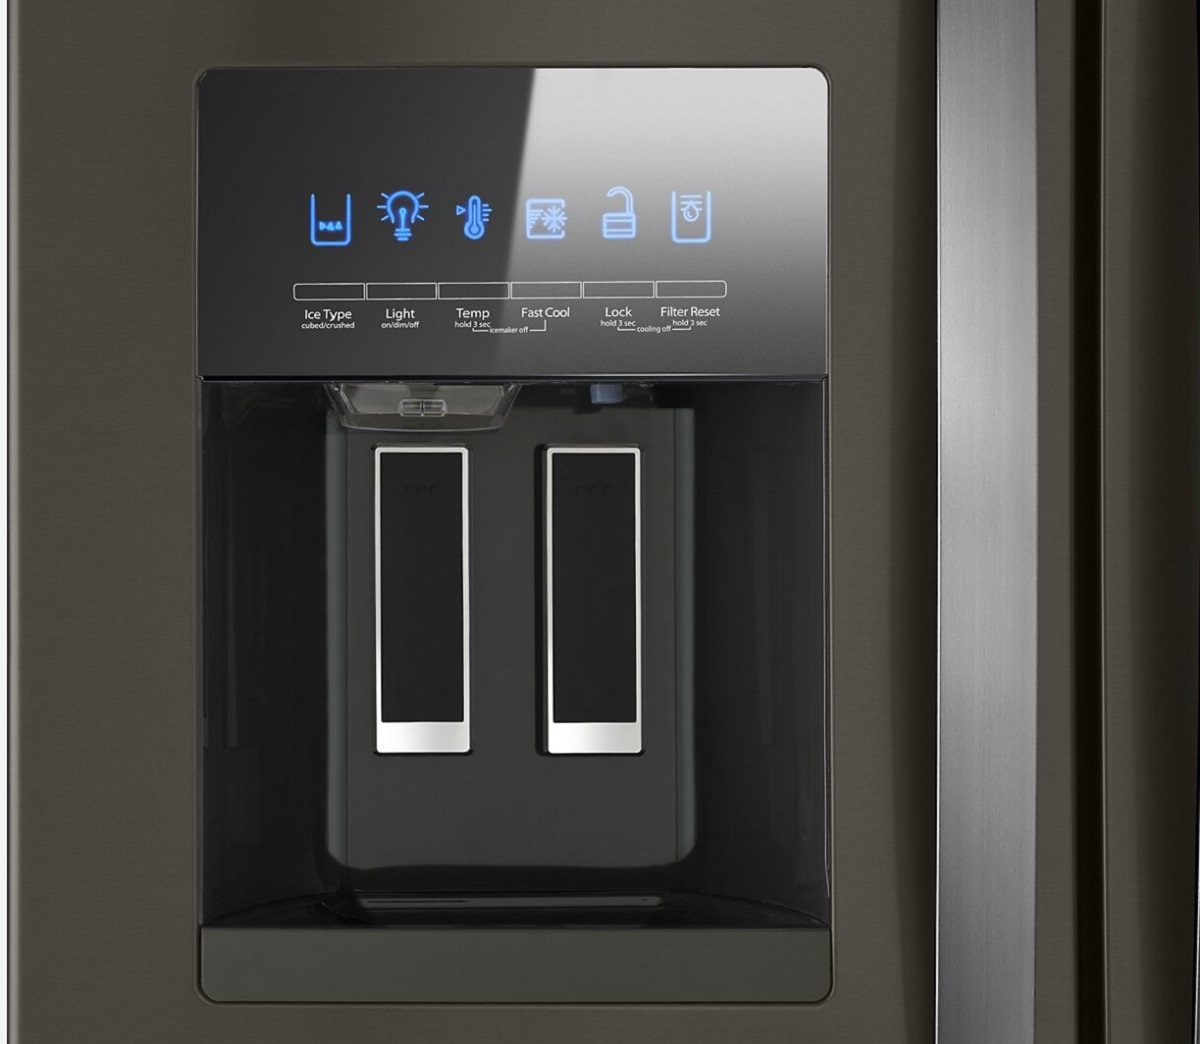
Step 2: Locate the On/Off Switch or Control Arm
After finding the ice maker in your refrigerator or freezer, the next step is to locate the on/off switch or control arm that will allow you to turn off the ice maker.
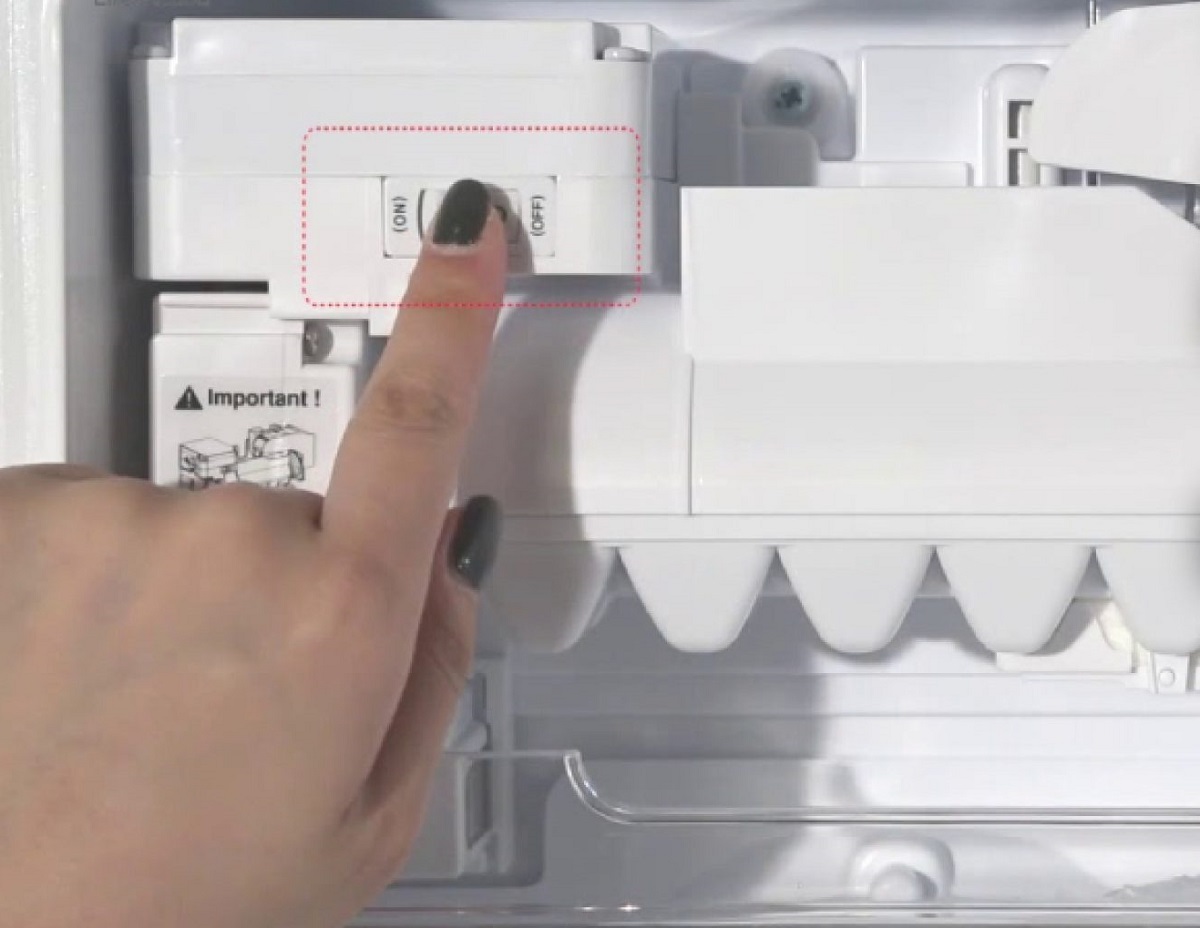
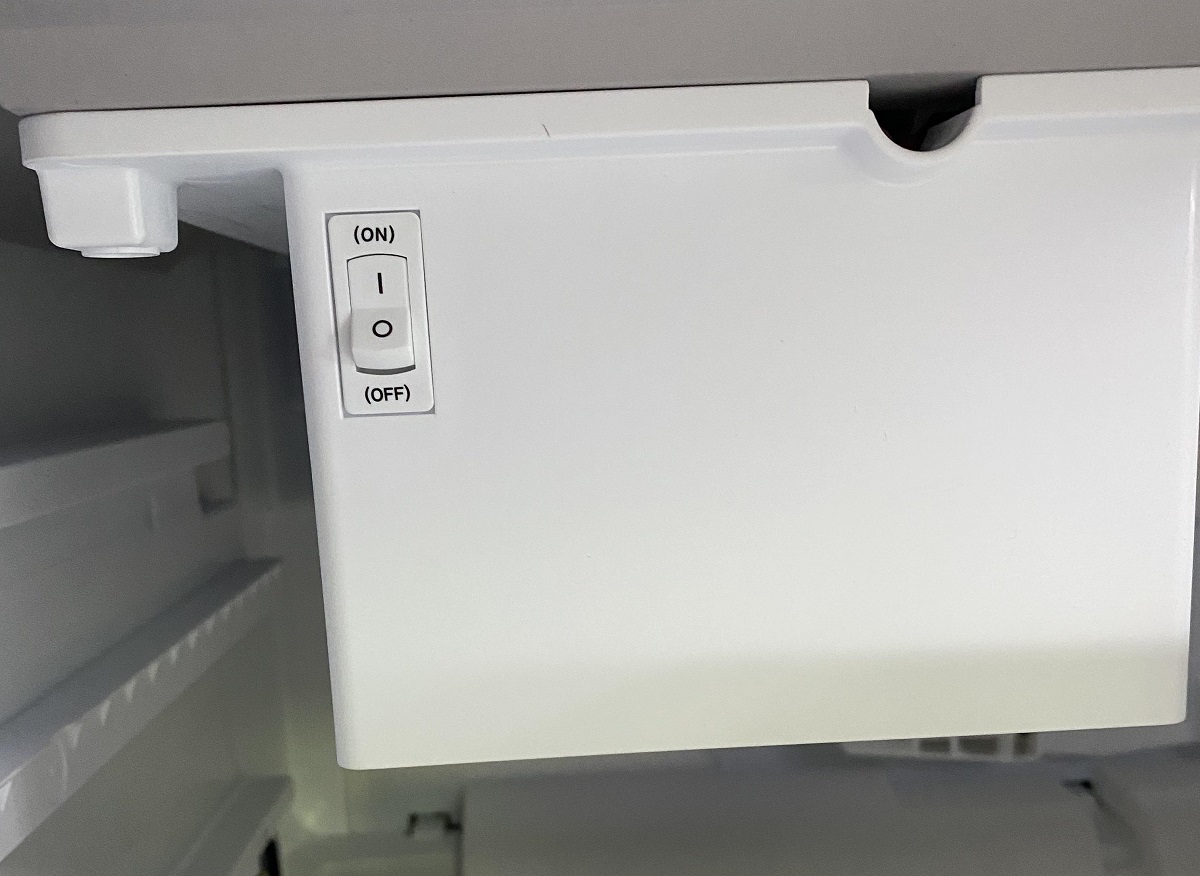
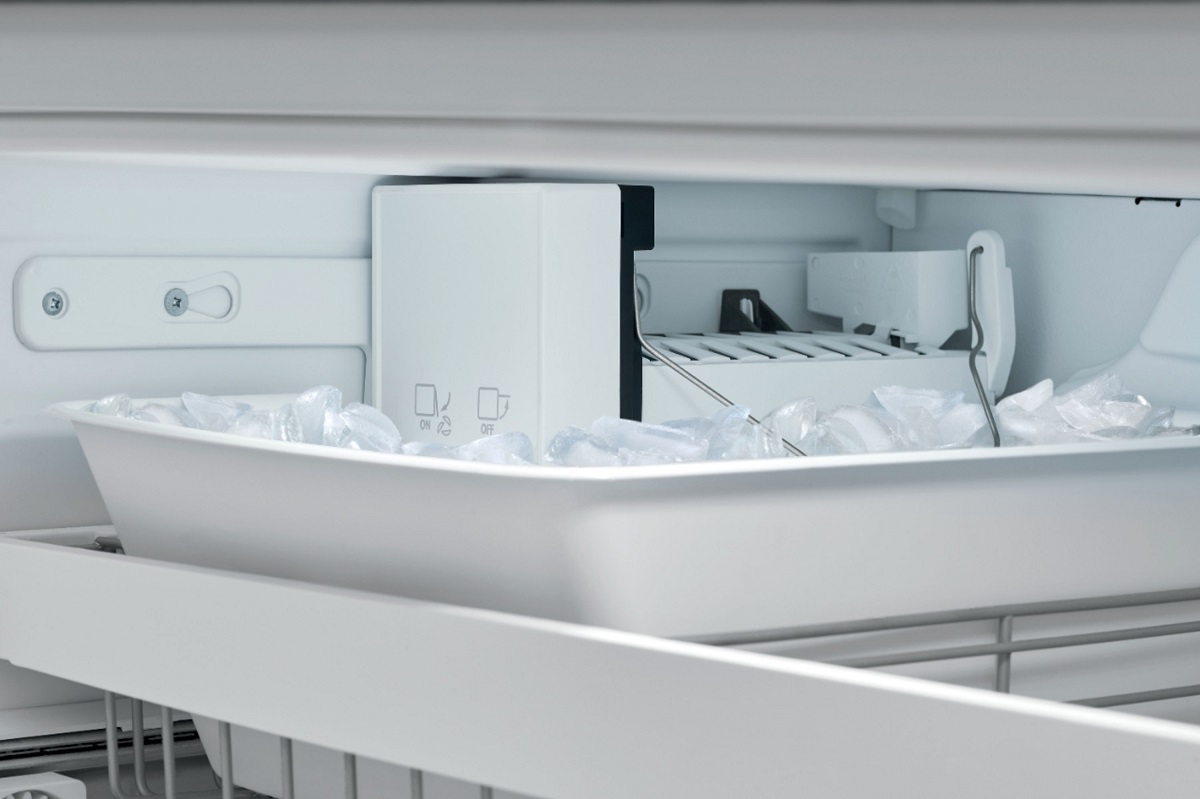
In some ice makers, you will find a small on/off switch or toggle located either on the front panel or side of the ice maker assembly. This switch is typically labeled “On” and “Off” or may have a power symbol indicating the on/off position.
If your ice maker does not have a switch, it may instead feature a control arm mechanism. The control arm is a plastic or metal rod that extends from the ice maker assembly. It is important to note that the design and location of the control arm may vary depending on the ice maker model.
To determine if your ice maker has a control arm, visually inspect the ice maker assembly and look for a thin rod that can be moved up and down. This control arm acts as a sensor, detecting the ice level in the ice bin and controlling the ice-making process.
Once you have identified the on/off switch or control arm, proceed to the next step to turn off your ice maker.
Step 3: Switch off the Ice Maker
Now that you have located the on/off switch or control arm of your ice maker, it’s time to switch off the ice maker and deactivate its ice-making function.
If your ice maker has an on/off switch, simply toggle the switch to the “Off” position. This action will disconnect the power supply to the ice maker and stop its operation. Some switches may have a light indicator that turns off when the ice maker is deactivated, providing a visual confirmation.
If your ice maker has a control arm, lift the arm to the upright or raised position. This position signals the ice maker to stop producing ice. The control arm may have a small notch or hook that holds it in place when lifted. Some models may also have a separate switch to turn off the ice maker once the control arm is raised.
It is essential to ensure that the on/off switch is securely in the “Off” position or that the control arm is fully raised to prevent any accidental ice production. This step will effectively turn off the ice maker and halt its functioning.
With the ice maker switched off, you can proceed to the next step to confirm that the ice maker is indeed deactivated.
To turn off an ice maker, locate the power switch or lever on the ice maker and switch it to the “off” position. This will stop the ice production process.
Step 4: Confirm the Ice Maker is Off
After switching off the ice maker, it is important to verify that it is indeed deactivated and no longer producing ice. Confirming the ice maker’s status will ensure that you have successfully turned it off.
To confirm the ice maker is off, follow these steps:
- Close the freezer door and wait for a few minutes.
- Open the freezer door again and observe the ice maker assembly.
- If the ice maker is properly turned off, there should be no noise or movement from the ice maker components. The control arm, if present, should remain in the raised position.
- Check the ice bin or tray to verify that no new ice cubes or crushed ice have been produced since turning off the ice maker.
If you notice any ice production or hear any noises coming from the ice maker, it may indicate that the ice maker is still active. In this case, double-check that you have correctly switched off the ice maker according to the previous steps.
By confirming that the ice maker is off, you can proceed to the next steps of emptying the ice bin and deactivating the water supply (if applicable).
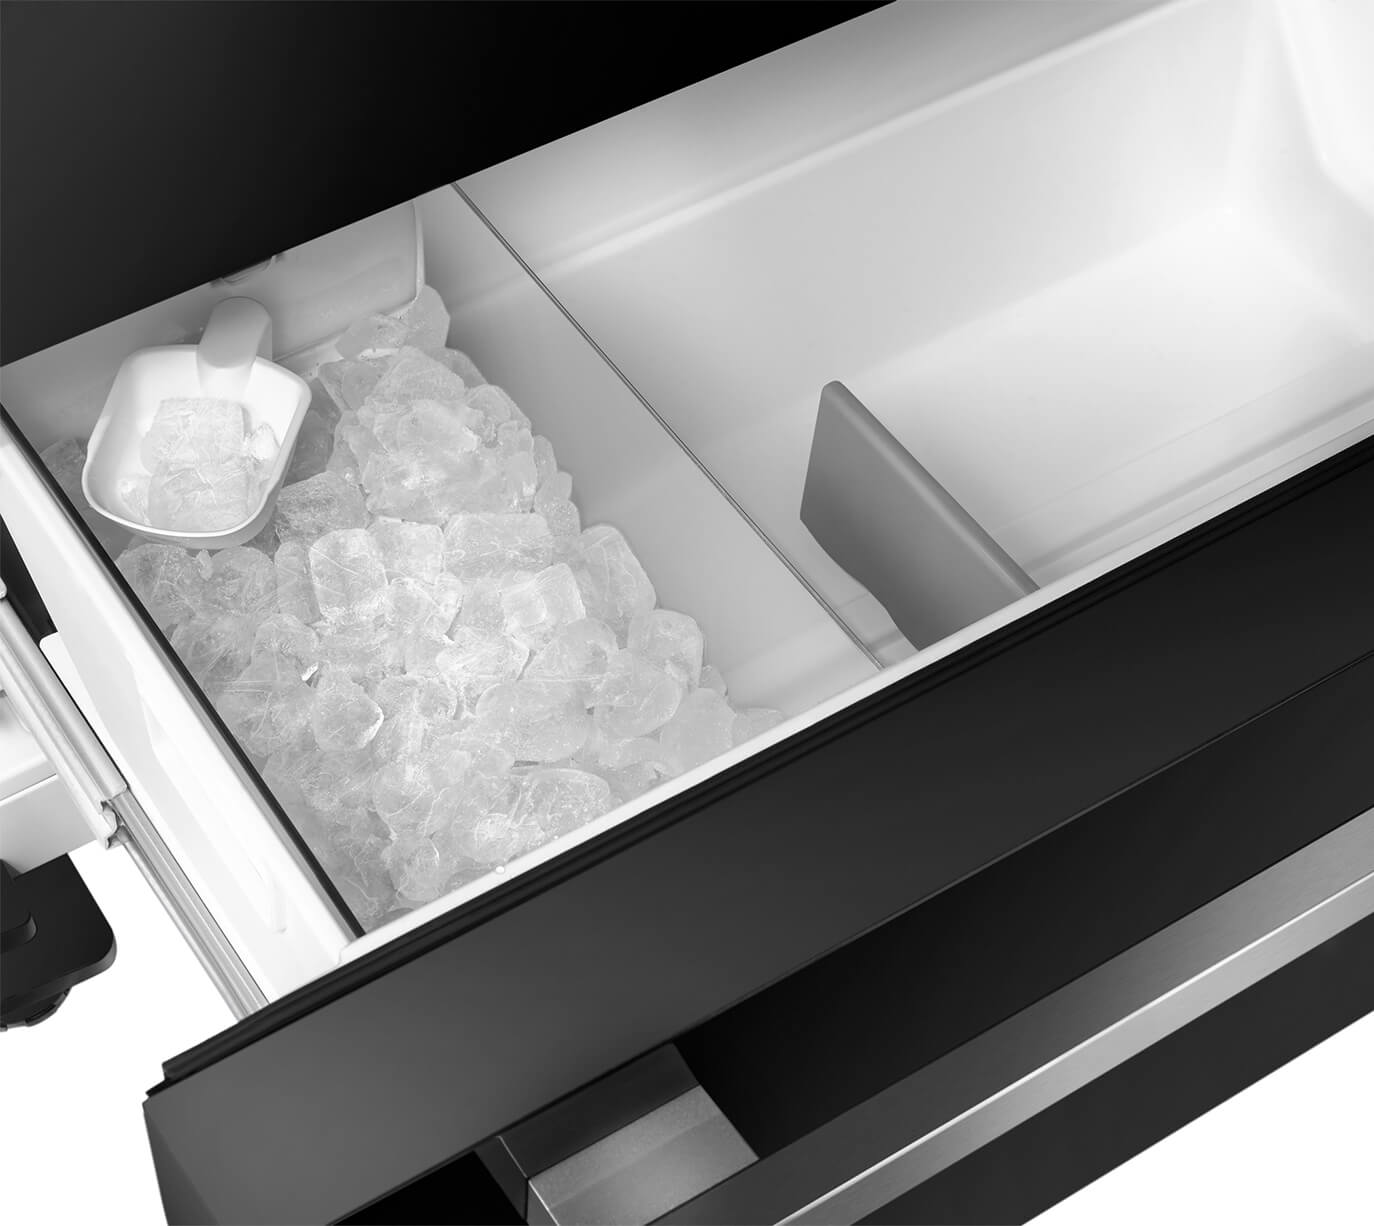
Step 5: Empty the Ice Bin
Once you have confirmed that the ice maker is off and no longer producing ice, the next step is to empty the ice bin or tray. This is necessary to prevent ice buildup and ensure the ice maker remains clean and ready for future use.
To empty the ice bin, follow these steps:
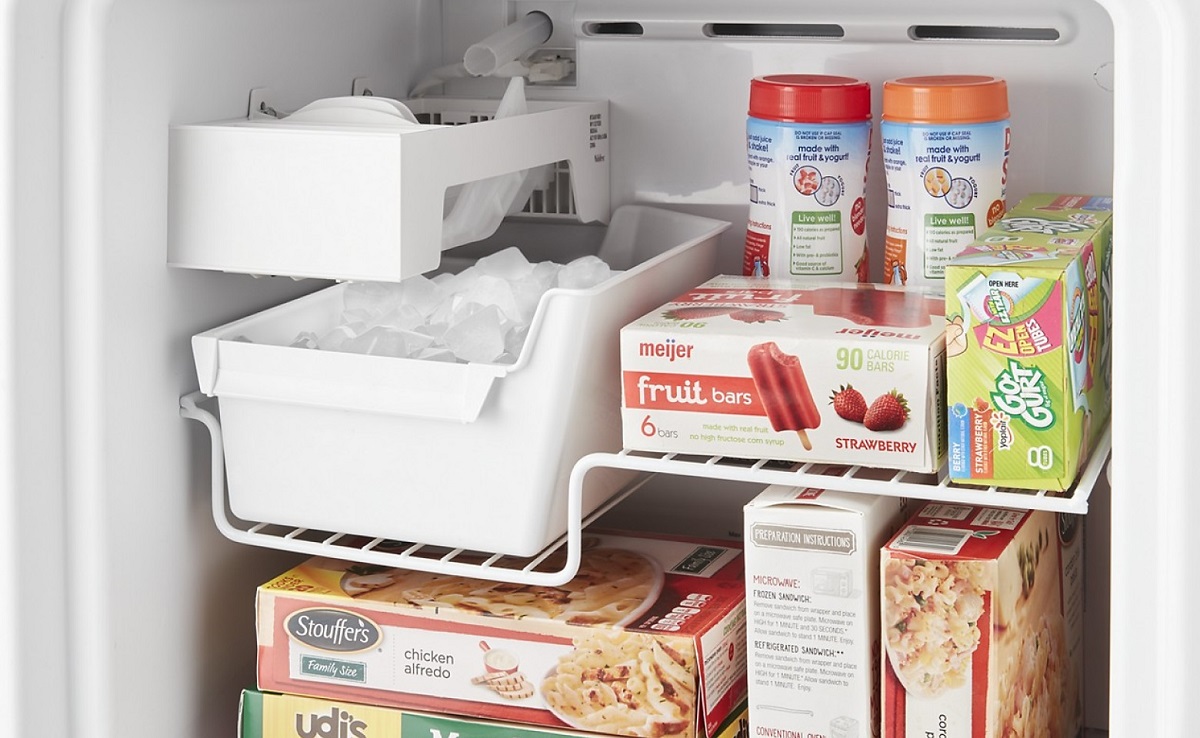
- Open the freezer door and locate the ice bin. It is usually a removable container or drawer located below or adjacent to the ice maker assembly.
- Check the ice bin for any ice cubes or crushed ice. Remove them by either pouring them into a sink or using a spoon or scoop to transfer them to a different container.
- Dispose of the ice cubes or crushed ice appropriately, or store them in another container in the freezer if you wish to use them later.
- Once the ice bin is empty, rinse it with warm water to remove any remaining ice residue. Dry it thoroughly before placing it back in the freezer.
Emptying the ice bin regularly helps maintain the freshness and quality of the ice, as well as prevents any potential clogging or ice buildup in the ice maker and water lines. With the ice bin emptied, you are ready to proceed to the next step to clean and deactivate the water supply.
Step 6: Clean and Deactivate the Water Supply
Cleaning and deactivating the water supply is an important step when turning off an ice maker. This ensures that no water is left stagnant in the ice maker and helps prevent any potential issues or contamination.
To clean and deactivate the water supply, follow these steps:
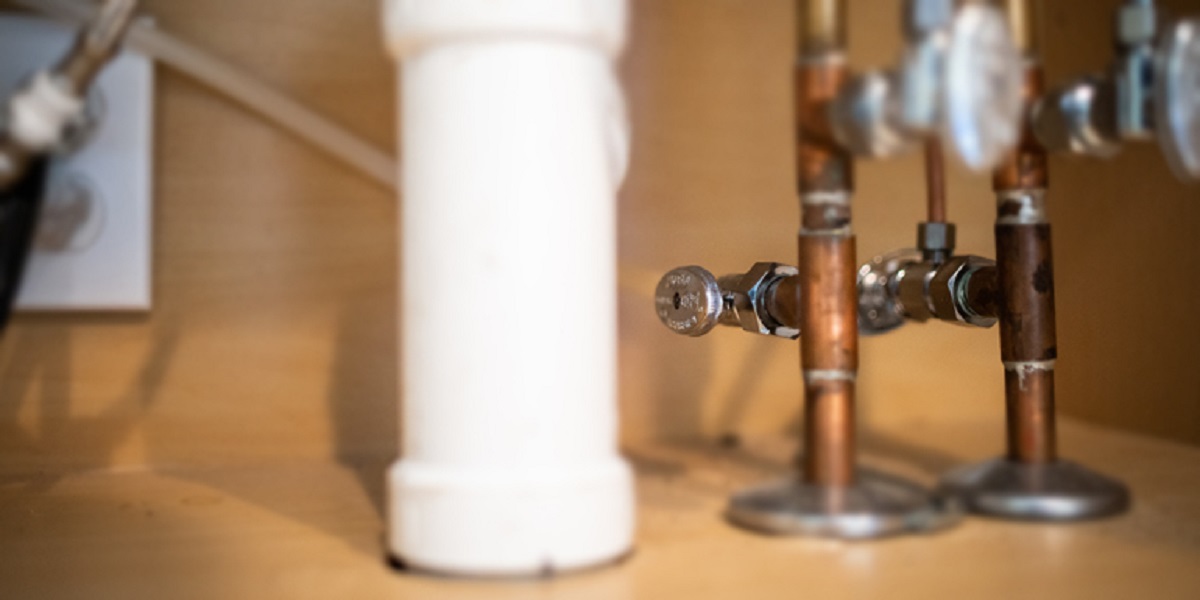
- Locate the water supply line that is connected to the ice maker. This line is usually located at the back of the refrigerator or inside the freezer compartment.
- Turn off the water supply by locating the shut-off valve connected to the water line. This valve can typically be found near the water source or along the water line itself. Rotate the valve clockwise to shut off the water supply.
- Once the water supply is turned off, it is recommended to flush out any remaining water from the lines. This can be done by dispensing water from the refrigerator’s water dispenser, if available, until the water stops flowing.
- To clean the water supply line, prepare a mixture of warm water and mild dish soap. Gently dip a clean cloth or sponge into the soapy water and wipe down the exterior of the water line to remove any dirt or residue. Rinse the cloth or sponge and wipe the line again with clean water to remove any soap residue.
- If there are any removable components, such as filters or valves, consult the ice maker manual for specific cleaning instructions. Follow the manufacturer’s recommendations to clean these components properly.
- Allow the water supply line and any cleaned components to air dry completely before reassembling or reconnecting them.
By cleaning and deactivating the water supply, you are taking necessary precautions to maintain the integrity of your ice maker and prevent any issues when you decide to turn it on again.
Step 7: Restarting the Ice Maker (if needed)
In some cases, you may need to restart your ice maker after it has been turned off. This could be when you want to resume ice production or reactivate the ice maker for regular use. Follow these steps to restart the ice maker:
- If the ice maker has an on/off switch, toggle the switch to the “On” position.
- If your ice maker uses a control arm, lower the arm back down to its original position. The arm should click into place or snap into a downward position.
- If you turned off the water supply, reconnect the water line to the ice maker and ensure the shut-off valve is open to allow water flow.
- Give the ice maker some time to start up and begin the ice-making process. This can typically take a few hours for the ice maker to freeze and dispense ice cubes.
- During the initial startup period, it is normal for the ice maker to make some noise as it fills with water and begins the ice-making cycle.
- Once the ice maker has restarted, periodically check the ice bin to ensure ice production is taking place as desired.
It is important to note that the time required for the ice maker to restart and begin producing ice may vary depending on the model and conditions. Always consult the manufacturer’s instructions for specific guidance on restarting and operating your particular ice maker.
With the ice maker restarted, you can now enjoy the convenience of having ice readily available whenever you need it.
Read more: How To Turn Off Ice Maker On Maytag Fridge
Conclusion
Congratulations! You have successfully learned how to turn off an ice maker. Whether you needed to temporarily deactivate your ice maker or shut it off permanently, following these step-by-step instructions ensures that you can take control of the ice production in your refrigerator or freezer.
By locating the ice maker and identifying the on/off switch or control arm, you can easily switch off the ice maker to stop ice production. Confirming that the ice maker is truly deactivated and emptying the ice bin helps maintain the cleanliness and functionality of the ice maker.
Moreover, cleaning and deactivating the water supply prevents any water-related issues and ensures that your ice maker remains in good condition. And if you ever need to restart the ice maker, you now have the knowledge to do so confidently.
Remember to always consult your ice maker’s manual for specific instructions and safety precautions. Additionally, if you encounter any difficulties or have any concerns, it is best to reach out to a professional or contact the manufacturer for assistance.
Now that you have mastered the art of turning off an ice maker, you can control when and how your ice maker functions, ensuring a constant supply of refreshing ice cubes or crushed ice whenever you desire.
Now that you know how to turn off your ice maker, why not learn other ways to optimize your household appliances for efficiency? For instance, mastering how to save energy with your air conditioning can reduce electricity bills and increase the lifespan of your AC unit. This handy guide provides easy steps to make your summer cooling as cost-effective as possible. So don’t wait—start saving today!
Frequently Asked Questions about How To Turn Off An Ice Maker
Was this page helpful?
At Storables.com, we guarantee accurate and reliable information. Our content, validated by Expert Board Contributors, is crafted following stringent Editorial Policies. We're committed to providing you with well-researched, expert-backed insights for all your informational needs.

0 thoughts on “How To Turn Off An Ice Maker”