Articles
How To Stain A Brick Fireplace
Modified: October 20, 2024
Learn the step-by-step process of staining a brick fireplace with our informative articles. Transform your fireplace into a stunning focal point with these expert tips and techniques.
(Many of the links in this article redirect to a specific reviewed product. Your purchase of these products through affiliate links helps to generate commission for Storables.com, at no extra cost. Learn more)
Introduction
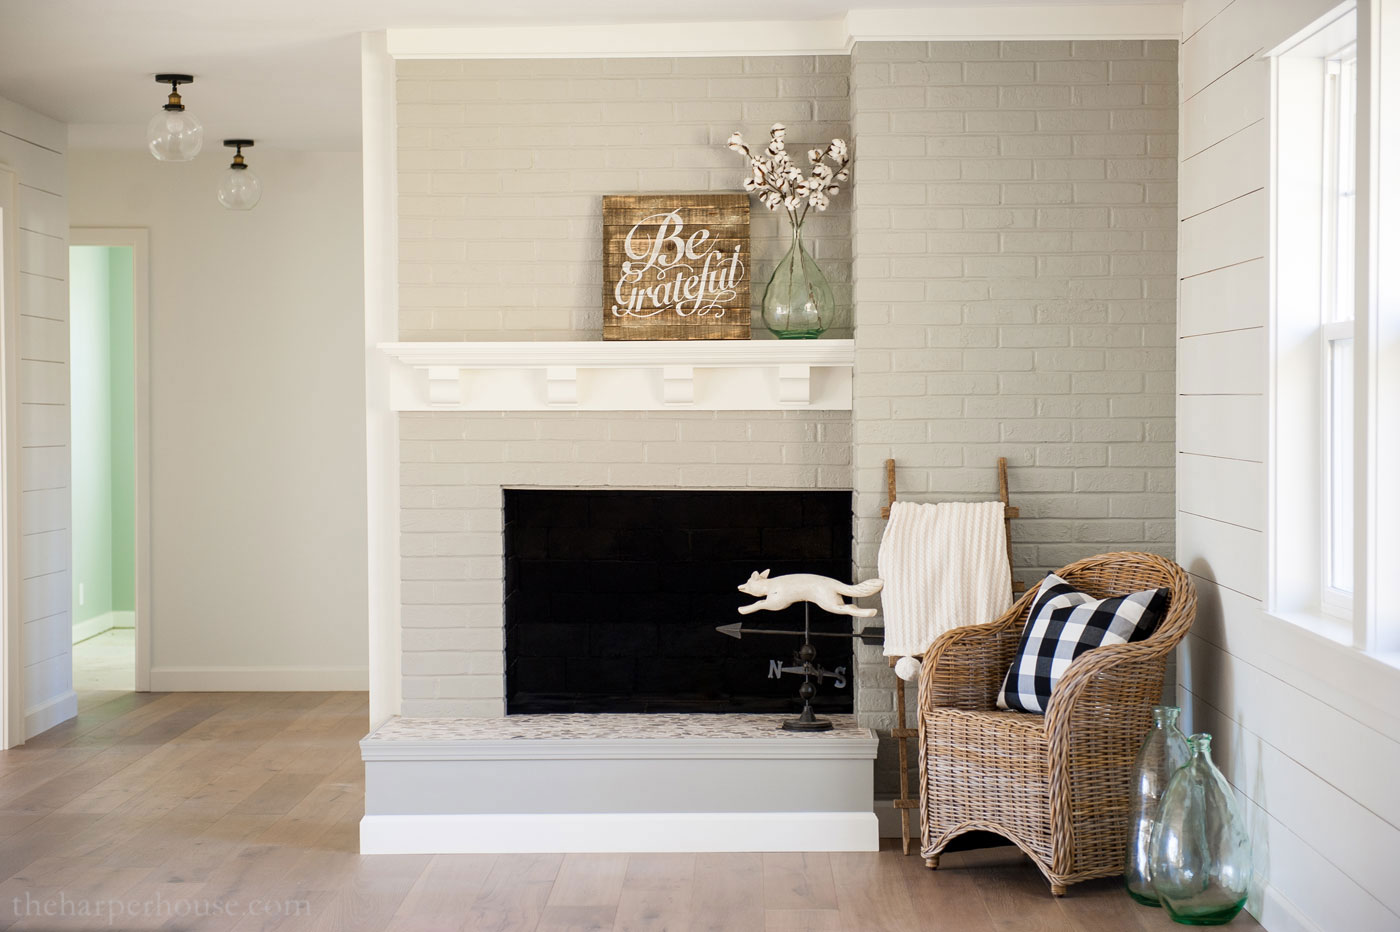
Welcome to our comprehensive guide on how to stain a brick fireplace. A brick fireplace is a classic feature that adds warmth and charm to any home. However, over time, the original color of the brick may start to fade or become outdated. Staining the brick is a cost-effective and easy way to give your fireplace a fresh new look.
Whether you want to darken the brick for a more dramatic effect or lighten it to create a brighter space, staining allows you to customize the appearance of your fireplace to match your personal style and decor. Plus, it can help protect the brick from damage and enhance its longevity.
In this article, we will take you through a step-by-step process of how to stain a brick fireplace. We will cover everything from gathering the necessary materials to applying the stain and giving your fireplace those finishing touches. So, let’s dive in and get started!
Key Takeaways:
- Transform your brick fireplace with a personalized touch by following our step-by-step staining guide. Achieve a fresh, updated look while protecting and enhancing the longevity of your fireplace.
- Embrace the rewarding DIY project of staining your brick fireplace to perfection. From gathering materials to adding finishing touches, create a warm and character-filled focal point for your home.
Read more: How To Stucco A Brick Fireplace
Step 1: Gather the necessary materials
Before you begin staining your brick fireplace, it’s important to gather all the necessary materials. Having everything on hand will make the process smoother and more efficient. Here are the items you will need:
- Stain: Choose a stain specifically designed for brick surfaces. You can opt for a water-based or oil-based stain, depending on your preference and the desired outcome.
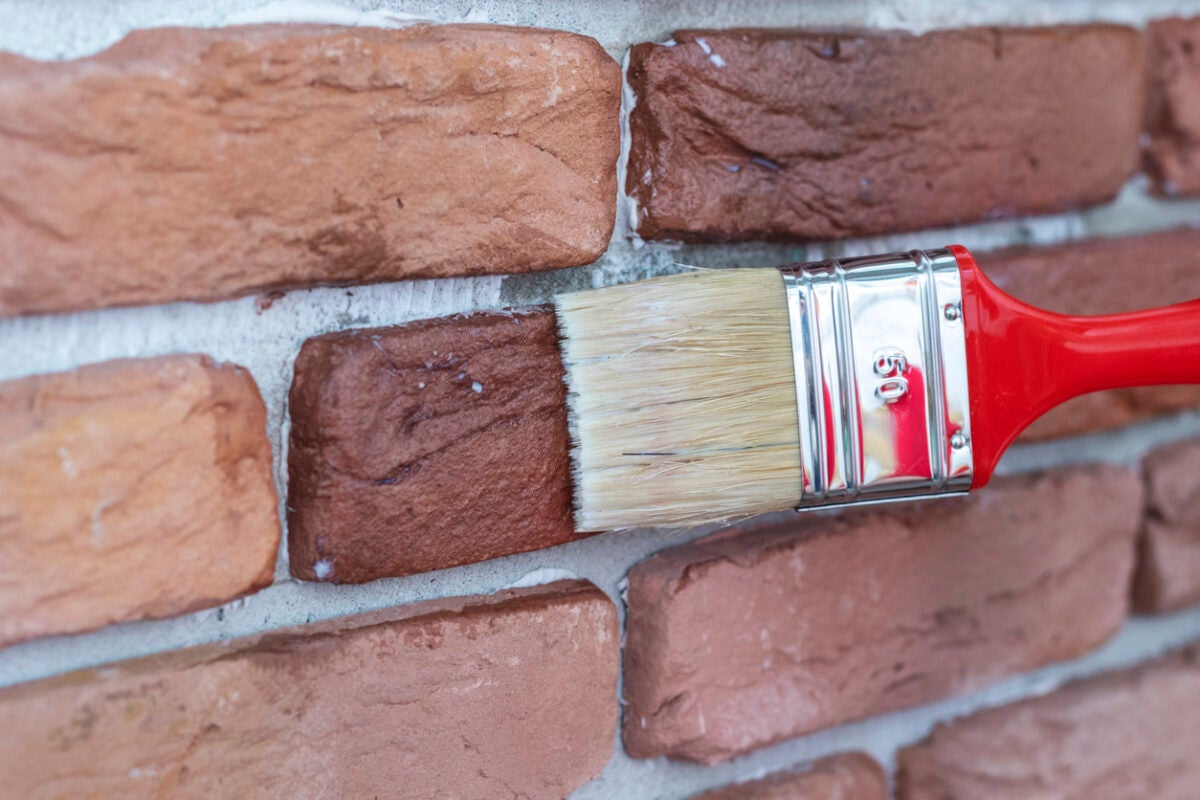
- Brushes: Grab a variety of brushes in different sizes. A large one for applying the stain to larger areas and smaller ones for reaching into crevices and corners.
- Roller or sprayer (optional): If you have a large surface to cover, using a roller or sprayer can speed up the process. Make sure they are suitable for use with brick stain.
- Drop cloths or plastic sheets: To protect the surrounding area from stains and spills, lay down drop cloths or plastic sheets. Cover any nearby furniture, floors, or objects that could accidentally come into contact with the stain.
- Painter’s tape: Use painter’s tape to mask off any areas you don’t want to stain. This could include areas around windows, trim, or adjacent walls.
- Cleaning solution: You’ll need a cleaning solution specifically formulated for brick. This will help remove any dirt, grease, or grime from the surface before applying the stain.
- Safety equipment: Always prioritize safety. Wear gloves, safety glasses, and a mask to protect yourself from the stain and cleaning solution fumes.
Having all these materials ready before you begin will ensure a smoother and more efficient staining process. Once you have gathered everything, you can move on to the next step: preparing the workspace.
Step 2: Prepare the workspace
Before you start staining your brick fireplace, it’s crucial to prepare your workspace properly. By taking the time to do this, you will protect the surrounding areas from accidental stains and make the staining process more manageable. Here’s how to prepare your workspace:
- Clear the area: Remove any furniture, decorations, or objects near the fireplace. This will give you ample space to work and prevent any accidents or damage.
- Lay down drop cloths or plastic sheets: Place drop cloths or plastic sheets over the floor, furniture, and anything else you want to protect from stains. Ensure that they are securely in place to catch any drips or spills.
- Mask off adjacent surfaces: Use painter’s tape to mask off any adjacent walls, windows, trim, or other surfaces that you don’t want to get stained. Take your time to ensure that the tape is securely in place and provides a clean line between the brick and the neighboring surfaces.
- Protect the hearth: If your fireplace has a hearth, cover it with a thick layer of newspaper or cardboard to prevent any accidental spills or drips from reaching the floor.
- Open windows or ensure proper ventilation: Staining can produce fumes that are potentially harmful if inhaled. Make sure to open windows or doors to allow for fresh air circulation. If possible, use fans or ventilators to keep the area well-ventilated.
- Put on safety equipment: Before you start handling any staining products or cleaning solutions, put on your safety equipment. Wear gloves, safety glasses, and a mask to protect yourself from any potential harm.
By properly preparing your workspace, you will create a safe and controlled environment for staining your brick fireplace. With these steps done, you’re now ready to move on to the next phase: cleaning the brick surface.
Step 3: Clean the brick surface
Before applying the stain to your brick fireplace, it’s essential to ensure that the surface is clean and free of any dirt, dust, or debris. Cleaning the brick will not only improve the adhesion of the stain but also enhance the overall look of the finished product. Here’s how to clean the brick surface:
- Start with a dry brush: Use a dry brush or broom to sweep away any loose dirt or debris from the brick. Pay attention to the mortar joints as well to remove any accumulated dust.
- Mix a cleaning solution: Prepare a cleaning solution by following the manufacturer’s instructions on a brick-specific cleaning product. If you don’t have a specialized cleaner, you can create a homemade solution by mixing mild dish soap with warm water.
- Scrub the surface: Dip a brush or sponge into the cleaning solution and scrub the brick surface gently. Focus on any areas with stubborn stains, grime, or soot. Use small circular motions to lift the dirt from the bricks effectively.
- Rinse with clean water: Once you have thoroughly scrubbed the brick, rinse the area with clean water. You can use a bucket or a hose to rinse off the cleaning solution. Make sure to remove all traces of the detergent and residue.
- Dry the surface: Allow the brick surface to dry completely before proceeding to the next step. This may take a few hours or longer, depending on the weather conditions. Avoid applying the stain on damp or wet bricks as it may affect the final outcome.
- Inspect for remaining stains: After the surface has dried, inspect the brick for any remaining stains or discoloration. If needed, repeat the cleaning process until the bricks are clean and ready for staining.
Cleaning the brick surface is a crucial step to ensure the best results when staining your fireplace. By removing dirt, dust, and grime, you’ll create a clean canvas for the stain to adhere to and achieve a more professional finish. With the brick surface cleaned and dried, you’re now ready to move on to the next step: protecting surrounding areas.
Step 4: Protect surrounding areas
When staining a brick fireplace, it’s essential to take precautions to protect the surrounding areas from accidental spills or stains. By properly covering and masking off adjacent surfaces, you can ensure a clean and professional-looking result. Here’s how to protect the surrounding areas:
- Cover the floor and furniture: Place drop cloths or plastic sheets over the floor, furniture, and any other nearby objects that you want to protect from the stain. Ensure that they are securely in place and cover a wide enough area.
- Mask off adjacent walls and trim: Use painter’s tape to carefully mask off any adjacent walls, windows, trim, or other surfaces that you don’t want to get stained. Run the tape along the edges of the surfaces, ensuring a clean and straight line.
- Protect the hearth: If your fireplace has a hearth, cover it with a thick layer of newspaper or cardboard to prevent any accidental spills or drips from reaching the floor.
- Seal gaps or cracks: Inspect the area around the fireplace for any gaps or cracks in the mortar or brickwork. Seal these areas with caulk or mortar patch to prevent the stain from seeping into unwanted areas.
- Double-check the coverage: Take a moment to step back and inspect the entire workspace. Ensure that all areas vulnerable to staining are adequately covered and protected.
By taking the time to protect the surrounding areas, you can focus on applying the stain to the brick without worry. This step will help you achieve a clean and professional finish while minimizing any potential mess or damage. With the surrounding areas properly safeguarded, it’s time to move on to the next step: applying the stain.
When staining a brick fireplace, be sure to clean the bricks thoroughly before applying the stain. Use a wire brush and mild detergent to remove any dirt, soot, or debris for the best results.
Read more: How To Cover A Brick Fireplace
Step 5: Apply the stain
Now that your workspace is prepared and the surrounding areas are protected, it’s time to apply the stain to your brick fireplace. Follow these steps to ensure a smooth and even application:
- Start with a small inconspicuous area: Before applying the stain to the entire fireplace, test it on a small, hidden area to ensure you are satisfied with the color and finish.
- Stir the stain: If you are using a canned stain, give it a good stir to ensure the color is well-mixed and consistent. If you’re using a pre-mixed stain, you can skip this step.
- Apply the stain: Using a brush or roller, start applying the stain to the bricks, working in small sections. Apply an even coat, making sure to distribute the stain evenly on the surface. Use a brush or smaller brush head to reach into corners and crevices.
- Work in manageable sections: Avoid applying the stain to the entire fireplace at once. Instead, work in smaller sections to ensure you have enough time to spread the stain evenly before it dries. This will help prevent streaks or uneven coloration.
- Blend overlapping areas: If you are working on larger sections and notice overlapping areas, make sure to blend them together while the stain is still wet. This will help achieve a uniform finish.
- Wipe off excess stain: After applying the stain to a section, use a clean cloth or rag to wipe off any excess stain. This will prevent buildup or drips that can affect the final appearance.
- Continue the process: Repeat these steps, working section by section, until you have covered the entire brick fireplace.
Take your time during the application process to ensure an even and consistent finish. Remember, the stain will darken as it dries, so keep that in mind when determining the desired color. Once you have completed the staining process, it’s time to move on to the next step: removing excess stain and letting it dry.
Step 6: Remove excess stain and let it dry
After applying the stain to your brick fireplace, it’s important to remove any excess stain and give it time to dry properly. This step ensures a clean and well-finished appearance. Follow these steps to remove excess stain and allow for adequate drying:
- Inspect for drips or pooling: Take a close look at the stained areas and check for any drips or pooling of the stain. Use a clean cloth or sponge to gently dab or wipe away any excess stain.
- Smooth out any uneven areas: If you notice any areas where the stain appears uneven or blotchy, use a brush or cloth to gently blend and smooth out the stain.
- Double-check for missed spots: Ensure that you have applied the stain to all visible areas of the brick fireplace. If you spot any missed spots, touch them up with an additional layer of stain.
- Allow the stain to dry: Set aside sufficient time for the stain to dry completely. Read the product instructions to determine the recommended drying time. This may range from a few hours to overnight.
- Keep the area well-ventilated: During the drying process, it’s essential to keep the area well-ventilated to allow for proper air circulation. Open windows or use fans to help speed up the drying process.
- Avoid touching or disturbing the stain: To ensure a smooth and uniform finish, avoid touching or disturbing the stained bricks until the recommended drying time has passed. This will prevent any smudges or smears.
By removing excess stain and allowing for sufficient drying time, you’ll achieve a professional and durable finish on your brick fireplace. Once the stain has completely dried, you can consider applying a second coat if desired. In the next step, we’ll go over the process of applying a second coat of stain (optional).
Step 7: Apply a second coat (optional)
Applying a second coat of stain to your brick fireplace is optional but can enhance the depth and richness of the color. If you choose to proceed with a second coat, follow these steps:
- Ensure the first coat is dry: Before applying a second coat, confirm that the first coat of stain is completely dry. Refer to the product instructions for the recommended drying time.
- Repeat the preparation steps: If you decide to apply a second coat, repeat Steps 4 and 5 to protect the surrounding areas and re-apply the stain.
- Apply the second coat: Using the same techniques as the first coat, apply the second coat of stain to the brick. Work in small sections and ensure an even application.
- Blend overlapping areas: Just like with the first coat, keep an eye out for any overlapping areas and blend them together for a seamless finish.
- Remove excess stain: After each section, use a cloth or sponge to wipe off any excess stain and create a smooth appearance.
- Let the second coat dry: Allow the second coat to dry completely before touching or disturbing the stained area. Follow the product instructions for drying time.
Applying a second coat of stain can deepen the color and add additional richness to your brick fireplace. However, keep in mind that two coats may result in a darker, more opaque finish. If you’re satisfied with the appearance after the first coat, it’s perfectly acceptable to skip this optional step.
Once the second coat has dried, it’s time to put the finishing touches on your newly stained brick fireplace. In the next step, we’ll discuss the final steps to complete the project.
Step 8: Finishing touches
As you near the completion of staining your brick fireplace, it’s time to add those final touches that will enhance the overall look and ensure a polished result. Here are some key steps to consider for the finishing touches:
- Inspect for any touch-ups: Take a thorough look at the stained fireplace and identify any areas that may need touch-ups. This could include spots that were missed or areas that appear uneven. Use a brush or cloth to apply a small amount of stain to these areas and blend them in.
- Remove protective coverings: Carefully remove the drop cloths, plastic sheets, painter’s tape, and any other protective coverings from the surrounding areas. Dispose of them properly or clean and store them for future use.
- Clean up the workspace: Clean any brushes, rollers, and other equipment used for staining. Dispose of any leftover stain or cleaning solution according to the manufacturer’s instructions. Wipe down any surfaces, tools, or containers that may have come into contact with the stain.
- Restore furniture and decor: If you had moved any furniture or decor items during the staining process, now is the time to put them back in place. Clean them if necessary and consider arranging them in a way that complements your newly stained fireplace.
- Admire your finished fireplace: Step back and take a moment to admire your newly stained brick fireplace. Appreciate the renewed look and the effort you put into transforming this focal point of your home.
Completing these finishing touches will ensure that your stained brick fireplace looks cohesive and well-crafted. Take pride in the work you have done and enjoy the fresh, updated appearance it brings to your living space.
With the project now finished, you can share your stunning fireplace with family and friends, knowing that you have successfully stained your brick fireplace to perfection. Congratulations on your successful DIY project!
If you have any further questions or need assistance with any other projects, don’t hesitate to reach out. Happy staining!
Read more: How To Demolish A Brick Fireplace
Conclusion
Staining a brick fireplace is a rewarding and cost-effective way to update and transform the look of your living space. By following the step-by-step process outlined in this guide, you can achieve a professional and beautiful result that adds warmth and character to your home.
From gathering the necessary materials to preparing the workspace, cleaning the brick surface, and protecting surrounding areas, each step plays a crucial role in ensuring a successful staining project. Applying the stain in even coats, removing excess stain, and allowing for proper drying time are essential for achieving a polished finish.
Remember, the option of applying a second coat is available for those looking for a deeper and more dramatic appearance. However, it’s important to test the stain, consider the desired outcome, and ensure that the first coat is completely dry before proceeding.
As you put the finishing touches on your stained brick fireplace, take pride in the effort you put into rejuvenating this focal point of your home. Admire the renewed beauty and enjoy the cozy ambiance it adds to your living space.
Now that you have successfully stained your brick fireplace, you can apply these newfound skills to other home improvement projects. Whether it’s staining brick walls, pavers, or outdoor fireplaces, the knowledge and experience gained from this guide can be applied to various contexts.
Remember, practice makes perfect, so don’t hesitate to experiment and refine your technique as you become more comfortable with the staining process. Always prioritize safety by wearing appropriate protective gear and ensuring proper ventilation throughout the project.
We hope this comprehensive guide has been helpful in your journey to stain a brick fireplace. If you have any further questions or need assistance with any other projects, we’re here to help. Happy staining!
Once you've mastered staining your brick fireplace, why stop there? Dive into our detailed guide on what to do next with this classic home feature. Whether you're contemplating a full transformation or just some creative tweaks, our next article offers a wealth of ideas to reinvigorate your living space. Don't miss out on these inspiring suggestions that can turn a simple brick fireplace into a true centerpiece of your home.
Frequently Asked Questions about How To Stain A Brick Fireplace
Was this page helpful?
At Storables.com, we guarantee accurate and reliable information. Our content, validated by Expert Board Contributors, is crafted following stringent Editorial Policies. We're committed to providing you with well-researched, expert-backed insights for all your informational needs.


0 thoughts on “How To Stain A Brick Fireplace”