Articles
How To Tile A Brick Fireplace
Modified: October 18, 2024
Learn how to tile a brick fireplace with our informative articles. Enhance the look of your fireplace with our step-by-step guides and expert tips.
(Many of the links in this article redirect to a specific reviewed product. Your purchase of these products through affiliate links helps to generate commission for Storables.com, at no extra cost. Learn more)
Introduction
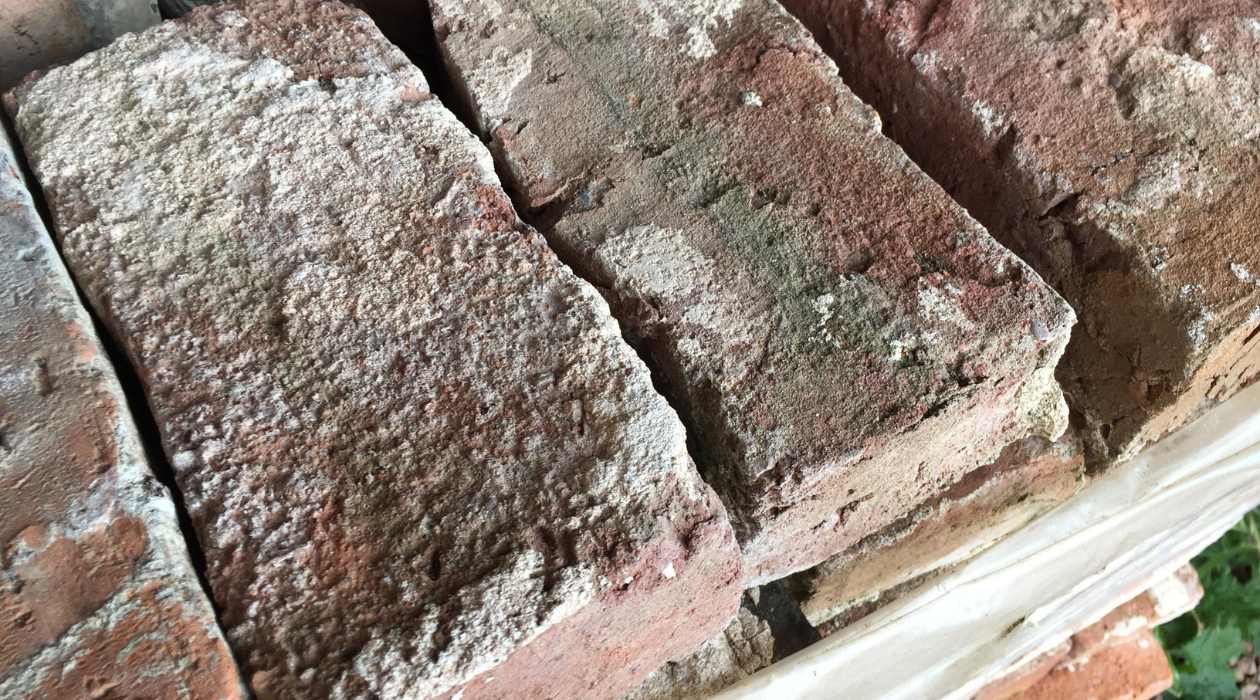
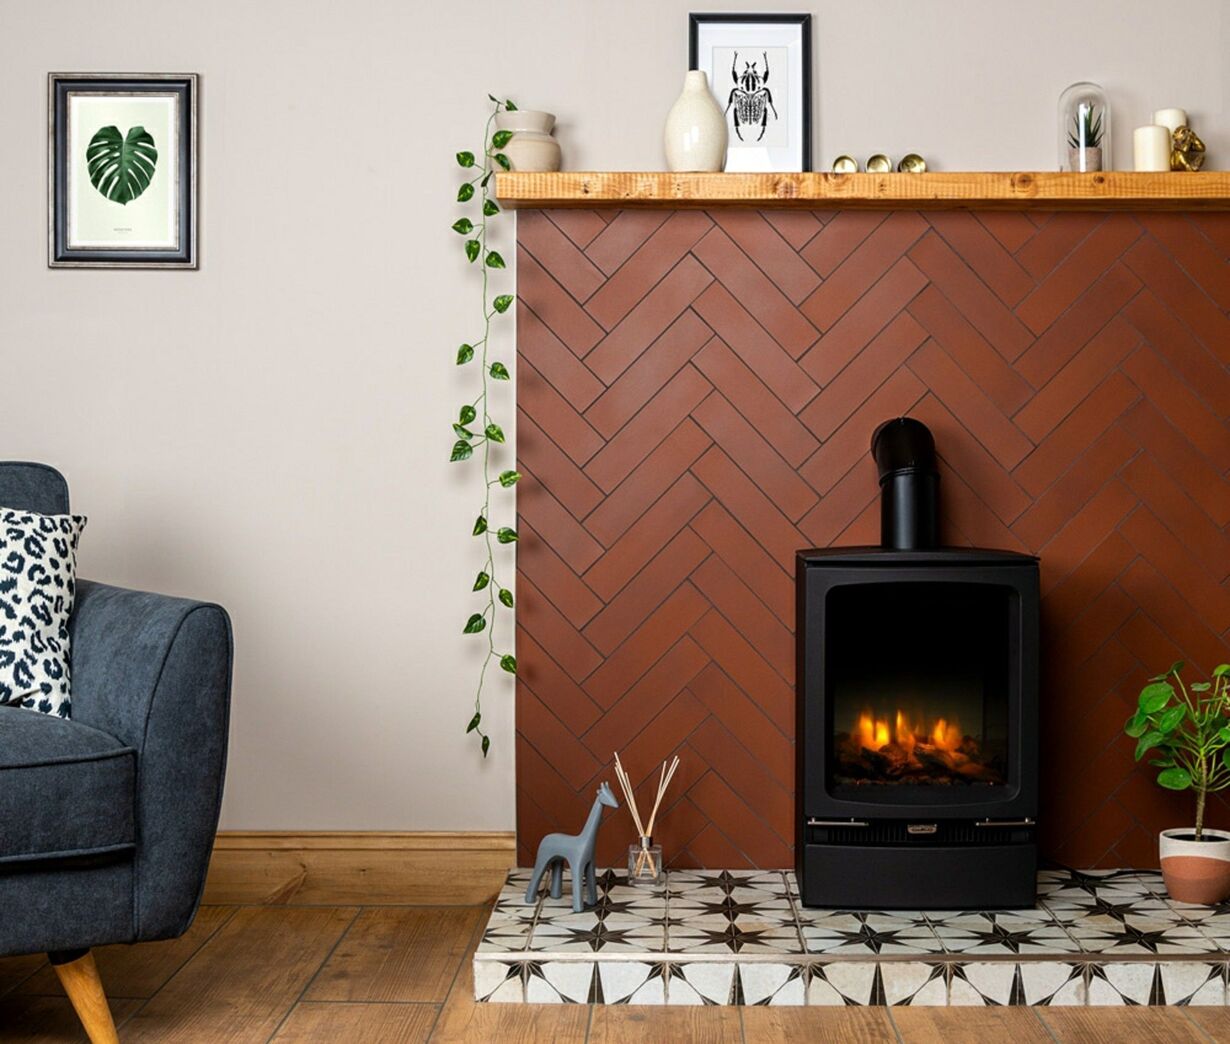
Your brick fireplace is the centerpiece of your living room, providing warmth and character to the space. However, if you’re looking to update its look and give it a fresh new vibe, tiling your brick fireplace can be the perfect solution. Not only will it transform the aesthetic appeal of your fireplace, but it will also add a touch of elegance and sophistication to your living space.
Tiling a brick fireplace may seem like a daunting task, but with the right tools, materials, and a step-by-step guide, you can achieve stunning results. In this article, we will walk you through the process of tiling a brick fireplace, from preparing the surface to finishing touches.
Before we dive into the steps, it’s important to note that proper preparation is key to a successful tiling project. Ensure that the brick surface is clean, free from dust, soot, and any loose mortar. Additionally, make sure to measure and plan your tile layout to determine the number of tiles you’ll need and any potential cuts or adjustments required.
Now, let’s get started and give your brick fireplace the makeover it deserves!
Key Takeaways:
- Transform your brick fireplace with elegance and sophistication by following a step-by-step guide to successful tiling. Emphasize preparation, attention to detail, and careful execution for stunning results.
- Achieve a professional-looking finish by meticulously measuring, planning, and installing tiles. Don’t forget the final touches, including grouting, cleaning, and adding decorative elements for a polished fireplace makeover.
Step 1: Preparing the Fireplace Surface
Before you begin tiling your brick fireplace, it’s important to properly prepare the surface to ensure a smooth and long-lasting finish. Here’s how:
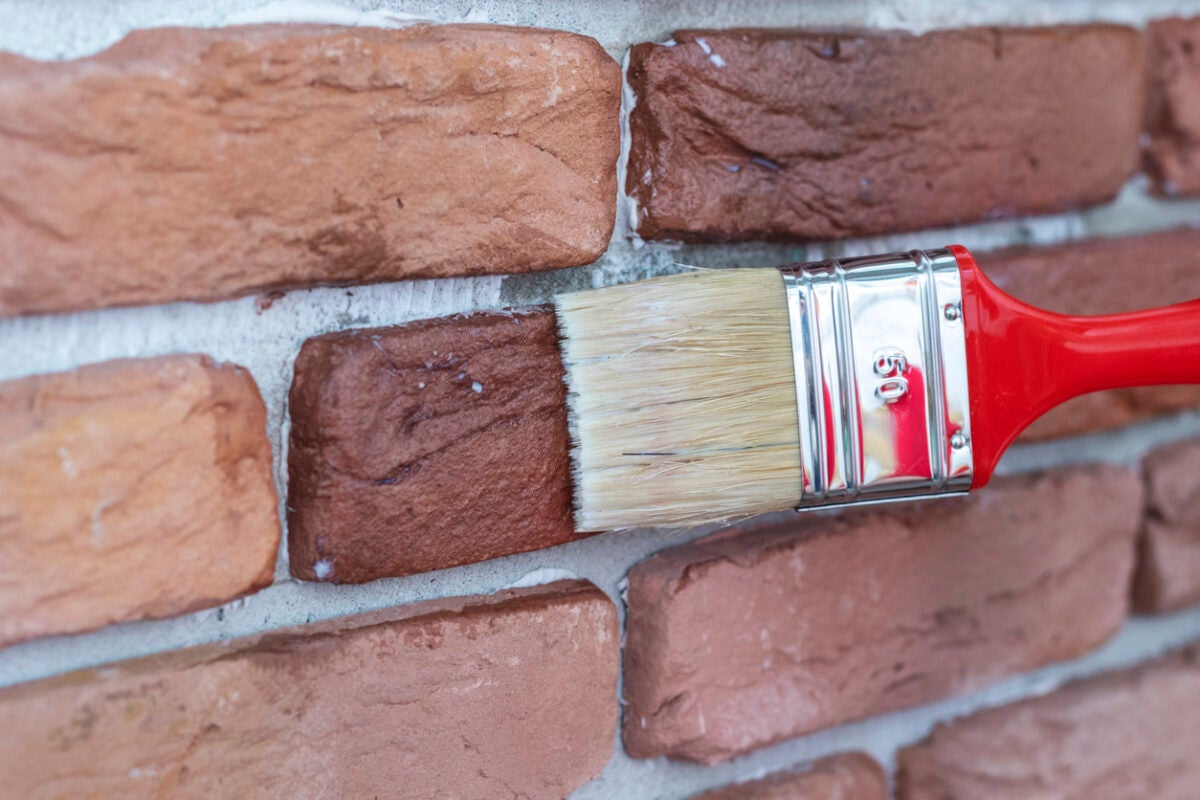
- Start by removing any loose debris, such as dust, soot, or cobwebs, from the surface of the fireplace. Use a brush or vacuum cleaner to thoroughly clean the bricks and remove any loose particles.
- If there are any areas with stubborn dirt or stains, you may need to use a mild detergent mixed with water and scrub gently. Rinse the area with clean water and allow it to dry completely before proceeding.
- Inspect the bricks and mortar joints for any signs of damage or crumbling. If you notice any loose or damaged bricks or mortar, you’ll need to repair them before tiling. Use a mortar repair compound to fill in any cracks or gaps, and allow it to dry according to the manufacturer’s instructions.
- Next, you’ll want to create a smooth surface for the tiles to adhere to. If your brick fireplace has a textured surface, you can use a wire brush or sandpaper to lightly sand down the bricks, removing any roughness. Be careful not to damage the bricks or remove too much material.
- Once the surface is smooth, wipe it down with a damp cloth to remove any dust or debris. This will ensure that the adhesive bonds properly with the surface.
Preparing the fireplace surface is a crucial step in the tiling process. By taking the time to clean and repair the bricks, you’ll create a stable foundation for your tiles and ensure a successful installation.
Step 2: Gathering the Necessary Materials and Tools
Before you start tiling your brick fireplace, it’s essential to gather all the materials and tools you’ll need. Having everything prepared in advance will save you time and ensure a smooth workflow. Here’s a list of the necessary items:
- Tiles: Choose the type and design of tiles that best suit your style and desired look for the fireplace. Consider factors such as color, size, and material. Measure the dimensions of your fireplace and calculate the number of tiles required based on the tile size.
- Tile Adhesive: Select a high-quality tile adhesive suitable for the surface of your fireplace. Depending on the type of tiles you’re using, such as porcelain or ceramic, choose a matching adhesive that provides good adhesion.
- Tile Spacers: These small plastic spacers are used to ensure even and consistent spacing between the tiles. The size of the spacers will depend on your desired grout line width.
- Grout: Pick a grout color that complements your tile choice and desired aesthetic. The grout will fill the gaps between the tiles, providing stability and a finished look.
- Trowel: A notched trowel is essential for applying the adhesive evenly on the fireplace surface. Choose a trowel size that matches the recommended notch size for your tile adhesive.
- Tile Cutter: If you anticipate needing to cut tiles to fit specific areas of your fireplace, a tile cutter will be necessary. There are various types of tile cutters available, including manual and electric options.
- Grout Float: A grout float is used to apply and spread the grout evenly between the tiles. It helps to ensure that the grout fills in all the gaps and creates a smooth and uniform finish.
- Sponge or Cloth: Keep a sponge or damp cloth handy to wipe away excess adhesive and grout during the tiling process.
- Protective Gear: To protect yourself during the tiling process, consider wearing safety glasses and gloves to prevent any accidents or skin irritation.
By gathering all the necessary materials and tools beforehand, you’ll be well-prepared to tackle the tiling project without interruptions. Double-check your inventory to ensure you have everything you need, and make any additional purchases as required.
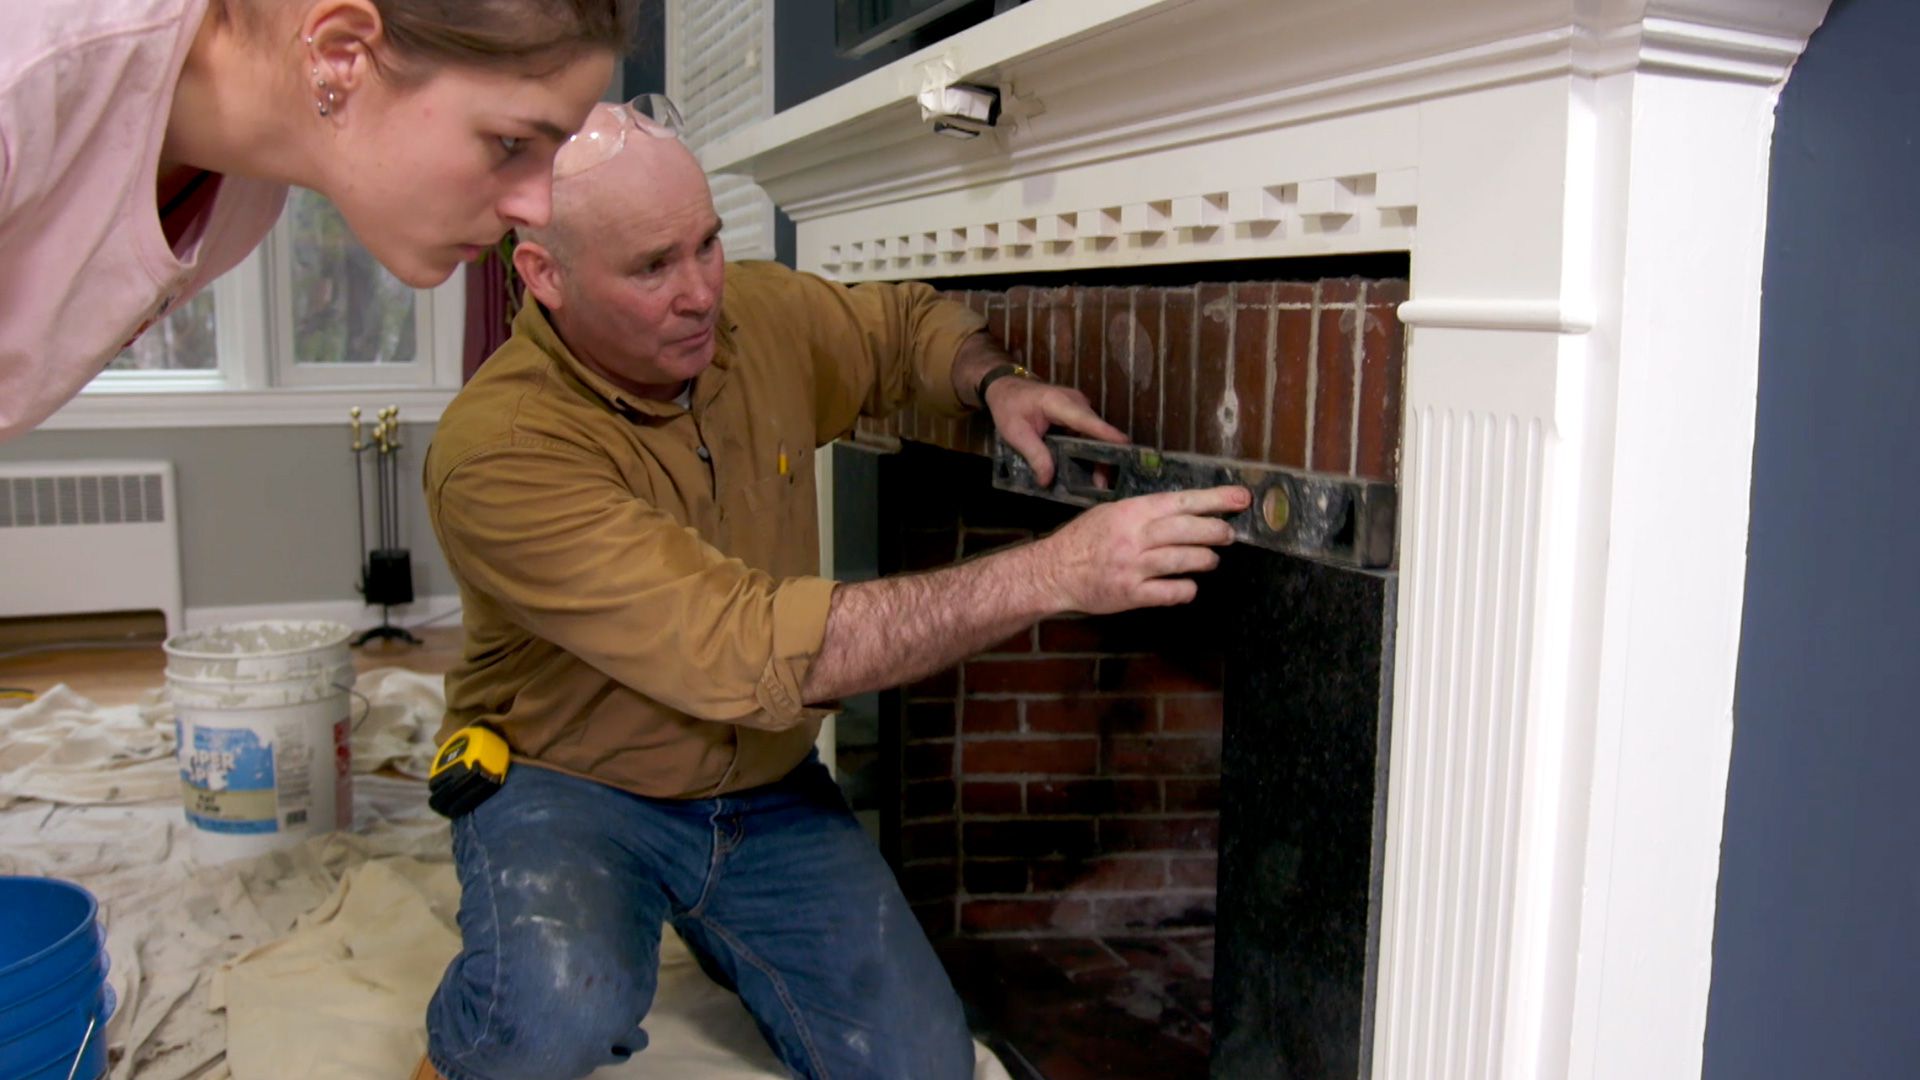
Step 3: Measuring and Planning the Tile Layout
Before you start applying the tile adhesive, it’s crucial to measure the fireplace and plan the layout of the tiles. Proper measurements and planning will ensure that the tiles are installed evenly and aesthetically pleasing. Here’s how to do it:
- Using a tape measure, carefully measure the height and width of the fireplace. Take note of any irregularities or protrusions, such as mantels or edges, as they will impact the layout of the tiles.
- With your measurements in hand, determine the best starting point for your tile installation. Many people choose to start at the center of the fireplace and work their way outwards. However, depending on your specific design preference, you may choose a different starting point.
- Lay out the tiles on the floor in the desired pattern, taking into consideration any cuts or adjustments that may be needed. This will give you a visual representation of how the tiles will look on the fireplace.
- Using a pencil and a level, mark a vertical and horizontal line on the fireplace as a guide for the first row of tiles. This will ensure that the tiles are installed straight and aligned.
- If you need to make any cuts to the tiles to fit around edges or obstacles, carefully measure and mark the tiles before using a tile cutter to make the necessary cuts. It’s always a good idea to measure twice and cut once to minimize errors.
- Take into account the spacing between tiles by using tile spacers. The spacing will depend on your preference and the tile size. Adjust the layout as needed to achieve even spacing and alignment.
- Step back and assess the planned tile layout. Make any necessary adjustments or refinements before proceeding to the next step.
Measuring and planning the tile layout is a critical step in ensuring a successful and visually appealing tile installation on your brick fireplace. Taking the time to carefully measure, mark, and plan will save you time and headaches later in the process.
Step 4: Applying the Tile Adhesive
Now that you have measured and planned the tile layout, it’s time to move on to the next step: applying the tile adhesive. The adhesive is what will secure the tiles to the surface of the brick fireplace. Here’s how to apply the tile adhesive:
- Start by preparing the tile adhesive according to the manufacturer’s instructions. This usually involves mixing the adhesive powder with water in a clean bucket. Use a trowel to mix the adhesive until it reaches a smooth, lump-free consistency.
- Using the notched side of the trowel, apply a thin layer of adhesive to a small section of the fireplace surface. The size of the section will depend on your comfort level and the drying time of the adhesive. Aim for an area that you can comfortably tile within 15-20 minutes.
- Hold the trowel at a 45-degree angle and comb through the adhesive with the notched side, creating ridges. This helps to ensure proper adhesion between the tiles and the surface.
- Take your first tile and press it firmly into the adhesive, aligning it with the marked guidelines. Give it a slight wiggle or twist to help the tile settle securely into the adhesive.
- Apply adhesive to the next small section and repeat the process, working in a systematic manner. Use tile spacers to maintain consistent spacing between the tiles. Continue this pattern, applying adhesive and placing the tiles until the entire fireplace is covered.
- Check periodically to ensure that the tiles are level and aligned. Adjust as needed by gently tapping or adjusting the position of the tiles while the adhesive is still wet.
- Wipe away any excess adhesive that may have squeezed out between the tiles using a damp sponge or cloth. It’s important to clean as you go to prevent the adhesive from drying on the tile surface.
- Allow the adhesive to dry and cure according to the manufacturer’s instructions before proceeding to the next step. This typically takes 24-48 hours, but be sure to check the recommended drying time.
Applying the tile adhesive requires precision and attention to detail to ensure that the tiles bond securely to the fireplace surface. Take your time and work in manageable sections to achieve the best results.
When tiling a brick fireplace, make sure to thoroughly clean the surface and use a high-quality mortar to ensure the tiles adhere properly. It’s also important to measure and plan the layout carefully before starting the tiling process.
Read more: How To Tile A Fireplace
Step 5: Installing the Tiles on the Fireplace
With the adhesive dry and cured, it’s time to move on to the exciting step of actually installing the tiles on the fireplace. This is where you will start to see your vision come to life. Here’s how to install the tiles:
- Inspect the adhesive on the fireplace surface to ensure it is fully dried and cured. The tiles should adhere securely without any movement.
- Starting from where you left off with the adhesive, apply more adhesive to a small section of the fireplace surface using the notched trowel.
- Take a tile and press it firmly into the adhesive, aligning it with the marked guidelines and the neighboring tiles. Use slight pressure to ensure the tile is fully embedded in the adhesive.
- Continue this process, applying adhesive and placing the tiles, working in a systematic manner across the fireplace. Use tile spacers to maintain consistent spacing between the tiles.
- Check periodically to ensure that the tiles are level and aligned. Make any necessary adjustments by gently tapping or adjusting the position of the tiles as you go.
- Continue installing the tiles until the entire fireplace is covered, working in small sections at a time.
- As you progress, periodically clean away any excess adhesive that may have squeezed out between the tiles using a damp sponge or cloth. This will help to keep the surface clean and prevent the adhesive from drying on the tile surface.
- Take your time and be mindful of your tile placement, making sure they are aligned and evenly spaced.
- Allow the tiles to set in the adhesive according to the manufacturer’s instructions. This typically takes 24-48 hours, but check the recommended drying time for the adhesive you used.
Installing the tiles on the fireplace requires patience and precision to ensure a professional-looking finish. Take your time, step back periodically to assess your progress, and make any necessary adjustments to achieve the desired result.
Step 6: Cutting and Fitting Tiles as Needed
While installing tiles on the fireplace, you will inevitably come across areas where full tiles cannot fit perfectly. This is where cutting and fitting tiles come into play. Here’s how to cut and fit tiles as needed:
- Before cutting any tiles, carefully measure the area that needs a custom fit. Use a measuring tape to determine the dimensions of the space accurately.
- Transfer the measurements onto the tile that needs to be cut. Mark the cutting line with a pencil or use a tile scribe to scratch the surface of the tile along the desired cutting line.
- For straight cuts, you can use a tile cutter. Place the tile on the cutter, aligning the marked line with the cutting guide. Apply even pressure as you score the tile along the line, then use the tile cutter’s handle to snap the tile cleanly along the scored line.
- If you need to make curved or irregular cuts, consider using a tile nipper or tile saw. These tools allow for more precise and detailed cuts. Follow the manufacturer’s instructions for your specific cutting tool.
- After cutting the tile, test the fit in the designated area. Make any necessary adjustments or additional cuts as needed to ensure a proper fit. It’s always a good idea to start with a conservative cut and make gradual adjustments until the tile fits perfectly.
- Once the tile has been cut and fitted correctly, apply adhesive to the back of the tile and press it firmly into place, ensuring that it blends seamlessly with the surrounding tiles.
- Continue cutting and fitting tiles for any other areas that require custom sizes or shapes.
Remember, cutting and fitting tiles can be a delicate process, so take your time and work carefully to achieve precise and clean cuts. Keep in mind that it’s always better to make small adjustments gradually rather than cutting too much off the tile at once.
By carefully cutting and fitting the tiles, you’ll be able to create a cohesive and polished look on your fireplace, even in areas where standard-sized tiles won’t fit.
Step 7: Grouting the Tile Joints
Once the tiles are securely in place on your fireplace, it’s time to move on to the next step: grouting the tile joints. Grout not only fills in the gaps between the tiles but also provides stability and a finished look. Here’s how to grout the tile joints:
- First, gather your grout and a grout float. Ensure that the grout color complements your tile choice and desired aesthetic.
- Read and follow the manufacturer’s instructions on how to mix the grout. Typically, you’ll mix the grout powder with water in a clean bucket until you achieve a smooth, paste-like consistency.
- Using the grout float, scoop a generous amount of grout onto the float’s surface.
- Hold the float at a 45-degree angle and press the grout into the tile joints, ensuring that each joint is completely filled. Work in small sections at a time to prevent the grout from drying out too quickly.
- Use the edge of the grout float to scrape off the excess grout from the tile surface. Hold the float at a steeper angle to remove as much excess grout as possible without disturbing the grout in the joints.
- After removing the excess grout, use a damp sponge or cloth to wipe down the tile surface. Gently wipe diagonally across the tiles, being careful not to disturb the grout in the joints. Rinse the sponge or cloth frequently to keep it clean.
- Allow the grout to cure according to the manufacturer’s instructions. This usually takes 24-48 hours, but be sure to check the recommended drying time.
- Once the grout has cured, use a dry cloth to buff the tiles and remove any haze or residue that may have formed.
Grouting the tile joints is the final step in the tiling process and brings the tiles together, creating a cohesive and finished look. Take your time to ensure that each joint is filled with grout and that the excess is removed properly to achieve a professional result.
Remember to protect your hands with gloves while working with grout and avoid exposing the grout to water for at least 48 hours after the application to allow it to fully cure.
Step 8: Cleaning and Finishing the Fireplace
Now that the tiles are in place and the grout has dried, it’s time to focus on cleaning and finishing touches to give your fireplace a polished and complete look. Here’s how to clean and finish your tiled fireplace:
- Begin by using a damp cloth or sponge to wipe down the entire tiled surface, removing any dust, grout haze, or residue. Make sure to clean the tiles and the grout lines thoroughly.
- If there are any stubborn stains or spots on the tiles, you can use a mild cleaning solution specifically designed for the type of tile you’ve used. Follow the manufacturer’s instructions and test on a small, inconspicuous area before applying it to the entire surface.
- After cleaning, allow the fireplace to dry completely.
- Inspect the tiles and grout lines for any gaps or areas where the grout might have settled or shrunk during the drying process. If necessary, mix more grout according to the manufacturer’s instructions and fill in any gaps with a grout float.
- Use a damp cloth or sponge to smooth and shape the grout lines, ensuring a clean and even look. Wipe away any excess grout from the tiles with a clean, damp cloth.
- Once the grout has dried and any touch-ups have been made, it’s time to add the final finishing touches. Consider applying a grout sealer to protect the grout from staining and discoloration. Follow the instructions on the sealer packaging for the application process.
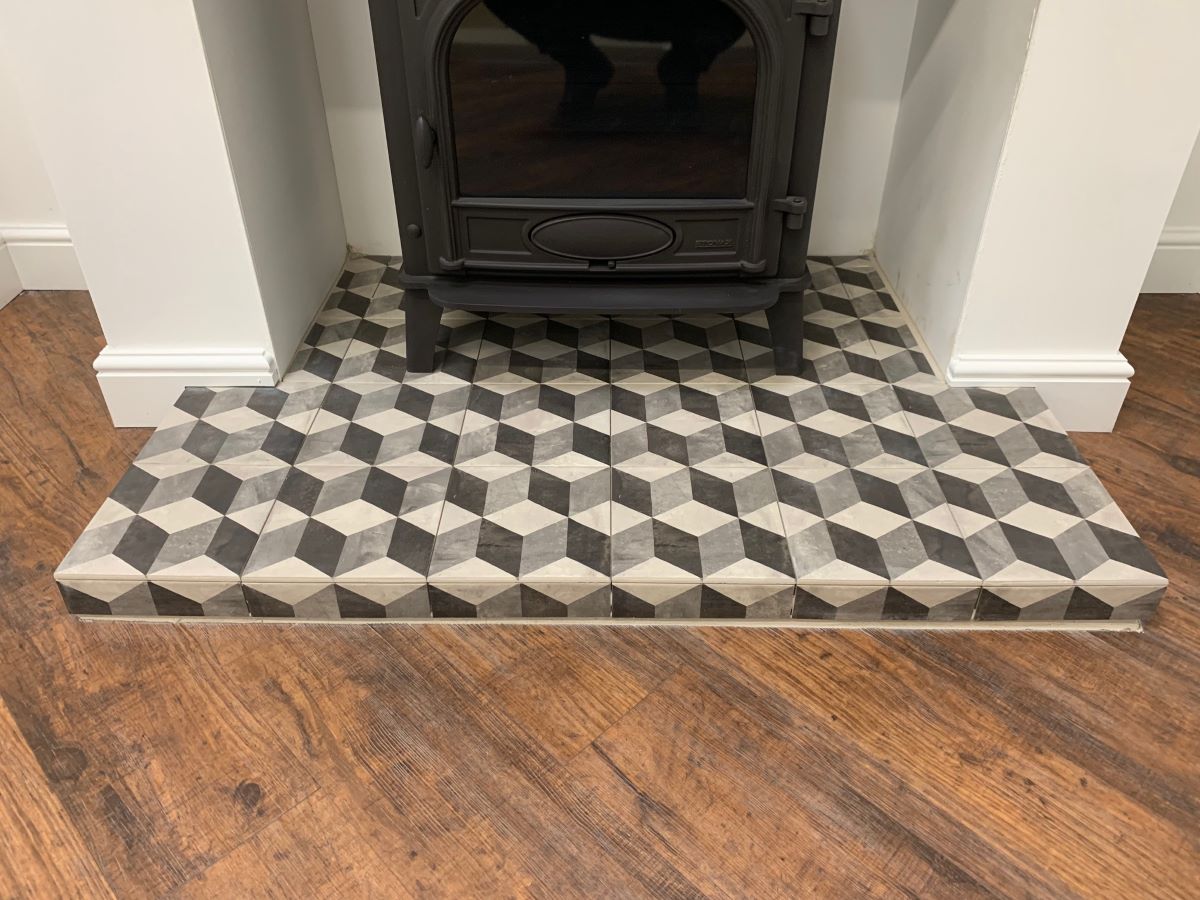
- Take a step back and admire your newly-tiled fireplace. Consider adding some decorative elements, such as a mantel, artwork, or accessories, to enhance the overall look and style.
Cleaning and finishing the fireplace is the last step in the tiling process. By ensuring a clean surface and attending to any final details, you’ll be able to enjoy your beautifully tiled fireplace for years to come.
Regular maintenance, including routine cleaning and periodic resealing of the grout, will help to keep your tiled fireplace looking pristine and extend its lifespan.
Read more: How To Tile A Fireplace Wall
Conclusion
Tiling a brick fireplace can transform its appearance and add a touch of elegance to your living space. By following the step-by-step guide provided in this article, you can successfully tile your brick fireplace and create a stunning focal point in your home.
Throughout the process, it’s important to emphasize the importance of proper preparation, careful measuring and planning, and attention to detail. Taking the time to clean the fireplace surface, gather the necessary materials and tools, and measure and plan the tile layout will set the stage for a successful tiling project.
Applying the tile adhesive, installing the tiles, and cutting and fitting tiles as needed are all critical steps in achieving a professional-looking finish. Remember to work in small sections, check for alignment and levelness, and clean away any excess adhesive or grout for a polished result.
The process concludes with grouting the tile joints, cleaning the fireplace surface, and adding the final finishing touches. This includes inspecting and touching up the grout lines, applying grout sealer for protection, and considering decorative elements to enhance the overall appearance of the tiled fireplace.
With patience, attention to detail, and careful execution, you can achieve a beautifully tiled brick fireplace that will enhance the aesthetic appeal of your space and provide years of enjoyment. So put on your DIY hat, gather your materials, and get ready to give your brick fireplace a stunning makeover!
Frequently Asked Questions about How To Tile A Brick Fireplace
Was this page helpful?
At Storables.com, we guarantee accurate and reliable information. Our content, validated by Expert Board Contributors, is crafted following stringent Editorial Policies. We're committed to providing you with well-researched, expert-backed insights for all your informational needs.


0 thoughts on “How To Tile A Brick Fireplace”