Home>Articles>How To Plan Your Fence Installation Project Effectively
Articles
How To Plan Your Fence Installation Project Effectively
Modified: December 7, 2023
Learn how to measure for a fence accurately with our informative articles. Get expert tips and insights on finding the right dimensions for your fencing project.
(Many of the links in this article redirect to a specific reviewed product. Your purchase of these products through affiliate links helps to generate commission for Storables.com, at no extra cost. Learn more)
Introduction
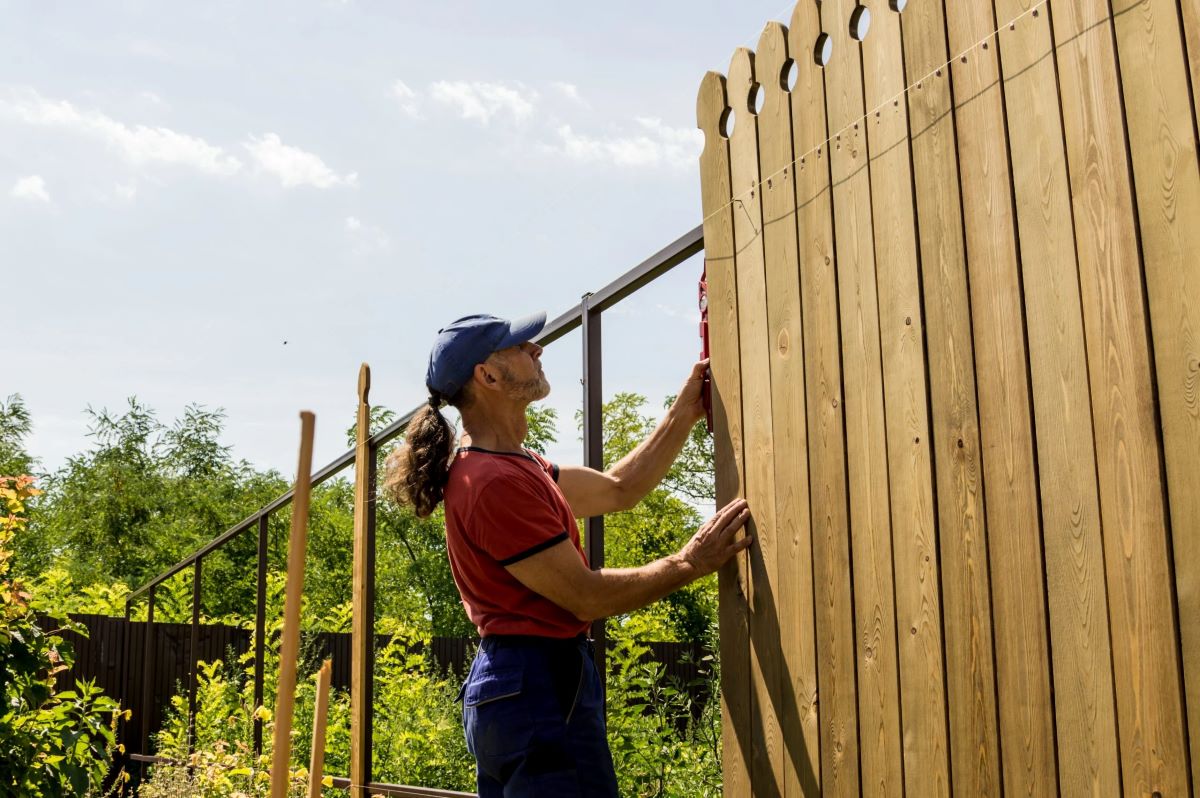
When it comes to installing a fence, accuracy is key. Whether you’re seeking privacy, security, or just to enhance the aesthetics of your property, having the right measurements is crucial to ensure the fence fits properly and looks its best. Measuring for a fence may seem like a daunting task, but with the right tools and guidance, it can be a straightforward process.
In this article, we will walk you through a step-by-step guide on how to measure for a fence. From gathering the necessary tools to making adjustments for slopes or inclines, we’ll cover everything you need to know to get accurate measurements and plan your fence installation project effectively.
By following these guidelines, you can save time and money by avoiding unnecessary mistakes and ensuring that your fence installation is a success. So, let’s dive in and learn how to accurately measure for a fence!
Key Takeaways:
- Accurate measurements are crucial for a successful fence installation. Gathering the right tools, determining the fence line, and accounting for slopes are essential steps to ensure a sturdy and visually appealing result.
- Taking the time to measure for a fence accurately can save time, money, and potential headaches. From gate placement to final adjustments, each step contributes to a seamless and rewarding installation process.
Read more: Free Trellis Plan
Step 1: Gathering the necessary tools
Before you begin measuring for your fence, it’s important to gather all the necessary tools to ensure accuracy and efficiency in the process. Here are some of the essential tools you’ll need:
- Tape measure: A reliable tape measure is an absolute must-have for measuring the length and height of your fence. Look for a tape measure that is at least 25 feet long and has clear marking increments.
- Level: A level is essential for ensuring that your fence is straight and level. Choose a bubble level with multiple vials, including horizontal, vertical, and 45-degree angles.
- Stakes or marking flags: Stakes or marking flags will help you mark the positions of the fence posts and corners. These can be easily inserted into the ground and serve as visual guides during the measurement process.
- Pencil or marker: Having a pencil or marker on hand will allow you to make clear and visible marks on the ground or any other surfaces.
- String or twine: String or twine can be used to create straight lines and guide your measurements. This will be especially helpful when marking the fence line or spacing out the posts.
- Hammer: A sturdy hammer will be required if you’re using stakes or post anchors to mark your fence line and post locations.
- Personal protective equipment (PPE): Safety should always be a priority. Be sure to wear appropriate PPE such as gloves, safety goggles, and ear protection if necessary.
By gathering these tools beforehand, you’ll have everything you need to measure your fence accurately and efficiently. Once you have them ready, you can move on to the next step: determining the fence line.
Step 2: Determining the fence line
After gathering your tools, the next step in measuring for a fence is to determine the fence line. This involves identifying the boundary where you want the fence to go.
Here are some steps to help you determine the fence line:
- Consult property boundaries: Check your property deed or consult with a surveyor to understand your property boundaries. This will ensure that your fence is installed within your property and doesn’t encroach on your neighbor’s land.
- Walk the perimeter: Take a walk around the area where you plan to install the fence. Look for any natural markers, such as trees or existing structures that can help you visually establish the fence line.
- Use a string or twine: Tie one end of the string or twine to a stake or existing structure along the desired fence line. Stretch the string to the next marker and secure it. Continue this process around the perimeter until you have clearly established the fence line.
- Double-check measurements: Use a tape measure to ensure that the distance between the string and the property boundaries is consistent along the entire fence line. This will help maintain a uniform look for your fence.
By taking the time to accurately determine the fence line, you can avoid installation errors and ensure that the fence aligns perfectly with your property boundaries. Once you have established the fence line, you can move on to the next step: marking the fence post locations.
Step 3: Marking the fence post locations
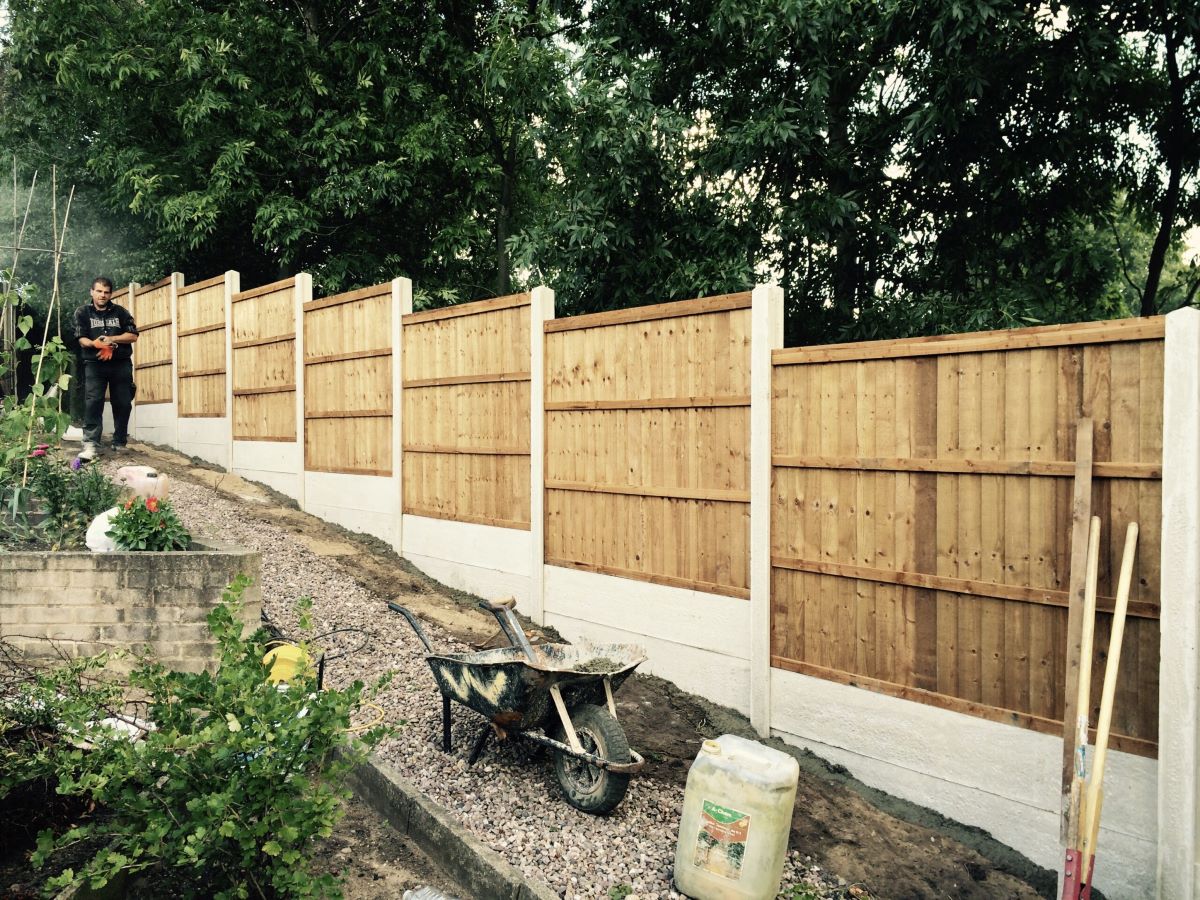
Once you have determined the fence line, the next step in measuring for a fence is to mark the locations where the fence posts will be installed. This is a crucial step as it will determine the stability and overall strength of your fence.
Here’s how you can mark the fence post locations:
- Measure and mark spacing: Start at one end of the fence line and measure and mark the desired spacing for each fence post. The typical spacing is between 6 to 8 feet, but it can vary depending on the type of fence you’re installing.
- Mark corner and gate posts: Identify the locations where you plan to have corner posts and gate posts. These areas will require extra support and reinforcement.
- Use stakes or marking flags: Insert stakes or use marking flags to indicate the exact positions of the fence posts. This will help ensure accuracy during the installation process.
- Double-check measurements: Measure the distance between each marked post location to ensure they align with the desired spacing. This will help maintain consistency and prevent any gaps or overlaps.
By marking the fence post locations accurately, you’ll have a solid foundation for your fence installation. This step ensures that you have a clear guide to follow when it comes to installing the posts and setting them at the proper intervals. Once you have marked the fence post locations, you can move on to the next step: measuring the distance between posts.
Step 4: Measuring the distance between posts
Once you have marked the locations for the fence posts, it’s time to measure the distance between them. This step is crucial for determining the number of fence panels or materials required for your project.
Here’s how you can measure the distance between posts:
- Start at the first post: Begin at the first marked fence post location and measure the horizontal distance to the next post. Use a tape measure and ensure that the measurement is taken at the same height as the desired fence height.
- Record the measurements: Write down the measurements for each space between the posts. This will help you keep track of the distances and calculate the number of fence panels or materials required.
- Consider panel width: Take into account the width of the fence panels or materials you plan to use. This will determine the actual space between the posts and ensure that the panels fit properly without gaps or overlaps.
- Calculate the number of panels: Divide the total distance by the width of the panels to determine the number of panels needed. Round up to the nearest whole number.
By measuring the distance between the fence posts accurately, you can ensure that your fence panels or materials will fit seamlessly without any uneven gaps. This step is crucial for planning your budget, purchasing the right materials, and ensuring a smooth installation process. Once you have measured the distance between posts, you can move on to the next step: calculating the number of fence panels required.
Step 5: Calculating the number of fence panels required
Now that you have measured the distance between the fence posts, it’s time to calculate the number of fence panels or sections needed for your project. This step is essential for estimating the amount of material you’ll need to purchase.
Here’s how you can calculate the number of fence panels required:
- Measure the width of each fence panel: Use a tape measure to determine the width of each fence panel. This measurement is typically provided by the manufacturer and should be consistent across all your panels.
- Calculate the total width: Multiply the width of a single panel by the number of panels required to cover the measured distance between the posts. This will give you the total width of all the panels combined.
- Account for gate openings: If you have gate openings in your fence, subtract the width of the gates from the total width calculated in the previous step. This will ensure that you don’t include unnecessary panels in your estimate.
- Round up: Round up the calculated number of panels to the nearest whole number. It’s always better to have a few extra panels on hand in case of any damages or future repairs.
By accurately calculating the number of fence panels required, you can avoid over or underestimating the amount of material needed for your project. This step will help you plan your budget effectively and ensure a seamless installation process. Once you have calculated the number of fence panels, you can move on to the next step: measuring for gate placement.
When measuring for a fence, always start by locating property lines and checking local regulations. Measure the perimeter accurately to ensure you purchase the correct amount of materials.
Step 6: Measuring for gate placement
When planning your fence installation, it’s important to consider the placement of gates to provide convenient access to your property. Measuring for gate placement will ensure that you have adequate space and a properly functioning entry point.
Here’s how you can measure for gate placement:
- Determine the gate width: Decide on the desired width of your gate. This will depend on the type of gate you choose and the space available for installation.
- Choose the gate location: Select the area where you want the gate to be placed. This is typically at the front entrance or any other convenient access point.
- Measure the gate opening: Measure the width between the nearest fence posts where the gate will be installed. Ensure that the measurement accounts for the space required for hinges and latches.
- Mark the gate location: Use stakes or marking flags to mark the exact positions where the gate posts will be installed. This will help you visualize the gate placement and ensure accuracy during installation.
- Consider gate swing: Determine the direction in which the gate will swing open. This will depend on the layout of your property and any obstructions that need to be considered.
By measuring for gate placement, you can ensure that you have a functional and well-positioned entry point in your fence. Planning for gates in advance will save you time and effort later on. Once you have measured for gate placement, you can move on to the next step: checking for level ground.
Step 7: Checking for level ground
Before proceeding with fence installation, it’s crucial to check if the ground is level along the fence line. This step is important to ensure a proper and sturdy installation, especially for fences that require posts to be set directly into the ground.
Here’s how you can check for level ground:
- Use a level: Take a reliable bubble level and place it horizontally against each fence post location. Check if the bubble in the level is centered between the two lines, indicating that the ground is level.
- Adjust uneven areas: If you encounter any uneven spots or slopes along the fence line, you may need to make adjustments. This can involve adding or removing soil to level the ground, or using retaining walls or terracing techniques for more significant variations.
- Consider grading: If the ground is consistently uneven or sloping, you may need to consider grading the area before installing the fence. This involves reshaping the land to create a more level surface for the fence installation.
- Ensure stability: Level ground is essential to ensure proper stability and support for the fence. It helps prevent sagging and leaning over time, ensuring a longer lifespan for your fence.
Checking for level ground before fence installation is crucial to avoid any potential issues down the line. By taking the time to level the ground or make necessary adjustments, you’ll set a sturdy foundation for your fence and ensure a more professional-looking result. Once you have checked for level ground, you can move on to the next step: accounting for slopes or inclines.
Step 8: Accounting for slopes or inclines
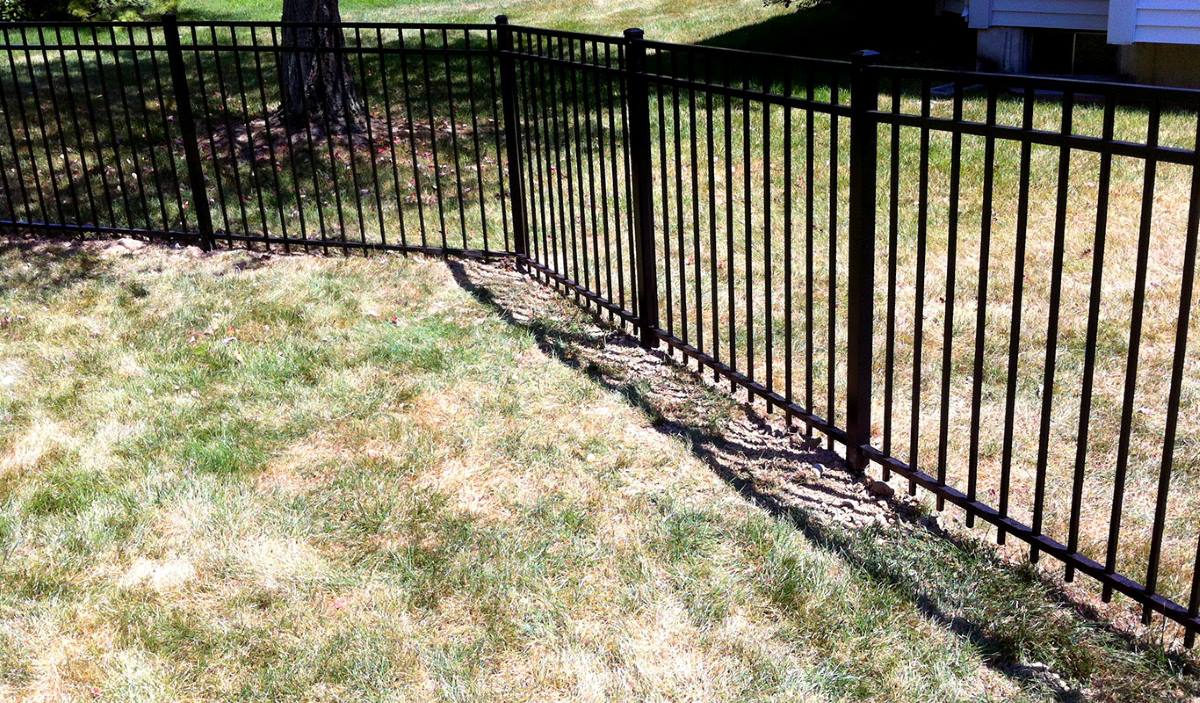
When measuring for a fence, it’s important to consider if the terrain has any slopes or inclines. Accounting for these variations in the landscape is necessary to ensure that your fence follows the natural flow of the land and maintains its stability.
Here’s how you can account for slopes or inclines:
- Identify the slope direction: Determine the direction and degree of the slope along the fence line. This will help you plan for any necessary adjustments in the fence installation process.
- Measure the slope: Use a measuring tape or a level to determine the height difference between the highest and lowest points along the slope. This will help you estimate how much the fence may need to be adjusted or stepped.
- Consider stepped installation: In cases of significant slopes, a stepped installation may be required. This involves installing shorter sections of fence that follow the contour of the slope, creating a visually pleasing and structurally sound result.
- Install retaining walls: For steep slopes, you may need to install retaining walls or other structural features to level the ground and provide stability for the fence.
- Ensure proper anchoring: When dealing with slopes, it’s crucial to ensure that the fence posts are securely anchored. This may involve digging deeper post holes on the higher side of the slope and using additional support, such as concrete footings.
By accounting for slopes or inclines in your fence measurement process, you’ll ensure that your fence is properly installed and adapts to the natural contours of the land. It also ensures the stability and longevity of your fence. Once you have accounted for slopes or inclines, you can move on to the final step: final measurements and adjustments.
Read more: How To Store Your Fridge Effectively
Step 9: Final measurements and adjustments
After taking all the necessary steps to measure for your fence, it’s time for the final measurements and adjustments. This step helps ensure that everything is accurate and allows you to make any final tweaks before beginning the installation process.
Here’s what you need to do for the final measurements and adjustments:
- Double-check all measurements: Go back and review all your measurements, including the fence line, post spacing, gate placement, and any adjustments for slopes or inclines. Verify that everything is accurate and aligned with your initial plans.
- Make any necessary adjustments: If you notice any discrepancies or inconsistencies, make the necessary adjustments. This can involve repositioning fence posts, revising gate placement, or re-measuring for panels.
- Consider additional factors: Take into account any additional factors that may affect your fence installation, such as existing structures, underground utilities, or local building codes. Ensure that your planned fence does not interfere with any of these factors.
- Revise your materials list: Based on the final measurements and adjustments, revise your materials list to ensure you have everything you need for the project. This includes the number of fence panels, gate hardware, posts, and any additional materials required.
By conducting final measurements and adjustments, you can be confident that your fence installation will be successful. This step allows you to catch any potential errors or oversights and make the necessary changes before beginning the actual work. Once you have completed the final measurements and adjustments, you’re ready to move forward with installing your fence.
Remember, taking the time to accurately measure and plan your fence installation will result in a more seamless process and a beautiful, functional, and long-lasting fence for your property.
Good luck with your project!
Conclusion
Measuring for a fence may seem like a daunting task, but with the right tools, guidance, and attention to detail, it can be a straightforward and rewarding process. By following the step-by-step guide outlined in this article, you can ensure that your fence installation is accurate, efficient, and successful.
From gathering the necessary tools to making final measurements and adjustments, each step plays a crucial role in ensuring that your fence fits properly, follows property boundaries, and withstands the test of time. Remember to take into account factors such as gate placement, slopes or inclines, and level ground to create a sturdy and visually appealing fence.
By measuring for a fence accurately, you can save time, money, and potential headaches down the line. Accurate measurements help you plan your budget more effectively, purchase the right materials, and prevent costly mistakes during installation.
Whether you’re looking to enhance privacy, security, or add an aesthetic element to your property, a well-measured fence will provide the desired functionality and improve the overall appearance of your outdoor space.
So, grab your tape measure, level, and other essential tools, and follow the steps outlined in this article to measure for your fence with confidence. By investing the time and effort into precise measurements, you’ll be rewarded with a professionally installed fence that will enhance your property for years to come.
Best of luck with your fence installation!
Frequently Asked Questions about How To Plan Your Fence Installation Project Effectively
Was this page helpful?
At Storables.com, we guarantee accurate and reliable information. Our content, validated by Expert Board Contributors, is crafted following stringent Editorial Policies. We're committed to providing you with well-researched, expert-backed insights for all your informational needs.


0 thoughts on “How To Plan Your Fence Installation Project Effectively”