
Articles
How To Repair Ceiling Fan
Modified: October 19, 2024
Learn how to repair a ceiling fan with these informative articles. Find step-by-step guides and expert tips to get your fan running smoothly again.
(Many of the links in this article redirect to a specific reviewed product. Your purchase of these products through affiliate links helps to generate commission for Storables.com, at no extra cost. Learn more)
Introduction
Ceiling fans are a popular and practical addition to any home. They provide comfort, improve air circulation, and can even help reduce energy costs. However, like any other electrical appliance, ceiling fans can encounter issues over time, such as wobbling, motor malfunctions, or noisy operation.
If you’re experiencing any problems with your ceiling fan, you may be wondering how to repair it. The good news is that with a little bit of time and effort, many common ceiling fan issues can be fixed without the need for professional help. In this article, we will guide you through the process of repairing a ceiling fan, step by step.
Before we start, it’s important to note that if you’re uncomfortable or unsure about working with electrical components, it’s best to hire a licensed electrician to handle the repair for you. Safety should always be the top priority when dealing with home electrical systems.
Now, let’s gather the necessary tools and materials before we begin the repair process.
Key Takeaways:
- DIY Ceiling Fan Repair
Save money and extend the life of your ceiling fan by following our step-by-step guide to safely troubleshoot and fix common issues. Prioritize safety and enjoy the satisfaction of a successful repair! - Safety First in Ceiling Fan Repair
From turning off the power to reattaching the fan blades, our comprehensive repair process emphasizes safety at every step. Exercise caution, use the right tools, and consider professional help if needed.
Read more: How A Ceiling Fan Works
Tools and Materials Required
Before you start repairing your ceiling fan, make sure you have the following tools and materials on hand:
- Step ladder or sturdy platform
- Screwdriver set (flathead and Phillips)
- Wire strippers
- Wire nuts
- Electrical tape
- Replacement parts (if necessary)
Depending on the specific issue with your ceiling fan, you may also need additional tools or materials. For example, if you’re replacing the fan motor, you’ll need a new motor that is compatible with your fan model.
It’s important to use the correct tools and materials for the job to ensure a successful repair. Using the wrong tools or low-quality materials can lead to further damage or safety hazards. If you’re unsure about the correct tools or materials needed for your specific repair, consult the manufacturer’s instructions or seek professional advice.
Now that you have the necessary tools and materials, let’s move on to the first step in the repair process: ensuring your safety.
Step 1: Safety Precautions
Before you start working on your ceiling fan, it’s crucial to prioritize safety. Follow these safety precautions to protect yourself and avoid any accidents:
- Turn off the power: Locate the circuit breaker or fuse that controls the electricity to the room where the ceiling fan is installed. Turn off the power to ensure that there is no electrical supply to the fan.
- Use a step ladder or sturdy platform: Ensure you have a stable and secure surface to stand on while working on the ceiling fan. A step ladder or sturdy platform is recommended for easy access to the fan.
- Wear protective gear: Safeguard yourself by wearing safety glasses, gloves, and appropriate footwear. This will protect you from any debris or accidental contact with sharp parts.
- Inspect the fan before starting: Before you begin any repair work, thoroughly examine the fan for any visible signs of damage or loose components. Make sure there are no exposed wires or loose screws.
By following these safety precautions, you minimize the risk of injury and ensure a secure workspace for the repair process.
Now that you’ve taken the necessary safety measures, we can proceed to step 2: turning off the power to the ceiling fan.
Step 2: Turn Off the Power
Before you begin working on the ceiling fan, it’s essential to ensure that there is no electrical supply to the fan. Follow these steps to turn off the power:
- Locate the circuit breaker or fuse box: Identify the circuit breaker or fuse that controls the electricity supply to the room where the ceiling fan is installed. This information can usually be found on the electrical panel.
- Switch off the circuit breaker or remove the fuse: Use the appropriate method to cut off the power. If you’re using a circuit breaker, flip the corresponding switch to the “off” position. If you have a fuse box, carefully remove the fuse that controls the fan’s circuit.
- Double-check the power supply: After turning off the power, use a non-contact voltage tester to confirm that there is no electrical current flowing to the fan. This handheld device can detect the presence of voltage without direct contact.
It’s crucial to ensure that the power supply is completely turned off before proceeding with any repairs. Working on a live electrical circuit can lead to serious injury or electric shock.
Now that the power is safely turned off, we can move on to the next step: removing the fan blades.
Step 3: Unscrew and Remove the Fan Blades
Now that the power is turned off, we can begin disassembling the ceiling fan. The next step is to unscrew and remove the fan blades. Follow these steps:
- Locate the screws: Look for the screws that secure the fan blades to the motor housing. These screws are usually located on the top side of each blade where it attaches to the fan motor.
- Use a screwdriver: Depending on the type of screw head, choose the appropriate screwdriver (Phillips or flathead) and start unscrewing each blade from the motor housing. Turn the screw counterclockwise to loosen and remove it.
- Gently remove the fan blades: Once the screws are removed, the blades should detach easily from the motor housing. Be careful not to bend or damage the blades, especially if they’re made of delicate materials like wood or plastic.
- Set the fan blades aside: Place the removed fan blades in a safe and secure location, away from the work area. You may want to use a soft cloth or padding to prevent any scratches or damage.
By unscrewing and removing the fan blades, you gain better access to the internal components of the ceiling fan. This step is often necessary when addressing issues such as motor repairs or replacing faulty components.
With the fan blades successfully removed, we can now proceed to step 4: removing the ceiling fan canopy.
Read more: How To Update A Ceiling Fan
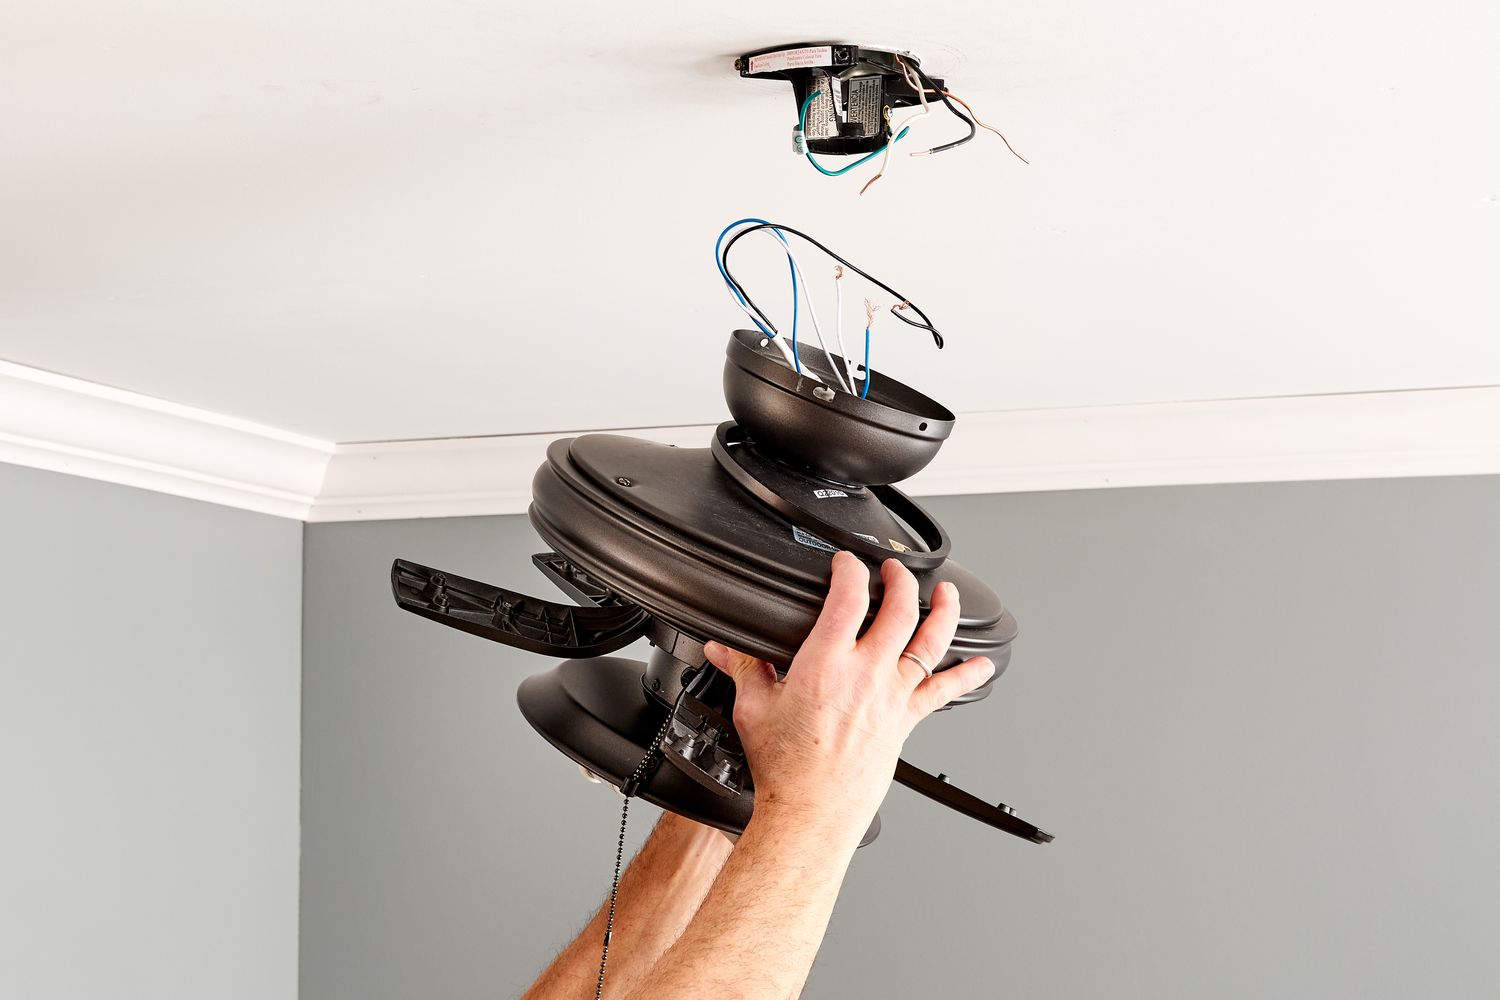
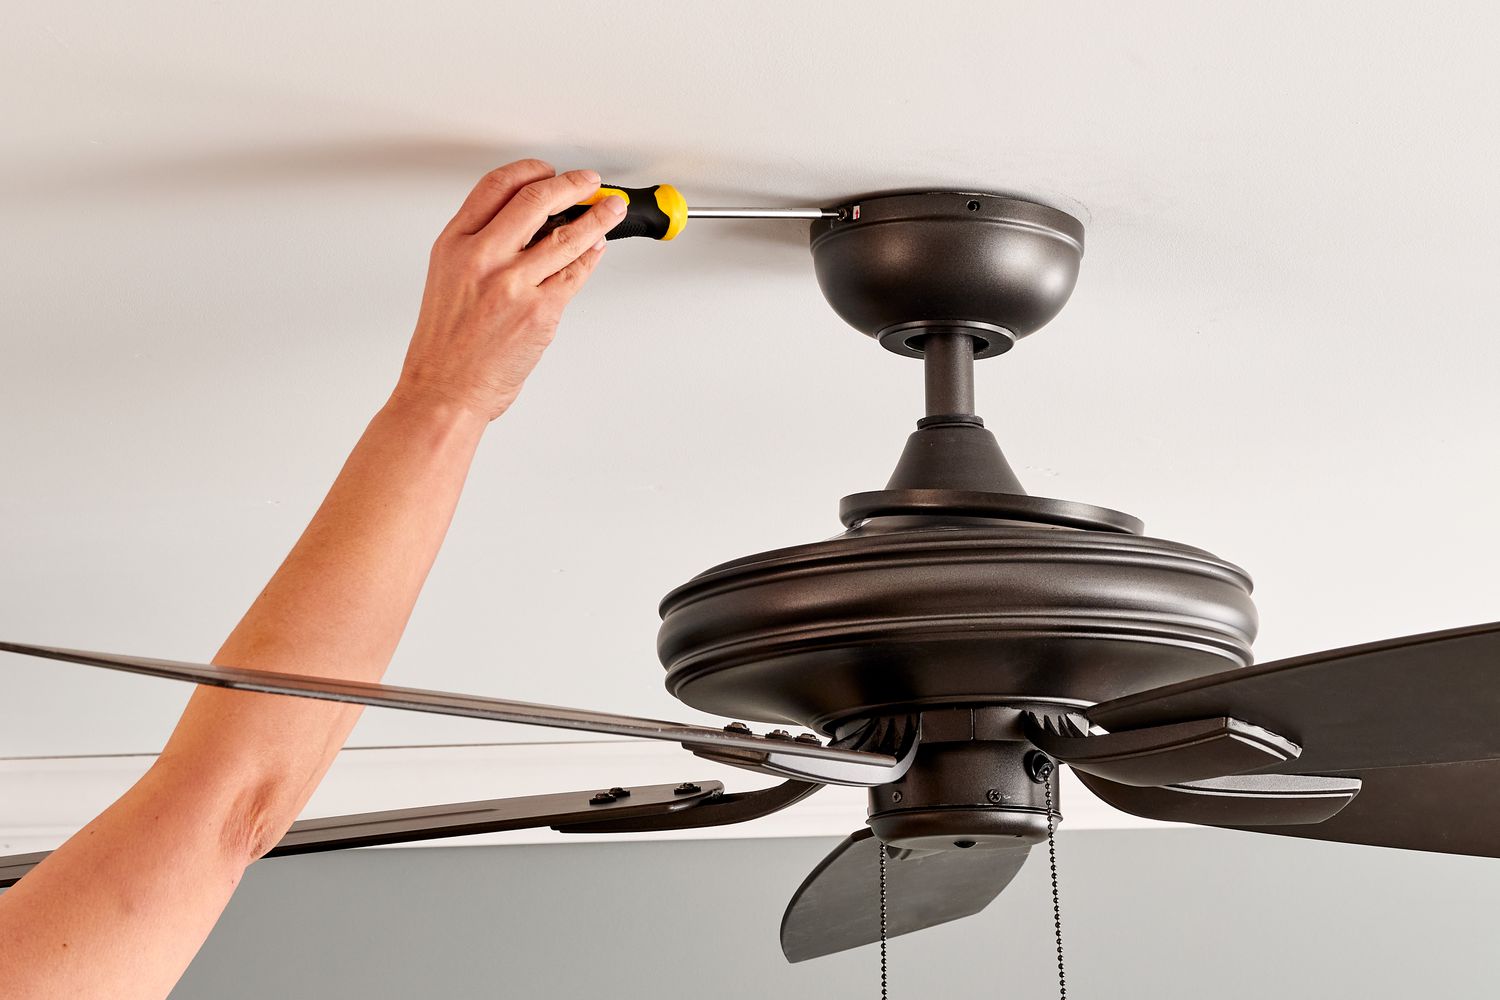
Step 4: Remove the Ceiling Fan Canopy
With the fan blades out of the way, the next step in repairing your ceiling fan is to remove the canopy. The canopy is the decorative cover that conceals the wiring and mounting bracket. Follow these steps to remove the ceiling fan canopy:
- Locate the mounting bracket cover: Look for a small decorative cover that hides the mounting bracket where the fan is attached to the ceiling. It is usually located near the ceiling and attached by screws or clips.
- Remove the mounting bracket cover: Use a screwdriver or your fingers (depending on the type of fasteners) to unscrew or release the mounting bracket cover. Set it aside in a safe place.
- Examine the canopy fasteners: Take a close look at how the canopy is attached to the mounting bracket. It may be connected using screws, clips, or other fasteners.
- Remove the canopy fasteners: Use the appropriate tools (such as a screwdriver or pliers) to loosen and remove the fasteners that secure the canopy to the mounting bracket. It’s important to be careful not to strip the screws or damage the fasteners during this process.
- Gently lower the canopy: Once the fasteners are removed, carefully lower the canopy down, making sure not to pull on any wires that may be connected to it.
Removing the ceiling fan canopy allows you to access the electrical connections and other internal components of the fan. This step is crucial for troubleshooting wiring issues or replacing faulty components.
With the canopy successfully removed, we can now move on to step 5: disconnecting the wiring.
Step 5: Disconnect the Wiring
Now that the canopy is out of the way, it’s time to disconnect the wiring of the ceiling fan. This step is necessary for performing repairs or replacing components safely. Follow these steps to disconnect the wiring:
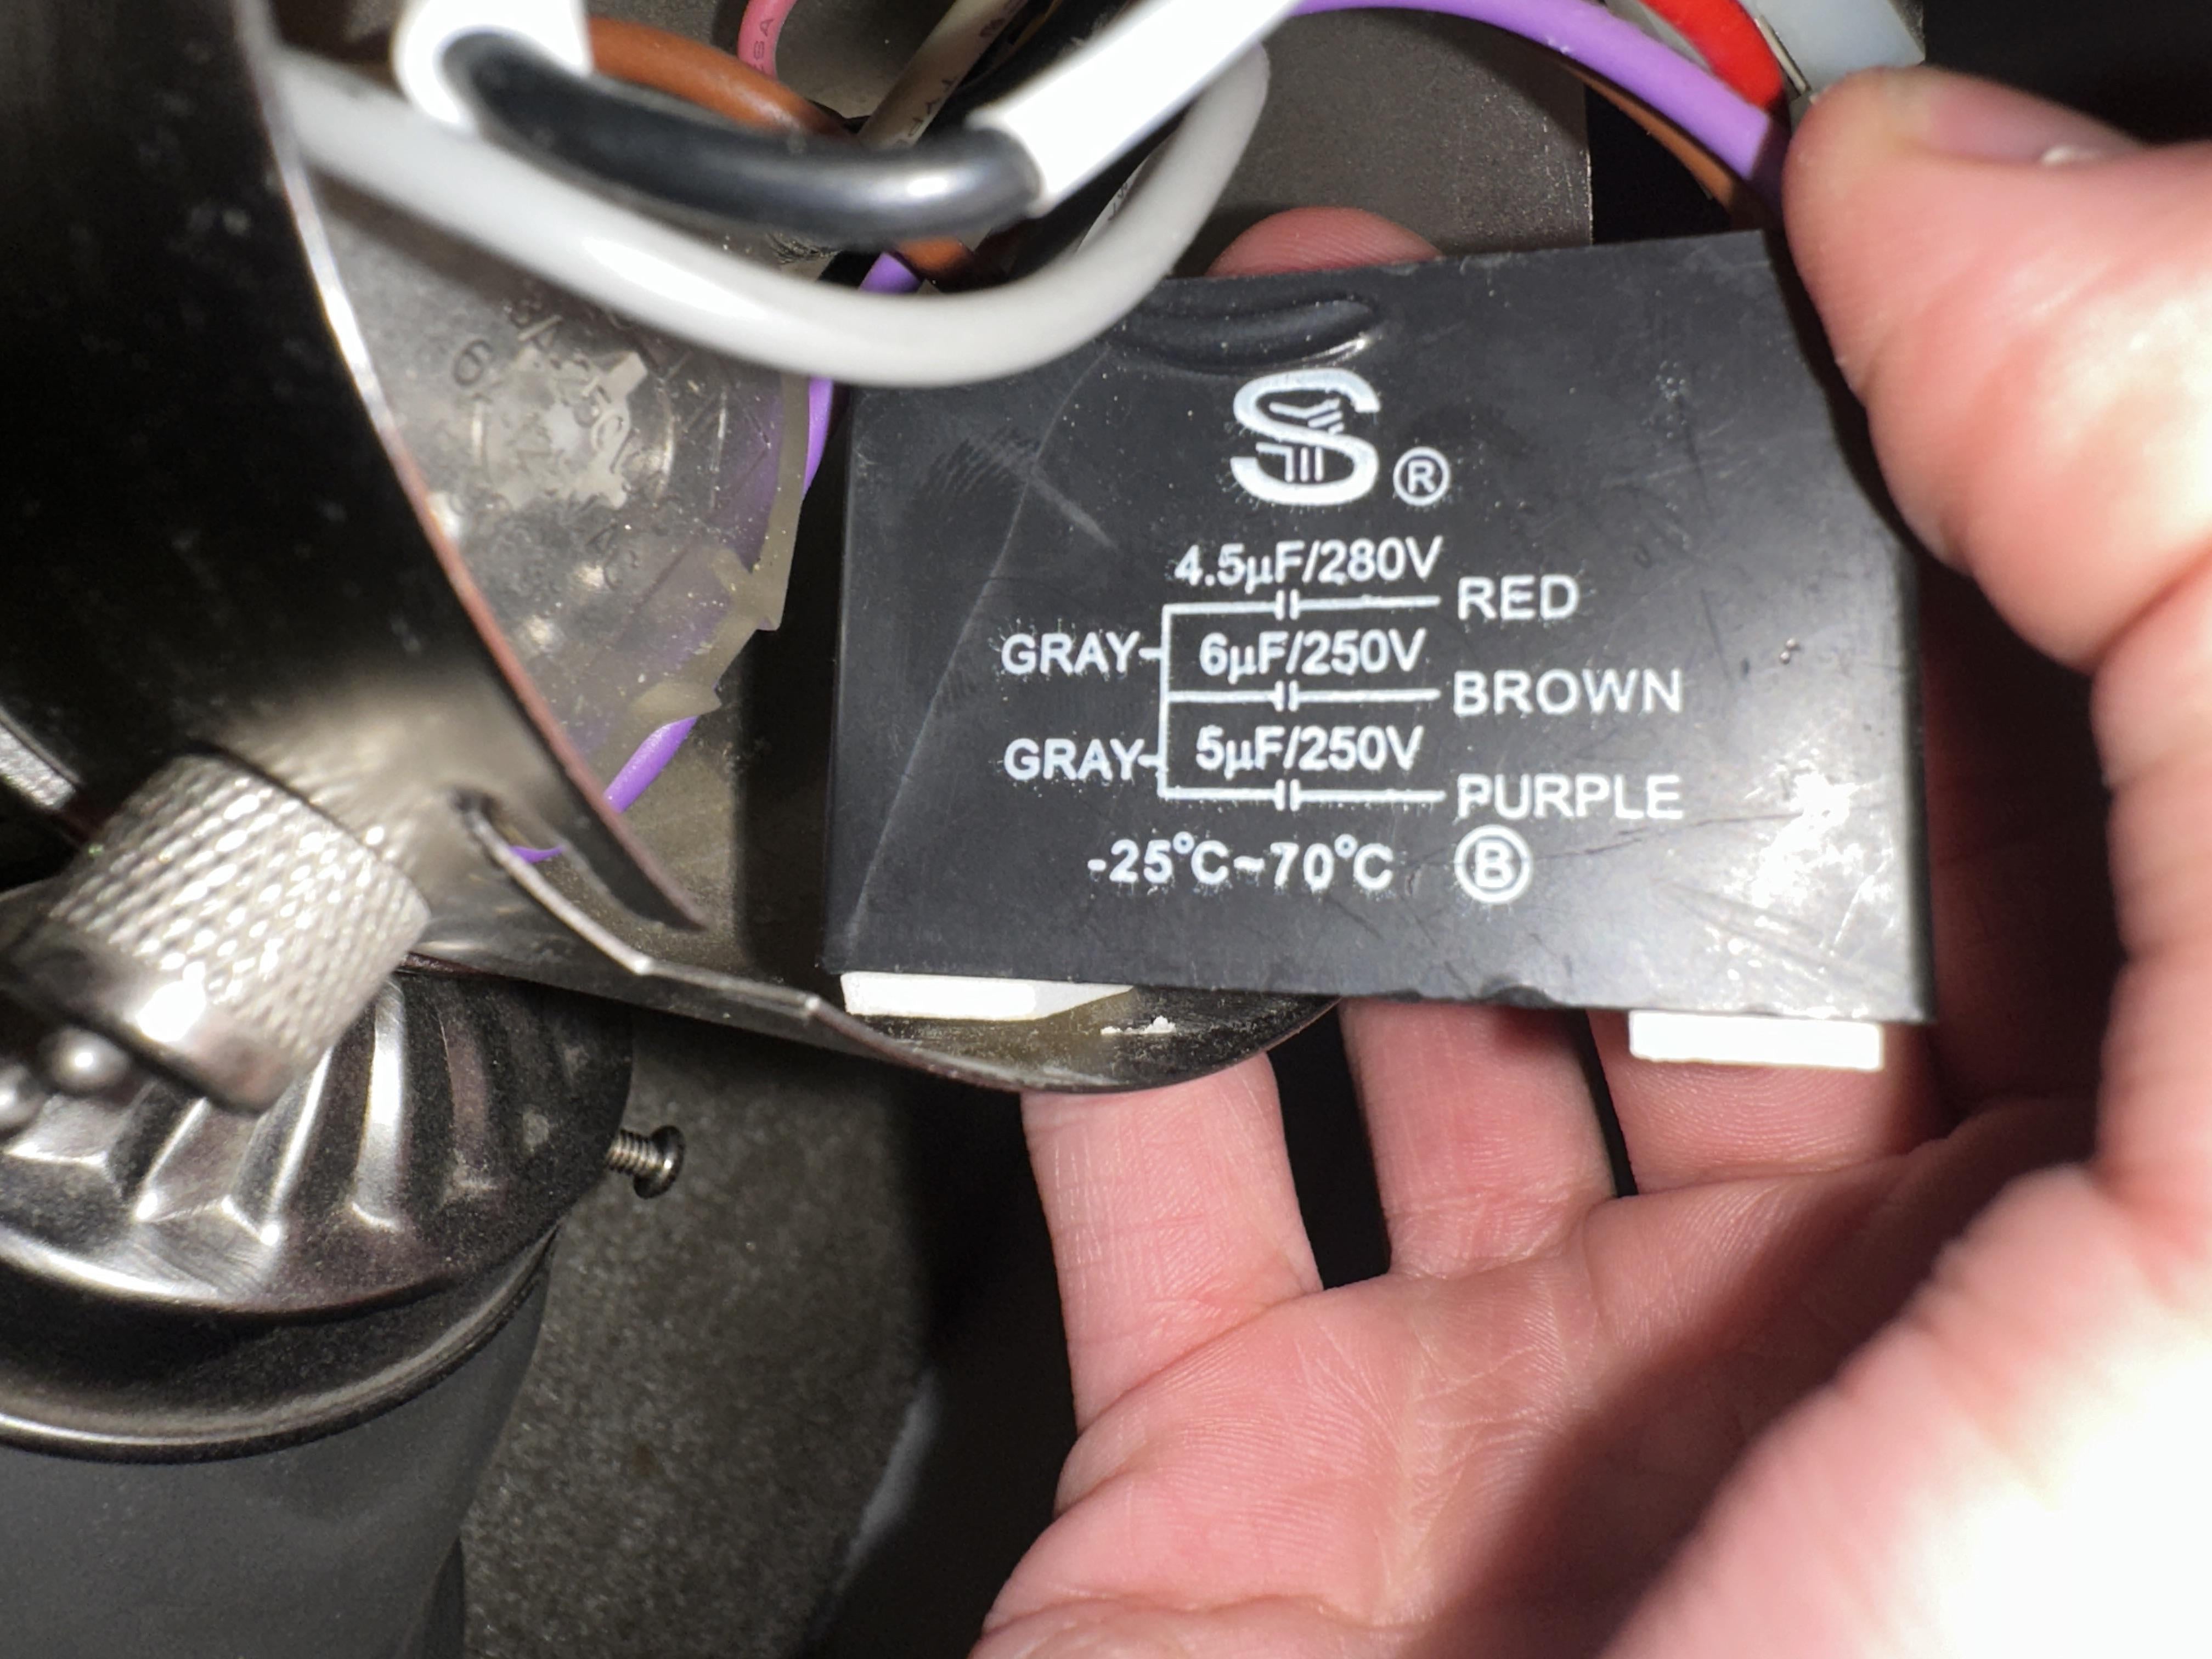
- Identify the electrical connections: Take a close look at the wiring inside the canopy. You will see several wires connected to the fan motor and possibly other electrical components.
- Take note of the wire connections: Before disconnecting any wires, it’s essential to understand the wiring configuration. Pay attention to which wires are connected to each other and make a note or take a picture, if necessary, for reference during reassembly.
- Disconnect the wires: Begin by removing any wire nuts or electrical tape that secure the wire connections. Carefully loosen the wire nuts by turning them counterclockwise or remove the tape by gently unwrapping it from the wires.
- Separate the wires: Once the wire connections are loosened, separate the wires from each other. Be gentle and avoid pulling on the wires excessively, as this can damage the insulation or connectors.
- Secure the wires: To prevent any accidental contact or short circuits, use wire nuts or electrical tape to cover the exposed wire ends. If any wires appear frayed or damaged, trim them back and strip a small portion of insulation for a clean connection.
By disconnecting the wiring, you ensure a safe working environment and create space to address any electrical issues or repairs that may be necessary. Be sure to handle the wires with care and safeguard against any potential electrical hazards.
Now that the wiring is disconnected, we can move on to step 6: removing the old fan motor.
Step 6: Remove the Old Fan Motor
With the wiring disconnected, it’s time to remove the old fan motor from the ceiling fan assembly. Follow these steps to remove the old motor:
- Identify the motor housing: Locate the motor housing, which is the part of the fan that contains the motor and other internal components. It is usually attached to the mounting bracket.
- Inspect the motor housing: Take a moment to examine the motor housing for any screws, clips, or other fasteners that secure it to the mounting bracket. These may vary depending on the fan model.
- Remove the motor housing fasteners: Use the appropriate tools, such as a screwdriver or pliers, to loosen and remove the fasteners that secure the motor housing to the mounting bracket. Keep track of these fasteners for reassembly.
- Detach the motor housing: Once the fasteners are removed, carefully detach the motor housing from the mounting bracket. Place it in a safe location, as you may need to refer back to it later for identification or troubleshooting.
- Inspect the fan motor: Take a close look at the old fan motor to determine if it can be repaired or if it needs to be replaced entirely. Look for any visible signs of damage, such as burnt wires or worn-out components.
Removing the old fan motor allows you to address any motor-related issues and replace it if necessary. If you’re unsure about the condition of the motor or how to proceed, consult the manufacturer’s instructions or seek advice from a professional.
Now that the old fan motor is removed, we can move on to step 7: installing the new fan motor.
Before attempting to repair a ceiling fan, always make sure to turn off the power at the circuit breaker to avoid any electrical accidents.
Step 7: Install the New Fan Motor
With the old fan motor removed, it’s time to install the new motor in your ceiling fan. Follow these steps to install the new fan motor:
- Ensure compatibility: Before installing the new motor, make sure it is compatible with your specific fan model. Check the manufacturer’s instructions or consult a professional if you’re unsure.
- Position the new motor: Place the new motor into the motor housing, aligning it with the mounting bracket. Be careful not to force the motor or damage any wires during this process.
- Secure the motor: Once the motor is in position, use the fasteners that were removed earlier to secure it to the mounting bracket. Tighten the screws or tighten the clips to ensure a secure fit.
- Connect the wiring: Reconnect the wiring according to the notes or pictures taken during the disconnection process. Match the wires by color or follow the manufacturer’s instructions for proper wiring connections.
- Secure the wires: Use wire nuts or electrical tape to secure the wire connections, covering the exposed ends. Make sure the wire nuts are tightened securely to ensure a safe and reliable connection.
Installing the new fan motor allows for improved functionality and performance of your ceiling fan. Take care during the installation process to avoid damaging any components and ensure a smooth operation.
Now that the new fan motor is installed, we can move on to step 8: reconnecting the wiring.
Read more: How To Dispose Ceiling Fans
Step 8: Reconnect the Wiring
With the new fan motor installed, it’s time to reconnect the wiring and restore the electrical connections. Follow these steps to reconnect the wiring:
- Match the wire connections: Refer to the notes or pictures taken during the disconnection process to ensure the proper matching of wire connections. Match the wires by color or follow the manufacturer’s instructions for the specific fan model.
- Strip the wire ends: If necessary, strip a small portion of insulation from the wire ends to create clean contact surfaces. Use wire strippers to strip the insulation carefully, making sure not to damage the underlying wire.
- Connect the wires: Twist together the matching wires, ensuring a secure and solid connection. If needed, use wire nuts to cover the twisted wire ends. Twist the wire nuts clockwise until they are tight and fully secure.
- Insulate the connections: Once the wire connections are secure, insulate them with electrical tape. Wrap the tape tightly around the exposed wire nuts to protect the connections and ensure they are not accidentally disturbed.
- Tuck in the wiring: Neatly tuck the connected and insulated wires into the canopy or motor housing. Ensure that the wires are not pinched or strained, as this can lead to electrical hazards or damage to the wiring.
Reconnecting the wiring is a crucial step in ensuring the safe and proper functioning of your ceiling fan. Take your time to make secure connections and properly insulate the wires to avoid any electrical issues down the line.
Now that the wiring is reconnected, we can move on to step 9: reinstalling the ceiling fan canopy.
Step 9: Reinstall the Ceiling Fan Canopy
With the wiring reconnected, we can now move on to step 9: reinstalling the ceiling fan canopy. The canopy is the decorative cover that conceals the wiring and mounting bracket. Follow these steps to reinstall the canopy:
- Position the canopy: Place the canopy over the motor housing, aligning it with the mounting bracket. Make sure it fits snugly and evenly against the ceiling.
- Secure the canopy: Use the fasteners that were removed earlier to secure the canopy to the mounting bracket. Depending on your fan model, this may involve screwing it in place or attaching it with clips.
- Tighten the fasteners: Ensure that the screws or clips used to secure the canopy are tightened securely. However, be careful not to overtighten and risk damaging the mounting bracket or canopy.
- Inspect the canopy: Once the canopy is secured, double-check for any loose or misaligned parts. Make sure the canopy is flush against the ceiling, without any gaps or wobbling.
Reinstalling the ceiling fan canopy completes the visual appearance of your fan and helps protect the internal components. Ensure that the canopy is properly secured, as any instability may lead to noise or imbalance during operation.
With the canopy securely reinstalled, we can move on to step 10: reattaching the fan blades.
Step 10: Reattach the Fan Blades
With the canopy in place, it’s time to reattach the fan blades to your ceiling fan. Follow these steps to properly reattach the fan blades:
- Inspect the fan blades: Before reattaching the blades, check each one for any damage or signs of wear. Ensure that they are clean and free from any debris or dust.
- Match the blade alignment: Align each fan blade with the corresponding blade arm on the motor housing. Pay attention to the orientation and make sure they are all facing the correct direction.
- Secure the fan blades: Once the blades are aligned, use the screws that were removed earlier to attach each blade to its respective blade arm. Insert the screws and tighten them clockwise until they are snug.
- Tighten all screws: After attaching all the fan blades, go back and double-check each screw. Make sure they are tightened securely, but be careful not to overtighten and damage the blades or blade arms.
Reattaching the fan blades completes the physical assembly of your ceiling fan. Ensure that each blade is secure and properly aligned to ensure smooth and balanced operation.
Now that the fan blades are reattached, we can move on to step 11: turning on the power to your ceiling fan.
Step 11: Turn on the Power
Now that all the components of your ceiling fan have been reassembled, it’s time to turn on the power and test the fan. Follow these steps to safely turn on the power:
- Locate the circuit breaker or fuse box: Return to the circuit breaker or fuse box where the power to the ceiling fan was turned off.
- Switch on the circuit breaker or replace the fuse: Use the appropriate method to restore power to the room where the ceiling fan is installed. Flip the circuit breaker to the “on” position or replace the fuse that controls the fan’s circuit.
- Look for indications of power: Once the power is restored, observe the fan for any signs of power, such as lights illuminating or the fan motor humming. These indications will let you know that the power has been successfully restored.
It’s important to verify that the power to the ceiling fan has been restored before proceeding to the next step. Observing the fan for signs of power ensures that it is receiving electricity and prepares you for the final step of testing the fan’s operation.
Now that the power is turned on, we can move on to step 12: testing the ceiling fan to ensure proper functionality.
Read more: How To Change A Ceiling Fan
Step 12: Test the Ceiling Fan
With the power restored, it’s time to test the functionality of your ceiling fan. Follow these steps to ensure that the fan is operating properly:
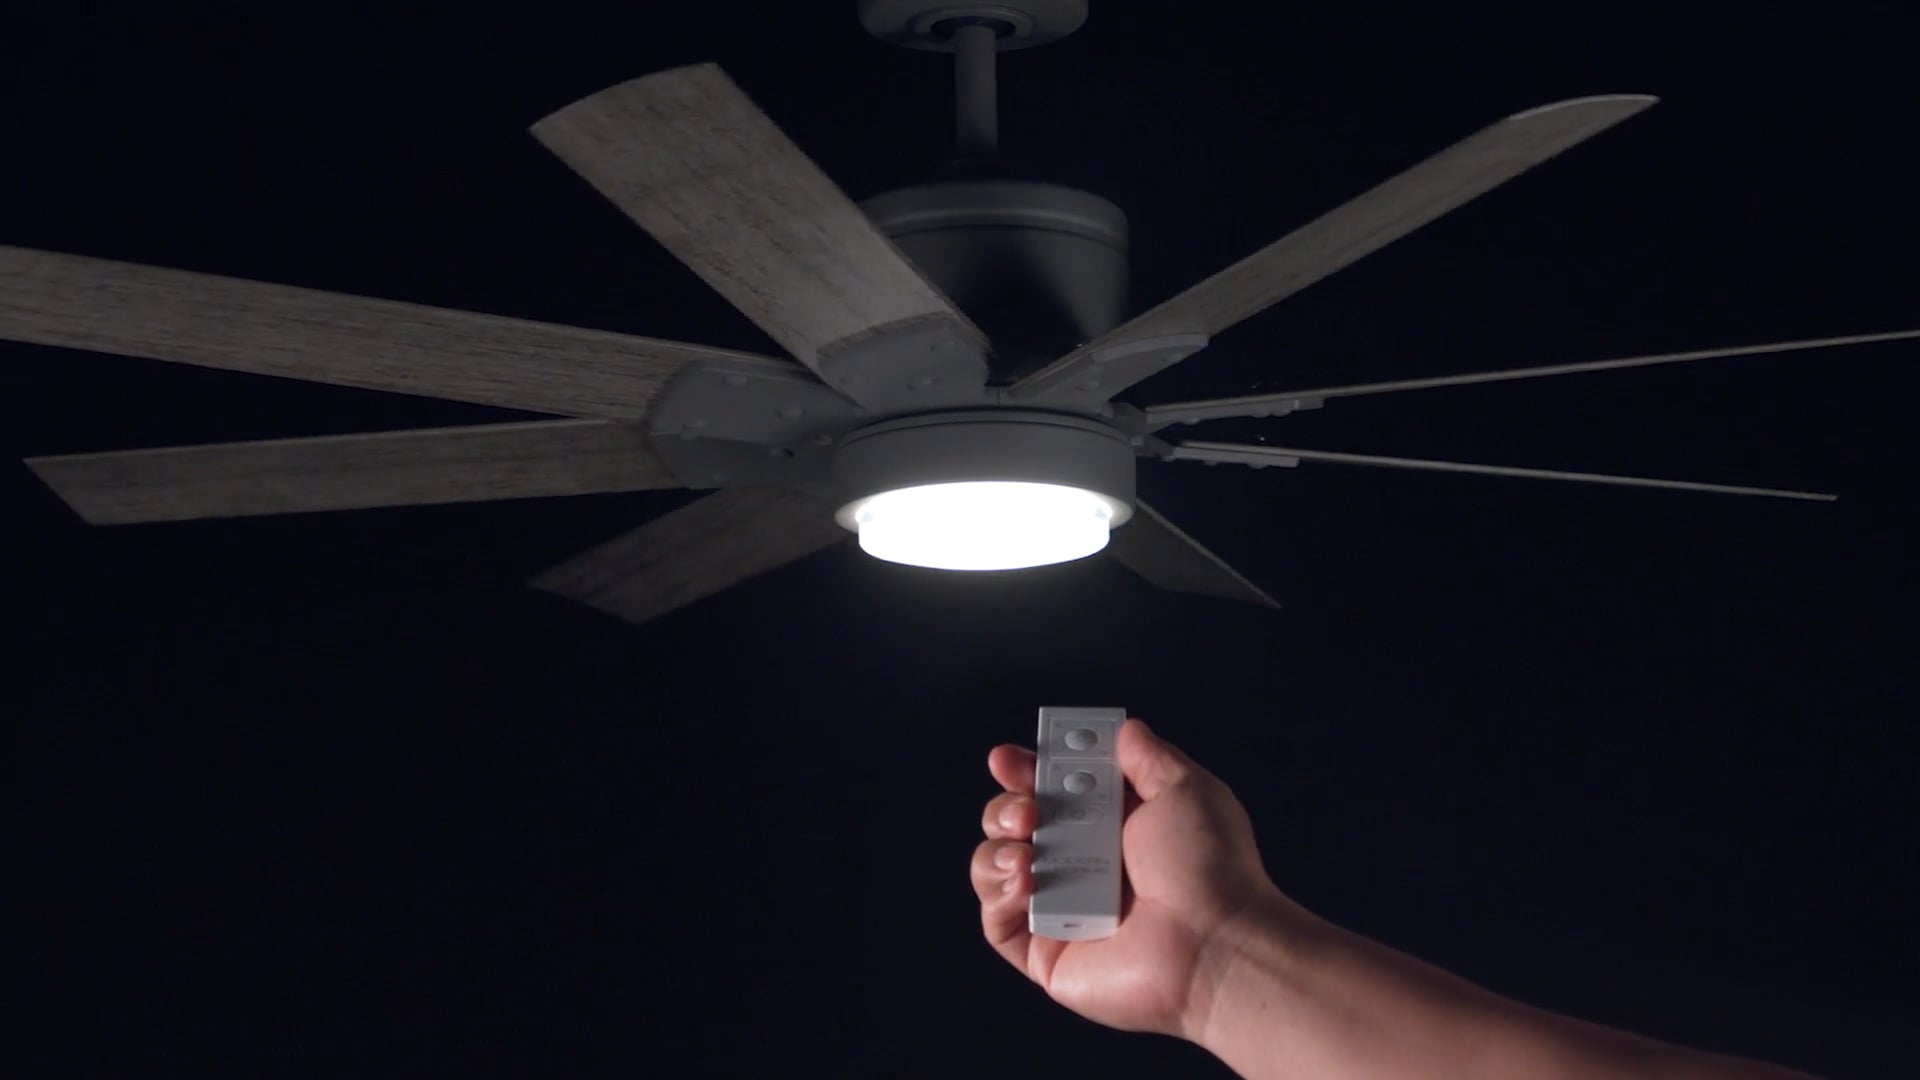
- Flip the fan switch: Locate the fan switch on the wall or remote control and turn it on. This will activate the fan’s motor and allow it to start spinning.
- Observe the fan blades: Watch the fan blades as they rotate to ensure they are moving smoothly and evenly without any wobbling or dragging against the motor housing.
- Check the fan speed settings: If your fan has multiple speed settings, test each one to ensure that the fan responds correctly and adjusts its speed accordingly.
- Listen for any unusual noises: While the fan is running, listen for any abnormal or loud noises that could indicate a mechanical issue. A properly functioning fan should operate quietly.
- Verify the direction of airflow: If your ceiling fan has a reversible motor, check if the airflow direction can be changed. Make sure the fan is blowing air downward during the summer months and upward during the winter months for optimal efficiency.
By testing the ceiling fan, you can confirm that the repairs and reassembly were successful. Pay close attention to any potential issues such as wobbling, noise, or incorrect airflow direction, as these may require further adjustments or troubleshooting.
If you encounter any problems during the testing phase or notice any issues with the fan’s performance, it may be necessary to consult the manufacturer’s instructions or seek assistance from a professional electrician or ceiling fan technician.
Congratulations! You have successfully repaired your ceiling fan. Enjoy the comfort and circulation it provides to your living space.
Now that you have tested the ceiling fan, we can conclude the repair process.
Conclusion
Repairing a ceiling fan may seem like a daunting task, but with the right tools, materials, and step-by-step instructions, it can be accomplished successfully. Taking the time to troubleshoot and fix common issues can save you money and prolong the life of your ceiling fan.
In this article, we walked you through the process of repairing your ceiling fan from start to finish. We covered essential steps that included safety precautions, turning off the power, unscrewing and removing the fan blades, removing the ceiling fan canopy, disconnecting the wiring, removing the old fan motor, installing the new fan motor, reconnecting the wiring, reinstalling the ceiling fan canopy, reattaching the fan blades, turning on the power, testing the ceiling fan, and concluding the repair process.
Throughout the process, we emphasized the importance of safety, suggesting the appropriate tools and materials, and reminding you to always consult professional help if needed. Remember, electrical work can be hazardous, and it’s crucial to prioritize safety at all times.
By following the step-by-step instructions provided in this article and exercising caution, you should be able to successfully repair your ceiling fan. However, if you’re uncomfortable or unsure about any step involved, it is always best to seek the assistance of a licensed electrician or ceiling fan technician.
We hope that this guide has been informative and helpful in your ceiling fan repair journey. Enjoy the improved comfort and air circulation provided by your rejuvenated ceiling fan!
Frequently Asked Questions about How To Repair Ceiling Fan
Was this page helpful?
At Storables.com, we guarantee accurate and reliable information. Our content, validated by Expert Board Contributors, is crafted following stringent Editorial Policies. We're committed to providing you with well-researched, expert-backed insights for all your informational needs.


0 thoughts on “How To Repair Ceiling Fan”