
Articles
How A Ceiling Fan Works
Modified: October 18, 2024
Learn how a ceiling fan works and discover useful articles on the topic to enhance your knowledge and understanding.
(Many of the links in this article redirect to a specific reviewed product. Your purchase of these products through affiliate links helps to generate commission for Storables.com, at no extra cost. Learn more)
Introduction
A ceiling fan is a popular and practical addition to any home, providing both comfort and energy efficiency. It circulates air, creating a gentle breeze that can cool you down in hot weather and help distribute heat evenly during colder months. But have you ever wondered how a ceiling fan actually works? In this article, we will explore the inner workings of a ceiling fan and understand the key components that make it function.
Every ceiling fan consists of several essential parts working together seamlessly to provide optimal performance. Understanding these components will give you a deeper appreciation for the engineering behind this everyday household item.
So, let’s dive in and explore the various parts that comprise a ceiling fan.
Key Takeaways:
- Understanding the inner workings of a ceiling fan, from the motor to the blades, allows for a deeper appreciation of its engineering and the comfort it brings through airflow and cooling effects.
- Ceiling fans provide versatile features such as speed and direction control, offering customizable airflow for different seasons. They are practical, energy-efficient, and add aesthetic value to any room.
Read more: How Do Ceiling Fans Work
Parts of a Ceiling Fan
A ceiling fan is composed of multiple components that work in harmony to create airflow. Let’s take a closer look at each part:
- Motor: The motor is the heart of the ceiling fan. It is typically located inside the fan housing and powers the rotation of the blades. Ceiling fan motors are designed to be durable and energy-efficient, with different motor types offering different speeds and power capabilities.
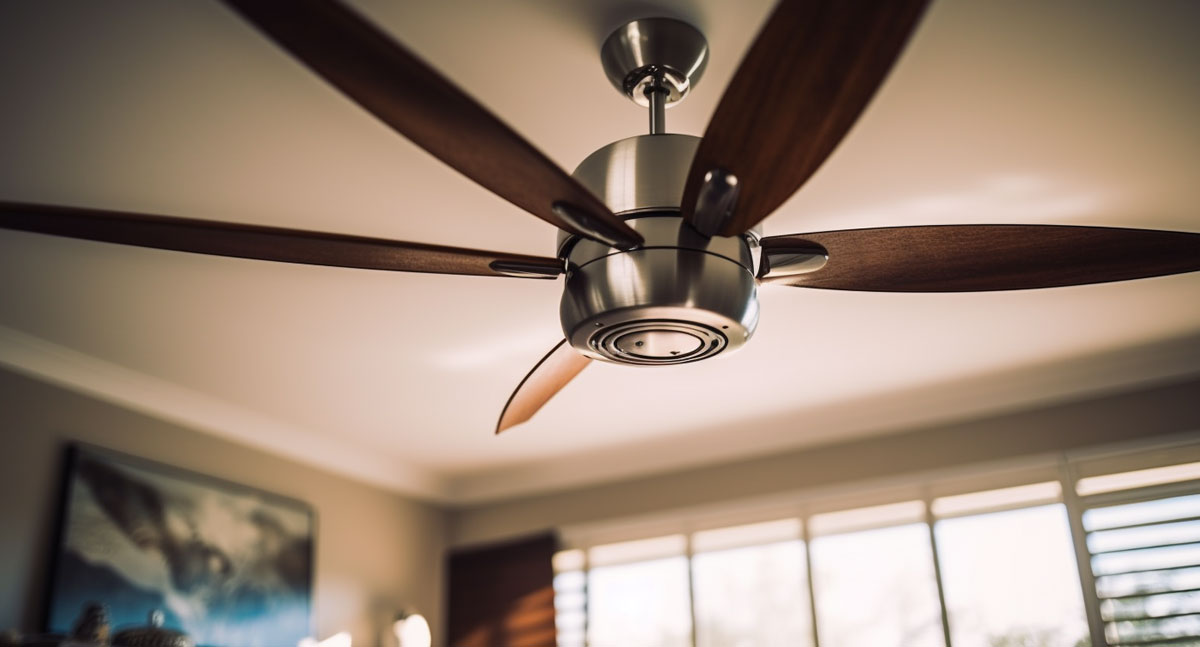
- Blades: The blades are the visible part of the ceiling fan and are responsible for moving the air. They are usually made of wood, plastic, or metal and come in various shapes and sizes. The angle and pitch of the blades determine the airflow and efficiency of the fan.
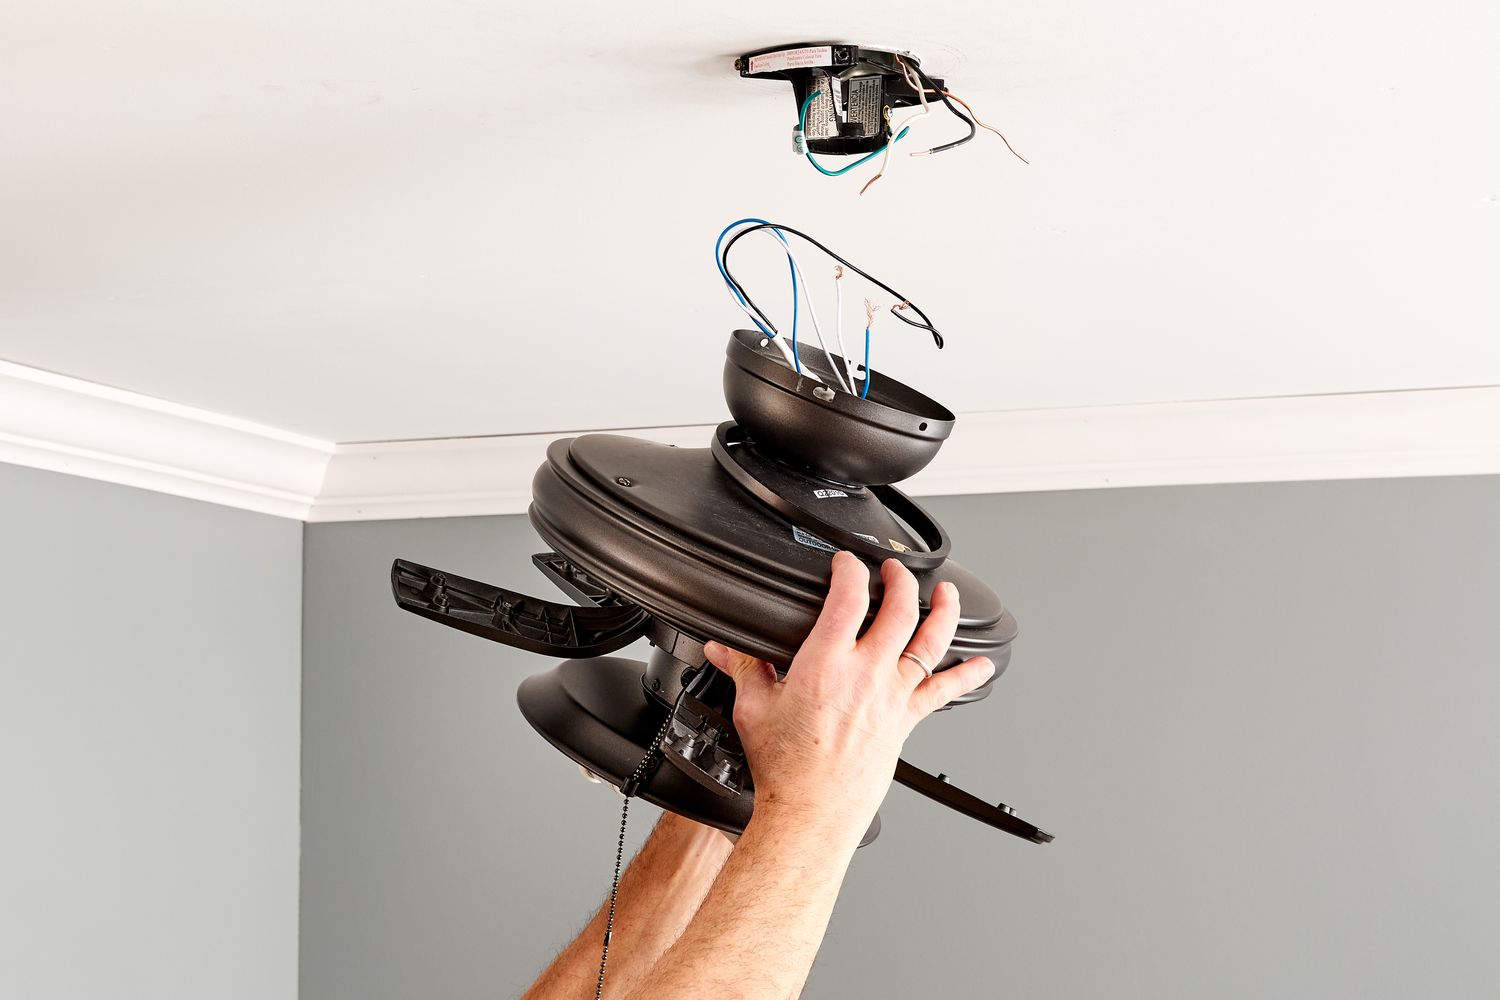
- Downrod: The downrod is a metal rod that connects the motor housing to the mounting bracket. It allows for proper distance between the ceiling and the fan, ensuring optimal airflow and clearance.
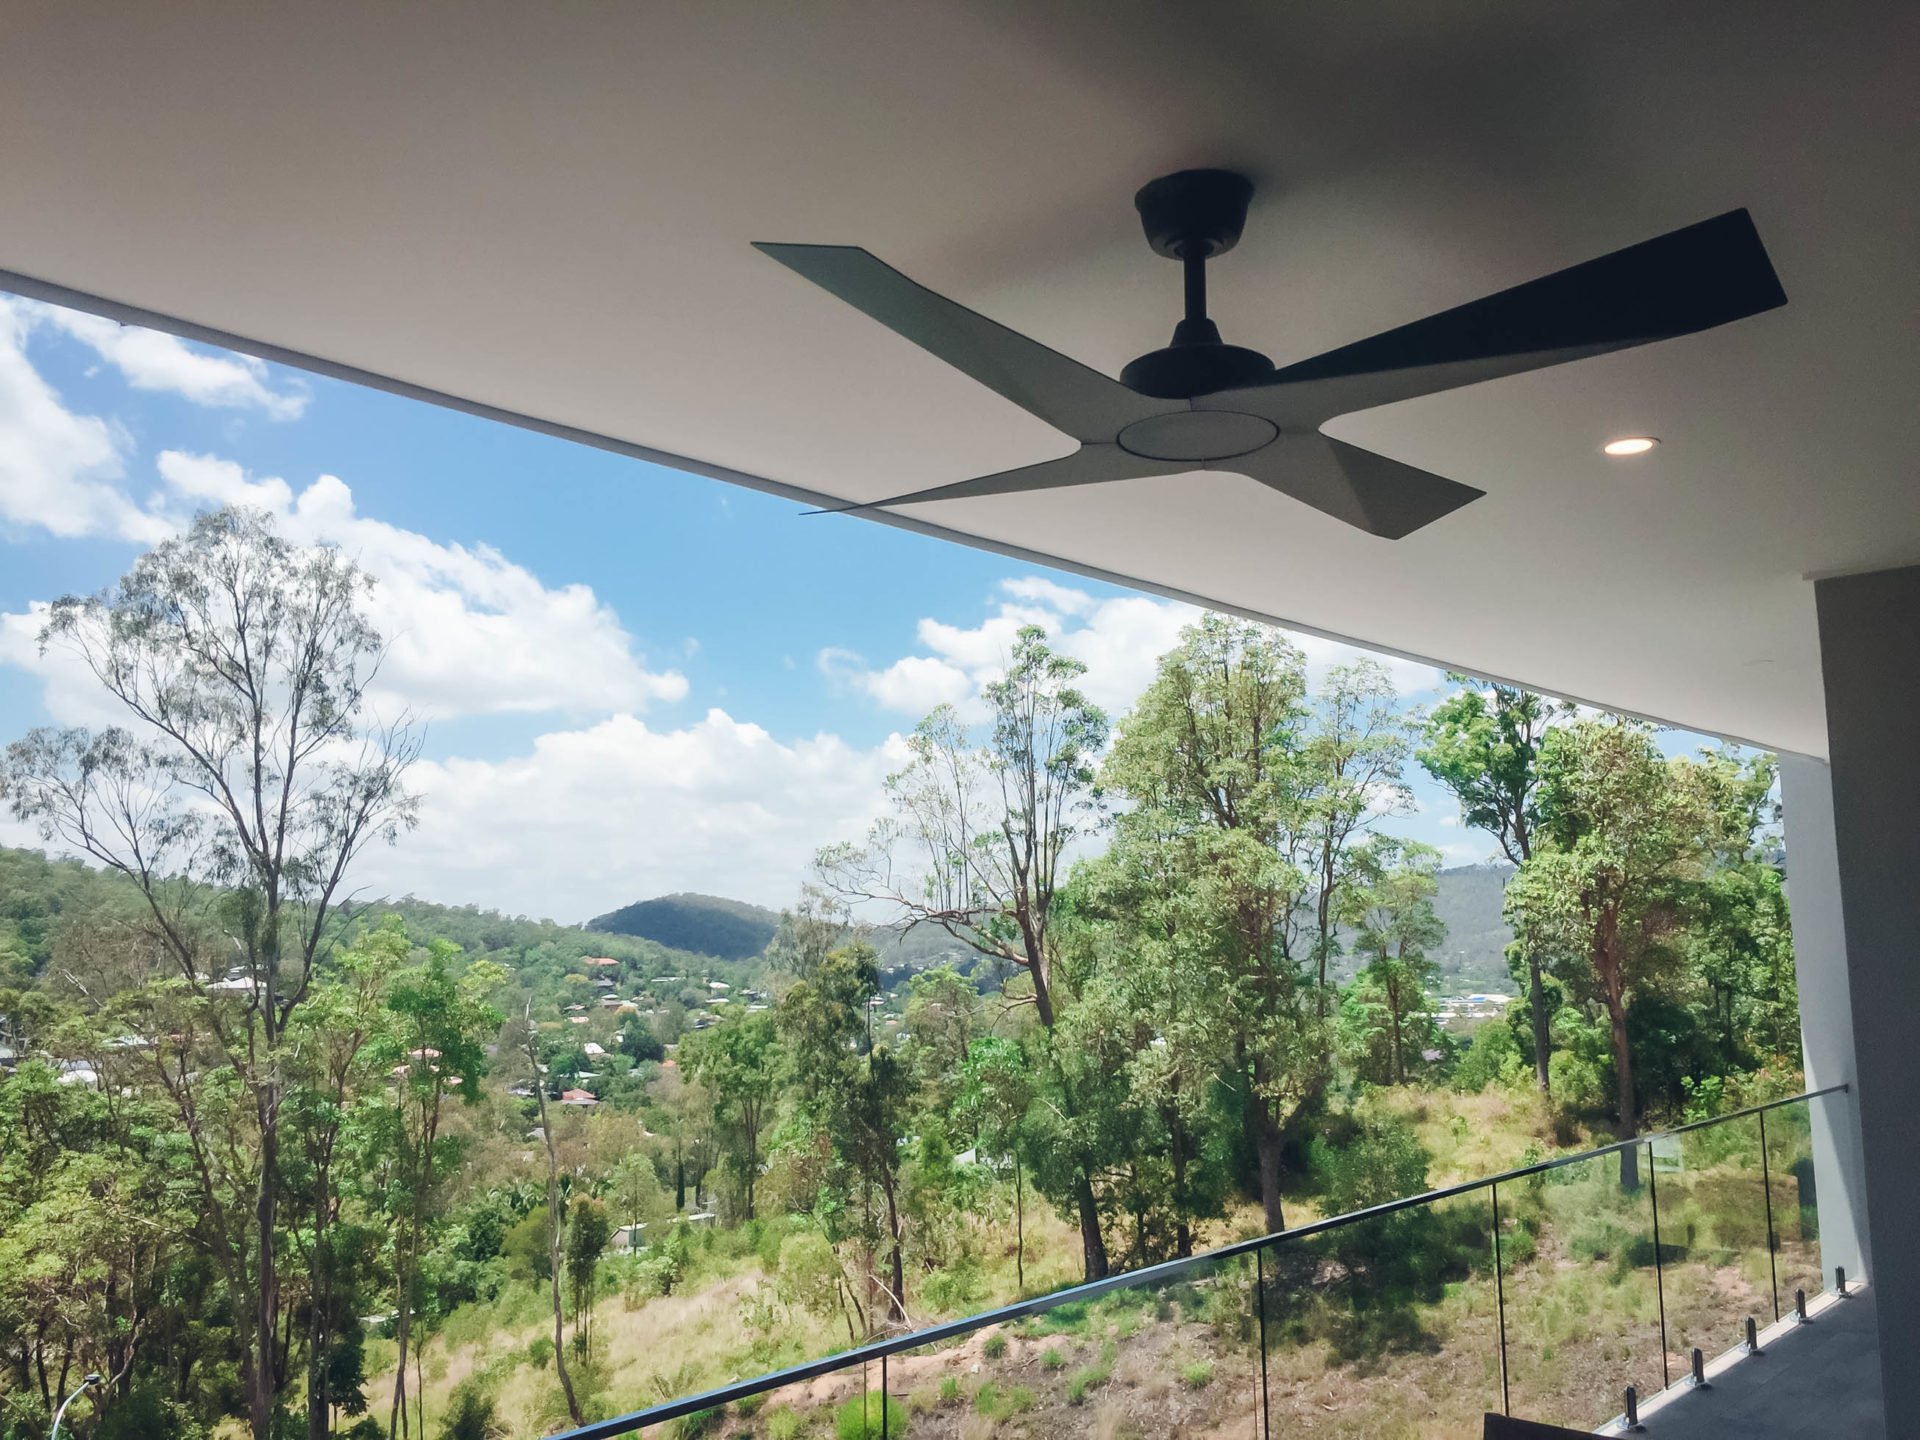
- Mounting System: The mounting system attaches the fan to the ceiling. There are different types of mounts available, including standard mounts, angled mounts for sloped ceilings, and low-profile mounts for ceilings with minimal clearance.
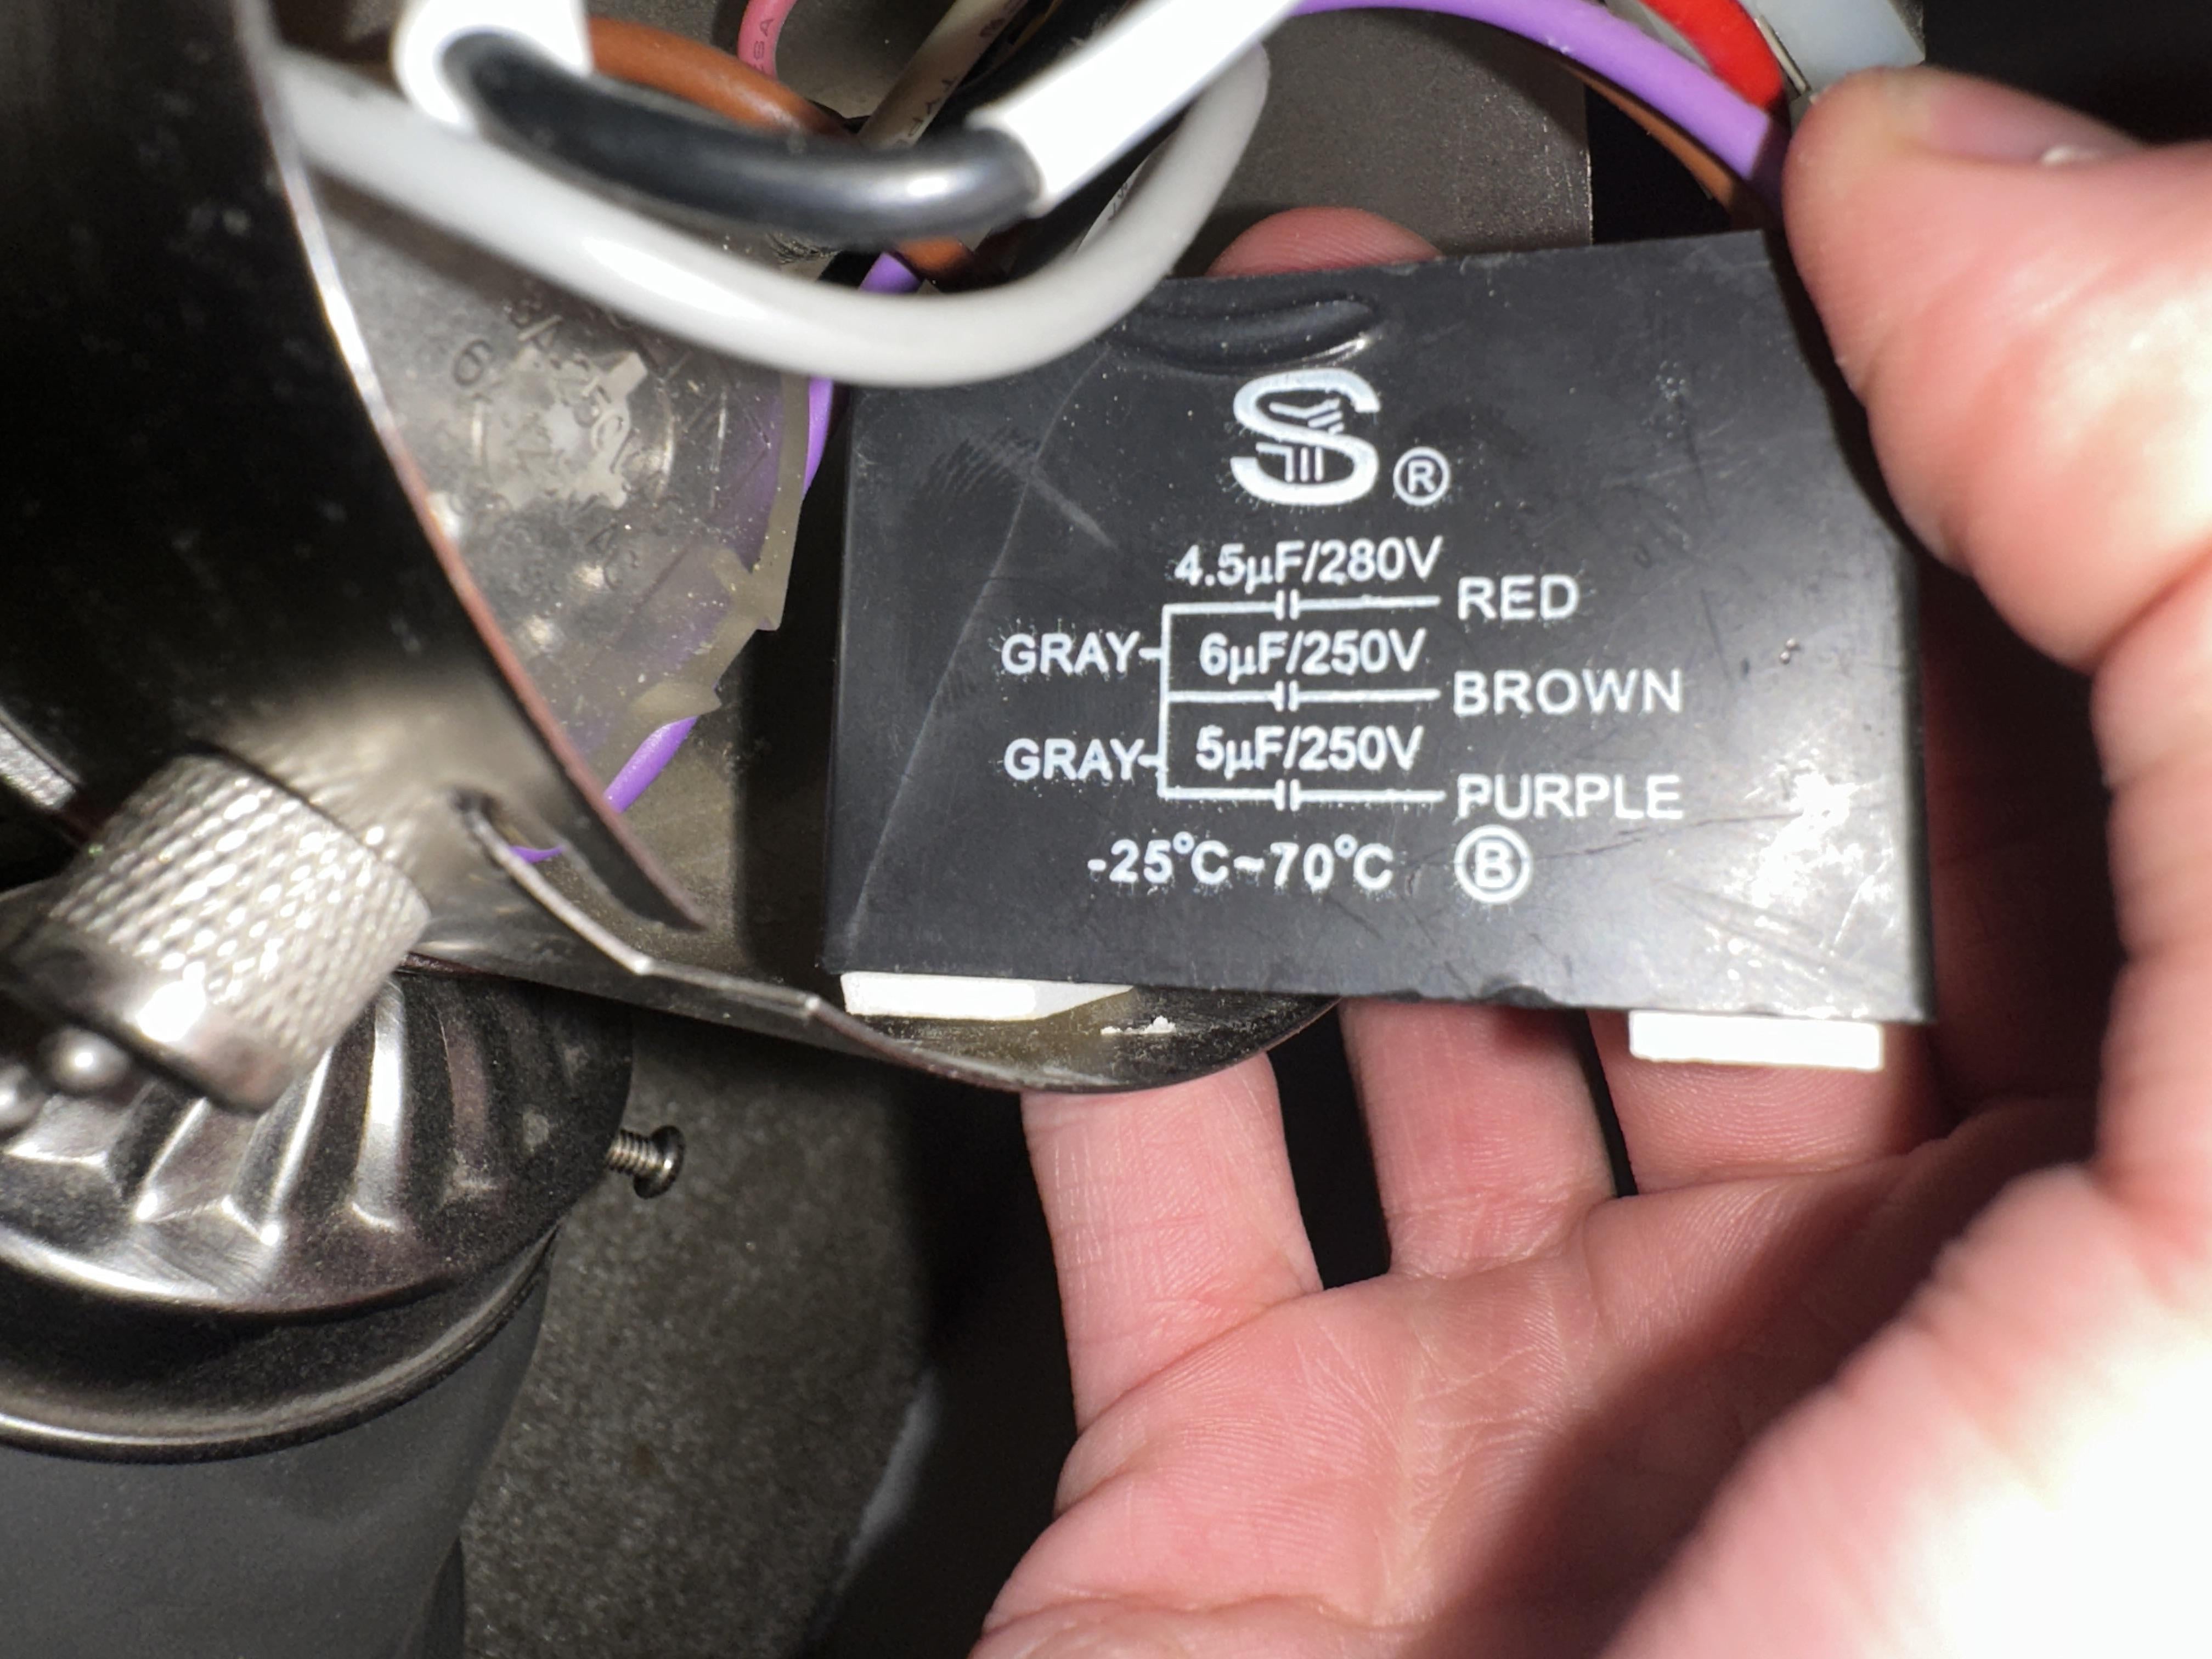
- Capacitor: The capacitor is an electronic component that regulates the speed of the motor. It stores an electrical charge and controls the amount of power delivered to the motor, allowing for multiple speed settings.
- Pull Chain: The pull chain is a common feature found on most ceiling fans. It allows users to control the fan’s speed and turn it on or off by simply pulling the appropriate chain.
- Switches and Controls: Some ceiling fans also come with switches or controls that provide additional features, such as reversing the fan’s direction, adjusting the speed electronically, or controlling the fan and light independently.
- Wiring: The internal wiring of a ceiling fan connects all the electrical components, allowing for the flow of electricity to power the motor. It is important to ensure proper wiring during installation to ensure the fan operates safely and efficiently.
With a better understanding of the various parts of a ceiling fan, let’s explore how these components work together to create the cooling effect and provide comfort in our living spaces.
Motor
The motor is the powerhouse of the ceiling fan, responsible for driving the rotation of the blades. Most ceiling fans use an electric motor, which is designed to be energy-efficient and reliable. The motor is housed within the fan’s motor casing, often concealed by a decorative cover.
Ceiling fan motors come in different types, including direct drive motors and AC induction motors. Direct drive motors are commonly found in residential ceiling fans and are known for their quiet operation and lower energy consumption. AC induction motors, on the other hand, are typically used in commercial and industrial ceiling fans, offering powerful performance and longevity.
The motor is connected to the fan blades through a central rod known as the motor shaft. When the motor is activated, it spins the shaft, causing the blades to rotate and generate airflow.
One important feature commonly found in ceiling fan motors is the ability to change speeds. This is achieved through the use of a capacitor. The capacitor stores electrical energy and controls the current delivered to the motor, enabling the fan to operate at different speeds.
Modern ceiling fan motors are designed to be energy-efficient, consuming minimal electricity while delivering optimal performance. Many fans also feature built-in thermal protection to prevent overheating and ensure the motor’s longevity.
When selecting a ceiling fan, it’s essential to consider the motor’s quality, efficiency, and performance. A well-designed motor will provide reliable operation, quiet performance, and long-lasting durability. It is worth investing in a ceiling fan with a high-quality motor to enjoy years of comfortable airflow in your home.
Blades
The blades of a ceiling fan are the most visible and recognizable part. They are responsible for moving the air and creating the cooling breeze that we feel. Ceiling fan blades come in various materials, including wood, plastic, and metal, each offering its own aesthetic appeal and performance characteristics.
The design and shape of the blades play a crucial role in determining how well the fan circulates air. The angle at which the blades are pitched, known as the blade pitch, affects how efficiently the fan moves air. A steeper blade pitch generates more airflow but requires more energy to operate.
Ceiling fan blades are typically angled between 12 to 15 degrees, although the angle may vary depending on the fan model. Blades with a larger surface area can move more air but may create more noise. Conversely, smaller blades create less airflow but provide a quieter operation.
The number of blades on a ceiling fan can range from two to six, but most residential fans have either three or four blades. The number of blades does not significantly affect the fan’s performance but can influence the overall appearance and style of the fan.
Another factor to consider when it comes to blades is the blade finish. The finish not only adds to the fan’s aesthetic appeal but also helps protect the blades from damage and wear over time. Common blade finishes include natural wood, painted finishes, and metal coatings.
It’s important to note that ceiling fan blades should be properly balanced during installation to ensure smooth operation and minimize noise. Imbalanced blades can cause vibrations that not only affect performance but may also lead to premature motor wear.
When choosing a ceiling fan, consider the room size and your desired airflow. Larger rooms generally benefit from fans with larger blades for better air circulation, while smaller rooms may require smaller or more compact fans. Selecting the right blade size and style will ensure optimal performance and enhance the overall aesthetics of your space.
Downrod
The downrod is an essential component of a ceiling fan that connects the motor housing to the mounting bracket. It serves two primary functions: providing the proper distance between the fan and the ceiling and facilitating optimal airflow.
The length of the downrod determines how far the fan hangs from the ceiling. It is important to select the right length to ensure proper clearance and prevent any obstructions that could hinder the fan’s performance. The ideal distance between the fan blades and the floor is typically around 7 to 9 feet, depending on the room’s size and ceiling height.
Most ceiling fans come with a standard downrod length, typically ranging from 3 to 6 inches. However, for rooms with higher ceilings, longer downrods are available to extend the fan’s reach. These longer downrods are usually sold separately and can be easily installed to accommodate taller spaces.
In addition to providing the appropriate distance from the ceiling, the downrod also plays a crucial role in optimizing airflow. By lowering the fan, it allows for better air circulation and improved cooling effect. This is especially important in rooms with high ceilings, as warm air tends to accumulate near the ceiling. The use of a downrod ensures that the fan’s airflow reaches occupants at a comfortable level.
It is important to note that for rooms with lower ceilings, there are also options available to install ceiling fans without a downrod, known as low-profile or flush mount fans. These fans are designed to be mounted directly onto the ceiling, allowing for maximum clearance in areas with limited vertical space.
When installing a ceiling fan with a downrod, it is essential to follow the manufacturer’s instructions and ensure secure mounting for safety and stability. Proper installation and selection of the appropriate downrod length will ensure that your ceiling fan operates efficiently and effectively in any space.
Read more: Why Would Ceiling Fan Stop Working
Mounting System
The mounting system is a crucial component of a ceiling fan that allows it to be securely attached to the ceiling. It ensures stability and proper support for the fan, enabling it to operate safely and effectively. There are several types of mounting systems available to accommodate different ceiling heights and configurations.
The most common type of mounting system is the standard or close-to-ceiling mount. This mount is suitable for rooms with standard ceiling heights and provides a secure attachment between the fan and the ceiling. It keeps the fan close to the ceiling, which is ideal for spaces with lower ceilings or where headroom is a concern.
For rooms with sloped or angled ceilings, an angled mount is often required. This type of mount allows the fan to be installed on ceilings with inclinations, ensuring that the blades remain level and the fan operates correctly. It is essential to choose an angled mount that matches the specific slope of the ceiling to maintain proper airflow and performance.
Another mounting option is the dual-mount or convertible mount. This versatile mount allows the fan to be installed either as a standard mount or as a flush mount, depending on the desired clearance from the ceiling. This flexibility is particularly useful for rooms with varying ceiling heights or spaces where you may want to adjust the fan’s position in the future.
When selecting a mounting system, it is crucial to consider the weight and size of the ceiling fan. Some larger or heavier fans may require special mounting systems to ensure secure attachment. It is always recommended to consult the manufacturer’s guidelines for the specific mounting requirements of your ceiling fan model.
Proper installation of the mounting system is essential to ensure the fan’s stability and prevent any accidents or damage. It is advised to hire a professional electrician or experienced installer if you are unsure about the installation process.
By choosing the appropriate mounting system for your ceiling fan, you can enjoy optimal performance and peace of mind knowing that your fan is securely attached to the ceiling.
Capacitor
The capacitor is a crucial component in the operation of a ceiling fan. It serves as an integral part of the fan’s electrical system, enabling the motor to function at multiple speeds.
A capacitor is an electronic device that stores and releases electrical energy. In the context of a ceiling fan, it acts as a temporary power source, regulating the amount of current delivered to the motor. By controlling the current, the capacitor allows the fan to operate at different speeds.
When you adjust the speed of a ceiling fan, whether through a pull chain or a remote control, the capacitor determines the voltage and current sent to the motor. This, in turn, affects the rotational speed of the fan blades, allowing you to adjust the airflow according to your comfort level.
Capacitors used in ceiling fans are often categorized by microfarads (µF), indicating their electrical capacity. The specific microfarad rating of a capacitor determines the range of speeds available for the fan. Capacitors with different microfarad ratings result in different speed settings, allowing for flexibility in tailoring the fan’s airflow.
It’s important to note that not all ceiling fans have the same capacitor setup. Some fans may have a single capacitor controlling both the motor speed and the direction of rotation, while others may have separate capacitors for each function.
In addition to regulating the fan’s speed, capacitors also play a crucial role in the fan’s startup process. When you turn on a ceiling fan, the motor needs an extra surge of electrical energy to start spinning. The capacitor provides this initial boost, helping the motor overcome inertia and begin rotating.
Over time, capacitors in ceiling fans can wear out or fail, resulting in issues such as slow or erratic fan speeds or failure to start. If you experience any of these problems, it may be necessary to replace the capacitor to restore proper fan operation.
When replacing a capacitor, it is essential to select a capacitor with the same microfarad rating as the original one. Choosing the wrong capacitor can lead to improper fan performance or even damage to the motor.
Overall, the capacitor is a critical component in a ceiling fan, allowing for speed control and enabling the motor to operate smoothly and efficiently. It plays a vital role in providing the desired airflow and making your ceiling fan a versatile and customizable cooling solution.
Pull Chain
The pull chain is a convenient and widely used control mechanism found on most ceiling fans. It allows users to adjust the fan’s speed and turn the fan on or off with a simple pull of the chain. The pull chain is typically located on the bottom of the fan, near the center.
Each pull chain is connected to a switch inside the fan housing that controls different functions. The most common function of the pull chain is speed control. By pulling the chain, you can cycle through various speed settings, typically including high, medium, and low. The number of pulls determines the speed, with one pull activating the lowest speed and subsequent pulls increasing the speed.
In addition to speed control, the pull chain may also incorporate other functions. One common additional feature is a reverse switch, which allows you to change the direction of the fan blades. By pulling the chain in a specific pattern or sequence, you can reverse the fan to either clockwise or counterclockwise rotation. This feature is especially useful in different seasons to promote air circulation and improve overall comfort.
The length of the pull chain varies depending on the fan model, but it is usually designed to be easily accessible for users. Some fans may have multiple pull chains, each controlling a different function, such as fan speed, light control, or direction reversal.
To ensure the longevity and smooth operation of the pull chain, it is essential to handle it with care. Pulling the chain too forcefully or yanking on it can cause the chain to detach or break. If the pull chain becomes disconnected or damaged, it is relatively easy to replace with a new one or a compatible pull chain extension.
Although pull chains are a popular and straightforward control option, many modern ceiling fans now offer additional control methods such as wall-mounted switches, remote controls, or even smartphone integration. These alternatives provide more convenience and flexibility in operating the fan, especially in larger rooms or when the fan is installed at a higher position.
Nonetheless, the pull chain remains a reliable and intuitive option for controlling ceiling fans. Its simple design and ease of use make it a popular choice in many households, providing a convenient way to adjust the fan’s speed and settings with a quick and easy pull.
Switches and Controls
Switches and controls play a vital role in operating and customizing the functionality of a ceiling fan. While the pull chain is a common control option, many ceiling fans offer additional switches and controls to provide more convenience and flexibility.
Wall-mounted switches are a popular alternative to pull chains. These switches are typically installed on the wall and connected to the fan’s electrical system. They allow users to control the fan’s speed and turn it on or off with the flick of a switch. Some wall switches also offer additional features, such as a reverse switch to change the fan’s direction or a timer switch to automatically shut off the fan after a set period.
In recent years, remote controls have become increasingly popular for ceiling fans. Remote controls provide the convenience of controlling the fan from anywhere in the room, eliminating the need to approach the fan to adjust its settings. They often come with buttons for adjusting the speed, reversing the direction, and turning the fan on and off. Some remote controls even include programmable settings and timer functions.
Smart home technology has also made its way into ceiling fan controls. Smart ceiling fans can be connected to home automation systems and controlled through smartphone apps or voice commands with compatible smart assistants. This adds a whole new level of convenience, allowing users to control the fan’s settings while being away from the room or even from different locations.
For added flexibility, some ceiling fans feature dual controls. These fans come with both a pull chain and a remote control or wall switch, providing multiple options for adjusting the fan’s settings. Dual controls offer convenience and cater to different preferences, allowing users to choose the method that best suits their needs.
When selecting a ceiling fan with switches and controls, consider your personal preferences and lifestyle. Choose a control option that is easy to use and provides the functionality you desire. It’s also important to ensure compatibility with the fan model you choose, as not all fans support all types of controls.
Overall, switches and controls enhance the user experience of ceiling fans by providing convenient and customizable ways to adjust the fan’s speed, direction, and settings. Whether through pull chains, wall-mounted switches, remote controls, or smart home integration, these controls offer versatility and ease of use for a more comfortable living space.
To understand how a ceiling fan works, remember that it uses the principle of convection to create a cooling effect. The fan blades push air downwards, creating a breeze that helps to evaporate moisture from the skin, making you feel cooler.
Read more: How To Update A Ceiling Fan
Wiring
Wiring is a crucial aspect of the electrical system in a ceiling fan. It connects all the electrical components, enabling the fan to function properly. Understanding the wiring of a ceiling fan is important for safe installation and maintenance.
The wiring in a ceiling fan consists of several key components:
- Power Supply: The power supply for a ceiling fan typically comes from the electrical circuit in your home. It is important to ensure that the electrical circuit can handle the power requirements of the fan to prevent overloading and potential hazards.
- Motor Wiring: The motor wiring is responsible for connecting the fan’s motor to the power supply. It allows power to flow from the electrical source to the motor, enabling the rotation of the fan blades.
- Capacitor Wiring: As mentioned earlier, the capacitor plays a crucial role in controlling the fan’s speed. The capacitor wiring connects the capacitor to the power source and the motor, allowing for voltage regulation and speed adjustment.
- Pull Chain Wiring: If your ceiling fan has a pull chain for speed control and other functions, the pull chain wiring connects the pull chain switch to the motor and other components. It allows for easy control of the fan’s settings by pulling the chain.
- Switch Wiring: In ceiling fans with wall switches or remote controls, switch wiring is required to connect the switches or remote receiver to the fan’s electrical system. This wiring enables the switches or remote controls to control the fan’s operation.
When installing or troubleshooting a ceiling fan’s wiring, it is crucial to follow all safety guidelines and adhere to electrical codes. It is recommended to consult a qualified electrician if you are unsure about any wiring procedures or if you experience any electrical issues.
Properly wiring a ceiling fan ensures safe and efficient operation. It is essential to use appropriate wiring methods, such as using the correct gauge of electrical wire, securing all connections, and protecting wires from damage.
Regular maintenance and inspection of the wiring is also important to ensure ongoing safe operation. Check for any signs of wear or loose connections, and address any issues promptly to avoid electrical hazards.
By understanding the wiring of a ceiling fan and following proper installation and maintenance practices, you can ensure a safe and reliable operation of your fan for years to come.
How a Ceiling Fan Works
A ceiling fan works by utilizing the principles of air circulation and convection to create a cooling effect in a room. When the fan is turned on, it begins to rotate its blades, drawing in surrounding air and pushing it downwards.
Here’s a step-by-step breakdown of how a ceiling fan works:
- Power Supply: When you switch on the fan using a wall switch, remote control, or pull chain, the power supply delivers electricity to the fan’s motor.
- Starting the Motor: The electricity from the power supply activates the motor, which begins to rotate the fan’s blades.
- Speed Control: The speed of the blades is controlled by the motor and capacitor. The capacitor regulates the voltage and current delivered to the motor, allowing you to adjust the fan’s speed using a pull chain, wall switch, or remote control.
- Direction Control: Some ceiling fans come with a reverse switch that allows you to change the direction of the fan’s rotation. In warmer months, you can set the fan to rotate counterclockwise, creating a cooling breeze. In colder months, you can set it to rotate clockwise to gently push warm air down from the ceiling.
- Cooling Effect: As the fan rotates its blades, it creates a downdraft that moves air in the room. This moving air creates a cooling sensation on your skin due to the evaporative cooling effect. It helps to dissipate body heat and enhances the natural evaporation of perspiration, making you feel more comfortable.
It’s important to note that a ceiling fan does not actually cool the air itself. Instead, it creates air movement that can make you feel up to 4 degrees cooler. However, this perceived cooling effect can allow you to adjust your thermostat, save energy, and reduce your reliance on air conditioning during mild to moderate weather conditions.
Additionally, a ceiling fan can help distribute warm air evenly during colder months. By setting it to rotate clockwise at a low speed, it gently pushes warm air down from the ceiling. This can help prevent hot air from accumulating near the ceiling and create a more comfortable and balanced indoor environment.
Overall, a ceiling fan is an energy-efficient and effective way to improve air circulation, create a cooling sensation, and enhance comfort in your living space. By understanding how a ceiling fan works, you can make the most of its features and benefits throughout the year.
Power Supply
The power supply is an essential component that provides the electrical energy needed to operate a ceiling fan. It serves as the source of power, allowing the fan’s motor and other electrical components to function.
A typical ceiling fan is designed to run on standard household electrical power, typically 120 volts AC (alternating current). This is the same voltage used for most residential appliances and lighting fixtures.
The power supply for a ceiling fan is typically connected to an electrical circuit in your home. This can be achieved by wiring the fan directly to a dedicated circuit or by connecting it to an existing circuit, such as the one used for lighting in the room.
It is important to ensure that the electrical circuit can handle the power requirements of the ceiling fan. This includes considering the wattage and current draw of the fan, as well as any additional features like lights or other accessories that may be included.
Before installing a ceiling fan, it is crucial to check the electrical circuit’s capacity to ensure it can safely handle the fan’s power requirements. If in doubt, consult a qualified electrician to evaluate the circuit and make any necessary upgrades or modifications.
When connecting the power supply to the fan, it is essential to follow proper wiring practices. This includes using appropriate wiring methods, securing all connections, and ensuring that the electrical wires are properly insulated to prevent any contact with metal components or other wires.
It is recommended to ensure the power supply is properly grounded. Grounding provides an additional level of safety by directing any electrical faults or excessive current away from the fan and into the ground.
In summary, the power supply is a critical element of a ceiling fan, providing the necessary electrical energy to enable the fan’s operation. Ensuring that the power supply is properly connected and that the electrical circuit can handle the fan’s power requirements is crucial for safe and reliable operation.
Starting the Motor
When you turn on a ceiling fan, the process of starting the motor begins. The motor is the heart of the fan and is responsible for driving the rotation of the blades, creating the airflow that circulates in the room.
Here’s how the starting process of the motor in a ceiling fan typically works:
- Power On: When you activate the power supply to the fan, whether through a wall switch, remote control, or pull chain, electricity flows into the motor.
- Stator and Rotor: Inside the motor, there are two main components: the stator and the rotor. The stator is a stationary part that consists of copper windings, while the rotor is a central rotating part.
- Magnetic Field: As electricity flows through the windings of the stator, it creates a magnetic field. This magnetic field interacts with the rotor, which is made of a set of permanent magnets.
- Electromagnetic Induction: The interaction between the magnetic field of the stator and the permanent magnets of the rotor induces electromagnetic forces. These forces cause the rotor to rotate.
- Starting Torque: To overcome the initial inertia, the motor requires an additional surge of electrical energy to start spinning. This additional energy is provided by the capacitor, which stores electrical charge and delivers it to the motor at startup.
With the help of electromagnetic induction and the initial surge of current from the capacitor, the motor begins to rotate, setting the fan’s blades into motion.
It’s worth mentioning that modern ceiling fans are designed with efficient motors that require relatively low power to start. This energy efficiency not only helps reduce electricity consumption but also extends the lifespan of the motor.
If you notice any issues with the motor starting process, such as the fan not starting or abnormal noises, it may indicate an underlying problem. In such cases, it is recommended to consult a professional electrician or contact the manufacturer for troubleshooting and assistance.
The starting process of the motor is a crucial step in the operation of a ceiling fan. By providing the necessary electrical energy and utilizing electromagnetic forces, the motor initiates the rotation of the blades, allowing the fan to create a comfortable airflow in your living space.
Read more: How To Dispose Ceiling Fans
Speed Control
One of the key features of a ceiling fan is its ability to adjust the speed of the blades, allowing you to customize the airflow and create the desired level of comfort in your space. Speed control is achieved through the motor and the associated electrical components in the fan.
Here is how speed control typically works in a ceiling fan:
- Capacitor: The speed control in a ceiling fan is facilitated by a capacitor, an electronic component that regulates the amount of electrical current flowing to the fan’s motor. The capacitor provides the necessary voltage and current to the motor, allowing for different speed settings.
- Capacitor Values: Ceiling fans are equipped with capacitors of different values, typically measured in microfarads (µF). Each value corresponds to a specific speed setting. For example, a lower microfarad rating will result in a slower fan speed, while a higher rating will increase the speed.
- Pull Chain or Switches: Many ceiling fans have a pull chain mechanism that controls the speed. Each pull of the chain toggles the circuit connected to the appropriate capacitor value. For example, a single pull may activate the low speed, while two pulls may initiate the medium speed setting.
- Wall Switch or Remote Control: Some ceiling fans provide speed control through wall switches or remote controls. These switches or controls are connected to the fan’s electrical system and allow you to select the desired speed setting with a simple press of a button or the adjustment of a dial.
By adjusting the fan’s speed, you can tailor the airflow to your liking and create the optimal level of comfort. On warmer days, a higher fan speed can create a more powerful breeze, while a lower speed is ideal for gentle cooling. During colder months, operating the fan at its lowest speed can help distribute warm air evenly throughout the room.
It’s worth noting that ceiling fans are typically designed with multiple speed options, allowing for a range of airflow possibilities. The exact number of speed settings can vary depending on the fan model, but most fans offer at least three speeds: low, medium, and high.
Ultimately, speed control is a valuable feature in a ceiling fan, allowing you to fine-tune the airflow and achieve the desired level of comfort in your living space. Whether through pull chains, switches, or remote controls, this functionality provides flexibility and allows you to create the perfect environment to suit your needs.
Direction Control
Direction control is a valuable feature found in many ceiling fans, allowing you to change the rotation direction of the fan blades. This functionality provides versatility and enhances the fan’s effectiveness in different seasons and conditions.
Here’s how direction control typically works in a ceiling fan:
- Reverse Switch: Ceiling fans with direction control are equipped with a reverse switch, usually located on the fan housing or on the remote control. The reverse switch allows you to change the rotation direction of the fan.
- Counterclockwise Rotation: In the default forward or “summer” mode, the fan blades rotate in a counterclockwise direction when viewed from below. This configuration creates a downward airflow, producing a cooling breeze that can make you feel up to 4 degrees cooler. This is ideal for warmer months when you want to create a cool and comfortable environment.
- Clockwise Rotation: By activating the reverse switch, the fan blades reverse their direction, rotating in a clockwise direction when viewed from below. This “reverse” or “winter” mode creates an upward airflow. As a result, the fan gently draws the room’s cooler air upward and pushes the warmer air that collects near the ceiling downward. This helps to equalize the room’s temperature and improve overall heating efficiency, making it suitable for colder months.
Changing the direction of the fan blades can have a significant impact on the comfort level and energy efficiency in your space. Here are a few benefits of direction control:
- Cooling Effect: In the summer, a counterclockwise rotation creates a breeze that enhances evaporative cooling, making you feel cooler without having to rely solely on air conditioning. This can help reduce energy consumption and lower utility bills.
- Heating Efficiency: In the winter, a clockwise rotation helps to circulate warm air that naturally rises to the ceiling. By pushing the warm air downward, the fan helps to distribute the heat more evenly throughout the room, making it more comfortable and potentially reducing the reliance on heating systems.
- Air Circulation: Regardless of the season, using direction control helps to enhance overall air circulation in the room, reducing stagnant air and improving the comfort level for occupants.
It’s important to note that not all ceiling fans have a direction control feature. If this functionality is important to you, ensure that the fan you choose includes a reverse switch or the compatibility for direction control.
Overall, direction control adds versatility to your ceiling fan, allowing you to optimize its functionality in different weather conditions. By adjusting the rotation direction, you can enhance comfort, improve energy efficiency, and create a more enjoyable living environment throughout the year.
Cooling Effect
The cooling effect produced by a ceiling fan is a major reason why it is a popular addition to any home. While a ceiling fan does not actually cool the air, it creates a perceived cooling sensation through the process of evaporative cooling, making you feel more comfortable in warm weather.
Here’s how the cooling effect of a ceiling fan works:
- Airflow: When the fan is turned on, its blades start rotating, creating airflow in the room. The movement of the blades stirs up the surrounding air, causing it to circulate and flow in a downward direction.
- Evaporative Cooling: As the air circulates around your body, it accelerates the evaporation of moisture on your skin. This evaporation process creates a cooling sensation on your skin, similar to the feeling you get when a breeze blows against your damp skin after a workout.
- Sensible Cooling: In addition to evaporative cooling, the air movement from the fan also helps to enhance sensible cooling by promoting heat transfer from your body. The moving air increases the rate of heat loss from your skin’s surface, making you feel cooler.
The cooling effect provided by a ceiling fan can make you feel up to 4 degrees cooler, allowing you to maintain comfort without solely relying on air conditioning. By using a ceiling fan in conjunction with your air conditioner, you can raise the thermostat by a few degrees and potentially save energy and reduce your utility bills. This is because the fan’s airflow helps to circulate the cooled air more effectively, making the room feel cooler at higher temperatures.
While a ceiling fan does not actually lower the room’s temperature, it creates a comfortable environment by countering the heat that accumulates around your body. This cooling sensation can be particularly beneficial during hot summer months or in regions with warm climates.
It’s important to note that a ceiling fan is most effective when used in occupied rooms. The airflow generated by the fan provides a localized cooling effect, making it more effective and energy-efficient when it is only cooling the occupants rather than an entire room or unoccupied space.
Remember to adjust the fan’s speed based on your comfort level. A higher fan speed can create a more pronounced cooling effect, but it is also important to ensure that the airflow is gentle enough to avoid discomfort or excessive drafts.
With its ability to create a cooling breeze and enhance comfort, a ceiling fan is a practical and energy-efficient tool for maintaining a comfortable indoor environment. By utilizing the cooling effect of a ceiling fan, you can reduce reliance on air conditioning, save energy, and enjoy a refreshing breeze throughout your home.
Conclusion
Ceiling fans are not only functional but also add aesthetic value to any room. Understanding how a ceiling fan works and its various components can help you appreciate the engineering behind this everyday household item. From the motor to the blades, downrod to mounting system, capacitor to pull chain, switches to wiring, each part plays a crucial role in creating a comfortable and efficient airflow.
Ceiling fans utilize the principles of air circulation and convection to create a cooling effect in the room. They don’t actually cool the air, but they create a perceived cooling sensation through evaporative cooling, making you feel more comfortable in warm weather. Ceiling fans provide an alternative to relying solely on air conditioning, allowing you to raise the thermostat and potentially save energy and reduce utility bills.
Additionally, ceiling fans offer versatility through features like speed control and direction control. This allows you to customize the airflow and adjust the fan’s operation according to your needs and the changing seasons. Whether you want a gentle breeze or a powerful airflow, or if you need to distribute warm air during colder months, speed and direction control options enable you to fine-tune the fan’s performance.
Wiring and power supply are essential elements to ensure the safe and proper functioning of a ceiling fan. Proper installation and maintenance of the fan’s electrical components, such as the motor, capacitor, and switches, are crucial for smooth operation and longevity.
In conclusion, a ceiling fan is a practical and efficient solution for enhancing airflow and creating a comfortable environment in your home. By understanding how a ceiling fan works and utilizing its various features, you can optimize its performance, save energy, and enjoy a cooler, more comfortable living space. So go ahead and choose a ceiling fan that suits your style and needs, and experience the benefits it brings to your everyday life.
Now that you've got the hang of how ceiling fans operate, why not tackle the next DIY project? If you're looking to replace that old light fixture with something that keeps you cool, our guide on ceiling fan installation offers step-by-step instructions. Or maybe you're planning to extend your power reach? Check out our practical tips on electrical wiring for safely running lines to your garage. Both articles are packed with useful insights to help you upgrade your home efficiently.
Frequently Asked Questions about How A Ceiling Fan Works
Was this page helpful?
At Storables.com, we guarantee accurate and reliable information. Our content, validated by Expert Board Contributors, is crafted following stringent Editorial Policies. We're committed to providing you with well-researched, expert-backed insights for all your informational needs.


0 thoughts on “How A Ceiling Fan Works”