Home>Home Appliances>Lighting Appliances>How To Change A Ceiling Light To A Ceiling Fan

Lighting Appliances
How To Change A Ceiling Light To A Ceiling Fan
Modified: August 27, 2024
Learn how to upgrade your lighting appliances by changing a ceiling light to a ceiling fan with our step-by-step guide. Enhance your home's comfort and style today!
(Many of the links in this article redirect to a specific reviewed product. Your purchase of these products through affiliate links helps to generate commission for Storables.com, at no extra cost. Learn more)
Introduction
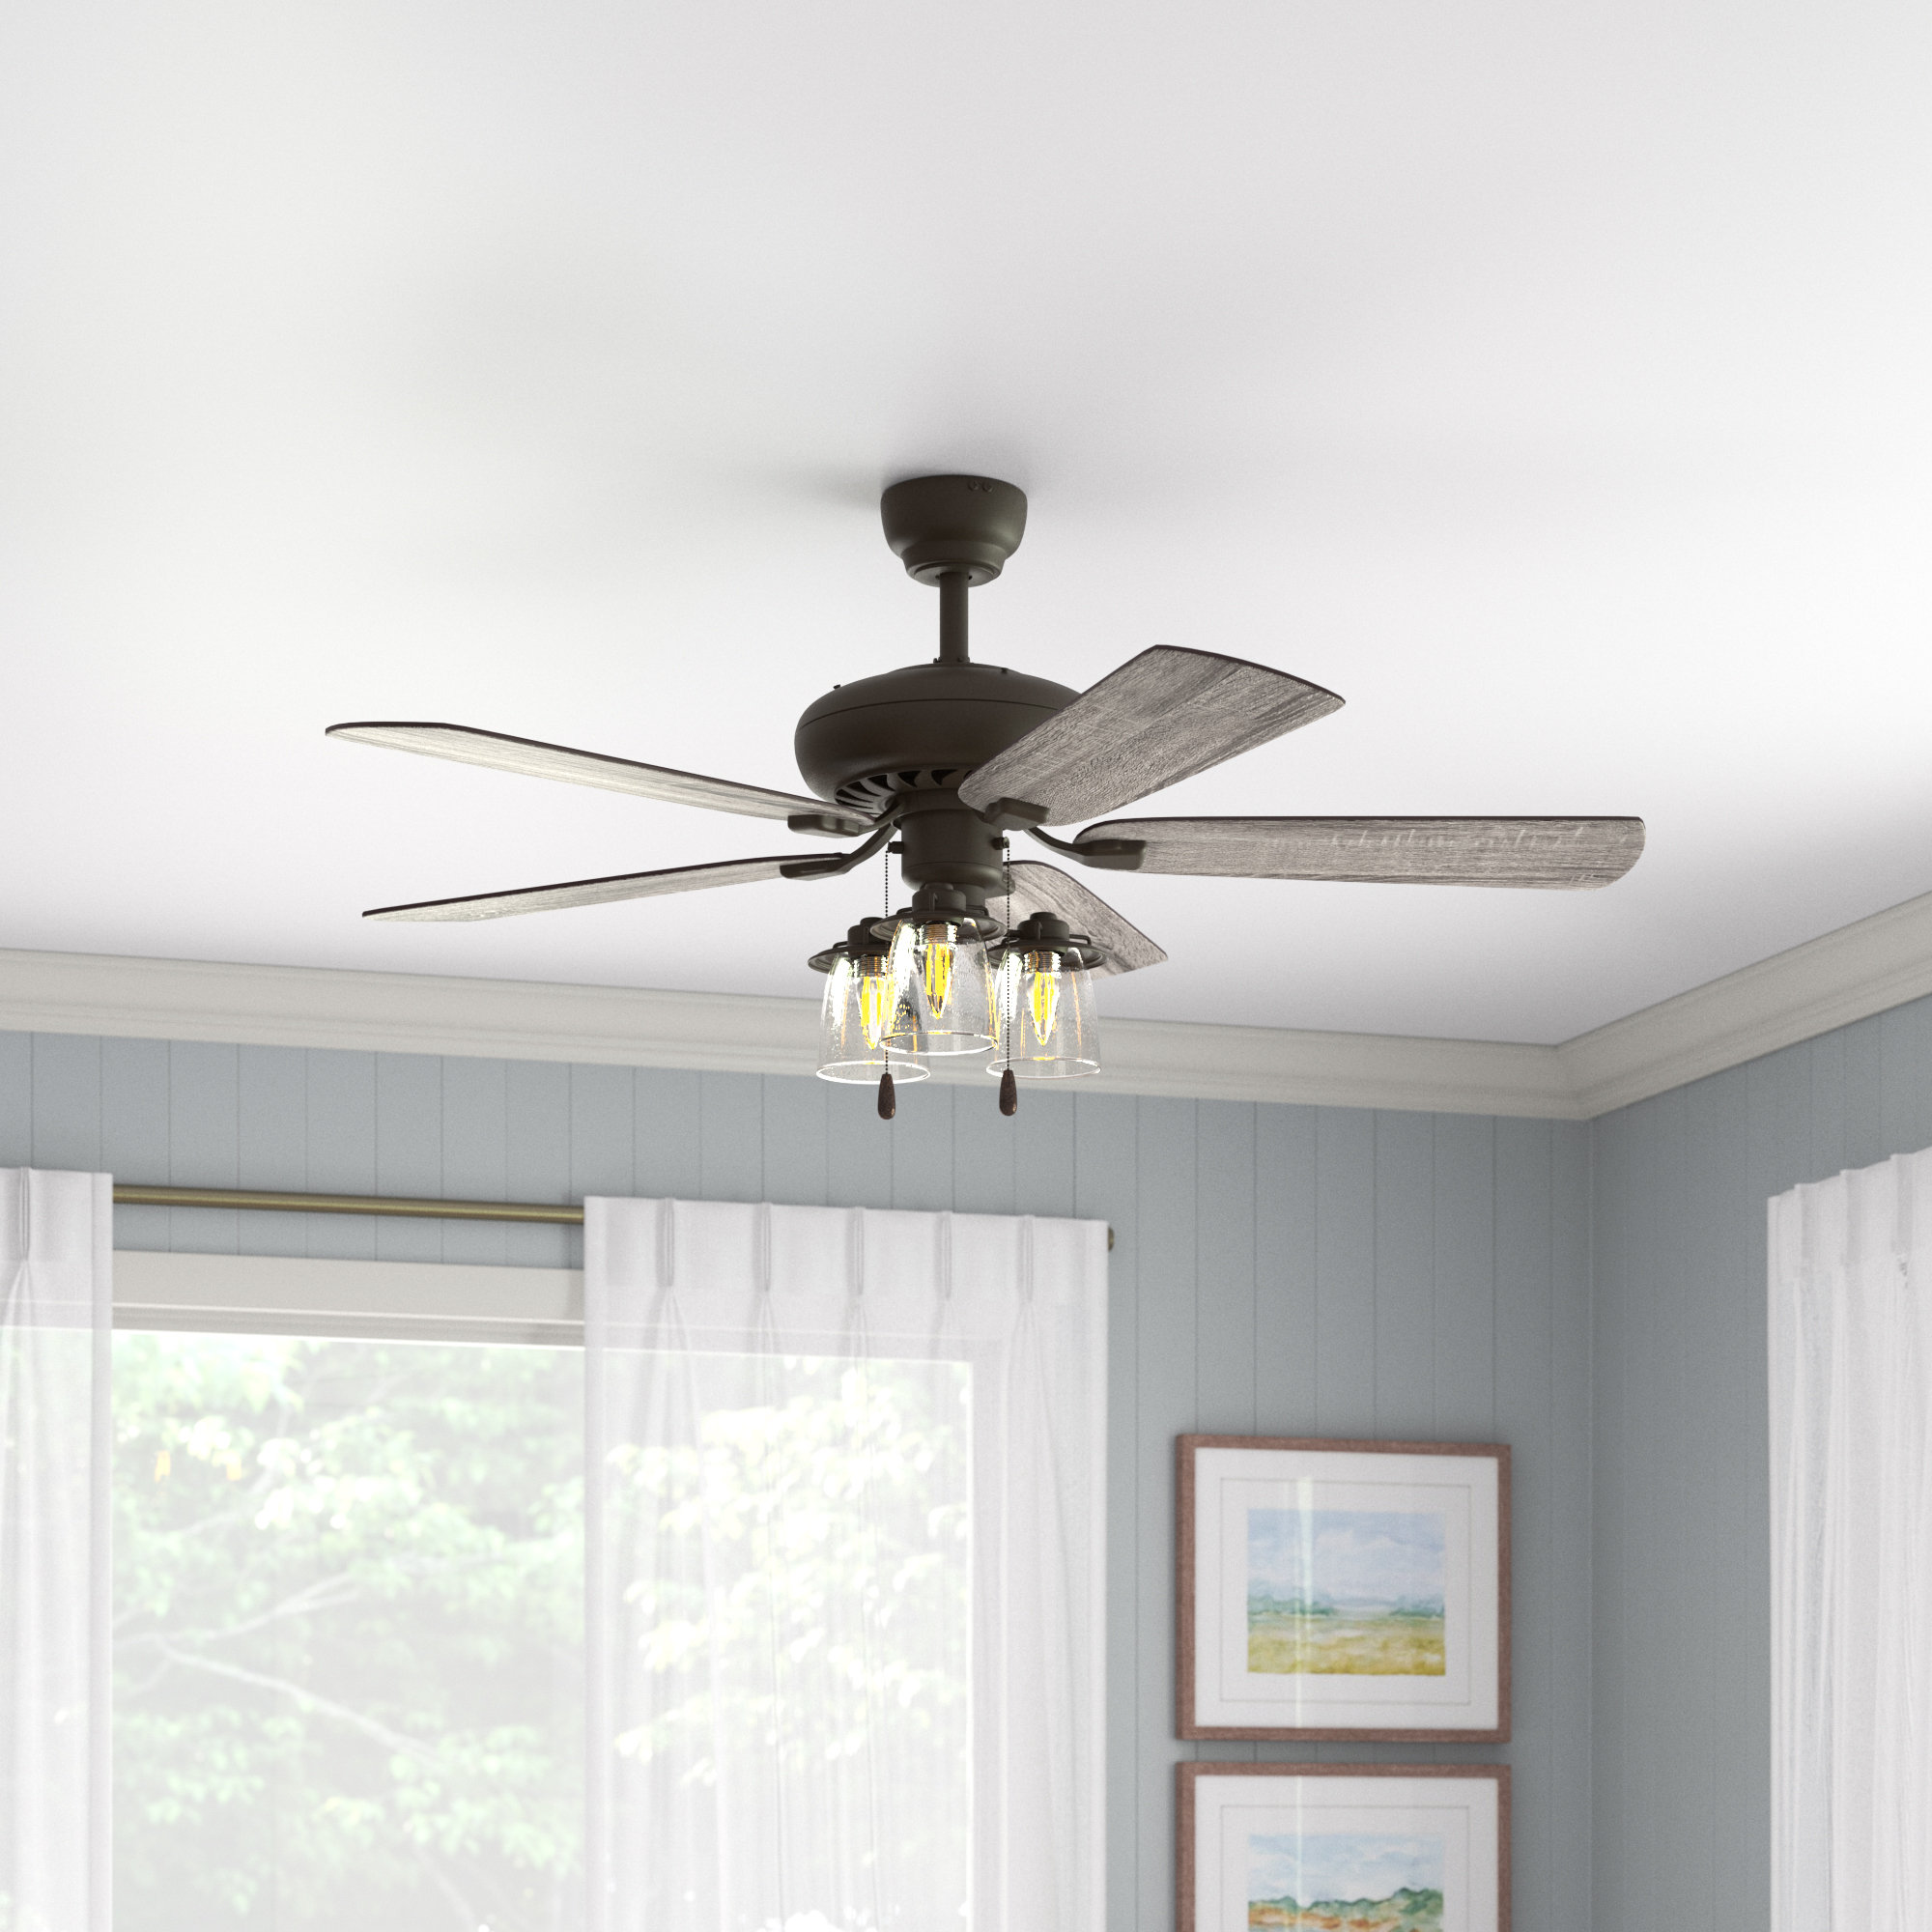
Changing a ceiling light to a ceiling fan is a fantastic way to upgrade the functionality and aesthetics of any room. Whether you're looking to improve air circulation, enhance lighting, or add a stylish focal point, installing a ceiling fan can be a rewarding project. With the right tools, a clear plan, and a bit of know-how, you can transform your space and create a more comfortable environment.
Ceiling fans are not only practical but also add a touch of elegance to any room. They come in a variety of styles, sizes, and finishes, making it easy to find one that complements your decor. Additionally, many modern ceiling fans are equipped with energy-efficient features, such as LED lighting and remote control operation, offering both functionality and cost savings.
Before embarking on this project, it's essential to familiarize yourself with the necessary steps and safety precautions. From turning off the power to securing the fan in place, each stage of the installation process requires attention to detail and precision. By following a systematic approach, you can ensure a smooth and successful transition from a ceiling light to a ceiling fan.
In this comprehensive guide, we will walk you through each step of the installation process, providing clear instructions and valuable tips to help you achieve professional results. Whether you're a seasoned DIY enthusiast or a first-time homeowner eager to take on a new challenge, this guide will equip you with the knowledge and confidence to tackle the project with ease.
So, roll up your sleeves, gather your tools, and get ready to elevate your space with a stylish and functional upgrade. Let's dive into the step-by-step process of changing a ceiling light to a ceiling fan and unlock the potential of your living space.
Key Takeaways:
- Changing a ceiling light to a ceiling fan is a rewarding project that enhances air circulation, adds elegance, and offers energy-efficient features. With careful steps and attention to detail, homeowners can transform their living space with confidence.
- The installation process involves turning off the power, removing the existing light fixture, assembling the fan components, and connecting the wiring. Once the fan is securely in place and the power is restored, homeowners can enjoy the immediate benefits of improved air circulation and enhanced comfort.
Read more: How To Change A Ceiling Fan
Step 1: Turn off the power
Before beginning any electrical work, safety should always be the top priority. Turning off the power to the existing ceiling light is the crucial first step in this process. This ensures that you can work on the installation without the risk of electrical shock.
To turn off the power, start by locating the circuit breaker or fuse box in your home. It's essential to identify the correct circuit that powers the ceiling light you'll be replacing. Once you've located the appropriate circuit, switch off the corresponding breaker or remove the fuse to cut off the electricity supply to the fixture.
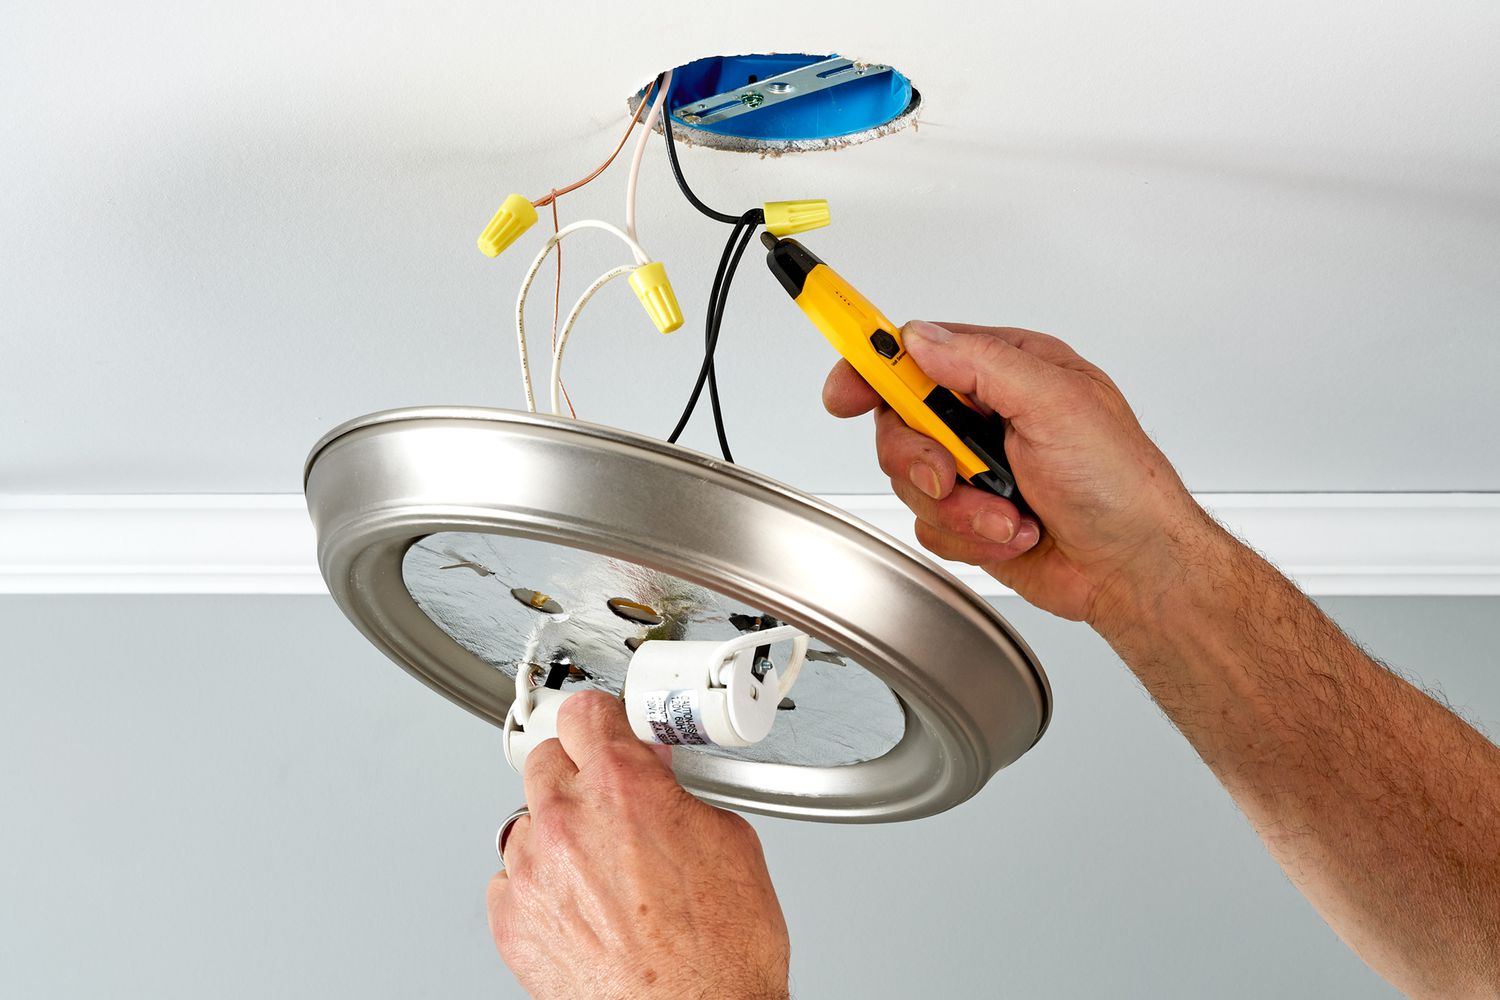
After turning off the power, it's a good practice to use a non-contact voltage tester to verify that the electrical wires are not live. This simple yet essential tool can detect the presence of electrical current without direct contact, providing an added layer of safety and peace of mind.
It's important to remember that working with electricity requires caution and respect for the potential hazards involved. Even after turning off the power, treat all wires as if they are live until proven otherwise. This mindset helps maintain a safety-conscious approach throughout the installation process.
By taking the time to properly turn off the power and verify that the electrical wires are not energized, you're laying a solid foundation for a safe and successful ceiling fan installation. This proactive approach sets the stage for the subsequent steps, allowing you to proceed with confidence and peace of mind.
With the power safely turned off and the absence of electrical current confirmed, you're now ready to move on to the next step in the process of changing a ceiling light to a ceiling fan. This initial precautionary measure paves the way for a smooth and secure installation, ensuring that you can proceed with the project in a safe and controlled manner.
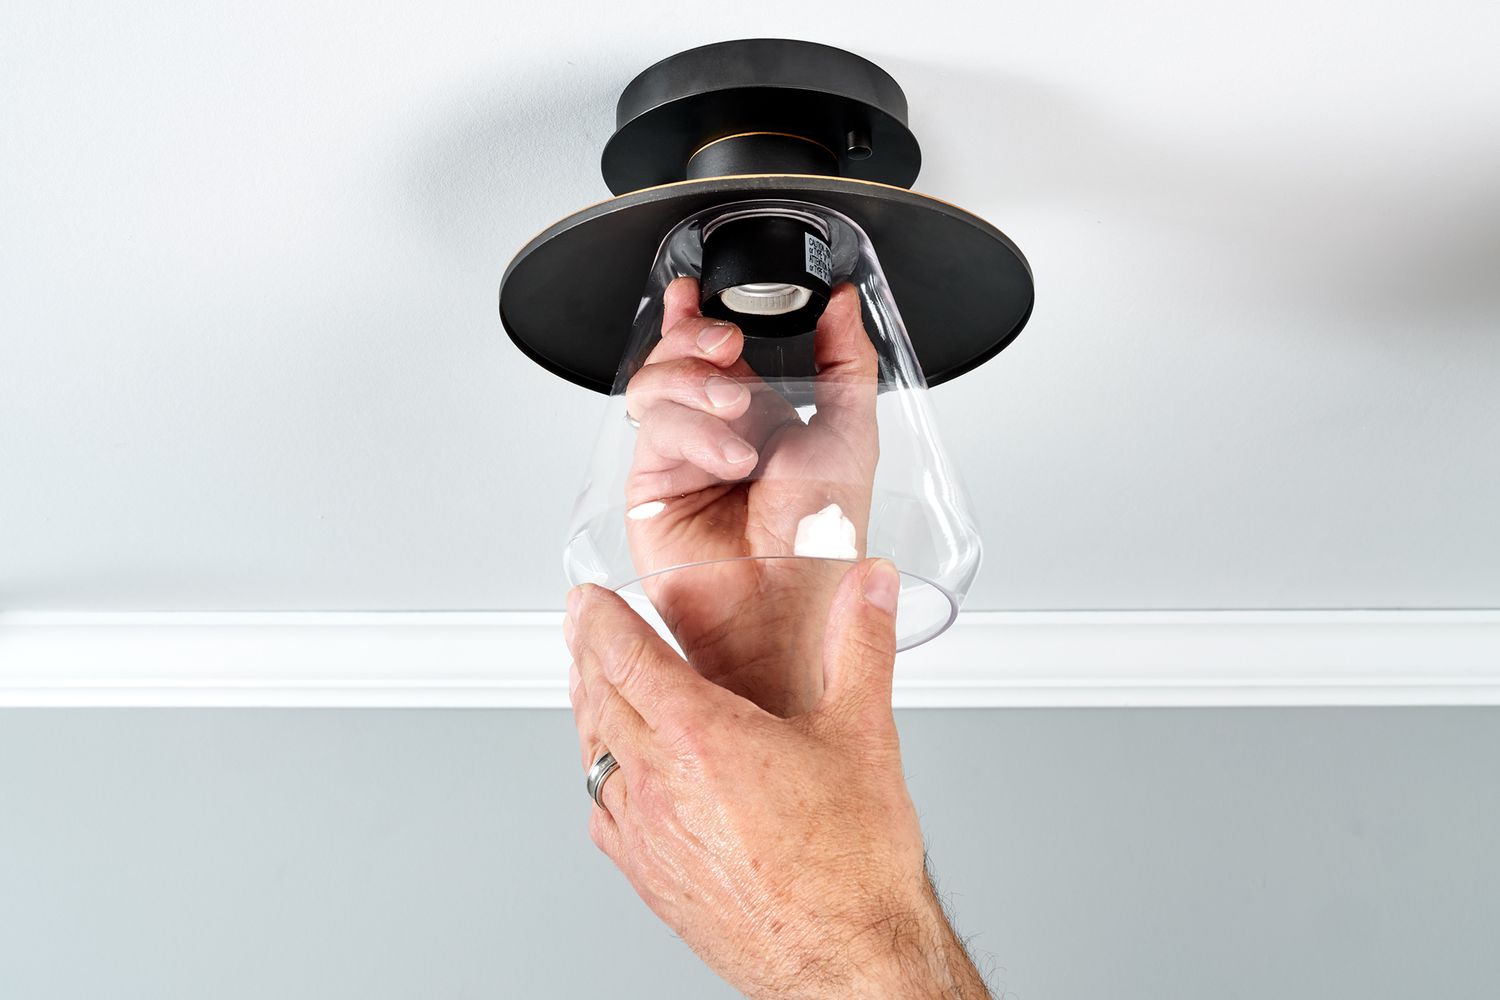
Step 2: Remove the existing light fixture
Removing the existing light fixture is a pivotal step in the process of transitioning to a ceiling fan. This phase requires careful attention to detail and a methodical approach to ensure a seamless removal process.
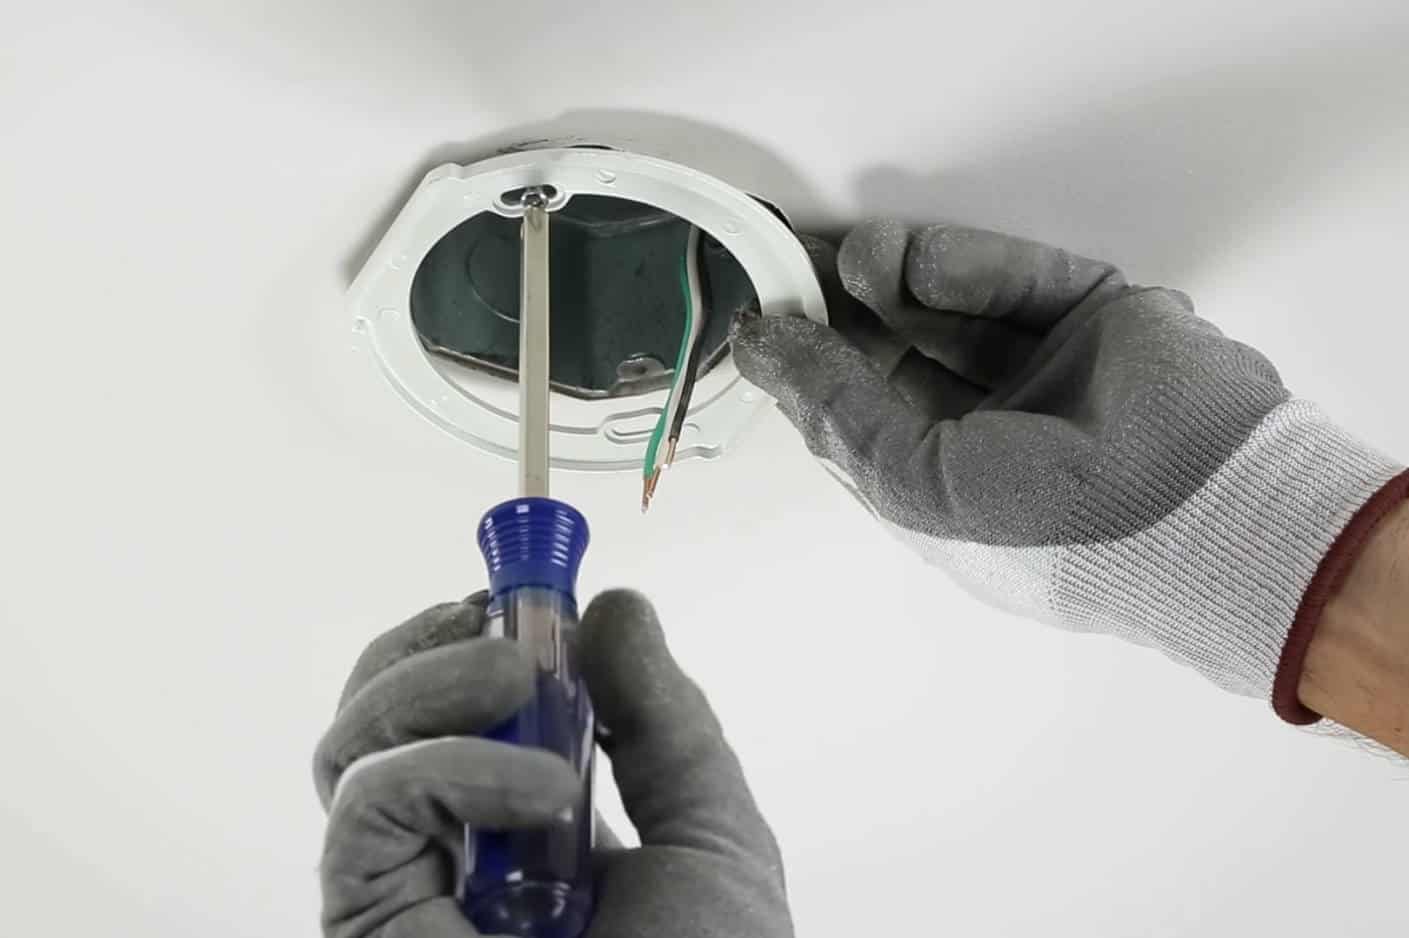
Begin by gathering the necessary tools for the task, including a screwdriver, wire cutters, and a voltage tester. Before proceeding, it's crucial to confirm that the power to the fixture is turned off. Once verified, carefully remove the screws or fasteners securing the light fixture to the ceiling. As you detach the fixture, be mindful of the electrical connections and support the weight of the fixture to prevent any accidental damage.
After lowering the light fixture, you'll be faced with the electrical wiring. Take note of the wire connections, ensuring that you can identify the hot (black or red), neutral (white), and ground (bare or green) wires. Using a voltage tester, double-check that the wires are not live before proceeding. Once confirmed, carefully disconnect the wires, taking care not to damage the insulation or create any loose connections.
With the electrical connections detached, you can proceed to remove the mounting bracket or strap that secured the light fixture to the ceiling. Depending on the type of fixture, this may involve unscrewing the bracket or releasing it from the ceiling junction box. Take your time to ensure that all components are safely detached and set aside the removed parts for future reference or disposal.
As you complete the removal process, take the opportunity to inspect the ceiling junction box and the wiring for any signs of wear or damage. This is an ideal time to address any issues and make any necessary repairs or replacements before proceeding with the installation of the ceiling fan.
By methodically removing the existing light fixture and handling the electrical connections with care, you're setting the stage for a smooth transition to a ceiling fan. This meticulous approach not only ensures a safe removal process but also prepares the space for the subsequent installation steps. With the existing fixture successfully removed, you're now ready to progress to the next phase of the ceiling fan installation journey.
Step 3: Install the ceiling fan mounting bracket
With the existing light fixture removed and the electrical connections safely handled, the next crucial step in the process of transitioning to a ceiling fan is installing the mounting bracket. The mounting bracket serves as the foundation for securing the ceiling fan to the ceiling, providing stability and support for the fixture.
Before proceeding with the installation, it's important to ensure that the ceiling junction box is suitable for supporting the weight and motion of a ceiling fan. If the existing junction box is not rated for ceiling fan installation, it must be replaced with a fan-rated box designed to handle the additional load and movement.
To install the mounting bracket, begin by identifying the specific type of bracket provided with the ceiling fan kit. Most mounting brackets feature a circular or rectangular design with slots or holes for securing the bracket to the ceiling. Align the bracket with the junction box, ensuring that it is level and securely positioned.
Using the provided screws or fasteners, attach the mounting bracket to the ceiling junction box, taking care to tighten the screws firmly to create a stable connection. It's essential to follow the manufacturer's instructions and recommendations for securing the bracket, as proper installation is critical to the safety and performance of the ceiling fan.
Once the mounting bracket is securely in place, double-check its alignment and stability to confirm that it can support the weight of the ceiling fan. A well-installed mounting bracket forms the basis for a secure and wobble-free ceiling fan, providing a solid anchor for the fixture.
In some cases, the ceiling fan kit may include additional support braces or hardware to reinforce the mounting bracket and enhance its stability. If provided, follow the manufacturer's guidelines to install these supplementary components, further fortifying the mounting system for the ceiling fan.
By installing the ceiling fan mounting bracket with precision and attention to detail, you're laying a solid groundwork for the subsequent stages of the installation process. A securely mounted bracket ensures the stability and safety of the ceiling fan, setting the stage for the assembly and attachment of the fan components in the following steps.
With the mounting bracket successfully installed, you're now ready to progress to the next phase of the ceiling fan installation journey, bringing you closer to the completion of this rewarding home improvement project.
Step 4: Assemble the ceiling fan
Assembling the ceiling fan is a pivotal stage in the installation process, marking the transition from preparation to the physical integration of the fan components. This step requires attention to detail and a systematic approach to ensure that the fan is assembled correctly and securely.
Begin by unpacking the contents of the ceiling fan kit and familiarizing yourself with the individual components. Lay out the fan motor, fan blades, mounting hardware, and any additional accessories in an organized manner, allowing for easy access during the assembly process.
Next, refer to the manufacturer's instructions to identify the specific assembly sequence for the ceiling fan. Most ceiling fan kits include detailed diagrams and step-by-step guidelines to facilitate the assembly process. It's essential to follow these instructions closely, as they provide valuable insights into the proper alignment and attachment of the fan components.
Start by attaching the fan blades to the blade brackets, following the designated orientation and ensuring a secure connection. Depending on the fan model, this may involve aligning the pre-drilled holes on the blades with the corresponding slots or screws on the brackets. Take care to tighten the screws evenly to maintain balance and stability across all fan blades.
Once the fan blades are securely attached to the blade brackets, proceed to connect the blade brackets to the fan motor housing. This step typically involves aligning the brackets with the designated mounting points on the motor housing and securing them in place using the provided screws or fasteners. It's important to verify that the blade brackets are evenly positioned and firmly attached to the motor housing to prevent any imbalance during operation.
As you progress through the assembly process, periodically check the alignment and tightness of the connections to ensure that the fan components are coming together smoothly. Pay attention to any specific instructions related to blade orientation, motor housing alignment, and attachment techniques provided by the manufacturer.
By methodically assembling the ceiling fan components according to the manufacturer's guidelines, you're laying the foundation for a well-balanced and efficient fixture. A carefully assembled ceiling fan not only ensures optimal performance but also contributes to the overall safety and longevity of the installation.
With the ceiling fan components successfully assembled, you're now poised to move on to the next phase of the installation process, bringing you closer to the completion of this transformative home improvement project.
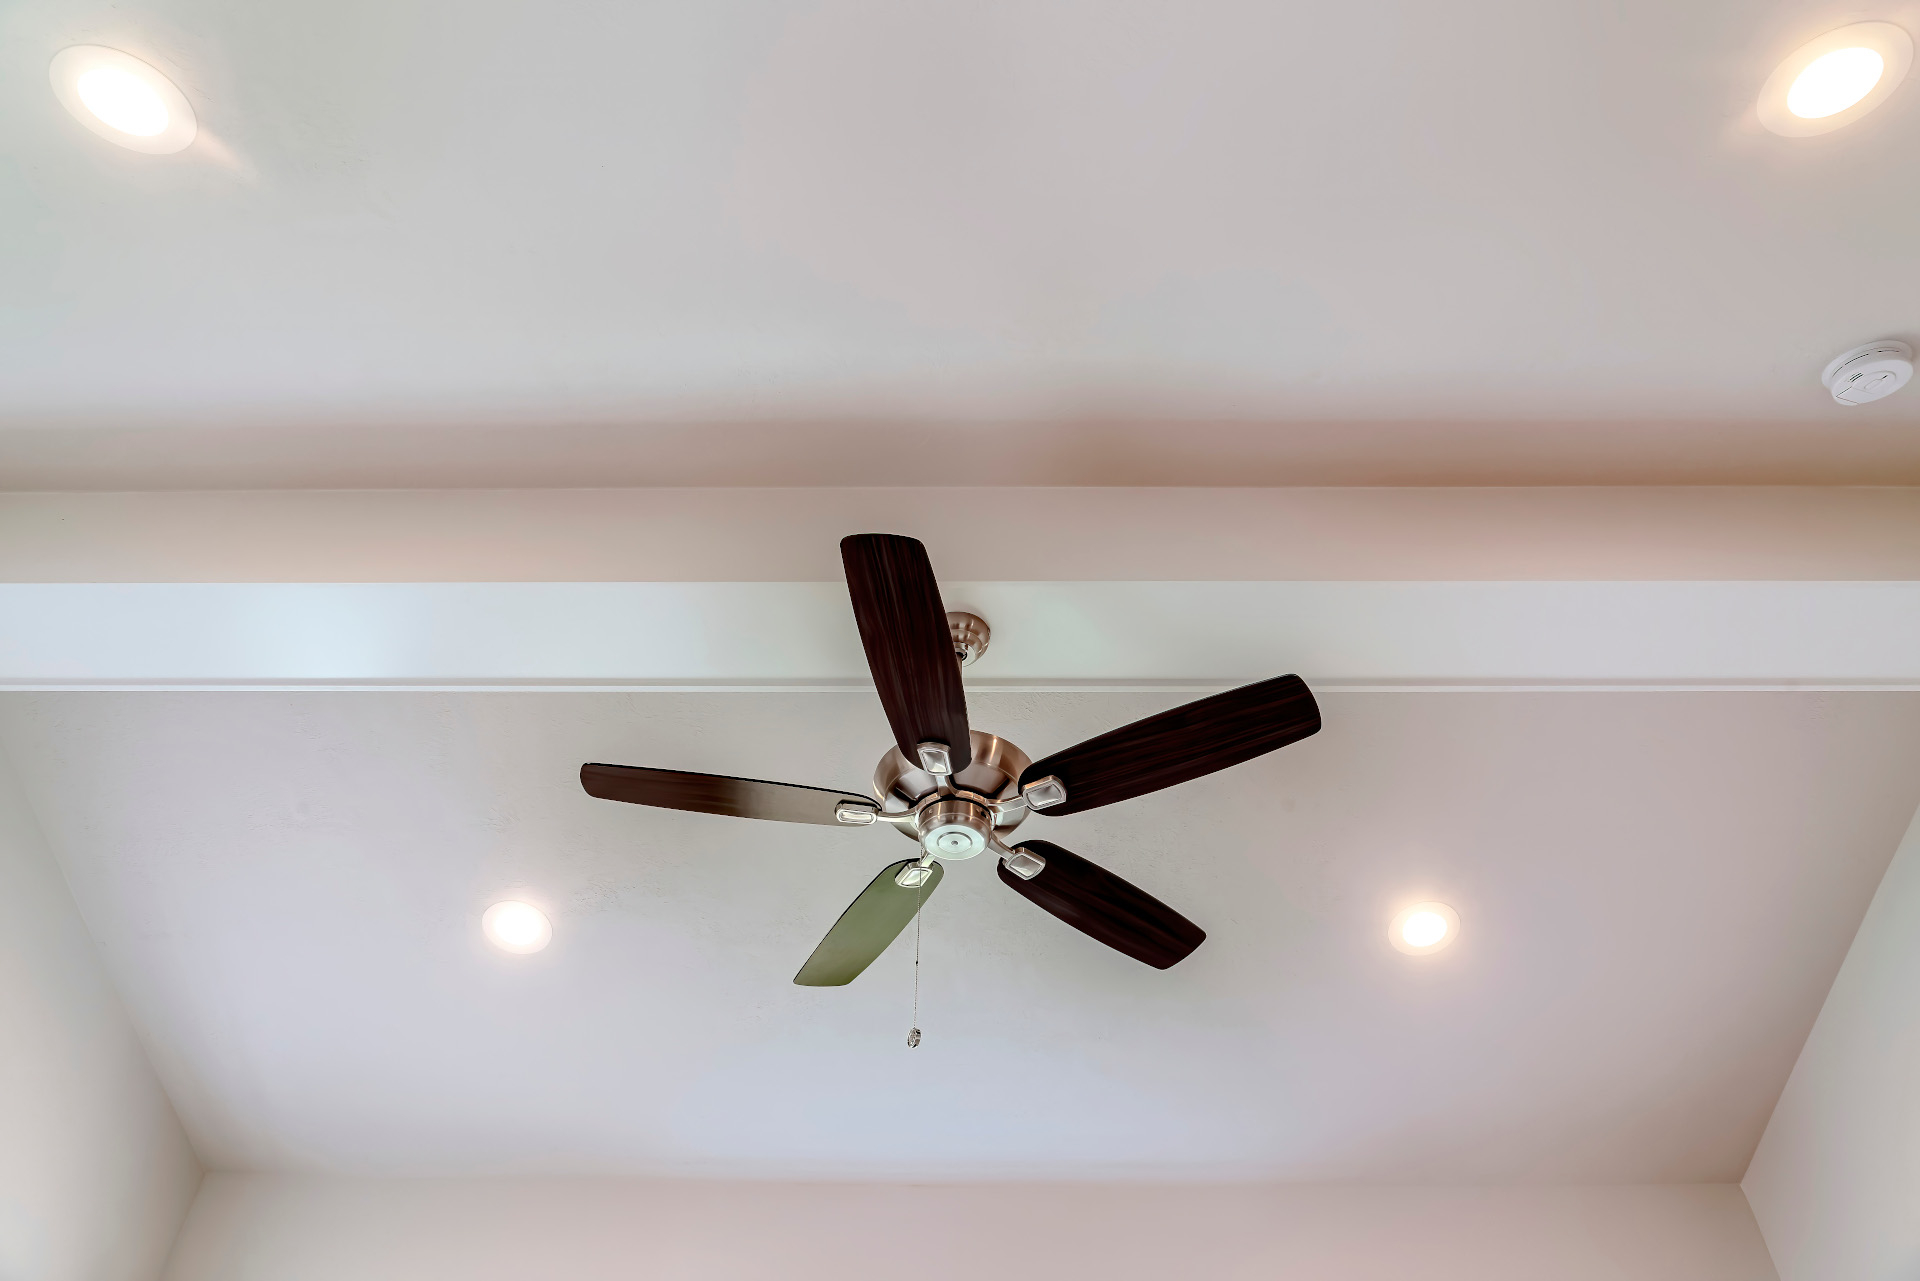
Step 5: Attach the fan blades
Attaching the fan blades is a crucial step in the installation process, as it directly impacts the performance and visual appeal of the ceiling fan. This phase requires precision and attention to detail to ensure that the blades are securely and evenly attached, contributing to the balanced operation and airflow efficiency of the fan.
Begin by carefully unpacking the fan blades from the ceiling fan kit and identifying the designated orientation for each blade. Most fan blades are designed with a specific shape or curvature to optimize airflow and minimize noise during operation. It's essential to align the blades according to the manufacturer's guidelines to achieve optimal performance.
Next, position the fan blades onto the blade brackets, taking care to match the pre-drilled holes on the blades with the corresponding slots or screws on the brackets. This alignment is critical to ensure that the blades are securely attached and properly balanced, minimizing the potential for wobbling or uneven airflow.
Using the provided screws or fasteners, firmly secure the fan blades to the blade brackets, ensuring that each attachment point is tightened evenly to maintain uniformity across all blades. It's important to exercise caution and avoid over-tightening the screws, as this can lead to warping or distortion of the blades, affecting their performance.
As you progress through the attachment process, periodically inspect the alignment and stability of the fan blades to confirm that they are securely fastened and level. Maintaining consistent blade alignment and tightness is essential to promote smooth and efficient airflow, contributing to the overall effectiveness of the ceiling fan.
Once all fan blades are securely attached to the blade brackets, double-check their alignment and balance to ensure uniformity across the entire fan assembly. This meticulous approach helps prevent potential issues such as noise, vibration, or uneven airflow, resulting in a well-balanced and visually appealing ceiling fan.
By methodically attaching the fan blades with precision and care, you're laying the groundwork for a reliable and efficient ceiling fan. A properly installed set of fan blades not only enhances the functionality of the fixture but also contributes to its aesthetic appeal, creating a harmonious addition to your living space.
With the fan blades successfully attached, you're now ready to progress to the next phase of the installation process, bringing you closer to the completion of this rewarding home improvement project.
Make sure to turn off the power to the light fixture before starting. Use a support brace to hold the fan’s weight and follow the instructions carefully.
Step 6: Connect the wiring
Connecting the wiring is a critical phase in the installation process, as it involves integrating the electrical components of the ceiling fan with the existing wiring in the ceiling junction box. This step requires careful attention to detail and adherence to electrical safety practices to ensure a secure and reliable connection.
Begin by identifying the electrical wires provided with the ceiling fan, typically consisting of a black (hot), white (neutral), and green or bare (ground) wire. It's essential to match these wires with the corresponding wires in the ceiling junction box, ensuring that the connections are made in accordance with standard electrical color coding.
Start by carefully threading the fan wires through the center of the mounting bracket, allowing for easy access during the wiring process. Next, identify the specific wires in the ceiling junction box, verifying the presence of the hot, neutral, and ground wires. It's crucial to confirm that the power to the junction box is turned off before proceeding with any wiring connections.
Using wire connectors or wire nuts, join the black fan wire to the hot or black wire in the ceiling junction box, the white fan wire to the neutral or white wire, and the green or bare fan wire to the ground wire. It's important to create secure and insulated connections, ensuring that the wires are tightly fastened and free from any exposed conductors.
As you make the wiring connections, it's advisable to use a voltage tester to confirm that the wires are not live before and after making the connections. This precautionary measure helps mitigate the risk of electrical shock and ensures that the wiring process is conducted in a safe and controlled manner.
Once the wiring connections are made, carefully tuck the connected wires into the ceiling junction box, ensuring that they are neatly arranged and do not interfere with the installation of the ceiling fan. It's important to maintain a clear and organized wiring layout to facilitate future maintenance and inspections.
After securing the wiring in the junction box, gently lift the assembled ceiling fan and align it with the mounting bracket, taking care to guide the fan wires through the designated opening in the canopy. Once the fan is positioned correctly, secure it to the mounting bracket using the provided screws or fasteners, ensuring that it is firmly anchored to the ceiling.
By methodically connecting the wiring with precision and adherence to electrical safety standards, you're establishing a reliable and secure electrical system for the ceiling fan. A well-executed wiring process not only ensures the functionality of the fan but also contributes to the overall safety and performance of the installation.
With the wiring successfully connected, you're now ready to progress to the next phase of the installation process, bringing you closer to the completion of this transformative home improvement project.
Step 7: Secure the fan in place
Securing the fan in place is a pivotal step that ensures the stability and safety of the ceiling fan installation. This phase involves anchoring the fan to the mounting bracket and verifying that it is securely fastened to the ceiling, creating a solid and wobble-free fixture.
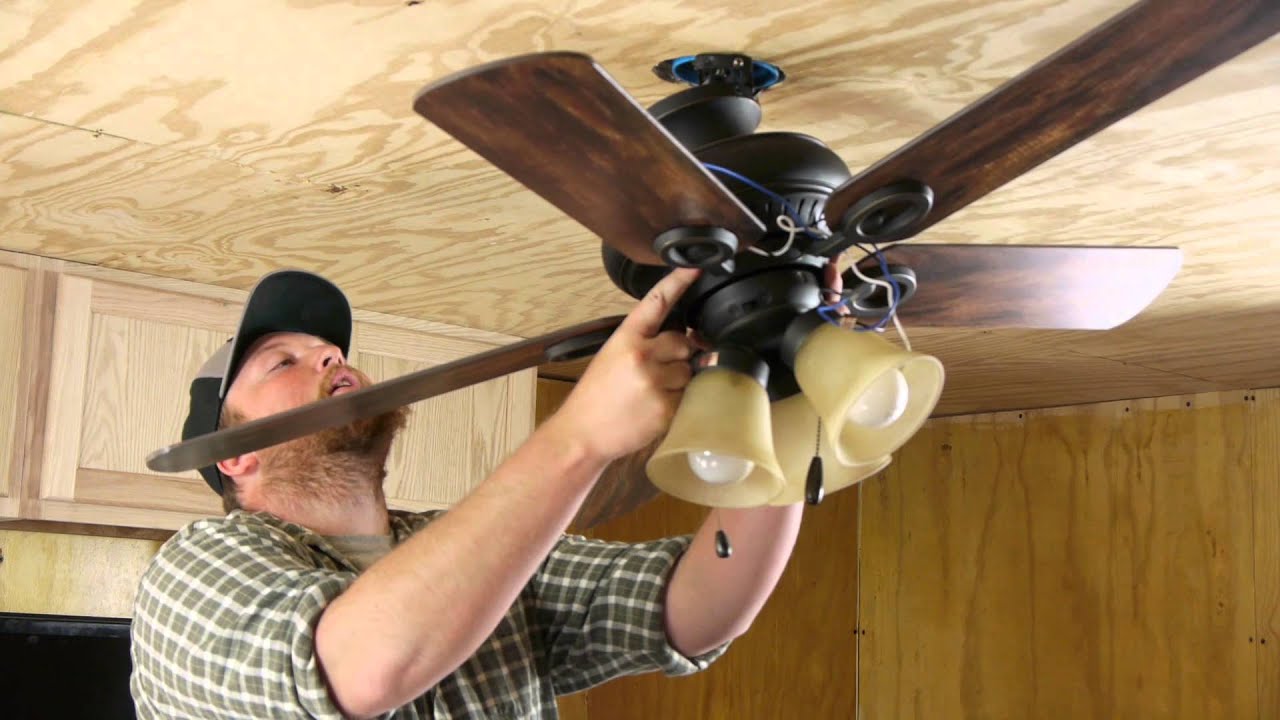
Begin by carefully lifting the assembled ceiling fan and aligning it with the mounting bracket attached to the ceiling. It's essential to position the fan correctly, ensuring that the fan wires are guided through the designated opening in the canopy. Take care to align the keyhole slots or mounting holes on the fan canopy with the corresponding tabs or screws on the mounting bracket.
Once the fan is aligned with the mounting bracket, gently rotate the fan until it locks into place, securing it to the bracket. This locking mechanism varies depending on the fan model but typically involves a twist-and-lock or snap-in design. Verify that the fan is firmly seated and engaged with the mounting bracket, providing a stable foundation for the fixture.
After securing the fan to the mounting bracket, use the provided screws or fasteners to reinforce the connection and ensure that the fan is firmly anchored to the ceiling. It's important to tighten the screws evenly and securely, creating a robust attachment that can withstand the movement and operation of the fan.
As you secure the fan in place, periodically check the alignment and stability of the fixture to confirm that it is level and wobble-free. A securely anchored ceiling fan not only enhances safety but also contributes to the smooth and efficient operation of the fixture, minimizing noise and vibration during use.
Once the fan is securely fastened to the ceiling, double-check the tightness of the screws and the overall stability of the installation. It's advisable to give the fan a gentle shake to ensure that it is firmly anchored and does not exhibit any wobbling or movement. This proactive approach helps identify and address any potential issues before completing the installation.
By methodically securing the fan in place with precision and attention to detail, you're establishing a reliable and stable fixture that enhances the comfort and functionality of your living space. A securely installed ceiling fan not only provides effective air circulation but also serves as a stylish and practical addition to your home.
With the fan securely in place, you're now ready to progress to the next phase of the installation process, bringing you closer to the completion of this rewarding home improvement project.
Step 8: Install the fan blades
Installing the fan blades is a pivotal stage in the ceiling fan installation process, marking the transition from component assembly to the integration of the essential elements that drive airflow and circulation. This step requires precision and attention to detail to ensure that the blades are securely and evenly attached, contributing to the balanced operation and airflow efficiency of the fan.
Begin by carefully unpacking the fan blades from the ceiling fan kit and identifying the designated orientation for each blade. Most fan blades are designed with a specific shape or curvature to optimize airflow and minimize noise during operation. It's essential to align the blades according to the manufacturer's guidelines to achieve optimal performance.
Next, position the fan blades onto the blade brackets, taking care to match the pre-drilled holes on the blades with the corresponding slots or screws on the brackets. This alignment is critical to ensure that the blades are securely attached and properly balanced, minimizing the potential for wobbling or uneven airflow.
Using the provided screws or fasteners, firmly secure the fan blades to the blade brackets, ensuring that each attachment point is tightened evenly to maintain uniformity across all blades. It's important to exercise caution and avoid over-tightening the screws, as this can lead to warping or distortion of the blades, affecting their performance.
As you progress through the attachment process, periodically inspect the alignment and stability of the fan blades to confirm that they are securely fastened and level. Maintaining consistent blade alignment and tightness is essential to promote smooth and efficient airflow, contributing to the overall effectiveness of the ceiling fan.
Once all fan blades are securely attached to the blade brackets, double-check their alignment and balance to ensure uniformity across the entire fan assembly. This meticulous approach helps prevent potential issues such as noise, vibration, or uneven airflow, resulting in a well-balanced and visually appealing ceiling fan.
By methodically attaching the fan blades with precision and care, you're laying the groundwork for a reliable and efficient ceiling fan. A properly installed set of fan blades not only enhances the functionality of the fixture but also contributes to its aesthetic appeal, creating a harmonious addition to your living space.
With the fan blades successfully attached, you're now ready to progress to the next phase of the installation process, bringing you closer to the completion of this rewarding home improvement project.
Read more: How To Change A Flat Ceiling Light
Step 9: Turn the power back on
After successfully completing the installation of the ceiling fan, the final crucial step is to restore power to the fixture. This pivotal phase marks the culmination of the installation process and allows you to test the functionality and performance of the newly installed ceiling fan.
Before turning the power back on, it's essential to conduct a comprehensive review of the installation, ensuring that all connections are secure, the fan blades are properly aligned, and the fixture is free from any obstructions. This proactive assessment helps identify and address any potential issues before energizing the fan.
Once you've verified the integrity of the installation, proceed to the circuit breaker or fuse box in your home. Locate the corresponding breaker or fuse that controls the power supply to the ceiling fan and switch it back to the "on" position. As the electricity flows back to the fixture, be attentive to any signs of abnormal operation, such as flickering lights, unusual sounds, or erratic fan movement.
As the power is restored, take a moment to observe the ceiling fan in action. Verify that the fan blades are rotating smoothly and evenly, generating a gentle and consistent airflow throughout the room. Listen for any unexpected noises or vibrations that may indicate a need for adjustments or further inspection.
If the ceiling fan is equipped with lighting features, test the functionality of the lights to ensure that they illuminate as intended. Verify that the fan's speed settings and any additional features, such as remote control operation or reversible blade rotation, are functioning correctly.
As the fan operates, assess the overall performance and comfort it provides to the room. Observe the airflow distribution and the impact of the fan on the ambient temperature, noting any improvements in air circulation and comfort. This real-time evaluation allows you to confirm the successful integration of the ceiling fan into your living space.
In the event of any unexpected issues or irregularities during the testing phase, it's advisable to turn off the power to the fixture immediately and conduct a thorough inspection to identify and address the underlying cause. This proactive approach helps maintain the safety and reliability of the installation, ensuring that the ceiling fan operates as intended.
By methodically turning the power back on and testing the functionality of the ceiling fan, you're finalizing the installation process and confirming the successful integration of the fixture into your living space. The restored power allows you to experience the immediate benefits of the ceiling fan, from enhanced air circulation to improved comfort, marking the completion of this transformative home improvement project.
Conclusion
In conclusion, the process of changing a ceiling light to a ceiling fan represents a transformative journey that elevates the functionality and aesthetics of any living space. From the initial steps of turning off the power and removing the existing light fixture to the meticulous assembly and installation of the ceiling fan components, this project embodies a blend of practicality, craftsmanship, and creativity. By following a systematic approach and adhering to safety protocols, homeowners can successfully transition from a basic lighting fixture to a versatile and stylish ceiling fan.
The installation of a ceiling fan not only enhances air circulation but also introduces a touch of elegance and comfort to the room. With a wide range of fan styles, sizes, and features available, homeowners have the flexibility to choose a ceiling fan that complements their decor while offering energy-efficient benefits and customizable options. Whether it's a sleek modern fan with integrated LED lighting or a classic design with reversible blades, the versatility of ceiling fans allows for personalized enhancements to any living space.
Throughout the installation process, attention to detail and precision are essential to ensure the safety and performance of the ceiling fan. From securing the mounting bracket to aligning and attaching the fan blades, each step contributes to the overall stability and efficiency of the fixture. By meticulously connecting the wiring and verifying the secure installation of the fan, homeowners can enjoy the peace of mind that comes with a professionally integrated ceiling fan.
As the power is restored and the ceiling fan comes to life, the immediate impact on the room's ambiance and comfort becomes evident. The gentle circulation of air, the soft illumination of the integrated lights, and the quiet operation of the fan collectively enhance the living space, creating a more inviting and enjoyable environment. The successful completion of the installation marks the beginning of a new chapter in home comfort and style, showcasing the rewarding results of the transition from a ceiling light to a ceiling fan.
In essence, the process of changing a ceiling light to a ceiling fan embodies the spirit of home improvement, offering homeowners the opportunity to enhance their living spaces with a practical and visually appealing upgrade. By embracing the installation process with enthusiasm and attention to detail, individuals can transform their rooms into comfortable retreats adorned with the charm and functionality of a well-installed ceiling fan.
Frequently Asked Questions about How To Change A Ceiling Light To A Ceiling Fan
Was this page helpful?
At Storables.com, we guarantee accurate and reliable information. Our content, validated by Expert Board Contributors, is crafted following stringent Editorial Policies. We're committed to providing you with well-researched, expert-backed insights for all your informational needs.


0 thoughts on “How To Change A Ceiling Light To A Ceiling Fan”