Articles
How To Quiet A Ceiling Fan
Modified: November 2, 2024
Discover effective techniques for quieting your ceiling fan with these informative articles. Get the peace and tranquility you deserve in your home.
(Many of the links in this article redirect to a specific reviewed product. Your purchase of these products through affiliate links helps to generate commission for Storables.com, at no extra cost. Learn more)
Introduction
Ceiling fans are a common feature in many homes and provide a cool breeze during the hot summer months. However, sometimes they can become noisy and disruptive, making it difficult to relax or concentrate. The good news is that there are various steps you can take to quiet a ceiling fan, restoring peace and tranquility to your living space.
In this article, we will guide you through the process of identifying the source of the noise and implementing practical solutions to eliminate or reduce it. From tightening loose screws to balancing the fan blades and using soundproofing materials, these methods will help restore your ceiling fan to its quiet and efficient state.
With a little effort and the right approach, you will be able to enjoy the benefits of your ceiling fan without the irritating noises that accompany it. So, let’s dive in and learn how to quiet a ceiling fan effectively.
Key Takeaways:
- Quiet your ceiling fan by tightening loose screws, lubricating the motor, and balancing the blades. Address worn or damaged parts and consider using anti-vibration pads for a peaceful living space.
- Experiment with fan speed and direction, and consider using soundproofing materials like acoustic foam to further reduce noise. Troubleshoot and implement solutions based on the specific cause of the noise.
Read more: How A Ceiling Fan Works
Step 1: Identify the Source of the Noise
The first step in quieting a ceiling fan is to identify the source of the noise. There can be several reasons why a ceiling fan may produce unwanted sounds, including loose components, worn-out parts, or an unbalanced blade. By determining the exact cause of the noise, you can address it directly and effectively.
Start by carefully observing the fan while it is running to locate the source of the noise. It could be coming from the motor, the blades, or any other part of the fan. Listen for any unusual sounds, such as grinding, rattling, or clicking noises. Also, take note of any vibrations you feel when the fan is operating.
If the noise is coming from the motor, it might indicate a mechanical issue or a lack of lubrication. Loose screws could also contribute to the noise as they can cause the fan to vibrate and create a rattling sound. On the other hand, if the noise seems to be coming from the blades, it could be a sign of imbalance or a worn-out part.
By pinpointing the source of the noise, you will have a better understanding of what needs to be done to quiet your ceiling fan. The next steps will address specific issues and provide solutions to eliminate the noise.
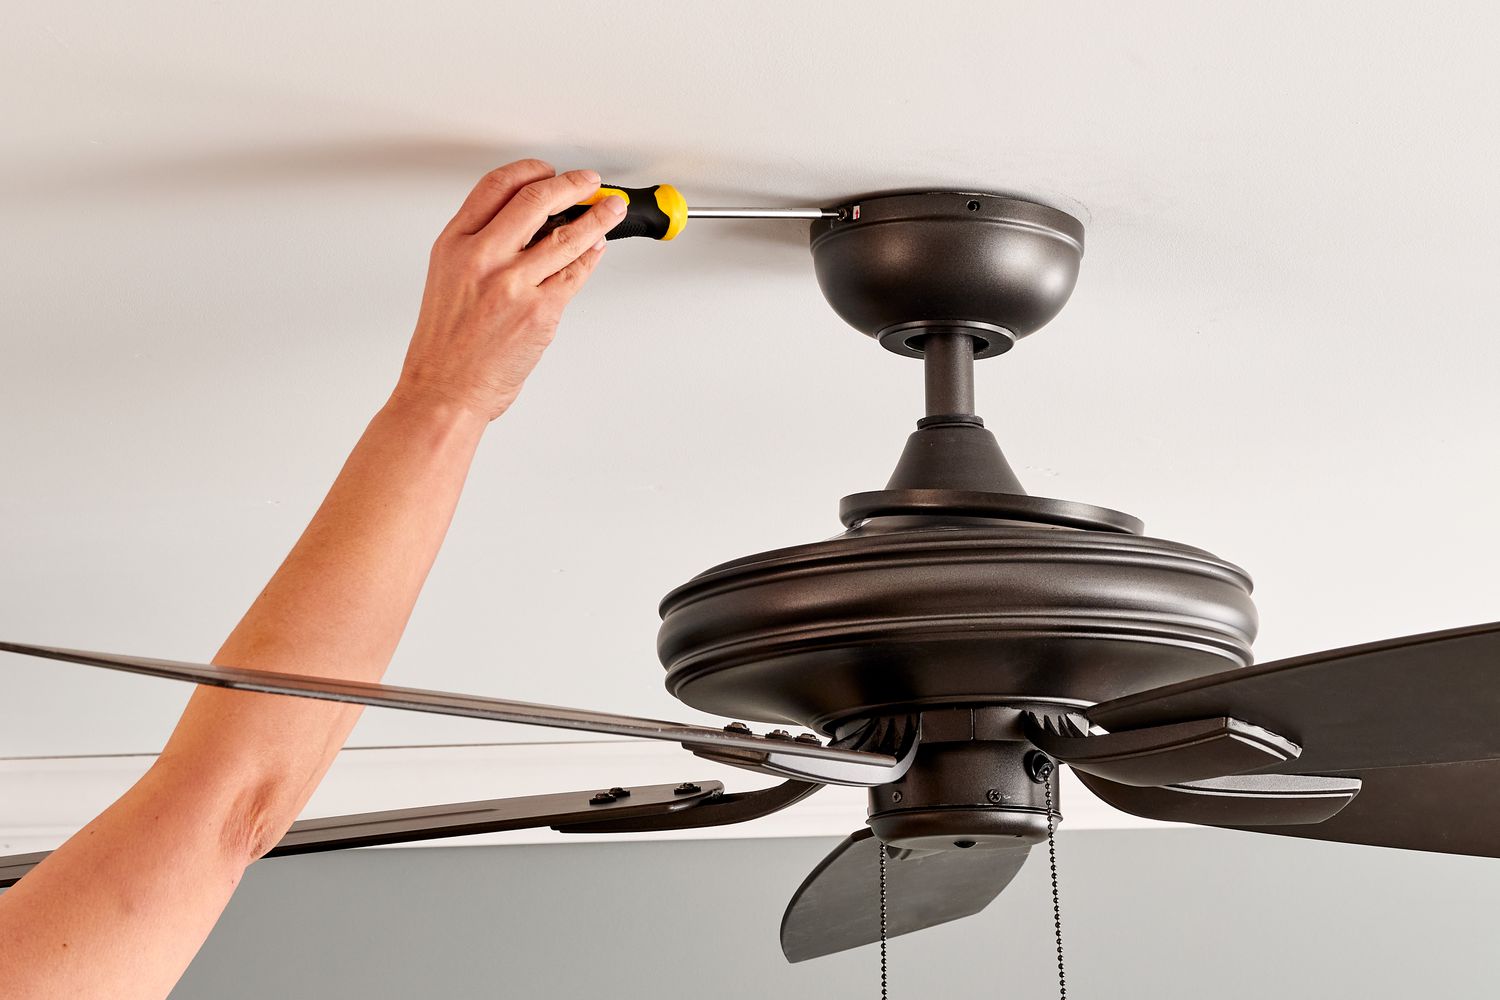
Step 2: Tighten Loose Screws
One common cause of a noisy ceiling fan is loose screws. Over time, the constant rotation of the fan can cause screws to loosen, resulting in vibrations and rattling noises. By tightening these screws, you can eliminate the source of the noise and restore peace and quiet to your fan.
To tighten the screws, start by turning off the fan and ensuring that it has completely stopped spinning. Use a step ladder or a stable platform to reach the fan, as it may be located high up on the ceiling. Carefully inspect the fan housing and blade assembly for any visible screws that may be loose.
You will need a screwdriver, preferably a Phillips head, appropriate for the type of screws used in your fan. Begin by gently tightening each screw, being careful not to overtighten as this could strip the screws or damage the fan. Go through all the visible screws, including those securing the motor housing, downrod, and blade brackets.
Once all the screws have been tightened, test the fan to see if the noise has been eliminated or significantly reduced. If there are still some lingering noises, move on to the next step to further address the issue.
Regularly checking and tightening the screws on your ceiling fan can help prevent future noise problems. Incorporate this simple maintenance task into your routine to ensure your fan remains quiet and efficient for years to come.
Step 3: Lubricate the Motor
Another reason why a ceiling fan may produce noise is a lack of lubrication in the motor. Over time, the internal components of the motor can become dry and cause friction, resulting in squeaking or grinding sounds. By lubricating the motor, you can reduce the friction and quiet down your ceiling fan.
To begin this step, turn off the fan and make sure it is not in motion. Locate the small oil port on the motor housing. This port is typically labeled and may be covered by a rubber or plastic cap. Remove the cap, revealing a small hole where you will apply the lubricant.
There are different types of lubricants suitable for ceiling fan motors, such as motor oil or a specific lubricating oil recommended by the fan manufacturer. Use a small amount of lubricant, applying it directly into the oil port. Be cautious not to overfill, as excess lubricant can cause dripping or other issues.
After applying the lubricant, replace the cap on the oil port securely. Turn on the fan and observe whether the noise has decreased. If the noise persists, it may be necessary to repeat the lubrication process or move on to the next step to troubleshoot further.
Remember to refer to your fan’s user manual for specific instructions and recommendations regarding motor lubrication. Regularly lubricating the motor can extend the lifespan of your fan and keep it running smoothly and quietly.
Step 4: Balance the Blades
An unbalanced ceiling fan can cause excessive vibrations and result in a noisy operation. Balancing the fan blades can help eliminate these vibrations, reducing the noise and creating a more peaceful environment.
To balance the blades, start by turning off the fan and allowing it to come to a complete stop. Use a ladder or a stable platform to access the fan. One by one, carefully measure the distance between each blade and the ceiling using a measuring tape. Take note of any significant differences in these measurements.
If you notice a significant variation in blade height, you can try a couple of methods to correct the imbalance. Some ceiling fans come with balancing kits that include small weights specifically designed for this purpose. These weights can be attached to the fan blades to even out the distribution of weight and reduce vibrations.
In some cases, you may need to experiment with the placement of the weights to achieve optimal balance. Start by attaching a weight to the lightest blade, using adhesive or the included hardware. Then, turn on the fan and observe if the noise has decreased. If the imbalance persists, try moving the weight to a different position or attaching it to a different blade.
If your fan doesn’t come with a balancing kit, you can also try using household items such as small adhesive-backed weights or even coins. Remember to distribute the weights evenly among the blades and test the fan after each adjustment to determine the effectiveness.
By properly balancing your ceiling fan blades, you can reduce vibrations and minimize noise. It may require some trial and error, but the effort is well worth it when you can enjoy a smooth and quiet operation from your fan.
To quiet a ceiling fan, try tightening the screws on the fan blades and motor housing. Dusting the blades and balancing the fan can also help reduce noise.
Read more: How To Update A Ceiling Fan
Step 5: Check for Worn or Damaged Parts
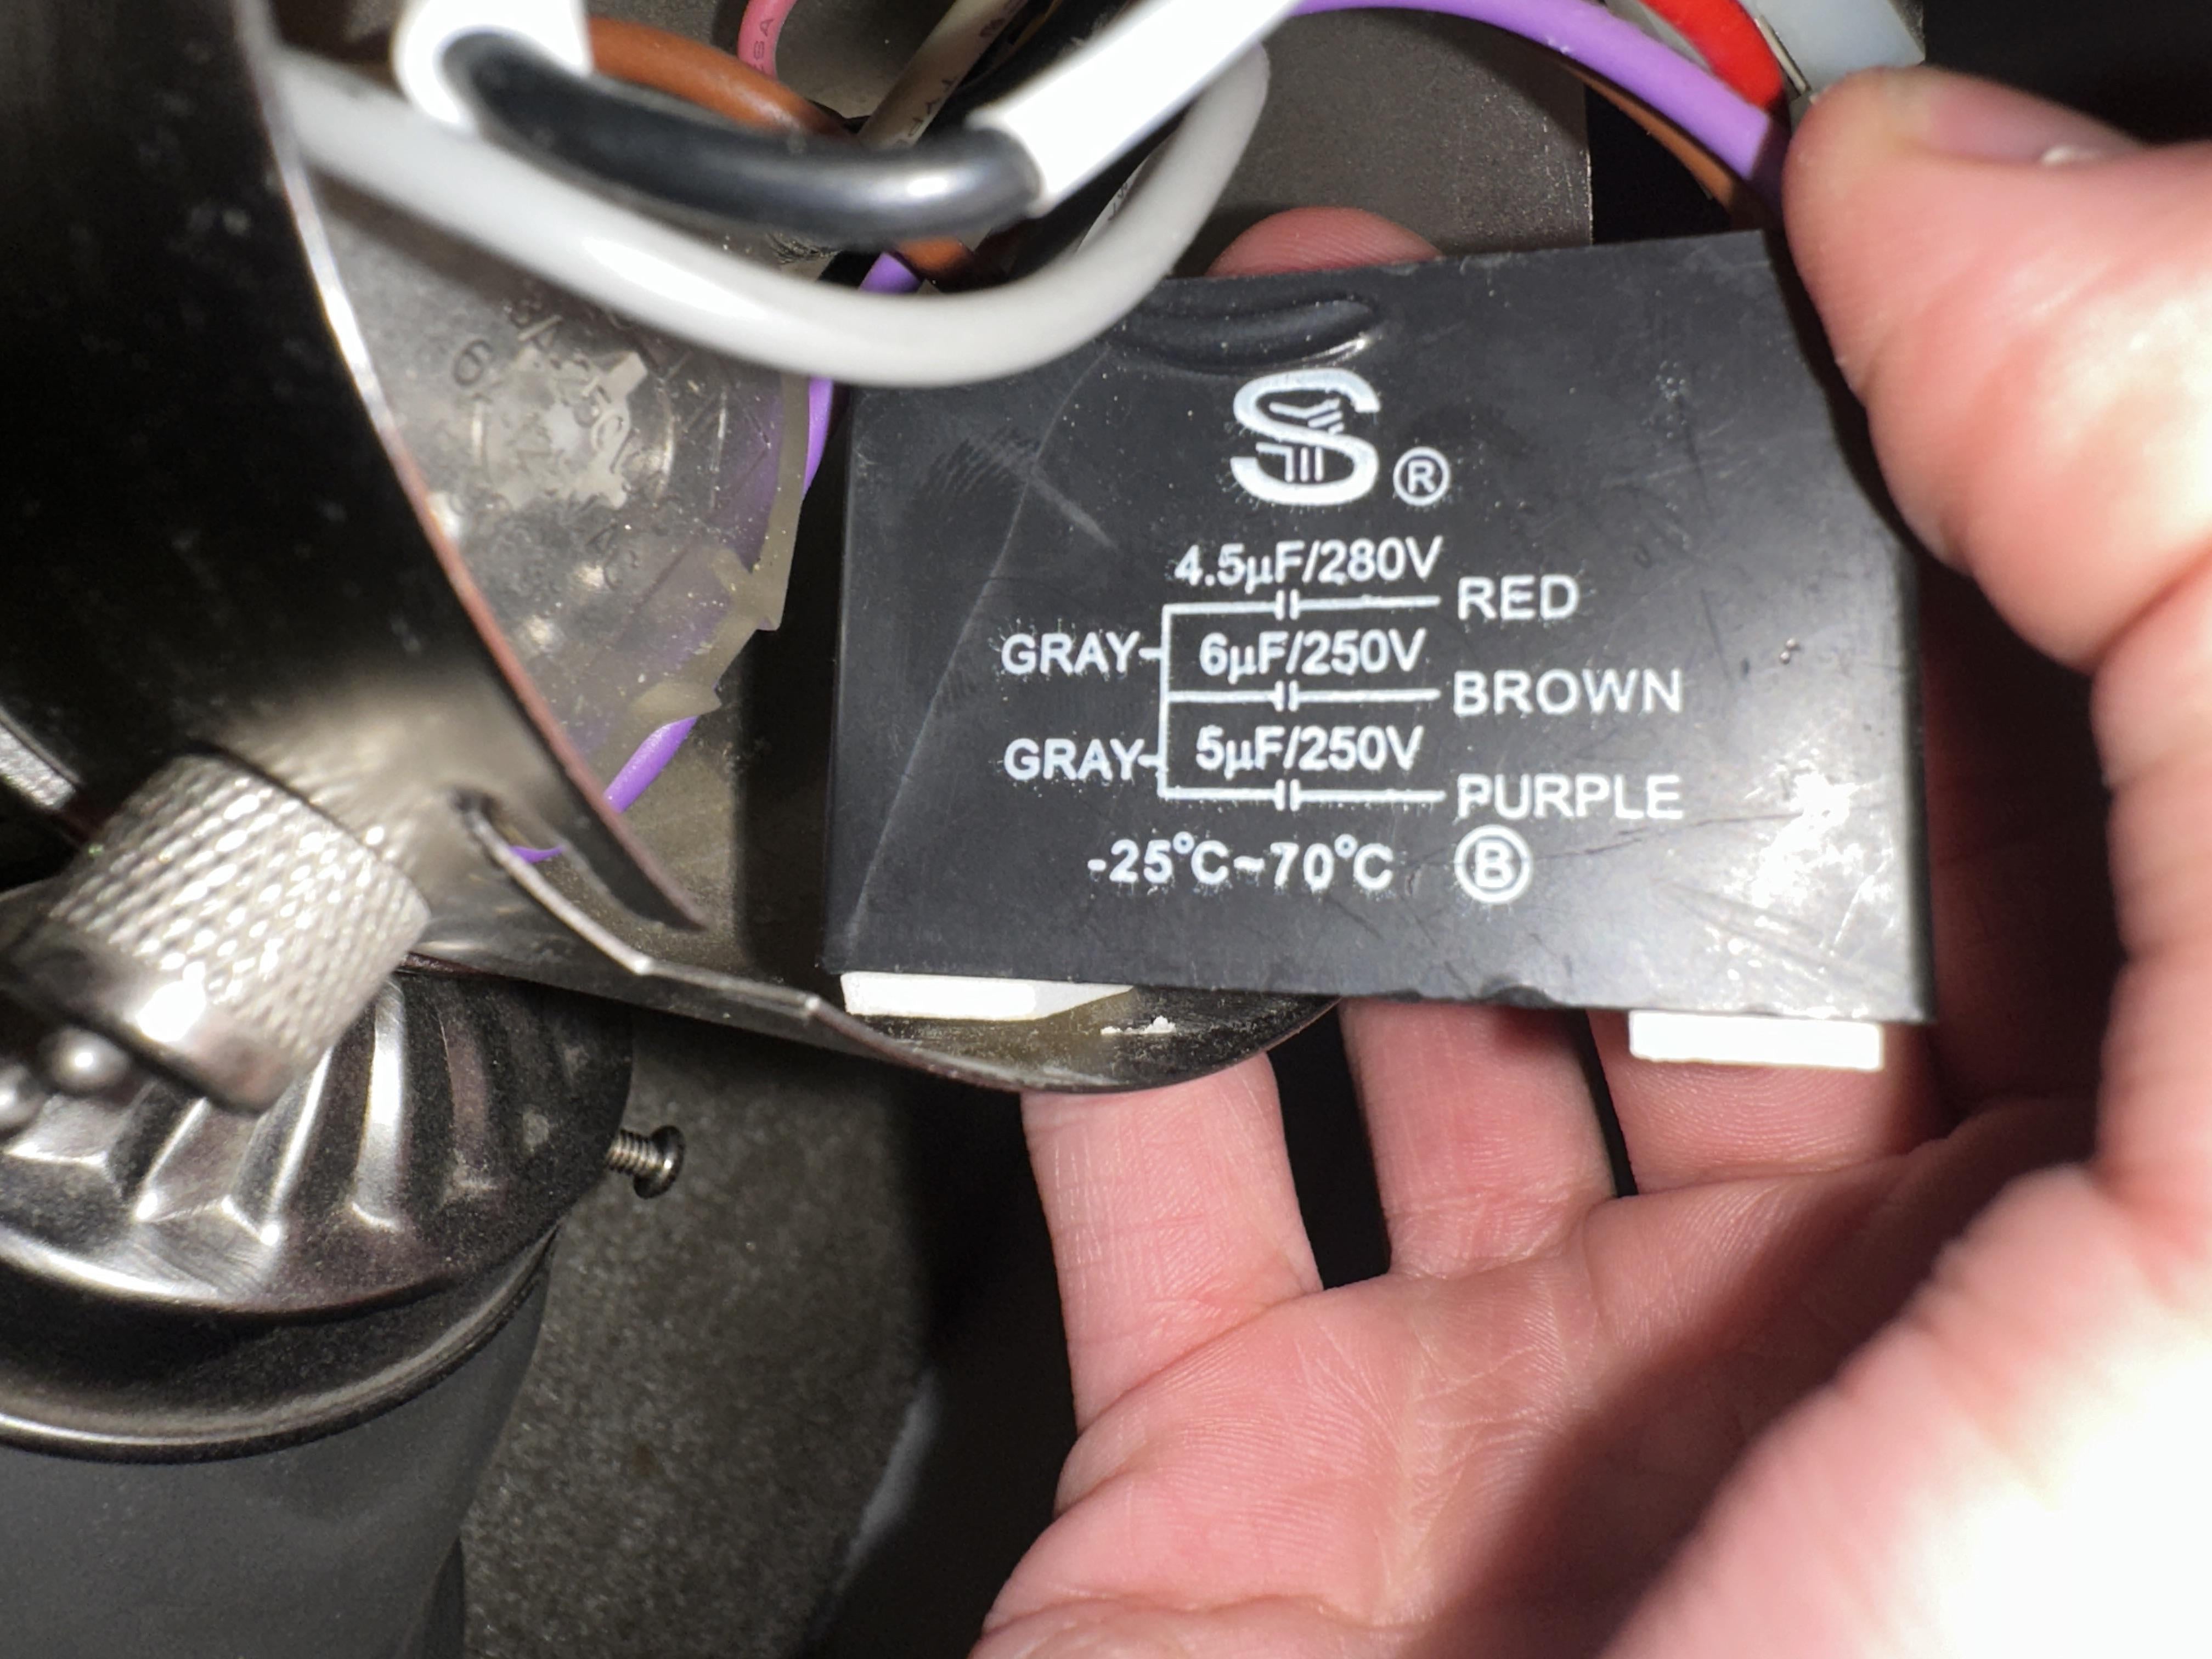
In some cases, a noisy ceiling fan may be caused by worn or damaged parts. Over time, components such as fan blades, motor bearings, or bushings can deteriorate, leading to increased noise levels. By identifying and replacing these worn or damaged parts, you can restore your fan’s quiet operation.
Begin by turning off the fan and allowing it to come to a complete stop. Inspect the fan blades for any signs of warping, cracks, or damage. If you notice any issues with the blades, such as uneven surfaces or visible damage, it may be necessary to replace them. Most manufacturers offer replacement blades that are compatible with their fans.
In addition to the blades, check the motor bearings and bushings for any signs of wear or damage. These parts facilitate the smooth rotation of the fan and when worn out, may create grinding or squeaking noises. If you notice any excessive play or roughness, it is recommended to consult the manufacturer or a professional technician for further assistance or replacement.
While inspecting the fan, also check the downrod and ceiling mount for any loose or damaged parts. Ensure that all connections are secure and tight. Loose fittings can cause the fan to vibrate, resulting in unnecessary noise.
If you identify any worn or damaged parts, it is crucial to replace them with compatible replacements. Consult the fan’s user manual or contact the manufacturer for guidance and instructions. By addressing these issues promptly, you can eliminate the noise and improve the overall performance of your ceiling fan.
Step 6: Install Anti-Vibration Pads
One effective way to reduce vibrations and noise from your ceiling fan is by installing anti-vibration pads. These pads act as a buffer between the fan motor and the mounting surface, absorbing vibrations and preventing them from transferring to the ceiling or walls.
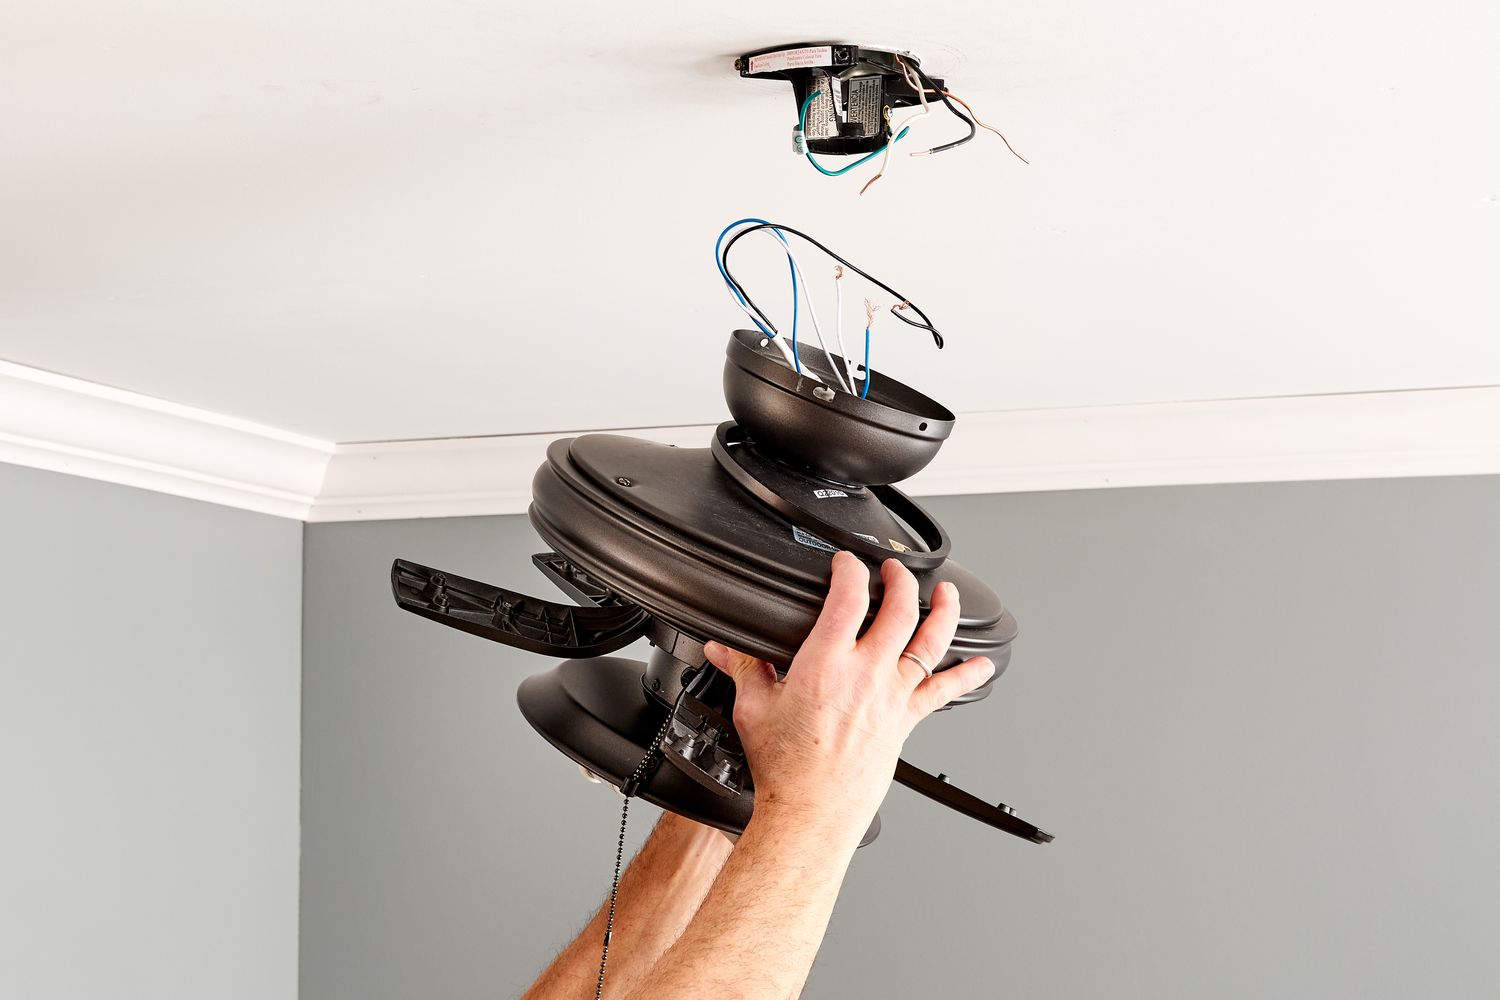
To install anti-vibration pads, start by turning off the fan and ensuring it is not in motion. Carefully remove the fan from the ceiling mount, following the instructions provided by the manufacturer. Place the fan on a stable surface.
Next, clean the mounting surface and the bottom of the fan motor to ensure proper adhesion. Anti-vibration pads typically come with adhesive backing, making them easy to attach. Peel off the protective backing and carefully place the pads on the bottom of the fan motor, ensuring they are evenly distributed.
Once the pads are attached, re-install the fan onto the ceiling mount, following the manufacturer’s instructions. Ensure all connections are secure and tight.
Anti-vibration pads not only reduce noise but also help to improve the stability and balance of the fan. They can be particularly beneficial in cases where vibrations are caused by uneven mounting surfaces or resonance between the fan and the ceiling structure.
Make sure to choose high-quality anti-vibration pads that are suitable for your fan model and size. While they may not completely eliminate all noise, they can significantly reduce vibrations and enhance the quietness of your ceiling fan.
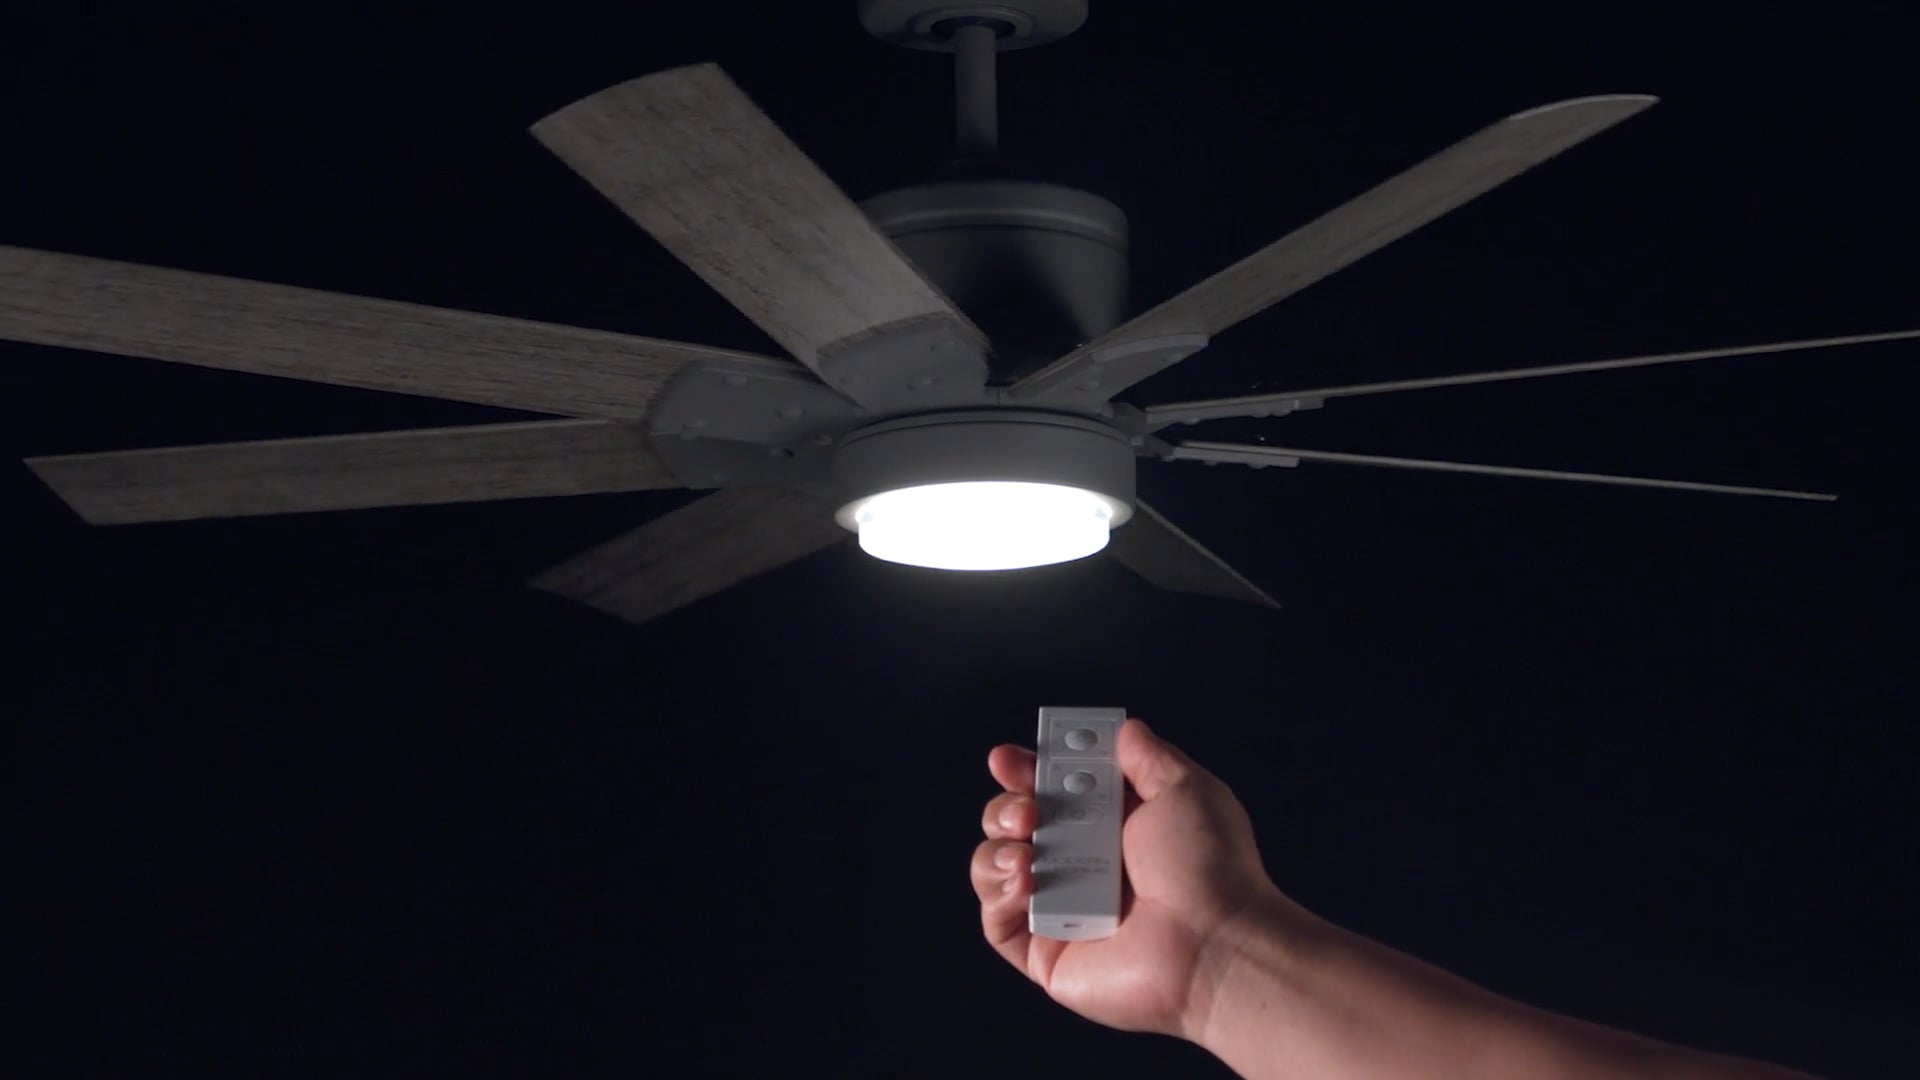
Step 7: Adjust Fan Speed and Direction
Another way to quiet a ceiling fan is by adjusting its speed and direction. Different fan speeds and directions can have varying levels of noise, so finding the right settings can help minimize any unwanted sounds.
Most ceiling fans come with multiple speed settings, typically controlled by a switch on the fan or a remote control. Start by experimenting with different speeds to find the one that produces the least amount of noise. In some cases, running the fan at a lower speed can help reduce vibrations and lessen noise levels. However, keep in mind that running the fan at a very low speed may not provide adequate airflow.
In addition to adjusting the speed, changing the direction of the fan blades can also affect the noise level. Ceiling fans can typically rotate in two directions: clockwise (or winter mode) and counterclockwise (or summer mode). Switching the direction of the fan blades can alter the airflow and may result in different noise levels. Try running the fan in both directions to determine which direction produces the least amount of noise.
Keep in mind that the optimal speed and direction may vary depending on the specific fan model and the layout of the room. Take some time to experiment and find the settings that offer the best combination of comfort and quietness.
By adjusting the speed and direction of your ceiling fan, you can find the sweet spot that minimizes noise and maximizes airflow. Take advantage of the fan’s features and capabilities to achieve the ideal balance for a peaceful and comfortable environment.
Step 8: Use a Soundproofing Material
If you have tried various methods to quiet your ceiling fan but still experience unwanted noise, you can consider using a soundproofing material to further reduce sound transmission. Soundproofing materials absorb and dampen vibrations, preventing them from spreading and causing noise in the surrounding areas.
One effective soundproofing material that you can use is acoustic foam. Acoustic foam panels are designed to absorb sound waves and reduce echoes. They are often used in recording studios and home theaters to create a more controlled and quiet environment.
To install acoustic foam, start by measuring the dimensions of the area where you want to apply it, such as the ceiling around the fan. Cut the foam panels to the appropriate size using a sharp utility knife or scissors. Peel off the backing and firmly press the foam panels onto the surface, ensuring they are evenly distributed.
Acoustic foam not only helps to reduce noise from the fan but can also improve overall room acoustics by minimizing echoes and reverberations. However, keep in mind that while it can significantly reduce noise, it may not completely eliminate all sounds.
If you prefer a less permanent solution, you can also consider using soundproofing curtains or soundproofing mats. These materials have sound-absorbing properties and can be easily hung around the fan area to reduce noise transmission.
Remember to research and choose high-quality soundproofing materials that are suitable for your specific needs and budget. By incorporating soundproofing material into your ceiling fan setup, you can further enhance the quietness and comfort of your living space.
Read more: How To Dispose Ceiling Fans
Conclusion
A noisy ceiling fan can be a major source of frustration and annoyance in your home. Luckily, there are several steps you can take to quiet your ceiling fan and restore peace to your living space.
Start by identifying the source of the noise, whether it’s loose screws, lack of lubrication, unbalanced blades, or worn-out parts. Tightening loose screws, lubricating the motor, and balancing the blades can often help reduce vibrations and eliminate noise.
If these measures don’t fully resolve the issue, check for any worn or damaged parts that may need replacing. Also, consider installing anti-vibration pads to further minimize vibrations and noise. Adjusting the fan’s speed and direction can also play a role in noise reduction.
If all else fails, you can explore the use of soundproofing materials such as acoustic foam to absorb and dampen sound waves, creating a quieter environment around your ceiling fan.
Remember, the key to successfully quieting your ceiling fan is to patiently troubleshoot and implement the appropriate solutions based on the specific cause of the noise.
By following these steps and employing the necessary techniques, you can enjoy a peaceful and quiet ceiling fan that provides efficient airflow without disruptive noises. Take the time to maintain your fan regularly and address any issues promptly to ensure its long-lasting performance.
So, don’t let a noisy ceiling fan interrupt your comfort. Implement these steps and reclaim the serenity in your home.
Frequently Asked Questions about How To Quiet A Ceiling Fan
Was this page helpful?
At Storables.com, we guarantee accurate and reliable information. Our content, validated by Expert Board Contributors, is crafted following stringent Editorial Policies. We're committed to providing you with well-researched, expert-backed insights for all your informational needs.


0 thoughts on “How To Quiet A Ceiling Fan”