Home>Home Maintenance>How To Install A Portable Air Conditioner In A Sliding Window
Home Maintenance
How To Install A Portable Air Conditioner In A Sliding Window
Modified: August 28, 2024
Learn how to easily install a portable air conditioner in a sliding window for efficient cooling at home. Get step-by-step instructions and tips for home maintenance.
(Many of the links in this article redirect to a specific reviewed product. Your purchase of these products through affiliate links helps to generate commission for Storables.com, at no extra cost. Learn more)
Introduction
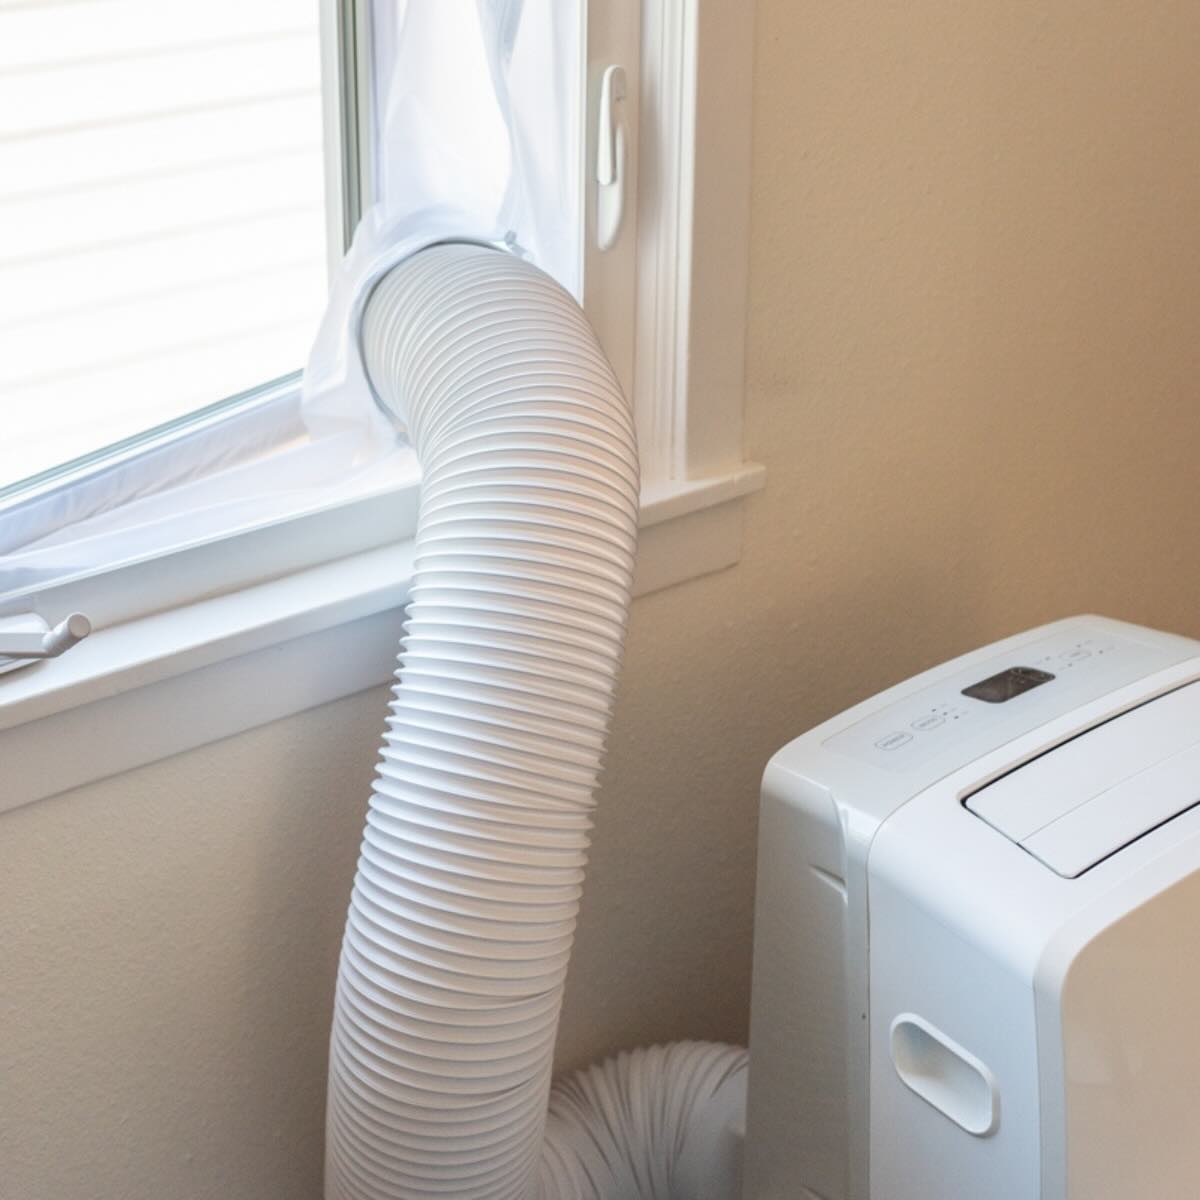
Installing a portable air conditioner in a sliding window can be a great solution for keeping your home cool during those hot summer months. Whether you don’t have central air conditioning or you simply want to cool down specific rooms, a portable AC unit offers flexibility and convenience.
In this article, we will guide you through the step-by-step process of installing a portable air conditioner in a sliding window. We will cover everything from measuring the window to securing the unit properly. By following these instructions, you will be able to enjoy a comfortable and cool living space in no time.
Before we dive into the installation process, let’s take a moment to highlight some of the benefits of a portable air conditioner. Unlike window-mounted or central air conditioning systems, portable units are portable, meaning you can move them from room to room as needed. This allows for targeted cooling and energy efficiency, as you only need to cool the spaces you are using.
Additionally, portable air conditioners are easy to install and require no permanent modifications to your home. They typically come with a window adapter kit that allows them to be seamlessly fitted into sliding windows. This makes them an excellent option for renters or those who want a temporary cooling solution.
However, it’s important to note that portable air conditioners do have some limitations. They are generally not as powerful as central air conditioning systems, so they may struggle to cool large areas or multiple rooms. Additionally, they require a window or vent through which to expel hot air, so proper installation is crucial to ensure efficient operation.
Now that we understand the benefits and considerations of portable air conditioners, let’s move on to the step-by-step installation process. Gather the required tools and let’s get started!
Key Takeaways:
- Installing a portable air conditioner in a sliding window is a practical and convenient way to keep your home cool. It offers flexibility, energy efficiency, and targeted cooling for specific rooms, making it a great option for renters or those in need of a temporary cooling solution.
- Proper installation, including measuring the window, preparing the opening, and securing the window kit and exhaust hose, is crucial for efficient operation. Testing the air conditioner ensures it is functioning correctly, providing a cooler and more comfortable living space.
Step 1: Gather the Required Tools
Before you begin the installation process, it’s important to gather all the necessary tools to ensure a smooth and efficient installation of your portable air conditioner in a sliding window. Here is a list of the tools you will need:
1. Portable air conditioner: Make sure you have your portable air conditioner unit ready. Ensure it is suitable for use with sliding windows and has the necessary accessories, such as an exhaust hose and window adapter kit.
2. Window adapter kit: Most portable air conditioners come with a window adapter kit that allows you to secure the unit in a sliding window. Check if your unit includes the appropriate window adapter kit or purchase one separately if needed.
3. Measuring tape: You will need a measuring tape to accurately measure the width of your sliding window. This measurement is crucial to ensure that the window adapter kit fits properly.
4. Screwdriver or drill: Depending on the design of your window adapter kit, you may need a screwdriver or drill to attach the components securely.
5. Support brackets (if needed): Some window adapter kits may come with support brackets that help stabilize the unit. If your kit does not include support brackets, consider purchasing them separately to enhance stability.
6. Sealant or weatherstripping: To prevent drafts and improve the efficiency of your air conditioner, you may need sealant or weatherstripping to seal any gaps around the window adapter kit.
7. Safety goggles and gloves: It’s always a good idea to wear safety goggles and gloves while handling tools and equipment to protect yourself from any potential hazards.
Once you have gathered all the necessary tools, you can move on to the next step: measuring the width of your sliding window.
Step 2: Measure the Width of the Sliding Window
Before you start installing the portable air conditioner in your sliding window, it’s essential to measure the width of the window to ensure a proper fit. Here’s how you can do it:
1. Start by fully opening the sliding window and removing any screens or obstacles that may be in the way.
2. Take your measuring tape and measure the width of the window from one side to the other. Be sure to measure the opening where the window will be placed, rather than the entire frame.
3. Write down the measurement and double-check its accuracy. It’s crucial to have precise measurements as this will determine the proper size of the window adapter kit.
4. Keep in mind that some portable air conditioners come with adjustable window adapter kits that can fit a range of window sizes. If your unit has this feature, ensure that the kit can accommodate the width of your window based on the measurements you’ve taken.
5. If the window width is too large for the standard window adapter kit, you can purchase extensions or additional panels that are compatible with your portable air conditioner. These extensions can be easily attached to the window adapter kit to fit wider windows.
6. On the other hand, if the window width is smaller than the standard window adapter kit, you may need to consider using weatherstripping or foam insulation to fill in any gaps. This will help create a snug fit and prevent hot air from entering your living space.
Taking accurate measurements is crucial for a successful installation. By measuring the width of your sliding window correctly, you will ensure that the window adapter kit fits securely, allowing your portable air conditioner to operate efficiently. With the width measurement in hand, you can move on to preparing the window opening for installation.
Step 3: Prepare the Window Opening
Once you have measured the width of your sliding window, the next step is to prepare the window opening to install the portable air conditioner. Preparing the window opening involves clearing any obstructions and ensuring a clean and stable surface for the installation. Here’s what you need to do:
1. Start by removing any window treatments, such as blinds or curtains, from the window. This will give you full access to the window opening and prevent any potential damage to the window treatment during the installation process.
2. Check the window track and remove any dirt, debris, or obstructions that may hinder the smooth movement of the window. Use a vacuum cleaner or a damp cloth to clean the area thoroughly.
3. Inspect the window frame for any damages or loose parts. If you notice any issues, such as cracked window frames or loose screws, repair them before proceeding with the installation. A stable and sturdy window frame is essential for a secure installation.
4. Consider using window sealant or weatherstripping to fill any cracks or gaps around the window frame. This will help improve insulation and prevent drafts from entering your home.
5. If your window has a sliding screen, it is generally recommended to remove it during the air conditioner installation. The screen can obstruct the proper installation of the window adapter kit, so store it in a safe place until you no longer need the portable air conditioner.
6. Ensure that the window track is smooth and clear of any obstructions. If it seems stiff or difficult to open and close, lubricate it with a silicone-based lubricant to facilitate smooth movement.
By preparing the window opening, you create a clean and stable foundation for the installation of the portable air conditioner. This step helps ensure the proper functioning of the window adapter kit and guarantees a secure and efficient installation. With the window opening prepared, you can now move on to the installation of the window adapter kit.
Step 4: Install the Window Adapter Kit
Installing the window adapter kit is a crucial step in setting up your portable air conditioner in a sliding window. The window adapter kit provides a secure connection between the unit and the window, allowing for the proper exhaust of hot air. Follow these steps to install the window adapter kit:
1. Begin by unpacking the window adapter kit and familiarizing yourself with its components. The kit typically includes a window panel, adjustable panels, and securing brackets. Make sure you have all the parts ready before proceeding.
2. Take the window panel, which is usually made of sturdy and adjustable material such as plastic or plexiglass. Align the panel with the width of your sliding window, ensuring that it fits snugly.
3. If the window adapter kit includes adjustable panels, attach them to the sides of the window panel to extend it to the required width. Secure the adjustable panels using the provided screws or clips.
4. Place the window panel with the attached adjustable panels into the window opening, making sure it sits flush against the window frame. Ensure that the panel is level and centered in the window opening for a proper fit.
5. Adjust the length of the window panel as needed by sliding it in or out. The panel should extend beyond the width of the window opening to create a seal and prevent hot air from leaking back into the room.
6. Attach the securing brackets to the window frame to hold the window panel in place. Depending on the design of the kit, this may involve using screws or adhesive strips. Follow the manufacturer’s instructions to securely fasten the brackets.
7. Double-check the stability and security of the installed window adapter kit. Ensure that it is firmly in place and does not wobble or shift when pressure is applied. This will help prevent any potential accidents or damage during the operation of the portable air conditioner.
By installing the window adapter kit correctly, you create a secure and efficient connection between the portable air conditioner and the sliding window. This step ensures that hot air is properly exhausted outside while keeping the interior cool and comfortable. With the window adapter kit securely installed, you can move on to placing the portable air conditioner in the window opening.
Use a plexiglass or plywood to fill the gap above the air conditioner in the sliding window. This will help to seal the window and prevent hot air from entering the room.
Step 5: Place the Portable Air Conditioner in the Window Opening
With the window adapter kit securely installed, it’s time to place the portable air conditioner into the window opening. This step ensures that the unit is properly positioned for optimal cooling and airflow. Follow these steps to place the portable air conditioner in the window opening:
1. Carefully position the portable air conditioner near the window opening. Make sure you have enough space to maneuver the unit without any obstructions.
2. Check the unit’s user manual for any specific instructions regarding positioning or orientation. Some units may need to be placed closer to the window for the best cooling performance.
3. Gently lift the portable air conditioner and place it into the window opening, aligning it with the window adapter kit. The unit should be positioned in a way that the exhaust hose is extending through the window panel while the control panel and intake are facing inward.
4. Ensure that the portable air conditioner is sitting securely in the window opening. It should not wobble or shift when pressure is applied.
5. Adjust the position of the unit if necessary to ensure proper alignment with the window adapter kit. The exhaust hose should be easily connected to the window panel without any kinks or bends.
6. Keep in mind that the weight of the portable air conditioner may require additional support. If your window adapter kit includes support brackets, attach them to the window frame to provide stability and prevent any potential accidents.
7. Check that all cords and cables are properly routed and not pinched by the unit or the window. This will prevent any damage to the cords and ensure safe operation.
Once the portable air conditioner is properly placed in the window opening, it is ready to be connected and secured for operation. In the next step, we will discuss how to extend the exhaust hose to complete the installation process.
Step 6: Extend the Exhaust Hose
Extending the exhaust hose is a crucial step in the installation of a portable air conditioner in a sliding window. The exhaust hose allows hot air to be expelled from the unit and should be properly extended to ensure effective cooling. Follow these steps to extend the exhaust hose:
1. Locate the exhaust hose outlet on the back of the portable air conditioner. This is usually a round or rectangular opening.
2. Measure the distance from the exhaust hose outlet to the window panel. This will determine how much hose you need to extend and position properly.
3. Identify the sections of your exhaust hose. In most cases, the hose is composed of multiple sections that can be extended and connected to reach the desired length.
4. Gently pull the sections of the exhaust hose apart to extend it to the required length. Make sure not to stretch or bend the hose too much, as this can restrict airflow.
5. Connect the extended sections of the exhaust hose firmly together. The hose sections should fit snugly to prevent any air leakage.
6. Hold the extended exhaust hose and carefully feed it through the window adapter kit’s designated opening or slot. Ensure that the hose extends through the window panel without any obstruction or kinks.
7. Attach the exhaust hose to the window panel using any clips, connectors, or brackets provided in the window adapter kit. This will secure the hose in place and prevent it from accidentally detaching during operation.
8. Check that the exhaust hose is properly positioned and aligned with the window panel. It should be straight and not overly twisted or bent, as this can obstruct airflow and reduce the unit’s efficiency.
9. Secure the window panel with the attached exhaust hose to the window frame using the brackets or straps provided in the window adapter kit. Ensure that the panel is tightly secured and does not move or shift.
By extending and properly positioning the exhaust hose, you create a clear path for hot air to be expelled from the portable air conditioner. This step is essential for optimal cooling performance and energy efficiency. With the exhaust hose extended and secured, you are now ready to move on to the next step: securing the window kit and exhaust hose.
Step 7: Secure the Window Kit and Exhaust Hose
Securing the window kit and exhaust hose is crucial for maintaining the integrity of the installation and ensuring efficient operation of your portable air conditioner. Properly securing these components will prevent air leaks, maintain a tight seal, and keep the unit stable. Follow these steps to secure the window kit and exhaust hose:
1. Check the window adapter kit for any additional brackets, screws, or adhesive strips provided. These components are designed to securely hold the window kit in place and minimize any potential movement.
2. Attach the additional brackets or screws provided with the window adapter kit to secure the window panel and window kit to the window frame. Follow the manufacturer’s instructions or guidelines to ensure proper attachment.
3. Make sure the window kit is tightly sealed against the window frame. Use weatherstripping or sealant, if necessary, to fill any gaps or spaces between the window adapter and the window frame. This will prevent outside air from entering and compromising the cooling efficiency.
4. Securely fasten any clips or connectors provided in the window adapter kit to connect the exhaust hose to the designated opening on the window panel. Ensure that the connection is tight and secure.
5. Check the entire setup for any signs of movement or instability. Gently push and pull on the window kit and exhaust hose to ensure they are firmly attached to the window frame and portable air conditioner.
6. If your window adapter kit includes support brackets or braces, attach them securely to the window frame to provide additional stability and prevent any accidental shifting or falling of the portable air conditioner.
7. Double-check all the connections and attachments to ensure that they are secure. An adequately secured window kit and exhaust hose will prevent any potential damage to the unit and ensure the efficient and safe operation of the portable air conditioner.
Properly securing the window kit and exhaust hose is critical to the overall performance of your portable air conditioner. It guarantees a tight seal and prevents any air leakage, ensuring that cool air remains inside while hot air is effectively expelled outside. With the window kit and exhaust hose securely in place, you can move on to the final step: testing the air conditioner.
Step 8: Test the Air Conditioner
After completing the installation process and securing the window kit and exhaust hose, it’s time to test the portable air conditioner to ensure it is functioning properly. Testing the unit will allow you to verify that the cooling performance meets your expectations and that all components are working correctly. Follow these steps to test the air conditioner:
1. Plug in the portable air conditioner into a grounded electrical outlet. Ensure that the outlet can handle the unit’s power requirements and is easily accessible.
2. Turn on the power switch on the unit, usually located on the control panel or near the power cord. Some models may also require you to set the desired temperature or select a cooling mode.
3. Allow the portable air conditioner to run for a few minutes to reach its full cooling capacity. This will give you a more accurate assessment of its performance.
4. Check the air coming from the unit’s vents. It should feel cold and refreshing, indicating that the cooling mechanism is functioning correctly. If the air doesn’t feel as cool as expected, double-check that the exhaust hose and window kit are properly installed without any leaks or obstructions.
5. Monitor the unit’s noise level. While some noise is typical for portable air conditioners, excessive or unusual sounds may indicate a problem. If you notice any loud or unusual noises, consult the user manual or contact the manufacturer for further assistance.
6. Use a thermometer or a thermostat to measure the temperature in the room. Compare the measured temperature with the temperature set on the portable air conditioner’s control panel. If there is a significant difference, you may need to calibrate the unit or make adjustments to achieve the desired cooling level.
7. Pay attention to any changes in the room’s humidity levels. Portable air conditioners can help reduce humidity, creating a more comfortable indoor environment. If you notice a decrease in humidity levels, the unit is functioning properly in dehumidifying mode.
8. Inspect the exhaust hose and window kit for any signs of condensation or water leakage. While some condensation is normal, excessive moisture or leakage may indicate a problem with the installation or the unit itself. In such cases, consult the user manual or contact the manufacturer for assistance.
By testing the portable air conditioner, you can ensure that it is operating correctly and providing the desired cooling effects. If you encounter any issues or inconsistencies during the testing, troubleshooting steps outlined in the user manual can help resolve common problems. With a successfully tested air conditioner, you can now enjoy a cooler and more comfortable living space.
Conclusion
Installing a portable air conditioner in a sliding window is a practical and convenient way to keep your home cool during the hot summer months. By following the step-by-step instructions outlined in this guide, you can successfully install your portable air conditioner and enjoy a comfortable living space.
Throughout the installation process, we covered essential steps that include gathering the required tools, measuring the width of the sliding window, preparing the window opening, installing the window adapter kit, placing the portable air conditioner in the window opening, extending the exhaust hose, securing the window kit and exhaust hose, and finally, testing the air conditioner.
Properly measuring the width of the sliding window, preparing the window opening, and correctly installing the window adapter kit are fundamental to ensuring a secure and efficient installation. Securing the window kit and exhaust hose helps maintain a tight seal, preventing any air leakage and maintaining the optimal performance of the portable air conditioner.
Once you have completed the installation, it is essential to test the air conditioner to verify its proper functioning. Testing the unit gives you the opportunity to assess the cooling performance and adjust any settings if necessary. It also allows you to ensure that all components are working correctly and address any potential issues or concerns.
Remember, while portable air conditioners offer flexibility and convenience, they do have certain limitations. They may not be as powerful as central air conditioning systems and may struggle to cool large areas or multiple rooms. It is also important to consider energy efficiency and regularly maintain the unit to ensure optimal performance.
By following the steps outlined in this guide and keeping these considerations in mind, you can enjoy a cool and comfortable home during the summer months. Remember to consult the user manual provided with your portable air conditioner for specific instructions and recommendations from the manufacturer.
Stay cool and beat the heat with your newly installed portable air conditioner!
Frequently Asked Questions about How To Install A Portable Air Conditioner In A Sliding Window
Was this page helpful?
At Storables.com, we guarantee accurate and reliable information. Our content, validated by Expert Board Contributors, is crafted following stringent Editorial Policies. We're committed to providing you with well-researched, expert-backed insights for all your informational needs.