Articles
How To Store Hyacinth Bean Seeds
Modified: September 1, 2024
Learn how to store hyacinth bean seeds with our informative articles. Proper storage techniques ensure the vitality and future growth of your seeds.
(Many of the links in this article redirect to a specific reviewed product. Your purchase of these products through affiliate links helps to generate commission for Storables.com, at no extra cost. Learn more)
Introduction
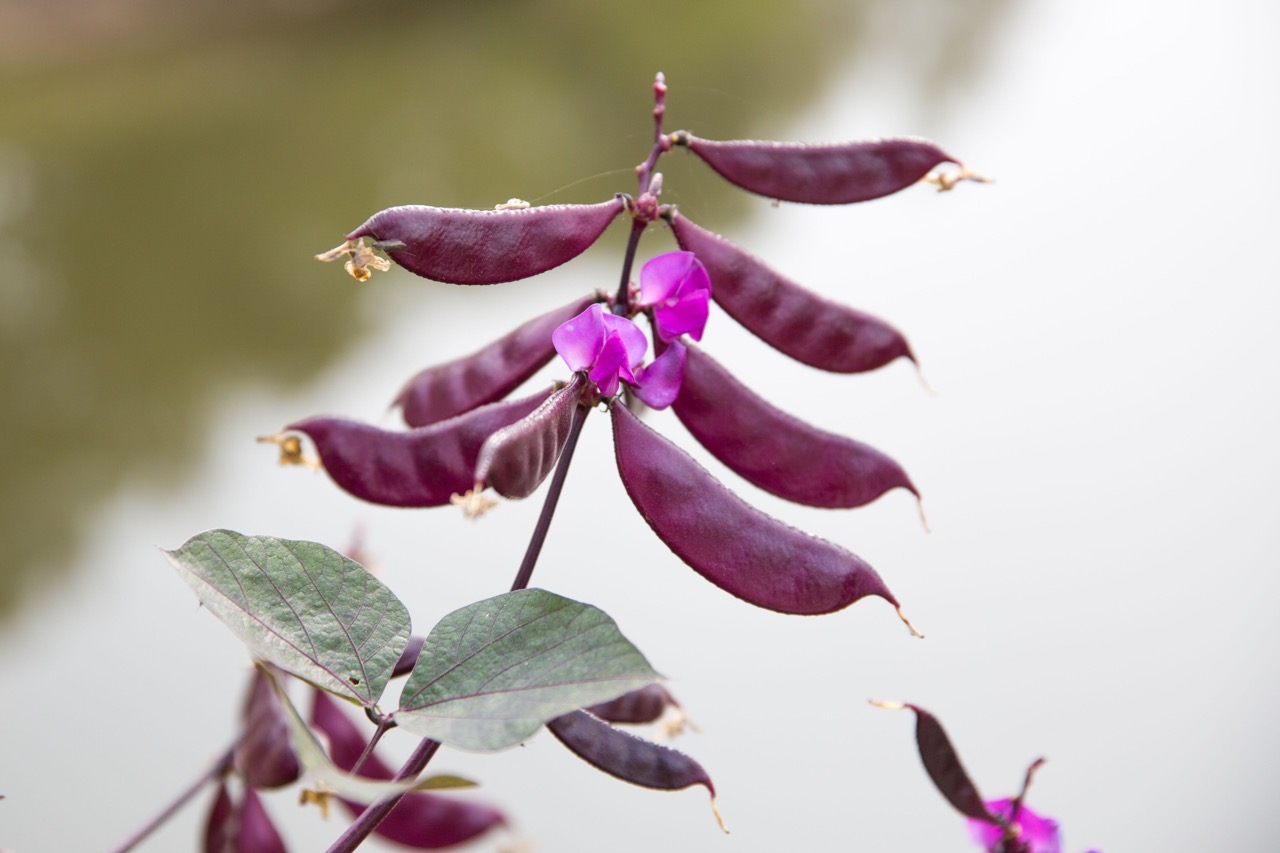
Welcome to the world of gardening and seed preservation! Hyacinth bean seeds, scientifically known as Lablab purpureus, are popular among gardeners for their vibrant purple flowers and attractive seed pods. These seeds can be harvested and stored to ensure a continuous supply for future planting. Whether you are a seasoned gardener or a beginner, learning how to store hyacinth bean seeds is a valuable skill that will increase your self-sufficiency and save you money in the long run.
Harvesting and storing seeds allows you to preserve the unique characteristics of a particular plant variety and maintain biodiversity in your garden. It also provides an opportunity for sharing seeds with other gardeners and contributing to seed conservation efforts. By following a few simple steps, you can ensure the longevity of your hyacinth bean seeds and successfully grow them year after year.
In this article, we will guide you through the process of storing hyacinth bean seeds. From harvesting to monitoring and planning, each step plays a crucial role in preserving the quality and viability of the seeds. So, roll up your sleeves and let’s dive into the wonderful world of seed storage!
Key Takeaways:
- Preserve the beauty and productivity of hyacinth bean seeds by following simple steps for harvesting, cleaning, drying, and storing. Regular monitoring ensures viability for future bountiful plantings.
- Embrace the joy of seed saving and contribute to biodiversity by mastering the art of storing hyacinth bean seeds. Plan for future planting and enjoy the rewards of sustainable gardening.
Read more: How To Save Hyacinth Bean Vine Seeds
Step 1: Harvesting Hyacinth Bean Seeds
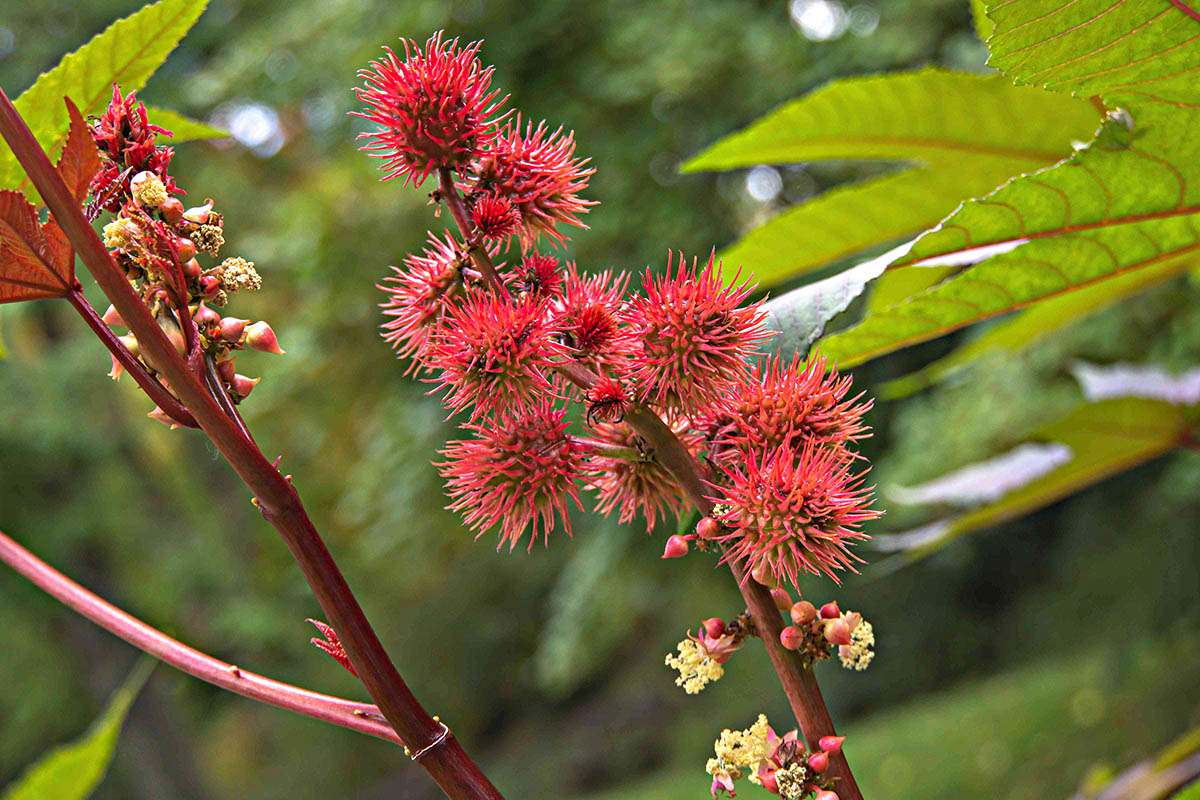
The first step in storing hyacinth bean seeds is to properly harvest them. Timing is crucial when it comes to seed harvesting, as you want to wait until the seed pods are fully mature but not overripe. Look for seed pods that have turned brown or dried out on the plant.
When harvesting hyacinth bean seeds, it’s best to choose a dry day to ensure that the pods are not moist. Moisten seeds are prone to mold and rot during the drying process. Use garden shears or sharp scissors to carefully cut the seed pods from the plant. Place the seed pods in a clean container or bucket, making sure to handle them gently to avoid damage.
Once you have gathered the seed pods, it’s time to move on to the next step: cleaning the seeds.
Note: It’s important to mention that hyacinth bean seeds can be toxic if ingested, so it’s necessary to keep them out of the reach of children and pets.
Step 2: Cleaning the Seeds
After harvesting the hyacinth bean seed pods, it’s essential to clean the seeds to remove any debris, plant matter, or pests. The cleaning process will help ensure that only viable and healthy seeds are stored for future planting.
Start by gently rubbing the seed pods between your hands to loosen the seeds. You can also lightly tap the seed pods against a clean surface to dislodge the seeds. This will help separate the seeds from the dried pod material.
Next, transfer the seeds to a sieve or strainer and rinse them under cool running water. Gently agitate the seeds with your fingers to remove any remaining dirt or debris. Make sure not to use hot or scalding water, as it can damage the seeds.
After rinsing, spread the seeds on a clean, dry towel or paper towels to air dry. Avoid using cloth towels, as they can retain moisture and lead to mold growth. Allow the seeds to dry completely before proceeding to the next step. This can take a few days, so be patient and ensure that the seeds are fully dry.
Now that you have cleaned and dried the hyacinth bean seeds, it’s time to move on to the next step: drying the seeds.
Step 3: Drying the Seeds
Drying the hyacinth bean seeds is a crucial step in preparing them for long-term storage. Proper drying will help prevent mold and rot, ensuring the seeds remain viable for future planting.
Transfer the cleaned seeds to a dry, well-ventilated area. Arrange them in a single layer on a clean, breathable surface such as a paper plate or a mesh screen. This allows for better air circulation around the seeds, aiding in the drying process.
Choose a location away from direct sunlight and excessive heat, as high temperatures can damage the seeds. A room with low humidity is ideal for drying the seeds, as moisture in the air can hinder the drying process and promote the growth of mold or mildew.
Leave the hyacinth bean seeds undisturbed in the drying area for about one to two weeks. During this time, periodically check the seeds for any signs of mold or moisture. If you notice any abnormalities, remove the affected seeds to prevent the spread of mold to the other seeds.
Once the seeds are completely dry, they should feel hard and brittle to the touch. Ensure there is no moisture left in the seeds to avoid any potential damage during storage. If you are unsure whether the seeds are dry enough, you can conduct a simple moisture test by placing a handful of seeds in a sealed plastic bag. If no condensation forms on the bag after a day or two, the seeds are adequately dried.
Now that the hyacinth bean seeds are thoroughly dried, it’s time to proceed to the next step: choosing the storage container.
Step 4: Choosing the Storage Container
Choosing the right storage container is crucial for maintaining the quality and viability of hyacinth bean seeds. The container should provide a suitable environment that protects the seeds from moisture, pests, and extreme temperature fluctuations.
Opt for airtight containers, such as glass jars with tight-fitting lids or plastic containers with airtight seals. These containers help prevent moisture from seeping in and protect the seeds from exposure to air and humidity.
Make sure the storage container is clean and dry before placing the seeds inside. Any residual moisture or dirt can compromise the quality of the seeds and promote the growth of mold or pests.
If you are storing a large quantity of seeds, consider using multiple smaller containers rather than one large container. This prevents you from exposing all the seeds to air every time you open the container. Additionally, it provides a safeguard in case one container gets damaged or contaminated.
Label the storage container with the name of the seeds and the date of storage. This ensures that you can easily identify the contents and keep track of the seed’s viability over time. You can use adhesive labels, marker pens, or even tape to write the necessary information on the container.
Store the containers in a cool, dark place, such as a pantry or cellar, away from direct sunlight and fluctuations in temperature. Avoid storing the seeds in places like garages or attics, as these areas can get excessively hot or cold, which can degrade the seeds’ viability.
Now that you have chosen the right storage container, it’s time to move on to the next step: storing hyacinth bean seeds.
Store hyacinth bean seeds in a cool, dry place in a paper envelope or breathable container. Make sure the seeds are completely dry before storing to prevent mold. Label the envelope with the date and variety of the seeds.
Read more: How To Germinate A Bean
Step 5: Storing Hyacinth Bean Seeds
Properly storing hyacinth bean seeds is essential to maintain their viability and ensure successful germination in future seasons. Following the correct storage methods will help preserve the seeds’ quality and increase the chances of a healthy plant growth.
Place the dried hyacinth bean seeds inside the chosen storage container. Fill the container only about halfway full to leave enough space for air circulation. If using multiple containers, distribute the seeds evenly among them.
To further protect the seeds from moisture, you can add a desiccant packet or a small bag filled with silica gel to the storage container. These materials help absorb any excess moisture and maintain a dry environment.
Close the lid tightly on the storage container to ensure an airtight seal. This helps prevent moisture from entering and protects the seeds from exposure to air and humidity. Make sure the container is securely sealed to avoid any accidental opening.
Store the sealed container in a cool, dark, and dry location. The ideal temperature for storing hyacinth bean seeds is around 40°F (4°C) with relatively low humidity. Avoid storing the seeds in areas prone to temperature fluctuations or high humidity, as these factors can negatively impact the seeds’ viability.
It is advisable to periodically check on the stored seeds to ensure they remain in good condition. Inspect the containers for any signs of mold, moisture, or pest infestation. If you detect any issues, take immediate action to remove and discard the affected seeds to prevent further damage.
By following these storage guidelines, you can maintain the viability of hyacinth bean seeds for several years, allowing you to enjoy their beauty in your garden for seasons to come.
Now that you have successfully stored hyacinth bean seeds, it’s crucial to monitor them regularly. This leads us to the next step: monitoring the seeds.
Step 6: Monitoring the Seeds
Monitoring the stored hyacinth bean seeds is essential to ensure their continued viability. Regular monitoring allows you to identify any signs of deterioration, mold, or pests early on, enabling you to take necessary measures to preserve the quality of the seeds.
Check on the seeds periodically, ideally every few months, to inspect their condition. Open the storage containers and examine the seeds for any visible changes or abnormalities. Look for signs of mold, discoloration, or insect infestation. If you notice any of these issues, remove the affected seeds immediately to prevent further contamination.
During the monitoring process, it’s a good idea to gently shake the storage containers to ensure the seeds remain loose and not clumped together. Clumping can indicate the presence of excess moisture, which can lead to mold or fungal growth. If you encounter clumped seeds, thoroughly dry them and consider using a desiccant packet to absorb any residual moisture.
Take note of the viability of the seeds during each monitoring session. This helps you keep track of the seeds’ longevity and decide when it’s time to replace older seeds with fresh ones, ensuring a higher germination rate for future plantings.
Additionally, maintaining proper environmental conditions for storage is crucial for the longevity of the seeds. Ensure the storage location remains cool, dark, and dry throughout the storage period. If any changes occur, such as an increase in temperature or humidity, adjust the storage conditions to restore the optimal environment for the seeds.
By regularly monitoring your stored hyacinth bean seeds and taking necessary actions to maintain their quality, you increase the chances of successful germination and a thriving garden.
However, keep in mind that the viability of hyacinth bean seeds typically decreases over time. It is recommended to replant or refresh your seed stock every 2-3 years for optimal germination rates.
Now that you are actively monitoring the stored seeds, it’s time to look ahead and plan for future planting.
Step 7: Planning for Future Planting
As you continue to store and monitor your hyacinth bean seeds, it’s important to plan for their future planting. By strategizing and preparing ahead of time, you can ensure a successful growing season and maximize the potential of your stored seeds.
Before planting, it’s beneficial to evaluate your gardening space and determine the best location for growing hyacinth beans. These plants thrive in full sun and well-drained soil, so choose a spot that receives at least 6-8 hours of direct sunlight per day. Prepare the soil by amending it with organic matter to improve its fertility and drainage.
Once the planting area is ready, consider the ideal timing for sowing hyacinth bean seeds. These plants are warm-season crops and should be planted after the last frost date in your area. Consult a local gardening calendar or reference guide to determine the appropriate planting time for your region.
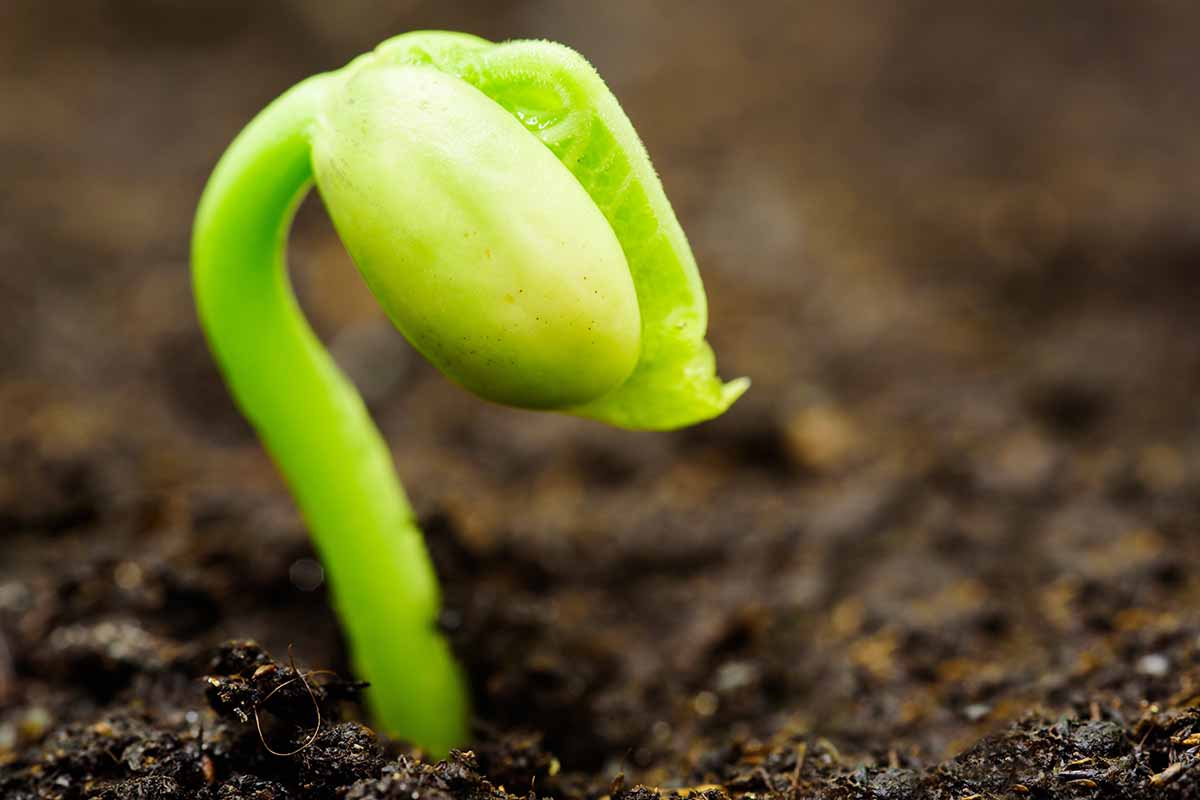
Prior to planting, it’s recommended to pre-soak the stored hyacinth bean seeds for 24 hours to enhance germination. Fill a small bowl with lukewarm water and place the seeds in it. Allow them to soak overnight before planting. This soaking process helps soften the seed coat and encourages faster and more uniform germination.
When it’s time to plant, dig small holes or make shallow furrows in the prepared soil. Plant the soaked hyacinth bean seeds about 1 inch deep and 6-8 inches apart. Gently cover the seeds with soil and water the area thoroughly.
Monitor the newly planted seeds for proper moisture and provide regular irrigation as needed, particularly during dry periods. The hyacinth bean plants will begin to germinate within a week or two, and as they grow, provide support such as trellises or stakes for the vines to climb.
As the plants develop, continue to care for them by watering consistently, providing occasional fertilization, and removing any weeds or competing vegetation. Monitor for pests and diseases, and take appropriate measures to protect the plants if necessary.
Once the hyacinth bean plants reach maturity, they will produce beautiful purple flowers and striking seed pods. Allow some of the seed pods to mature and dry on the vine if you wish to collect and store seeds for future use. Follow the harvesting and seed storing steps we discussed earlier to continue the cycle of growing and preserving hyacinth bean seeds.
By planning for future planting and implementing proper care and cultivation practices, you can enjoy the beauty and benefits of hyacinth bean plants year after year.
Congratulations! You have completed all the steps for storing hyacinth bean seeds and are now well-equipped to preserve their viability and cultivate them in your garden. Enjoy the process and the rewards of seed preservation, and may your future plantings be bountiful and successful!
Remember, gardening is a continuous learning experience, so don’t hesitate to experiment, adapt, and explore new techniques to refine your seed-saving skills.
Happy gardening!
Conclusion
Congratulations! You have successfully learned how to store hyacinth bean seeds, a valuable skill that allows you to preserve the beauty and productivity of these plants for future seasons. By following the steps outlined in this article, you can ensure the longevity and viability of your hyacinth bean seeds, creating a sustainable seed bank for your garden.
From harvesting the mature seed pods to cleaning, drying, and storing the seeds in suitable containers, each step plays a vital role in maintaining the quality of the seeds. By monitoring the stored seeds regularly, you can identify and address any issues promptly, ensuring that only healthy and viable seeds make it into your garden.
Remember to provide the optimal conditions for storage, including a cool, dark, and dry environment, and periodic checks to prevent mold or pests from damaging your seed supply. Proper planning for future planting, including selecting the right location, timing, and preparation of the planting area, will set you up for success when it’s time to sow the seeds and grow beautiful hyacinth bean plants.
Preserving and storing seeds not only allows you to maintain a diverse collection of plants in your garden but also empowers you to share seeds with fellow gardeners and contribute to seed conservation efforts. By developing seed-saving skills, you become part of a broader community dedicated to preserving biodiversity and ensuring the availability of heirloom and rare plant varieties.
So, embrace the joy of seed saving, experiment with different techniques, and continue to expand your knowledge in the realm of gardening. As you embark on this journey of nurturing and preserving hyacinth bean seeds, may your garden flourish with vibrant hues, delightful blooms, and abundant harvests.
Happy seed storing and gardening!
Frequently Asked Questions about How To Store Hyacinth Bean Seeds
Was this page helpful?
At Storables.com, we guarantee accurate and reliable information. Our content, validated by Expert Board Contributors, is crafted following stringent Editorial Policies. We're committed to providing you with well-researched, expert-backed insights for all your informational needs.


0 thoughts on “How To Store Hyacinth Bean Seeds”