Home>Garden Essentials>How To Grow Green Beans From Seed
Garden Essentials
How To Grow Green Beans From Seed
Modified: October 18, 2024
Learn how to grow green beans from seed in your garden with these simple and effective tips. Start your own vegetable patch and enjoy fresh, homegrown produce.
(Many of the links in this article redirect to a specific reviewed product. Your purchase of these products through affiliate links helps to generate commission for Storables.com, at no extra cost. Learn more)
Introduction
Growing green beans from seed is a rewarding and fulfilling experience for gardeners of all levels. Not only are green beans delicious and nutritious, but they are also relatively easy to cultivate. Plus, the satisfaction of harvesting your homegrown beans is unmatched. Whether you have a large backyard or a small balcony, green beans can be grown in containers or in the ground, making them a versatile vegetable to include in your garden.
Green beans, also known as snap beans or string beans, belong to the legume family. They are rich in fiber, vitamins, and minerals, making them a healthy addition to any diet. There are various types of green beans to choose from, including bush beans and pole beans. Bush beans are compact plants that do not require any extra support, while pole beans are vining plants that need trellising or staking for vertical growth.
In this article, we will guide you through the process of growing green beans from seed. We will provide helpful tips and tricks to ensure a successful and bountiful harvest. By following these steps, you’ll be enjoying fresh and crisp green beans in no time.
Before we dive into the details, it’s important to note that green beans thrive in warm climates with full sun exposure. They prefer well-draining soil and regular watering. With the right conditions and proper care, you can enjoy a continuous harvest of green beans throughout the growing season.
So, let’s get started on this green bean growing adventure!
Key Takeaways:
- Growing green beans from seed is a fun and rewarding experience that can be done in any size garden. With the right seeds, soil preparation, and care, you can enjoy a continuous harvest of fresh and nutritious green beans.
- Harvesting green beans at the right time ensures the best flavor and quality. Regular monitoring, proper support for climbing varieties, and pest control are essential for healthy plants and a bountiful harvest.
Read more: How To Grow Green Beans From Seeds
Step 1: Selecting the Right Seeds
Choosing the right seeds is crucial for successful green bean cultivation. There are many varieties of green beans available, each with its own characteristics and growth requirements. Here are a few factors to consider when selecting your green bean seeds:
1. Variety: Green beans come in various colors, shapes, and sizes. Some popular varieties include “Provider,” which is known for its early maturity and heavy yields, and “Kentucky Wonder,” a pole bean that produces long and tender pods. Consider your preferences and the space available in your garden when choosing a variety.
2. Open-pollinated vs. Hybrid: Open-pollinated seeds are pollinated naturally, allowing for seed saving and replanting in subsequent seasons. Hybrid seeds are the result of controlled cross-pollination and offer specific traits such as disease resistance or productivity. Decide whether you want to save seeds or prioritize certain characteristics in your green beans.
3. Seed Quality: Purchase seeds from a reputable source to ensure high germination rates. Check the packaging for the seed’s expiration date, as fresh seeds will have a higher probability of successful germination.
4. Spacing Requirements: Consider the space available in your garden or containers when selecting green bean seeds. Some varieties are more compact and suitable for smaller spaces, while others require trellising or staking for vertical growth.
Once you have chosen your green bean seeds, it’s time to move on to the next step: preparing the soil.
Step 2: Preparing the Soil
Preparing the soil is a crucial step in creating a favorable environment for your green bean plants. Here are the steps to follow when preparing the soil for planting:
1. Choose a Sunny Location: Green beans thrive in full sun, so select a spot in your garden that receives at least 6-8 hours of direct sunlight per day. If you are growing green beans in containers, place them in a sunny location on your balcony or patio.
2. Clear the Area: Remove any weeds, rocks, or debris from the planting area. Weeds can compete with your green bean plants for nutrients and space, so it’s essential to have a clean and weed-free bed.
3. Loosen the Soil: Use a garden fork or tiller to loosen the soil in the planting area. This will help improve drainage and allow the roots to penetrate easily. Avoid working the soil when it is too wet, as it can lead to compaction.
4. Amend the Soil: Green beans prefer well-draining soil with a pH range of 6.0 to 7.0. Test the soil pH and amend it if necessary. If the soil is too acidic, add lime to raise the pH. If it is alkaline, add sulfur or organic matter to lower the pH. Incorporating organic matter, such as compost or well-rotted manure, will also improve the soil’s fertility and drainage.
5. Add Fertilizer: Green beans are not heavy feeders, but it’s beneficial to provide them with a balanced organic fertilizer before planting. Follow the recommended dosage on the fertilizer package. Avoid using high nitrogen fertilizers, as they can encourage excessive foliage growth at the expense of bean production.
6. Create Raised Beds: If your soil has poor drainage or is heavy clay, consider creating raised beds to improve the growing conditions for your green beans. Raised beds provide better drainage and warmth, promoting healthy root development.
By following these steps and preparing the soil properly, you will create a nutrient-rich and well-drained environment for your green bean plants to thrive. Now that the soil is ready, it’s time to move on to the next step: planting the seeds.
Step 3: Planting the Seeds
Planting green bean seeds correctly is essential for ensuring strong germination and healthy plant growth. Follow these steps to plant your green bean seeds:
1. Timing: Plant green beans after the last frost date in your region when the soil temperature has reached at least 60°F (15°C). Green beans prefer warm soil for optimal germination and growth.
2. Spacing: Green beans require adequate space for proper growth and air circulation. Space bush beans about 4-6 inches (10-15 cm) apart in rows that are around 18-24 inches (46-61 cm) apart. For pole beans, create mounds or build trellises with a spacing of 3-4 feet (91-122 cm) between each mound or trellis.
3. Planting Depth: Plant the green bean seeds 1-2 inches (2.5-5 cm) deep in the soil. If the soil is heavy or clay-like, plant them slightly shallower. Ensure that the pointed end of the seed faces downward.
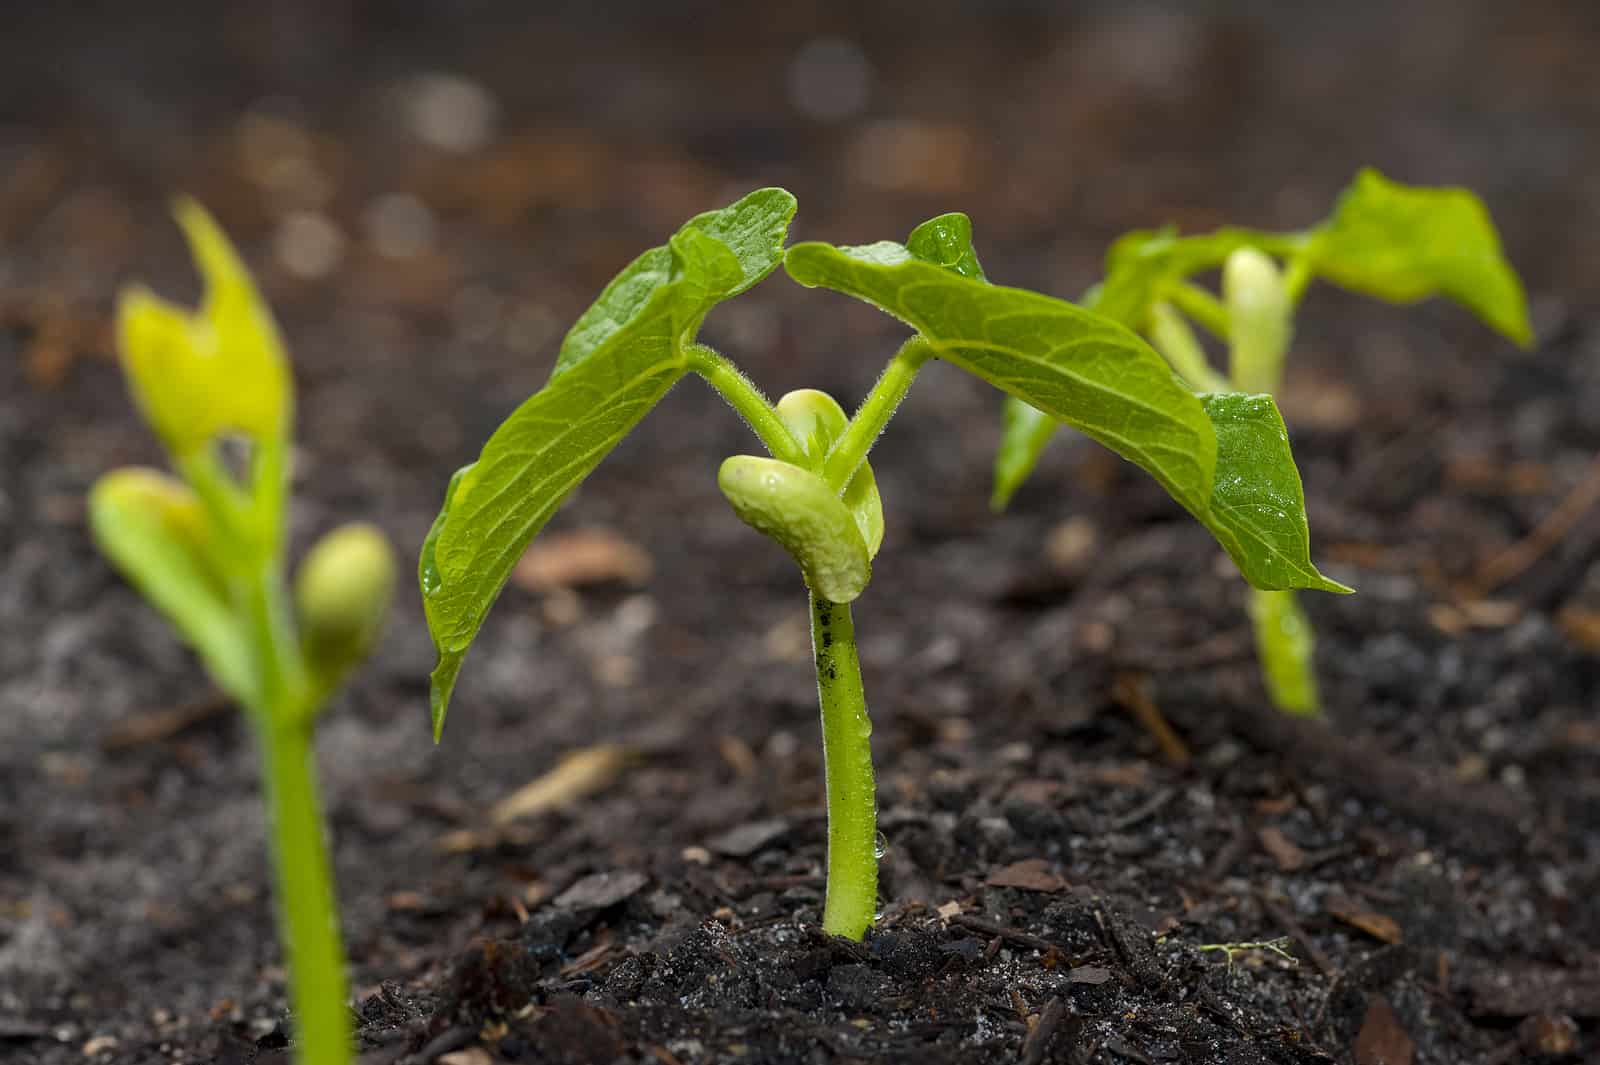
4. Planting Technique: You can either directly sow the seeds into the ground or start them indoors in biodegradable pots a few weeks before the last frost date. If starting indoors, transplant the seedlings carefully, ensuring minimal damage to the roots.
5. Watering: After planting, water the soil gently to provide moisture for germination. Be careful not to overwater, as excessive moisture can lead to rotting and fungal diseases. Once the seedlings emerge, water regularly to keep the soil consistently moist but not waterlogged.
6. Mulching: Mulching the soil around the green bean plants can help conserve moisture, suppress weed growth, and regulate soil temperature. Use organic mulch, such as straw or wood chips, and spread it around the plants, leaving space around the stem to prevent rotting.
7. Support for Pole Beans: If you are growing pole beans, install trellises, stakes, or a sturdy framework for the plants to climb. Position them at the time of planting to avoid disturbing the roots later.
Remember to label your planting area with the variety and planting date to keep track of your green bean plants. With proper planting techniques, your green bean seeds will germinate, and healthy seedlings will emerge. Next, we will discuss the importance of watering and caring for your growing green bean plants.
Step 4: Watering and Caring for the Plants
Proper watering and care are essential for the healthy growth and development of green bean plants. Follow these guidelines to ensure optimal conditions for your green beans:
1. Watering: Green beans require regular and consistent watering to keep the soil evenly moist. Water deeply, ensuring that the water reaches the plant’s roots. Avoid overhead watering, as it can promote disease development. Instead, use a soaker hose or drip irrigation to water at the base of the plants.
2. Mulching: Maintain a layer of organic mulch around the base of the plants to help retain moisture and prevent weed growth. Mulching also regulates soil temperature and reduces the need for frequent watering.
3. Fertilizing: Green beans are relatively light feeders, but they still benefit from the occasional boost of nutrients. Apply a balanced organic fertilizer once or twice during the growing season, following the manufacturer’s instructions. Avoid using excessive nitrogen fertilizers, as they can lead to lush foliage but fewer beans.
4. Weeding: Regularly monitor and remove weeds near your green bean plants. Weeds compete for space, nutrients, and water, which can hinder the growth of your green beans. Be mindful not to disturb the shallow roots of the plants when weeding.
5. Supporting Pole Beans: As pole beans grow and climb, ensure that they have proper support. Regularly check the trellises, stakes, or framework and gently guide the vines to prevent them from tangling or breaking.
6. Pest and Disease Management: Green beans are generally resistant to many common pests and diseases. However, occasional pests like aphids or bean beetles may appear. Monitor your plants regularly and, if necessary, treat pest infestations with organic pest control methods. Proper spacing, good airflow, and healthy plants can also help prevent disease issues.
7. Regular Harvesting: Harvest green beans regularly once the pods are tender and fully developed but not overripe. Regular harvesting encourages more flowering and bean production. Use a pair of garden scissors or carefully snap the beans off the plants to avoid damaging the stems.
By providing adequate water, proper care, and attention to your green bean plants, you will ensure healthy growth and a productive harvest. Next, we will explore the importance of trellising or staking for pole beans.
Plant green bean seeds in well-draining soil, 1-2 inches deep and 2-4 inches apart. Water regularly and provide support for the vines to climb. Harvest when the beans are firm and crisp.
Read more: How To Plant Green Bean Seeds
Step 5: Trellising or Staking the Plants
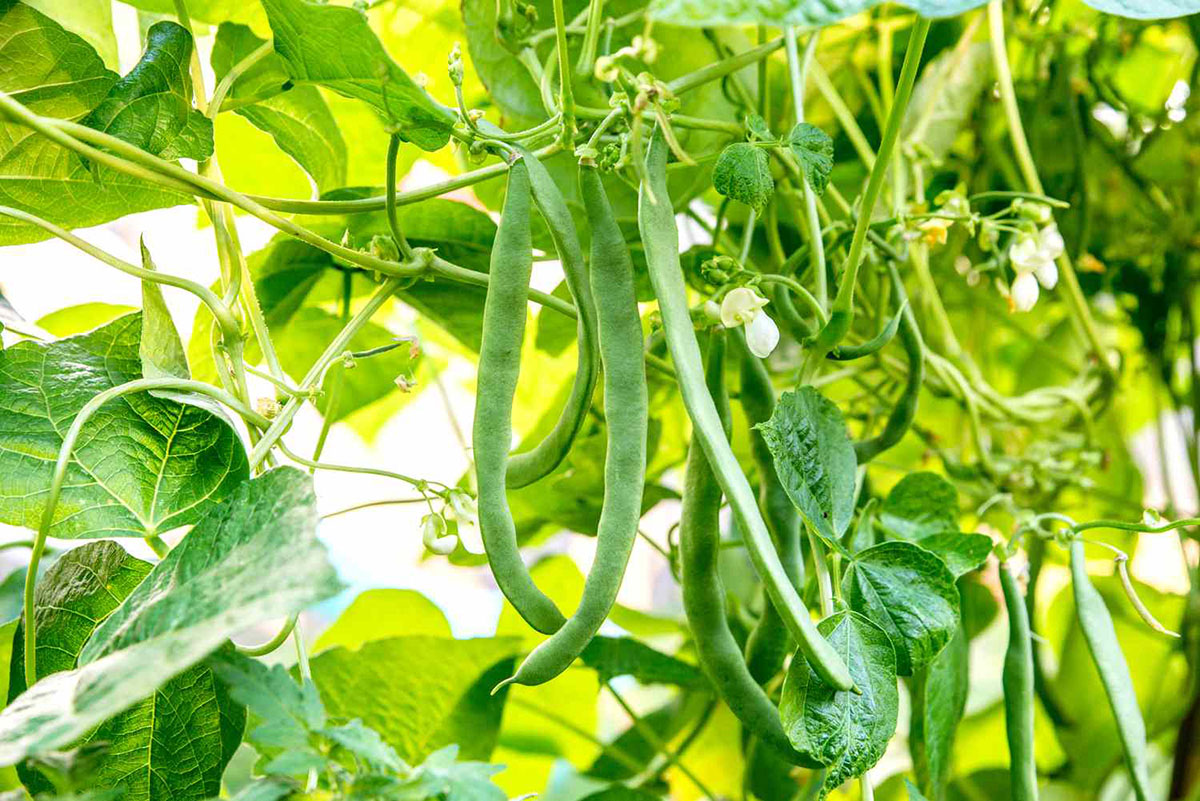
Trellising or staking is an important step for supporting pole beans during their growth. These climbing varieties require vertical support to prevent them from sprawling on the ground and to maximize space utilization. Here’s how to trellis or stake your green bean plants:
1. Choose a Support System: There are various options for providing support to pole beans. You can use trellises, stakes, or a sturdy framework. Select a support system based on the layout and size of your garden, as well as the number of plants you have.
2. Install the Support: Place the trellises, stakes, or framework firmly in the ground before or soon after planting the pole bean seeds. Ensure that the support system is tall enough to accommodate the full height of the plants.
3. Planting Near the Support: For proper positioning, plant the pole bean seeds or seedlings about 3-4 inches (7.5-10 cm) away from the support structure. This allows the vines to easily reach and wrap around the support as they grow.
4. Gentle Guidance: As the pole bean plants start to climb, carefully guide the vines towards the support system. Use gardening twine or soft ties to secure them loosely to the trellis or stake.
5. Regular Maintenance: Regularly check that the vines are properly attached to the support system. Adjust and secure any loose or wayward vines to prevent tangling or breakage.
6. Additional Tying: Occasionally, you may need to tie the main stem of the pole bean plant to the support structure for extra stability. Use soft ties or garden twine, and tie the stem loosely to avoid causing damage.
Trellising or staking your pole beans not only keeps the plants upright but also improves airflow around the foliage, reducing the risk of diseases. Moreover, it makes harvesting more convenient and helps protect the beans from soilborne pests and diseases.
Remember to consider the weight and potential height of your pole bean plants when selecting and installing the support system. By providing proper support, you’ll ensure healthier and more productive pole bean plants. Now, let’s move on to step 6, where we’ll discuss pest and disease control.
Step 6: Maintaining Pest and Disease Control
Keeping your green bean plants healthy and free from pests and diseases is crucial for a successful harvest. By following these guidelines, you can effectively manage common issues that may arise:
1. Monitor Regularly: Inspect your plants regularly for signs of pests or diseases. Look for chewed leaves, discoloration, wilting, or any unusual growth. Early detection allows for prompt action and prevents further damage.
2. Handpick Pests: If you notice pests such as aphids, bean beetles, or caterpillars, remove them by hand. Wear gloves and simply pick off the pests and dispose of them. This method works well for minor infestations.
3. Encourage Beneficial Insects: Invite beneficial insects, such as ladybugs and lacewings, into your garden. These insects feed on common pests and help keep their populations in check. Planting companion plants like marigolds or herbs like dill or fennel can attract beneficial insects.
4. Organic Pest Control: If the pest infestation is severe, consider using organic pest control methods. These can include insecticidal soaps, neem oil, or natural sprays made from ingredients like garlic or pepper. Follow the instructions on the products carefully and apply them sparingly.
5. Disease Prevention: To prevent diseases, ensure proper spacing between your green bean plants to promote good airflow. Avoid overhead watering, as excessive moisture on the foliage can lead to fungal diseases. If you notice signs of disease, remove and destroy affected plants to prevent the further spread of the infection.
6. Crop Rotation: Practice crop rotation by avoiding planting green beans in the same location each year. This reduces the buildup of pests and diseases in the soil.
7. Clean Garden Tools: Regularly clean and disinfect your gardening tools to avoid spreading diseases from one plant to another. Clean off any soil or plant residue and disinfect with a diluted bleach solution.
By practicing regular monitoring, implementing organic pest control methods, and taking preventative measures, you can maintain a healthy garden and minimize the impact of pests and diseases on your green bean plants.
With pest and disease control in check, you’re one step closer to a successful green bean harvest. In the next step, we’ll discuss the exciting part: harvesting green beans.
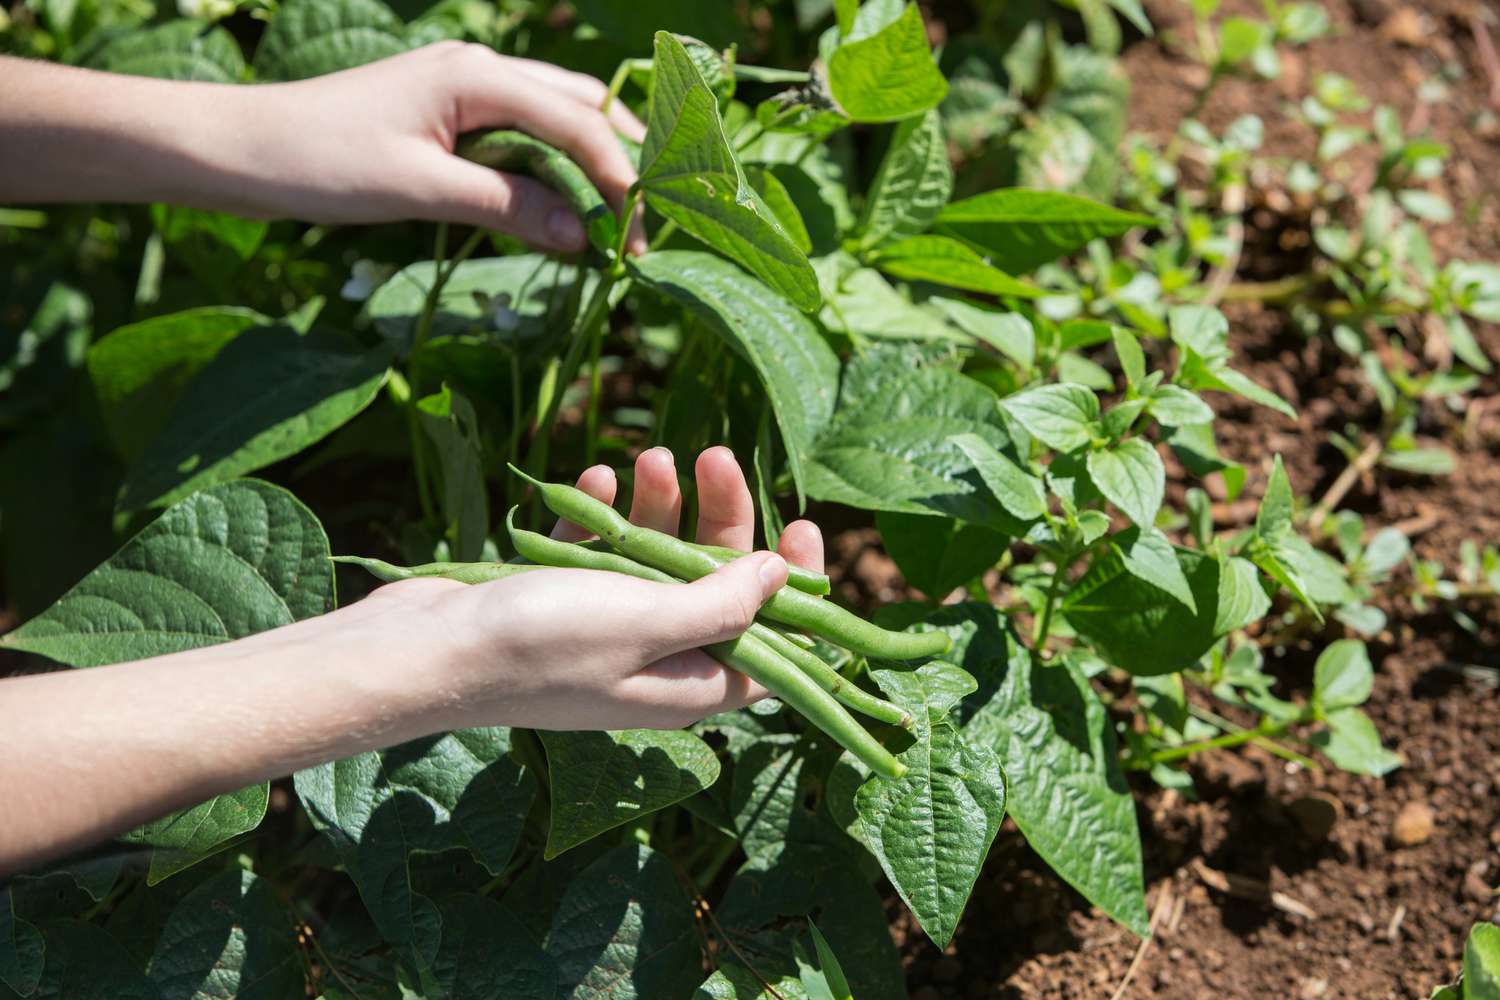
Step 7: Harvesting Green Beans
Harvesting green beans at the right time ensures the best flavor and quality. Here’s how to know when your green beans are ready for picking and how to properly harvest them:
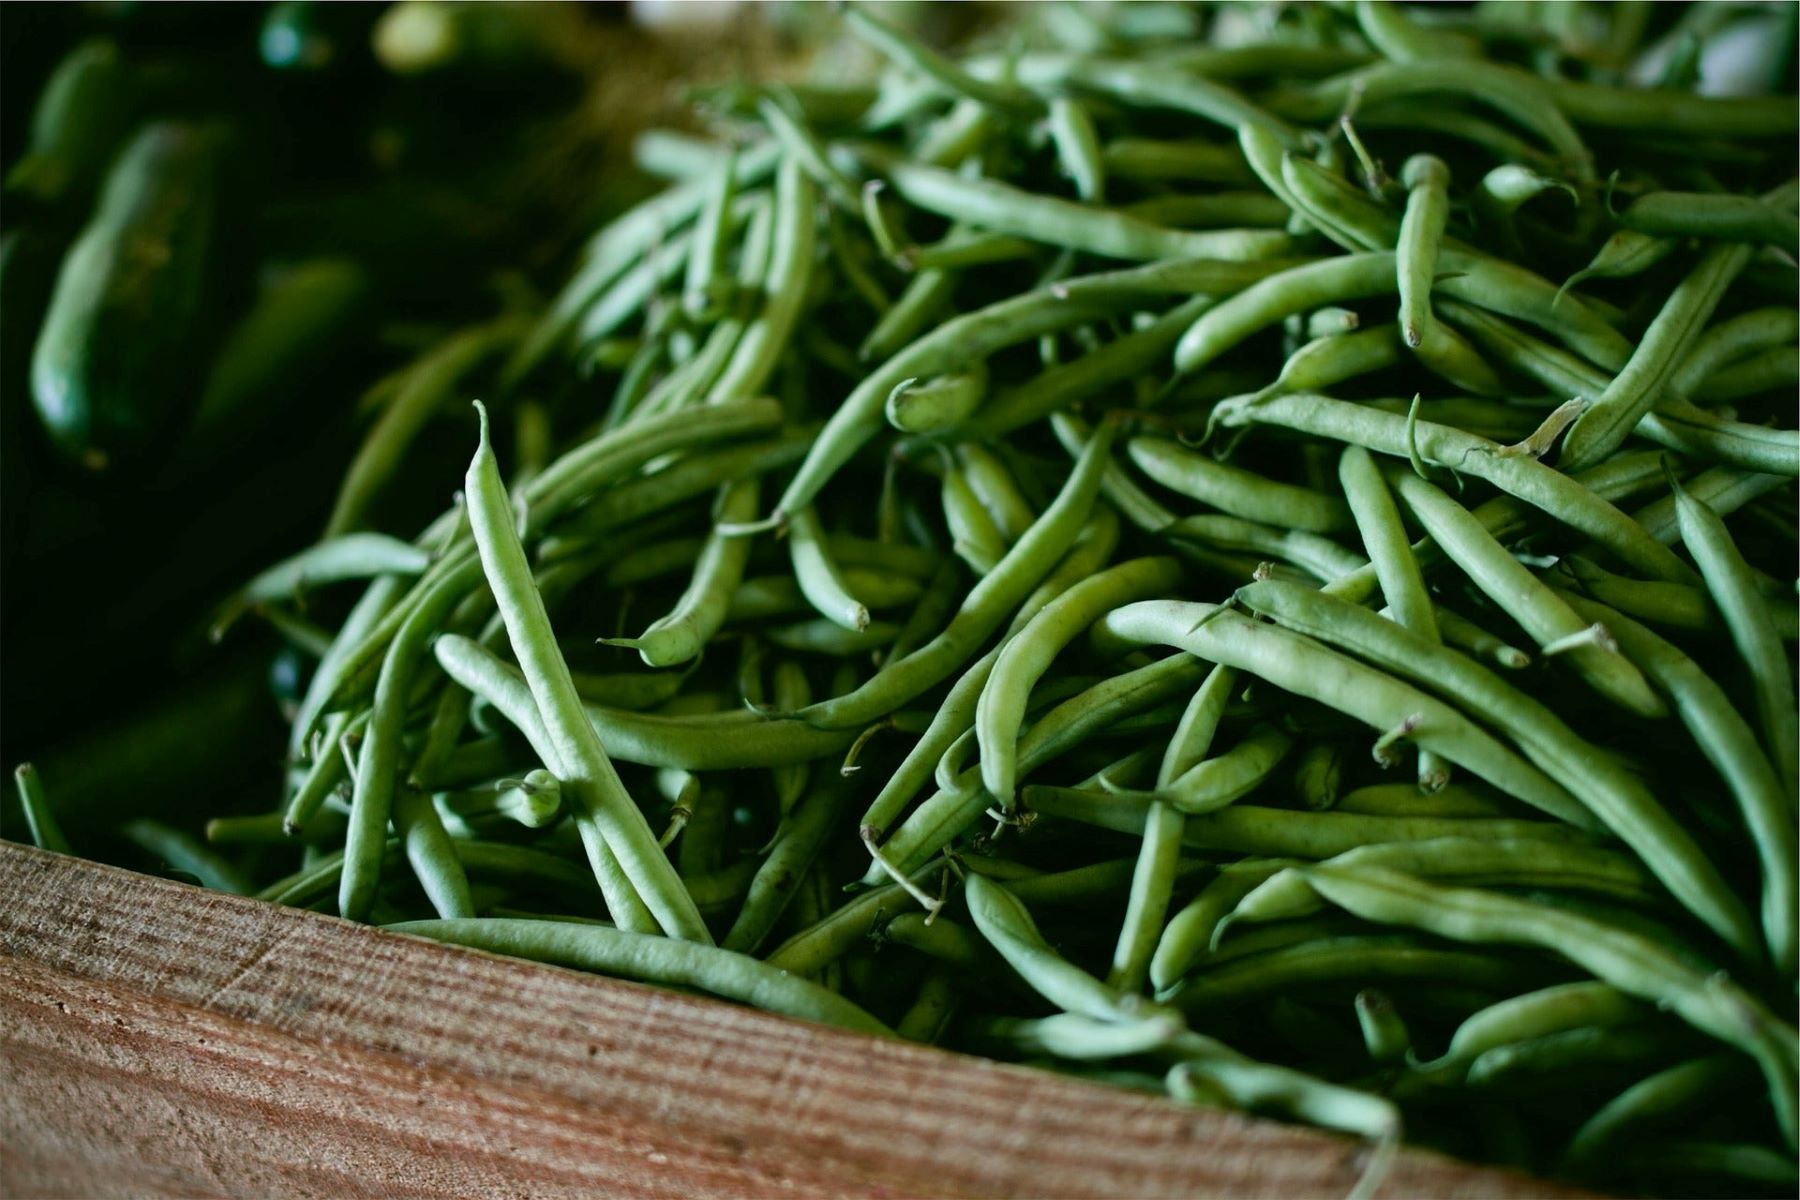
1. Timing: Green beans are typically ready to harvest 50-70 days after planting, depending on the variety. You’ll know it’s time to harvest when the pods are well-formed, plump, and crisp. Avoid waiting too long, as overripe beans can become tough and lose their sweetness.
2. Pod Appearance: Look for pods that are smooth, bright green, and free from any blemishes or discoloration. They should feel firm and pliable but not overly hard or soft.
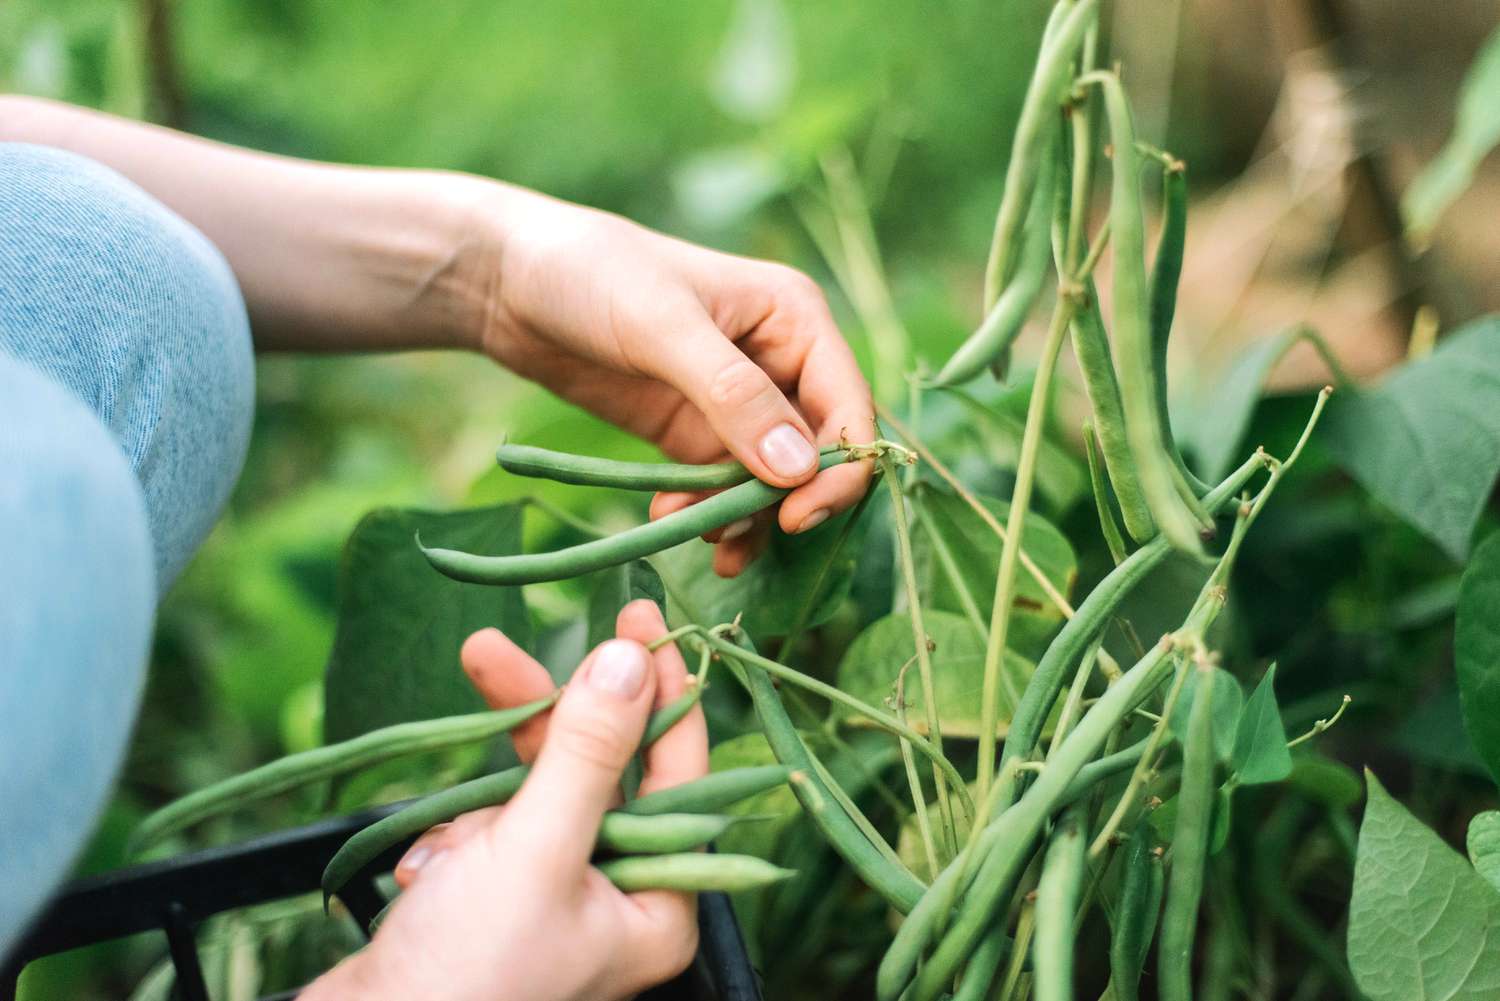
3. Harvesting Technique: Gently hold the stem of the green bean plant with one hand and grasp the pod firmly with your other hand. Apply a slight downward pressure and snap the pod off the plant. Alternatively, you can use garden scissors or shears to cut the pods from the plant.
4. Continuous Harvest: Green beans are prolific producers, so harvest them regularly to encourage continuous production. Check your plants every couple of days for new pods that are ready to be picked. Be sure to harvest all the mature beans to prevent them from getting too mature and tough.
5. Storing Green Beans: Freshly harvested green beans can be stored in the refrigerator for up to a week. Place them in a perforated plastic bag or wrap them in a damp paper towel to maintain their freshness. For longer-term storage, blanch and freeze the beans.
6. Seed Saving: If you want to save seeds for future planting, allow someof the green beans to mature fully on the plant. The pods will turn yellow and dry out, and the seeds inside will become hard and mature. Collect the dried pods, remove the seeds, and store them in a cool, dry place for the next planting season.
Remember, the more you harvest your green beans, the more they will continue to produce new pods. Enjoy the fruits of your labor and savor the delicious taste of homegrown green beans.
To conclude, growing green beans from seed is a rewarding and enjoyable gardening experience. By following these steps, from selecting the right seeds to harvesting, you can cultivate healthy and productive green bean plants in your own garden. So, roll up your sleeves, get your hands dirty, and start growing your own fresh and nutritious green beans!
Conclusion
Growing green beans from seed is a satisfying and relatively straightforward process that allows you to enjoy the freshest and most flavorful beans straight from your garden. By following the steps outlined in this article, you can successfully cultivate green beans and experience the joy of harvesting your own homegrown produce.
From selecting the right seeds and preparing the soil to planting, trellising, and caring for the plants, each step plays a vital role in the success of your green bean journey. Watering regularly, providing support for climbing varieties, and implementing pest and disease control measures are crucial for maintaining healthy plants and optimizing yield.
Remember to harvest your green beans at the right time, when the pods are plump, firm, and vibrant green. Regular harvesting encourages continuous production and ensures the best flavor and quality.
Whether you have a sprawling backyard or a small balcony, green beans can be grown in containers or in-ground, making them accessible to gardeners of all levels. The versatility and nutritional value of green beans make them a wonderful addition to any garden and diet.
Not only do green beans provide delicious meals, but they also enrich the soil through nitrogen fixation, making them beneficial for crop rotation and overall garden health. Plus, the act of nurturing and witnessing the growth of your green bean plants can be a rewarding and therapeutic experience.
So, gather your gardening tools, select your desired green bean varieties, and embark on this green bean growing adventure. With a little patience, care, and attention, you can enjoy the satisfaction of harvesting your own fresh and nutritious green beans. Happy gardening!
Now that you've mastered growing green beans, why stop there? Expand your gardening prowess with our guide on innovative garden fence ideas that elevate any outdoor space. Whether you're looking to enhance privacy or add a decorative touch, find inspiration and practical solutions easily. Ready for more growing tips? Dive into our comprehensive guide on cultivating a thriving vegetable garden. From soil prep to harvest, get all the info needed to ensure your veggies flourish.
Frequently Asked Questions about How To Grow Green Beans From Seed
Was this page helpful?
At Storables.com, we guarantee accurate and reliable information. Our content, validated by Expert Board Contributors, is crafted following stringent Editorial Policies. We're committed to providing you with well-researched, expert-backed insights for all your informational needs.


0 thoughts on “How To Grow Green Beans From Seed”