Home>Garden Essentials>How To Plant Castor Beans Seeds
Garden Essentials
How To Plant Castor Beans Seeds
Modified: March 15, 2024
Learn how to plant castor bean seeds in your garden and grow beautiful castor plants. Step-by-step guide, tips, and tricks for successful gardening.
(Many of the links in this article redirect to a specific reviewed product. Your purchase of these products through affiliate links helps to generate commission for Storables.com, at no extra cost. Learn more)
Introduction
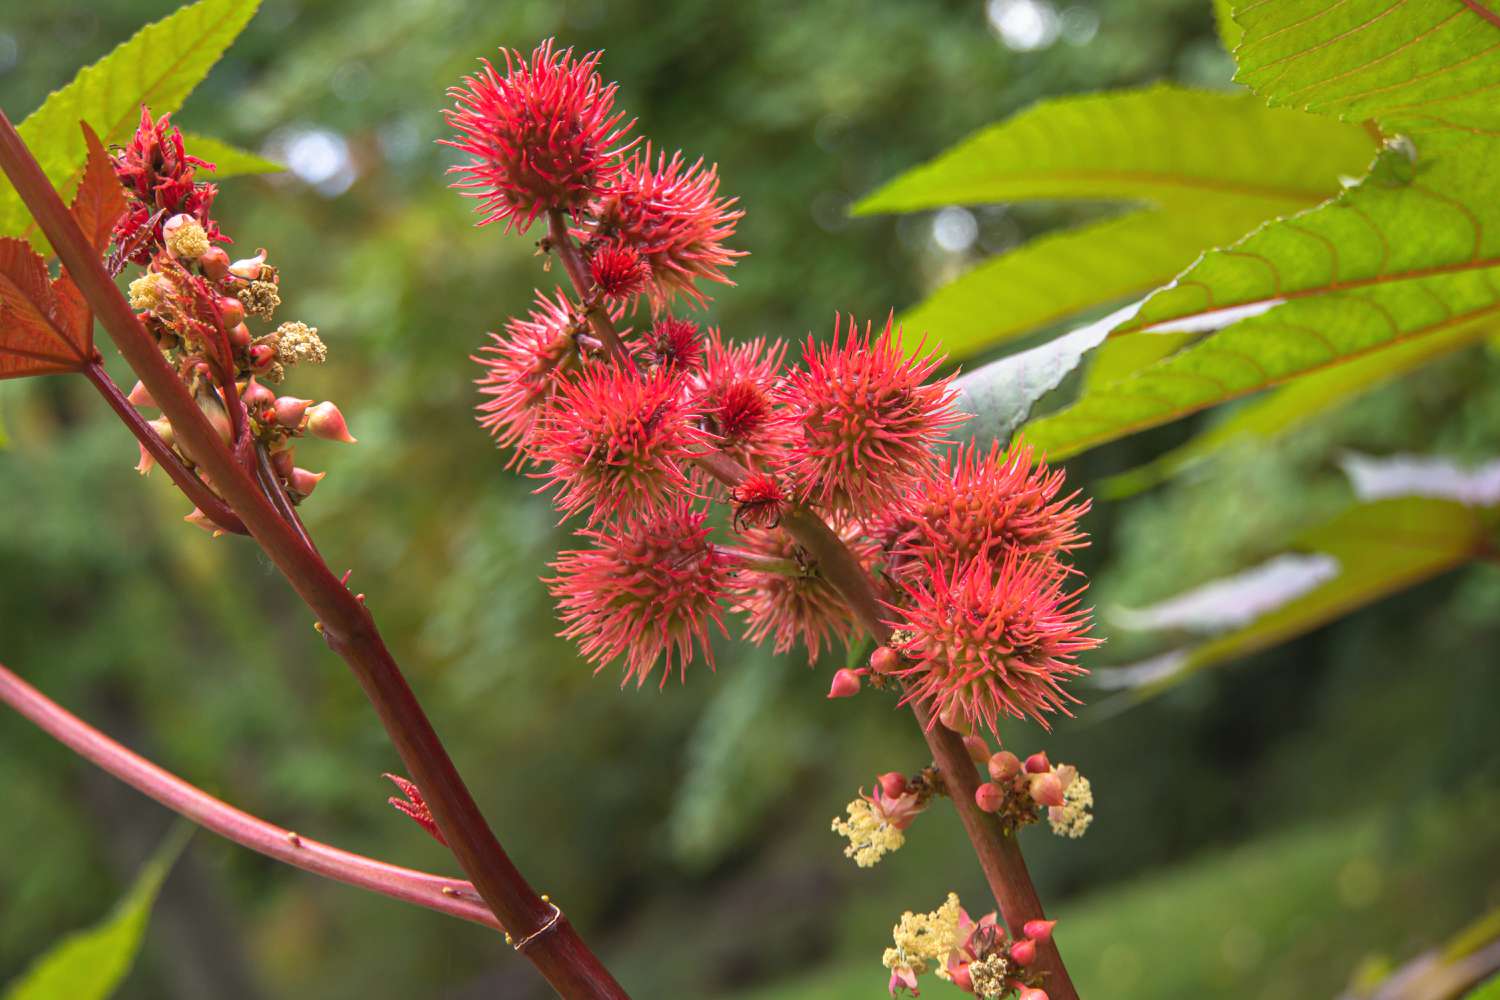
Welcome to the world of gardening! If you’re looking to add some unique plants to your garden, then planting castor beans might be just the thing for you. Castor beans, scientifically known as Ricinus communis, are not only beautiful with their large leaves and vibrant colors, but they also have a variety of practical uses.
In this article, we will guide you through the process of planting castor bean seeds, step by step. Whether you’re an experienced gardener or just starting out, we will provide you with all the information you need to successfully grow and care for these fascinating plants.
Before we dive into the planting process, let’s take a moment to learn about the castor bean plant itself. Native to the tropical regions of Africa, castor beans have been cultivated for centuries for their oil-rich seeds. The seeds are processed to extract castor oil, which is widely used in various industries including cosmetics, pharmaceuticals, and even as a renewable energy source.
Aside from its practical uses, the castor bean plant also adds a touch of drama to any garden. With its large, palm-shaped leaves and tall, sturdy stalks, it can create a stunning focal point or serve as a unique backdrop for other plants. The colors of the castor bean plant are another reason why many garden enthusiasts are drawn to it. The leaves can range from deep green to reddish-purple, and the seed pods come in a variety of hues, including vibrant reds, pinks, and purples.
However, it’s important to note that while the castor bean plant is visually stunning and its oil has many uses, it also contains toxic compounds, especially in its seeds. The toxins can be harmful if ingested, so it’s crucial to handle the plant with care, especially if you have young children or pets. It’s always better to be safe than sorry, so take the necessary precautions when handling the plant.
Now that we have some background information, let’s begin our journey into the world of planting castor bean seeds. Get ready to roll up your sleeves, grab your gardening tools, and let’s get started!
Key Takeaways:
- Planting and caring for castor bean plants requires gathering materials, choosing the right location, preparing the soil, and providing support if needed. Remember to handle the toxic seeds with care and enjoy the beauty of these unique plants.
- Harvesting castor bean seeds involves observing seed maturity, protecting yourself from the toxic seeds, and properly storing the harvested seeds. Take precautions, follow the steps, and appreciate the beauty and practical uses of these fascinating plants.
Read more: How Long For Castor Beans To Germinate
Step 1: Gather Materials
Before you start planting castor bean seeds, it’s essential to gather all the necessary materials. Having everything prepared ahead of time will make the planting process smoother and more efficient. Here’s a list of the materials you’ll need:
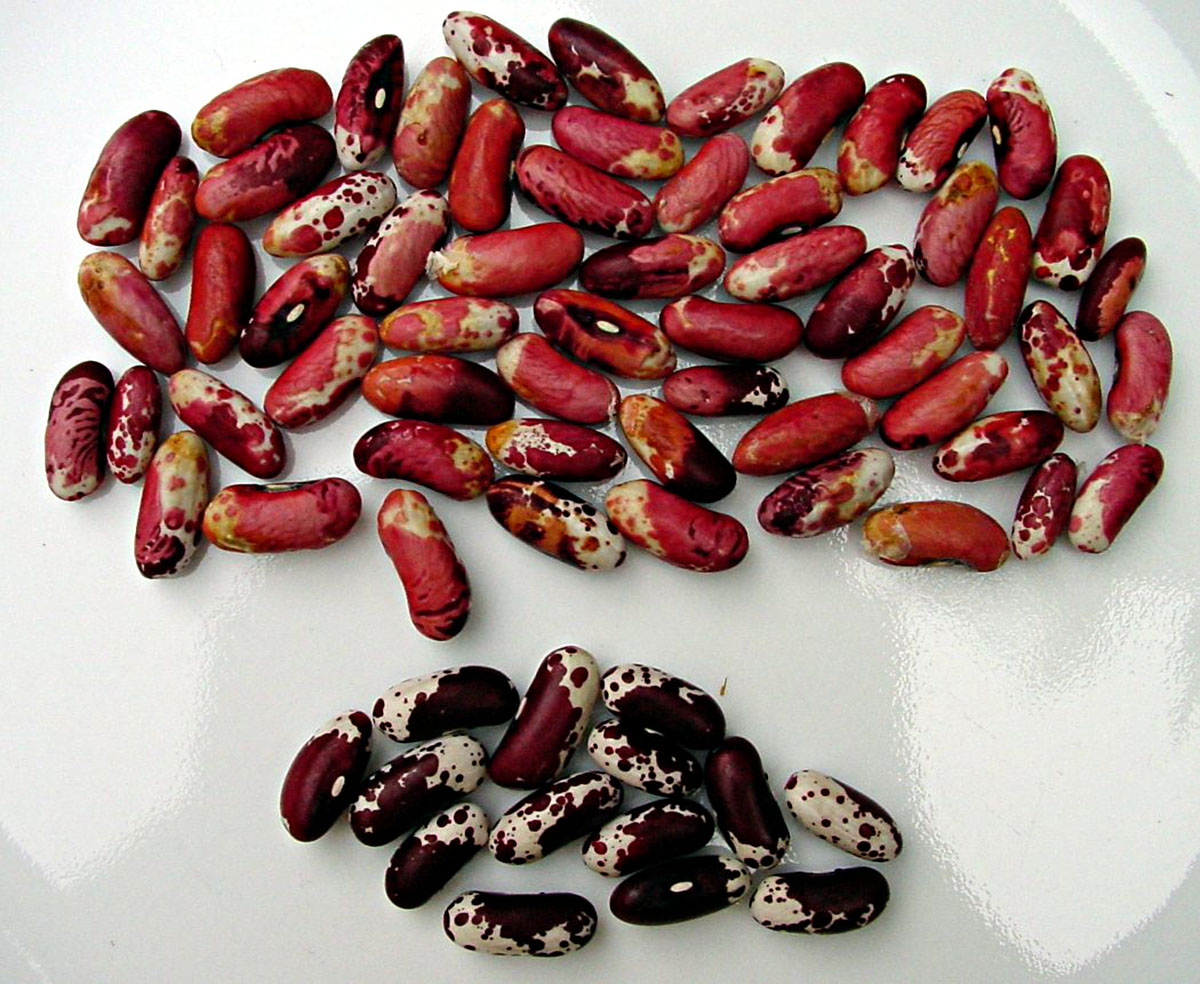
- Castor bean seeds: Make sure to obtain high-quality seeds from a reputable source. You can either buy them from a garden center or order them online. Remember to check the recommended growing conditions for the specific variety you choose.
- Garden tools: You will need a trowel or a small shovel for digging, a watering can or a hose with a gentle sprayer attachment for watering, and a pair of gardening gloves to protect your hands.
- Well-draining soil: Castor beans prefer loose, well-draining soil. If your garden soil is heavy and clayey, consider adding organic matter such as compost or well-rotted manure to improve its drainage and fertility.
- Fertilizer: While castor beans are known to thrive in nutrient-poor soils, a slow-release fertilizer can help provide them with the necessary nutrients to grow strong and healthy. Look for a balanced fertilizer with an N-P-K ratio of 10-10-10 or similar.
- Mulch: Applying a layer of organic mulch around the base of the plants after planting will help conserve moisture, suppress weed growth, and regulate soil temperature.
- Support structures (optional): Depending on the variety you choose and your desired aesthetic, you may want to provide support for your castor bean plants. This can be in the form of stakes, trellises, or cages.
Once you’ve gathered all the necessary materials, you’ll be fully prepared to start planting your castor bean seeds. Having everything on hand will save you time and ensure a successful planting process.
Step 2: Choose the Planting Location
Choosing the right planting location is crucial for the success of your castor bean plants. Since castor beans are native to tropical regions, they thrive in warm climates where they can receive full sun exposure. Here are a few factors to consider when selecting the planting location:
- Sunlight: Castor beans need at least six to eight hours of direct sunlight each day. Choose a spot in your garden that receives ample sunlight throughout the day and is not shaded by trees or buildings.
- Soil Quality: Castor beans can adapt to a wide range of soil conditions, but they prefer well-draining soil. Avoid areas with heavy clay or compacted soil, as this can cause waterlogging and root rot. If your soil is not ideal, consider amending it with organic matter to improve drainage and fertility.
- Space: Castor bean plants can grow quite large, with some varieties reaching heights of 6 to 10 feet (1.8 to 3 meters) or even taller. Make sure you choose a location that provides enough space for the plants to grow without overcrowding or shading other nearby plants.
Additionally, it’s important to consider the potential hazards associated with castor bean plants. As mentioned earlier, the seeds of the castor bean plant contain toxic compounds. If you have children or pets, it’s best to choose a location that is less accessible to them to minimize the risk of accidental ingestion.
Once you’ve identified a suitable planting location, mark the area where you’ll be planting the castor beans. This will help you envision and plan the layout of your garden.
Remember, the right planting location is essential for the healthy growth of your castor bean plants. Take the time to evaluate and choose a spot that meets the sunlight, soil, and space requirements. With a well-chosen location, your castor bean plants will have the best chance of thriving and adding beauty to your garden.
Step 3: Prepare the Soil
Now that you have chosen the perfect planting location for your castor bean plants, it’s time to prepare the soil. Proper soil preparation is essential for providing the plants with a healthy and nutrient-rich environment to grow. Follow these steps to prepare the soil:
- Clear the area: Remove any weeds, rocks, or debris from the planting area. Castor beans thrive in soil that is free from competition with other plants and debris.
- Loosen the soil: Use a garden fork or a shovel to loosen the soil in the planting area. Break up any compacted soil and remove any large clumps. This will improve drainage and make it easier for the castor bean roots to penetrate the soil.
- Add organic matter: Incorporate organic matter such as compost or well-rotted manure into the soil. This will improve the soil structure, enhance its fertility, and provide essential nutrients for the plants. Spread a layer of organic matter over the planting area and mix it into the soil with your garden fork or shovel.
- Test the soil pH: Castor beans prefer slightly acidic to neutral soil with a pH range of 6.0 to 7.5. Use a soil testing kit to determine the pH level of your soil. If the pH is too low (acidic), you can raise it by adding lime. If the pH is too high (alkaline), you can lower it by adding elemental sulfur.
By preparing the soil before planting, you are creating an optimal environment for your castor bean plants to establish healthy roots and grow vigorously. The addition of organic matter enhances the soil’s nutrient content and improves its texture, allowing for better water retention and drainage.
Take the time to properly prepare the soil, as it is a crucial step in ensuring the success of your castor bean plants. By providing them with a fertile and well-draining soil, you are setting the stage for them to flourish and thrive in your garden.
Step 4: Soak the Seeds
Preparing the castor bean seeds before planting is an important step to help ensure successful germination. Soaking the seeds can help to soften the outer seed coat, making it easier for the seedling to emerge. Follow these steps to properly soak your castor bean seeds:
- Gather your materials: Before you begin, gather the castor bean seeds, a bowl or container, and water. Make sure the container is large enough to comfortably hold the seeds and allow them to soak.
- Fill the container with water: Pour room temperature water into the container, ensuring there is enough water to fully submerge the seeds. Avoid using hot water, as it may damage the seeds.
- Add the seeds: Carefully place the castor bean seeds into the water, making sure they are fully submerged. You may notice that some seeds float initially, but they will eventually sink as they absorb water.
- Soak the seeds: Allow the seeds to soak in the water for 24 to 48 hours. This soaking period will help to soften the seed coat and encourage faster and more uniform germination.
- Change the water (optional): If you notice the water becoming cloudy or discolored during the soaking process, you can change the water. This can help prevent the growth of harmful bacteria or fungi.
After the soaking period, your castor bean seeds are ready to be planted. The water will have penetrated the seed coat, allowing the germination process to begin more easily. Remember to handle the soaked seeds with care, as their outer coating may be delicate.
Soaking the seeds is a simple yet effective step that can improve the germination rate and promote healthier seedlings. By softening the seed coat, you are giving your castor bean seeds the best possible start in their journey to become thriving plants in your garden.
Read more: How To Plant A Bean Seed
Step 5: Sow the Seeds
Now that your castor bean seeds are properly soaked and ready, it’s time to sow them into the prepared soil. Follow these steps to ensure successful planting of your castor bean seeds:
- Choose the planting method: You have two options when it comes to sowing the castor bean seeds: direct sowing or indoor seed starting. Direct sowing involves planting the seeds directly into the garden soil, while indoor seed starting involves germinating the seeds indoors and transplanting the seedlings later. Choose the method that works best for your garden and climate.
- Direct sowing: If you choose to directly sow the seeds, use your finger or a small garden trowel to create small holes in the soil. Space the holes at least 2 to 3 feet (60 to 90 cm) apart to allow for proper growth and development. Place one or two soaked seeds in each hole, about 1 inch (2.5 cm) deep, and cover them with soil. Water gently to settle the soil.
- Indoor seed starting: If you prefer to start the seeds indoors, fill seed trays or small containers with a well-draining seed starting mix. Plant one soaked seed in each container, about 1 inch (2.5 cm) deep, and cover it with soil. Place the trays or containers in a warm area with plenty of light, such as a sunny windowsill or under grow lights. Keep the soil moist, but not waterlogged.
- Provide warmth and moisture: Castor bean seeds require warmth and moisture for successful germination. If the weather is cooler, you can use a heating mat or place a clear plastic cover over the planted seeds to create a greenhouse effect. This will help maintain the optimal temperature and humidity levels for germination.
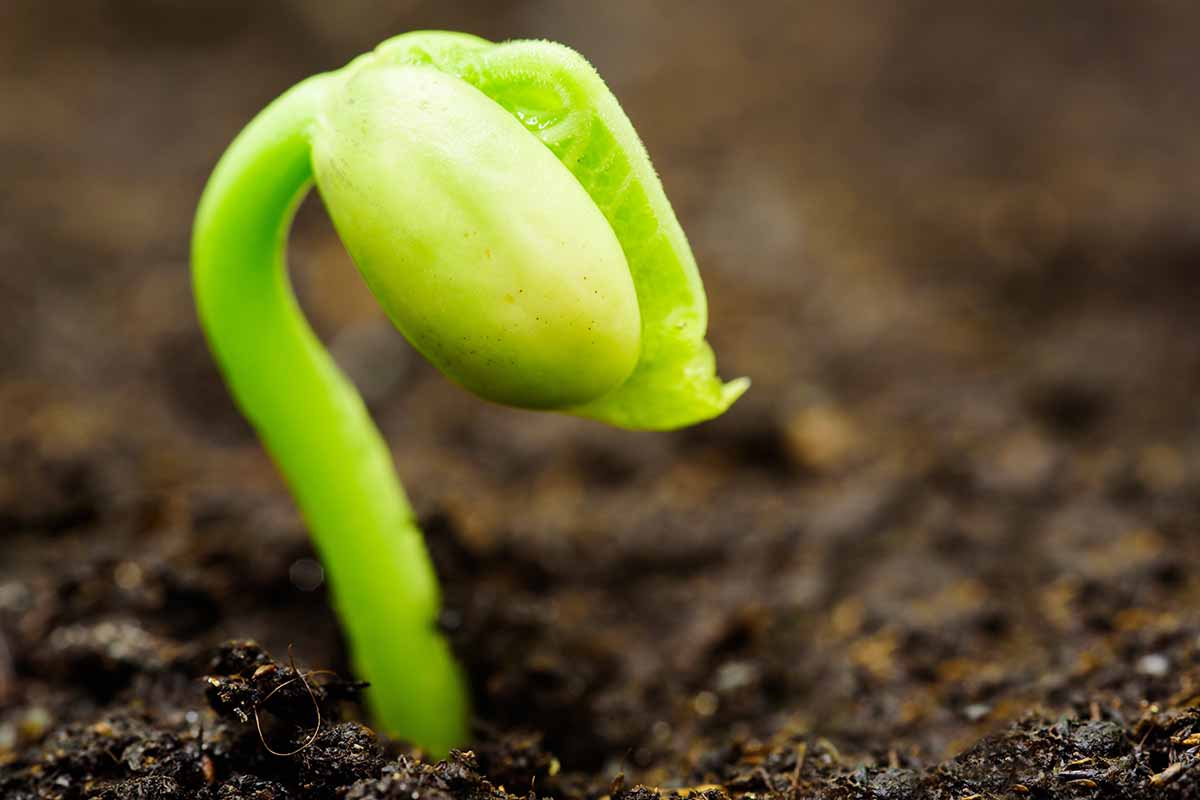
- Wait for germination: Castor bean seeds typically take around 7 to 14 days to germinate, depending on the temperature and conditions. Be patient and continue to provide the necessary warmth, moisture, and light for the seeds to sprout.
After sowing the seeds, it’s important to monitor the soil moisture levels and make sure it stays consistently damp but not waterlogged. Avoid overwatering, as excessive moisture can lead to rot and fungal diseases.
Whether you choose to directly sow the seeds or start them indoors, the key is to provide the optimal conditions for germination and ensure that the seeds are planted at the proper depth. With patience and care, your castor bean seeds will soon sprout and begin their journey towards becoming magnificent plants in your garden.
Plant castor bean seeds in well-drained soil in a sunny spot. Sow seeds 1 inch deep and 3 feet apart. Water regularly, but avoid overwatering to prevent root rot. Watch out for pests and diseases.
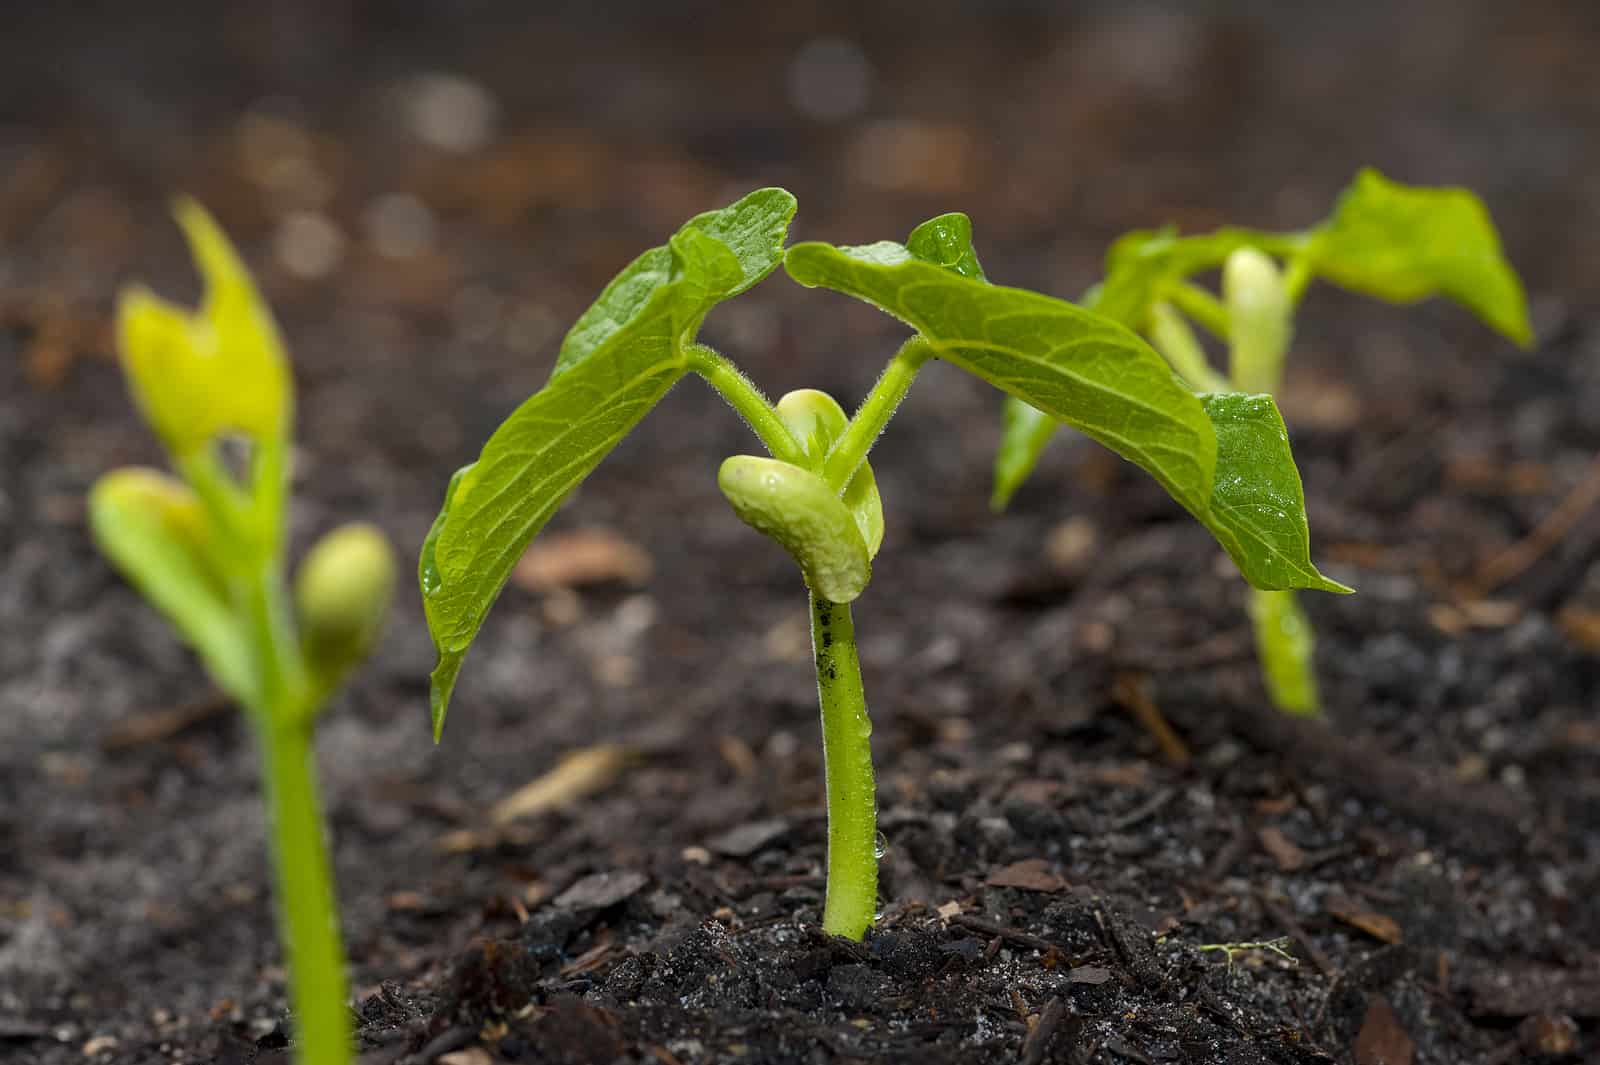
Step 6: Water and Maintain
Proper watering and maintenance are essential for the healthy growth of your castor bean plants. Once the seeds have germinated and sprouted, follow these guidelines to ensure their ongoing care:
- Watering: Castor bean plants thrive in moist soil, so it’s important to maintain adequate soil moisture throughout their growth. Water the plants deeply and evenly, ensuring that the soil is moist but not waterlogged. Depending on the weather conditions, you may need to water every few days or once a week. Adjust the frequency and duration of watering based on the moisture levels of the soil.
- Mulching: Apply a layer of organic mulch, such as straw or wood chips, around the base of the plants. Mulching helps to retain soil moisture, suppress weed growth, and regulate soil temperature. Make sure to keep the mulch a few inches away from the stem of the plants to prevent potential rot or fungal diseases.
- Fertilizing: Castor bean plants are relatively low-maintenance and can typically grow well in nutrient-poor soil. However, if you notice signs of nutrient deficiency, such as yellowing leaves or stunted growth, you can apply a balanced slow-release fertilizer around the base of the plants. Follow the manufacturer’s instructions for proper application and dosage.
- Pruning: While not necessary, you can prune your castor bean plants to maintain their shape and remove any dead or damaged leaves. Prune the plants in early spring or late winter before the new growth emerges. Use clean and sharp pruning shears, and make clean cuts just above a leaf node or lateral branch.
- Weeding: Regularly inspect the area around your castor bean plants for any weeds. Remove them carefully, taking care not to disturb the roots of the castor bean plants. Weeds compete with the plants for nutrients and water, so keeping the area weed-free will promote healthier growth.
- Support (optional): If you have chosen a tall variety of castor bean plants or if you want to create a visual impact, you may need to provide support for the plants. As they grow, use stakes, trellises, or cages to support the stalks and prevent them from toppling over.
- Pest and disease control: Keep an eye out for common pests such as aphids, snails, and slugs. Monitor the plants regularly and take prompt action if you notice any signs of infestation. Additionally, watch for signs of diseases such as powdery mildew or fungal infections. If detected, treat the plants with appropriate organic or chemical treatments, following the instructions carefully.
By addressing the watering needs, providing proper nutrition, and maintaining a clean and healthy growing environment, you’ll ensure the optimal growth and vitality of your castor bean plants.
Remember to observe and be attentive to the needs of your plants throughout their lifecycle. By providing them with the necessary care and attention, you’ll be rewarded with stunning, thriving castor bean plants that will be the envy of your garden.
Step 7: Provide Support (Optional)
Depending on the variety of castor bean plants you’ve chosen and your desired aesthetic, providing support for the plants may be necessary. This step is especially important if you have selected a tall variety or if you want to create a visually appealing vertical element in your garden. Follow these guidelines to provide support for your castor bean plants:
- Evaluate the plant size: Assess the expected height and growth habit of your specific castor bean variety. Some varieties can grow up to 6 to 10 feet (1.8 to 3 meters) tall, while others may reach even greater heights. Understanding the plant’s size will help you determine the type and level of support needed.
- Choose the support method: There are various support structures you can use, depending on your preference and the specific needs of your castor bean plants. Options include stakes, trellises, bamboo poles, or cages. Choose a method that is sturdy enough to support the height and weight of the plants.
- Install the support system: Place the support structure near the base of the castor bean plants, ensuring it is firmly anchored in the ground. Make sure the support is tall enough to allow the plants to grow upward without any hindrance. If using stakes, insert them into the ground at an angle toward the plants and secure them with ties or twine.
- Tie the plants to the support: As the castor bean plants grow, gently tie the main stems or stalks to the support structure using soft plant ties or twine. Be careful not to tie them too tightly, as this can restrict growth and cause damage. Allow some flexibility for natural movement and growth.
- Regularly check and adjust: Periodically inspect the plants and their support system to ensure they are adequately supported. As the plants continue to grow, you may need to readjust ties or provide additional support if necessary. Avoid attaching the plants directly to any support system that may cause damage or constrict their growth.
Providing support for your castor bean plants not only helps maintain their stability and prevents them from toppling over, but it also adds a visually appealing element to your garden. The support structures can enhance the overall aesthetic, create vertical interest, and make a statement in your landscaping.
Remember to choose a support method that suits the height and growth habit of your castor bean plants and regularly monitor and adjust the support system as needed. With the right support, your castor bean plants will grow strong and upright, adding beauty and drama to your garden space.
Step 8: Prune and Weed
Pruning and weeding are important tasks to keep your castor bean plants healthy and thriving. Regularly tending to these maintenance activities will ensure that your plants have the best environment to grow and flourish. Follow these steps to effectively prune and control weeds in your castor bean garden:
- Pruning: Pruning your castor bean plants helps maintain their shape, promotes airflow, and removes any dead or damaged foliage. Start by inspecting the plants for any diseased, yellowed, or withered leaves. Using clean and sharp pruning shears, make clean cuts just above a leaf node or lateral branch. Be careful not to over-prune, as the foliage is important for photosynthesis and healthy growth.
- Weeding: Regularly inspect the area around your castor bean plants for any weeds. Weeds compete with your plants for resources such as water, nutrients, and sunlight. Remove weeds carefully, making sure to pull them out by the roots to prevent regrowth. Avoid using chemical weed killers near your castor bean plants, as these can be harmful to the environment and other beneficial organisms.
- Mulching: Apply a layer of organic mulch, such as straw or wood chips, around the base of your castor bean plants. Mulching helps suppress weed growth by preventing sunlight from reaching weed seeds, and it also helps conserve soil moisture. Ensure that the mulch is a few inches away from the stem to prevent rot and fungal diseases.
- Maintain a clean garden: Regularly remove any fallen leaves, debris, or plant trimmings from the garden area. This will help prevent the buildup of pests, diseases, and fungal pathogens. Keep the surrounding soil clear to provide a clean and healthy growing environment for your castor bean plants.
- Monitor for pests and diseases: Keep an eye out for common pests such as aphids, spider mites, and caterpillars. Inspect the undersides of leaves for any signs of infestation, such as webs or discolored spots. If you detect any pests, treat them with organic pest control methods or insecticidal soap. Also, watch for signs of diseases such as powdery mildew or rust. If detected, remove and destroy affected plant material and apply appropriate fungicides if necessary.
By regularly pruning and weeding your castor bean garden, you are promoting a healthy growing environment for your plants. Pruning encourages new growth, reduces the risk of disease, and keeps your plants looking neat and tidy. Weeding prevents competition for resources and ensures that your castor bean plants receive the nutrients and water they need to thrive.
Remember to handle pruning tools carefully, sanitize them between cuts to prevent the spread of diseases, and dispose of pruned material properly. With proper pruning and ongoing weed control, your castor bean plants will maintain their health and vigor throughout the growing season.
Read more: How To Plant Green Bean Seeds
Step 9: Monitor for Pests and Diseases
Keeping a close eye on your castor bean plants for pests and diseases is crucial to maintain their health and prevent any significant damage. Early detection and proactive measures are key to effectively managing pest infestations and preventing the spread of diseases. Follow these steps to monitor and address common pests and diseases in your castor bean garden:
- Regular inspection: Set a routine to inspect your castor bean plants. Pay close attention to the leaves, stems, and undersides of leaves, as pests often hide in these areas. Look for signs of damage, such as holes in the leaves, chewed edges, discoloration, or wilting.
- Identify common pests: Familiarize yourself with common pests that can affect castor bean plants. Some pests to watch out for include aphids, spider mites, caterpillars, and slugs. Additionally, keep an eye out for any signs of pest eggs or larvae.
- Natural pest control: If you detect pest infestations, start with organic pest control methods. This can include manually removing pests, spraying the plants with a strong stream of water, or using natural solutions like insecticidal soap or neem oil. Beneficial insects such as ladybugs and lacewings can also help control certain pest populations.
- Monitor for diseases: Watch for common diseases that can affect castor bean plants, such as powdery mildew, rust, or leaf blight. Look for signs like white powdery spots, discolored patches, or black spots on the leaves. If you identify a disease, take immediate action to prevent its spread.
- Disease management: To manage diseases, remove and destroy affected plant material. This includes infected leaves, stems, or any fallen debris. Avoid working with wet plants to prevent spreading fungal spores. Applying appropriate organic or chemical fungicides can also help control disease outbreaks, following the product instructions carefully.
- Practice good garden hygiene: Regularly clean up fallen leaves, debris, or plant trimmings from the garden area. This helps remove potential breeding grounds for pests and prevents diseases from overwintering. Dispose of the plant material properly, either through composting or bagging and disposal.
- Keep plants healthy: Keeping your castor bean plants healthy and vigorous is one of the best defenses against pests and diseases. Ensure proper watering, provide sufficient nutrients through organic fertilizers, and maintain optimal growing conditions. Healthy plants are more resilient and less susceptible to pest and disease attacks.
Being vigilant in monitoring for pests and diseases and taking appropriate actions will help keep your castor bean plants strong and thriving. Regular inspection and early intervention are crucial to prevent the infestations or diseases from spreading and causing severe damage to your plants.
Remember to take a proactive approach, use organic pest control methods whenever possible, and practice good hygiene and plant care to ensure the health and longevity of your castor bean garden.
Step 10: Harvesting Castor Beans
After all the hard work of growing and caring for your castor bean plants, it’s time to enjoy the rewards of a bountiful harvest. Harvesting castor beans involves knowing the right time to harvest and the proper techniques to ensure the seeds are collected and prepared for use. Follow these steps to harvest your castor beans:
- Observe seed maturity: Castor beans are typically ready to harvest when the seed pods or capsules turn brown and start to split open. The seeds inside should be cream-colored or brown and fully developed. The timing will depend on the specific variety and growing conditions.
- Protect yourself: Remember that castor bean seeds contain toxic compounds, especially ricin, which can be harmful if ingested. Take precautions by wearing gloves and avoiding any contact between the seeds and your bare skin. Keep children and pets away from the harvesting process.
- Harvest the seed pods: To harvest the castor beans, gently cut or snap off the seed pods using pruning shears or scissors. Place the harvested pods in a bucket or a tray lined with paper or a cloth to catch any loose seeds. Be careful not to damage the stems or leaves as you harvest.
- Thresh and clean the seeds: Once you have collected the seed pods, threshing is the process of removing the seeds from the pods. Place the pods in a sack, pillowcase, or a bucket and gently crush them or roll them to break open the pods and release the seeds. Separate the seeds from any remaining pod debris.
- Dry the seeds: After threshing, spread the castor bean seeds in a single layer on a clean, dry surface, such as a tray or a sheet of paper. Leave them in a well-ventilated area with low humidity to dry. Stir or turn the seeds occasionally to ensure even drying. Properly dried seeds should feel hard to the touch and no longer have any moisture content.
- Store the seeds: Store the dried castor bean seeds in a cool, dry place in airtight containers, such as glass jars or sealed plastic bags. Make sure they are away from direct sunlight and moisture to prolong their shelf life.
- Disposal of residue: It’s important to dispose of any remaining plant material, such as seed pods or debris, properly as they still contain toxic compounds. Seal them in a bag and dispose of them in a way that complies with local regulations for hazardous waste.
Remember, castor bean seeds are toxic and should never be consumed. They should be handled with care and kept out of reach of children and pets. Only use castor bean seeds for purposes such as making castor oil, crafts, or botanical displays, while taking appropriate safety precautions.
By following these steps, you can safely and successfully harvest castor beans from your plants. Enjoy the unique beauty and practical uses of these versatile seeds as you incorporate them into your chosen projects or display them as an intriguing addition to your garden space.
Conclusion
Congratulations on successfully growing and harvesting your castor bean plants! Throughout this comprehensive guide, we have covered the step-by-step process of planting, caring for, and harvesting castor beans. By following these steps and implementing proper techniques, you have created an environment for your castor bean plants to thrive and produce abundant seeds.
From gathering materials and choosing the right planting location to preparing the soil, soaking the seeds, and sowing them, you have laid the foundation for healthy growth. You have learned about watering, providing support (if necessary), pruning, and weed control to maintain the vitality of your plants. Monitoring for pests and diseases and taking appropriate action will ensure the health and well-being of your castor bean garden.
Lastly, the exciting moment arrives when you can harvest your castor bean seeds. Taking the necessary precautions while harvesting, threshing, and drying the seeds ensures safety and longevity. Remember to store the seeds properly to maintain their quality for future use.
As you reflect on your journey through the world of castor bean gardening, you can appreciate the beauty and practical uses of these fascinating plants. Whether it’s the dramatic foliage, vibrant colors, or the versatile castor oil derived from the seeds, the castor bean plant makes a captivating addition to any garden.
While enjoying the rewards of your efforts, it’s essential to remember the toxic nature of the castor bean seeds. Handling them with care and taking necessary precautions will ensure the safety of both you and your loved ones.
Thank you for joining us on this gardening adventure, and we hope that your experience with growing castor beans has been fulfilling and rewarding. May your garden continue to thrive and bring joy and beauty to your life.
Frequently Asked Questions about How To Plant Castor Beans Seeds
Was this page helpful?
At Storables.com, we guarantee accurate and reliable information. Our content, validated by Expert Board Contributors, is crafted following stringent Editorial Policies. We're committed to providing you with well-researched, expert-backed insights for all your informational needs.


0 thoughts on “How To Plant Castor Beans Seeds”