Home>Garden Essentials>How To Plant Green Bean Seeds
Garden Essentials
How To Plant Green Bean Seeds
Modified: March 15, 2024
Learn how to plant green bean seeds in your garden and enjoy a bountiful harvest. Follow our step-by-step guide for a successful gardening experience!
(Many of the links in this article redirect to a specific reviewed product. Your purchase of these products through affiliate links helps to generate commission for Storables.com, at no extra cost. Learn more)
Introduction
Growing your own green beans is not only a rewarding experience, but it also allows you to enjoy the freshest and most delicious beans right from your garden. Whether you are a seasoned gardener or a beginner, planting green bean seeds is a relatively simple and enjoyable process. By following a few key steps, you can ensure a successful harvest of vibrant and healthy green beans.
In this article, we will guide you through the process of planting green bean seeds, from preparing the soil to harvesting the beans. We will also provide tips on choosing the right variety of green beans, caring for the seedlings, providing support for the growing plants, managing pests and diseases, and more. So, let’s get started and learn how to plant green bean seeds and enjoy the bountiful harvest!
Key Takeaways:
- Planting green beans is a fun and simple process that starts with preparing the soil and choosing the right variety. Soaking the seeds, planting them, and providing care will lead to a bountiful harvest of delicious green beans.
- Supporting the growing plants, managing pests and diseases, and harvesting at the right time are crucial for successful green bean gardening. Enjoy the satisfaction of homegrown green beans and keep learning and improving your gardening skills!
Read more: How To Start Green Bean Seeds
Step 1: Preparing the Soil
Before planting green bean seeds, it’s crucial to prepare the soil to provide the best growing conditions for your plants. Follow these steps for preparing the soil:
- Choose a well-draining location: Green beans thrive in well-drained soil, so select a site that does not have standing water or heavy clay soil. If your soil tends to be heavy or clayey, consider adding organic matter such as compost or aged manure to improve drainage.
- Remove weeds and rocks: Clear the planting area of any weeds, rocks, or debris. Weeds can compete with the young green bean plants for nutrients and water, so it’s important to eliminate them before planting.
- Loosen the soil: Use a garden fork or a tiller to loosen the soil to a depth of about 8 to 10 inches. This helps improve aeration and allows the roots of the green bean plants to penetrate easily.
- Test the soil pH: Green beans prefer slightly acidic soil with a pH range of 6.0 to 6.8. You can test the soil pH using a soil testing kit available at your local garden center. If the pH is too low (acidic), add lime to raise it. If the pH is too high (alkaline), add sulfur or compost to lower it.
- Add organic matter: Incorporate organic matter such as compost or well-rotted manure into the soil. This enriches the soil with essential nutrients and improves its texture.
By following these steps, you are creating an optimal environment for your green bean plants to grow strong and healthy. Once the soil is prepared, you’re ready for the next step: choosing the right variety of green beans.
Step 2: Choosing the Right Variety of Green Beans
When it comes to choosing the right variety of green beans, there are several factors to consider. The choice you make will depend on your personal preferences, available space, and growing conditions. Here are some things to keep in mind:
- Determinate or Indeterminate: Green beans come in two main types – determinate and indeterminate. Determinate varieties tend to grow in a bush-like form and have a compact size, making them suitable for small gardens or containers. Indeterminate varieties, on the other hand, are vining types that require support and can grow tall. Consider the space you have available and your gardening goals when selecting the type of green beans you want to grow.
- Growing Season: Some green bean varieties are specifically bred for early or late-season planting. Pay attention to the recommended growing season for each variety to ensure that it aligns with your local climate and planting timeline.
- Taste and Texture: Green beans come in different flavors and textures. Some varieties are known for their tender and sweet taste, while others have a more robust flavor. Consider your preferences and culinary needs when selecting the taste and texture of green beans you desire.
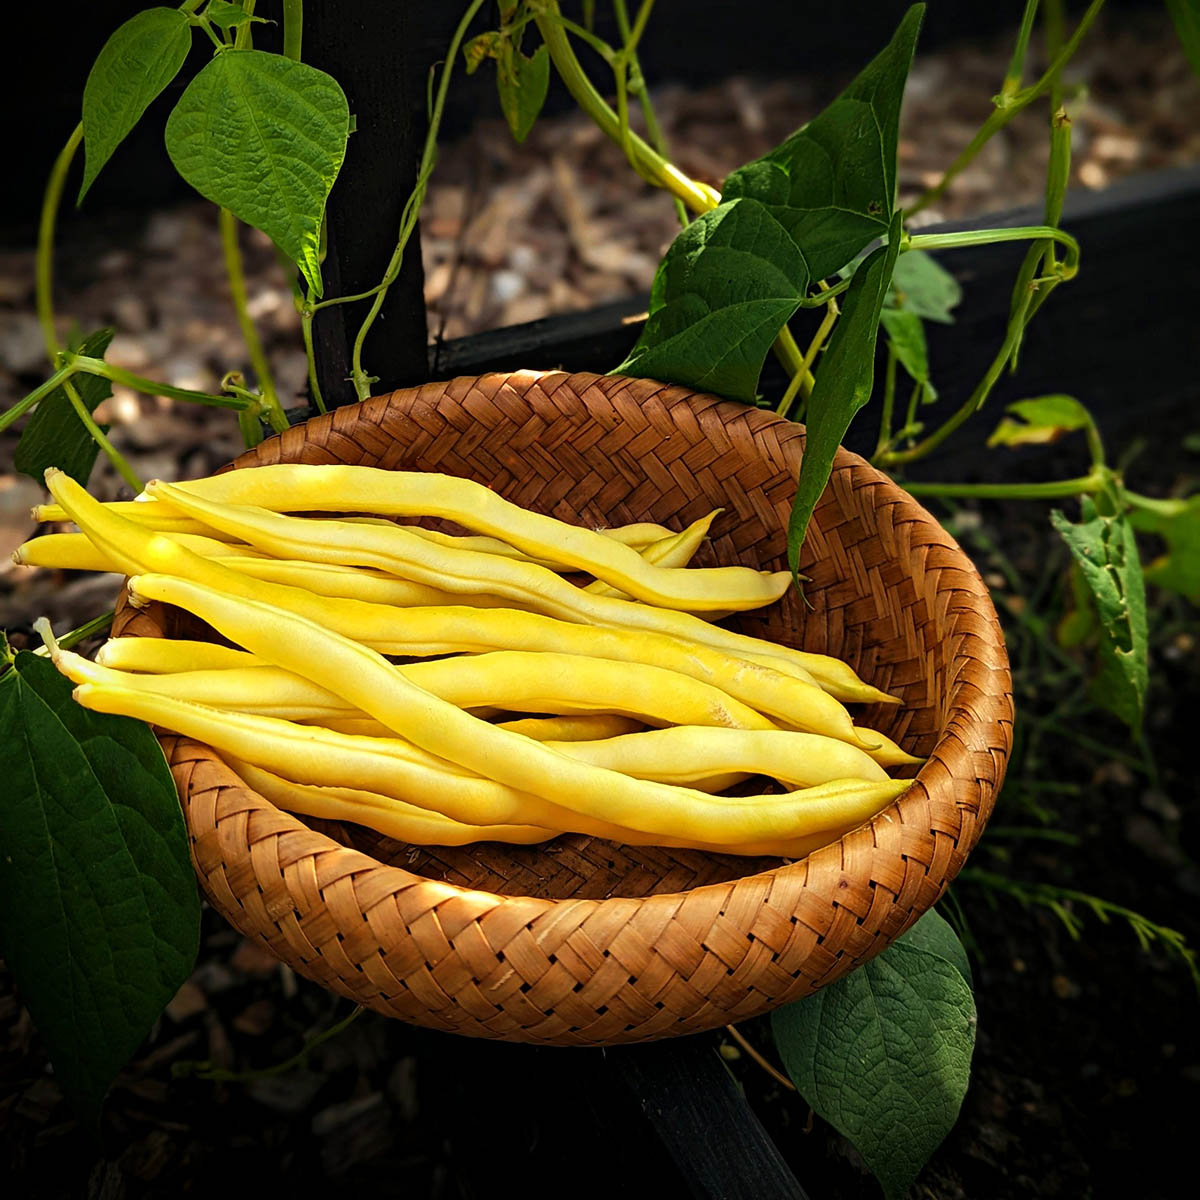
- Color and Appearance: Green beans are not just green! There are varieties available in different colors such as yellow, purple, or speckled. If you want to add visual interest to your garden and meals, consider choosing a variety with unique colors.
- Disease Resistance: Certain green bean varieties are resistant to common diseases such as powdery mildew or bean mosaic virus. If you have experienced specific issues in your garden in the past, look for varieties that are known for their disease resistance.
Take some time to research different green bean varieties and read seed catalogs or consult with local gardeners or experts to determine which varieties are most suitable for your garden. Once you have chosen the right variety, it’s time to move on to the next step: soaking the seeds.
Step 3: Soaking the Seeds
Soaking green bean seeds before planting can help speed up the germination process and increase the chances of successful seedling development. Follow these steps to soak your green bean seeds:
- Choose a container: Select a shallow container or a glass jar that is large enough to hold the seeds and water.
- Measure and add water: Measure out 1-2 inches of water and pour it into the container. Make sure the water is at room temperature.
- Add the seeds: Place the green bean seeds into the water, ensuring that they are fully submerged.
- Allow soaking: Let the seeds soak for 8-12 hours. You can do this overnight or during the day, depending on when you plan to plant them.
- Drain the water: After the soaking period, carefully pour out the water, being careful not to lose any seeds. You can use a strainer or a sieve to aid in this process.
Soaking the green bean seeds helps to soften the seed coat and initiate the germination process. This can lead to faster and more uniform germination when the seeds are planted in the soil. It is important to note that not all seeds require soaking, so check the specific instructions on your seed packet to see if it is recommended.
With your seeds soaked and ready to go, we can move on to the next step: planting them in the soil!
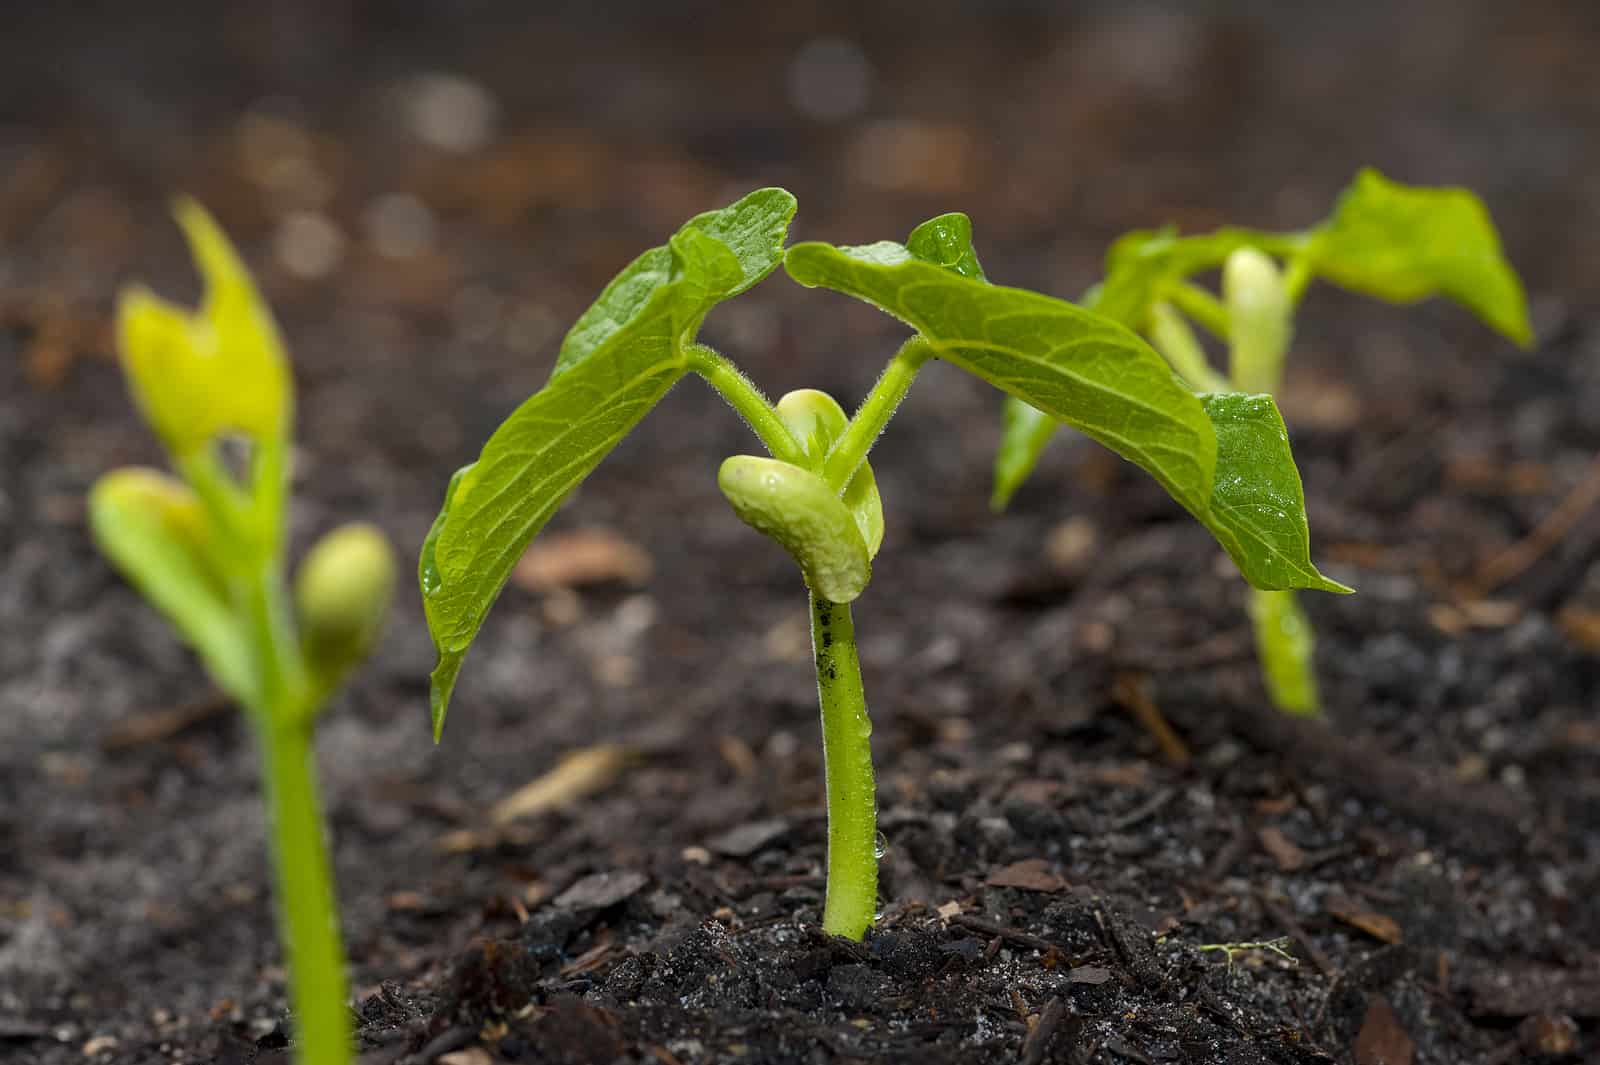
Step 4: Planting the Seeds
Now that your green bean seeds are soaked and ready, it’s time to plant them in the soil. Follow these steps to ensure successful planting:
- Choose the planting method: There are two common methods for planting green bean seeds – direct sowing or starting seeds indoors. Direct sowing involves planting the seeds directly into the garden bed, while starting seeds indoors allows you to get a head start by growing them in containers before transplanting them outdoors.
- Prepare the planting holes: If you are direct sowing, dig small planting holes in the garden bed, spaced about 4-6 inches apart. Make sure the holes are deep enough to accommodate the size of the soaked seeds.
- Plant the seeds: Place one soaked green bean seed into each planting hole, covering it gently with soil. If you are starting seeds indoors, plant them in individual containers, ensuring that each seed is covered with a thin layer of soil.
- Water the seeds: After planting, give the seeds a thorough watering to provide moisture for germination. Be careful not to wash away or disturb the newly planted seeds.
- Label and mark the planting area: It’s helpful to label or mark the planting area to keep track of where you have planted the green bean seeds. This ensures that you can monitor their progress and make adjustments if needed.
It’s important to follow the recommended spacing guidelines for your chosen green bean variety. Crowding the plants can lead to poor air circulation, increased risk of disease, and smaller yields. Give the plants enough space to grow and spread out.
Remember to check the specific instructions on your seed packet for any additional planting guidelines, such as the recommended planting depth and spacing. With your green bean seeds planted, it’s time to move on to the next step: watering and caring for the seedlings.
Plant green bean seeds in well-drained soil, 1-2 inches deep and 2-4 inches apart. Water regularly and provide support for climbing varieties.
Read more: How To Plant A Bean Seed
Step 5: Watering and Caring for the Seedlings
After successfully planting your green bean seeds, it’s important to provide them with proper care to ensure healthy growth and development. Follow these steps for watering and caring for the seedlings:
- Watering frequency: Green bean seedlings require regular watering to establish strong roots. Water deeply at least once a week, providing enough moisture to soak the soil to a depth of 1-2 inches. Adjust the frequency and amount of water based on weather conditions and the moisture needs of the plants.
- Avoid overwatering: While it’s crucial to keep the soil moist, be cautious not to overwater the seedlings. Overwatering can lead to root rot and other issues. Ensure that the soil has proper drainage to prevent waterlogged conditions.
- Mulch the soil: Apply a layer of organic mulch, such as straw or shredded leaves, around the base of the plants. Mulching helps retain moisture in the soil, suppresses weeds, and regulates soil temperature.
- Provide support: If you are growing vining green bean varieties, it’s important to provide support for the growing plants. Install trellises, stakes, or fences near the plants to allow the vines to climb and prevent them from sprawling on the ground.
- Fertilize as needed: Green beans are generally not heavy feeders, but you can provide them with a balanced fertilizer during the growing season if needed. Follow the instructions on the fertilizer packaging and avoid over-fertilization, which can lead to excessive foliage growth at the expense of bean production.
Regularly monitor the seedlings for any signs of pests or diseases. Remove any weeds that may compete with the plants for nutrients and water. Inspect the plants for any abnormalities, such as yellowing leaves or spots, and take appropriate action if necessary.
Remember to provide adequate sunlight for the plants. Green beans thrive in full sun, receiving at least 6-8 hours of direct sunlight each day. Monitor the weather conditions and protect the seedlings from extreme temperatures, strong winds, or heavy rains if needed.
With proper watering, care, and support, your green bean seedlings will grow into strong and healthy plants. Next, we will discuss the importance of providing support for the growing plants.
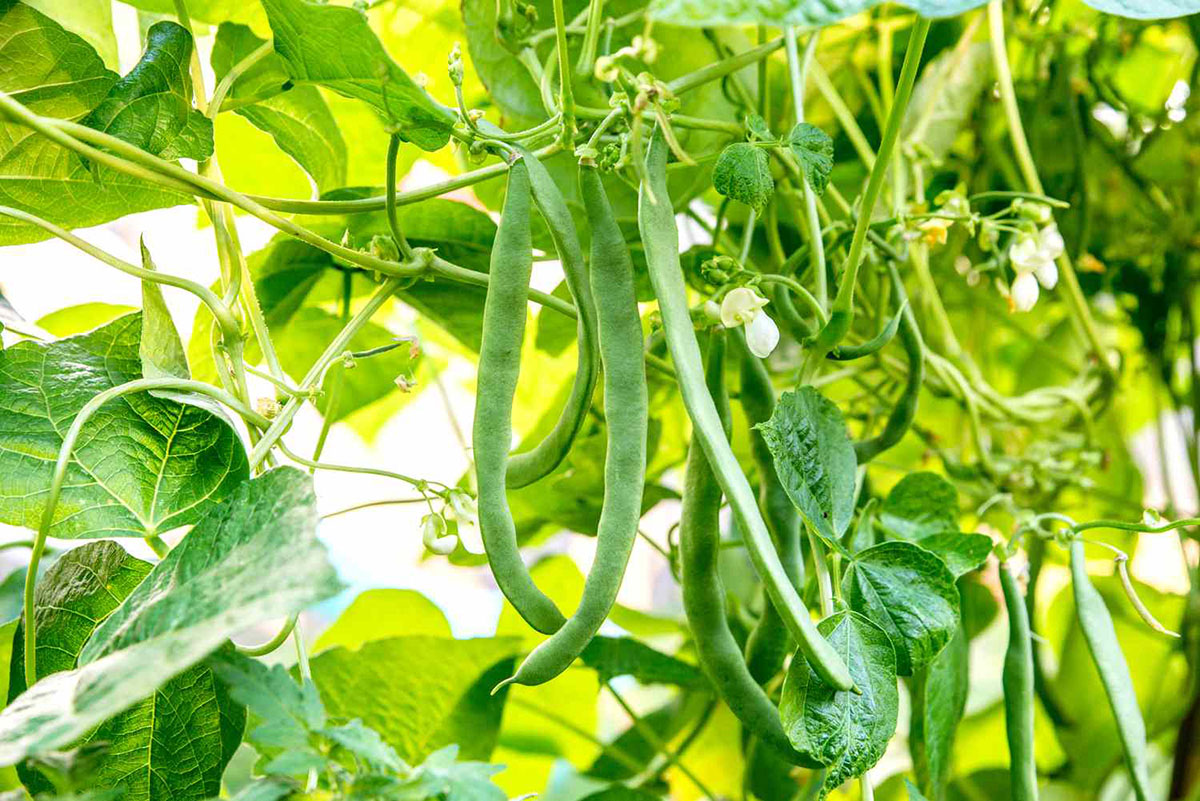
Step 6: Providing Support for the Growing Plants
As your green bean plants continue to grow, providing them with appropriate support becomes essential. Follow these steps to ensure your plants have the necessary support:
- Choose the right support system: Depending on the variety of green beans you are growing, there are various support options available. Common methods include trellises, stakes, teepees, or fence panels. Select a support system that best suits your garden space and the growth habit of your green beans.
- Install the support system: Place the support system in the ground before the plants start to climb. Ensure that it is stable and properly anchored, especially if you anticipate strong winds or heavy fruit load.
- Train the plants: As the green bean plants grow, gently guide the vines onto the support system. Avoid rough handling, as the plants can be delicate. Use plant ties or soft twine to secure the vines to the support system, allowing them to climb and spread out.
- Regularly check and adjust: Monitor the growth of the plants and regularly check if any vines have detached or need repositioning. Adjust the ties or twine to provide additional support as needed.
Providing support for your green bean plants is important for several reasons. Firstly, it helps prevent the plants from sprawling on the ground, reducing the risk of disease and pest issues. Secondly, it allows for better air circulation around the plants, reducing the chance of fungal diseases. Lastly, it makes harvesting easier as the beans are more accessible when grown vertically.
Remember to maintain the support system throughout the growing season and make any necessary repairs or adjustments as you go along. By providing proper support, you can ensure that your green bean plants grow upright, healthy, and productive.
Next, we will discuss steps to manage pests and diseases to protect your green bean plants.
Step 7: Managing Pests and Diseases
Just like any other plants in the garden, green beans are susceptible to pests and diseases. To protect your plants and ensure a bountiful harvest, follow these steps for managing pests and diseases:
- Monitor regularly: Regularly inspect your green bean plants for any signs of pest damage or disease. Look for common pests such as aphids, bean beetles, or spider mites, as well as signs of diseases like powdery mildew or bacterial spot.
- Handpick pests: If you spot any pests on your plants, such as aphids or bean beetles, remove them by hand and drop them into a bucket of soapy water. This can help control minor infestations without the need for chemical pesticides.
- Natural predators: Encourage natural predators in your garden that can help control pest populations. Ladybugs, lacewings, and parasitic wasps are beneficial insects that prey on common garden pests.
- Companion planting: Consider incorporating companion plants that repel pests or attract beneficial insects. For example, planting marigold flowers near your green beans can help repel aphids.
- Practice crop rotation: Rotate your crops each year to prevent the buildup of pests and diseases in the soil. Avoid planting green beans in the same spot for consecutive growing seasons.
- Proper sanitation: Keep your garden clean by removing fallen leaves or debris that can harbor pests or diseases. Dispose of any infected plant material to prevent the spread of diseases.
- Organic pest control: If necessary, you can use organic pest control measures such as neem oil or insecticidal soap. Follow the instructions on the product label and apply them sparingly, targeting affected areas.
It’s important to note that prevention and early detection are key in managing pests and diseases. Regular monitoring and taking prompt action can help prevent serious infestations or outbreaks.
If you’re uncertain about identifying or treating a specific pest or disease issue, consult with local garden centers, extension services, or experienced gardeners for guidance. With proper management, you can protect your green bean plants and foster a healthy growing environment.
Next, we’ll move on to the penultimate step: harvesting the green beans!
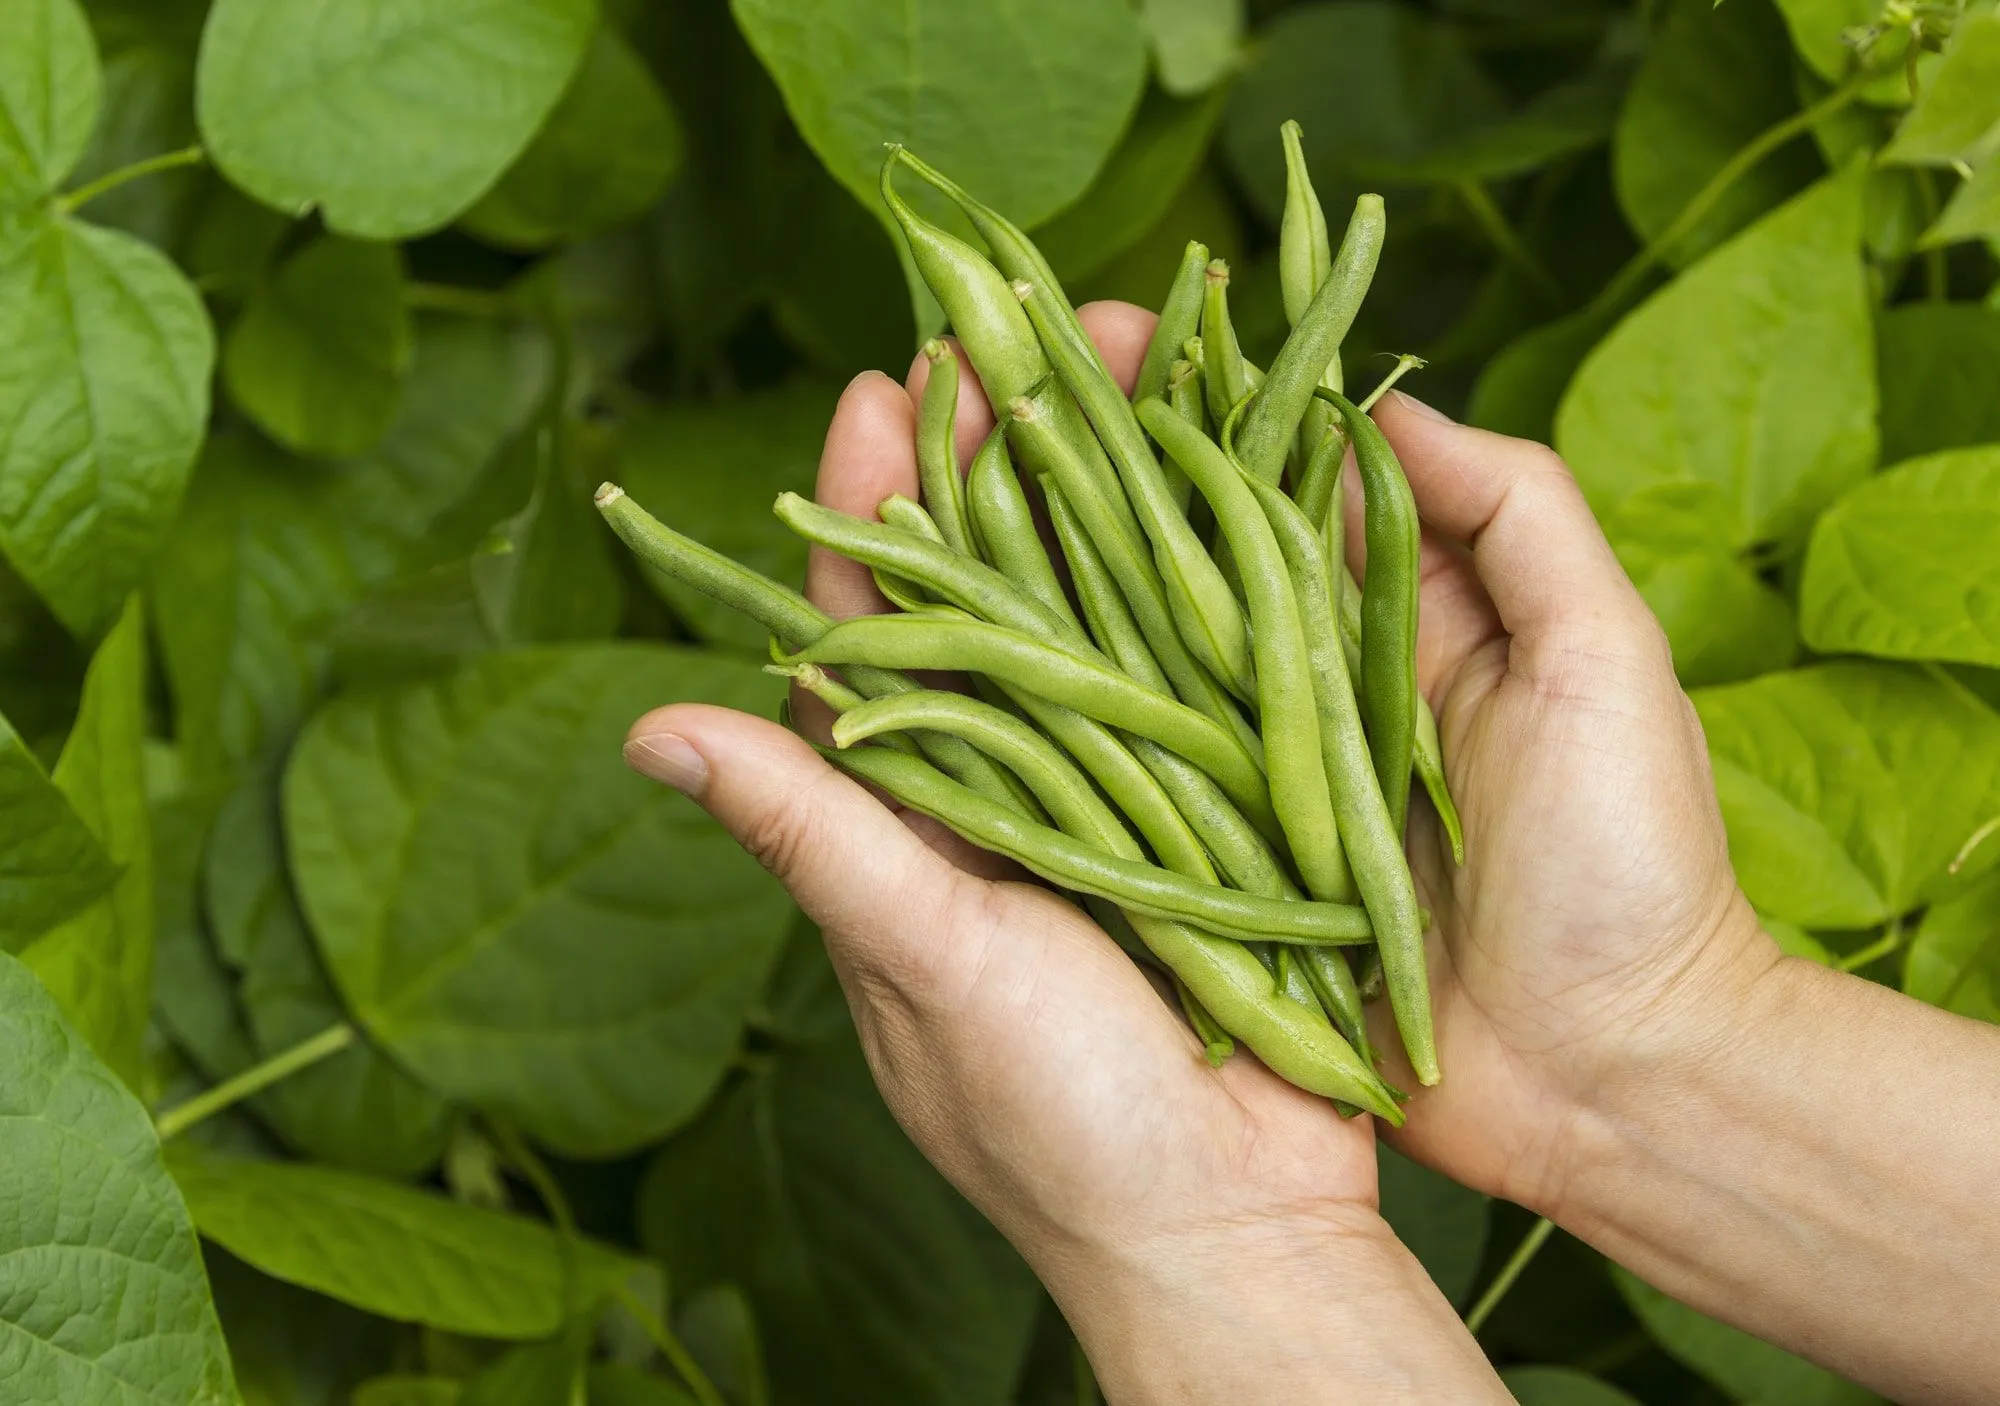
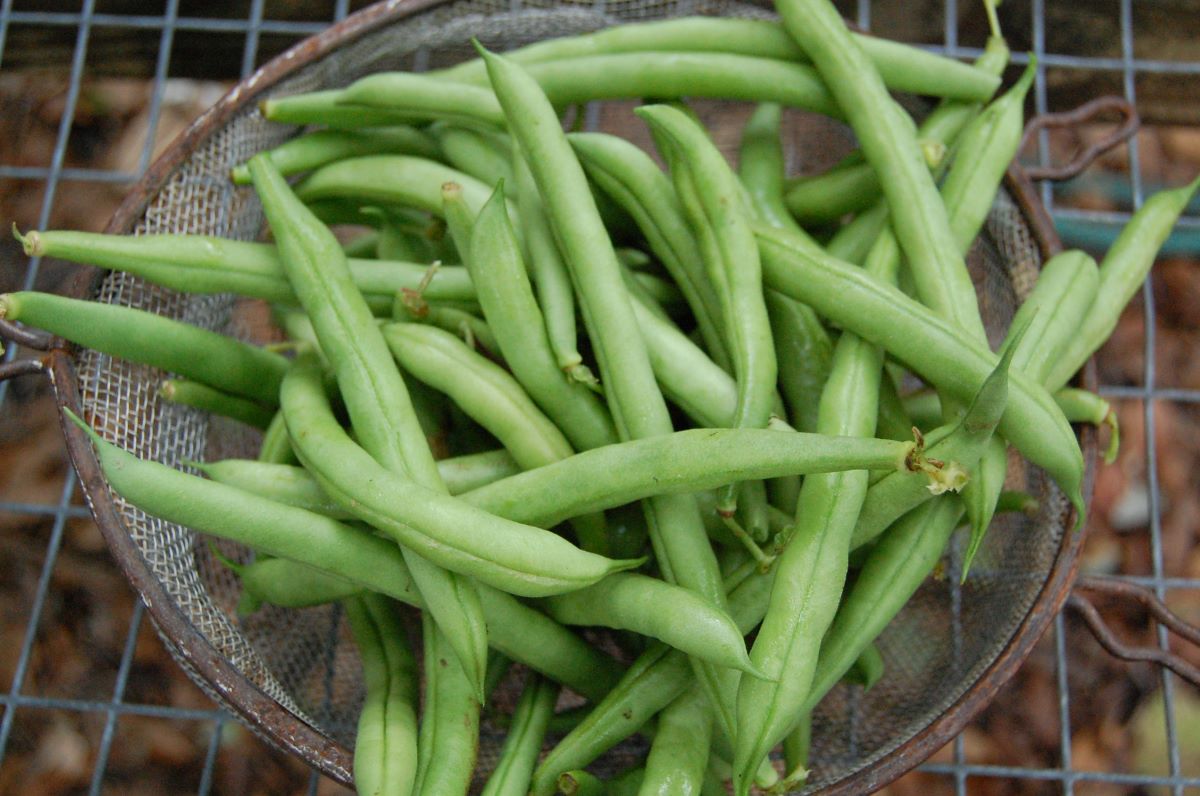
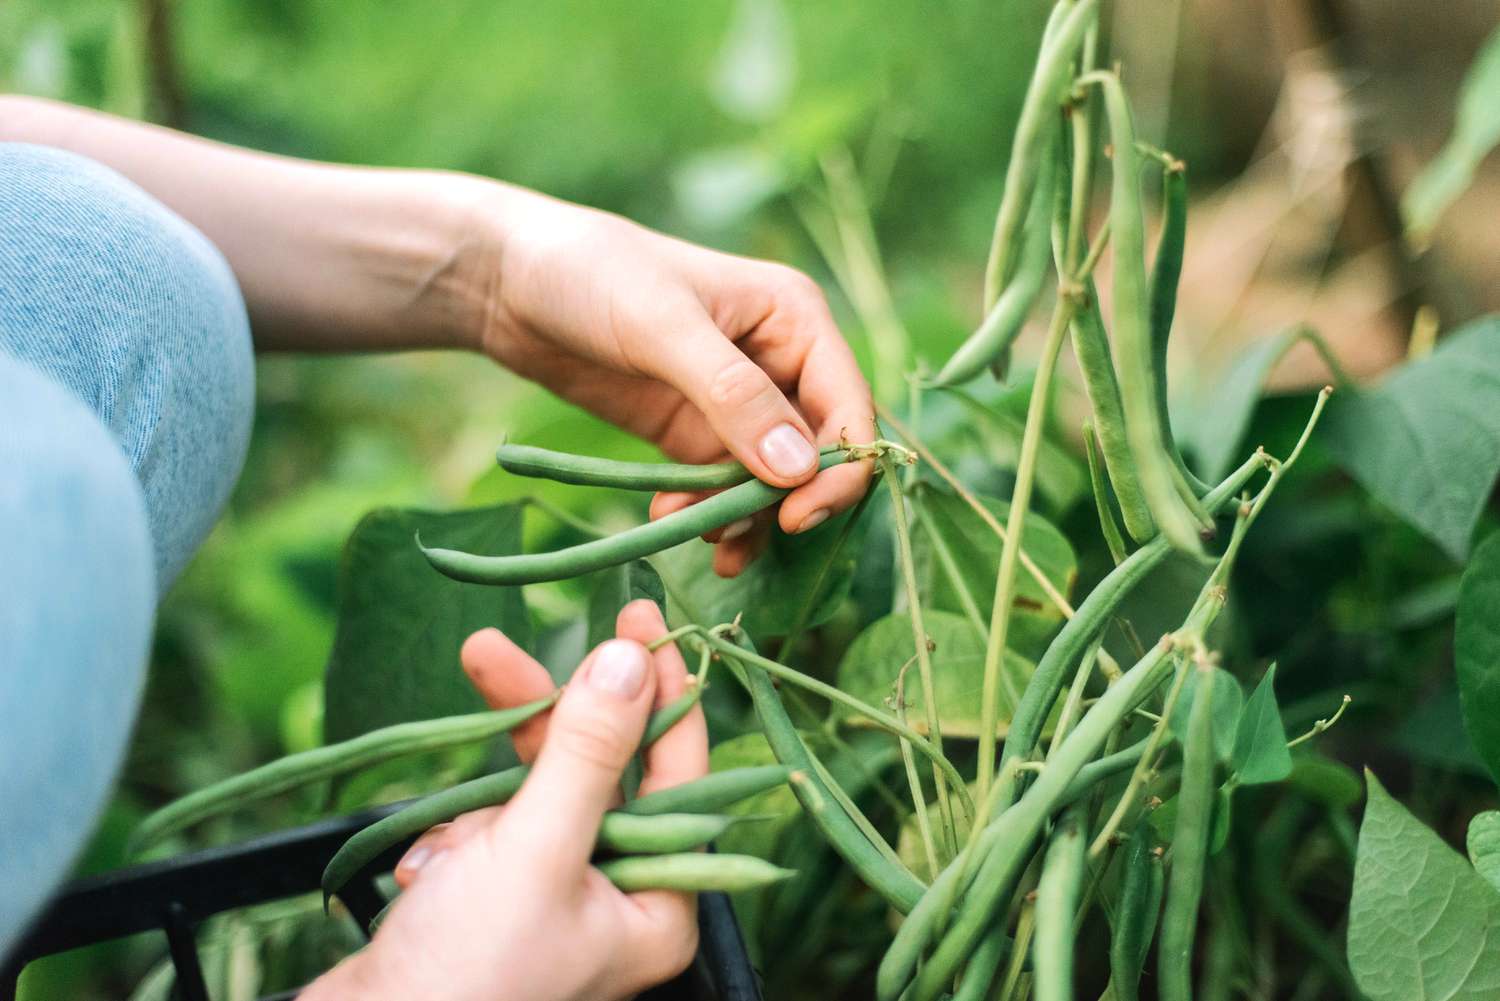
Step 8: Harvesting the Green Beans
After weeks of care and attention, it’s finally time to harvest your green beans! Follow these steps for a successful harvest:
- Check for maturity: Green beans are ready to be harvested when they reach the appropriate size and maturity. Different varieties may have different mature bean sizes, but generally, they are harvested when they are about 4-6 inches long and firm.
- Inspect the pods: Examine the pods closely to ensure they are free from any signs of discoloration, blemishes, or distortion. The beans should be plump, crisp, and vibrant in color.
- Use two hands: When harvesting, use one hand to hold the stem of the plant and the other hand to gently snap or cut the green bean near the stem. This helps prevent damage to the plant and ensures a clean harvest.
- Harvest regularly: Green beans have a continuous production cycle, so it’s important to harvest regularly. Aim to harvest every few days as new beans reach maturity. This encourages the plant to produce more beans and prevents overripening or toughness.
- Store properly: After harvesting, gently wash the beans to remove any dirt or debris. Pat them dry and store them in the refrigerator in a plastic bag or container with a damp paper towel. Green beans can typically be stored for about 3-5 days.
It’s important to note that if you allow some of the green bean pods to fully mature on the plant, they will develop into bean seeds for future planting or other culinary uses, such as drying for soups or stews.
For a continuous harvest throughout the growing season, you can stagger planting dates or choose different varieties with varying maturity times. This way, you can enjoy a steady supply of fresh, homegrown green beans.
Finally, sit back, relax, and savor the delicious flavor and satisfaction of enjoying the fruits of your labor – homegrown green beans!
Congratulations! You have now completed all the steps for successfully planting, growing, and harvesting green beans. With each season, you can refine your gardening techniques and experiment with different varieties to further enhance your green bean growing experience.
Read more: How To Grow Green Beans From Seeds
Conclusion
Planting and growing your own green beans can be a rewarding and enjoyable experience. By following the steps outlined in this guide, you can successfully plant green bean seeds and nurture them into healthy and productive plants. From preparing the soil to harvesting the beans, each step plays a crucial role in ensuring a bountiful harvest.
Remember to choose the right variety of green beans based on your preferences and growing conditions. Soaking the seeds before planting can help jumpstart the germination process. Proper care, including regular watering, providing support for the growing plants, and managing pests and diseases, will nurture your green bean plants to their full potential.
Once it’s time for harvesting, be sure to pick the green beans when they are at their peak maturity, ensuring optimal flavor and quality. With proper storage, you can enjoy the taste of freshly harvested green beans for days to come.
As a gardener, always strive to learn and improve your skills. Each season brings new opportunities to experiment with different varieties, techniques, and growing methods. Don’t be afraid to ask for guidance from local garden centers or experienced gardeners who can provide invaluable insights and advice.
Growing your own green beans allows you to connect with nature, get your hands dirty, and ultimately enjoy the satisfaction of harvest. So, roll up your sleeves, follow these steps, and get ready to savor the delicious flavors of homegrown green beans – straight from your garden to your plate!
Frequently Asked Questions about How To Plant Green Bean Seeds
Was this page helpful?
At Storables.com, we guarantee accurate and reliable information. Our content, validated by Expert Board Contributors, is crafted following stringent Editorial Policies. We're committed to providing you with well-researched, expert-backed insights for all your informational needs.


0 thoughts on “How To Plant Green Bean Seeds”