Home>Garden Essentials>How To Plant A Bean Seed

Garden Essentials
How To Plant A Bean Seed
Modified: March 16, 2024
Learn how to plant a bean seed in your garden and enjoy the satisfaction of growing your own food. Follow our step-by-step guide for a successful gardening experience.
(Many of the links in this article redirect to a specific reviewed product. Your purchase of these products through affiliate links helps to generate commission for Storables.com, at no extra cost. Learn more)
Introduction
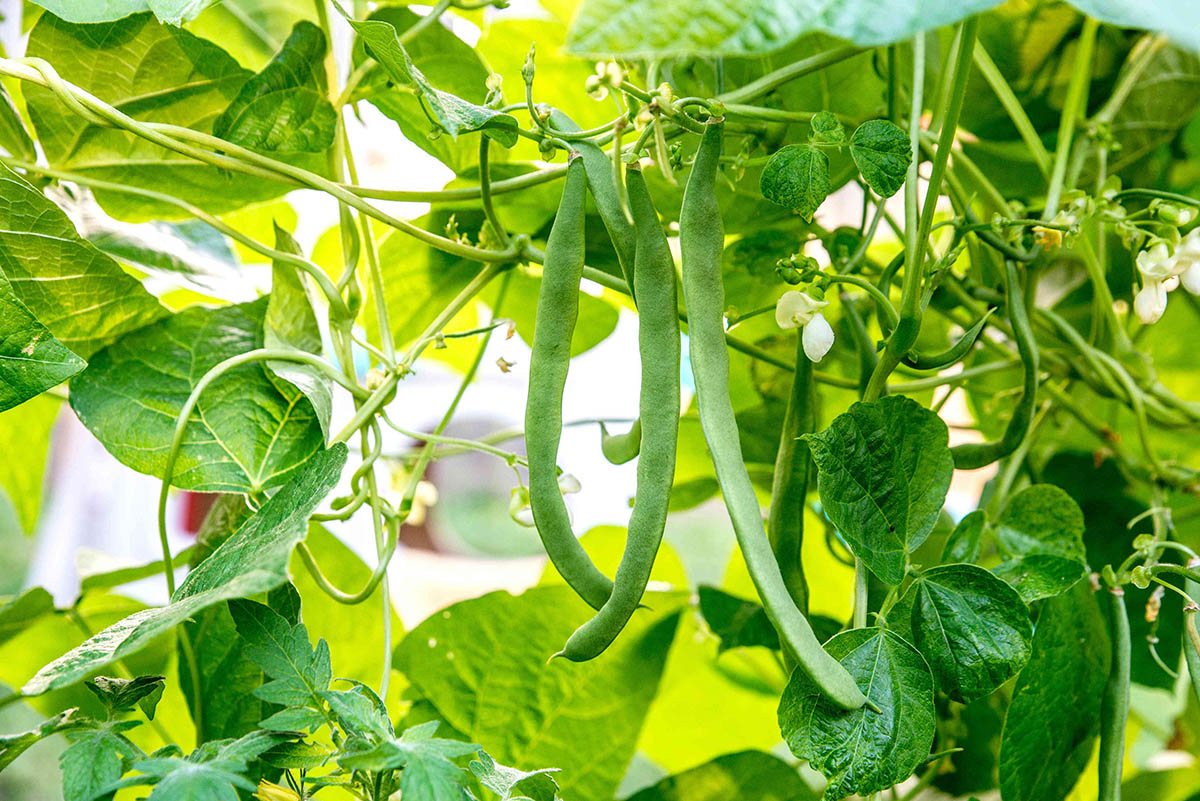
Welcome to the world of gardening! Planting and growing your own fruits, vegetables, and flowers can be a rewarding and fulfilling experience. One of the easiest and most popular plants to start with is the bean seed. Beans are not only delicious to eat, but they also provide many health benefits. Plus, they are relatively easy to grow, making them an ideal choice for new gardeners.
In this article, we will guide you through the steps of planting a bean seed and taking care of it until harvest. Whether you have a large backyard or just a small balcony, you can enjoy the satisfaction of watching your bean seed sprout, grow, and eventually produce a bountiful harvest.
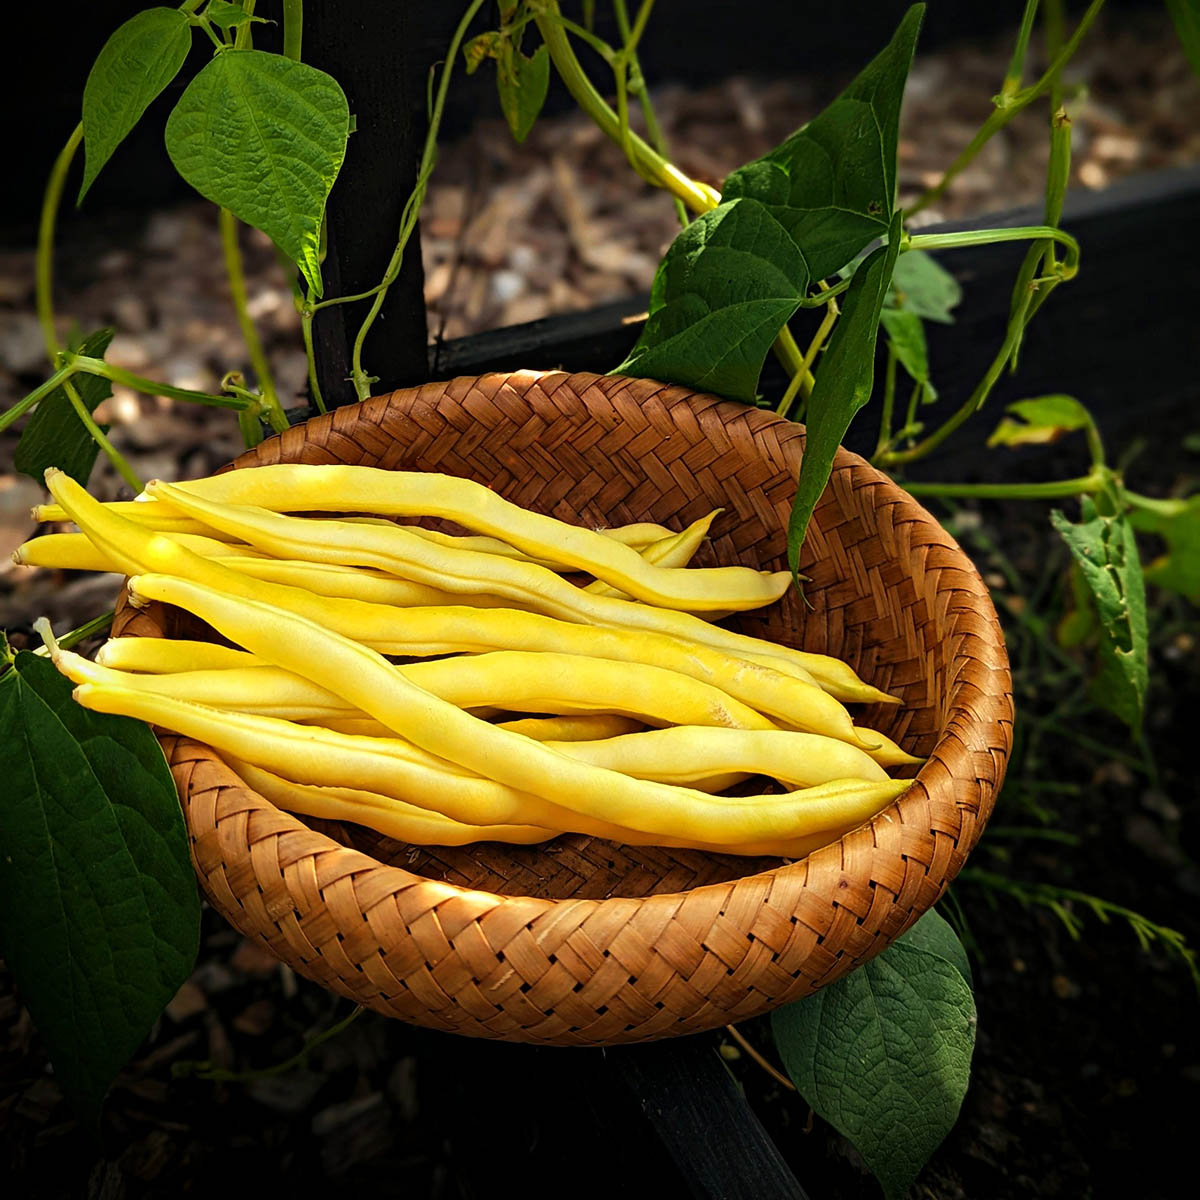
Before we dive into the details of planting a bean seed, it’s essential to understand why beans are a fantastic addition to your garden. Beans are a great source of protein, dietary fiber, vitamins, and minerals. They are low in fat and cholesterol, making them a healthy choice for any diet. Plus, they come in a variety of types, such as green beans, runner beans, and bush beans, each with its unique flavor and texture.
Not only are beans nutritious to eat, but they also have numerous benefits for your garden. They are nitrogen-fixing plants, meaning they convert atmospheric nitrogen into a form that is easily absorbed by plants. This process enhances soil fertility and reduces the need for synthetic fertilizers. Additionally, beans are excellent companion plants, attracting beneficial insects and deterring pests.
Now that we’ve touched on the advantages of growing beans let’s move on to the practical steps you need to follow to successfully plant a bean seed. By the end of this article, you’ll have all the knowledge you need to start your bean-growing journey. Let’s get started!
Key Takeaways:
- Planting bean seeds is a fun and rewarding experience that provides delicious, nutritious beans. Follow the steps to gather materials, choose the right location, and care for your plants to enjoy a successful bean-growing journey.
- By monitoring the growth of your bean plants and harvesting the beans at the right time, you can savor the flavors and nutritional benefits of homegrown beans. Enjoy the process, experiment with different varieties, and embrace the lessons that gardening teaches us.
Read more: How To Plant Green Bean Seeds
Step 1: Gather Materials
Before you begin planting your bean seed, it’s important to gather all the necessary materials. Having everything prepared beforehand will make the process smoother and more efficient. Here are the materials you’ll need:
- Bean Seeds: Choose a variety of bean seeds that suits your preferences and growing conditions. You can find bean seeds at your local garden center or order them online.
- Pots or Containers: If you plan to grow your beans in containers, make sure to have pots or containers with drainage holes. Opt for larger containers to allow enough space for the roots to grow.
- Garden Soil: Use high-quality, well-draining soil for your bean plants. If you’re planting in containers, choose a potting mix specifically designed for container gardening.
- Garden Tools: Gather essential garden tools such as a shovel, gardening gloves, a watering can or hose, and a trowel for planting.
- Stakes or Trellises: Depending on the type of beans you’re growing, you may need stakes or trellises to support the plants as they grow. Bush beans generally don’t require support, while pole beans and runner beans need a trellis or stakes.
- Sun Exposure: Beans thrive in full sun, so choose a location in your garden or balcony that receives at least 6-8 hours of sunlight each day.
- Water Source: Make sure you have a water source nearby, whether it’s a garden hose or a watering can, to provide your bean plants with regular water.
By gathering these materials ahead of time, you’ll be well-prepared to start your bean planting journey. Once you have everything ready, it’s time to move on to the next step – choosing the right location for your bean plants.
Step 2: Choose the Right Location
Choosing the right location for your bean plants is crucial for their growth and success. Beans thrive in warm and sunny conditions, so look for a spot in your garden or balcony that receives ample sunlight. Here are a few factors to consider when selecting the location:
Sunlight: Beans require at least 6-8 hours of direct sunlight each day. Observe the potential planting area throughout the day to ensure it receives adequate sunlight. Avoid areas that are heavily shaded or blocked by trees or buildings.
Soil Quality: Beans prefer well-draining soil with a pH level between 6 and 7. Test your soil to determine its acidity or alkalinity and amend it if necessary. Add organic matter, such as compost or aged manure, to improve soil fertility and drainage.
Wind Protection: While beans enjoy the warmth of the sun, they can be sensitive to strong winds. If your planting area is prone to gusty winds, consider providing some wind protection, such as a fence or planting taller crops as a windbreak.
Accessibility: Choose a location that is easily accessible for watering, weeding, and harvesting. Consider the convenience of having a water source nearby so you won’t have to carry heavy watering cans or hoses across your garden.
Companion Planting: Beans are excellent companion plants. They can be planted alongside other compatible crops, such as corn, carrots, cucumbers, or lettuce. Consider the layout of your garden and plan for companion planting to maximize your space and create a harmonious garden ecosystem.
Once you have identified the ideal location for your bean plants, it’s time to prepare the soil to ensure optimal conditions for growth. We will cover this in the next step.
Step 3: Prepare the Soil
Preparing the soil before planting your bean seeds is essential to provide a nutrient-rich and well-draining environment for your plants. Here are the steps to prepare the soil:
1. Clear the Area: Remove any weeds, rocks, or debris from the planting area. Clearing the area ensures that your beans won’t have to compete with unwanted plants for nutrients and space.
2. Loosen the Soil: Use a garden fork or shovel to loosen the soil to a depth of about 6-8 inches. This will improve aeration and allow the roots to penetrate easily into the soil.
3. Amend the Soil: Depending on your soil’s quality, you may need to amend it with organic matter. Add compost, leaf mold, or well-rotted manure to enrich the soil. These organic amendments enhance drainage, increase fertility, and provide essential nutrients for the growing beans.
4. Test the pH: Check the pH level of your soil using a soil testing kit. Beans prefer a slightly acidic to neutral pH, ideally between 6 and 7. If the pH is outside this range, you can adjust it by adding lime to raise the pH or elemental sulfur to lower it.
5. Mix the Amendments: Once you’ve added the necessary amendments to your soil, use a garden fork or shovel to mix them thoroughly with the existing soil. This ensures that the amendments are evenly distributed, promoting uniform growth and nutrient availability for your bean plants.
6. Level the Soil: Smooth out the soil surface by gently raking it to create a level planting area. This will make it easier to sow the bean seeds and provide an even surface for watering.
By following these steps, you will create an optimal growing environment for your bean plants. Now that the soil is prepared, it’s time to move on to the exciting part – planting the bean seeds. Let’s get started!
Step 4: Planting the Bean Seed
Now that you have prepared the soil, it’s time to plant your bean seeds. Follow these steps to ensure successful planting:
1. Determine the Planting Method: There are two common methods for planting bean seeds – sowing directly in the ground or starting them indoors and transplanting later. Choose the method that suits your preferences and growing conditions.
2. Spacing: Beans need enough space to grow and spread, so ensure proper spacing between the seeds or seedlings. For bush beans, plant the seeds or seedlings 2-3 inches apart in rows that are 18-24 inches apart. For pole beans or runner beans, place support structures like stakes or trellises and sow the seeds 4-6 inches apart along the structure.
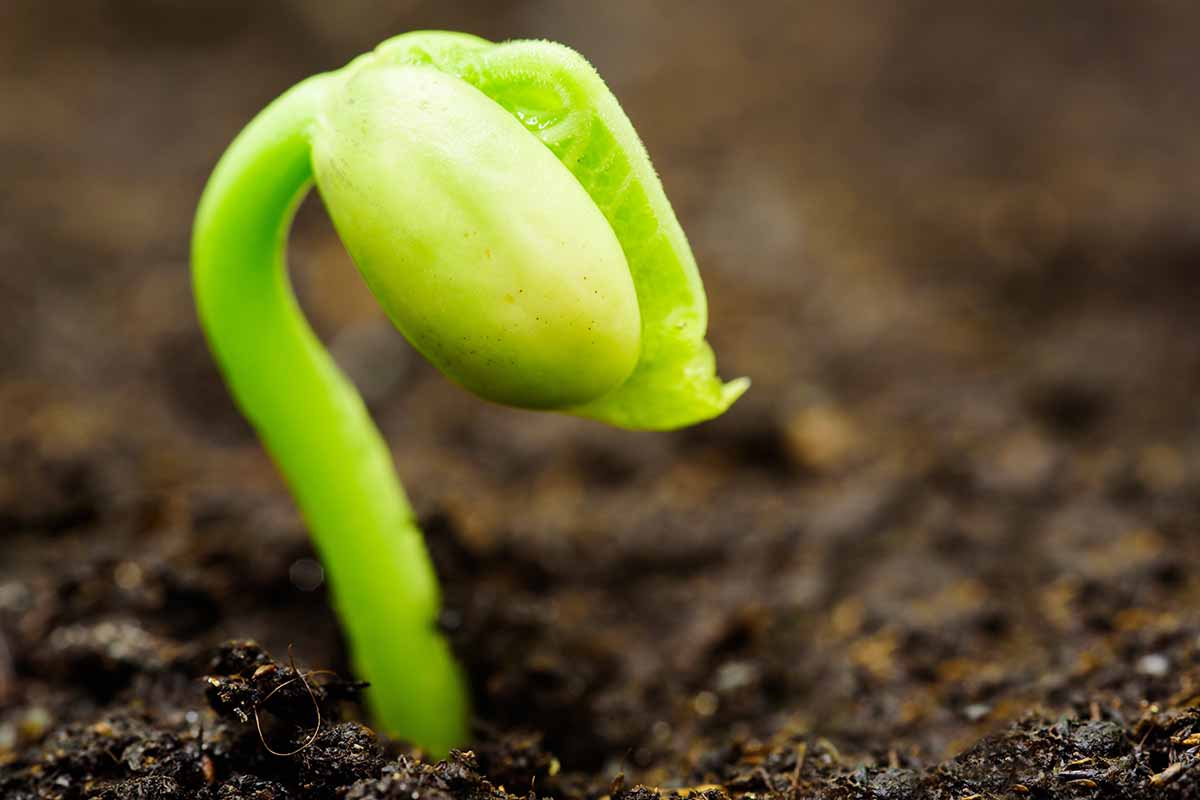
3. Sowing Depth: The depth at which you plant the bean seeds will vary depending on the type of bean. As a general rule, plant the seeds about 1 to 1.5 inches deep in the soil. Consult the seed packet for specific instructions related to your bean variety.
4. Watering: After planting the seeds, water the soil gently but thoroughly. This will ensure that the seeds are in contact with moist soil, aiding in germination. Avoid heavy watering as it may dislodge the seeds or lead to waterlogging.
5. Mulching: Consider adding a layer of organic mulch around the bean plants. Mulching helps retain soil moisture, suppresses weeds, and regulates soil temperature. Use materials like straw, wood chips, or compost and spread them around the base of the plants, leaving a small gap around the stem.
6. Labeling: It’s helpful to label your bean rows or pots with the variety and planting date. This will assist you in keeping track of different types of beans and their growth progress.
7. Provide Support (If Needed): If you’re growing pole beans or runner beans, install stakes or trellises to provide support for the plants as they grow. This will prevent the plants from tangling and help maximize space in your garden.
Once you have completed the planting process, it’s time to move on to the next step – watering and caring for your bean plants to ensure healthy growth. Let’s discover how to nurture your bean seeds in the next step.
Before planting a bean seed, make sure to choose a sunny spot with well-drained soil. Plant the seed about 1-2 inches deep and water regularly to keep the soil moist but not waterlogged.
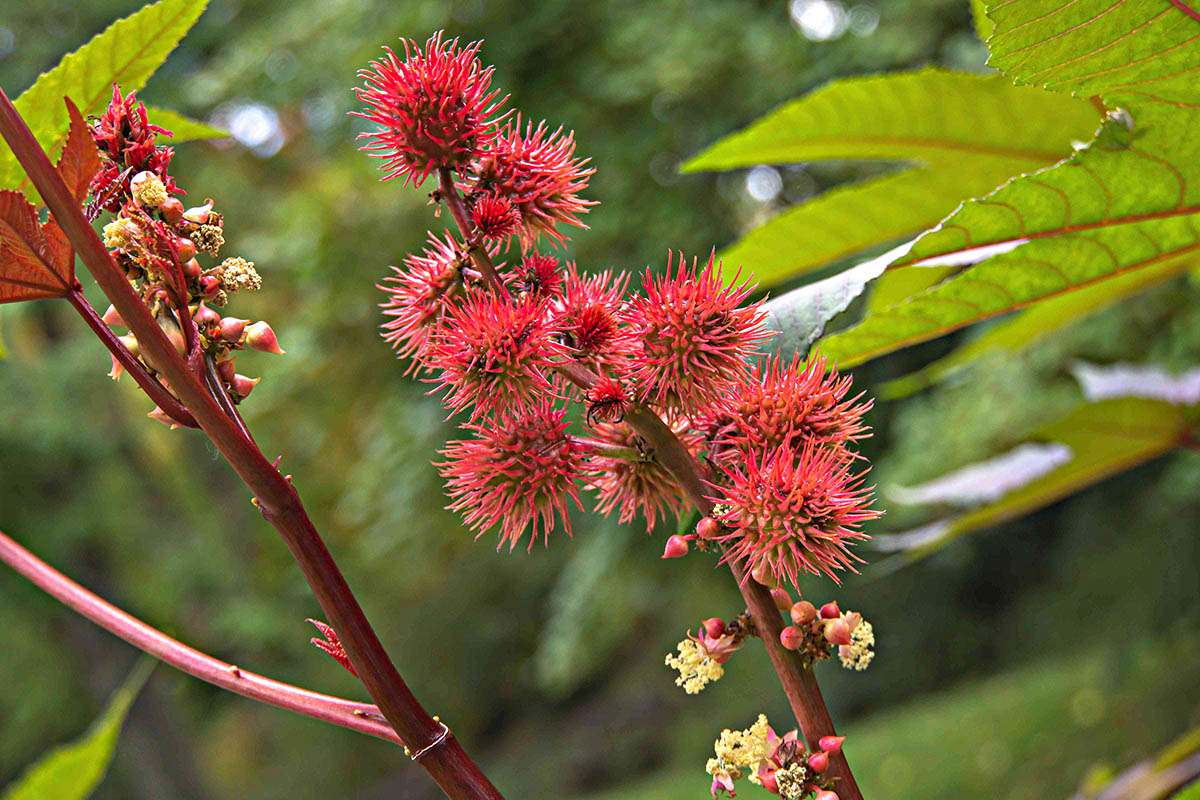
Read more: How To Plant Castor Beans Seeds
Step 5: Watering and Care
Watering and providing proper care are essential for the growth and development of your bean plants. Here are the steps to ensure your beans receive adequate moisture and care:
1. Watering: Beans require consistent moisture, especially during germination and flowering. Water your bean plants regularly, ensuring that the soil is kept evenly moist but not waterlogged. A general guideline is to provide about 1 inch of water per week, either through rainfall or manual watering.
2. Watering Methods: When watering your beans, it’s best to water at the base of the plants, avoiding overhead watering whenever possible. Watering at the base minimizes the risk of fungal diseases and ensures that the water reaches the roots effectively.
3. Mulching: Maintain a layer of mulch around the bean plants to conserve moisture in the soil. Mulch helps to reduce water evaporation, keeps the soil temperature consistent, and suppresses weed growth. Make sure to replenish the mulch as needed throughout the growing season.
4. Weed Control: Regularly inspect your bean plants for any weeds. Weeds can compete with your beans for nutrients and moisture. Remove weeds carefully so as not to disturb the shallow root system of the beans. Mulching can also help minimize weed growth.
5. Fertilization: Beans are nitrogen-fixing plants, meaning they have the ability to convert atmospheric nitrogen into a form that can be utilized by plants. However, if your soil lacks fertility, you can supplement it with organic fertilizer or compost. Apply fertilizers following the product instructions or the recommendations of a soil test.
6. Pest and Disease Management: Keep an eye out for common bean pests such as aphids, beetles, and spider mites. Identify any signs of pest infestation early and take appropriate measures to control them. Additionally, monitor your plants for any signs of diseases like powdery mildew or bacterial spot. Proper crop rotation, regular inspection, and using disease-resistant bean varieties can help mitigate these issues.
7. Support Maintenance: If you’re growing pole beans or runner beans, check the support structures regularly and adjust them as needed. Ensure that the vines are properly trained and securely attached to prevent breakage.
By diligently watering, providing care, and addressing any potential issues, you’ll help your bean plants thrive. Now, let’s move on to the next step – monitoring the growth of your beans and preparing for harvest!
Step 6: Monitoring Growth
Monitoring the growth of your bean plants is an important step to ensure their health and productivity. By observing their progress, you can address any issues promptly and provide the necessary support they need. Here are some key aspects to consider when monitoring the growth of your bean plants:
1. Daily Observation: Take a few minutes each day to observe your bean plants. Check for any signs of distress, such as wilting leaves, yellowing foliage, or pest infestation. Early detection allows you to take immediate action and prevent any potential problems from escalating.
2. Growth and Development: Observe how your bean plants grow and develop over time. Notice the emergence of new leaves, the development of flowers, and the formation of bean pods. Keep a record of their growth progress to track their performance and plan for future plantings.
3. Support Maintenance: If you’re growing pole beans or runner beans, regularly inspect the support structures. Ensure that the stakes or trellises are secure and able to bear the weight of the growing vines. Adjust or reinforce the supports as necessary to prevent damage to the plants.
4. Pest and Disease Management: Continuously monitor your bean plants for any signs of pests or diseases. Look for chewed leaves, discoloration, or abnormal growth. If you notice any issues, identify the problem and take appropriate measures to control the pests or diseases. Organic pest control methods or companion planting can help manage common bean pests and diseases.
5. Watering and Nutrient Needs: Pay attention to the water and nutrient requirements of your bean plants. Adjust your watering schedule based on weather conditions and the moisture needs of the plants. If you notice any signs of nutrient deficiencies, such as yellowing leaves or stunted growth, consider supplementing with organic fertilizers or compost.
6. Training Vines (If Applicable): If you’re growing pole beans or runner beans, guide the vines along the support structure as they grow. Gently tie the vines to the stakes or trellises to provide stability and prevent tangling. This ensures that the plants can maximize their vertical growth and produce an abundant harvest.
By regularly monitoring the growth of your bean plants, you can intervene when needed and create optimal growing conditions. This brings us to the final step – harvesting the beans and enjoying the fruits of your labor!
Step 7: Harvesting the Beans
The final step in your bean planting journey is the exciting process of harvesting the beans. Harvesting at the right time ensures that your beans are at their peak flavor and texture. Here’s what you need to know about harvesting beans:
1. Check the Seed Packet: Refer to the seed packet or the specific variety’s harvesting guidelines to determine when the beans are ready to harvest. Different types of beans have different maturity times, so it’s important to know the specific requirements for your variety.
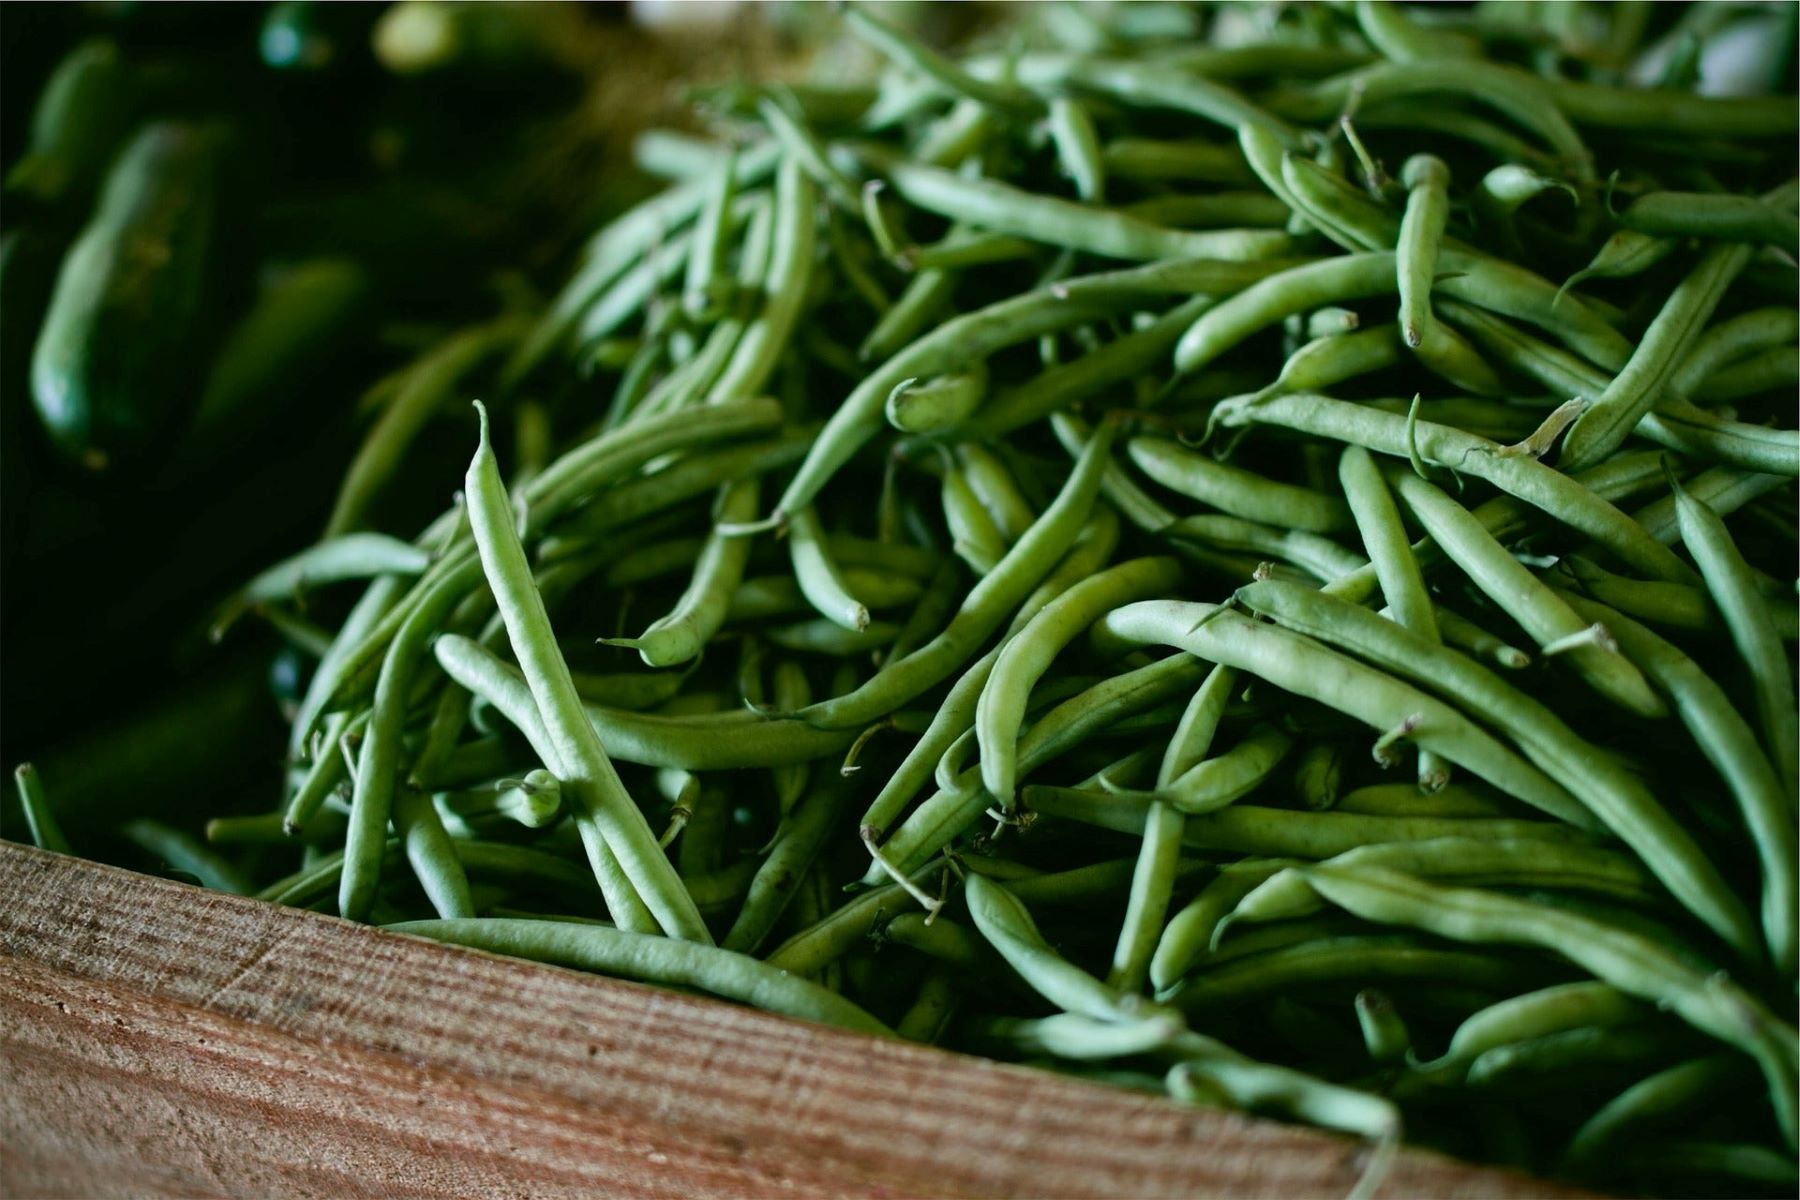
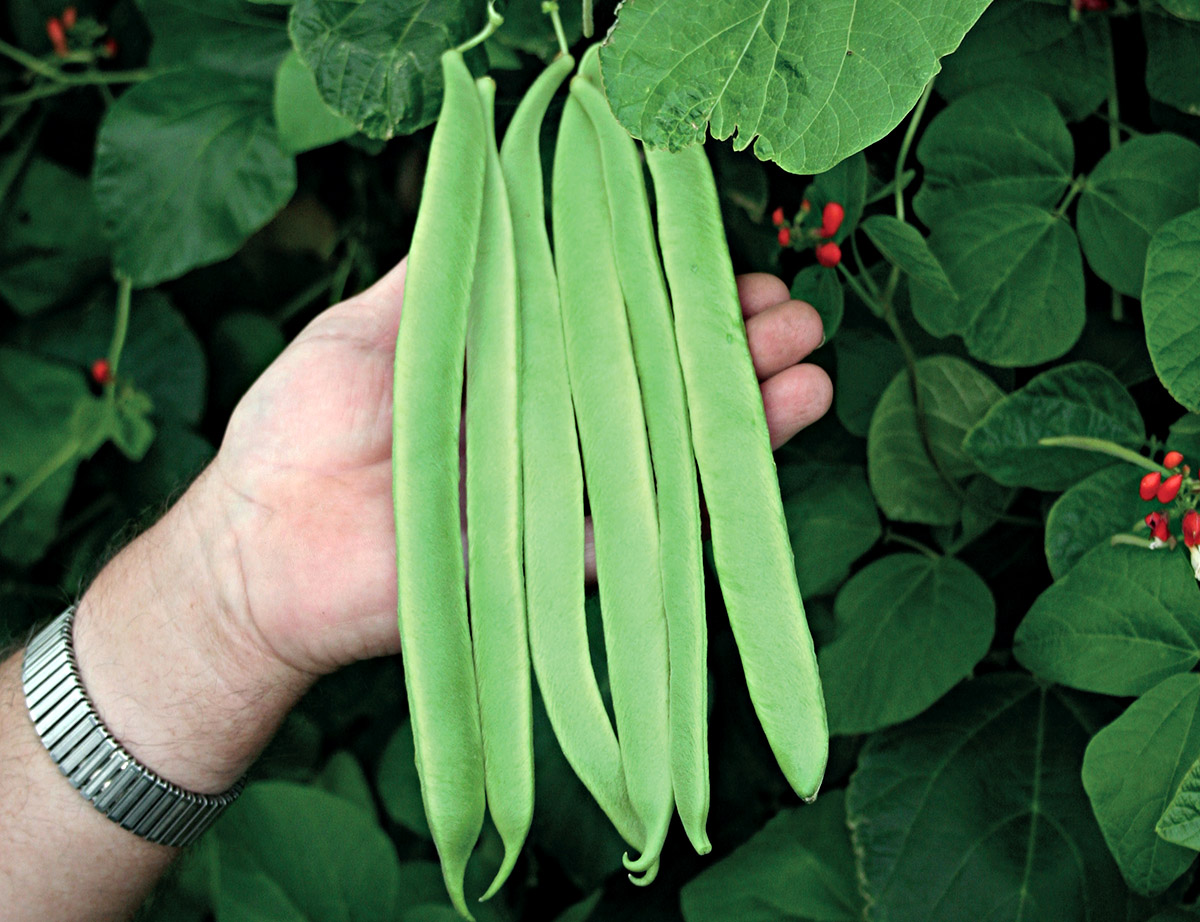
2. Look for Visual Cues: In general, beans are ready to harvest when the pods are firm, crisp, and fully developed. Look for visual cues such as a change in color, typically from green to yellow or brown, depending on the variety.
3. Test for Snap: To confirm if the beans are ready to be harvested, gently snap one of the pods in half. If it breaks easily and cleanly, the beans are at the ideal stage. If the pod is tough and difficult to snap, it may need more time to mature.
4. Harvesting Technique: When harvesting beans, use scissors or gardening shears to cut the pods from the plant. Be careful not to damage the stem or nearby foliage. Harvest the beans regularly, as this encourages the plant to continue producing new pods.
5. Storage and Utilization: After harvesting, promptly store the beans in a cool and dry place. If you’re not using them right away, you can blanch and freeze them to preserve their freshness. Beans are versatile and can be used in various culinary preparations such as stir-fries, salads, soups, and side dishes.
6. Seed Saving: If you’re interested in saving seeds for future planting, allow some of the bean pods to fully mature and dry on the plant. Once the pods are completely dry, carefully remove the seeds and store them in a cool, dry place in labeled containers.
Harvesting the beans is an incredibly rewarding experience, and it allows you to enjoy the fruits of your labor. By following these guidelines, you can savor the flavors and nutritional benefits of homegrown beans.
Congratulations on successfully completing all the steps of planting and growing your bean plants!
Remember, each gardening journey is a learning experience, and with practice, you’ll develop a deeper understanding of the specific needs of your beans and other plants. Enjoy the process, experiment with different varieties, and continue to expand your gardening skills.
Happy gardening and happy harvest!
Conclusion
Congratulations! You’ve learned how to plant bean seeds and nurture them into thriving plants. Gardening is a wonderful experience that not only provides you with fresh, nutritious produce but also allows you to connect with nature and experience the satisfaction of growing your own food.
Throughout this article, we’ve covered the essential steps, from gathering materials and choosing the right location to preparing the soil, planting the seeds, and caring for your bean plants. We explored the importance of monitoring their growth, addressing any issues that may arise, and ultimately harvesting the beans.
By following these steps, you’ve set yourself up for success in growing healthy and productive bean plants. Remember to adapt these guidelines to your specific growing conditions, be it in a large backyard garden or a small balcony. Gardening is a flexible and adaptable endeavor that can be enjoyed by everyone, regardless of space limitations.
As you continue your gardening journey, don’t be afraid to experiment with different bean varieties and companion plants. Try growing pole beans versus bush beans or explore unique heirloom varieties. Discover the joy of companion planting and create a diverse and harmonious garden ecosystem.
Always stay connected with your garden and the needs of your plants. Regularly observe, water, feed, and protect your bean plants from pests and diseases. With care and attention, you’ll witness the transformation of tiny seeds into thriving plants, laden with delicious and nutritious beans.
Remember to enjoy the process and embrace the lessons that gardening teaches us – patience, resilience, and the beauty of nature’s cycles. Every success and every challenge in the garden contributes to your growth as a gardener.
So, grab your gardening tools, get your hands in the soil, and start planting those bean seeds. Enjoy the journey, relish the harvest, and savor the flavors of your homegrown beans. Happy gardening!
Frequently Asked Questions about How To Plant A Bean Seed
Was this page helpful?
At Storables.com, we guarantee accurate and reliable information. Our content, validated by Expert Board Contributors, is crafted following stringent Editorial Policies. We're committed to providing you with well-researched, expert-backed insights for all your informational needs.


0 thoughts on “How To Plant A Bean Seed”