Articles
How To Take Off Electric Stove Top
Modified: February 29, 2024
Learn how to safely remove an electric stove top with our step-by-step articles. Discover expert tips and tricks for a hassle-free process.
(Many of the links in this article redirect to a specific reviewed product. Your purchase of these products through affiliate links helps to generate commission for Storables.com, at no extra cost. Learn more)
Introduction
Welcome to our comprehensive guide on how to take off an electric stove top. Whether you are looking to clean your stove top thoroughly, make repairs, or replace an old stove top, knowing how to safely and efficiently remove the electric stove top is essential.
An electric stove top is a common feature in many kitchens, providing a convenient and efficient way to cook meals. However, over time, it can accumulate grease, spills, and debris, which can affect its performance and aesthetics. Taking off the stove top allows you to clean hard-to-reach areas and ensure that your appliance is in top condition.
Removing an electric stove top may seem like a daunting task, but with the right materials, precautions, and step-by-step guidance, you can successfully accomplish it. This guide will walk you through the process, providing tips and insights along the way.
Before we begin, it’s important to note that safety should always be your top priority when working with any electrical appliance. Make sure to follow the manufacturer’s instructions and turn off the power supply to the stove before starting the removal process.
Now, let’s gather the materials needed for the task at hand.
Key Takeaways:
- Proper removal and cleaning of an electric stove top are essential for optimal performance and longevity. Following safety precautions and performing routine maintenance can ensure a clean and efficient cooking experience in your kitchen.
- By mastering the step-by-step process of removing and reinstalling an electric stove top, you can confidently tackle cleaning, repairs, or replacements as needed. Remember, safety should always be a top priority when working with electrical appliances.
Read more: How To Take Knobs Off Of Gas Stove Burners
Step 1: Gather Materials
Before you start removing the electric stove top, it’s important to have all the necessary materials and tools ready. Having everything prepared beforehand will streamline the process and make it easier for you to complete the task.
Here are the materials you will need:
- Screwdriver (check the type and size required for your specific stove model)
- Wrench or pliers (if necessary for disconnecting gas or water lines, depending on your stove configuration)
- Clean cloth or sponge
- Mild dish soap or stove-top cleaner
- Scraper or putty knife
- Bucket or sink for water and dirty components
Having these materials on hand will ensure that you’re equipped to tackle any challenges that may arise during the removal process. Now that you’re fully prepared, let’s move on to the next step – safety precautions.
Step 2: Safety Precautions
When working with any electrical appliance, including an electric stove top, safety should always be a top priority. Taking the necessary precautions will help prevent accidents and ensure that the removal process goes smoothly.
Here are some important safety precautions to keep in mind:
- Turn off the power: Before you begin, make sure to turn off the power supply to the stove. This can usually be done by flipping the corresponding circuit breaker in your electrical panel. If you’re unsure which breaker controls the stove, it’s best to shut off the main power to your home to ensure your safety.
- Allow the stove to cool down: The stove top can be hot, especially if it has been recently used. Give it enough time to cool down before attempting to remove it. This will prevent burns or accidental damage to the stove top.
- Wear protective gear: To protect yourself during the removal process, it’s recommended to wear gloves and safety goggles. This will help prevent injuries, such as cuts or eye irritation, while handling sharp or potentially hazardous components.
- Follow manufacturer’s instructions: Different stove models may have specific instructions for removal. It’s important to consult the user manual or contact the manufacturer to ensure you’re following the correct procedures and avoiding any potential damage to the stove or yourself.
By taking these safety precautions, you can minimize the risk of accidents and injuries. Once you’re confident that you’ve followed these steps, you’re ready to move on to the next step – disconnecting the electric stove top.
Step 3: Disconnecting the Electric Stove Top
Before you can remove the electric stove top, you’ll need to disconnect it from the power source. This step is crucial for ensuring your safety and preventing any damage to the appliance. Follow these steps to properly disconnect the electric stove top:
- Turn off the power supply: As mentioned before, make sure to turn off the power supply to the stove. This step is important to prevent any electrical accidents while you’re working on disconnecting the stove top.
- Locate the electrical connection: Depending on your stove model, the electrical connection may be located either at the back of the stove top or underneath it. Look for a metal junction box or a plug connection in either of these areas.
- Disconnect the wires: Using a screwdriver, carefully unscrew the screws holding the wires in place or gently detach the plug connection. Take note of the wire configuration or take a picture to ensure easy reconnection later.
- Secure the wires: Once the wires are disconnected, it’s a good idea to secure them in a way that prevents them from falling back into the stove. You can use electrical tape or wire ties to keep them safely in place.
- Secure the electrical connection: If there is a metal junction box, ensure that it is securely closed with screws. This will prevent any loose wires from causing a safety hazard.
By following these steps, you have successfully disconnected the electric stove top from the power supply. Now, it’s time to move on to the next step and remove the burner elements and drip pans.
Step 4: Removing Burner Elements and Drip Pans
Now that you have disconnected the electric stove top, it’s time to remove the burner elements and drip pans. These components are removable and may require cleaning or replacement. Follow these steps to safely remove them:
- Allow the stove top to cool down: Make sure the stove top has cooled down completely before proceeding. This will prevent any burns or injuries while handling the burner elements and drip pans.
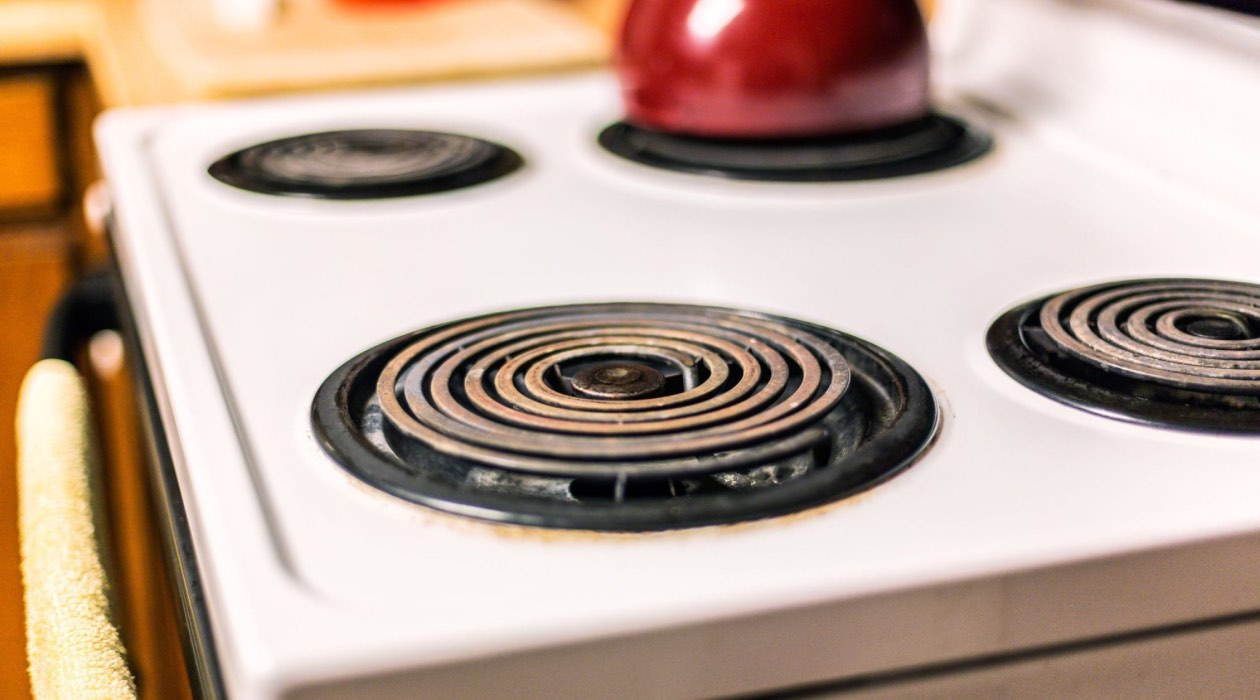
- Identify the burner elements: The burner elements are the heating coils on the stove top. Depending on your stove model, they may be sealed or plug-in type. Take note of their location for easy reassembly later.
- Remove the burner elements: If the burner elements are plug-in type, simply lift them up and gently pull them out of their sockets. For sealed elements, you may need to unscrew them from the stove top using a screwdriver.
- Remove the drip pans: The drip pans, located beneath the burner elements, are designed to catch any spills or drips. They are usually removable for easy cleaning. Carefully lift them up and pull them out from their slots.
- Clean or replace the burner elements and drip pans: Now that you have removed the burner elements and drip pans, you can clean them using a mild dish soap or stove-top cleaner. If they are damaged or worn out, consider replacing them with new ones for optimal performance.
With the burner elements and drip pans removed, you have successfully completed this step. Now, let’s move on to the next step and detach the stove top from the counter.
Before attempting to take off an electric stove top, make sure to turn off the power at the circuit breaker to avoid any electrical hazards. Then, carefully lift and remove the stove top according to the manufacturer’s instructions.
Read more: How To Take Electrical Cord Off Dishwasher
Step 5: Detaching the Stove Top from the Counter
With the burner elements and drip pans safely removed, it’s time to detach the electric stove top from the counter. This step involves loosening any securing mechanisms and carefully lifting the stove top away from the counter surface. Follow these steps to complete this process:
- Inspect the stove top: Before proceeding, take a look at the underside of the stove top. Look for any visible screws, brackets, or clips that are securing it to the counter. Take note of their location as you will need to remove them.
- Remove the securing mechanisms: Using a screwdriver or a wrench, carefully unscrew any visible screws holding the stove top in place. If you come across brackets or clips, use a flathead screwdriver or pliers to release them. Gently lift the stove top and slide it away from the counter surface.
- Be cautious of any gas or water lines: If your stove has gas or water connections, take extra care to avoid damaging or disconnecting them while lifting the stove top. If necessary, use a wrench or pliers to detach the lines, following the manufacturer’s instructions or consulting a professional if needed.
- Place the stove top on a secure surface: Once the stove top is detached, place it on a stable and secure surface, such as a countertop or table. Ensure that it is well-supported and won’t tip over or cause any accidents.
By following these steps, you have successfully detached the electric stove top from the counter. Now, it’s time to move on to the next step and learn some cleaning and maintenance tips.
Step 6: Cleaning and Maintenance Tips
Now that you have successfully removed the electric stove top, it’s an opportune time to clean and perform some basic maintenance. Regular cleaning and maintenance not only keep your stove top looking its best but also help preserve its performance. Here are some tips to help you with this step:
- Clean the stove top: Using a clean cloth or sponge, wipe down the entire surface of the stove top. Remove any spills, grease, or debris. You can use mild dish soap or a specialized stove-top cleaner to tackle stubborn stains or build-up. Be sure to follow the cleaner’s instructions for optimal results.
- Clean the burner elements and drip pans: Take this opportunity to thoroughly clean the burner elements and drip pans you removed earlier. Soak them in warm, soapy water and scrub gently to remove any grease or residue. Rinse them well and let them dry before reassembling.
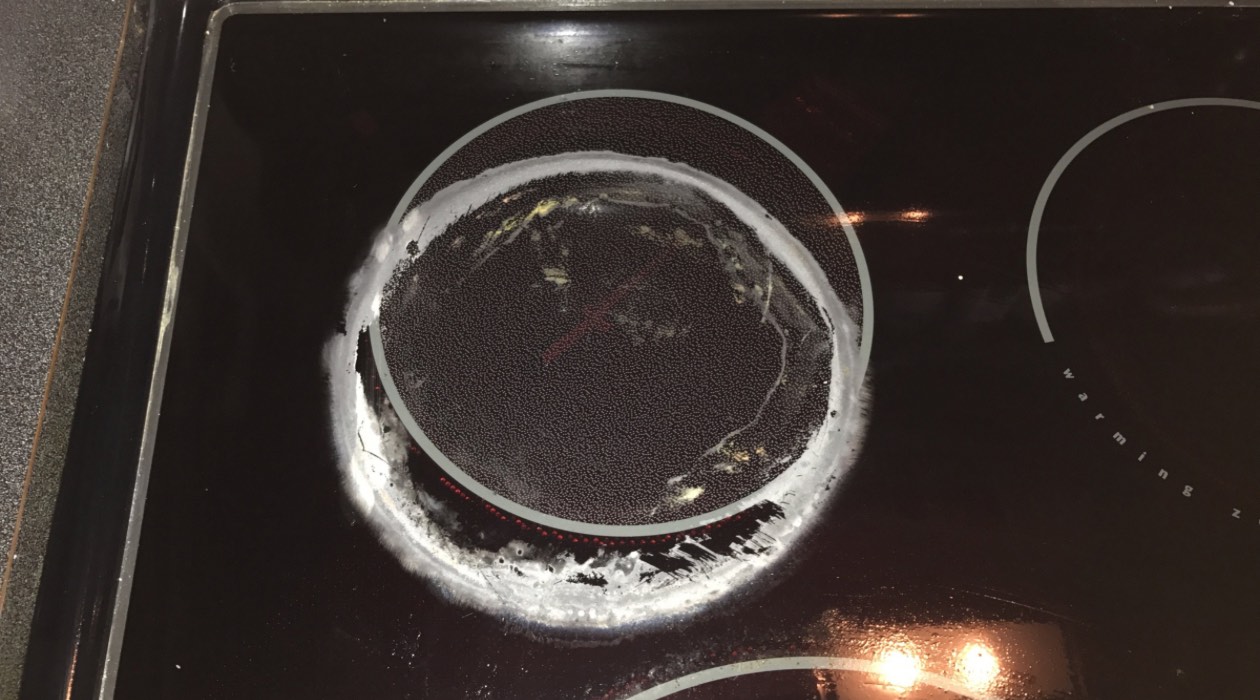
- Inspect for damage: While you have the stove top removed, take the time to inspect it for any damage or wear. Look for cracks, broken parts, or signs of deterioration. If you notice anything that requires repair or replacement, consult a professional or contact the manufacturer for further assistance.
- Check the connections: If you have detached any gas or water lines during the removal process, now is a good time to inspect them for any leaks or loose connections. Ensure that everything is properly secured and in good working condition. If you notice any issues, it’s best to seek professional help to avoid any safety hazards.
- Perform routine maintenance: In addition to cleaning, regular maintenance can help prolong the lifespan of your electric stove top. Follow the manufacturer’s instructions for recommended maintenance tasks, such as changing filters, lubricating moving parts, or inspecting electrical connections. These routine tasks can contribute to the overall performance and longevity of your stove top.
By following these cleaning and maintenance tips, you can ensure that your electric stove top stays in excellent condition. Now, it’s time to move on to the final step – reinstalling the electric stove top.
Step 7: Reinstalling the Electric Stove Top
After thoroughly cleaning and performing maintenance on your electric stove top, it’s time to reinstall it. Follow these steps to safely and securely reinstall the stove top:
- Position the stove top: Carefully lift the stove top and position it back onto the counter surface. Make sure it aligns properly with any openings or cutouts on the counter for a seamless fit.
- Reconnect the securing mechanisms: If you had removed any screws, brackets, or clips during the removal process, now is the time to reconnect them. Use a screwdriver or pliers to securely fasten any screws or brackets and ensure that the stove top is held firmly in place.
- Reconnect gas or water lines: If you had disconnected any gas or water lines, now is the time to reconnect them. Carefully follow the manufacturer’s instructions for reattaching the lines, making sure they are properly secured to avoid any leaks or hazards. If you’re unsure about the process, it’s best to seek professional help.
- Reconnect the electrical wires: Remember the wires you secured earlier? It’s time to reconnect them. Take the wires and carefully connect them back to their respective terminals or plug connections. Double-check the wire configuration or refer to the picture you took earlier to ensure correct reconnection.
- Test the stove top: Once everything is securely connected, it’s time to test the stove top. Restore the power supply by flipping the corresponding circuit breaker or turning on the main power. Turn on the stove burners and ensure they heat up properly. Check for any signs of malfunction or irregularities.
By following these steps, you have successfully reinstalled the electric stove top. Congratulations! Your stove is ready to be used again.
Remember, if you encounter any difficulties or are unsure about any aspect of the process, it’s always best to consult the user manual or contact the manufacturer for assistance. Safety should always be a priority when working with electrical appliances.
Now that you have completed the reinstallation, take a moment to admire your clean and well-maintained electric stove top. By regularly cleaning and maintaining it, you can ensure optimal performance and longevity.
Finally, the last step of our guide has arrived. Let’s conclude our comprehensive guide on how to take off an electric stove top.
Conclusion
Congratulations! You have successfully learned how to take off an electric stove top. By following the step-by-step guide, gathering the necessary materials, taking safety precautions, disconnecting the power supply, removing burner elements and drip pans, detaching the stove top from the counter, cleaning and performing maintenance, and finally reinstalling the stove top, you have mastered the process.
Remember, proper cleaning and maintenance of your electric stove top is crucial for its performance and longevity. Regularly removing and cleaning burner elements and drip pans, inspecting for damage, and performing routine maintenance tasks can help ensure your stove top functions optimally and lasts for years to come.
If you ever encounter any difficulties or are unsure about any aspect of the removal process, don’t hesitate to consult the manufacturer’s instructions or seek professional assistance. Safety should always be a top priority when working with electrical appliances.
We hope this comprehensive guide has been helpful in guiding you through the process of taking off an electric stove top. Now, armed with this knowledge, you can confidently clean, repair, or replace your stove top as needed. Enjoy a clean and efficient cooking experience in your kitchen!
Frequently Asked Questions about How To Take Off Electric Stove Top
Was this page helpful?
At Storables.com, we guarantee accurate and reliable information. Our content, validated by Expert Board Contributors, is crafted following stringent Editorial Policies. We're committed to providing you with well-researched, expert-backed insights for all your informational needs.


0 thoughts on “How To Take Off Electric Stove Top”