Articles
How To Install A Double Sink Vanity
Modified: October 31, 2024
Learn the step-by-step process of installing a double sink vanity in your bathroom with this informative article. Ensure a successful DIY project with helpful tips and tricks.
(Many of the links in this article redirect to a specific reviewed product. Your purchase of these products through affiliate links helps to generate commission for Storables.com, at no extra cost. Learn more)
Introduction
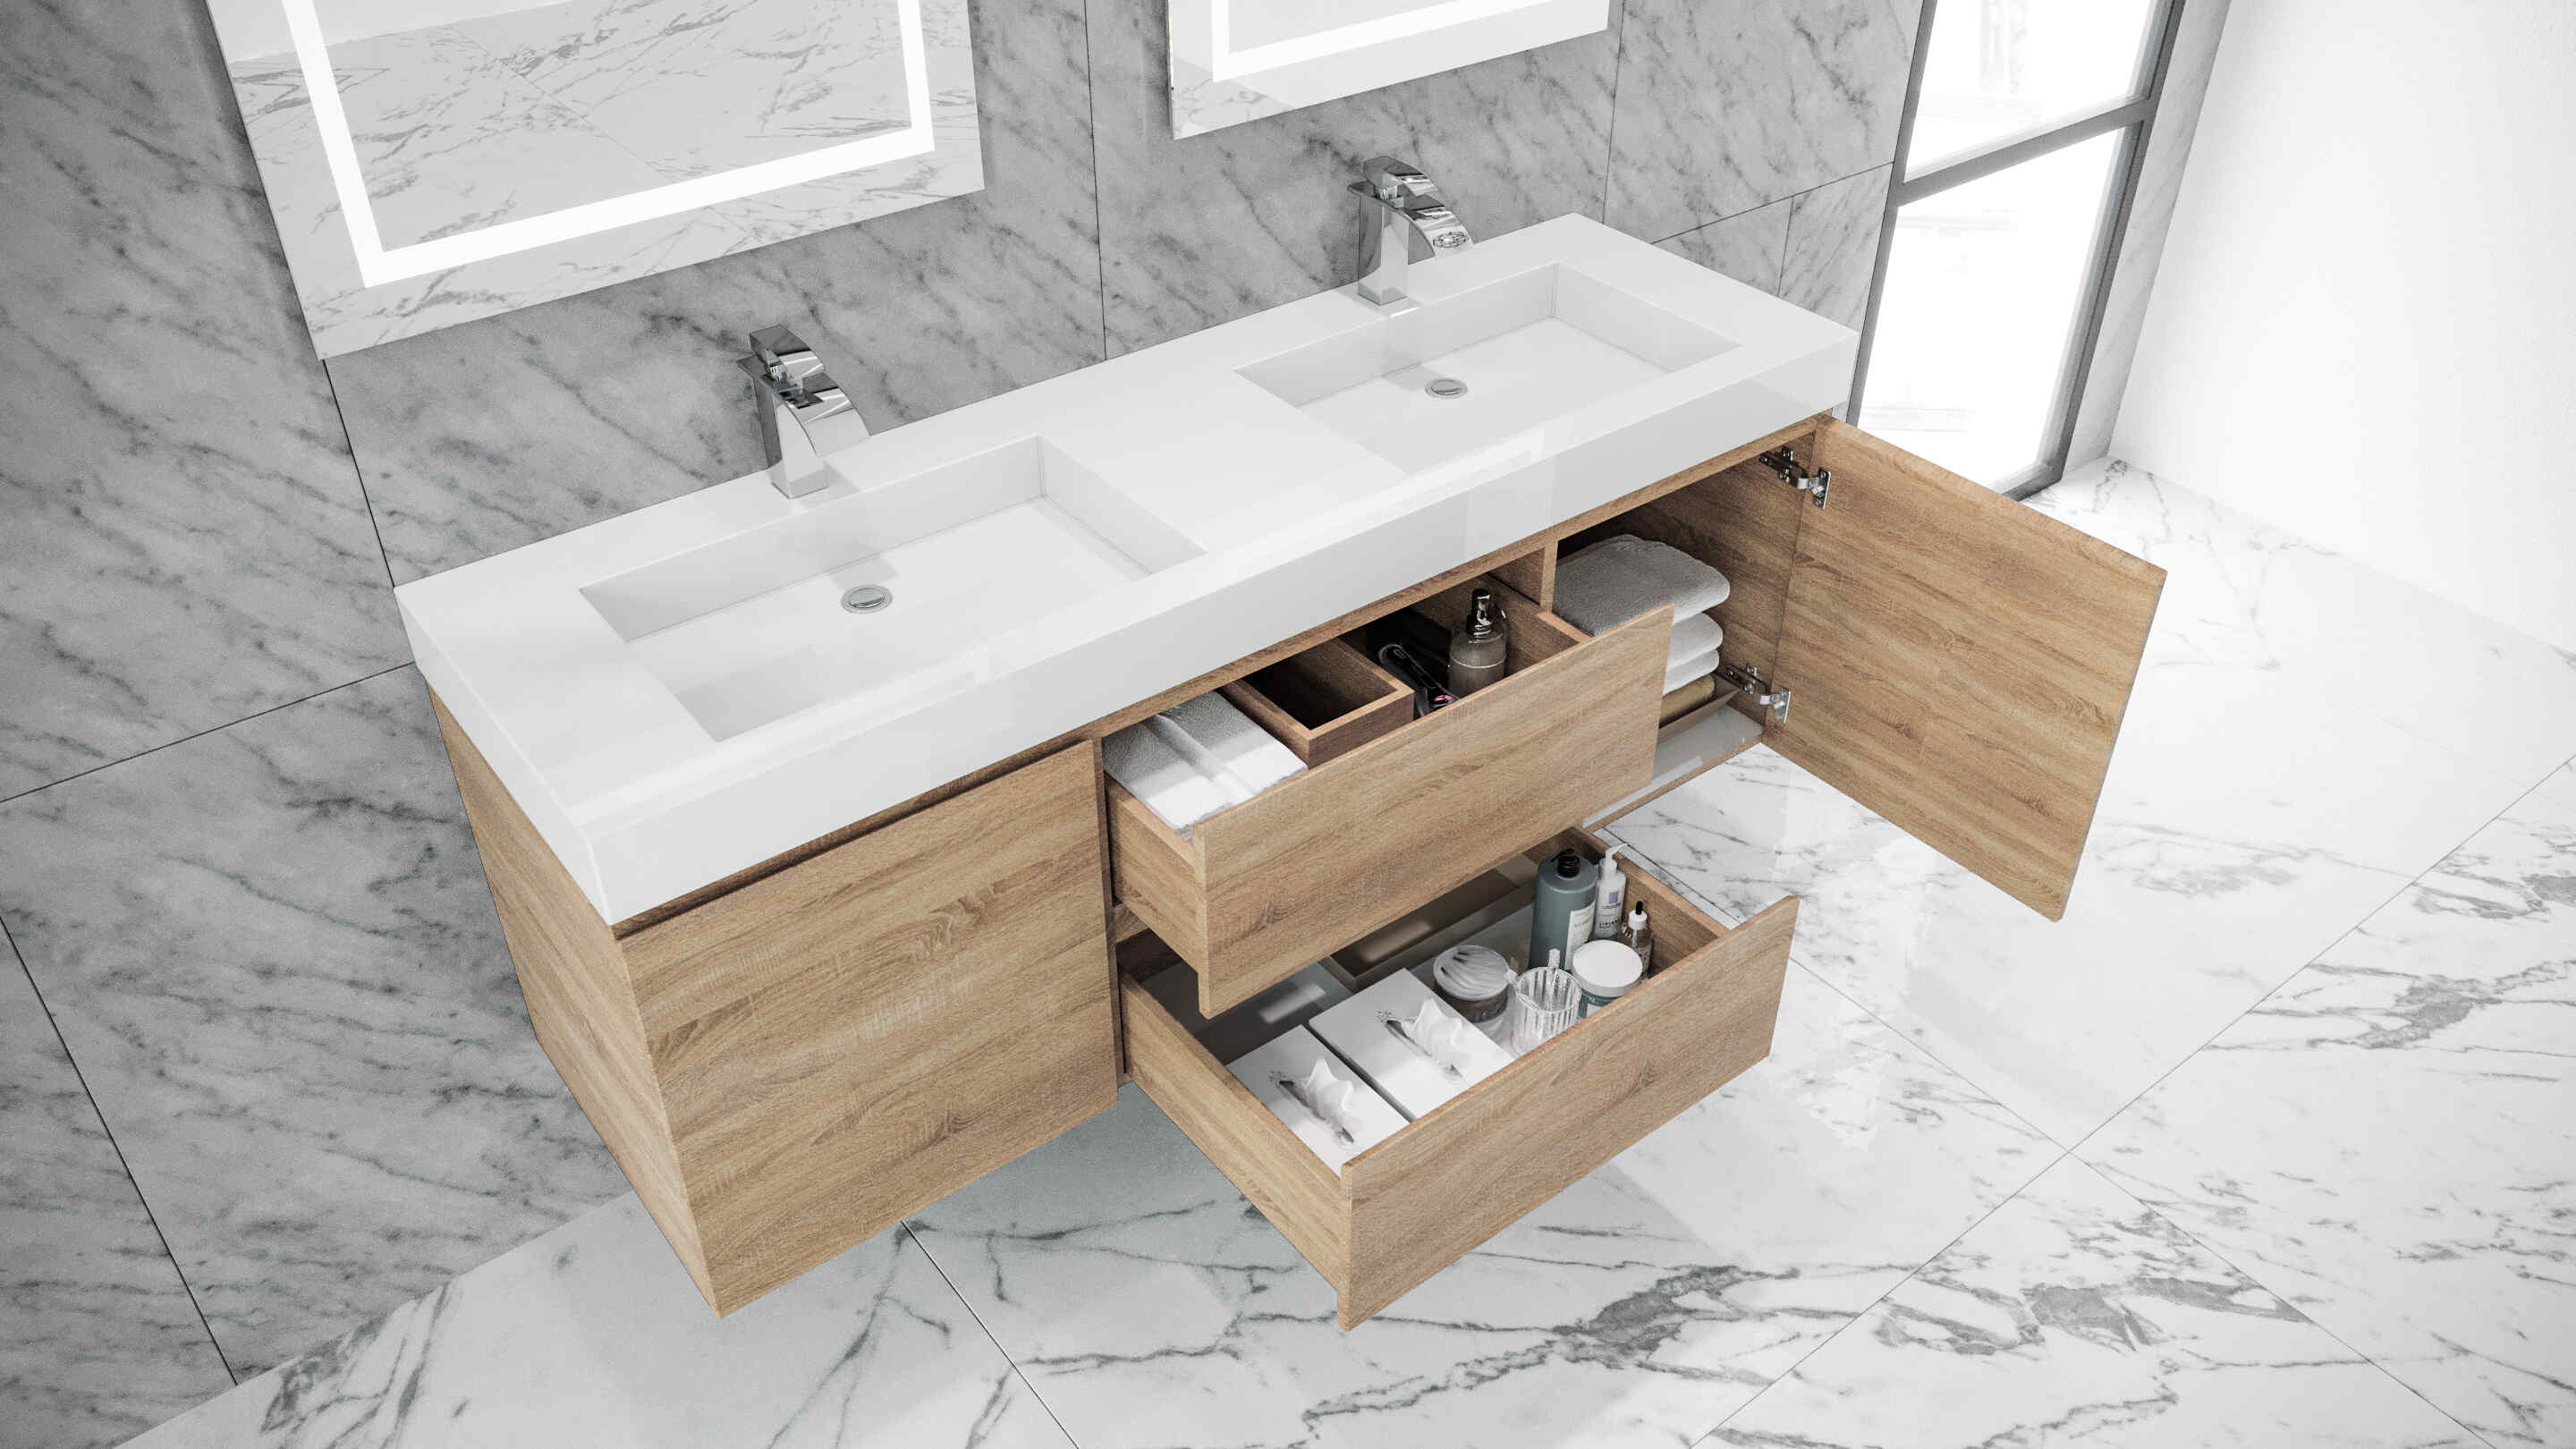
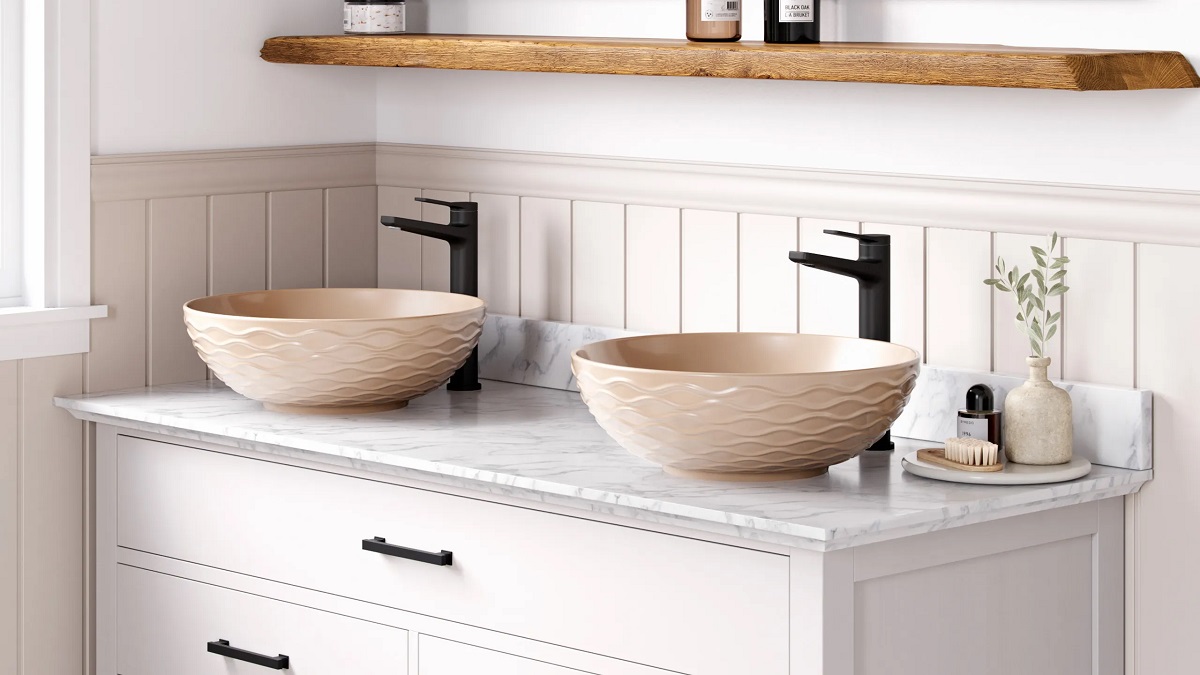
Installing a double sink vanity in your bathroom can be a game-changer. Not only does it provide convenience for two people to use the sink simultaneously, but it also adds a touch of modern elegance to your space. Whether you’re renovating your bathroom or starting from scratch, the process of installing a double sink vanity might seem daunting at first. But fear not! With the right tools, materials, and a little bit of know-how, you can achieve a professional-looking installation in no time.
In this guide, we’ll take you through the step-by-step process of installing a double sink vanity. From preparing the space to connecting the water supply lines, we’ll cover all the necessary tasks to ensure a successful installation. So, gather your tools and let’s get started!
Note: Before proceeding with the installation, it’s important to turn off the water supply and follow all safety precautions. If you’re unsure about any part of the process, consult a professional plumber or general contractor.
Key Takeaways:
- Installing a double sink vanity requires meticulous preparation, precise measurements, and attention to detail. From connecting the plumbing to securing the vanity, each step contributes to a successful and professional-looking installation.
- The final touches, such as applying caulk and finishing the installation, are essential for creating a polished and seamless appearance. Regular maintenance will ensure the longevity and aesthetic appeal of your double sink vanity.
Step 1: Measure and Prepare the Space
The first step in installing a double sink vanity is to measure and prepare the space where it will be placed. This will ensure a proper fit and allow for any necessary adjustments.
Start by measuring the width, depth, and height of the area where the vanity will be installed. Take note of any obstacles such as plumbing pipes or electrical outlets that may affect the placement of the vanity.
Next, remove any existing fixtures or cabinets that are in the way. This may involve disconnecting and removing the old sink, vanity, and countertops. Use caution when working with plumbing connections and turn off the water supply before proceeding.
If necessary, make any repairs or modifications to the walls or flooring to create a level and stable surface for the new vanity. Patch any holes or uneven areas and allow them to dry completely before moving on to the next step.
Once the space is prepared, consider the layout and design of the double sink vanity. Determine the placement of the sinks, faucets, and storage drawers or cabinets. Ensure there is enough space for comfortable use and access to plumbing connections.
Before proceeding to the installation, double-check your measurements to ensure accuracy. It’s better to catch any potential issues at this stage than to encounter problems later on.
With the space measured and prepared, you’re ready to move on to the next step: removing the existing sink and vanity.
Step 2: Remove Existing Sink and Vanity
Now that you have prepared the space, it’s time to remove the existing sink and vanity to make way for the double sink vanity installation.
Start by turning off the water supply to the sink. Locate the shut-off valves under the sink and turn them clockwise to close them. Once the water supply is turned off, turn on the faucet to release any remaining water in the lines.
Next, disconnect the water supply lines from the faucet using an adjustable wrench. Place a bucket or towel underneath to catch any water that may spill out during this process.
Once the water lines are disconnected, remove the drain pipe by unscrewing the coupling nut that connects it to the trap. Again, have a container ready to catch any residual water.
With the water supply lines and drain pipe disconnected, you can now remove the sink from the vanity top. Depending on the type of sink and installation, this may involve unscrewing mounting clips or brackets underneath the sink.
After removing the sink, it’s time to remove the vanity itself. Use a screwdriver or drill to unscrew any screws or brackets that secure the vanity to the wall or floor. Be careful when removing the vanity to avoid causing any damage to the walls or flooring.
Clean the area where the old vanity was removed, making sure to remove any debris or adhesive left behind. This will provide a clean surface for the new double sink vanity installation.
Once the old sink and vanity are removed and the area is cleaned, you’re ready to move on to the next step: installing the drainage and plumbing for the new double sink vanity.
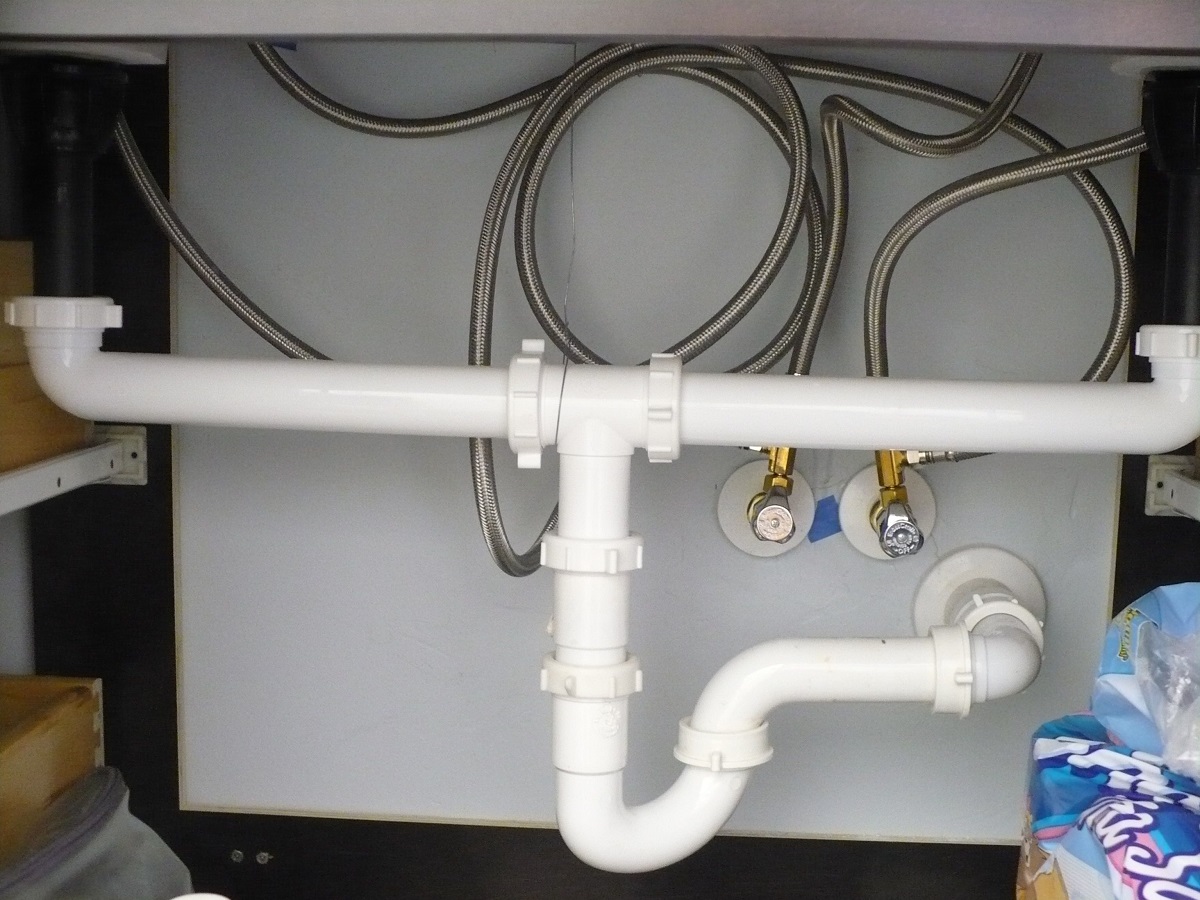
Step 3: Install the Drainage and Plumbing
Installing the drainage and plumbing for your double sink vanity is a crucial step to ensure proper functionality and prevent any future issues with your plumbing system.
Start by positioning the new vanity base in the desired location. Make sure it is level and aligned with the water supply and drain lines. Mark the positions of the drainage and water supply pipes on the back of the vanity.
Next, measure and cut the drainage pipes to the appropriate length using a pipe cutter or hacksaw. Apply PVC primer to the outside of the pipes and inside of the fittings, followed by PVC glue. Connect the drainage pipes and fittings, ensuring a tight and secure fit.
With the drainage pipes in place, it’s time to install the P-trap. Attach the P-trap to the drain pipe coming out of the wall or floor, and then attach the other end to the drainage pipe connected to the sink. Use adjustable slip-joint pliers to tighten the connections.
Ensure that there is proper slope in the drainage pipes to allow for smooth flow of water. Use a level to check the alignment of the pipes and make any necessary adjustments.
Next, move on to the water supply lines. Measure and cut the copper or PEX pipes to the appropriate lengths, using a pipe cutter or tubing cutter. Install shut-off valves to each water supply line, and connect them to the corresponding hot and cold water lines.
Apply Teflon tape to the threaded ends of the water supply lines to create a watertight seal. Use adjustable wrenches to tighten the connections, being careful not to over-tighten and cause damage.
Finally, check for any leaks by turning on the water supply and running water through the sink. Inspect all connections and fittings for any signs of water leakage. If any leaks are detected, tighten the connections or replace any faulty parts.
Once you have successfully installed the drainage and plumbing for your double sink vanity, you’re ready to move on to the next step: installing the vanity base.
Step 4: Install the Vanity Base
Now that the drainage and plumbing are in place, it’s time to install the vanity base for your double sink vanity.
Start by lifting the vanity base and placing it in the desired position. Use a level to ensure that the vanity is level from front to back and side to side. Make any necessary adjustments by adding shims underneath the base.
Once the vanity base is properly aligned, secure it to the wall using screws or brackets. Use a drill to make pilot holes in the back of the vanity, then insert the screws or attach the brackets. This will ensure that the vanity is securely anchored to the wall and won’t shift or tip over.
Ensure that there is enough clearance for the doors and drawers to open and close smoothly. Adjust the position of the vanity base if necessary to achieve proper clearance.
Next, check the level of the vanity top. Place a level across the top of the vanity and make any adjustments by adding shims underneath the top. This will ensure that the sink bowls sit evenly on the vanity top.
Once the vanity base is securely installed and the vanity top is level, you’re ready to move on to the next step: attaching the faucets and drain pipes.
Note: If your double sink vanity came with a pre-assembled vanity base and top, you can skip the installation steps for the vanity base and move directly to installing the faucets and drain pipes.
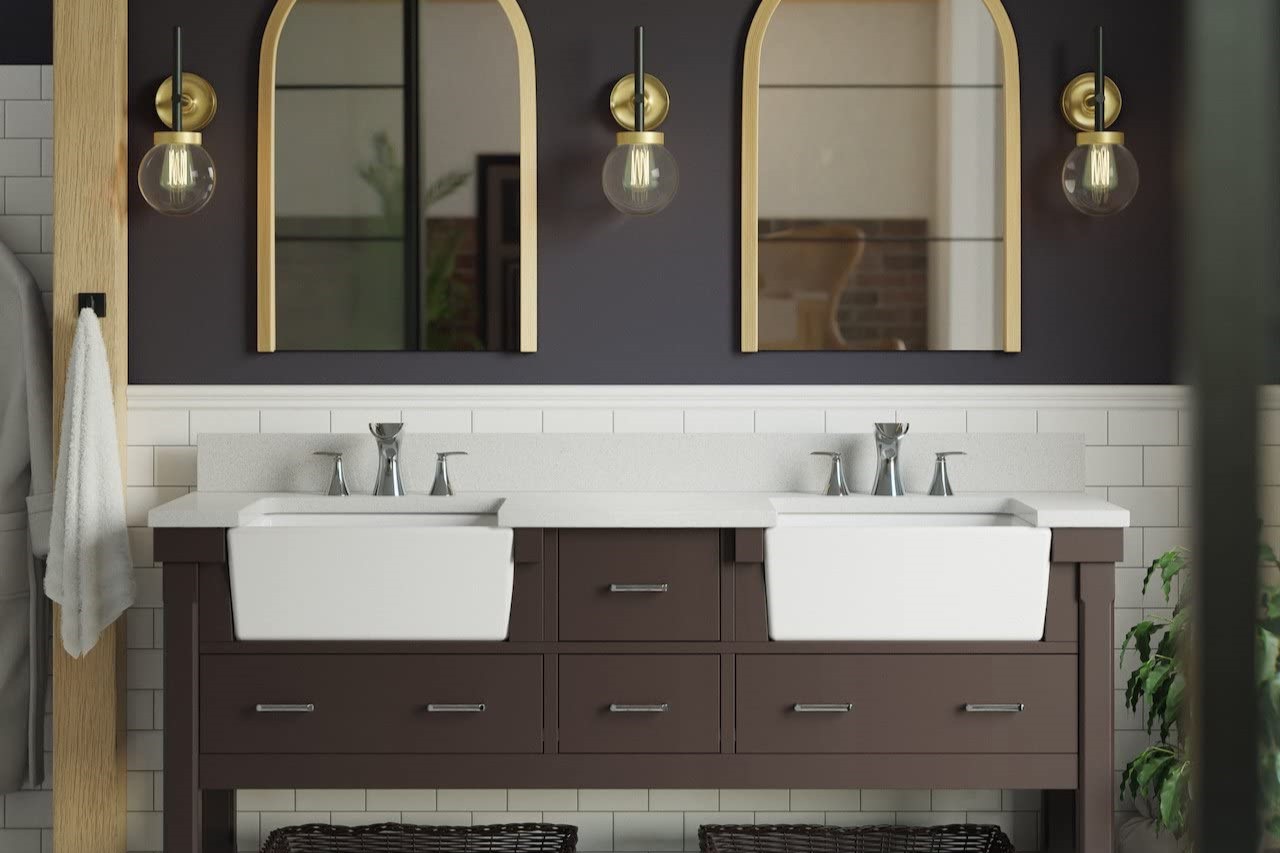
Step 5: Attach the Faucets and Drain Pipes
With the vanity base installed, it’s time to attach the faucets and drain pipes to complete the plumbing for your double sink vanity.
Start by placing a rubber or foam gasket on the underside of each faucet. This will help create a watertight seal and prevent any leaks. Position the faucets on the sink deck or countertop and secure them in place with the provided nuts or mounting hardware. Use an adjustable wrench to tighten the nuts, being careful not to overtighten and damage the faucet or sink surface.
Next, connect the flexible supply lines from the shut-off valves to the corresponding inlets on the faucets. Ensure that the hot water supply line is connected to the hot water inlet and the cold water supply line is connected to the cold water inlet. Use adjustable wrenches to tighten the connections.
Move on to the drain pipes. Attach the drain assemblies to the bottom of each sink bowl. Apply plumber’s putty or silicone sealant around the drain flanges to create a watertight seal. Insert the drain assemblies into the drain openings of the sink bowls and tighten the retaining nuts from underneath the sink.
Connect the drain pipes to the P-trap by sliding the slip nuts and washers onto the pipes. Use adjustable slip-joint pliers to tighten the connections. Ensure that the drain pipes are properly aligned and there is enough slope for proper drainage.
Once all the faucets and drain pipes are securely connected, test them for any leaks. Turn on the water supply and run water through each faucet. Check all the connections and fittings for any signs of leakage. If any leaks are detected, tighten the connections or use plumber’s tape to create a better seal.
With the faucets and drain pipes successfully attached and leak-free, you’re ready to move on to the next step: attaching the countertop and backsplash.
When installing a double sink vanity, make sure to measure the space carefully to ensure it will fit properly. Also, consider the plumbing and make any necessary adjustments before installing the vanity.
Step 6: Attach the Countertop and Backsplash
Now that the plumbing is in place, it’s time to attach the countertop and backsplash to complete the installation of your double sink vanity.
Start by positioning the countertop on the vanity base, ensuring that it lines up with the edges of the base and sits flush. Apply a bead of adhesive or silicone caulk along the top edges of the vanity base to create a secure bond between the countertop and the base.
Carefully lower the countertop onto the base, making sure it is aligned properly. Press down firmly to ensure the countertop adheres to the adhesive or silicone caulk. Use a damp cloth to wipe away any excess adhesive that may have squeezed out during the process.
If your countertop requires additional support, secure it to the vanity base using screws or brackets. Drill pilot holes through the underside of the countertop into the base, then insert the screws or attach the brackets. This will provide added stability and prevent the countertop from shifting or coming loose over time.
Once the countertop is securely attached, it’s time to install the backsplash. Apply a thin layer of adhesive or silicone caulk to the back of the backsplash and press it firmly against the wall. Make sure it is level and aligned with the countertop. Use a damp cloth to wipe away any excess adhesive.
If your backsplash is longer than the space between the vanity and the wall, you may need to cut it to size. Use a saw or a tile cutter to trim the backsplash to fit, if necessary.
Allow the adhesive or caulk to dry completely according to the manufacturer’s instructions before proceeding. This will ensure a strong and secure installation.
With the countertop and backsplash attached, you’re almost done! Only a few more steps remain to complete the installation of your double sink vanity. Next up: connecting the water supply lines.
Step 7: Connect the Water Supply Lines
With the countertop and backsplash in place, it’s time to connect the water supply lines and bring water to your double sink vanity.
Start by locating the shut-off valves for the hot and cold water supply lines. These should be located underneath the sink or nearby in the wall. Turn the valves clockwise to shut off the water supply.
Take the flexible supply lines that are attached to your faucets and connect them to the shut-off valves. Ensure that the hot water supply line is connected to the hot water shut-off valve, and the cold water supply line is connected to the cold water shut-off valve. Use adjustable wrenches to tighten the connections, making sure they are secure but not overly tightened.
Before turning on the water supply, check for any kinks or twists in the supply lines. Straighten them out if necessary to ensure a smooth flow of water.
Once you have checked for any potential issues, open the shut-off valves by turning them counterclockwise. This will allow water to flow into the supply lines and reach your double sink vanity.
Inspect all the water supply connections for any signs of leaks. Check the connections at the faucets, shut-off valves, and supply lines. If you notice any leaks, tighten the connections or use plumber’s tape to create a better seal.
With the water supply lines successfully connected and leak-free, it’s time to move on to the next step: securing the vanity to the wall.
Note: If your double sink vanity came with a pre-assembled vanity base or mounting brackets for wall installation, follow the manufacturer’s instructions for securing the vanity to the wall.
Step 8: Secure the Vanity to the Wall
Securing your double sink vanity to the wall is an important step to ensure stability and prevent any accidents or shifting over time. Follow these steps to securely attach your vanity to the wall.
Start by locating the wall studs behind the vanity. Use a stud finder or tap on the wall to listen for a solid sound, indicating the presence of a stud. Mark the locations of the studs with a pencil.
Next, position the vanity against the wall, aligning it with the marked stud locations. Use a level to ensure that the vanity is plumb, both vertically and horizontally. Adjust the position as needed.
Proceed by drilling pilot holes through the back of the vanity and into the wall studs. Use a drill with a drill bit that is slightly smaller than the screws you will be using. This will help prevent the wood from splitting.
After drilling the pilot holes, secure the vanity to the wall by driving screws through the holes and into the wall studs. Start with the top of the vanity and work your way down. Make sure to use screws that are long enough to penetrate through the vanity and into the studs for a secure hold.
Check the stability of the vanity by giving it a gentle shake. It should feel solid and not wobble or move. If needed, add additional screws to reinforce the attachment.
With the vanity securely attached to the wall, you can now move on to the next step: installing the sink bowls.
Note: If your double sink vanity came with a wall mounting bracket, follow the manufacturer’s instructions for installing and securing the vanity to the wall.
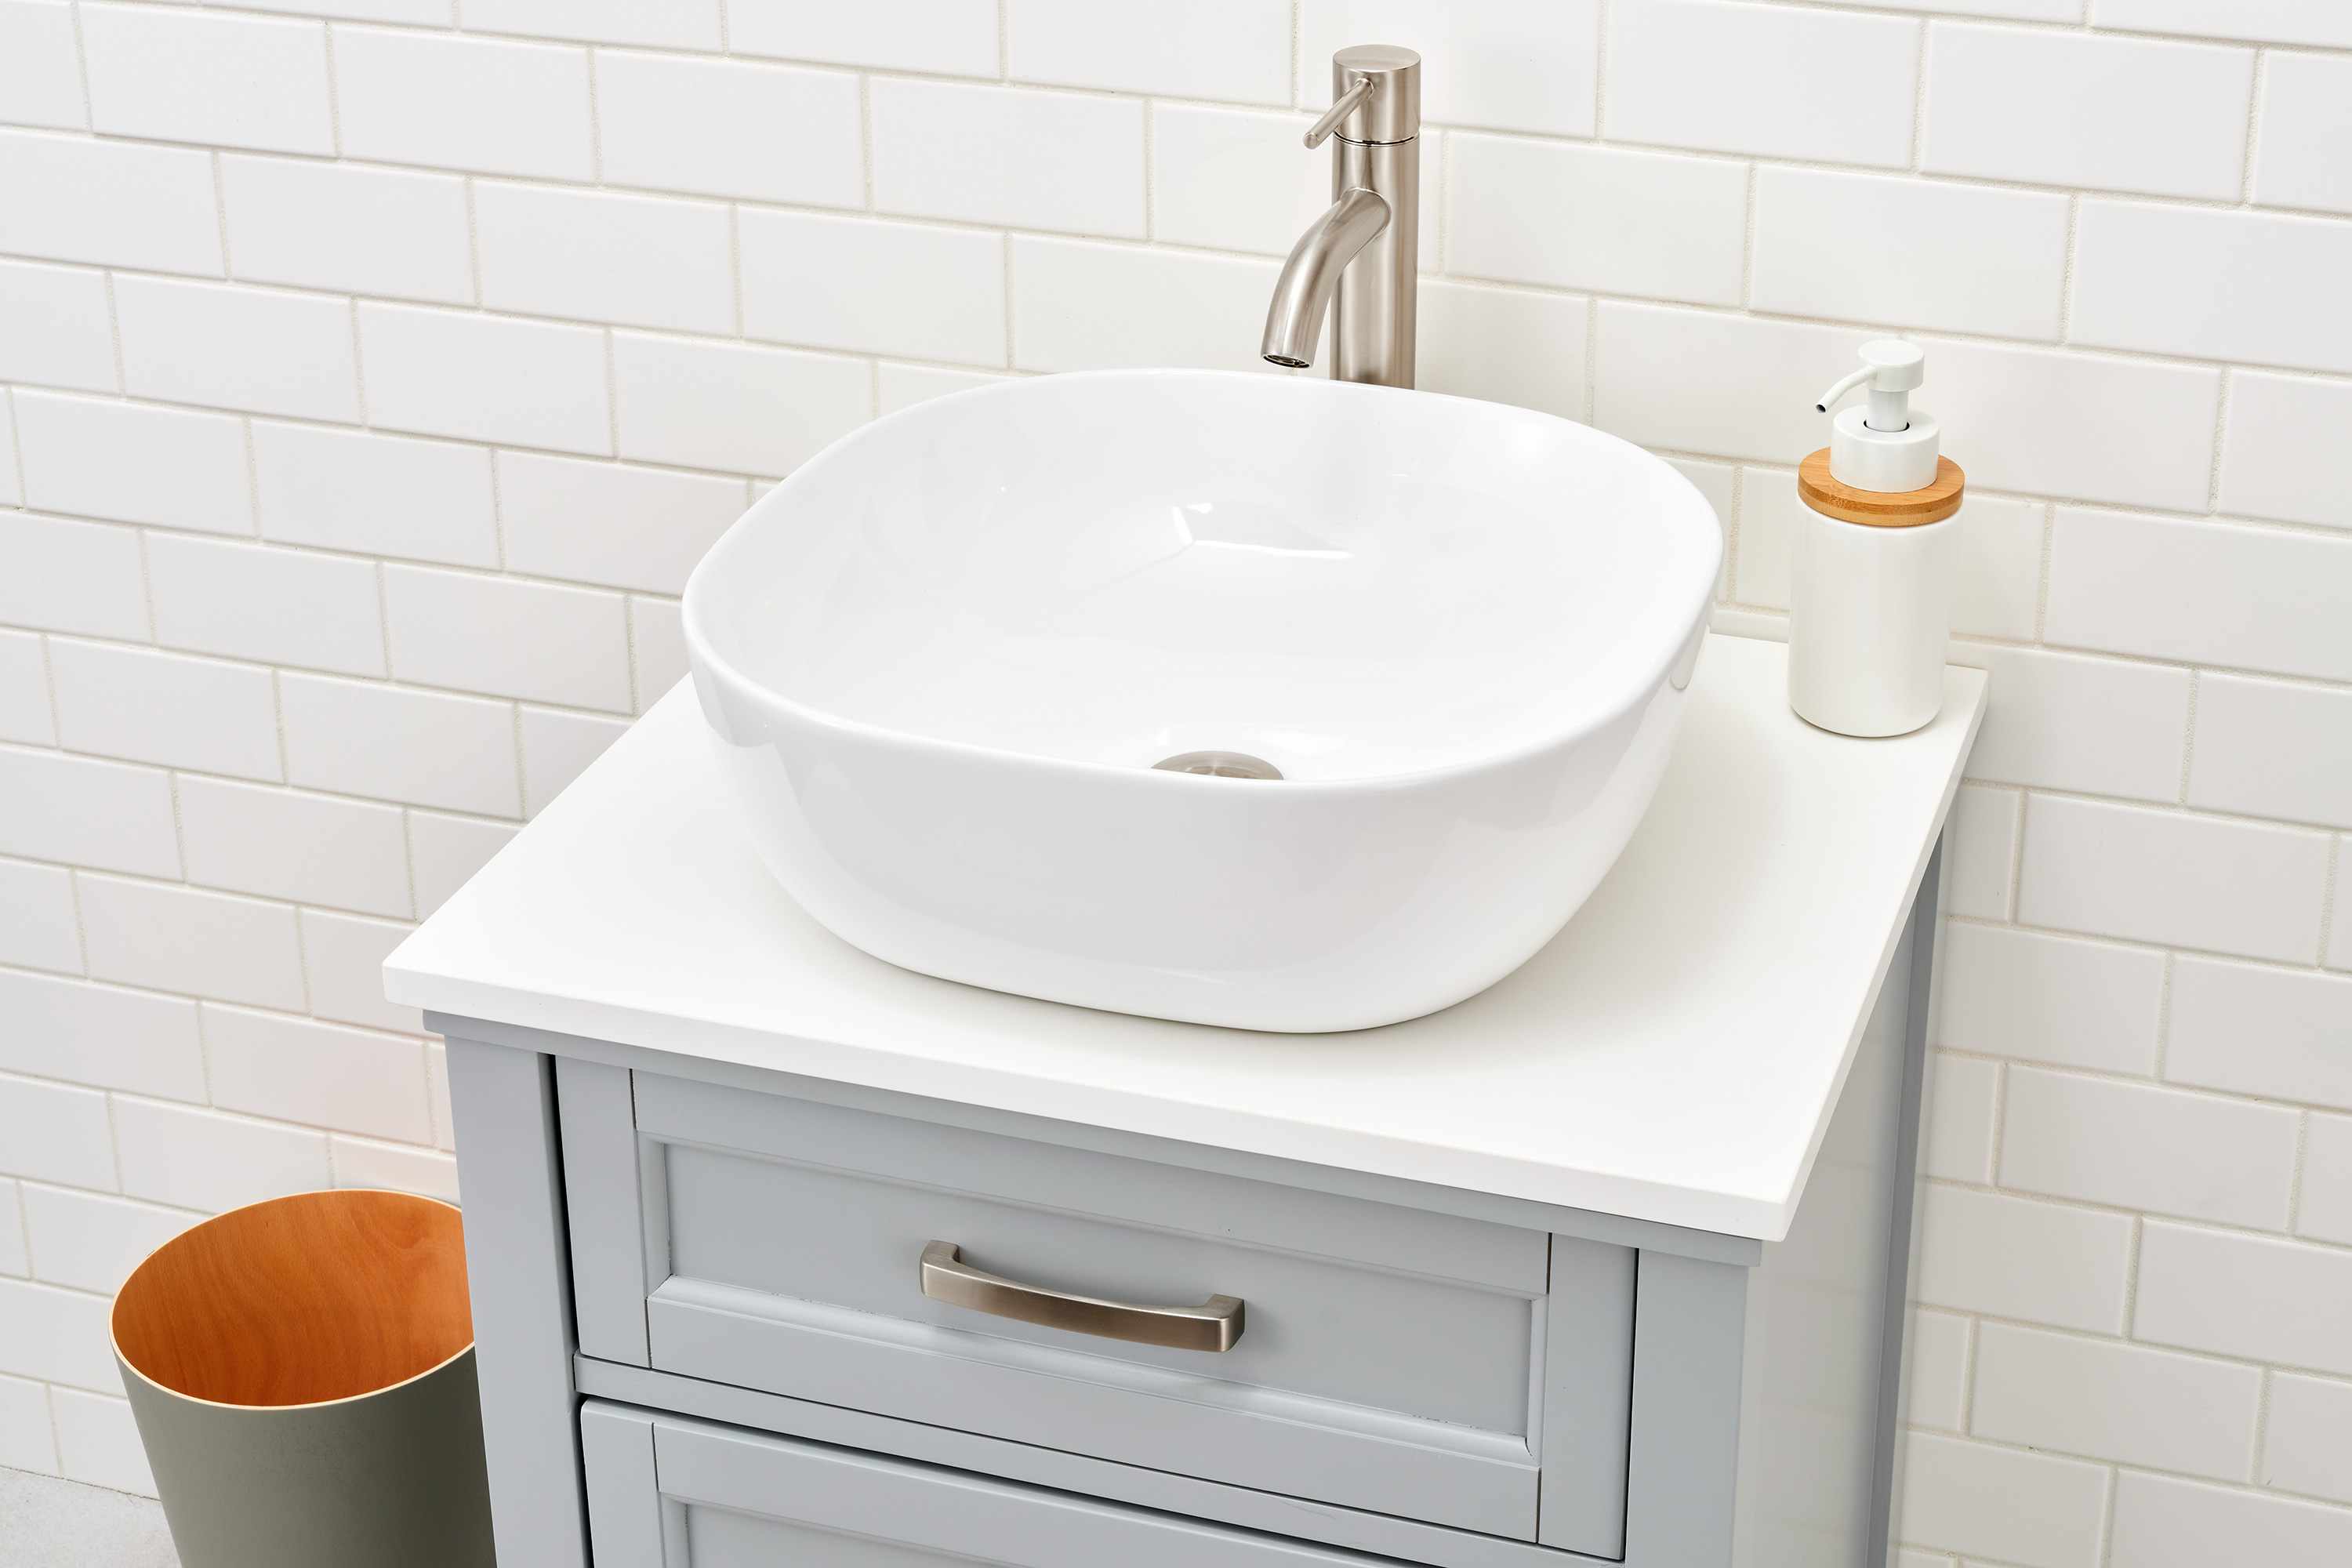
Step 9: Install the Sink Bowls
Installing the sink bowls is one of the final steps in completing your double sink vanity installation. Follow these steps to properly install the sink bowls:
Start by turning the sink bowls upside down on a soft surface, such as a towel or blanket, to protect the surface from scratches. Check the instructions provided by the manufacturer to determine if any additional items, such as mounting clips or brackets, are required for installation.
Apply a thin bead of silicone adhesive or sealant around the perimeter of the sink cutouts on the vanity top. This will create a waterproof seal and help to secure the sink bowls in place. Make sure to leave enough space for the sink clips or brackets, if needed.
Carefully lift the sink bowls and position them on top of the adhesive, aligning them with the sink cutouts. Press down firmly to ensure a secure bond. Wipe away any excess adhesive or sealant with a damp cloth.
If your sink bowls require mounting clips or brackets, follow the manufacturer’s instructions to properly install them. This may involve securing the clips to the underside of the sink bowls or using brackets to secure the sinks to the vanity top. Make sure to evenly distribute the clips or brackets around the perimeter of the sink bowls for stability.
Once the sink bowls are securely installed, check for any gaps between the sinks and the vanity top. If necessary, apply a small amount of silicone adhesive or sealant to fill in the gaps and create a seamless look.
Allow the silicone adhesive or sealant to dry according to the manufacturer’s instructions before using the sinks. This will ensure a proper seal and prevent any leaks or water damage.
Congratulations! You have successfully installed the sink bowls on your double sink vanity. The final step is to apply caulk and finish the installation, which we will cover in the next step.
Step 10: Apply Caulk and Finish the Installation
The final step in installing your double sink vanity is to apply caulk and finish the installation. This will provide a polished look and help to prevent water damage. Follow these steps to complete the installation:
Start by cleaning the area where the vanity top meets the wall or backsplash. Remove any dirt, dust, or debris using a damp cloth or sponge. Make sure the surface is dry before proceeding.
Next, select a high-quality silicone caulk that is suitable for bathroom use. Choose a color that matches or complements the color of your sink bowls and vanity top.
Using a caulk gun, apply a thin bead of caulk along the joint where the vanity top meets the wall or backsplash. Start at one end and work your way along the entire length, ensuring consistent coverage. Use a caulk smoothing tool or your finger to smooth out the caulk and create a neat and even seal.
Wipe away any excess caulk with a damp cloth or sponge. Take care not to disturb the freshly applied caulk while cleaning.
Allow the caulk to dry fully according to the manufacturer’s instructions. This will typically take 24 hours or more, depending on the caulk used.
Once the caulk is dry, perform a final inspection of your double sink vanity installation. Check for any loose components, uneven seams, or areas that may need touch-ups.
Clean the sink bowls and vanity top using a non-abrasive cleaner and a soft cloth. Ensure the surfaces are free of any residue or marks.
With the caulk dried and the vanity clean and in place, your double sink vanity installation is complete! Enjoy your new functional and stylish addition to your bathroom.
Note: Regular maintenance and upkeep of your double sink vanity will help prolong its lifespan and keep it looking great. Clean the sinks and vanity top regularly, check for any leaks, and promptly address any issues that arise.
Conclusion
Installing a double sink vanity can completely transform the functionality and aesthetics of your bathroom. By following the step-by-step guide outlined in this article, you can successfully install a double sink vanity and create a beautiful and efficient space.
From measuring and preparing the space to securing the vanity to the wall, each step plays a crucial role in ensuring a successful installation. Taking the time to measure accurately, properly prepare the space, and connect the plumbing will prevent future issues and provide a stable foundation for your double sink vanity.
Attaching the faucets and drain pipes, as well as installing the countertop and backsplash, are key steps that require attention to detail and precision. Ensuring proper waterproofing and secure connections will give you peace of mind and a professional-looking installation.
Lastly, applying caulk and finishing the installation with attention to detail will give your double sink vanity a polished and seamless appearance. The caulk will not only provide an aesthetic finish, but it will also prevent water damage and extend the lifespan of your vanity.
Remember, if at any point during the installation process you feel unsure or uncomfortable, it’s always a good idea to consult a professional plumber or general contractor. They can provide guidance and expertise to ensure a successful installation.
Now that you have completed the installation of your double sink vanity, take the time to enjoy and appreciate your newly transformed bathroom. It’s a functional and stylish addition that will enhance your daily routine and elevate the overall look of your space.
Maintain your double sink vanity by regularly cleaning the sinks, countertops, and fixtures, as well as keeping an eye out for any potential leaks or issues. Regular maintenance will ensure that your double sink vanity remains in top-notch condition for years to come.
Congratulations on your successful double sink vanity installation, and enjoy the beauty and convenience it brings to your bathroom!
Frequently Asked Questions about How To Install A Double Sink Vanity
Was this page helpful?
At Storables.com, we guarantee accurate and reliable information. Our content, validated by Expert Board Contributors, is crafted following stringent Editorial Policies. We're committed to providing you with well-researched, expert-backed insights for all your informational needs.


0 thoughts on “How To Install A Double Sink Vanity”