
Articles
How To Plumb A Double Kitchen Sink
Modified: October 19, 2024
Learn how to efficiently and effectively plumb your double kitchen sink with our informative articles. Simplify the installation process and ensure proper functionality.
(Many of the links in this article redirect to a specific reviewed product. Your purchase of these products through affiliate links helps to generate commission for Storables.com, at no extra cost. Learn more)
Introduction
Plumbing a double kitchen sink is a task that may seem daunting at first, but with the right tools and a little know-how, it can be a relatively straightforward process. Whether you’re remodeling your kitchen or simply replacing an old sink, understanding how to properly plumb a double kitchen sink is essential for efficient and leak-free plumbing.
In this article, we will guide you through the steps of plumbing a double kitchen sink, from measuring and marking to installing the drain pipes and connecting the water supply lines. By following these steps, you’ll be able to successfully complete the plumbing process and enjoy the convenience and functionality that a double kitchen sink brings to your space.
Before we get started, it’s important to gather all the necessary tools and materials. Having everything readily available will help you work efficiently and save time. Let’s take a look at the tools and materials you’ll need for this project.
Key Takeaways:
- Plumbing a double kitchen sink may seem daunting, but with the right tools and step-by-step guidance, it can be a manageable and rewarding DIY project, providing convenience and functionality to your space.
- Proper measurement, alignment, and thorough testing for leaks are crucial for a successful installation. Attention to detail and maintenance will ensure the longevity and efficiency of your double kitchen sink’s plumbing system.
Tools and Materials Needed
Before you begin plumbing a double kitchen sink, it’s important to have the right tools and materials on hand. Here’s a list of what you’ll need:
Tools:
- Adjustable wrench
- Hacksaw or pipe cutter
- Tape measure
- Screwdriver
- Plumber’s putty
- Plumber’s tape
- Bucket or container for catching water
- Pipe wrench
- Pliers
Materials:
- PVC or ABS drain pipes
- P-Trap
- Tailpieces
- Faucet
- Water supply lines
- Silicone sealant
- Plumbing fittings and connectors
Make sure you have all the necessary tools and materials before you start the project. Having everything at hand will make the installation process much smoother and more efficient.
Now that you’re equipped with the right tools and materials, let’s move on to the next step of plumbing a double kitchen sink: measuring and marking.
Step 1: Measure and Mark
The first step in plumbing a double kitchen sink is to measure and mark the location for the sink and its associated components. This will ensure that the installation is accurate and aligned properly with the existing plumbing connections.
To begin, measure the width of the sink cabinet and mark the centerline. This will serve as a reference point for the rest of the installation process. Use a tape measure and a pencil to make the mark.
Next, measure and mark the locations for the drain and water supply lines. The drain lines will typically be located in the wall behind the sink, while the water supply lines may be located in the wall or under the sink cabinet. Use a tape measure to measure the distance from the centerline to the desired locations for the drain and water supply lines. Mark these locations with a pencil.
Once you have measured and marked the locations for the drain and water supply lines, check for any obstructions such as studs or pipes that may interfere with the installation. Make adjustments to the markings if necessary to avoid any obstructions.
Finally, mark the locations for the sink and faucet. Place the sink upside down on the countertop and trace around its perimeter with a pencil. Remove the sink and mark the locations for the faucet holes if applicable.
Double check all of your measurements and markings to ensure accuracy before moving on to the next step. With the measurements and markings in place, you’re now ready to install the drain pipes.
Read more: How To Disconnect Sink Plumbing
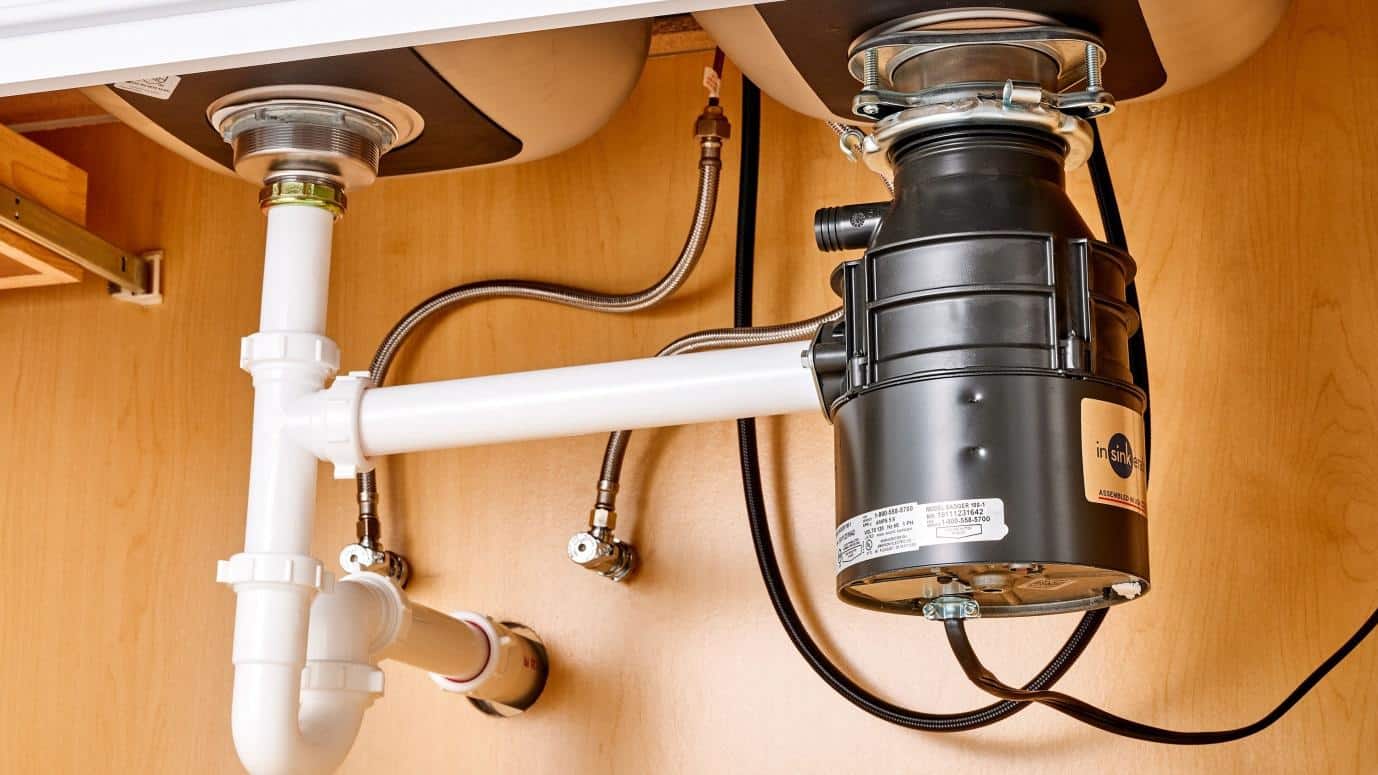
Step 2: Install the Drain Pipes
With the measurements and markings in place, it’s time to move on to installing the drain pipes for your double kitchen sink. The drain pipes will carry wastewater from the sink to the main drain or sewer line.
Start by assembling the drain pipes according to the manufacturer’s instructions. Typically, you’ll need to connect the tailpiece, the trap arm, and the trap using PVC or ABS pipe and fittings. Apply plumber’s tape or a small amount of plumber’s putty to the threaded connections to ensure a watertight seal.
Attach the tailpiece to the sink drain opening and tighten the connection using an adjustable wrench. Make sure the tailpiece is positioned correctly so that it aligns with the marked location for the drain pipe.
Next, connect the trap arm to the tailpiece. The trap arm is a horizontal section of pipe that extends from the tailpiece to the wall. Use a pipe wrench or pliers to tighten the connection securely.
Attach the P-trap to the trap arm. The P-trap is a curved section of pipe that forms a water seal to prevent sewer gas from entering the kitchen. Ensure that the trap is properly aligned and level, making any necessary adjustments to the trap arm length if required.
Once you have assembled the drain pipes, test the fit and alignment by temporarily connecting them together. Make sure all connections are tight and secure.
If everything fits properly, disassemble the pipes and apply a thin layer of plumber’s putty or silicone sealant to the slip joints and threads before reassembling them. This will provide an extra layer of leak protection.
Finally, connect the drain pipes to the main drain or sewer line in the wall. Use the appropriate fittings and connectors to make a watertight connection. Follow the manufacturer’s instructions for securing the pipes to the wall, as this can vary depending on the materials used.
Once the drain pipes are securely connected, move on to the next step: connecting the drain pipes to the wall.
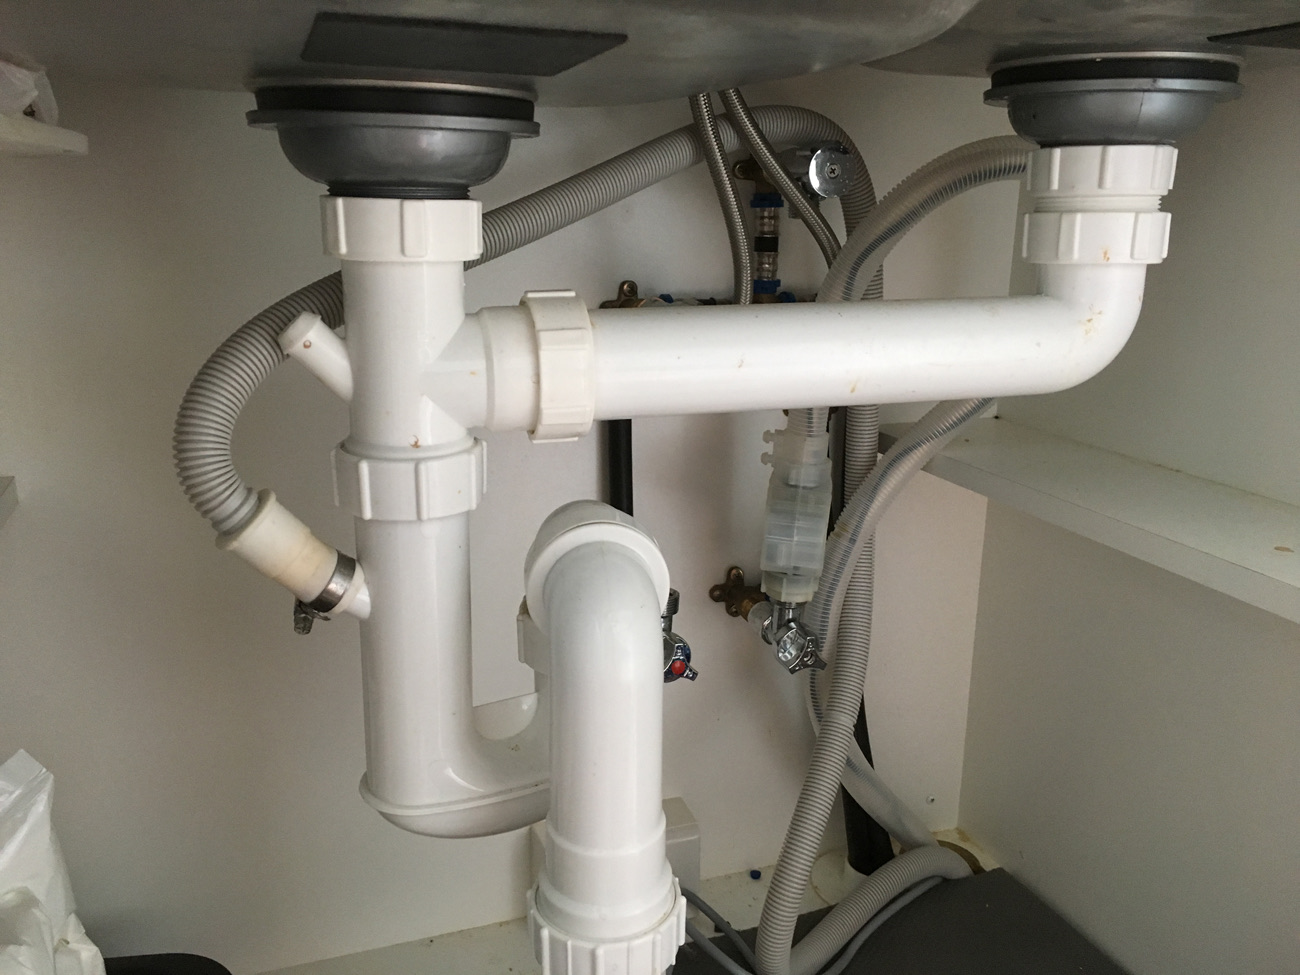
Step 3: Connect the Drain Pipes to the Wall
Now that the drain pipes are installed and connected under the sink, the next step is to connect them to the wall where the main drain or sewer line is located.
First, determine the type of connection you need to make to the wall. If you have a PVC drain pipe, you may need to use a PVC adapter to connect it to the main drain. If you have an ABS drain pipe, you’ll need an ABS adapter. Consult the manufacturer’s instructions or a plumbing professional for guidance if you’re unsure.
Apply plumber’s tape to the male threads of the adapter. This will ensure a tight and secure connection. Then, thread the adapter onto the wall drain pipe, being careful not to cross-thread it. Use an adjustable wrench or pipe wrench to tighten the connection, making it snug but not overly tight.
Next, connect the other end of the drain pipe to the adapter. Apply plumber’s tape to the male threads of the drain pipe and twist it onto the adapter until it is securely in place. Again, use an adjustable wrench or pipe wrench to tighten the connection.
Ensure that the drain pipes are properly aligned and level. If necessary, use a level to make any adjustments to the position of the pipes before tightening the connections fully.
Once the drain pipes are connected to the wall, it’s important to check for any leaks. Run water through the sink and inspect the connections for any signs of water leakage. If you notice any leaks, tighten the connections further or apply plumber’s tape or sealant to create a watertight seal.
With the drain pipes securely connected to the wall, you’re now ready to move on to the next step: installing the P-Trap.
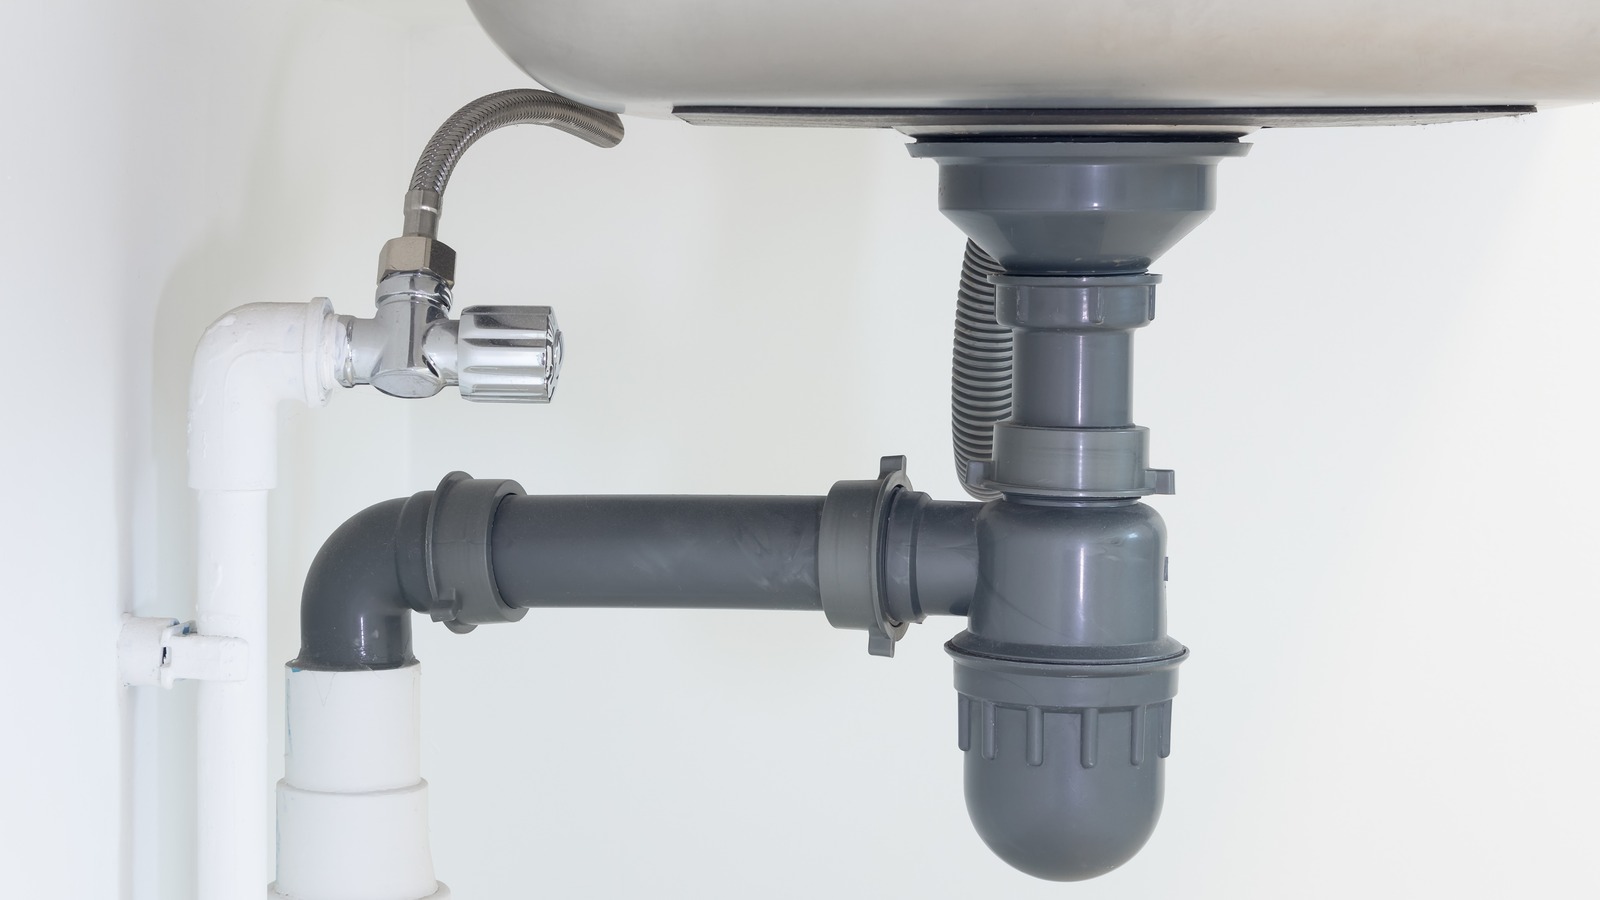
Step 4: Install the P-Trap
The P-trap is a crucial component of the plumbing system that prevents sewer gases from entering your kitchen. In this step, we will guide you through the process of installing the P-trap for your double kitchen sink.
Start by assembling the P-trap according to the manufacturer’s instructions. The P-trap consists of a curved section of pipe with two slip nut connections on either end. Ensure that the trap is positioned correctly, with the curved part facing downwards.
Slide one of the slip nuts onto the end of the trap arm that extends from the wall. Then, slide the other slip nut onto the end of the trap arm that extends from the sink drain.
Next, carefully align the P-trap with the trap arm and sink drain. Push the slip nuts onto the corresponding sections of the trap arm and sink drain, ensuring a snug fit. You may need to twist the slip nuts slightly to secure the connection.
Hand-tighten the slip nuts initially and then use pliers or a pipe wrench to further tighten them. Be cautious not to overtighten, as this can damage the pipes or create leaks. Check for any gaps or misalignment in the connections, and adjust as needed.
Once the P-trap is securely installed, fill the sink with water and check for any leaks. Let the water drain and observe if there are any signs of leakage around the P-trap connections. If you notice any leaks, tighten the slip nuts further or apply plumber’s tape or sealant to ensure a watertight seal.
Remember, the P-trap should always maintain a small amount of water to create a water seal and prevent sewer gases from coming back up into your kitchen. Regularly check and clean the P-trap to maintain its proper functionality.
With the P-trap successfully installed, you’re now ready to move on to the next step: connecting the tailpieces to the sink drain.
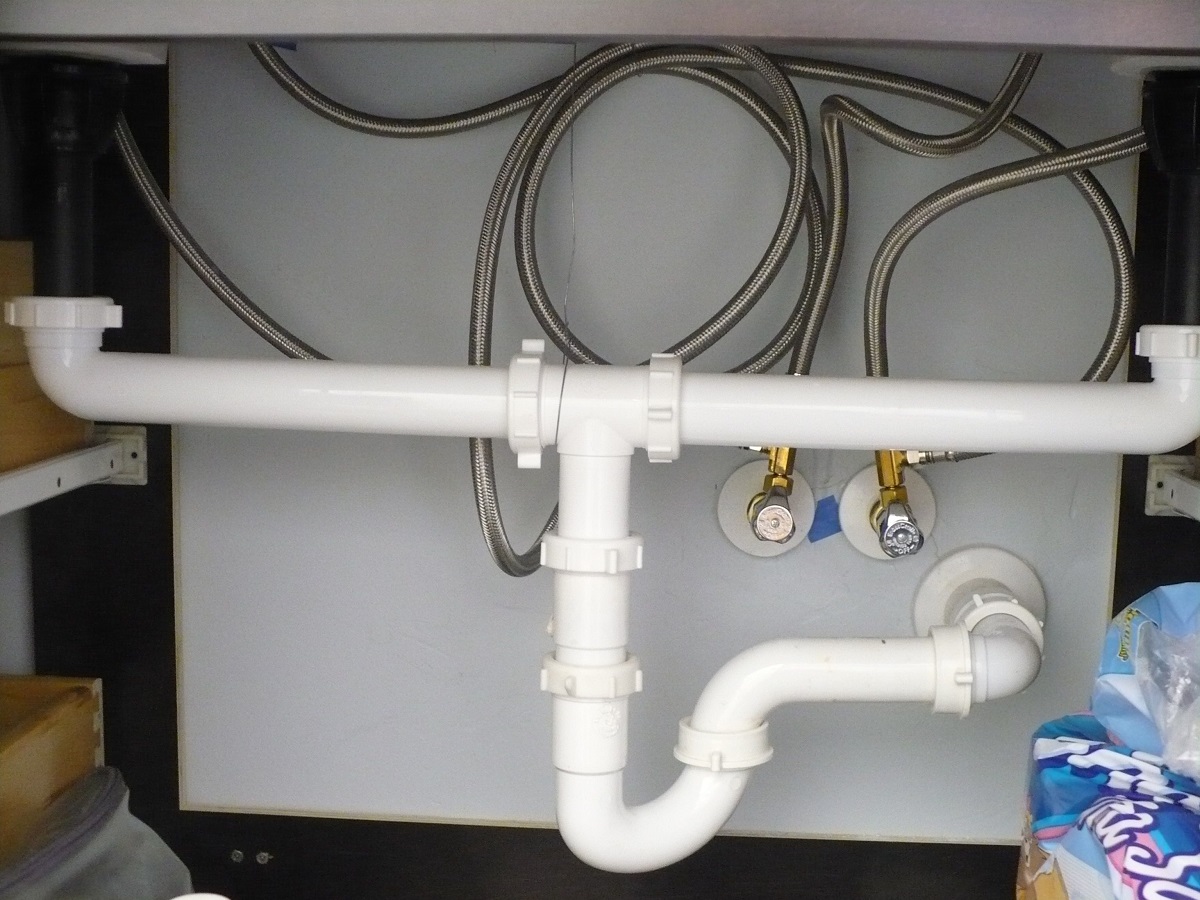
Step 5: Connect the Tailpieces to the Sink Drain
Now that the P-trap is in place, it’s time to connect the tailpieces to the sink drain. The tailpieces are vertical pipes that extend from the sink drain down to the P-trap.
Begin by applying plumber’s tape to the threaded portion of the tailpiece. This will create a watertight seal when connected to the sink drain. Make sure the tape is wrapped tightly around the threads.
Insert the tailpiece into the sink drain opening, aligning it with the marked location. Twist the tailpiece clockwise to thread it into the sink drain. Use an adjustable wrench to tighten the connection until it is snug, making sure not to overtighten and risk damaging the pipe.
Repeat the process with the other tailpiece if you have a double kitchen sink. Make sure both tailpieces are securely connected to the sink drains.
With the tailpieces in place, check for any leaks by running water into both sinks simultaneously. Monitor the connections and look for any signs of water leakage. If you notice any leaks, tighten the connections further or apply plumber’s tape or sealant to create a watertight seal.
It’s important to ensure that the tailpieces are correctly aligned and level. Adjust their positions as needed to ensure a proper fit and alignment with the sink drains and P-trap.
Once you have confirmed that the tailpieces are securely connected and leak-free, move on to the next step: installing the faucet for your double kitchen sink.
When installing a double kitchen sink, make sure to properly align the drain pipes and use plumber’s putty or silicone sealant to create a watertight seal around the drain openings. This will prevent leaks and ensure proper drainage.
Read more: How To Have A Sink Without Plumbing
Step 6: Install the Faucet
The faucet is a central component of your double kitchen sink, allowing you to control the flow of water. In this step, we will guide you through the process of installing the faucet.
Begin by removing the old faucet, if applicable. Disconnect the water supply lines and any mounting hardware securing the faucet to the sink or countertop. Follow the manufacturer’s instructions or consult a professional if you’re unsure how to remove the faucet.
Next, position the new faucet on the sink or countertop, aligning it with the centerline mark you made earlier. Ensure that the faucet is centered over the sink or sinks.
Depending on the type of faucet you have, follow the manufacturer’s instructions for individual components, such as handles, spout, and sprayer. Install these components according to the provided instructions, using any necessary mounting hardware or connectors.
Once all the components are in place, secure the faucet to the sink or countertop using the provided mounting hardware. Follow the manufacturer’s instructions for specific tightening instructions, as overtightening can damage the faucet or the surface it is mounted to.
Now, it’s time to connect the water supply lines to the faucet. The supply lines are usually flexible hoses that connect the faucet to the hot and cold water sources.
Attach the hot water supply line to the hot water valve on the faucet, ensuring a secure connection. Repeat the same process for the cold water supply line, connecting it to the cold water valve. Use an adjustable wrench to tighten the connections, making sure they are snug but not overtightened.
Before turning on the water, check all the connections for any signs of leakage. Double-check the tightness of the connections and make any necessary adjustments to ensure a watertight seal.
Once you’re satisfied with the connections and have verified there are no leaks, move on to the next step: connecting the water supply lines.
Step 7: Connect the Water Supply Lines
Now that the faucet is installed, it’s time to connect the water supply lines to provide water to your double kitchen sink. The water supply lines are responsible for delivering both hot and cold water.
Start by identifying the hot and cold water valves located under the sink. These valves can usually be found near the back wall or within the sink cabinet. Turn off the water supply by turning the valves clockwise until they are fully closed.
Once the water supply is turned off, remove the caps or plugs from the hot and cold water valves to expose the threads. Apply plumber’s tape to the male threads of the valves to create a tight seal.
Next, attach the water supply lines to the threaded valve connections. The hot water supply line is typically marked with a red nut or indicator, while the cold water supply line is marked with a blue nut or indicator.
Screw the nut of each supply line onto the corresponding valve in a clockwise direction. Use an adjustable wrench to tighten the connections, ensuring they are snug but not overly tight.
With the supply lines securely connected, check all the connections for leaks. Slowly turn on the water supply by opening the hot and cold water valves counterclockwise. Inspect the connections and the surrounding area for any signs of water leakage. If you notice any leaks, tighten the connections further or apply plumber’s tape or sealant to create a watertight seal.
Once you’ve verified that all the connections are secure and leak-free, turn on the faucet and let the water run for a few minutes to flush out any debris or air from the lines.
Congratulations! You have successfully connected the water supply lines for your double kitchen sink. Move on to the final step: testing for leaks.
Step 8: Test for Leaks
After completing the installation of your double kitchen sink’s plumbing components, it’s crucial to test for any potential leaks. This final step will ensure that your plumbing system is operating efficiently and without any water wastage or potential damage. Follow these steps to test for leaks:
1. Fill both sinks with water: Plug the drain for each sink and simultaneously fill both sinks with water. Fill them close to the brim to create maximum pressure on the plumbing system.
2. Monitor the drainpipes and connections: Carefully inspect the drainpipes, the P-trap, the tailpieces, and the connections underneath the sink for any signs of water leakage. Look for drips, puddles, or wet spots. If you notice any leaks, tighten the connections or apply plumber’s tape or sealant as needed.
3. Check the faucet connections: Examine the connections between the faucet and the sink or countertop. Look for drips or water pooling around the base of the faucet. Ensure that the connections are secure and properly sealed.
4. Inspect the water supply lines: Check the connections between the water supply lines and the hot and cold water valves. Look for any drips or moisture around the connections. Make sure the connections are tight and free of leaks.
5. Verify the connections to the main drain or sewer line: If you made any connections to the wall drain or sewer line, verify that they are secure and watertight. Look for any signs of water leakage or drips from these connections.
6. Identify and resolve any leaks: If you discover any leaks during the testing process, take immediate action to address them. Tighten connections, replace faulty parts, or apply the necessary sealant to eliminate leaks and ensure a watertight system.
7. Repeat the test, if necessary: If you made repairs or adjustments to address leaks, repeat the testing process to confirm that the issues have been resolved. Continue to check for any leaks to ensure the system is functioning properly.
By diligently testing for leaks in your double kitchen sink’s plumbing system, you can identify and address any potential problems before they cause significant damage or water wastage. Once you are confident that there are no leaks, you can enjoy your efficiently functioning double kitchen sink and the convenience it brings to your daily tasks.
Congratulations on successfully completing the installation and testing of your double kitchen sink’s plumbing system. Now, sit back, relax, and enjoy the benefits of your properly functioning sink!
Conclusion
Plumbing a double kitchen sink may initially seem like a complex task, but with the right approach and knowledge, it can be accomplished successfully. By following the step-by-step instructions outlined in this article, you can confidently install and connect the plumbing components of your double kitchen sink.
From measuring and marking the location to connecting the drain pipes, installing the P-trap and faucet, and connecting the water supply lines, each step contributes to a well-functioning and leak-free plumbing system.
It is essential to gather all the necessary tools and materials before starting the project, as this will ensure a smooth and efficient installation process. Additionally, paying attention to proper alignment, applying plumber’s tape or sealant where necessary, and consistently checking for leaks will help maintain the integrity of your plumbing system.
Remember, safety is paramount during any plumbing project. If at any point you feel unsure or uncomfortable with a particular task, it is recommended to consult a professional plumber for assistance. They have the expertise and experience to ensure proper installation and minimize any potential risks or complications.
By successfully plumbing a double kitchen sink, you’ll enjoy the convenience and functionality it provides. Whether you’re remodeling your kitchen, upgrading an old sink, or simply seeking to enhance the efficiency of your workspace, a double kitchen sink offers added convenience for cooking, cleaning, and entertaining.
Keep in mind that proper maintenance is crucial to prolong the longevity and efficiency of your plumbing system. Regularly inspect for leaks, address any issues promptly, and follow appropriate maintenance practices to keep your double kitchen sink in optimal working condition.
With the knowledge gained from this article, you are well-equipped to tackle the plumbing installation of a double kitchen sink. Enjoy the benefits of your new sink and the satisfaction of a job well done!
Now that you've mastered plumbing a double kitchen sink, why not consider upgrading your setup? Our article on the finest kitchen sinks for 2024 offers a curated selection, helping you find the perfect centerpiece for your kitchen. Or maybe you've got a new faucet in mind? Check out our guide on sink faucet installation to ensure your upgrades go smoothly. Both resources are packed with practical advice to assist in your next home improvement project.
Frequently Asked Questions about How To Plumb A Double Kitchen Sink
Was this page helpful?
At Storables.com, we guarantee accurate and reliable information. Our content, validated by Expert Board Contributors, is crafted following stringent Editorial Policies. We're committed to providing you with well-researched, expert-backed insights for all your informational needs.


0 thoughts on “How To Plumb A Double Kitchen Sink”