Home>Articles>How To Use A Manual Sander To Smooth Out Small Projects

Articles
How To Use A Manual Sander To Smooth Out Small Projects
Modified: December 7, 2023
Learn how to use a manual sander effectively on small projects with our informative articles. Achieve a smooth finish with ease.
(Many of the links in this article redirect to a specific reviewed product. Your purchase of these products through affiliate links helps to generate commission for Storables.com, at no extra cost. Learn more)
Introduction
Welcome to the world of DIY woodworking! Whether you’re a seasoned woodworker or just starting out, using a manual sander is a valuable skill to have. Manual sanders are perfect for smoothing out small projects, such as furniture refinishing, craft projects, or even touch-ups on larger pieces.
In this article, we will explore the various aspects of using a manual sander to achieve a smooth and professional finish on your small woodworking projects. We will discuss the safety precautions you should take, how to choose the right manual sander for your project, the materials you will need, and the proper techniques to use when sanding. By the end of this article, you’ll have the knowledge and confidence to tackle any small sanding project!
Before we dive into the details, it’s essential to understand that safety should always be your top priority when working with tools. Make sure to wear appropriate protective gear, such as safety glasses and a dust mask, and follow all safety guidelines provided by the manufacturer.
Now, let’s get started on our journey to mastering the art of using a manual sander!
Key Takeaways:
- Prioritize safety, choose the right manual sander, and employ proper sanding techniques to achieve a smooth finish on small woodworking projects. Embrace the joy of woodworking and continuous skill improvement.
- Clean and organize your workspace after sanding, admire your craftsmanship, and explore new woodworking projects with confidence. The possibilities for your woodworking ventures are endless!
Read more: How To Use Ryobi Sander
Safety Precautions
When working with a manual sander, it is crucial to prioritize your safety. Here are some important safety precautions to keep in mind:
- Wear Protective Gear: Always wear safety glasses to protect your eyes from flying debris and dust. Additionally, wear a dust mask or respirator to prevent inhaling harmful particles.
- Work in a Well-Ventilated Area: Sanding can produce a significant amount of dust, so it’s important to work in a well-ventilated space. If possible, set up a fan or open windows to ensure good airflow.
- Avoid Loose Clothing and Jewelry: Loose clothing or dangling jewelry can get caught in the sander, causing serious injuries. Wear fitted clothing and remove any accessories before starting the sanding process.
- Secure Your Workpiece: Before sanding, make sure your workpiece is securely clamped or held in place. This will prevent any movement or slipping, reducing the risk of accidents.
- Keep Your Hands Away from the Sanding Surface: It’s important to keep your hands clear of the sanding surface at all times. The high-speed motion of the sander can cause serious injuries if your hands come into contact with it.
- Take Breaks: Sanding can be physically demanding. Take regular breaks to rest your muscles and regain focus. This will help prevent fatigue and maintain safe working conditions.
- Disconnect Power When Not in Use: Whenever you take a break or finish using the sander, unplug it from the power source. This will prevent accidental starts and ensure your safety.
Remember, accidents can happen even with the proper precautions. If you experience any injuries or accidents while using a manual sander, seek medical attention immediately.
By following these safety precautions, you can minimize the risks associated with using a manual sander and create a safe working environment for yourself. Now that we’ve discussed the safety measures, let’s move on to choosing the right manual sander for your needs!
Choosing the Right Manual Sander
When it comes to choosing the right manual sander for your project, there are a few factors to consider. Here are some key points to keep in mind:
- Sanding Pad Type: Manual sanders come in various types of sanding pads, such as a block sander or a sanding sponge. Consider the surface you’ll be sanding and choose a sander with a pad that is suitable for your project.
- Grit Size: The grit size of the sandpaper determines the level of coarseness or fineness. For rough sanding or removing paint or finishes, opt for a lower grit number (e.g., 60-80). For fine sanding and achieving a smooth finish, use a higher grit number (e.g., 120-220).
- Size and Shape: Manual sanders come in various sizes and shapes. Choose a size that is comfortable for you to hold and maneuver. Additionally, consider the shape of the sander, as it should be suitable for the contours and edges of your project.
- Durability: Look for a manual sander made from high-quality materials that can withstand prolonged use. A durable sander will ensure longevity and efficiency in your sanding process.
- Ease of Use: Consider the design and ergonomics of the manual sander. Look for features such as a comfortable grip, easy-to-use controls, and adjustable sanding angles. These factors will contribute to a more user-friendly experience.
- Price Range: Set a budget for your manual sander. Prices can vary based on the brand, features, and quality of the sander. Consider your needs and find a sander that offers good value for your investment.
Take your time to research and read reviews on different manual sanders to find one that meets your specific requirements. Consider seeking recommendations from fellow woodworkers or consulting with staff at your local hardware store for expert advice.
Remember that the right manual sander can make a significant difference in the quality of your sanding results. So, choose wisely and invest in a sander that will help you achieve the desired smooth finish on your small woodworking projects.
Now that you know how to choose the right manual sander, let’s move on to gathering the necessary materials for your sanding project.
Gathering the Necessary Materials
Before you start sanding, it’s essential to gather all the necessary materials to ensure a smooth and efficient process. Here’s a list of items you’ll need for your sanding project:
- Manual Sander: Based on your project and personal preference, choose the appropriate manual sander with the right sanding pad and size.
- Sandpaper: Select sandpaper sheets or rolls with the appropriate grit size for your project. Remember to have a range of grits available, starting from coarse for initial sanding and progressing to finer grits for a smooth finish.
- Protective Gear: Wear safety glasses to protect your eyes from debris and a dust mask or respirator to prevent inhaling dust particles. Additionally, consider wearing ear protection if using a manual sander that produces loud noise.
- Clamps or Vises: Depending on your project, you may need clamps or vises to secure the workpiece in place, ensuring stability during sanding.
- Dust Collection System or Vacuum: To minimize the amount of dust in your workspace, consider using a dust collection system or a vacuum cleaner with a dust collection attachment. This will help keep the area clean and reduce the risk of respiratory issues.
- Drop Cloth or Plastic Sheeting: Cover your work area with a drop cloth or plastic sheeting to catch any debris or dust that may fall during the sanding process. This makes for easier cleanup afterward.
- Stiff Bristle Brush: Have a stiff bristle brush on hand to brush away excess dust or debris from the surface being sanded.
- Finishing Supplies: Depending on your project, you may need to gather other finishing supplies such as wood filler, stain, paint, or varnish to complete the final touches after sanding.
- Cleaning Supplies: Prepare cleaning supplies, including a broom, dustpan, and damp cloths, to tidy up the workspace once the sanding process is complete.
Having all these materials ready before you start sanding will streamline the process and ensure you have everything you need at your fingertips.
Now that you’ve gathered all the necessary materials, it’s time to prepare your workspace for sanding. We’ll discuss workspace preparation in the next section.
Preparing the Workspace
Preparing your workspace is an essential step before you begin using a manual sander. A well-prepared workspace will ensure a smooth and efficient sanding process. Follow these steps to get your workspace ready:
- Clear the Area: Remove any obstacles or clutter from your work area to create a safe and spacious environment. This includes moving furniture, tools, and other items that may hinder your movement or pose a risk during sanding.
- Cover Surfaces: Use a drop cloth or plastic sheeting to cover nearby surfaces or objects that you want to protect from dust and debris. This will help make cleanup easier after you’ve completed the sanding process.
- Ensure Adequate Lighting: Proper lighting is essential for accurate sanding and preventing eye strain. Make sure your workspace is well-lit, either with natural light or by using bright artificial lighting sources.
- Secure the Workpiece: If your project requires it, secure your workpiece using clamps or vises to avoid any movement during the sanding process. This will ensure stability and prevent potential accidents.
- Establish a Dust Collection System: Set up a dust collection system or attach a vacuum cleaner with a dust collection attachment to your sander. This will help minimize the amount of dust in the air and keep your workspace clean as you sand.
- Organize Tools and Materials: Arrange your sandpaper, manual sander, and other tools and materials within easy reach. Having everything organized will save you time and prevent any unnecessary interruptions during the sanding process.
- Put on Protective Gear: Before you start sanding, put on your safety glasses and dust mask or respirator to protect your eyes and respiratory system from debris and airborne particles.
Once you’ve completed these steps, take a moment to familiarize yourself with your workspace and make sure you have a clear understanding of the sanding project at hand. This will help you work efficiently and confidently.
Now that your workspace is prepared, let’s move on to discovering the different sanding techniques you can use for small projects.
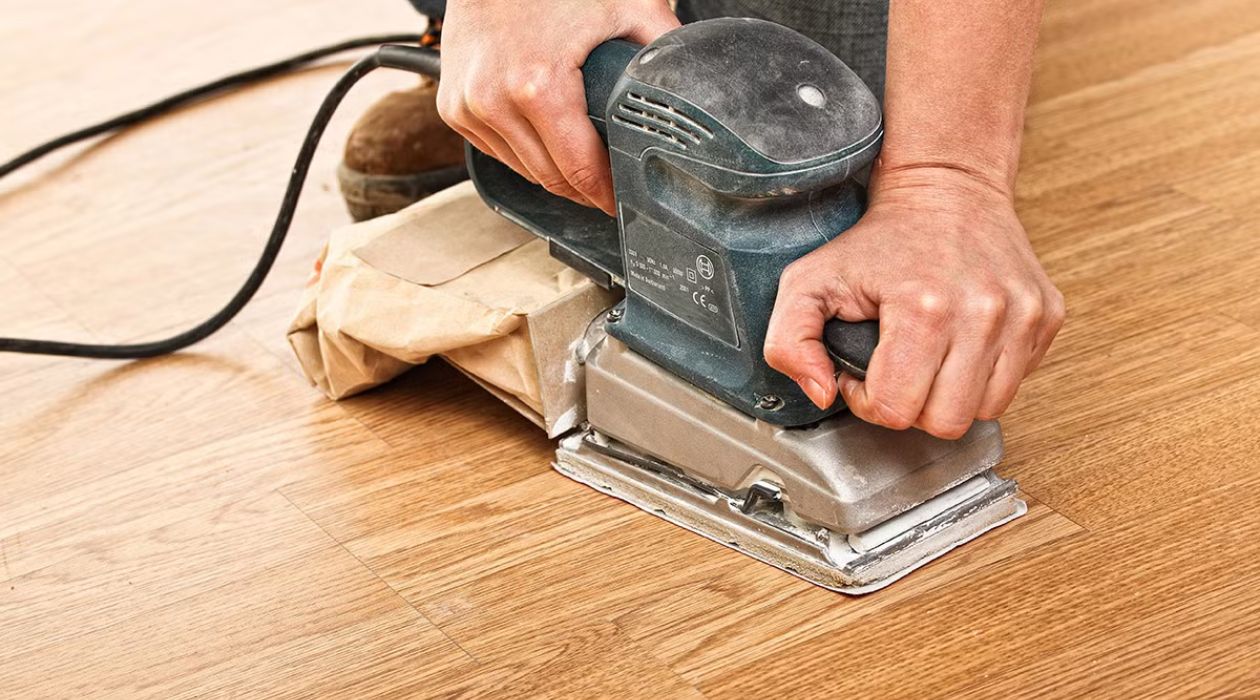
When using a manual sander to smooth out small projects, start with a coarse grit sandpaper and gradually move to a finer grit for a smooth finish. Sand in the direction of the wood grain for best results.
Read more: How To Use A Palm Sander
Sanding Techniques for Small Projects
When it comes to sanding small projects, using the right techniques can make all the difference in achieving a smooth and professional finish. Here are some essential sanding techniques to keep in mind:
- Start with Coarse Grits: Begin by using a coarse-grit sandpaper (such as 60 or 80 grit) to remove any rough surfaces, scratches, or old finishes. Apply even pressure and sand in the direction of the wood grain for the best results.
- Progress to Finer Grits: Once you’ve smoothed out the rough areas, switch to a medium-grit sandpaper (around 120 grit) and continue sanding. Gradually progress to finer grits (e.g., 180, 220) to achieve a smoother surface.
- Use Light Pressure: While sanding, avoid applying excessive force. Let the sander do the work, using gentle and consistent pressure to avoid over-sanding or uneven results. Keep the sander level and move it in a back-and-forth or circular motion, depending on the shape of the surface.
- Focus on Edges and Corners: Pay extra attention to sanding edges, corners, and hard-to-reach areas. For these areas, you may need to use sanding sponges or small handheld sanding blocks to ensure a consistent and smooth finish.
- Check for Uniformity: Periodically stop and assess the surface you’re sanding to ensure it’s smooth and uniform. Take note of any remaining rough patches or imperfections that require further sanding.
- Wipe Down the Surface: As you progress with sanding, use a clean, dry cloth to wipe away dust and debris from the surface. This will help you see the progress and ensure you’re not missing any areas that require additional sanding.
- Finish with Fine Grit and Hand Sanding: Once you’ve achieved a smooth surface with your manual sander, you can further refine the finish by hand sanding with a fine-grit sandpaper (e.g., 320 or 400 grit). This step will help to eliminate any remaining imperfections and create an even smoother surface.
Remember to frequently check your progress and adjust your sanding technique as needed. Patience and attention to detail are key when it comes to achieving a flawless finish on small woodworking projects.
Now that you’re familiar with the essential sanding techniques, let’s explore the importance of sanding in different directions.
Sanding in Different Directions
When sanding small projects, it’s important to sand in different directions to achieve the best results. Sanding in multiple directions helps ensure an even and uniform surface, eliminates visible sanding marks, and minimizes any potential distortion of the wood grain. Here’s why it’s important to sand in different directions:
- Even Out the Surface: Sanding in different directions helps to even out the surface by removing any irregularities or high spots. By sanding in both parallel and perpendicular directions, you can ensure that the entire surface is smooth and level.
- Eliminate Sanding Marks: When you sand in a single direction, it can leave visible sanding marks on the surface. By sanding in different directions, you can effectively blend those marks, creating a more uniform appearance.
- Maintain Wood Grain Integrity: Sanding only in one direction can cause the wood grain to become distorted or flattened. By sanding in different directions, you preserve the natural beauty and integrity of the wood grain, enhancing the aesthetics of your project.
- Prevent Over-Sanding: Sanding in different directions helps prevent over-sanding in specific areas. If you sand in one direction for an extended period, you may remove more material than necessary from that particular area, resulting in an uneven surface.
- Smooth Transition between Sections: Sanding in different directions ensures a seamless transition between different sections of your project. Whether you’re blending edges or smoothing out corners, sanding in multiple directions helps create smooth and uniform transitions.
When sanding in different directions, it’s important to start with a coarse-grit sandpaper and gradually progress to finer grits. Remember to always go with the grain of the wood and avoid applying excessive pressure. Take your time and focus on maintaining a consistent sanding pattern throughout the project.
By incorporating this technique into your sanding process, you’ll achieve a professional and flawless result on your small woodworking projects.
Now that you understand the importance of sanding in different directions, let’s move on to some helpful tips for achieving a smooth finish.
Tips for Achieving a Smooth Finish
When it comes to achieving a smooth finish on your small woodworking projects, attention to detail and proper techniques are key. Here are some valuable tips to help you achieve a flawless and professional outcome:
- Choose the Right Grit: Select the appropriate grit size for each stage of sanding. Start with a coarse-grit paper to remove imperfections, then progressively move to finer grits for a smooth finish. This step-by-step approach will yield optimal results.
- Regularly Inspect the Surface: Pause periodically to assess the surface for missed spots, imperfections, or areas requiring additional sanding. This step ensures you achieve a consistently smooth finish across the entire project.
- Work Methodically: Establish a systematic sanding pattern and stick to it. This ensures even coverage and prevents the risk of over-sanding certain areas. Move the sander in a controlled manner, applying consistent pressure without rushing.
- Sand Parallel to the Wood Grain: To preserve the natural beauty of the wood and prevent cross-grain scratches, always sand parallel to the wood grain. Sanding against the grain can lead to visible blemishes that are difficult to fix.
- Use a Light Touch on Edges: When sanding the edges of your project, apply minimal pressure to prevent rounding or overly tapering the edges. Use a sanding sponge or wrap sandpaper around a small block to maintain control and precision.
- Keep the Surface Clean: Regularly wipe away dust and debris from the surface as you sand to maintain a clear view of your progress. Cleaning the surface also helps avoid scratching from particles trapped under the sandpaper.
- Test the Finish: Before applying any stain, paint, or sealer, it’s advisable to test it on a small, inconspicuous area. This allows you to ensure the finish achieves the desired look and matches your expectations before applying it to the entire project.
- Finish Strong: After sanding, consider applying a top coat or protective finish to enhance the durability and aesthetics of your project. This additional step can also help to further smoothen the surface and provide a polished final look.
- Prioritize Patience: Achieving a smooth finish takes time and patience. Avoid rushing through the sanding process, as it can lead to mistakes and subpar results. Take breaks as needed to prevent fatigue, and embrace the journey of refining your project.
By following these tips, you’ll be well on your way to achieving a smooth and professional finish on your small woodworking projects. Embrace the process, enjoy the satisfaction of transforming rough surfaces into polished masterpieces, and take pride in your craftsmanship!
Now that you’re armed with these valuable tips, the next step is to clean up your workspace. We’ll discuss how to do that in the following section.
Cleaning up the Workspace
After completing the sanding process, it’s important to properly clean up your workspace. Cleaning not only ensures a tidy and organized area but also helps maintain a safe and efficient working environment. Follow these steps to effectively clean up your workspace:
- Collect Dust and Debris: Start by using a broom or handheld vacuum to collect loose dust and debris from the floor and surrounding surfaces. Pay attention to corners, edges, and other hard-to-reach areas where dust may have accumulated.
- Dispose of Waste Properly: Dispose of used sandpaper, empty dust collection bags, and any other waste materials in appropriate trash containers. Be mindful of any hazardous materials and dispose of them according to local regulations.
- Clean Your Equipment: Thoroughly clean your manual sander, sanding blocks, and any other tools used in the sanding process. Use a stiff bristle brush or a soft cloth to remove any remaining dust or debris. Properly store your tools to keep them in good condition.
- Wipe Down Surfaces: Use a damp cloth to wipe down surfaces that may have accumulated dust during the sanding process. Pay attention to tabletops, shelves, and any other flat surfaces. This will help remove any remaining dust and give your workspace a fresh and clean look.
- Ventilate the Area: Open windows or use fans to improve ventilation in your workspace. This will help dissipate any airborne dust particles and maintain a fresh and clean environment.
- Return Materials to Their Proper Place: Put away unused sandpaper, unused finishing supplies, and any other materials in their designated storage areas. This will help keep your workspace organized and ensure that everything is readily available for future projects.
- Inspect the Finish: Take a moment to inspect the finish of your project. Look for any areas that may need touch-ups or additional sanding. Address these areas promptly to achieve the desired smooth and polished look.
- Admire Your Work: Once your workspace is clean and organized, take a step back and admire your completed project. Take pride in your craftsmanship and the effort you put into achieving a smooth finish.
By following these steps, you can wrap up your project with a clean and organized workspace. Cleaning up not only improves the appearance of your workspace but also sets the stage for your next woodworking endeavor.
Now that you’ve cleaned up your workspace, it’s time to reflect on the knowledge you’ve gained and appreciate the satisfaction of a job well done. Congratulations on achieving a smooth finish on your small woodworking project!
If you’re ready for more woodworking adventures, explore new projects, and continue sharpening your skills. Enjoy the process and let your creativity run wild!
Do you have any further questions or need assistance with anything else? I’m here to help!
Read more: How To Smooth Out A Rough Concrete Patio
Conclusion
Congratulations on completing your journey to mastering the art of using a manual sander for small woodworking projects! Throughout this article, we have covered important aspects such as safety precautions, choosing the right manual sander, gathering necessary materials, preparing the workspace, sanding techniques, sanding in different directions, tips for achieving a smooth finish, and cleaning up the workspace.
By adhering to safety precautions, selecting the appropriate manual sander, and gathering the necessary materials, you have set yourself up for success. Preparing your workspace and employing the correct sanding techniques have allowed you to achieve a smooth and professional finish on your small woodworking projects. The tips provided will help you navigate potential challenges and ensure the best possible outcome.
Remember, practice makes perfect, and mastering the use of a manual sander requires patience, attention to detail, and continuous learning. As you embark on future woodworking projects, continue to refine your skills and explore new techniques to further enhance your craft.
Always prioritize safety in your work, wear protective gear, and work in a well-ventilated area. Take breaks when needed, and remember that woodworking is as much a creative process as it is a technical one. Embrace the joy of working with your hands and transforming raw materials into beautiful, functional pieces.
Now that you’ve successfully completed this guide, the possibilities for your woodworking ventures are endless. Don’t hesitate to explore new projects, experiment with different wood species and finishes, and challenge yourself to continuously improve your skills.
As always, if you have any questions or need further assistance, don’t hesitate to seek advice from fellow woodworkers or consult with professionals in the field. The woodworking community is a welcoming and supportive one, eager to help you on your journey.
So go forth with confidence, armed with the knowledge and skills you’ve gained, and create stunning pieces that showcase your craftsmanship and passion for woodworking. Enjoy the process, relish in the satisfaction of completing each project, and continue to let your creativity soar.
Thank you for joining us on this woodworking adventure. Wishing you all the best in your future woodworking endeavors!
Frequently Asked Questions about How To Use A Manual Sander To Smooth Out Small Projects
Was this page helpful?
At Storables.com, we guarantee accurate and reliable information. Our content, validated by Expert Board Contributors, is crafted following stringent Editorial Policies. We're committed to providing you with well-researched, expert-backed insights for all your informational needs.





0 thoughts on “How To Use A Manual Sander To Smooth Out Small Projects”