Home>Renovation & DIY>Tools & Equipment>How To Smooth A Spackle

Tools & Equipment
How To Smooth A Spackle
Modified: August 26, 2024
Learn how to smooth spackle with the right tools and equipment. Our step-by-step guide will help you achieve a flawless finish.
(Many of the links in this article redirect to a specific reviewed product. Your purchase of these products through affiliate links helps to generate commission for Storables.com, at no extra cost. Learn more)
Introduction
Welcome to the world of DIY home improvement! Whether you’re a seasoned DIY enthusiast or just starting out, learning how to smooth a spackle is a valuable skill that can help you achieve professional-looking results. Spackling is a common technique used to repair and conceal small cracks, holes, and imperfections in walls and ceilings before painting. By mastering the art of smoothing spackle, you can transform blemished surfaces into seamless, flawless canvases for your paint or wallpaper.
In this guide, we’ll walk you through the step-by-step process of smoothing spackle, from preparing the surface to applying the spackle, and finally, achieving that smooth, polished finish. With the right tools, materials, and techniques, you’ll be well-equipped to tackle your spackling project with confidence and precision.
So, roll up your sleeves, gather your supplies, and let’s dive into the world of spackling and smoothing!
Key Takeaways:
- Master the art of smoothing spackle for flawless walls and ceilings. Prepare, apply, and smooth with precision for professional-quality results in your DIY projects.
- Gather materials, prioritize safety, and embrace creativity for successful spackling. Achieve seamless and polished surfaces with patience and attention to detail.
Read more: How To Smooth Ceiling
Materials Needed
Before embarking on your spackling journey, it’s essential to gather the necessary materials to ensure a successful and efficient process. Here’s a list of the primary materials you’ll need:
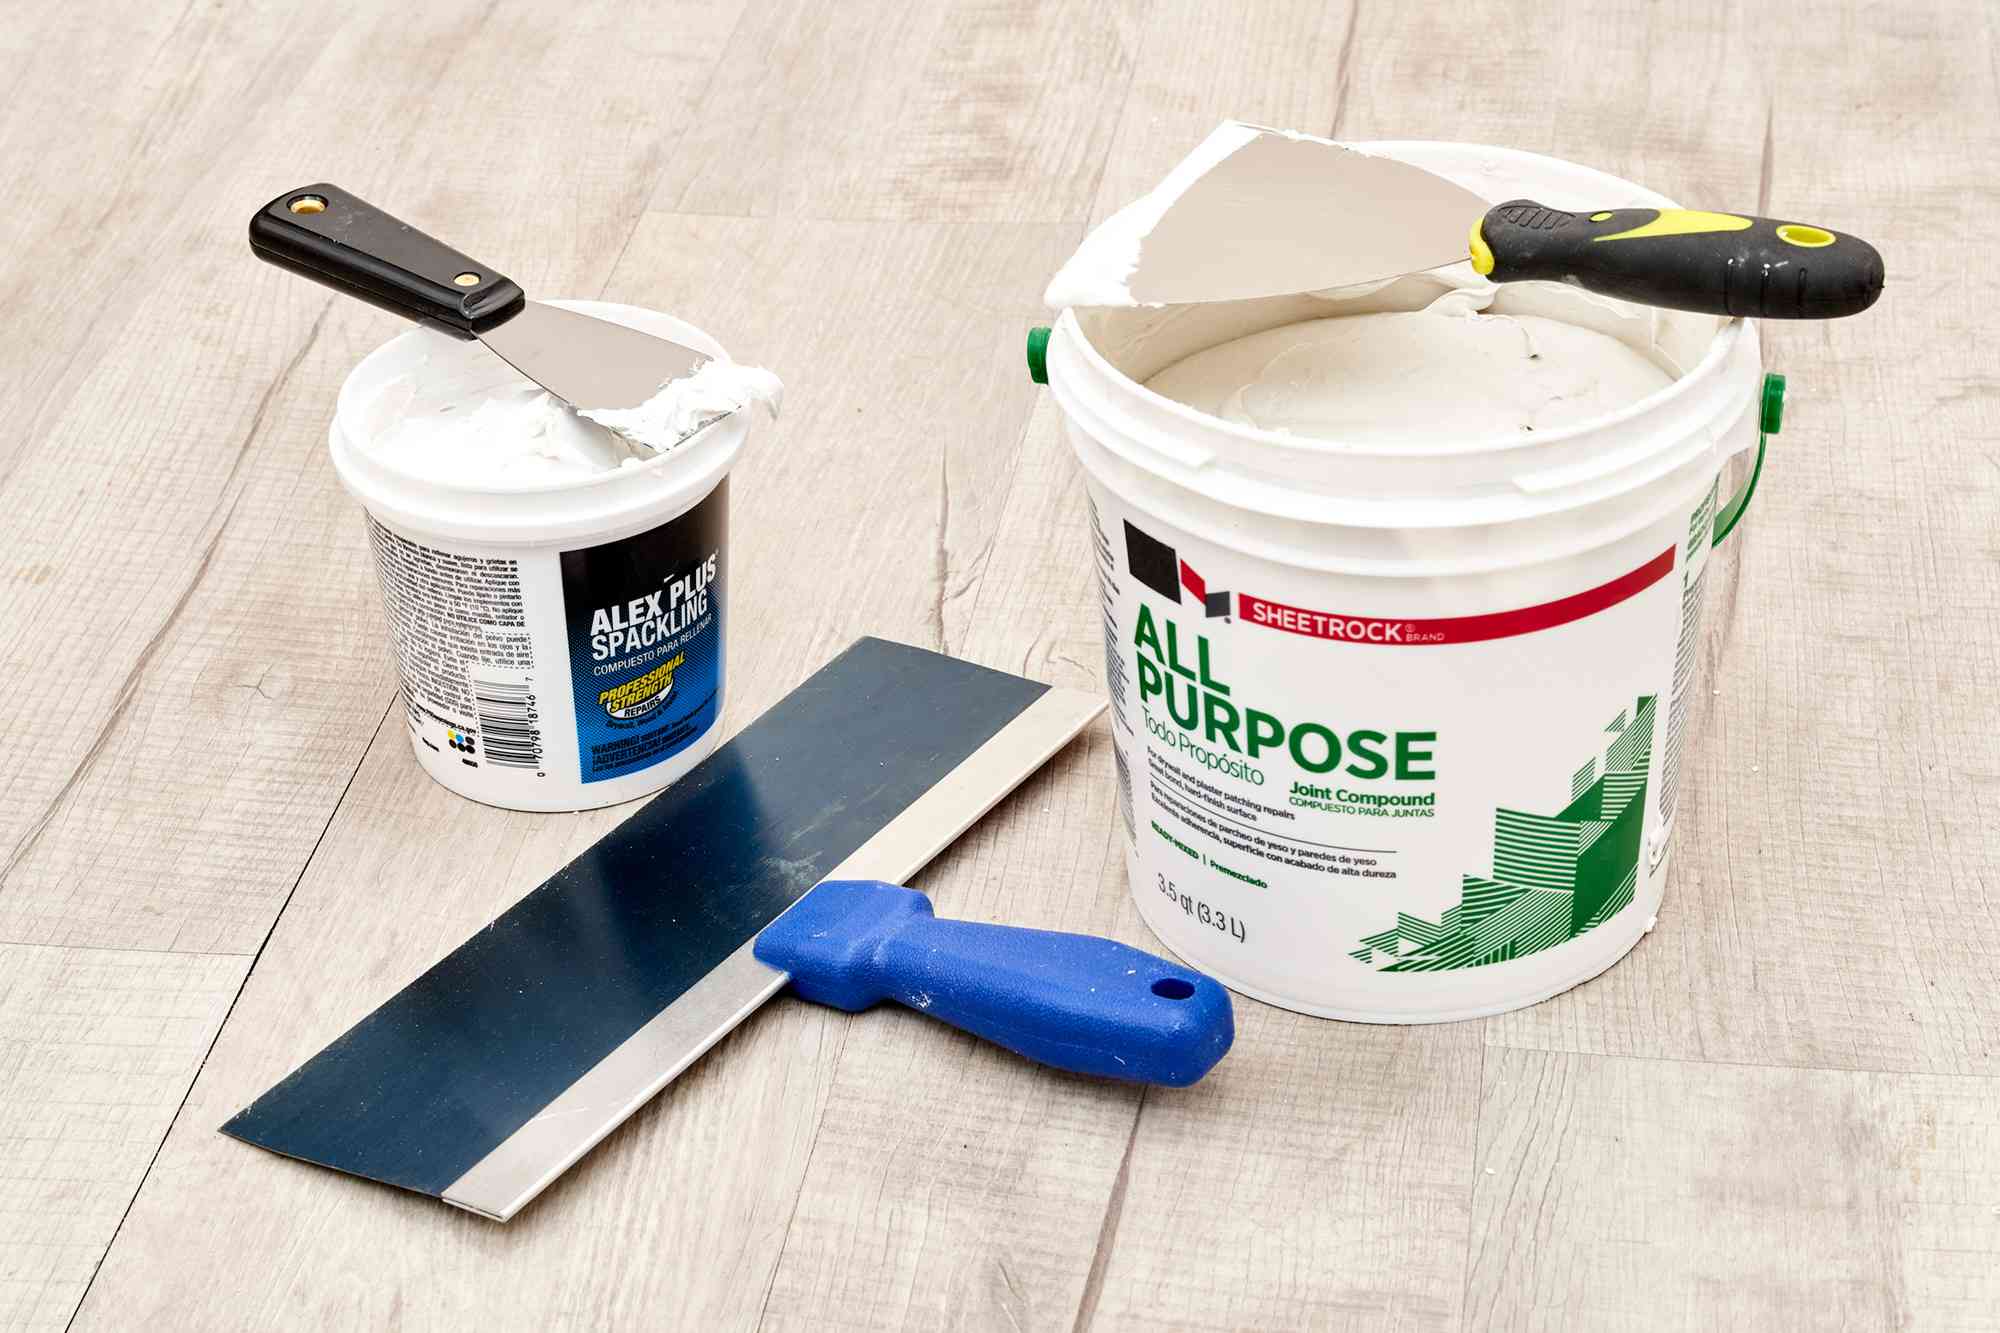
- Spackle Compound: Choose a high-quality spackle compound that is suitable for your specific project, whether it’s for interior or exterior use. Consider the drying time and ease of sanding when selecting the spackle.
- Putty Knife: An assortment of putty knives in varying sizes will allow you to apply and smooth the spackle with precision. A wider putty knife is ideal for larger areas, while a smaller one is perfect for intricate details.
- Sandpaper: Invest in fine-grit sandpaper to achieve a smooth and seamless finish. A sanding block or sanding sponge can also be useful for larger surfaces.
- Primer: A high-quality primer will help the spackled area blend seamlessly with the surrounding surface and provide a uniform base for painting.
- Paint and Painting Supplies: If you plan to repaint the spackled area, have your chosen paint, brushes, rollers, and other painting supplies on hand.
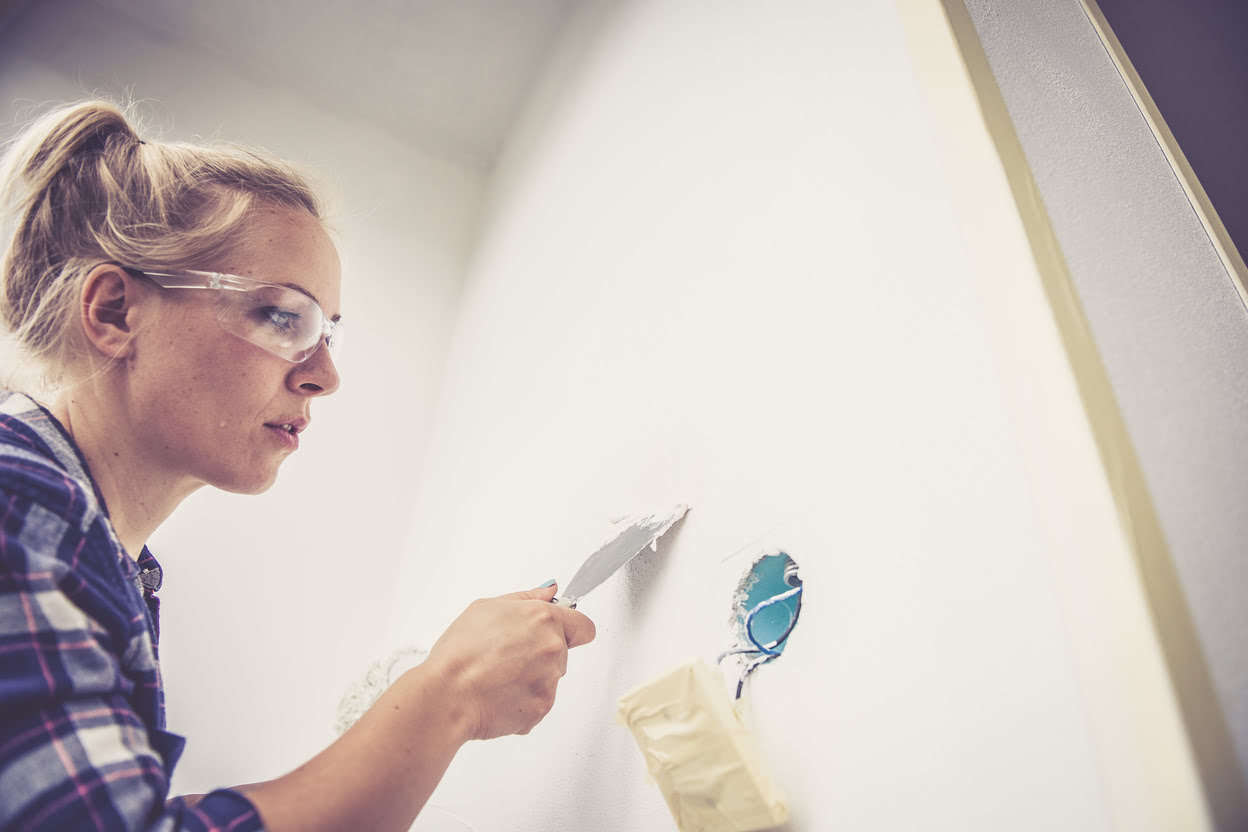
- Protective Gear: Ensure your safety by wearing protective gear, including safety goggles, a dust mask, and gloves, especially during the sanding process.
- Clean Cloth or Sponge: Keep a clean, damp cloth or sponge nearby to wipe away excess spackle and clean your tools as you work.
- Drop Cloth or Plastic Sheeting: To protect your surroundings from dust and spackle residue, lay down a drop cloth or secure plastic sheeting around the work area.
- Lighting: Adequate lighting is crucial for spotting imperfections and ensuring a smooth finish. Position a bright, adjustable light source to illuminate the work area effectively.
By having these materials at your disposal, you’ll be well-prepared to tackle the spackling process and achieve professional-quality results.
Preparing the Surface
Before diving into the spackling process, it’s crucial to prepare the surface to ensure optimal adhesion and a seamless finish. Follow these steps to prepare the area for spackling:
- Clean the Surface: Begin by thoroughly cleaning the area to be spackled. Use a mild detergent and water to remove dirt, dust, and grease. Wipe the surface dry with a clean cloth and allow it to air dry completely.
- Inspect for Loose Material: Examine the surface for any loose paint, drywall compound, or debris. Gently scrape away any flaking or loose material using a putty knife or sandpaper. Ensure that the surface is smooth and free of any loose particles that could affect the adhesion of the spackle.
- Repair Larger Holes and Cracks: For larger holes or cracks, consider using a mesh patch or joint tape to reinforce the area before applying spackle. This will provide added support and prevent the spackle from sinking into the hole as it dries.
- Mask Off Surrounding Areas: If necessary, use painter’s tape to mask off adjacent surfaces or areas that you want to protect from spackle and sanding dust. This will help maintain clean lines and prevent accidental damage to surrounding areas.
- Prime the Area (Optional): Depending on the surface and the type of spackle being used, applying a coat of primer to the area can enhance the adhesion of the spackle and promote a uniform finish. Allow the primer to dry completely before proceeding to apply the spackle.
By taking the time to properly prepare the surface, you’ll create an ideal foundation for the spackling process, setting the stage for a flawless and long-lasting repair.
Applying the Spackle
With the surface prepared and ready for spackling, it’s time to apply the spackle compound. Follow these steps to ensure a smooth and even application:
- Prepare the Spackle: If using pre-mixed spackle, stir it thoroughly to achieve a uniform consistency. For powdered spackle, follow the manufacturer’s instructions to mix the compound to the desired consistency.
- Load the Putty Knife: Using a putty knife, scoop a small amount of spackle onto the blade. For larger areas, use a wider putty knife to apply the spackle more efficiently.
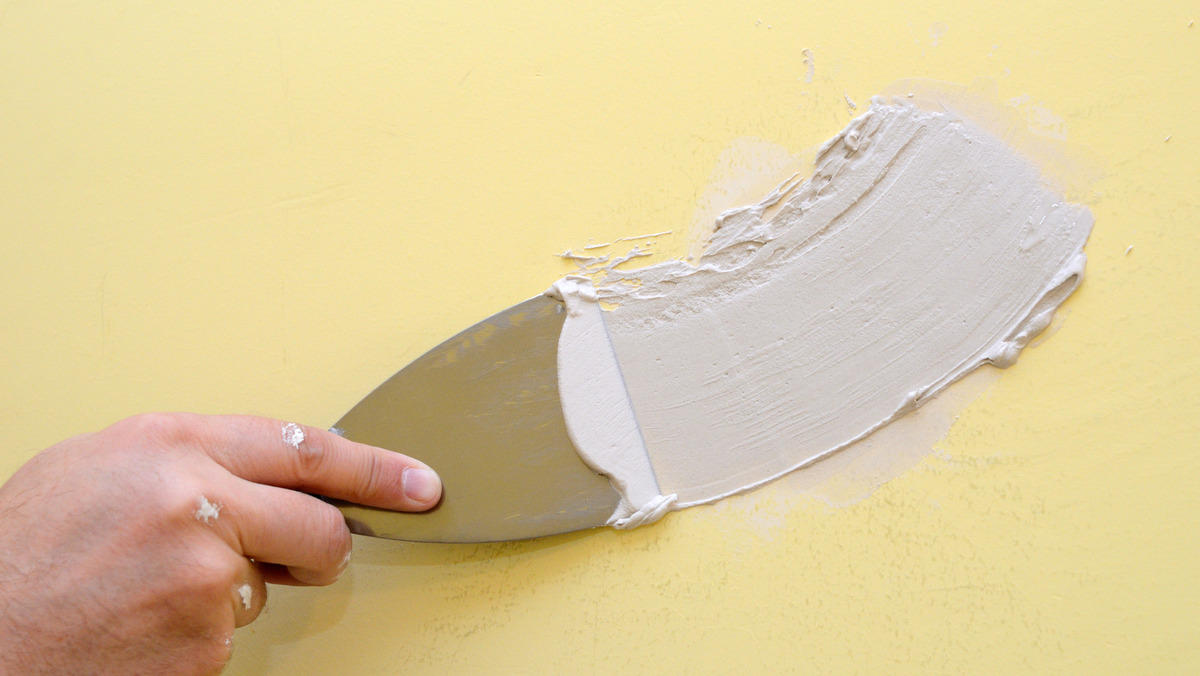
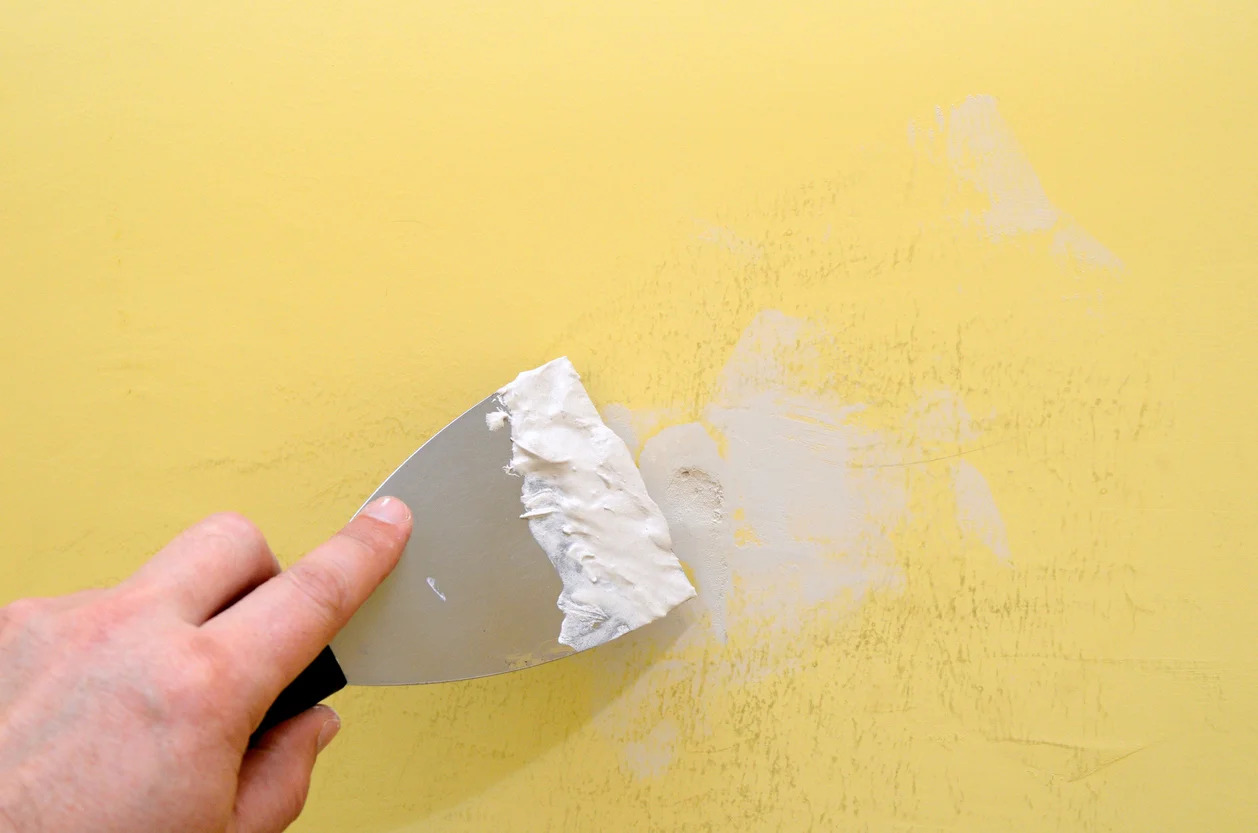
- Apply the Spackle: Hold the putty knife at a slight angle and apply the spackle to the damaged or repaired area using smooth, even strokes. Ensure that the spackle fills the imperfections without overfilling or leaving voids.
- Feather the Edges: To blend the spackle seamlessly with the surrounding surface, feather the edges by lightly dragging the putty knife over the applied spackle. This technique helps create a smooth transition and minimizes the need for extensive sanding.
- Build Up in Layers (if needed): For deeper imperfections, it may be necessary to apply the spackle in multiple thin layers, allowing each layer to dry before applying the next. This approach helps prevent shrinkage and promotes a more durable repair.
- Clean Excess Spackle: As you work, periodically clean any excess spackle from your tools and the surrounding area using a damp cloth or sponge. This will help maintain a tidy workspace and prevent dried spackle from interfering with the smoothing process.
By following these steps, you’ll be able to apply the spackle with precision and finesse, setting the stage for the next crucial phase: smoothing the spackle to achieve a flawless finish.
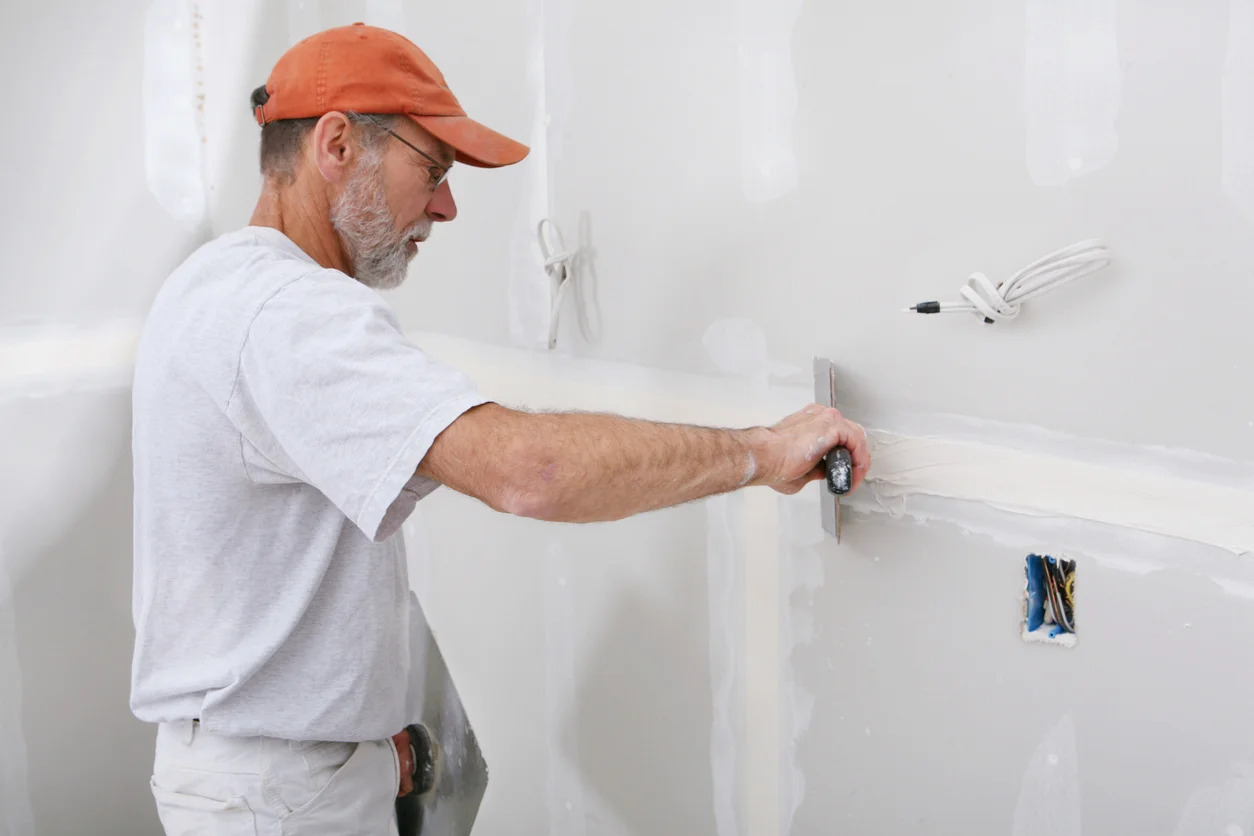
After applying spackle, use a damp sponge to smooth the surface. Gently wipe away excess spackle to create a seamless finish.
Smoothing the Spackle
After applying the spackle, the next step is to smooth and refine the surface to achieve a seamless and professional finish. Here’s how to effectively smooth the spackled area:
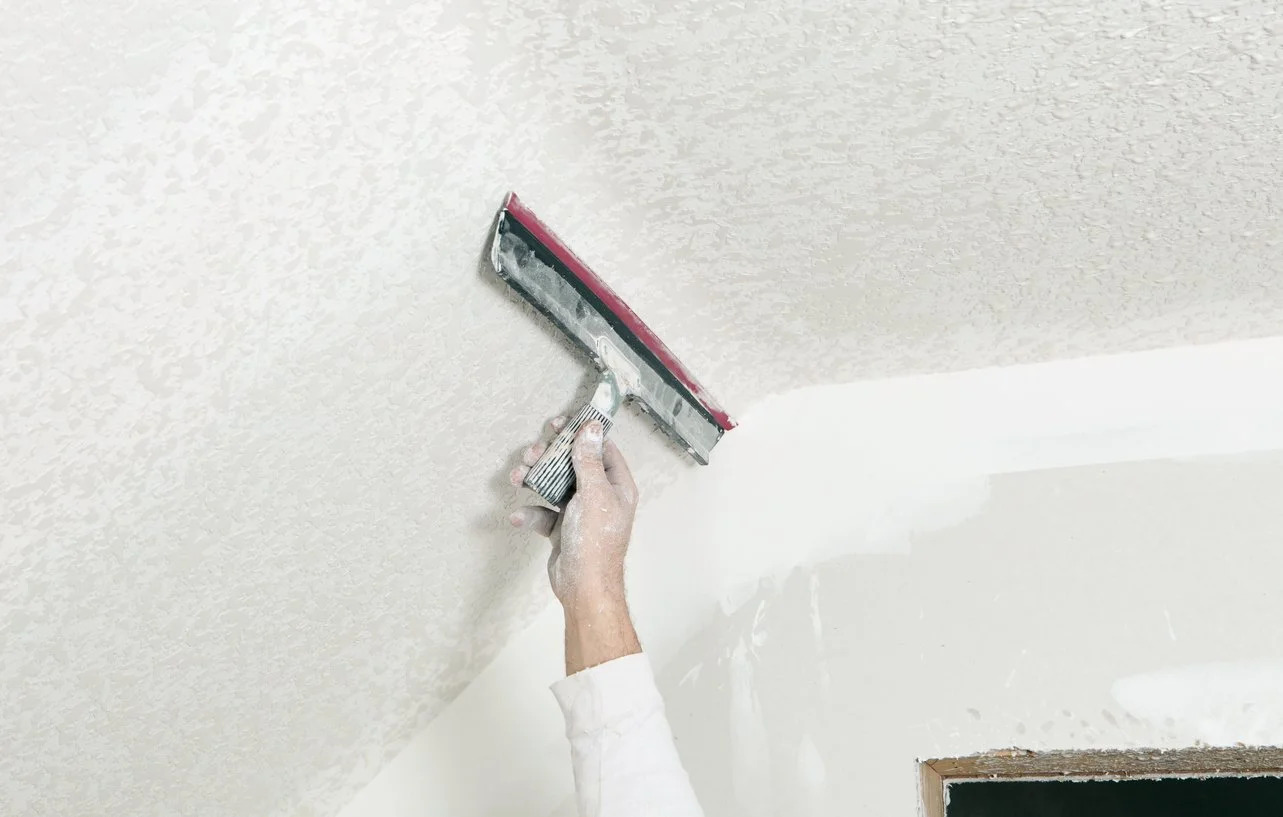
- Select the Right Tool: Choose a clean, high-quality putty knife or trowel with a flexible blade. A wider blade can help cover larger areas, while a narrower one is ideal for detailed work.
- Moisten the Tool: Dampen the blade of the putty knife slightly to prevent it from sticking to the spackle. This will facilitate smoother and more controlled movements during the smoothing process.
- Apply Light Pressure: Holding the putty knife at a low angle, gently glide it over the spackled area in smooth, even strokes. Apply light pressure to level the spackle and create a uniform surface without creating ridges or uneven patches.
- Smooth in Multiple Directions: To ensure a consistently smooth finish, vary the direction of your smoothing strokes. This technique helps minimize visible lines or patterns and promotes a more natural integration of the spackle with the surrounding surface.
- Blend the Edges: Pay special attention to blending the edges of the spackled area with the surrounding surface. Feather the edges gently to create a seamless transition, minimizing the need for extensive sanding and touch-ups.
- Check for Imperfections: As you smooth the spackle, inspect the surface carefully for any remaining imperfections, such as air bubbles, ridges, or uneven areas. Address these issues promptly to ensure a flawless result.
By employing these techniques and taking a meticulous approach to smoothing the spackle, you’ll be well on your way to achieving a flawless and visually appealing surface, laying the groundwork for the final stages of the spackling process.
Read more: How To Smooth A Concrete Patio
Sanding the Spackle
Once the spackled area has been smoothed, the next critical step is to sand the surface to refine the texture and achieve a seamless blend with the surrounding area. Follow these steps to sand the spackled surface effectively:
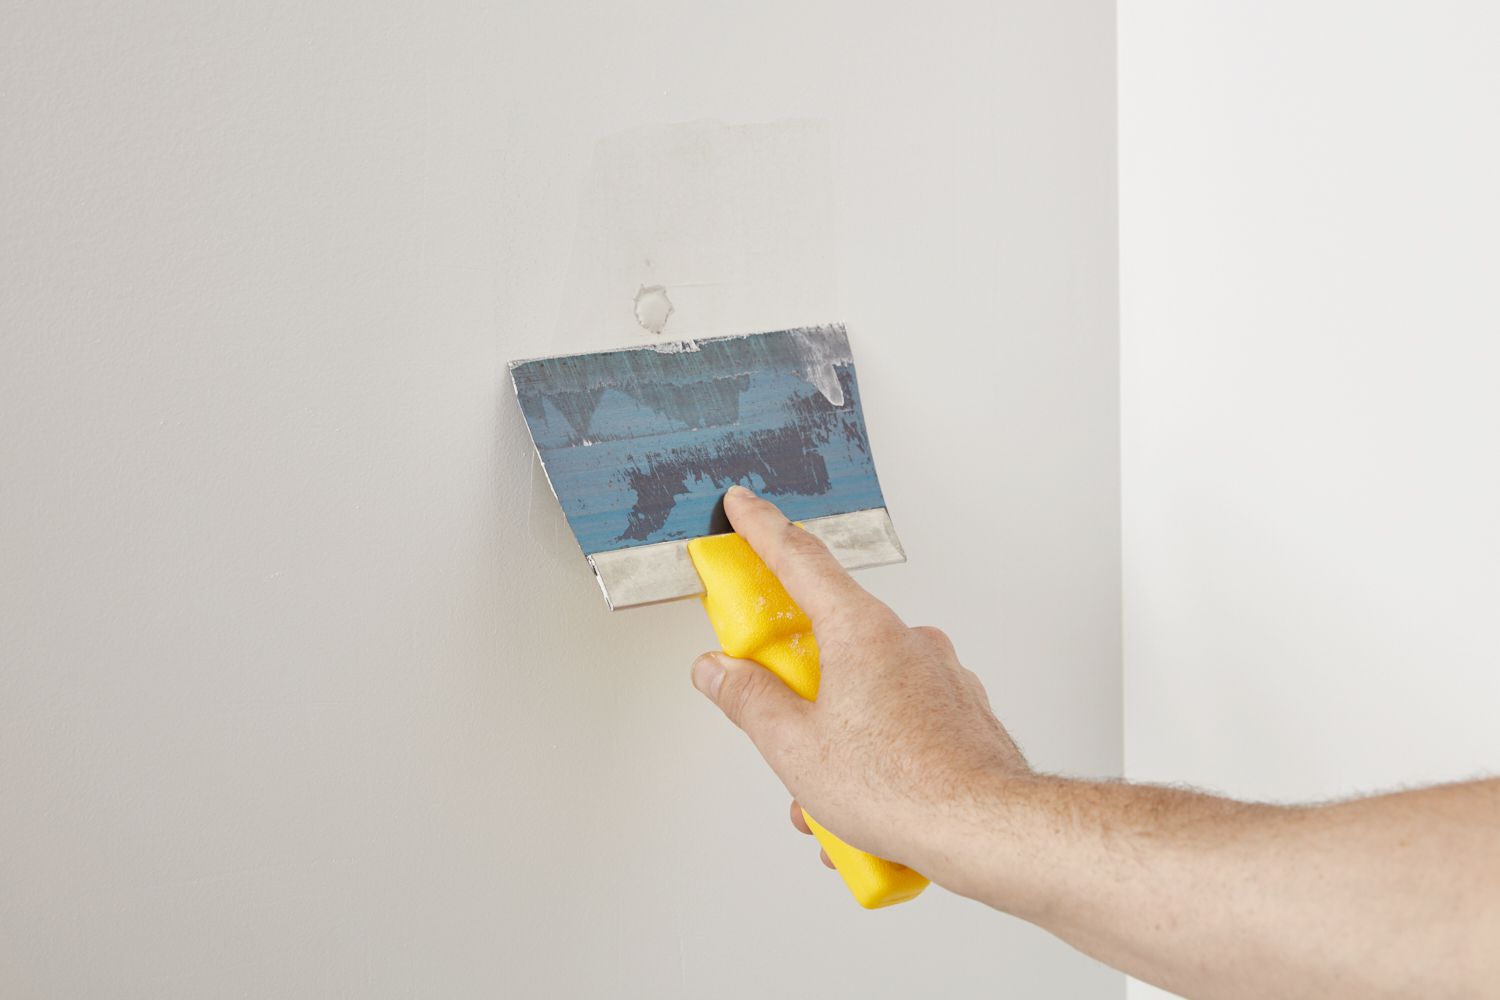
- Choose the Right Sandpaper: Opt for fine-grit sandpaper, such as 120-grit or higher, to gently smooth the spackled surface without creating visible scratches or abrasions. A sanding block or sanding sponge can also be used for larger areas.
- Gently Sand the Surface: Using light, circular motions, sand the spackled area to level the surface and blend the spackle seamlessly with the surrounding wall or ceiling. Avoid applying excessive pressure, as this can result in uneven patches or damage to the spackled area.
- Check the Progress Periodically: As you sand, periodically wipe away the dust with a clean, damp cloth to assess the smoothness of the surface. This will allow you to identify any remaining imperfections that require further attention.
- Focus on Feathering the Edges: Pay particular attention to feathering and blending the edges of the spackled area to create a smooth transition. This meticulous approach will minimize the visibility of the repaired area once it’s painted or finished.
- Inspect the Surface Carefully: After sanding, inspect the spackled area under adequate lighting to ensure that the surface is uniform and free of any visible imperfections. Address any remaining flaws with additional spackling and sanding as needed.
By following these steps and maintaining a gentle, methodical approach to sanding, you’ll be able to achieve a seamlessly blended and refined surface, setting the stage for the final touches and, ultimately, a flawless finish.
Final Touches
As you approach the completion of the spackling process, it’s essential to focus on the final touches that will elevate the overall result and prepare the surface for painting or finishing. Here are the crucial final steps to consider:
- Remove Sanding Residue: Thoroughly wipe the spackled area with a clean, damp cloth to remove any remaining sanding dust and residue. Ensure that the surface is entirely clean and free of debris before proceeding.
- Apply Primer (if necessary): Depending on the type of spackle used and the condition of the surface, applying a coat of high-quality primer can enhance the adhesion of the paint and promote a uniform finish. Allow the primer to dry completely according to the manufacturer’s instructions.
- Inspect for Imperfections: Carefully inspect the spackled and sanded area under adequate lighting to identify any remaining imperfections or uneven patches. Address these issues promptly by applying additional spackle, smoothing, and sanding as needed.
- Blend with Surrounding Surface: Ensure that the spackled area blends seamlessly with the surrounding wall or ceiling. Feather the edges and transition areas to create a natural and unnoticeable repair.
- Final Sanding (if required): If any imperfections or uneven areas are detected during the inspection, perform a final gentle sanding to refine the surface and achieve a flawless result.
- Clean and Protect the Area: Once the spackling and sanding processes are complete, clean the surrounding area thoroughly to remove any dust or debris. Protect the workspace from dust and damage as you prepare for the painting or finishing phase.
By meticulously attending to these final touches, you’ll ensure that the spackled area is impeccably prepared for the next stage, whether it’s painting, wallpapering, or applying a decorative finish.
Conclusion
Congratulations on mastering the art of smoothing spackle! By following the step-by-step process outlined in this guide, you’ve acquired the knowledge and skills needed to achieve professional-quality results in your spackling projects. From preparing the surface to applying the spackle, smoothing, and sanding, you’ve learned the essential techniques to transform blemished walls and ceilings into seamless, flawless surfaces.
Remember, patience and attention to detail are key when it comes to spackling and achieving a polished finish. By carefully preparing the surface, applying the spackle with precision, and smoothing it to perfection, you’ve set the stage for a successful and visually appealing repair.
Whether you’re tackling minor repairs or larger renovation projects, the ability to smooth spackle effectively will serve you well in maintaining and enhancing the beauty of your living spaces. Your newfound expertise in spackling and smoothing will empower you to take on a wide range of home improvement projects with confidence and finesse.
As you embark on your spackling endeavors, don’t forget to gather the necessary materials, prioritize safety, and maintain a clean and organized workspace. With the right tools, techniques, and a touch of creativity, you’ll be well-equipped to achieve seamless and professional-looking results in your spackling projects.
Now, armed with the knowledge and skills acquired in this guide, you’re ready to embark on your spackling journey with confidence and precision. Happy spackling!
Frequently Asked Questions about How To Smooth A Spackle
Was this page helpful?
At Storables.com, we guarantee accurate and reliable information. Our content, validated by Expert Board Contributors, is crafted following stringent Editorial Policies. We're committed to providing you with well-researched, expert-backed insights for all your informational needs.


0 thoughts on “How To Smooth A Spackle”