Home>Renovation & DIY>DIY Projects & Ideas>How To Use Confetti Stickers In DIY Projects
DIY Projects & Ideas
How To Use Confetti Stickers In DIY Projects
Modified: January 4, 2024
Discover creative ways to incorporate confetti stickers into your DIY projects and get inspired with our unique ideas and tips. Transform your crafts with our DIY project guide!
(Many of the links in this article redirect to a specific reviewed product. Your purchase of these products through affiliate links helps to generate commission for Storables.com, at no extra cost. Learn more)
Introduction
Are you ready to add a touch of whimsy and charm to your DIY projects? Look no further than confetti stickers! These delightful little embellishments are versatile, fun, and can elevate the visual appeal of any project. Whether you're a seasoned crafter or just starting out, confetti stickers can bring a pop of color and personality to your creations. From scrapbooking and card making to home decor and party planning, the possibilities are endless when it comes to incorporating these tiny treasures into your DIY endeavors.
In this article, we'll explore the exciting world of confetti stickers and discover innovative ways to use them in your crafting ventures. We'll delve into the materials needed, share creative ideas for incorporating confetti stickers into various projects, provide step-by-step instructions, and offer valuable tips and tricks to help you make the most of these delightful embellishments. So, grab your confetti stickers and let's embark on a crafting adventure filled with color, creativity, and endless inspiration!
Key Takeaways:
- Add a touch of whimsy and charm to DIY projects with confetti stickers. From scrapbooking to home decor, these versatile embellishments bring joy and personality to any creation.
- Gather your materials and let confetti stickers spark wonder and delight in your crafting experience. Embrace the joy of crafting and celebrate the beauty of handmade creations with these delightful embellishments.
Read more: How To Use Stucco Siding And Its Benefits
Materials Needed
Before diving into the wonderful world of confetti sticker DIY projects, it’s essential to gather the necessary materials. Here’s a list of items you’ll need to get started:
- Confetti Stickers: The star of the show! These come in a variety of shapes, sizes, and colors, allowing for endless creative possibilities.
- Base Material: Depending on your project, you may need cardstock, paper, fabric, glass, or any other surface on which to apply the confetti stickers.
- Adhesive: Ensure you have glue, double-sided tape, or adhesive dots to securely attach the confetti stickers to your chosen base material.
- Scissors or Craft Punch: For precise cutting or creating custom shapes from your base material.
- Embellishments (Optional): Additional decorative elements such as ribbons, sequins, markers, or paints to complement your confetti sticker designs.
- Protective Sealant (Optional): If your project will be exposed to wear and tear, consider using a sealant to preserve the confetti stickers and prevent them from peeling or fading.
With these materials at your disposal, you’re well-equipped to unleash your creativity and embark on a confetti sticker crafting journey that’s sure to delight and inspire.
Ideas for Using Confetti Stickers in DIY Projects
Confetti stickers are incredibly versatile and can be incorporated into a wide array of DIY projects, adding a touch of whimsy and charm to each creation. Here are some imaginative ideas to spark your creativity:
- Scrapbooking Sensation: Transform your scrapbook pages into vibrant, eye-catching displays by scattering confetti stickers among photos and journaling. Create themed pages for birthdays, holidays, or everyday moments, and watch as the confetti stickers infuse each layout with joy and personality.
- Captivating Cards: Elevate your handmade cards with the addition of confetti stickers. Whether it’s a birthday card, thank-you note, or holiday greeting, these stickers can serve as delightful accents that instantly enliven the design. Consider using them to form borders, wreaths, or focal points on your cards.
- Party Perfection: Sprinkle confetti stickers on party invitations, place cards, and decorations to bring a festive flair to your celebrations. Whether it’s a baby shower, wedding, or casual get-together, these stickers can add a playful touch to the overall ambiance.
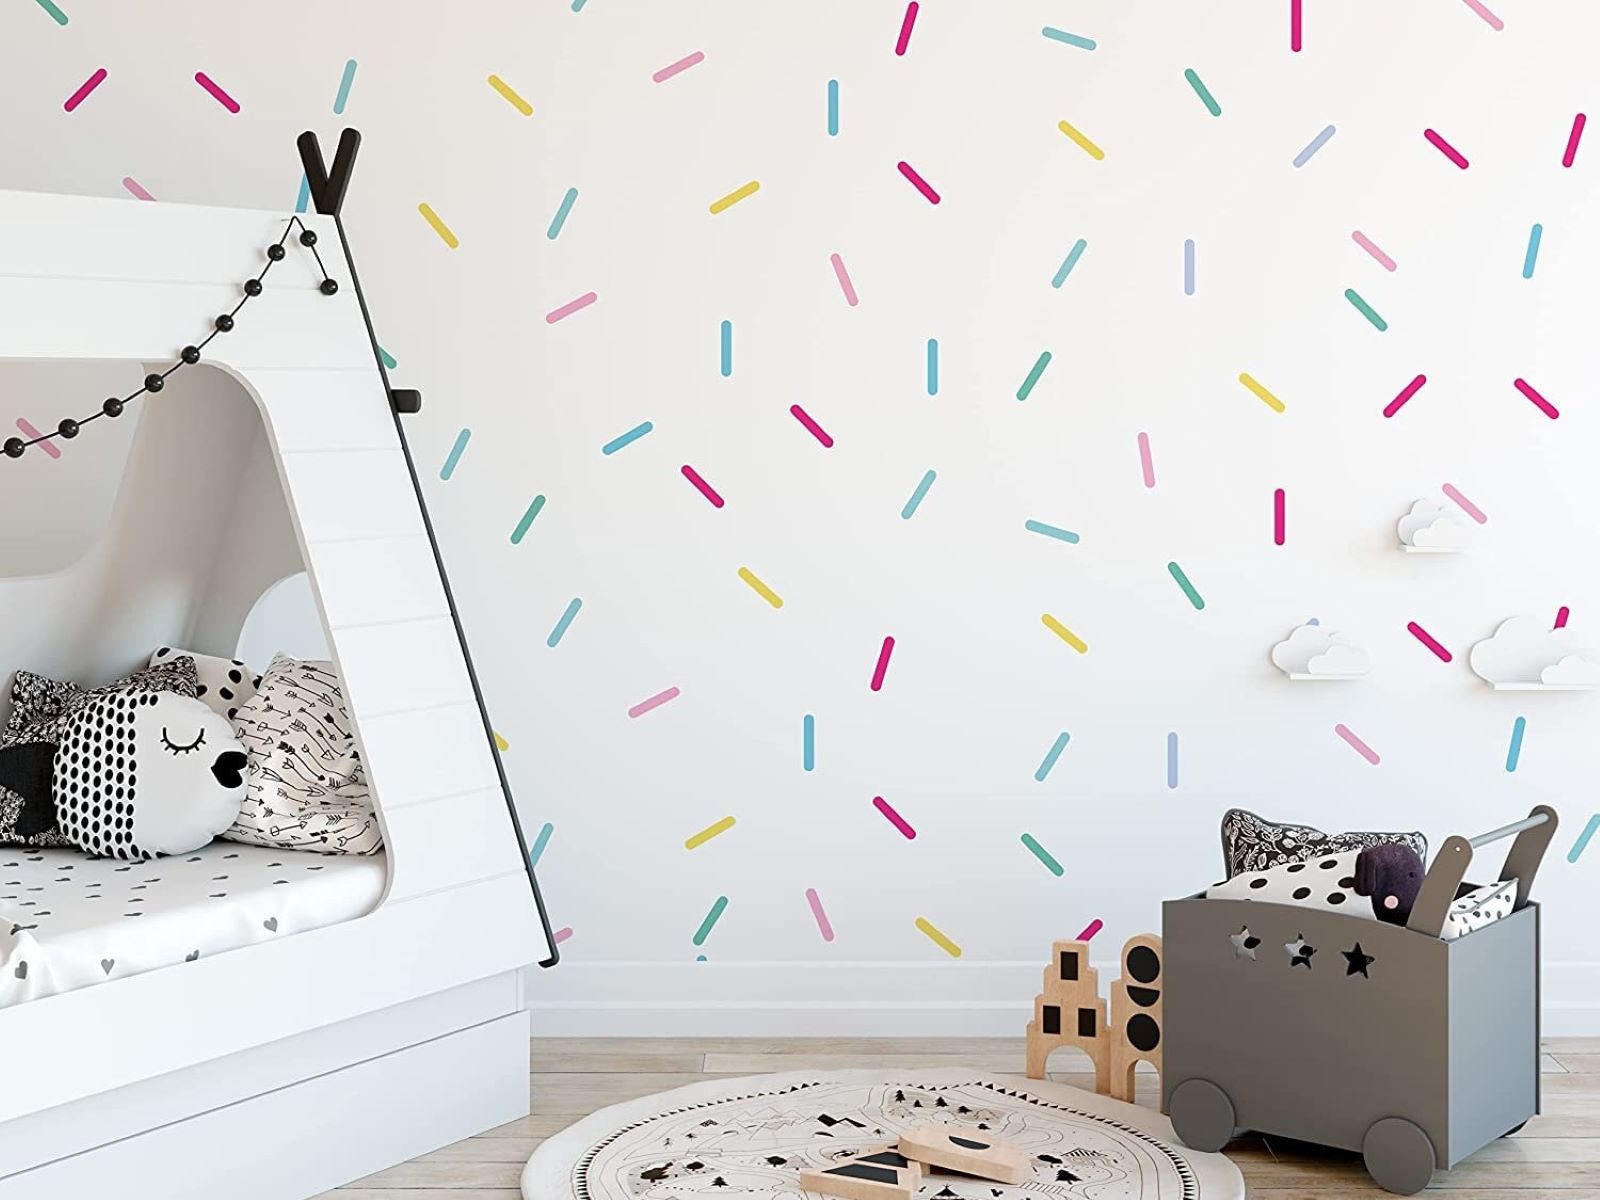
- Dynamic Décor: Infuse your home decor with a dose of creativity by incorporating confetti stickers into framed art, wall hangings, or decorative accents. Use them to embellish photo frames, create custom artwork, or adorn vases and candle holders for a personalized touch.
- Festive Fashion: Jazz up plain clothing items such as t-shirts, tote bags, or hats by strategically applying confetti stickers to create unique, wearable art. Whether you opt for a subtle sprinkle or a bold statement, these stickers can add a playful and fashionable twist to your wardrobe.
These ideas merely scratch the surface of the myriad ways you can use confetti stickers in your DIY projects. Let your imagination run wild, and don’t hesitate to experiment with different applications to discover the full potential of these delightful embellishments.
Add confetti stickers to a plain phone case for a fun and unique look. Simply stick the stickers onto the case in a random pattern for a personalized touch.
Step-by-Step Instructions
Now that you’re brimming with creative ideas, it’s time to bring your confetti sticker projects to life. Follow these step-by-step instructions to embark on a crafting journey filled with color, sparkle, and endless possibilities:
- Choose Your Base: Select the surface or material on which you’ll be using the confetti stickers. This could be a scrapbook page, cardstock, fabric, glass, or any other suitable medium for your project.
- Plan Your Design: Visualize how you want to incorporate the confetti stickers into your project. Whether it’s creating a border, forming a pattern, or accenting a specific area, having a plan in mind will guide your creative process.
- Arrange the Stickers: Carefully peel the confetti stickers from their backing and arrange them on your chosen base material. Experiment with different placements and compositions until you’re satisfied with the overall look.
- Secure the Stickers: Once you’re happy with the arrangement, use adhesive such as glue, double-sided tape, or adhesive dots to firmly attach the confetti stickers to the base material. Ensure that they are securely in place to prevent any accidental displacement.
- Personalize and Embellish (Optional): If desired, complement the confetti stickers with additional embellishments such as ribbons, sequins, or hand-drawn accents to further enhance the visual appeal of your project.
- Protect and Preserve (Optional): If your project will be handled frequently or exposed to environmental factors, consider applying a protective sealant over the confetti stickers to safeguard them from wear and tear.
- Admire Your Handiwork: Step back and admire your completed creation! Revel in the joy of bringing your vision to life and reveling in the delightful charm that confetti stickers have added to your DIY project.
These step-by-step instructions serve as a roadmap for infusing your DIY projects with the enchanting allure of confetti stickers. Embrace each stage of the process and allow your creativity to flourish as you bring your unique creations to fruition.
Tips and Tricks
As you embark on your confetti sticker crafting endeavors, consider these valuable tips and tricks to enhance your creative process and ensure stunning results:
- Explore Different Shapes and Sizes: Experiment with an assortment of confetti sticker shapes and sizes to add depth and visual interest to your projects. Mix and match various designs to create captivating compositions.
- Layer with Dimension: Elevate the impact of your confetti sticker arrangements by layering them to create a sense of depth and dimension. This technique can add a dynamic and multi-dimensional quality to your designs.
- Consider Color Combinations: Delve into the realm of color theory and explore harmonious or contrasting color combinations when selecting confetti stickers. Thoughtfully chosen colors can evoke specific moods and enhance the overall aesthetic of your projects.
- Embrace Negative Space: Allow the base material to serve as a backdrop, utilizing negative space to create balance and visual appeal. Strategic placement of confetti stickers can make a powerful statement against a clean, uncluttered background.
- Customize with Personal Touches: Infuse your projects with personal flair by incorporating hand-written messages, doodles, or photographs alongside the confetti stickers. This personalization adds sentimental value and a unique touch to your creations.
- Practice Precision and Patience: When arranging and adhering confetti stickers, exercise precision and patience to achieve the desired outcome. Take your time to ensure each sticker is positioned accurately and secured firmly in place.
- Share the Joy: Spread happiness and creativity by involving friends and family in confetti sticker crafting sessions. Collaborate on projects, exchange ideas, and revel in the collective joy of creating something beautiful together.
By incorporating these tips and tricks into your creative process, you’ll elevate the impact of your confetti sticker projects and unleash a world of imaginative possibilities. Embrace the journey of exploration and discovery as you infuse each creation with your unique artistic vision.
Conclusion
Incorporating confetti stickers into your DIY projects opens a gateway to boundless creativity, allowing you to infuse each creation with joy, color, and a touch of whimsy. Whether you’re crafting handmade cards, embellishing scrapbook pages, or adding a playful twist to home decor, these delightful embellishments have the power to transform ordinary materials into extraordinary works of art.
As you journey through the world of confetti sticker crafting, remember that the possibilities are as limitless as your imagination. Embrace the process of experimentation, exploration, and self-expression, allowing each project to serve as a canvas for your unique artistic vision. Whether you’re a seasoned crafter or a newcomer to the DIY scene, the charm and versatility of confetti stickers make them a delightful addition to any creative endeavor.
So, gather your materials, unleash your creativity, and let the confetti stickers spark a sense of wonder and delight in your crafting experience. With each project, you have the opportunity to infuse a little bit of magic into the world, one colorful sticker at a time.
Embrace the joy of crafting, celebrate the beauty of handmade creations, and revel in the enchanting allure of confetti stickers as they add a sprinkle of happiness to every project you undertake.
Frequently Asked Questions about How To Use Confetti Stickers In DIY Projects
Was this page helpful?
At Storables.com, we guarantee accurate and reliable information. Our content, validated by Expert Board Contributors, is crafted following stringent Editorial Policies. We're committed to providing you with well-researched, expert-backed insights for all your informational needs.


0 thoughts on “How To Use Confetti Stickers In DIY Projects”