Articles
How To Wire An Attic Fan With Thermostat
Modified: October 19, 2024
Learn how to wire an attic fan with thermostat and create a more efficient cooling system for your home. Read our comprehensive articles on the topic and get expert tips and advice.
(Many of the links in this article redirect to a specific reviewed product. Your purchase of these products through affiliate links helps to generate commission for Storables.com, at no extra cost. Learn more)
Introduction
Welcome to our guide on how to wire an attic fan with a thermostat. Attic fans are excellent additions to any home as they help to regulate the temperature and improve ventilation in your attic space. By installing a thermostat, you can automate the operation of your attic fan based on the ambient temperature, ensuring optimal energy efficiency.
Wiring an attic fan with a thermostat may sound like a daunting task, but with the right tools and some basic electrical knowledge, it can be easily accomplished. In this article, we will guide you through the step-by-step process of wiring an attic fan with a thermostat, ensuring a safe and successful installation.
Before we get started, it is important to note that working with electricity can be dangerous if not done correctly. If you are not comfortable or experienced with electrical work, it is highly recommended to consult a professional electrician. Safety should always be the top priority when dealing with electrical wiring.
In the following steps, we will explain how to wire an attic fan with a thermostat, ensuring that you have a thorough understanding of the process and are equipped with the necessary tools and materials.
Key Takeaways:
- Automate attic ventilation and save energy by wiring an attic fan with a thermostat. Prioritize safety, gather tools, and follow step-by-step instructions for a successful installation.
- Enhance your home’s comfort and energy efficiency by installing an attic fan with a thermostat. Enjoy improved ventilation, temperature control, and reduced energy costs with this DIY project.
Read also: 15 Best Attic Fan Thermostat for 2025
Step 1: Gather the necessary tools and materials
Before starting the wiring process, it is essential to gather all the required tools and materials. By having everything in place, you can save time and ensure a smooth installation. Here are the tools and materials you will need:
- Attic fan
- Thermostat
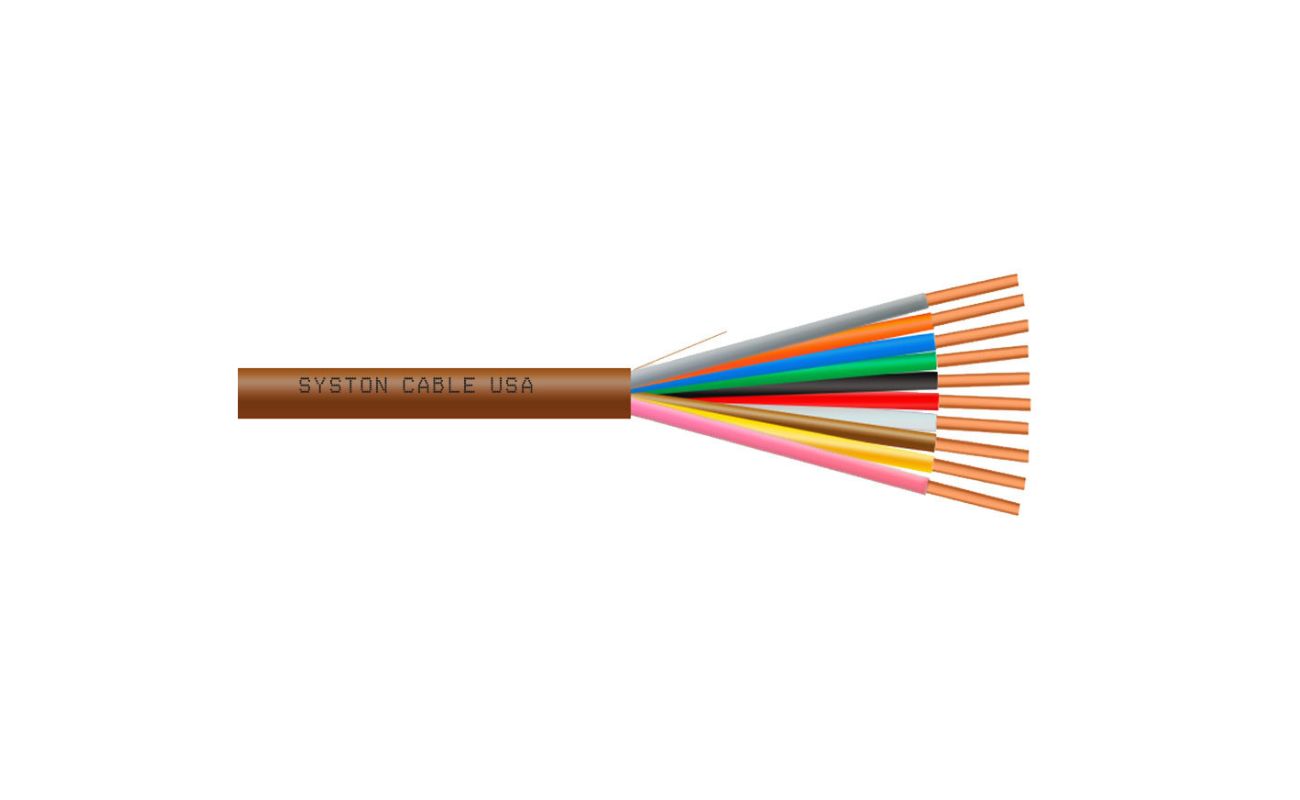
- Electrical wire (14-gauge or 12-gauge, depending on the fan’s power requirements)
- Cable staples
- Circuit breaker
- Screwdriver
- Wire cutters/strippers
- Electrical tape
- Wire nuts
- Drill and drill bits
- Measuring tape
Once you have gathered all the necessary tools and materials, you are ready to move on to the next step. Having everything prepared will make the installation process much smoother and more efficient. It is always better to be well-prepared before embarking on any DIY project.
Step 2: Turn off the power
Before working with any electrical connections, it is critical to ensure your safety by turning off the power to the area where you will be installing the attic fan and thermostat. This step will help prevent any electrical mishaps and protect you from potential harm.
Start by identifying the circuit breaker that controls the power supply to your attic. Typically, it will be labeled as “attic” or “fan”. If you are unsure, it is recommended to turn off the main power switch to ensure complete safety.
Once you have located the correct circuit breaker, turn it off by flipping the switch to the “off” position. After doing so, use a non-contact voltage tester to confirm that the power has been successfully turned off. This device will indicate whether there is any live electricity in the area.
Double-checking the power is off is crucial before proceeding with any electrical work. This step is vital to avoid accidental shocks or short circuits.
Remember, when working with electricity, always prioritize safety. If you are uncertain or uncomfortable working with electrical components, it is best to consult a professional electrician.
Once you have ensured that the power is off, you can proceed to the next step of locating the electrical junction box.
Step 3: Locate the electrical junction box
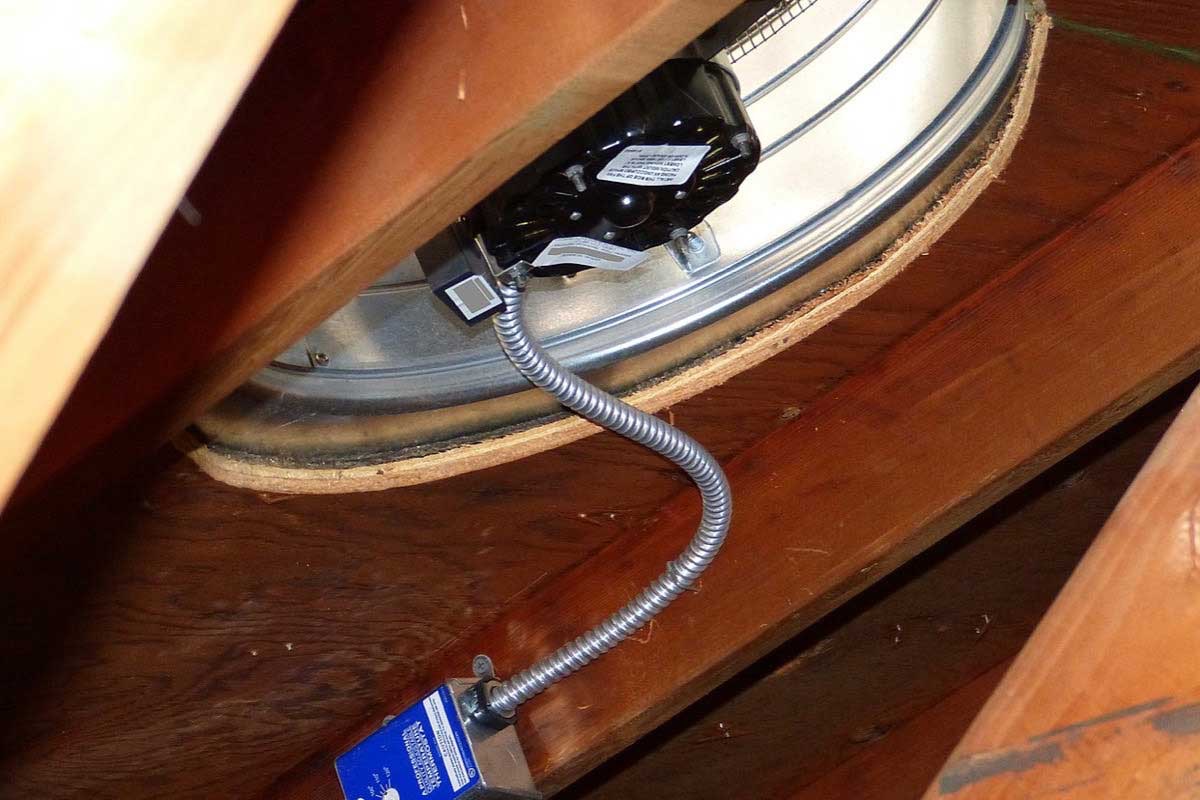
After turning off the power, the next step is to locate the electrical junction box in your attic. The junction box is where the wiring connections will be made, and it is essential to find its exact location for a successful installation.
Start by accessing your attic through the designated entry point. Use a flashlight or a headlamp to navigate and carefully inspect the area. Look for a metal or plastic box attached to a wall stud or ceiling joist. This box is commonly referred to as the electrical junction box.
If you are uncertain about the location of the junction box, refer to your home’s electrical blueprint or consult a professional for assistance. Locating the box is crucial to ensure proper connection and wiring of the attic fan and thermostat.
Once you have located the junction box, ensure that it is in good condition. Check for any damages such as cracks or loose connections. If the box is damaged, it needs to be replaced before proceeding with the installation.
Additionally, ensure that the junction box is positioned in a suitable location to accommodate the attic fan and thermostat. It should be easily accessible and have enough space for the necessary wiring connections.
With the junction box located and in good condition, you are now ready to proceed with the installation of the thermostat in the next step.
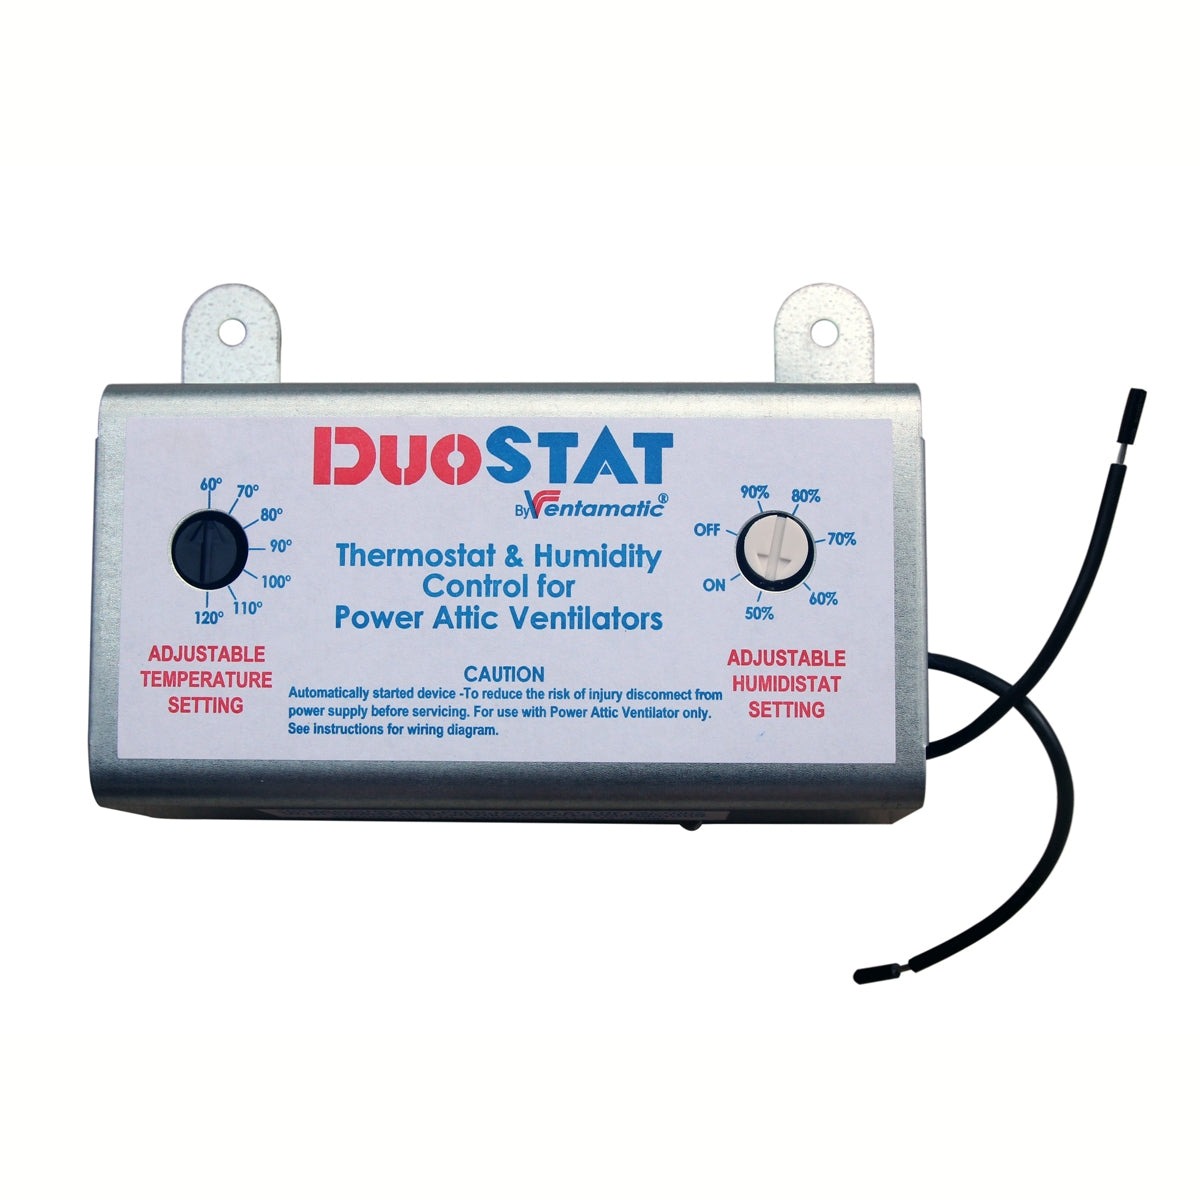
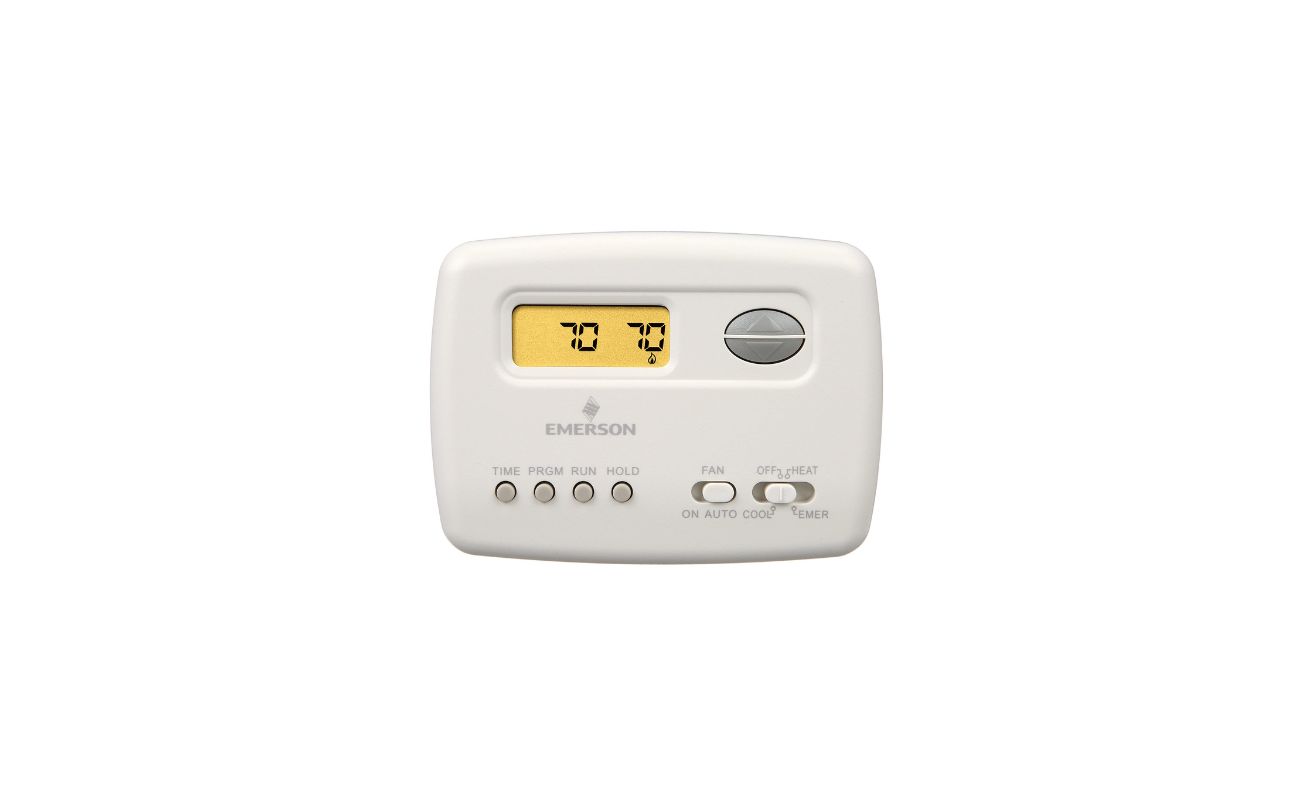
Step 4: Install the thermostat
Installing the thermostat is a crucial part of wiring an attic fan with a thermostat. The thermostat helps regulate the temperature in the attic by turning the fan on and off as needed. Follow these steps to install the thermostat:
- Choose the appropriate location for the thermostat on the wall near the entrance to the attic. Make sure it is easily accessible and at a comfortable height for operation.
- Using a measuring tape, measure and mark the desired location for the thermostat. Ensure it is level and aligned correctly.
- Using a drill and appropriate drill bit, create holes for mounting the thermostat base to the wall. Insert wall anchors if needed.
- Secure the thermostat base to the wall using screws provided with the thermostat.
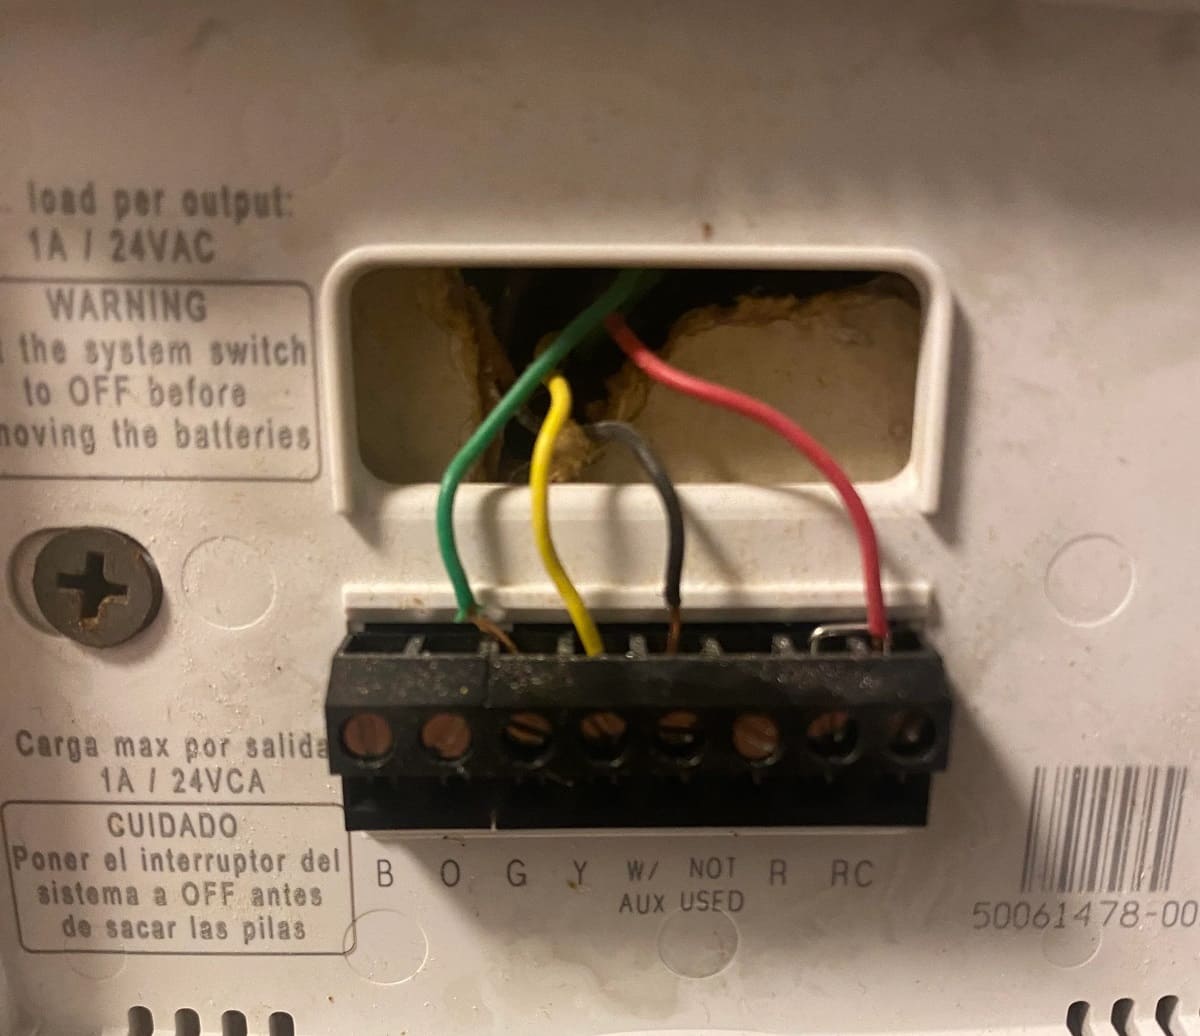
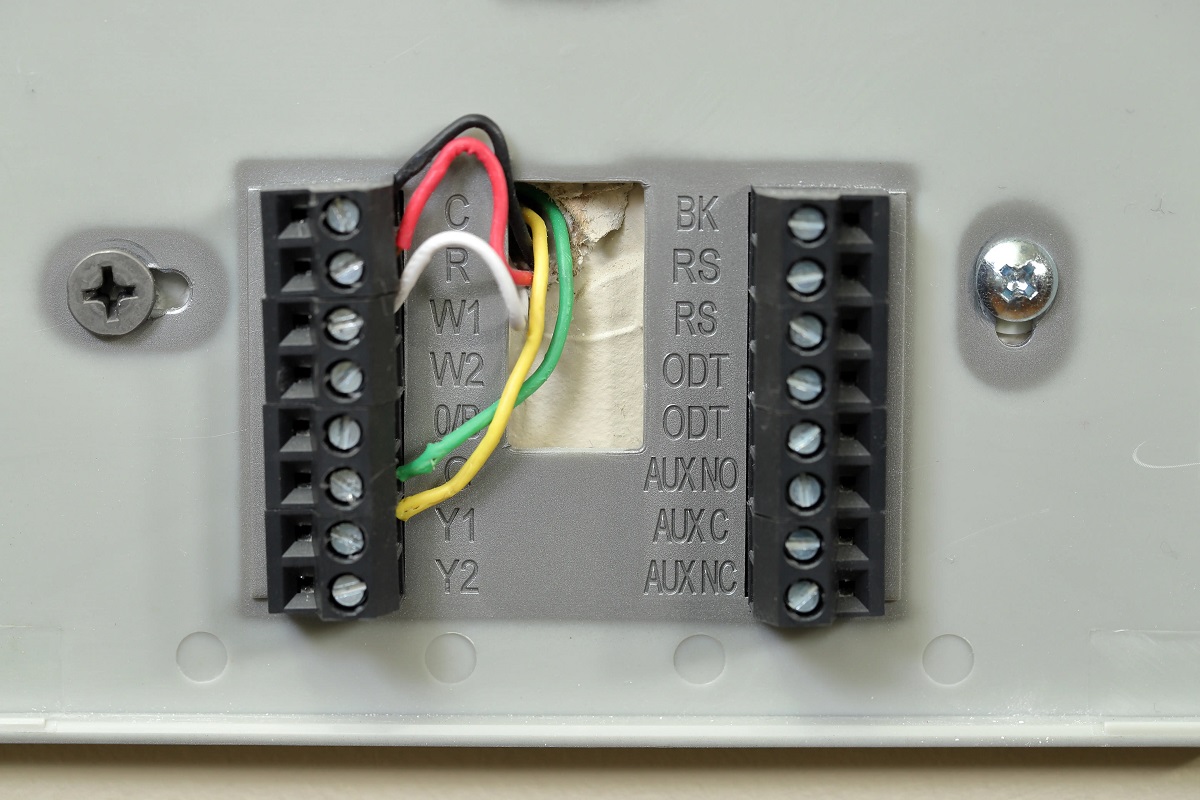
- Take the thermostat cover off to reveal the interior wiring terminals.
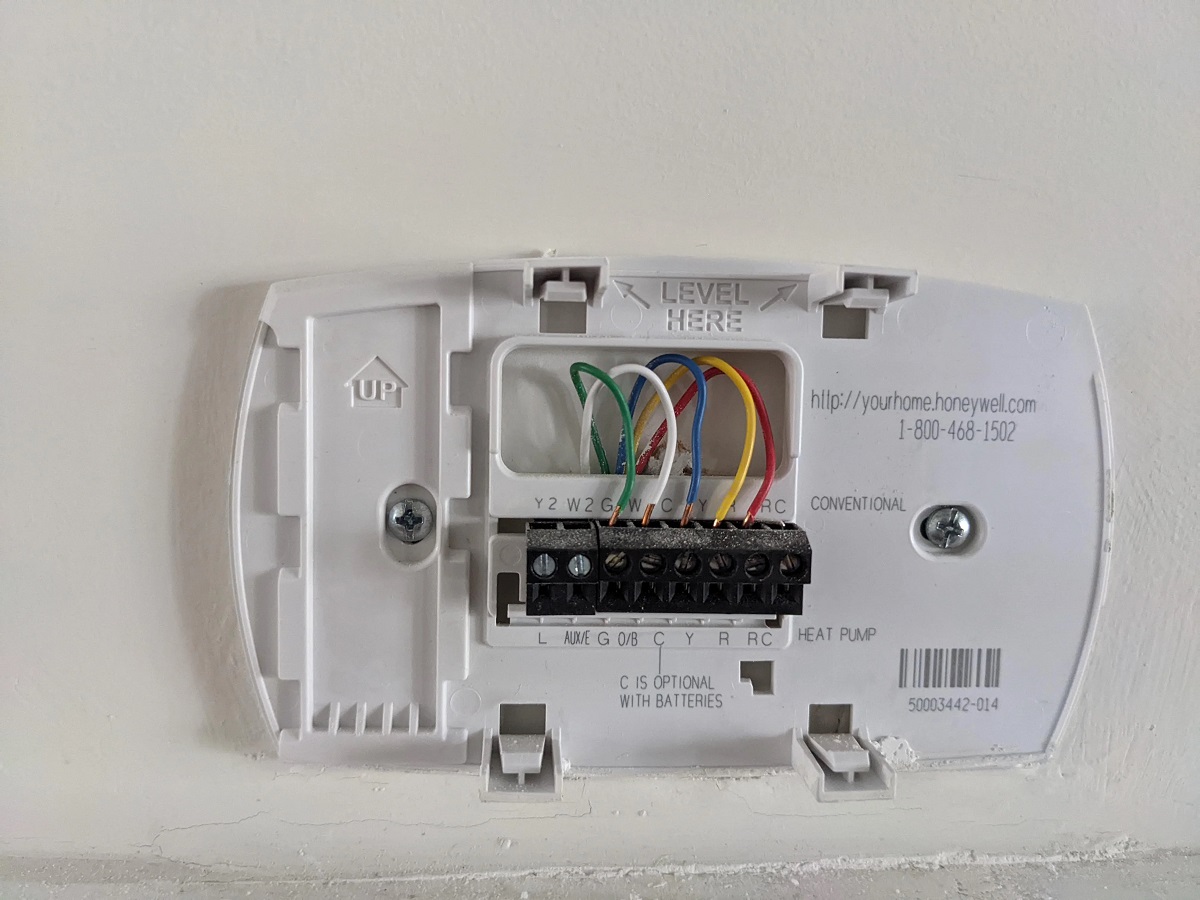
- Identify the wiring terminals on the thermostat base and familiarize yourself with their labels (e.g., R, W, Y, G). Refer to the manufacturer’s instructions for specific terminal labeling and configuration.
- Using wire cutters/strippers, strip the insulation off the ends of the thermostat wires to expose the bare copper conductors.
- Insert the stripped ends of the wires into the corresponding wiring terminals on the thermostat base. It is important to match the colors or labels on the wiring terminals and wires.
- Tighten the terminal screws securely to ensure a reliable connection.
- Insert the batteries or connect the power supply (if applicable) for the thermostat.
- Attach the thermostat cover back onto the thermostat base.
By following these steps, you have successfully installed the thermostat for your attic fan. The next step will involve connecting the wires to complete the wiring process.
When wiring an attic fan with a thermostat, make sure to use the proper gauge wire for the fan’s power requirements and to connect the thermostat according to the manufacturer’s instructions to ensure proper functionality and safety.
Step 5: Connect the wires
Once the thermostat is installed, the next step in wiring an attic fan with a thermostat is to connect the necessary wires. Properly connecting the wires ensures a secure and functional electrical connection for the attic fan and thermostat. Follow these steps to connect the wires:
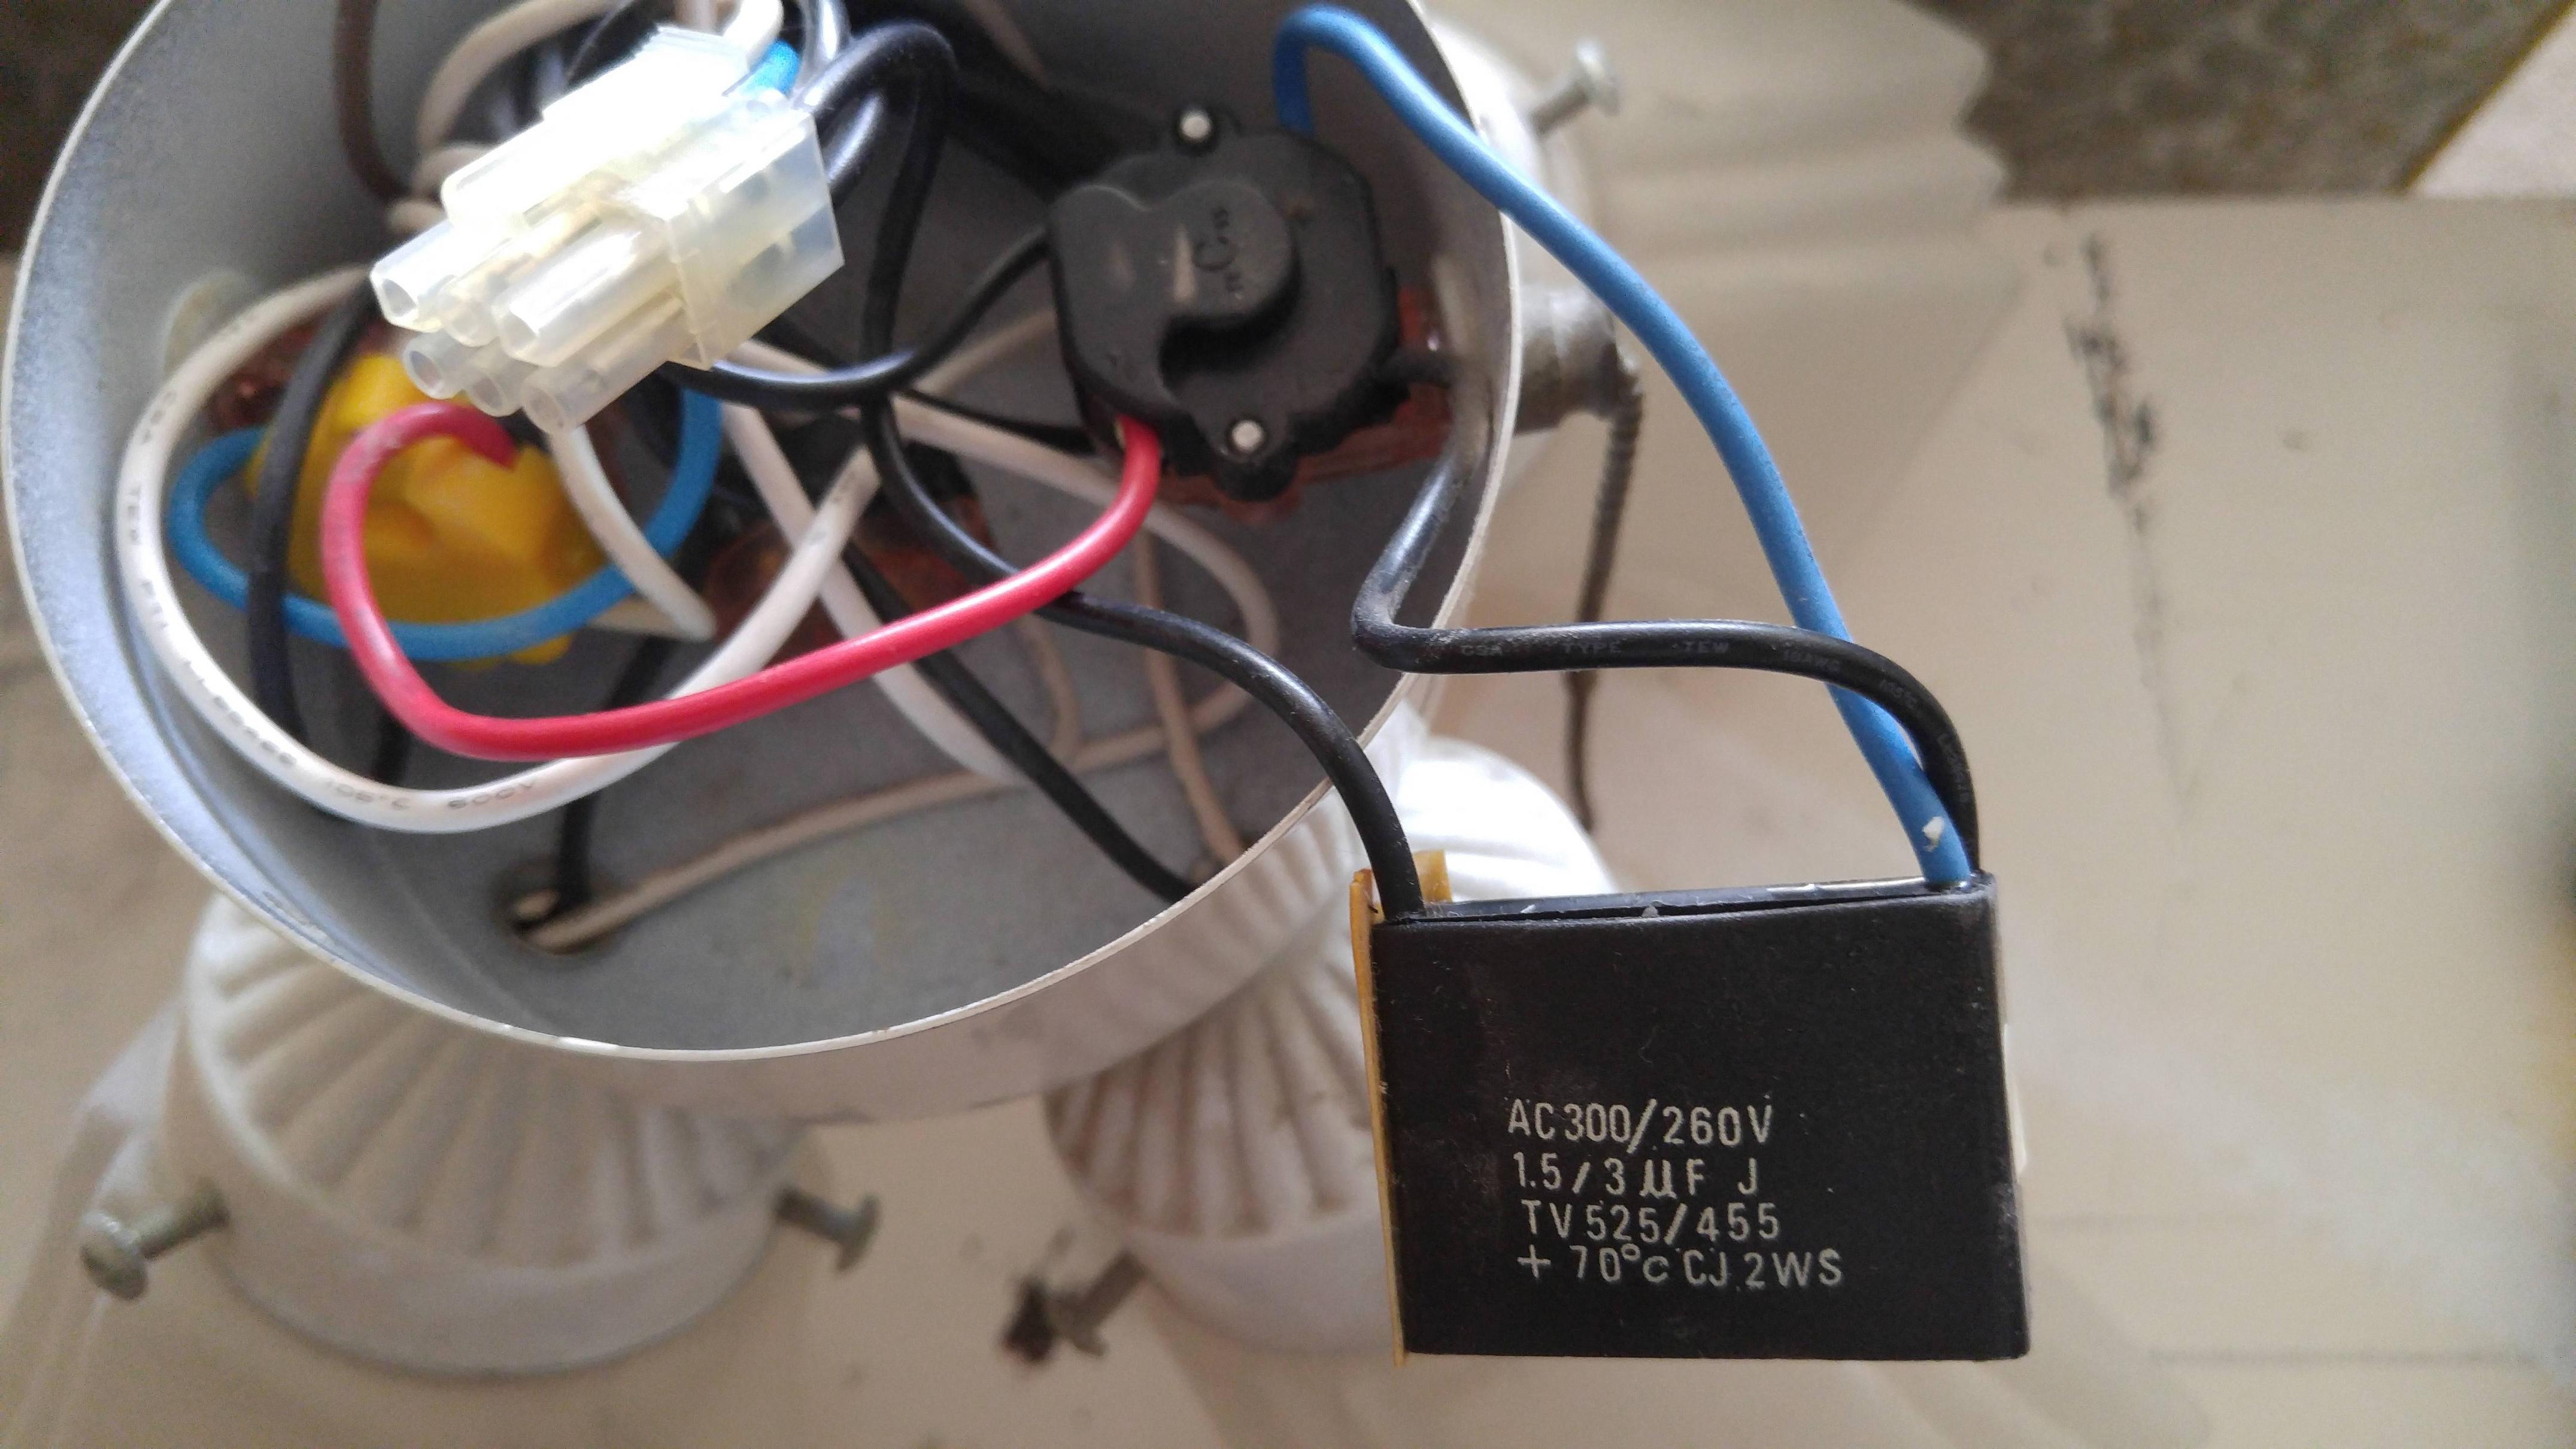
- Identify the wires coming from the attic fan. These wires are typically labeled or color-coded for ease of identification.
- Using wire cutters/strippers, strip approximately 1/2 inch of insulation off the ends of the fan wires to expose the bare copper conductors.
- Insert the stripped ends of the fan wires into the corresponding wiring terminals on the thermostat base. Match the colors or labels on the wiring terminals and fan wires to ensure correct connections.
- Tighten the terminal screws securely to establish a reliable connection between the fan and thermostat.
- Next, identify the wires coming from the power source or electrical junction box. These wires will provide the electrical supply to the attic fan and thermostat.
- Using wire cutters/strippers, strip approximately 1/2 inch of insulation off the ends of the power source wires to expose the bare copper conductors.
- Connect the power source wires to the corresponding wiring terminals on the thermostat base, following the color or labeling scheme.
- Secure the terminal screws tightly to establish a secure connection between the power source and thermostat.
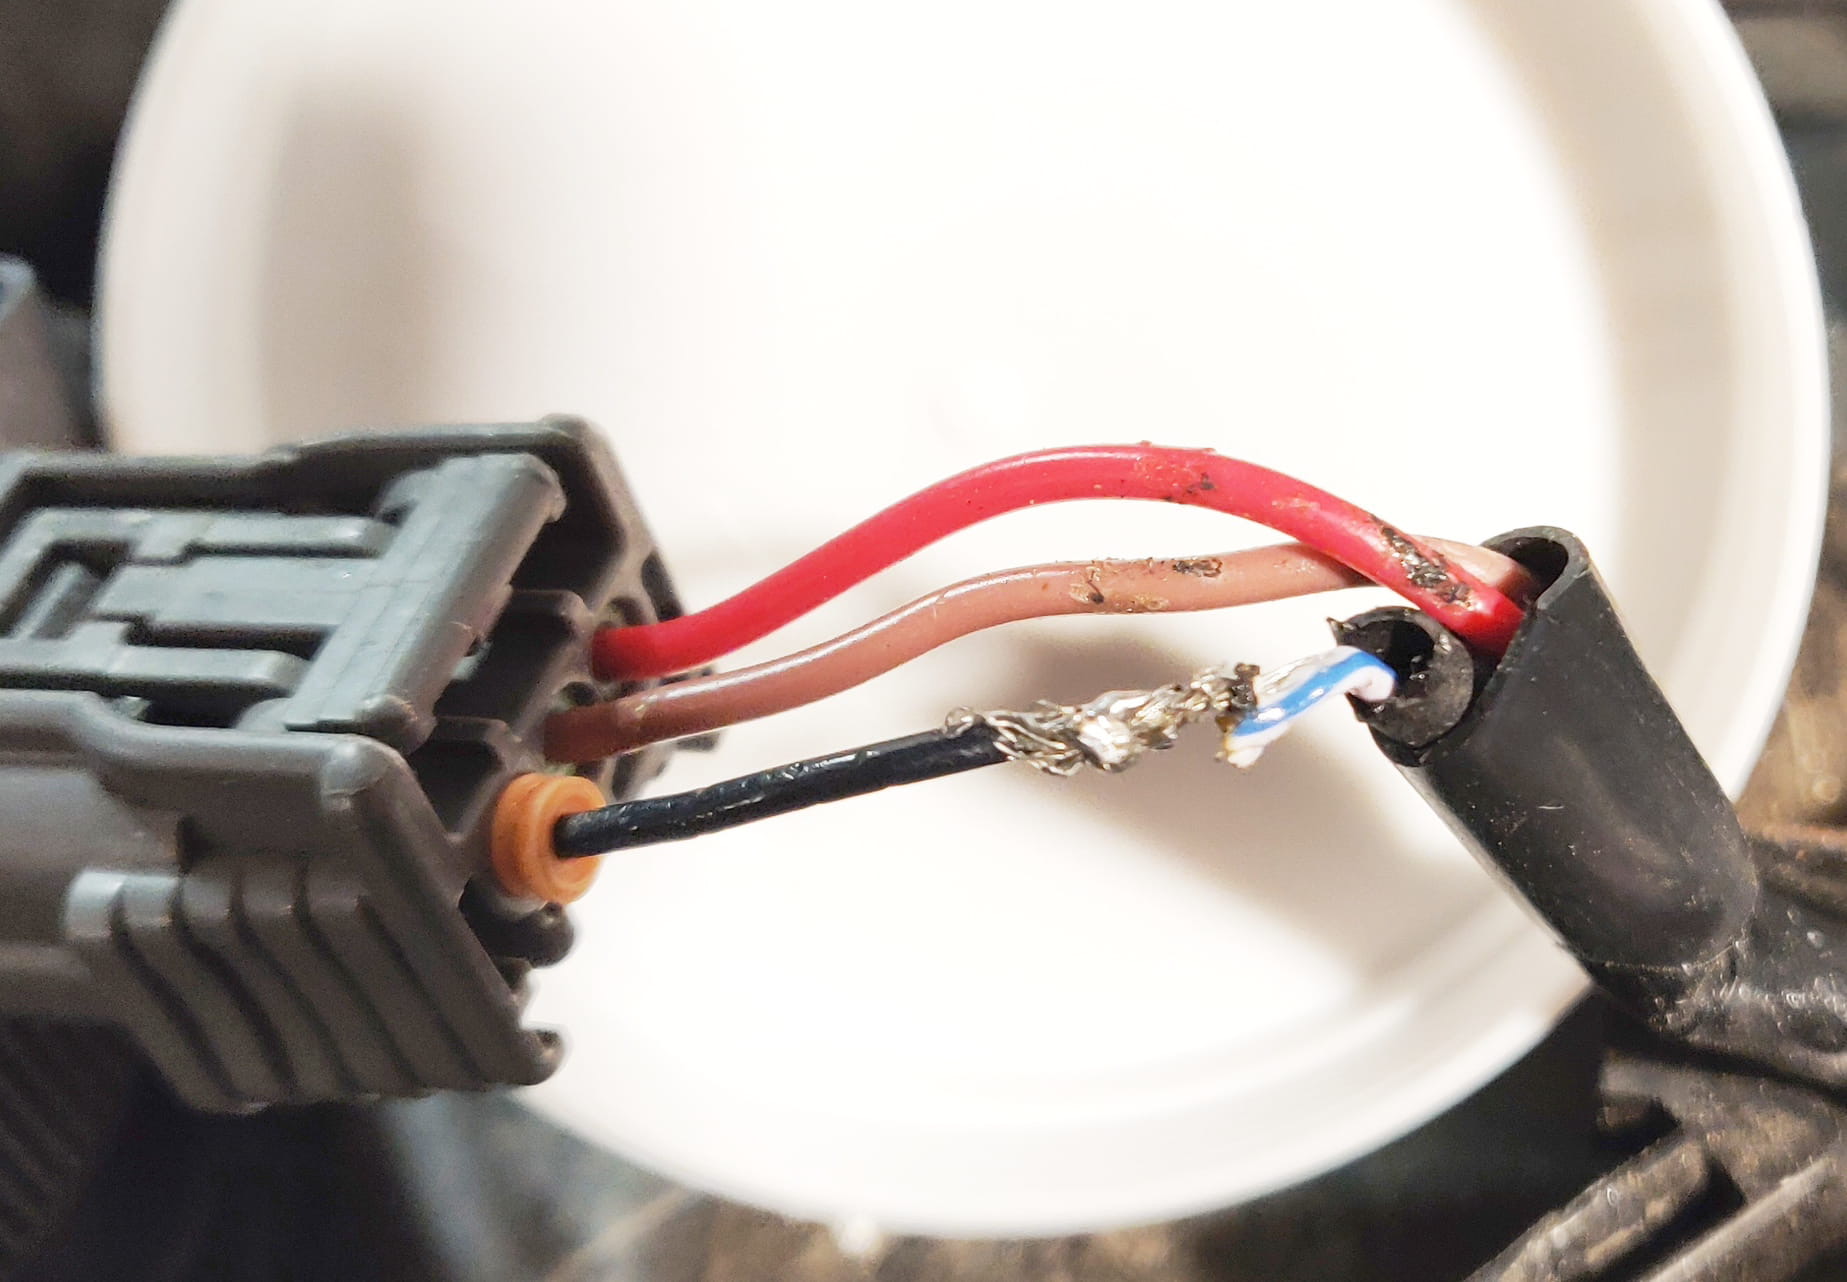
- Finally, double-check all the wire connections to ensure they are properly secured and there are no loose or exposed wires.
It is crucial to ensure all the connections are made correctly and securely to avoid any electrical hazards or malfunctions. If you are unsure about any of the connections, refer to the manufacturer’s instructions or consult a professional electrician for guidance.
With the wires connected, you are now ready to proceed to the next step and mount the attic fan.
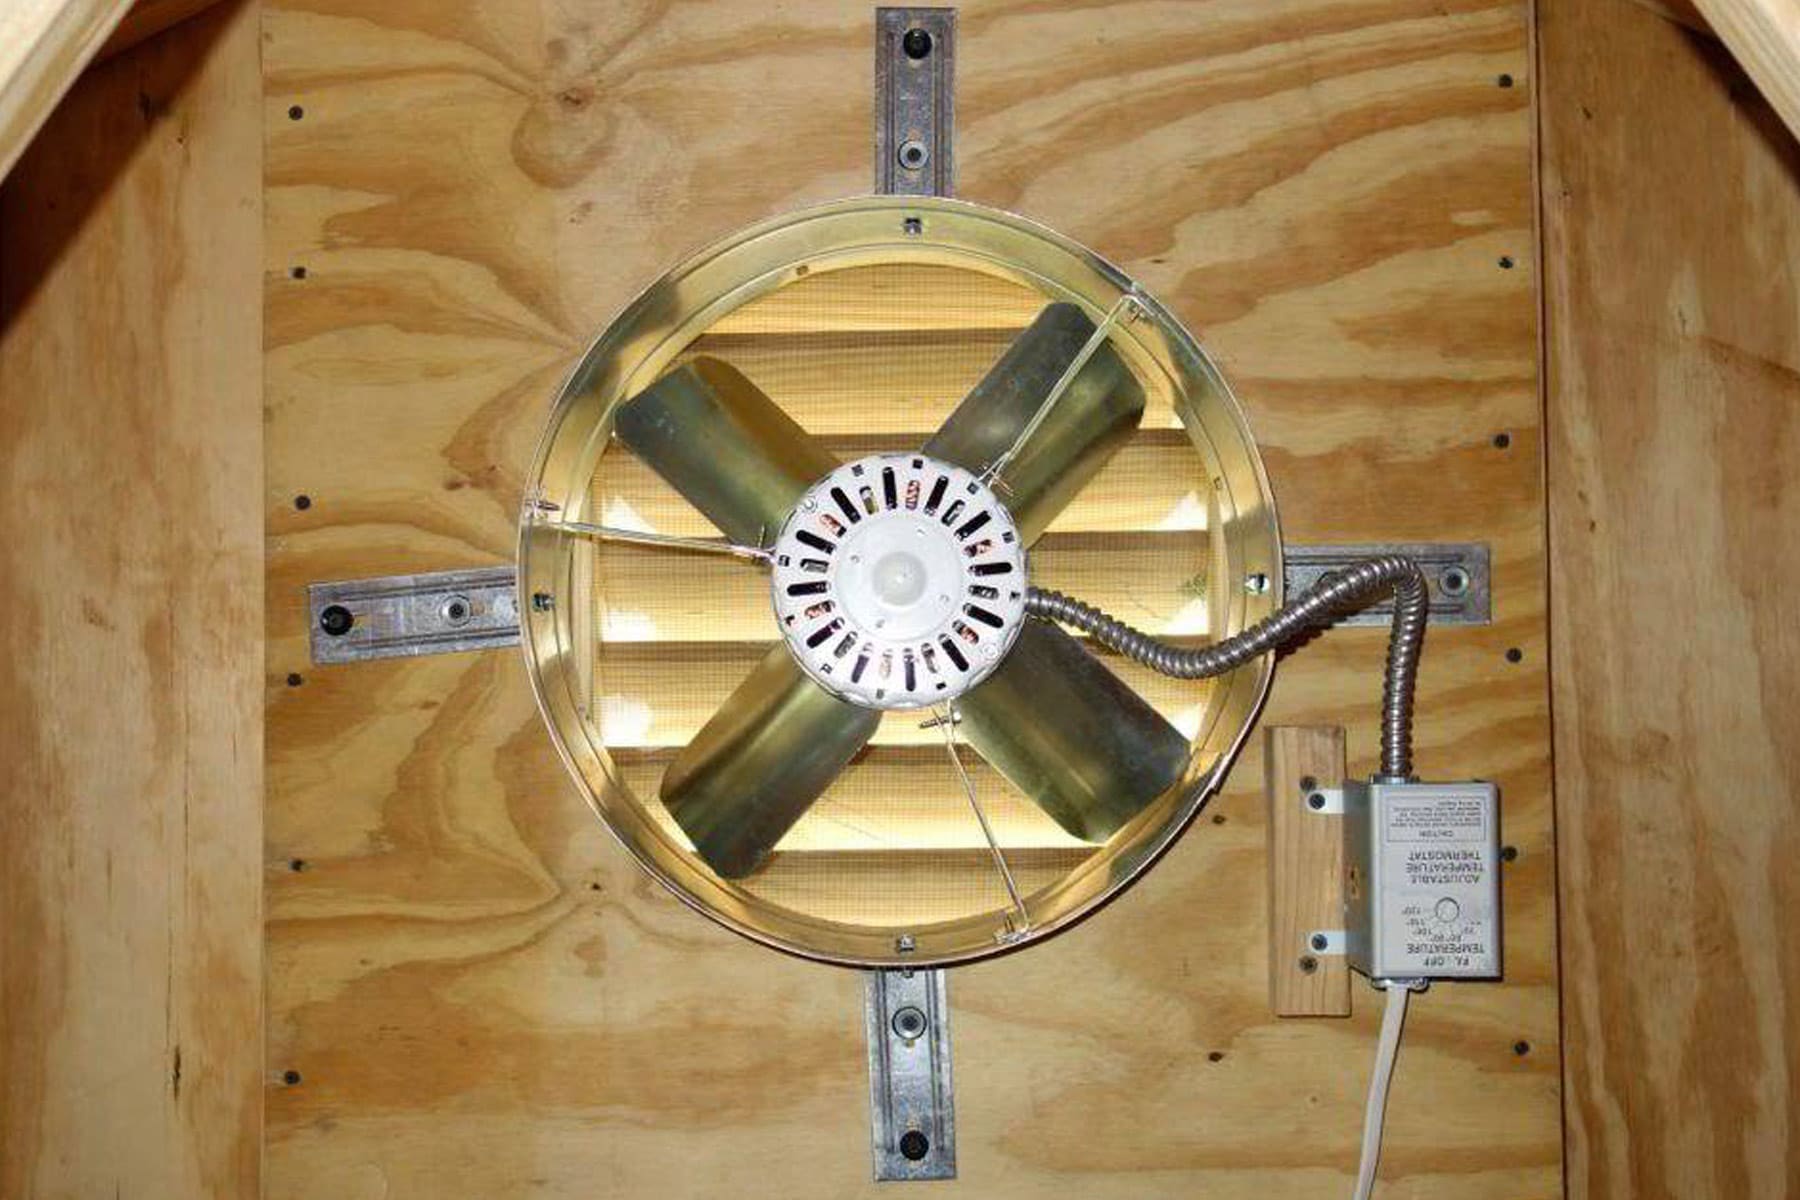
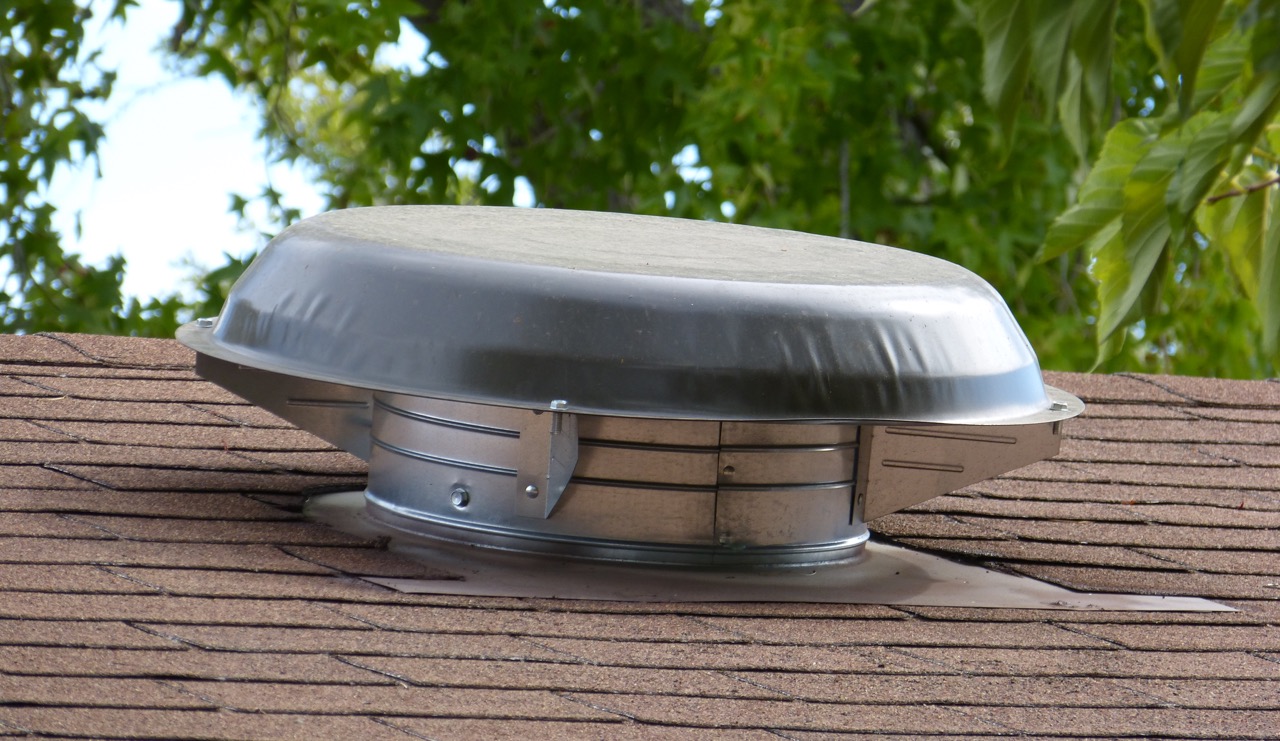
Step 6: Mount the attic fan
Mounting the attic fan is an important step in the installation process. Properly securing the fan ensures its stability and efficient operation. Follow these steps to mount the attic fan:
- Choose the desired location for the attic fan in your attic. Consider factors such as ventilation needs and accessibility.
- If necessary, mark the location with a pencil or marker to ensure accurate placement.
- Using a drill and appropriate drill bit, create pilot holes at the marked locations. Ensure the pilot holes are large enough to accommodate the mounting screws provided with the attic fan.
- Position the attic fan over the pilot holes and align it with the markings or guidelines.
- Using the provided screws, secure the attic fan to the ceiling or wall, making sure it is securely fastened.
- Check the fan for stability and adjust if necessary.
- If the attic fan requires any additional support brackets or hardware, refer to the manufacturer’s instructions for proper installation.
- Double-check all the connections and ensure there are no loose wires or components.
It is important to follow the manufacturer’s instructions when mounting the attic fan, as different models may have specific requirements and guidelines. If you are unsure about any step of the installation process, consult the manufacturer’s documentation or seek the help of a professional electrician.
With the attic fan securely mounted, you are now ready for the final step: testing the attic fan and thermostat before completing the installation.
Step 7: Test the attic fan and thermostat
Before considering the installation process complete, it is important to test the attic fan and thermostat to ensure they are functioning properly. By conducting a test, you can identify any potential issues or adjustments that may be needed. Follow these steps to test the attic fan and thermostat:
- Make sure the power supply to the attic fan and thermostat is turned on.
- Adjust the thermostat to the desired temperature setting, ensuring it is within the recommended operating range of the attic fan.
- Observe the attic fan to see if it turns on when the temperature reaches the set threshold. The fan should start spinning once the temperature exceeds the set point.
- Allow the attic fan to run for a sufficient amount of time to ensure it is operating smoothly and effectively.
- Check the thermostat to ensure it accurately displays the current temperature and responds promptly to changes.
- If the attic fan and thermostat are not functioning as expected, check for loose connections or any wiring issues. Refer to the manufacturer’s instructions or consult a professional if necessary.
- Once you have confirmed that the attic fan and thermostat are operating correctly, you can consider the installation process complete.
Regularly monitor the attic fan and thermostat to ensure they continue to function properly. If you encounter any issues or unusual behavior, address them promptly to prevent any further complications.
Remember, safety should always be a priority when working with electrical components. If you are unsure about any part of the installation or testing process, it is recommended to consult a professional electrician for assistance.
Congratulations! You have successfully wired an attic fan with a thermostat, enhancing the ventilation and temperature control in your attic space.
Conclusion
Wiring an attic fan with a thermostat can greatly improve the airflow and temperature regulation in your attic space. By following the steps outlined in this guide and carefully connecting the necessary wires, you can create a more comfortable and energy-efficient environment.
Throughout this article, we have covered the essential steps to wire an attic fan with a thermostat, including gathering the necessary tools and materials, turning off the power, locating the electrical junction box, installing the thermostat, connecting the wires, mounting the attic fan, and testing the system.
It is important to emphasize the significance of prioritizing safety when working with electrical components. If you feel unsure or uncomfortable about any step of the installation process, it is always recommended to seek the assistance of a professional electrician.
Once the installation is complete and the attic fan and thermostat are properly connected and functioning, you can enjoy the benefits of improved ventilation and temperature control in your attic. This can lead to reduced energy costs, prevention of moisture damage, and an overall healthier living environment.
Remember to regularly maintain and monitor your attic fan and thermostat to ensure they continue to operate efficiently. Address any issues or concerns promptly to prevent potential malfunctions and prolong the lifespan of your equipment.
We hope this guide has provided you with the necessary knowledge and guidance to successfully wire an attic fan with a thermostat. Enjoy the benefits of a well-ventilated and temperature-controlled attic space!
Frequently Asked Questions about How To Wire An Attic Fan With Thermostat
Was this page helpful?
At Storables.com, we guarantee accurate and reliable information. Our content, validated by Expert Board Contributors, is crafted following stringent Editorial Policies. We're committed to providing you with well-researched, expert-backed insights for all your informational needs.


0 thoughts on “How To Wire An Attic Fan With Thermostat”