Home>Home Appliances>Home Automation Appliances>How To Wire An AC Thermostat
Home Automation Appliances
How To Wire An AC Thermostat
Modified: February 18, 2024
Learn how to wire an AC thermostat for your home automation appliances with our step-by-step guide. Ensure efficient temperature control and energy savings.
(Many of the links in this article redirect to a specific reviewed product. Your purchase of these products through affiliate links helps to generate commission for Storables.com, at no extra cost. Learn more)
Introduction
So, you've decided to take control of your home's cooling and heating system by installing a new AC thermostat. Congratulations! This is a great way to increase energy efficiency and customize your indoor climate to suit your preferences. However, before you can start enjoying the benefits of your new thermostat, you'll need to wire it correctly. Don't worry; with a little guidance, you can tackle this task with confidence.
In this comprehensive guide, we'll walk through the process of wiring an AC thermostat, providing you with the knowledge and skills needed to complete the installation successfully. Whether you're replacing an old thermostat or installing a new one for the first time, understanding the wiring process is crucial for ensuring that your HVAC system operates optimally.
Before we dive into the nitty-gritty of wiring, it's essential to have a solid grasp of the basics of AC thermostats. Understanding how thermostats function and the role they play in regulating indoor temperatures will set the stage for a smooth and successful installation process. Additionally, we'll cover the tools and materials you'll need, the step-by-step wiring procedure, and essential tips for testing and troubleshooting your newly installed thermostat.
By the end of this guide, you'll not only have the satisfaction of completing a DIY project but also the confidence that comes with understanding and controlling a vital component of your home's comfort system. Let's embark on this journey to wire your AC thermostat and take control of your indoor climate!
Key Takeaways:
- Takeaway 1: Wiring an AC thermostat empowers you to control your home’s temperature, save energy, and enjoy a comfortable indoor environment. With the right tools and knowledge, you can tackle this DIY project confidently.
- Takeaway 2: Understanding thermostat basics, gathering tools, and following step-by-step wiring instructions are key to successfully installing and troubleshooting your AC thermostat. Enjoy personalized climate control and energy efficiency in your home!
Read more: How To Wire 4-Wire Thermostat
Understanding the Basics of AC Thermostats
An AC thermostat is a device that regulates the temperature of a heating and cooling system in a home or building. It serves as the control center for maintaining a comfortable indoor environment by activating the heating or cooling equipment as needed. Modern thermostats offer a range of features, including programmable schedules, Wi-Fi connectivity, and energy-saving modes, allowing users to customize their HVAC settings for optimal comfort and efficiency.
Thermostats operate based on the principle of temperature sensing and control. When the indoor temperature deviates from the set point, the thermostat triggers the HVAC system to adjust the temperature accordingly. This is achieved through the use of sensors, which detect temperature changes and signal the heating or cooling equipment to activate or deactivate as required.
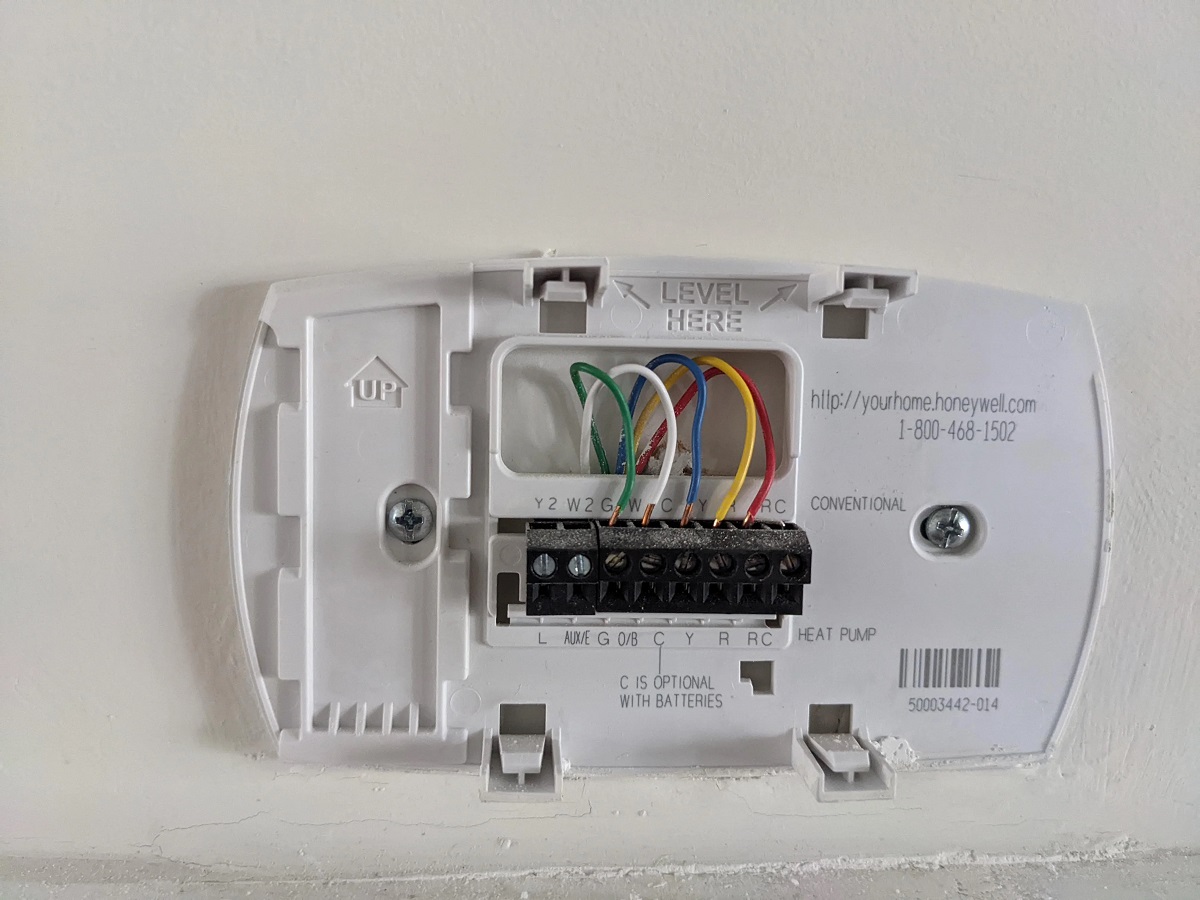
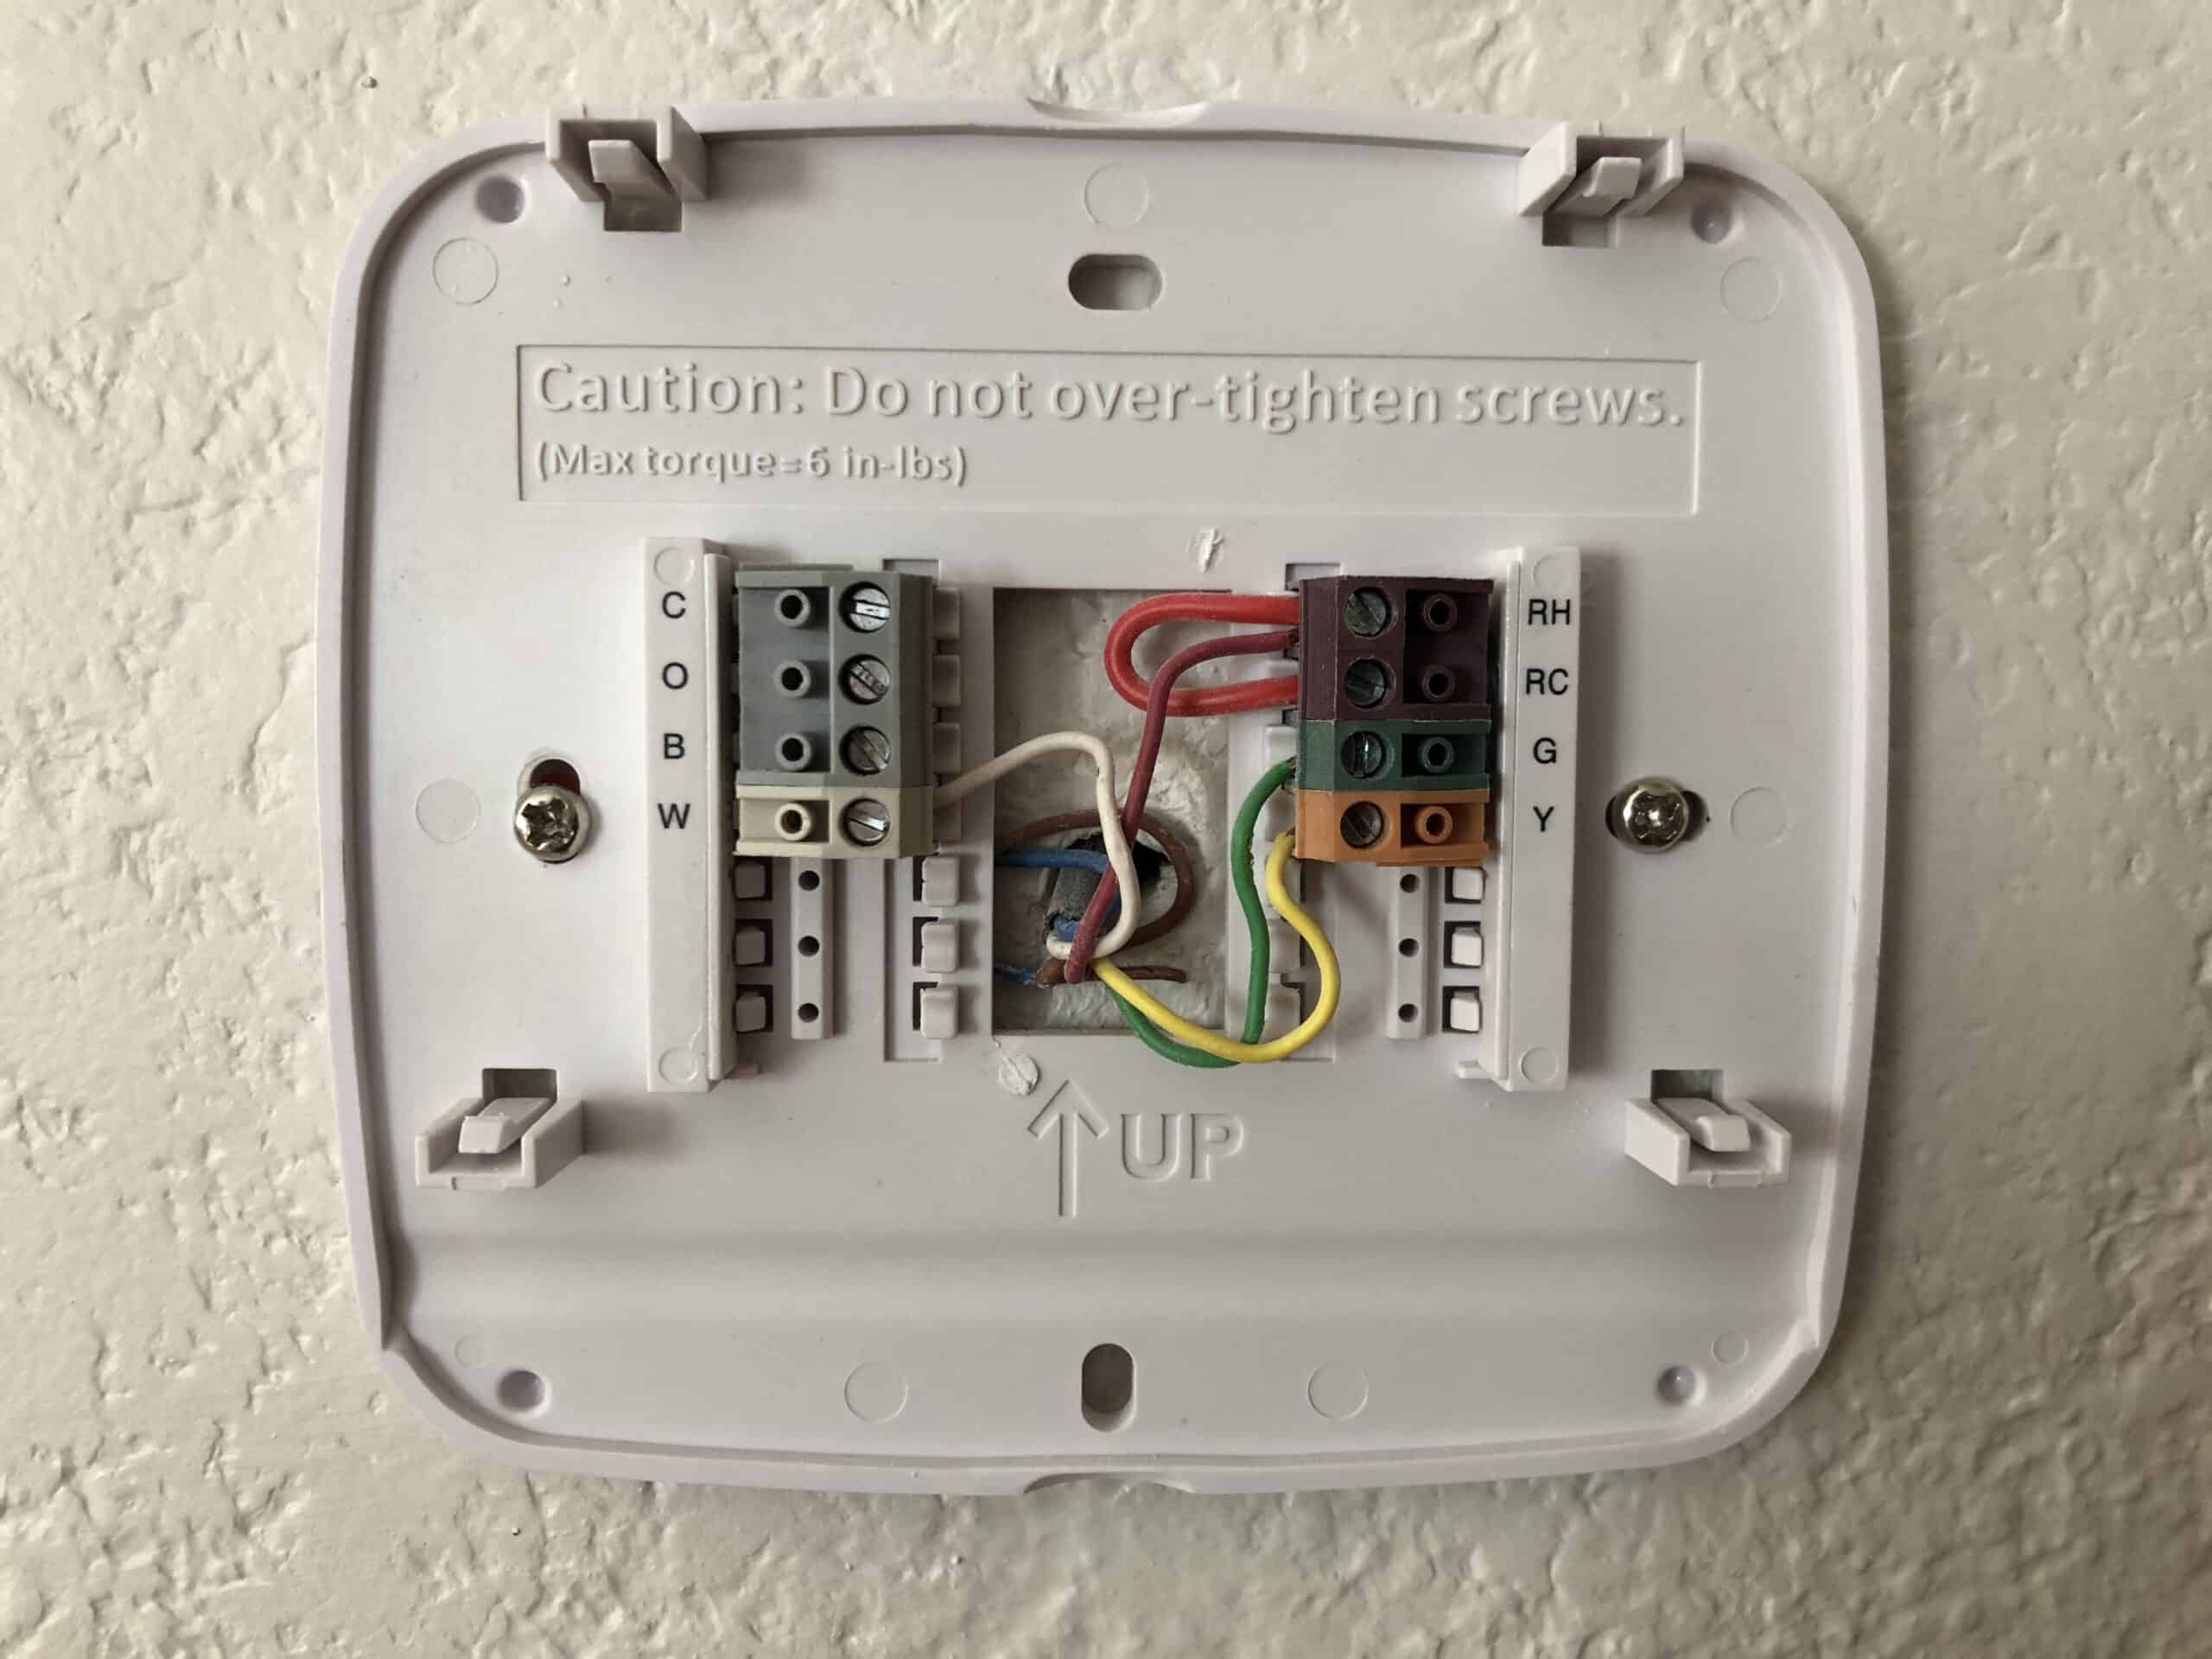
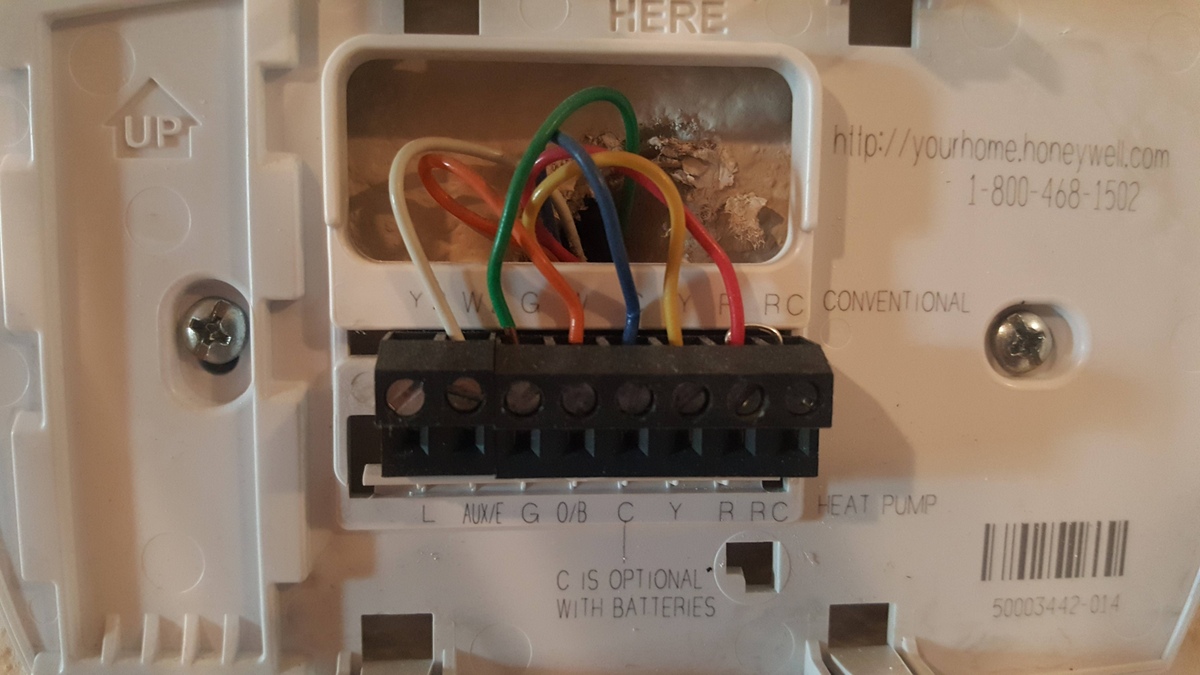
Understanding the wiring and functionality of an AC thermostat is crucial for ensuring that it operates seamlessly with the HVAC system. Thermostats typically consist of several terminals, each designated for specific wires that connect to the heating and cooling equipment. These terminals may include R (power), C (common), W (heat), Y (cooling), G (fan), and others, depending on the thermostat model and system configuration.
It’s important to note that different thermostat models may have varying wiring configurations, so it’s essential to refer to the manufacturer’s instructions and the HVAC system’s wiring diagram to ensure proper compatibility and installation. Additionally, some thermostats may require a power source, often in the form of a common wire (C-wire), to operate certain features such as Wi-Fi connectivity and backlighting.
As technology continues to advance, smart thermostats have become increasingly popular due to their ability to learn user preferences, provide energy usage reports, and be controlled remotely via smartphone apps. These innovative devices offer a user-friendly interface and advanced programming options, making them a valuable addition to modern homes seeking energy efficiency and convenience.
By familiarizing yourself with the fundamental principles of AC thermostats, you’ll gain a deeper appreciation for their role in maintaining indoor comfort and energy efficiency. Armed with this knowledge, you’ll be well-prepared to proceed with the wiring process and take control of your home’s climate regulation.
Tools and Materials Needed
Before you begin the process of wiring an AC thermostat, it’s important to gather the necessary tools and materials to ensure a smooth and efficient installation. Here’s a list of essential items you’ll need:
Tools:
- Screwdriver set: A set of flathead and Phillips head screwdrivers will be necessary for accessing and securing the thermostat and HVAC system wiring.
- Wire strippers: These tools are essential for removing insulation from the ends of the thermostat wires, allowing for proper connections.
- Needle-nose pliers: Useful for bending and shaping wires, as well as securing them to the thermostat terminals.
- Drill and bits (if needed): In some cases, you may need to drill holes for mounting the thermostat base or running wires through walls or conduits.
- Level: Ensures that the thermostat is mounted straight and level for a professional appearance.
- Multimeter: This tool can be used to test for voltage and continuity, providing valuable information during the installation and troubleshooting process.
Materials:
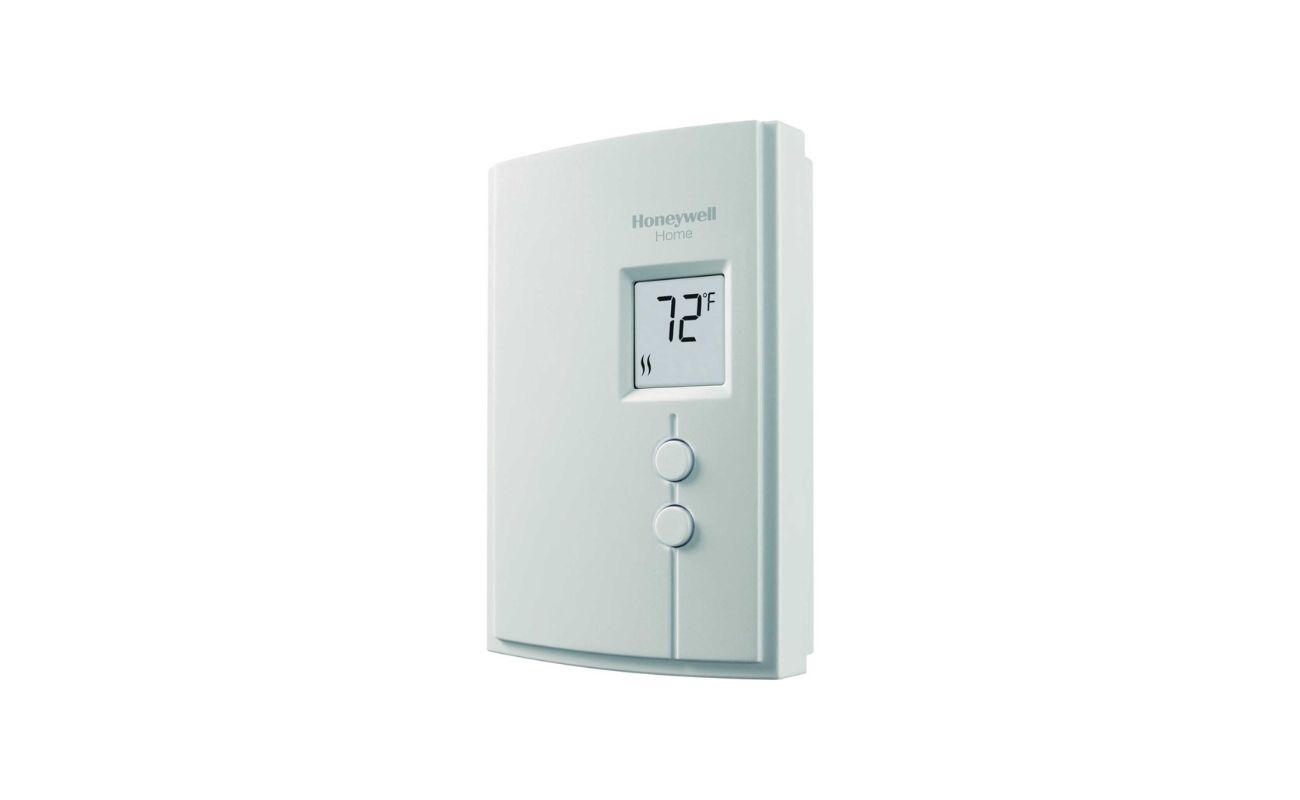
- New thermostat: Select a compatible thermostat that meets your specific heating and cooling system requirements. Consider features such as programmable schedules, Wi-Fi connectivity, and energy-saving modes based on your preferences.
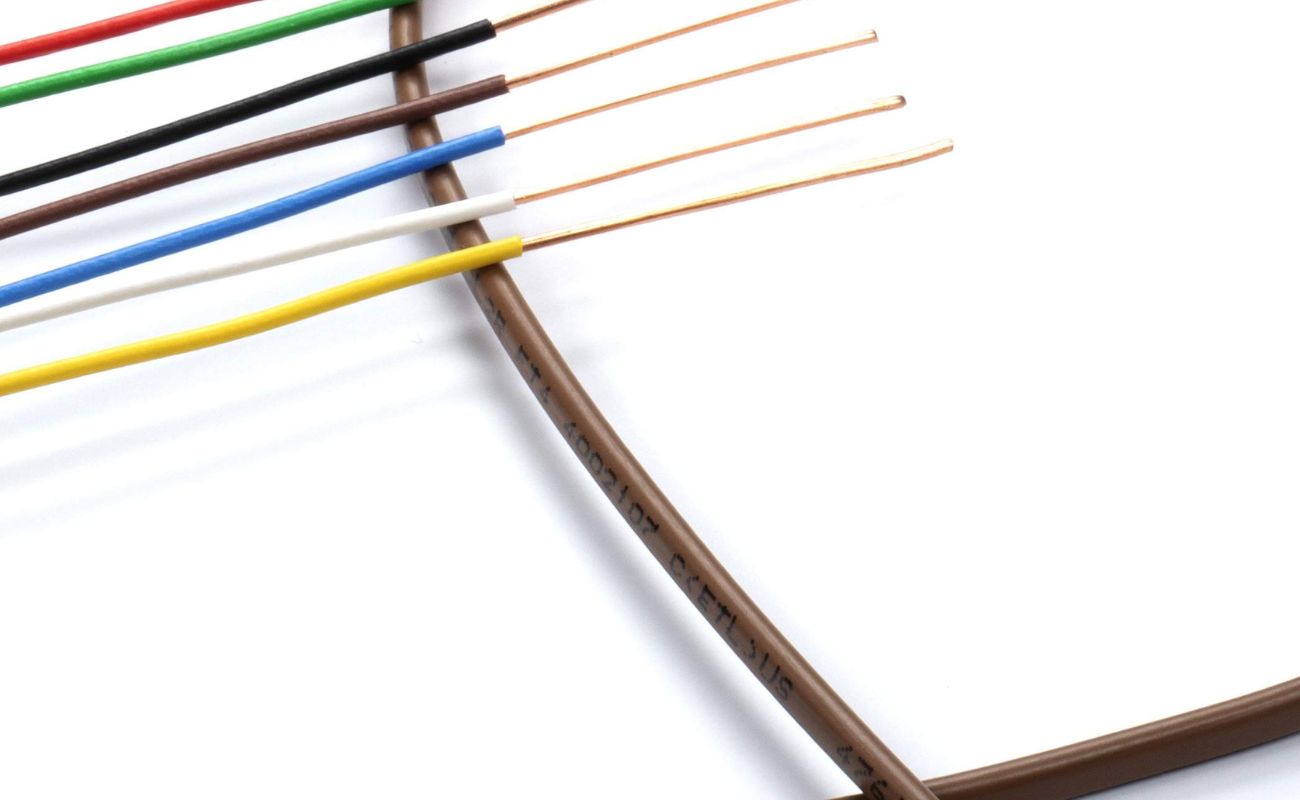
- Thermostat wire: Depending on the existing wiring setup and the new thermostat’s requirements, you may need additional thermostat wire for proper connections. Ensure that the wire gauge and number of conductors meet the specifications of both the thermostat and HVAC system.
- Wall anchors and screws: These are used to securely mount the thermostat base to the wall, providing a stable foundation for the thermostat.
- Labeling materials: It’s helpful to have labels or tape on hand for marking the existing wires during the removal process, ensuring that they are reconnected correctly to the new thermostat.
- Electrical tape: Use electrical tape to secure and insulate wire connections, preventing accidental contact and ensuring safety.
- C-wire adapter (if needed): For thermostats that require a common wire (C-wire) but don’t have one available, a C-wire adapter can be used to provide the necessary power for the thermostat.
By having these tools and materials ready, you’ll be well-prepared to tackle the wiring process with confidence and precision. Additionally, ensuring that you have the correct thermostat and compatible wiring components will contribute to a successful and hassle-free installation.
Read more: How To Wire Up A Thermostat
Steps to Wire an AC Thermostat
Wiring an AC thermostat involves several sequential steps to ensure a proper and functional installation. By following these steps carefully, you can confidently wire your thermostat and take control of your home’s heating and cooling system. Here’s a comprehensive guide to help you through the process:
Step 1: Turn Off Power
Prior to beginning any work on the thermostat or HVAC system, it’s crucial to turn off the power at the circuit breaker to prevent electrical hazards. This ensures a safe working environment as you proceed with the installation.
Step 2: Remove Existing Thermostat
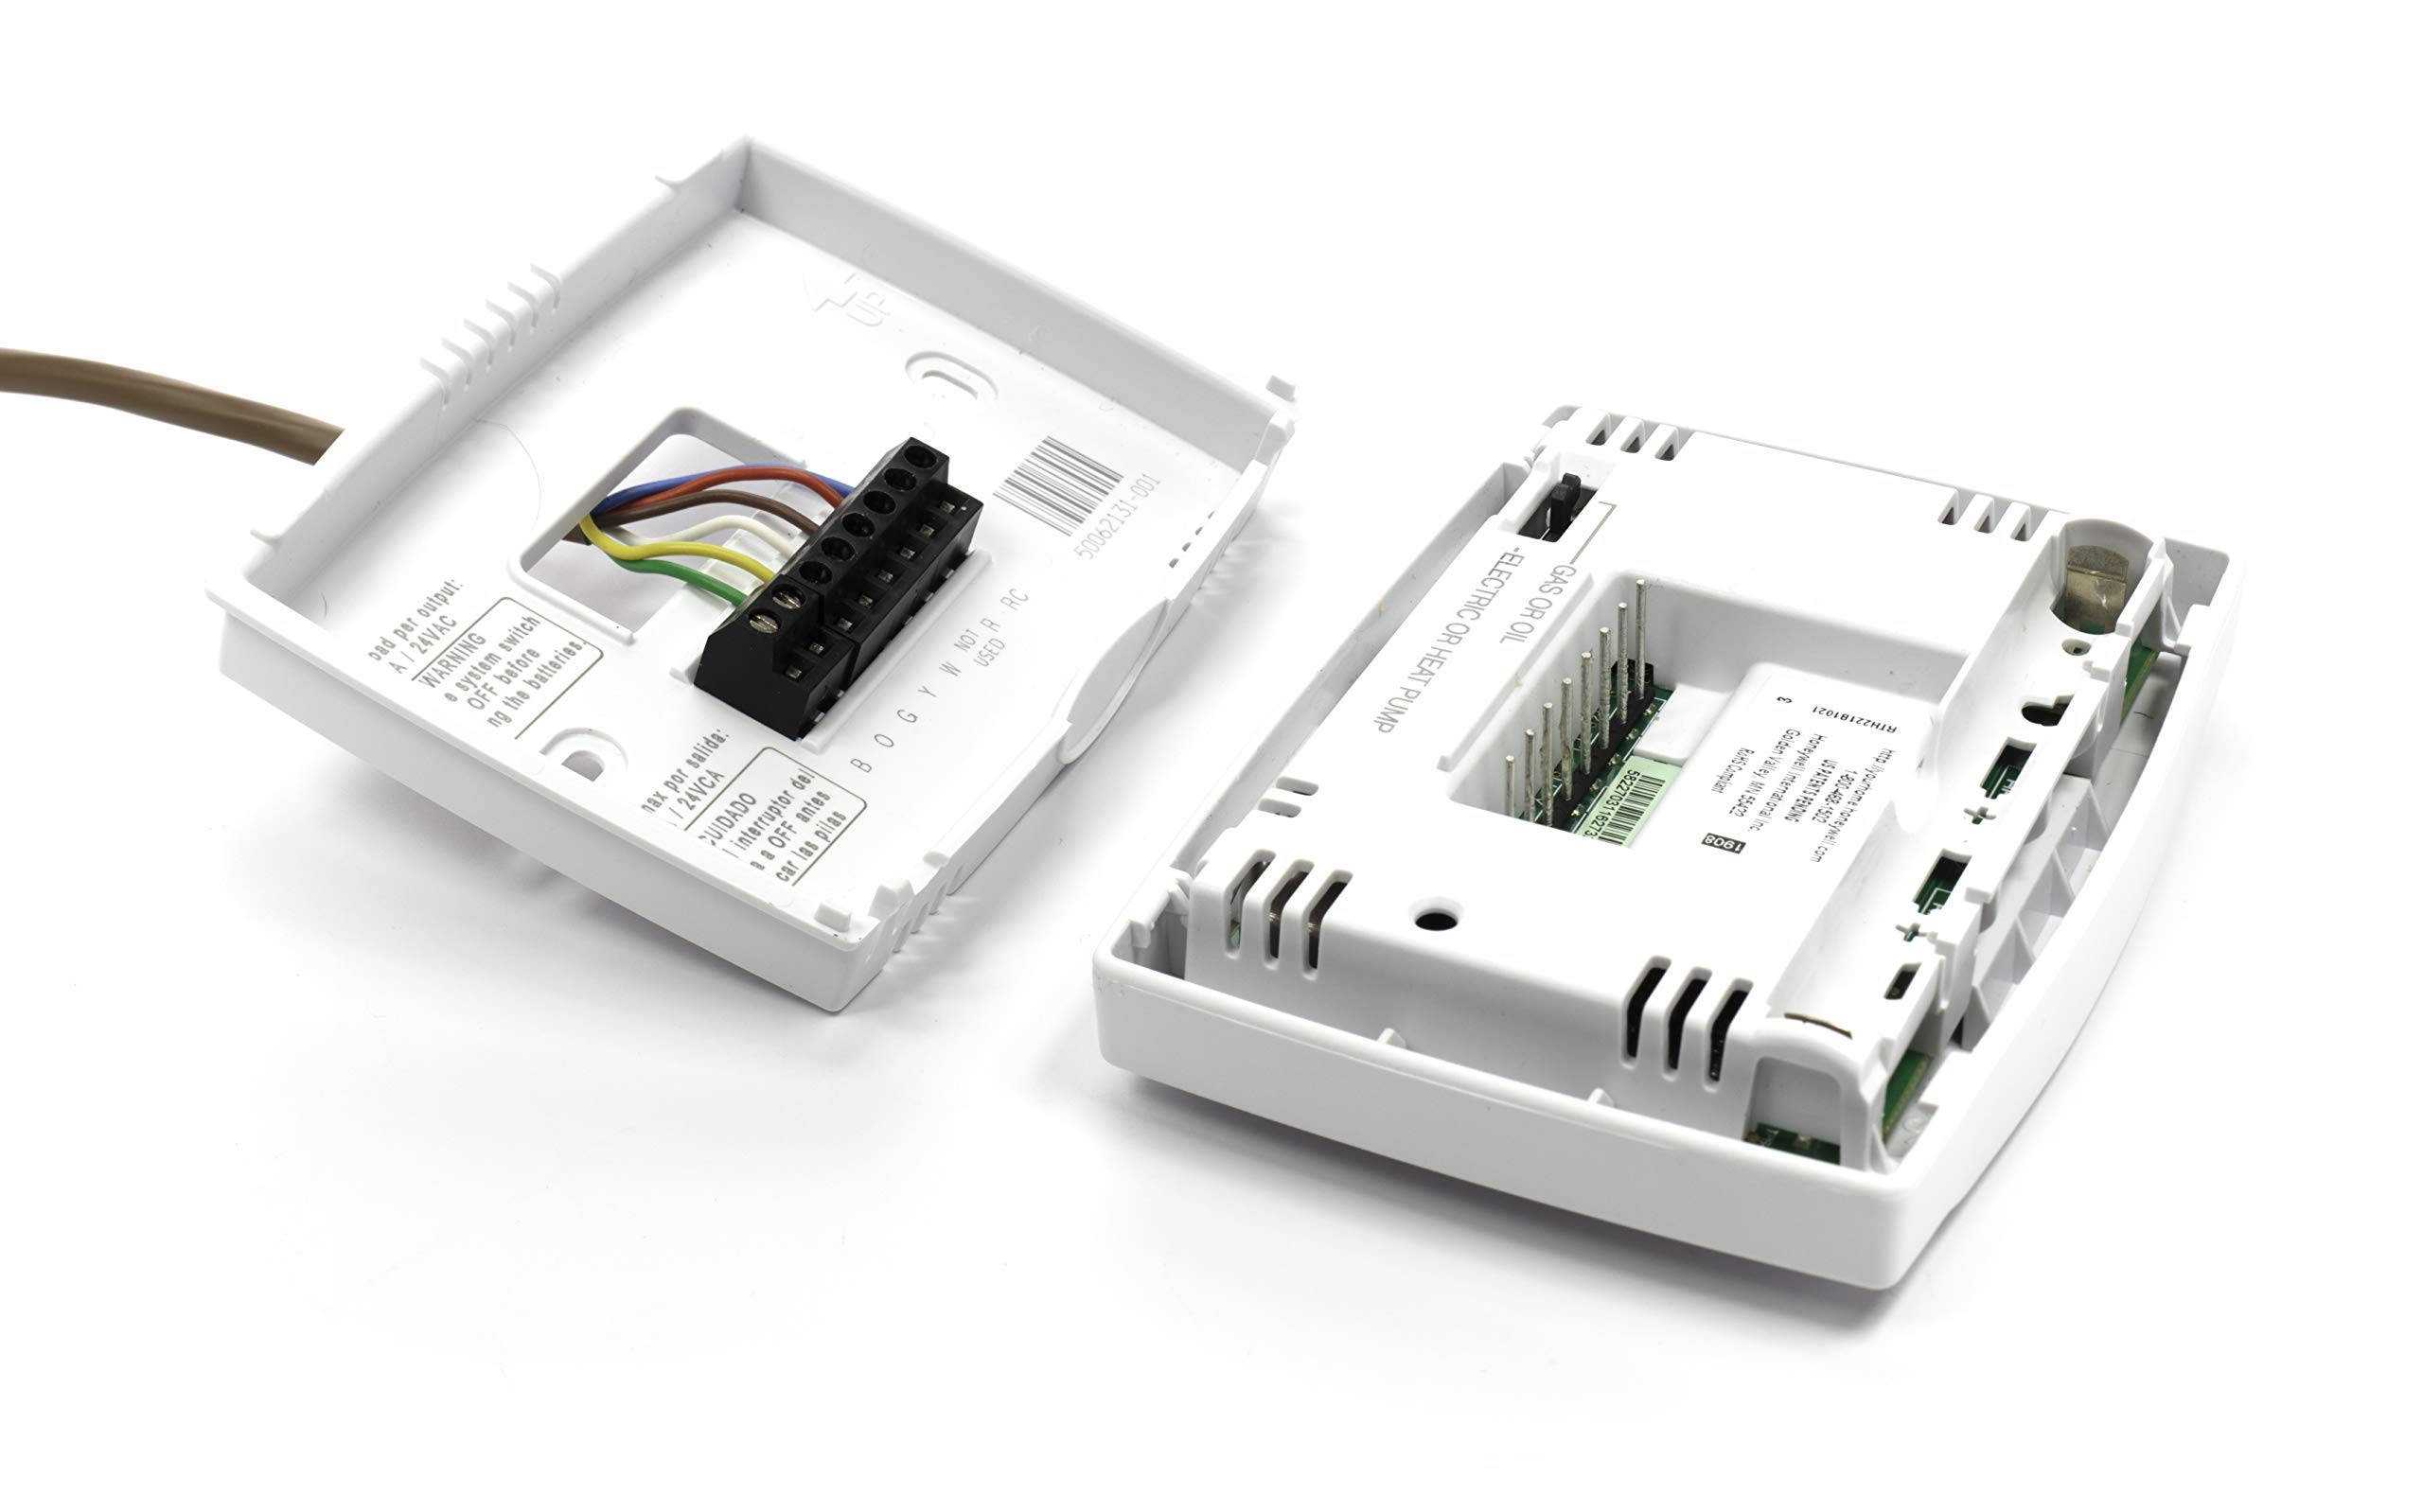
Using a screwdriver, carefully remove the cover of the existing thermostat to access the wiring and mounting base. Take note of the wire connections to the terminals, or use labels to mark each wire according to its terminal designation for reference during the installation of the new thermostat.
Step 3: Mount New Thermostat Base
Position the new thermostat base on the wall at the desired location, ensuring that it is level and securely mounted. Use a drill and appropriate bits, if necessary, to create holes for the mounting screws and anchors. Once the base is in place, feed the thermostat wires through the base and proceed to the wiring process.
Read more: How To Wire An Emerson Thermostat
Step 4: Wire Connections
Refer to the wiring diagram provided with the new thermostat to identify the appropriate terminals for each wire. Use wire strippers to remove a small portion of insulation from the ends of the wires, allowing for proper connections. Securely attach each wire to its designated terminal on the thermostat base, ensuring a snug and reliable connection.
Step 5: Install C-Wire Adapter (If Needed)
If your thermostat requires a common wire (C-wire) for power but your existing wiring setup doesn’t include one, follow the manufacturer’s instructions to install a C-wire adapter. This adapter provides the necessary power for the thermostat to function properly, especially for features such as Wi-Fi connectivity and backlighting.
Step 6: Attach Thermostat to Base
Once the wiring is complete, carefully align the thermostat with the base and secure it in place. Ensure that the thermostat is level and firmly attached, as this will contribute to its overall stability and performance.
Step 7: Restore Power and Test
After verifying that all wire connections are secure and the thermostat is properly mounted, restore power at the circuit breaker to activate the HVAC system. Test the thermostat by setting the desired temperature and observing the system’s response. Verify that the heating and cooling equipment activates as expected based on the thermostat’s settings.
Read more: How To Wire An AC Disconnect
Step 8: Program and Customize Settings
Once the thermostat is wired and functioning correctly, take the time to program any desired schedules, set temperature preferences, and explore additional features offered by the thermostat. Familiarize yourself with the user interface and adjust settings to optimize comfort and energy efficiency in your home.
By following these step-by-step instructions, you can confidently wire your AC thermostat and enjoy the benefits of personalized climate control in your home. Remember to refer to the manufacturer’s guidelines and consult a professional if you encounter any challenges during the installation process.
Testing and Troubleshooting
After wiring your AC thermostat, it’s essential to perform thorough testing to ensure that the system operates as intended. Additionally, being prepared to troubleshoot any potential issues will contribute to a successful installation and optimal performance. Here’s a guide to testing and troubleshooting your newly wired thermostat:
Testing the Thermostat
Once the thermostat is wired and powered on, perform the following tests to verify its functionality:
- Temperature Control: Set the thermostat to a desired temperature and observe the heating or cooling equipment’s response. Ensure that the system activates and maintains the set temperature within a reasonable range.
- Fan Operation: Test the fan setting on the thermostat to verify that the HVAC system’s fan activates and circulates air as expected.
- Programmable Features: If your thermostat offers programmable schedules or other advanced features, program different settings to confirm that the thermostat operates according to your preferences.
- Wi-Fi Connectivity (if applicable): If your thermostat is equipped with Wi-Fi connectivity, ensure that it successfully connects to your home network and allows for remote control via a smartphone app or web interface.
Troubleshooting Common Issues
If you encounter any issues during testing, consider the following troubleshooting steps to address potential problems:
- Check Wire Connections: Verify that all wires are securely connected to the correct terminals on the thermostat base. Loose or incorrect connections can disrupt the system’s operation.
- Inspect Power Source: If the thermostat is not receiving power or displaying an error message, ensure that the C-wire adapter (if used) is properly installed and providing the necessary power for the thermostat.
- Verify Compatibility: Confirm that the thermostat is compatible with your HVAC system and that the wiring configuration matches the manufacturer’s specifications. Refer to the thermostat’s manual and the HVAC system’s wiring diagram for guidance.
- Reset and Reconfigure: If the thermostat exhibits erratic behavior or malfunctions, consider performing a factory reset and reconfiguring the settings to eliminate any software-related issues.
- Consult Professional Help: If troubleshooting steps do not resolve the issues, consider seeking assistance from a qualified HVAC technician or the thermostat manufacturer’s support team for further diagnosis and resolution.
By conducting thorough testing and being prepared to troubleshoot potential issues, you can ensure that your newly wired AC thermostat operates reliably and effectively. Remember that proper installation and attention to detail are key to maximizing the benefits of a well-functioning thermostat in your home.
Read more: What Is The Orange Wire On A Thermostat
Conclusion
Congratulations on successfully completing the wiring process for your AC thermostat! By following the steps outlined in this guide, you’ve taken a significant step toward enhancing the comfort and energy efficiency of your home’s heating and cooling system. As you reflect on the journey of wiring your thermostat, it’s important to recognize the impact of this DIY project on your daily comfort and overall household energy consumption.
By understanding the basics of AC thermostats, gathering the necessary tools and materials, and diligently following the step-by-step wiring process, you’ve gained valuable insights into a critical component of your home’s climate control system. The knowledge and skills acquired during this installation not only empower you to take control of your indoor environment but also provide a sense of accomplishment and self-sufficiency.
As you test and troubleshoot your newly wired thermostat, remember that occasional challenges are opportunities for learning and improvement. The ability to diagnose and address potential issues demonstrates your commitment to maintaining a well-functioning HVAC system and ensuring the long-term reliability of your thermostat.
Looking ahead, your newly wired AC thermostat offers a range of benefits, including personalized temperature control, energy-saving features, and, if applicable, advanced connectivity options. Whether you’ve opted for a programmable thermostat, a smart Wi-Fi-enabled model, or a basic yet reliable unit, your investment in a modern thermostat reflects your commitment to a comfortable and sustainable home environment.
As you enjoy the convenience and efficiency of your newly installed thermostat, remember to explore its features, program personalized schedules, and leverage its capabilities to optimize your home’s climate control. Embracing the technological advancements and user-friendly interfaces of modern thermostats can significantly enhance your daily comfort while contributing to reduced energy consumption and lower utility costs.
In conclusion, the successful wiring of your AC thermostat marks a significant achievement in your journey toward a more comfortable, energy-efficient home. By embracing the knowledge and skills gained through this process, you’ve not only enhanced your living space but also positioned yourself as a capable steward of your home’s essential systems. As you revel in the benefits of your newly wired thermostat, take pride in your ability to take control of your indoor climate and contribute to a more sustainable and enjoyable living environment.
Frequently Asked Questions about How To Wire An AC Thermostat
Was this page helpful?
At Storables.com, we guarantee accurate and reliable information. Our content, validated by Expert Board Contributors, is crafted following stringent Editorial Policies. We're committed to providing you with well-researched, expert-backed insights for all your informational needs.

0 thoughts on “How To Wire An AC Thermostat”