Home>Home Appliances>Home Automation Appliances>How To Wire Up A Thermostat
Home Automation Appliances
How To Wire Up A Thermostat
Modified: February 18, 2024
Learn how to wire up a thermostat for your home automation appliances with our step-by-step guide. Ensure efficient energy usage and comfort in your home.
(Many of the links in this article redirect to a specific reviewed product. Your purchase of these products through affiliate links helps to generate commission for Storables.com, at no extra cost. Learn more)
**
Introduction
**
Welcome to the world of home automation, where the convenience of modern technology meets the comfort of your living space. One of the key components of a smart home is a thermostat, which allows you to control the temperature of your home with ease and precision. Whether you're upgrading to a new thermostat or installing one for the first time, understanding the wiring process is crucial for ensuring its proper functionality.
In this comprehensive guide, we will delve into the intricacies of thermostat wiring, providing you with the knowledge and confidence to tackle this project. From understanding the different wires to the tools and materials needed, we will walk you through the step-by-step process of wiring up a thermostat. By the end of this journey, you will be well-equipped to harness the full potential of your thermostat, creating a comfortable and energy-efficient environment within your home.
So, grab your tools and let's embark on this enlightening adventure into the realm of thermostat wiring. Whether you're a seasoned DIY enthusiast or a newcomer to the world of home improvement, this guide is designed to empower you with the skills and insights needed to wire up a thermostat like a pro. Let's get started!
Key Takeaways:
- Understanding thermostat wiring is crucial for integrating it with your HVAC system. Different wire colors serve specific functions, enabling precise temperature control and system operation.
- Gathering the right tools and materials, and following the step-by-step wiring process, empowers you to seamlessly integrate your thermostat. Thorough testing ensures its reliable operation for personalized comfort and energy efficiency.
Read more: How To Wire 4-Wire Thermostat
Understanding Thermostat Wiring
Before diving into the practical aspects of wiring up a thermostat, it’s essential to grasp the fundamentals of thermostat wiring. At its core, a thermostat serves as the control center for your heating and cooling system, regulating the temperature to maintain a comfortable indoor environment. Understanding the wiring configuration is crucial for seamlessly integrating the thermostat with your HVAC system.
Thermostat wiring typically consists of various colored wires, each serving a specific function in the heating, ventilation, and air conditioning system. These wires are responsible for transmitting signals between the thermostat and the HVAC equipment, enabling the control of temperature settings and system operation.
The most common types of thermostat wiring systems include the two-wire, four-wire, and five-wire configurations. The two-wire system is commonly found in older heating systems and typically includes a red wire for power and a white wire for heat. In contrast, the four-wire system incorporates additional wires for controlling both heating and cooling systems, while the five-wire system provides extra wires for features such as fan control and power monitoring.
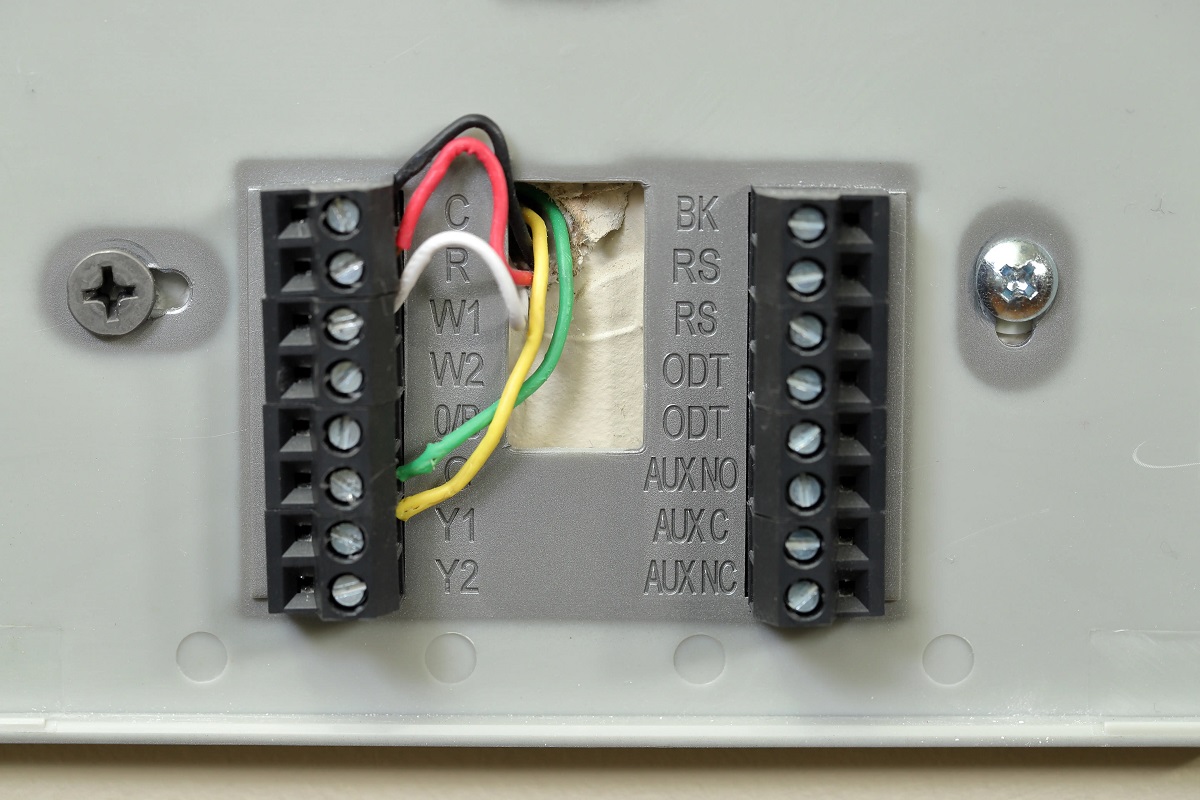
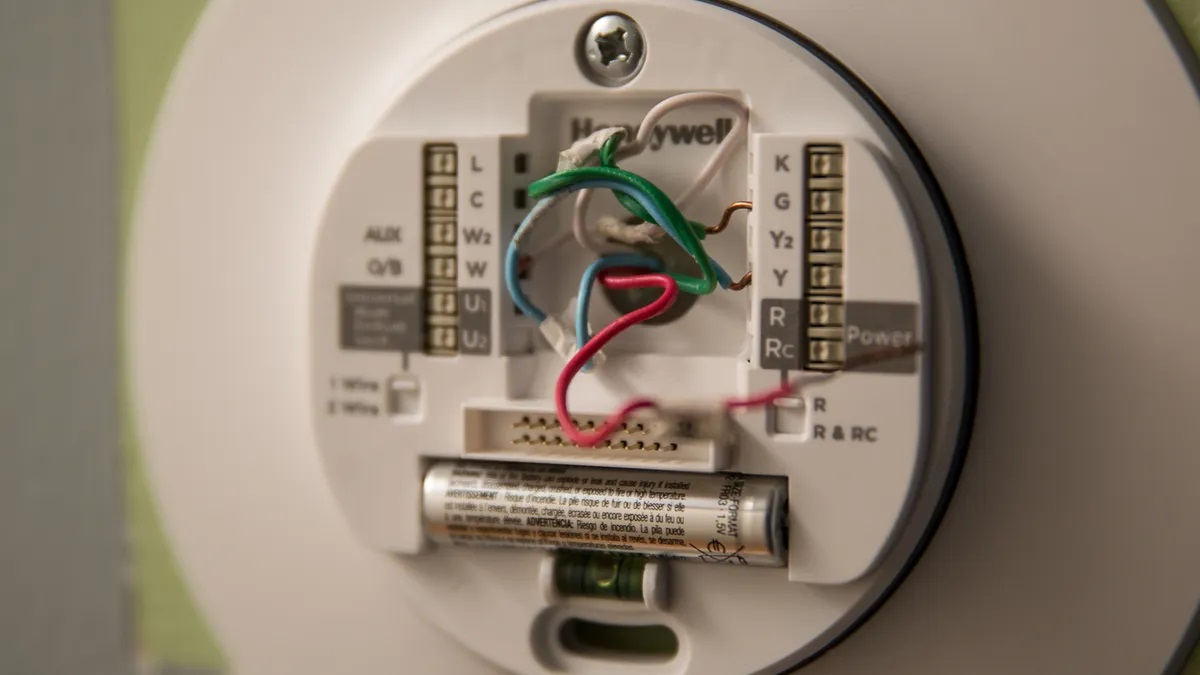
Understanding the function of each wire is integral to the wiring process. The most common wire colors and their functions are as follows:
- Rh or Rc (Red): The red wire serves as the 24-volt hot wire, providing power to the thermostat.
- W (White): This wire controls the heating system, activating the furnace or boiler when the temperature drops below the set threshold.
- Y (Yellow): The yellow wire is responsible for activating the cooling system, signaling the air conditioner to start when the temperature rises above the set level.
- G (Green): This wire controls the fan, initiating its operation to circulate air throughout the home.
- C (Blue): In systems with a common wire, the blue wire provides a continuous power supply to the thermostat, ensuring consistent operation.
By familiarizing yourself with these wire functions, you will gain a comprehensive understanding of how the thermostat interacts with the HVAC system, paving the way for a successful wiring installation.
Now that we’ve laid the groundwork for thermostat wiring, let’s explore the essential tools and materials needed to embark on this wiring journey.
Tools and Materials Needed
As you prepare to wire up a thermostat, it’s essential to gather the necessary tools and materials to ensure a smooth and efficient installation process. Having the right equipment at your disposal will empower you to tackle the task with confidence and precision, setting the stage for a successful integration of the thermostat with your HVAC system.
Here’s a comprehensive list of the tools and materials you’ll need:
Tools:
- Screwdriver Set: A set of screwdrivers, including flathead and Phillips head varieties, will be essential for loosening and tightening terminal screws during the wiring process.
- Wire Strippers: These specialized tools allow you to strip the insulation from the thermostat wires, preparing them for connection to the terminal screws.
- Drill and Bits: In some cases, you may need to drill pilot holes for mounting the thermostat base to the wall, making a drill and appropriate bits indispensable.
- Level: Ensuring that the thermostat base is mounted level is crucial for both aesthetics and proper functionality, making a bubble level a valuable tool for this task.
- Multimeter: This electronic measuring instrument can be used to test the voltage and continuity of the thermostat wires, providing valuable insights into the electrical connections.
Materials:
- Thermostat: Select a thermostat that is compatible with your HVAC system and meets your specific heating and cooling needs. Whether you opt for a programmable, smart, or traditional thermostat, ensure that it aligns with your preferences and system requirements.
- Thermostat Wire: Depending on the wiring configuration of your HVAC system, you may need thermostat wire to establish connections between the thermostat and the HVAC equipment. The gauge and number of wires required will vary based on your system's specifications.
- Anchors and Screws: If your thermostat requires wall mounting, anchors and screws will be necessary for securely affixing the thermostat base to the wall.
- Labels: Using labels to identify the thermostat wires during the installation process can help prevent confusion and ensure accurate connections.
- Electrical Tape: Electrical tape can be used to secure and insulate the exposed portions of the thermostat wires, safeguarding against potential electrical hazards.
By assembling these tools and materials, you’ll be well-prepared to embark on the wiring process, equipped with everything you need to seamlessly integrate the thermostat into your home’s HVAC system. With these resources at your disposal, you’re ready to take the next step and begin wiring up your thermostat.
Read more: How To Wire An Emerson Thermostat
Steps to Wire Up a Thermostat
Now that you’ve familiarized yourself with thermostat wiring and gathered the necessary tools and materials, it’s time to embark on the step-by-step process of wiring up your thermostat. By following these clear and concise steps, you’ll be able to seamlessly integrate the thermostat with your HVAC system, setting the stage for precise temperature control and enhanced comfort within your home.
Step 1: Turn Off Power
Before beginning the wiring process, it’s crucial to turn off the power to your HVAC system at the circuit breaker. This precautionary measure will ensure a safe and secure environment for working with the thermostat wiring.
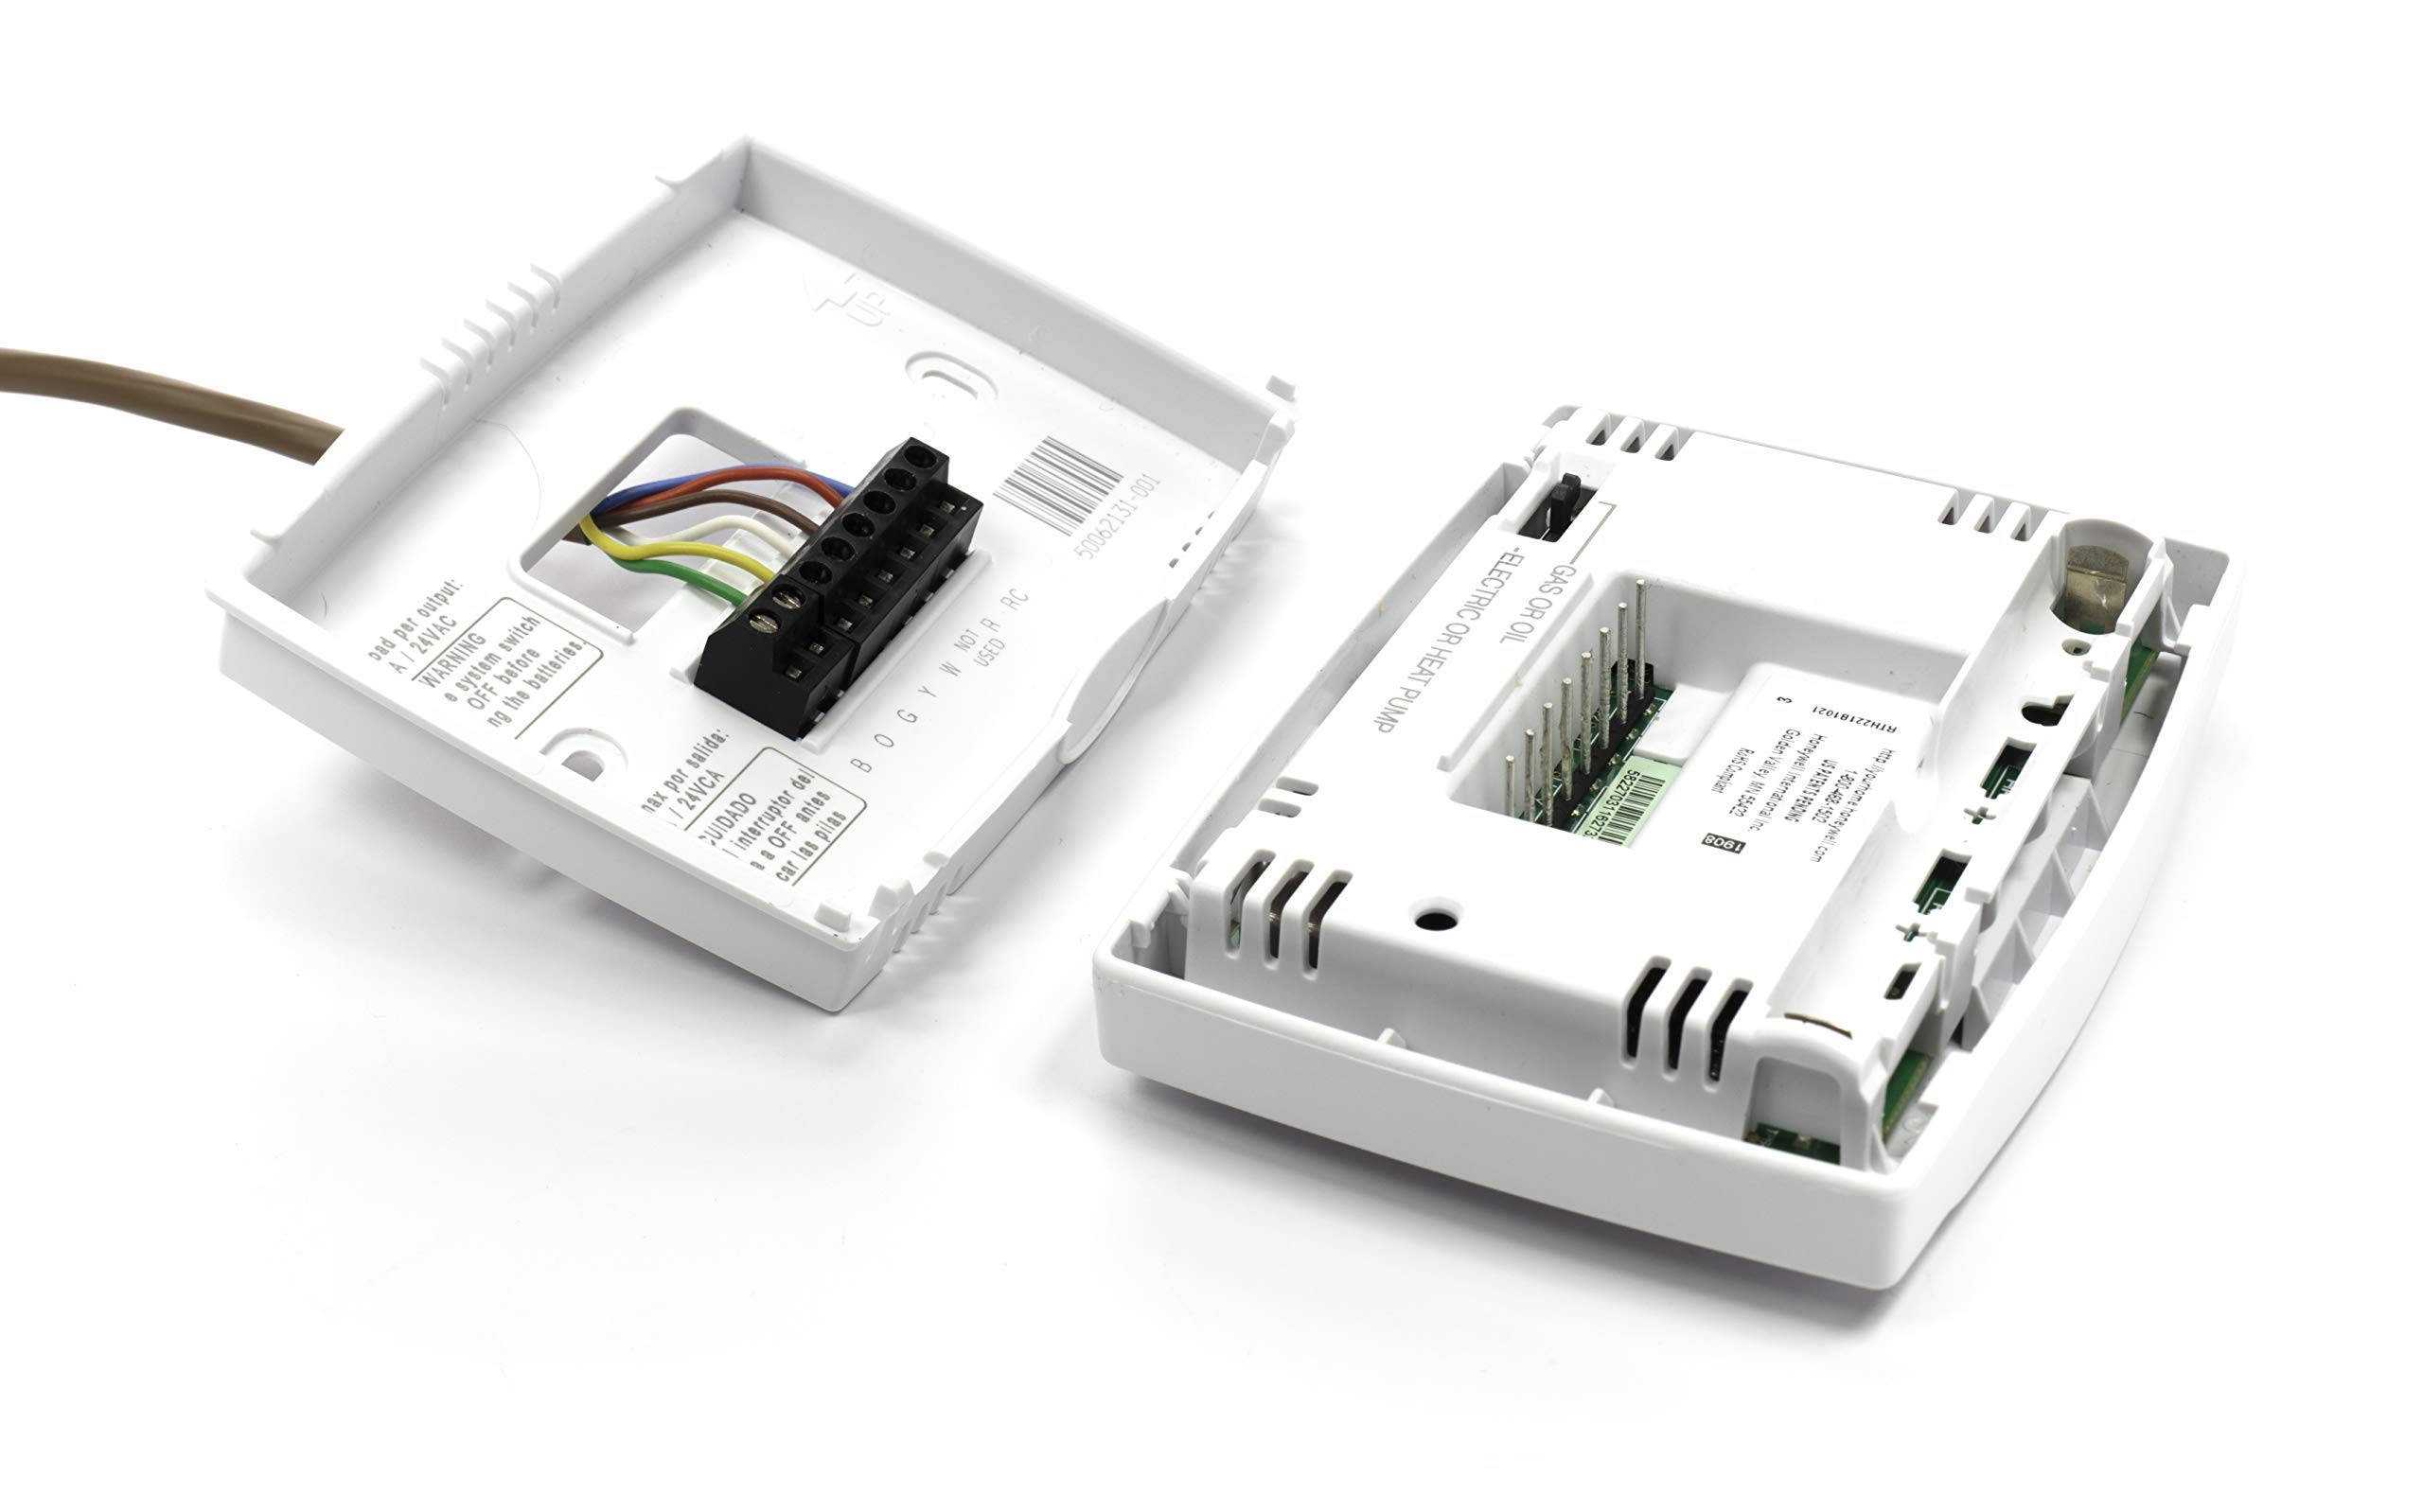
Step 2: Remove Old Thermostat
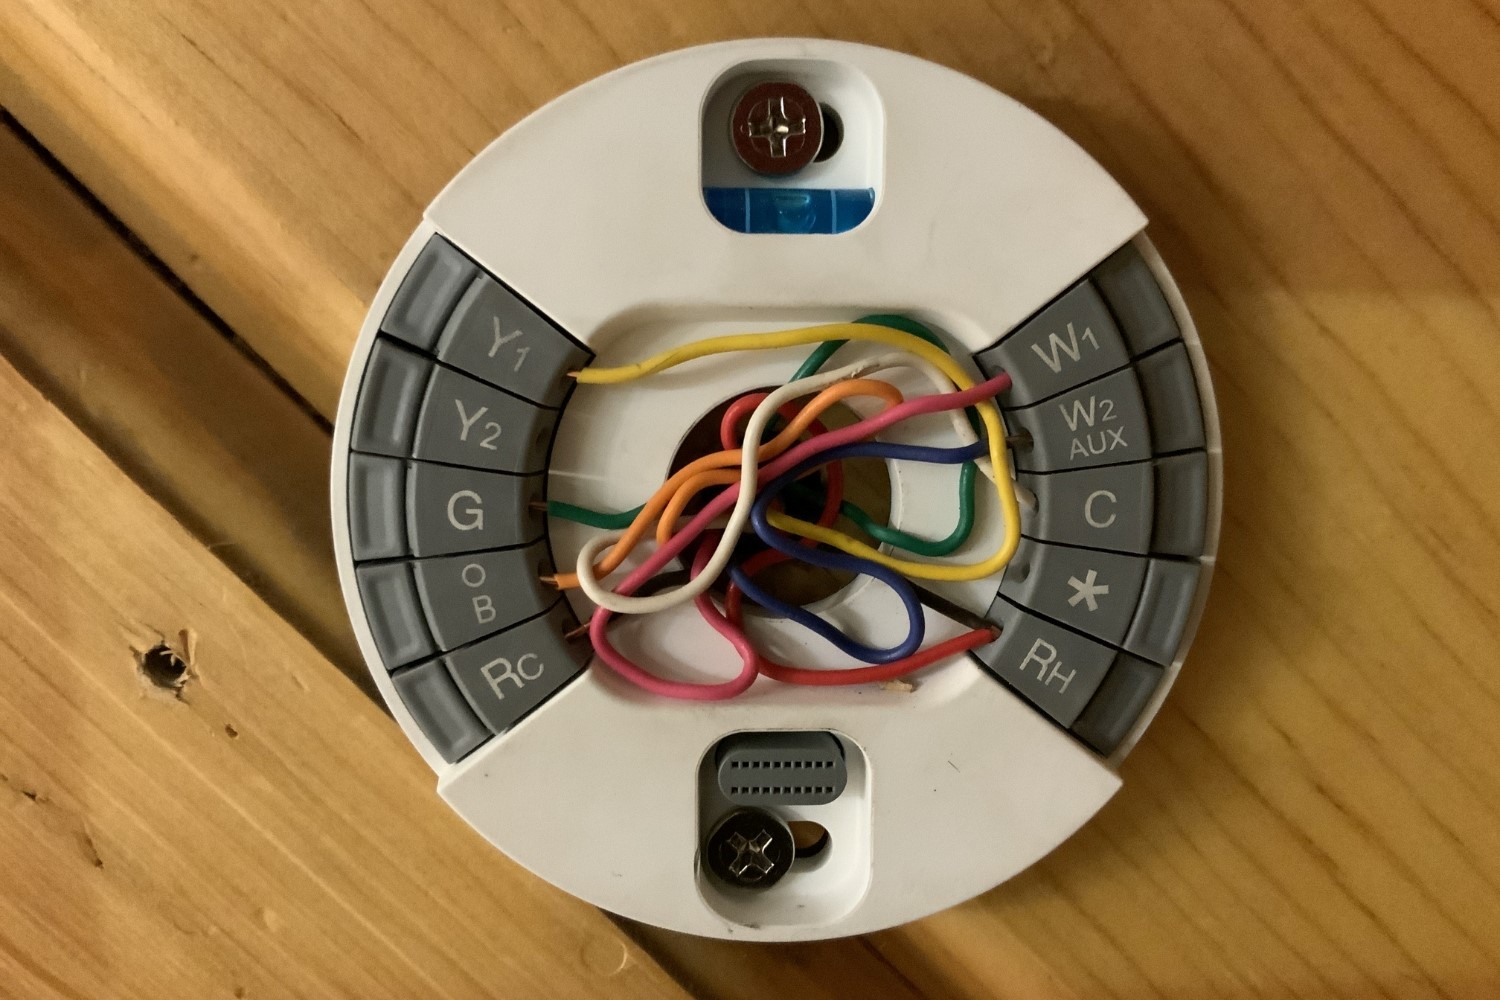
If you’re replacing an existing thermostat, carefully remove the old unit from the wall, exposing the wiring and mounting plate. Take note of the wire connections and their corresponding terminals on the thermostat base.
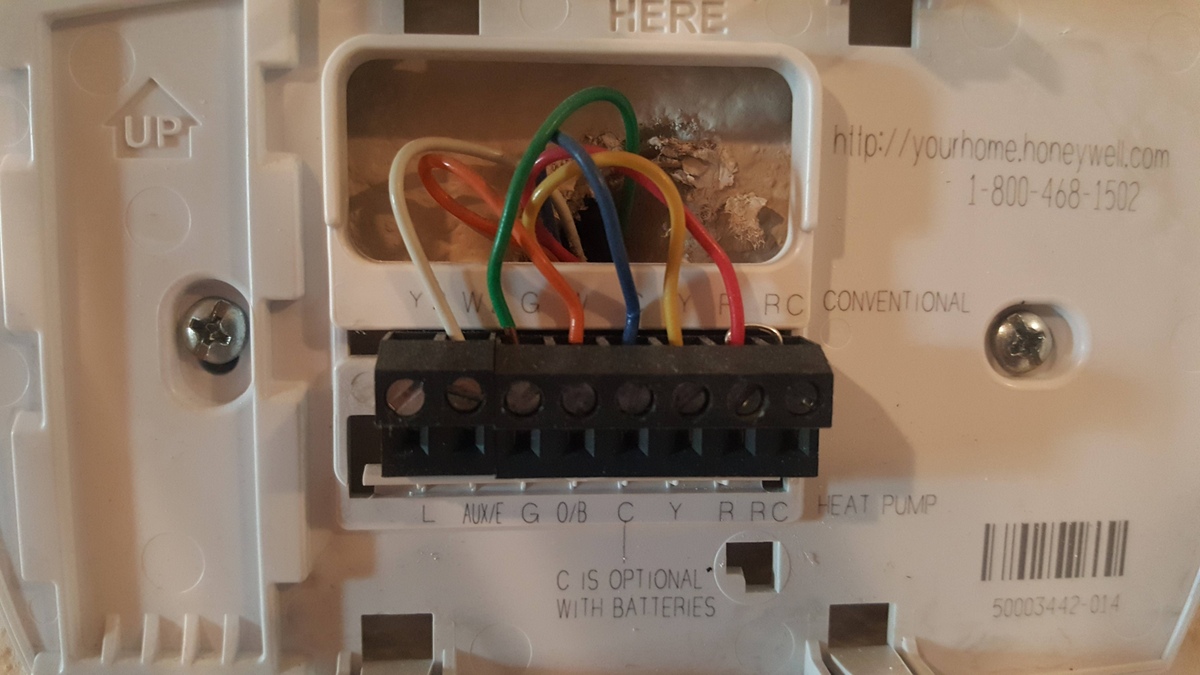
Step 3: Label the Wires
Using the labels provided or creating your own, carefully label each wire based on its corresponding terminal. This will prevent any confusion when connecting the wires to the new thermostat.
Read more: How To Wire An AC Thermostat
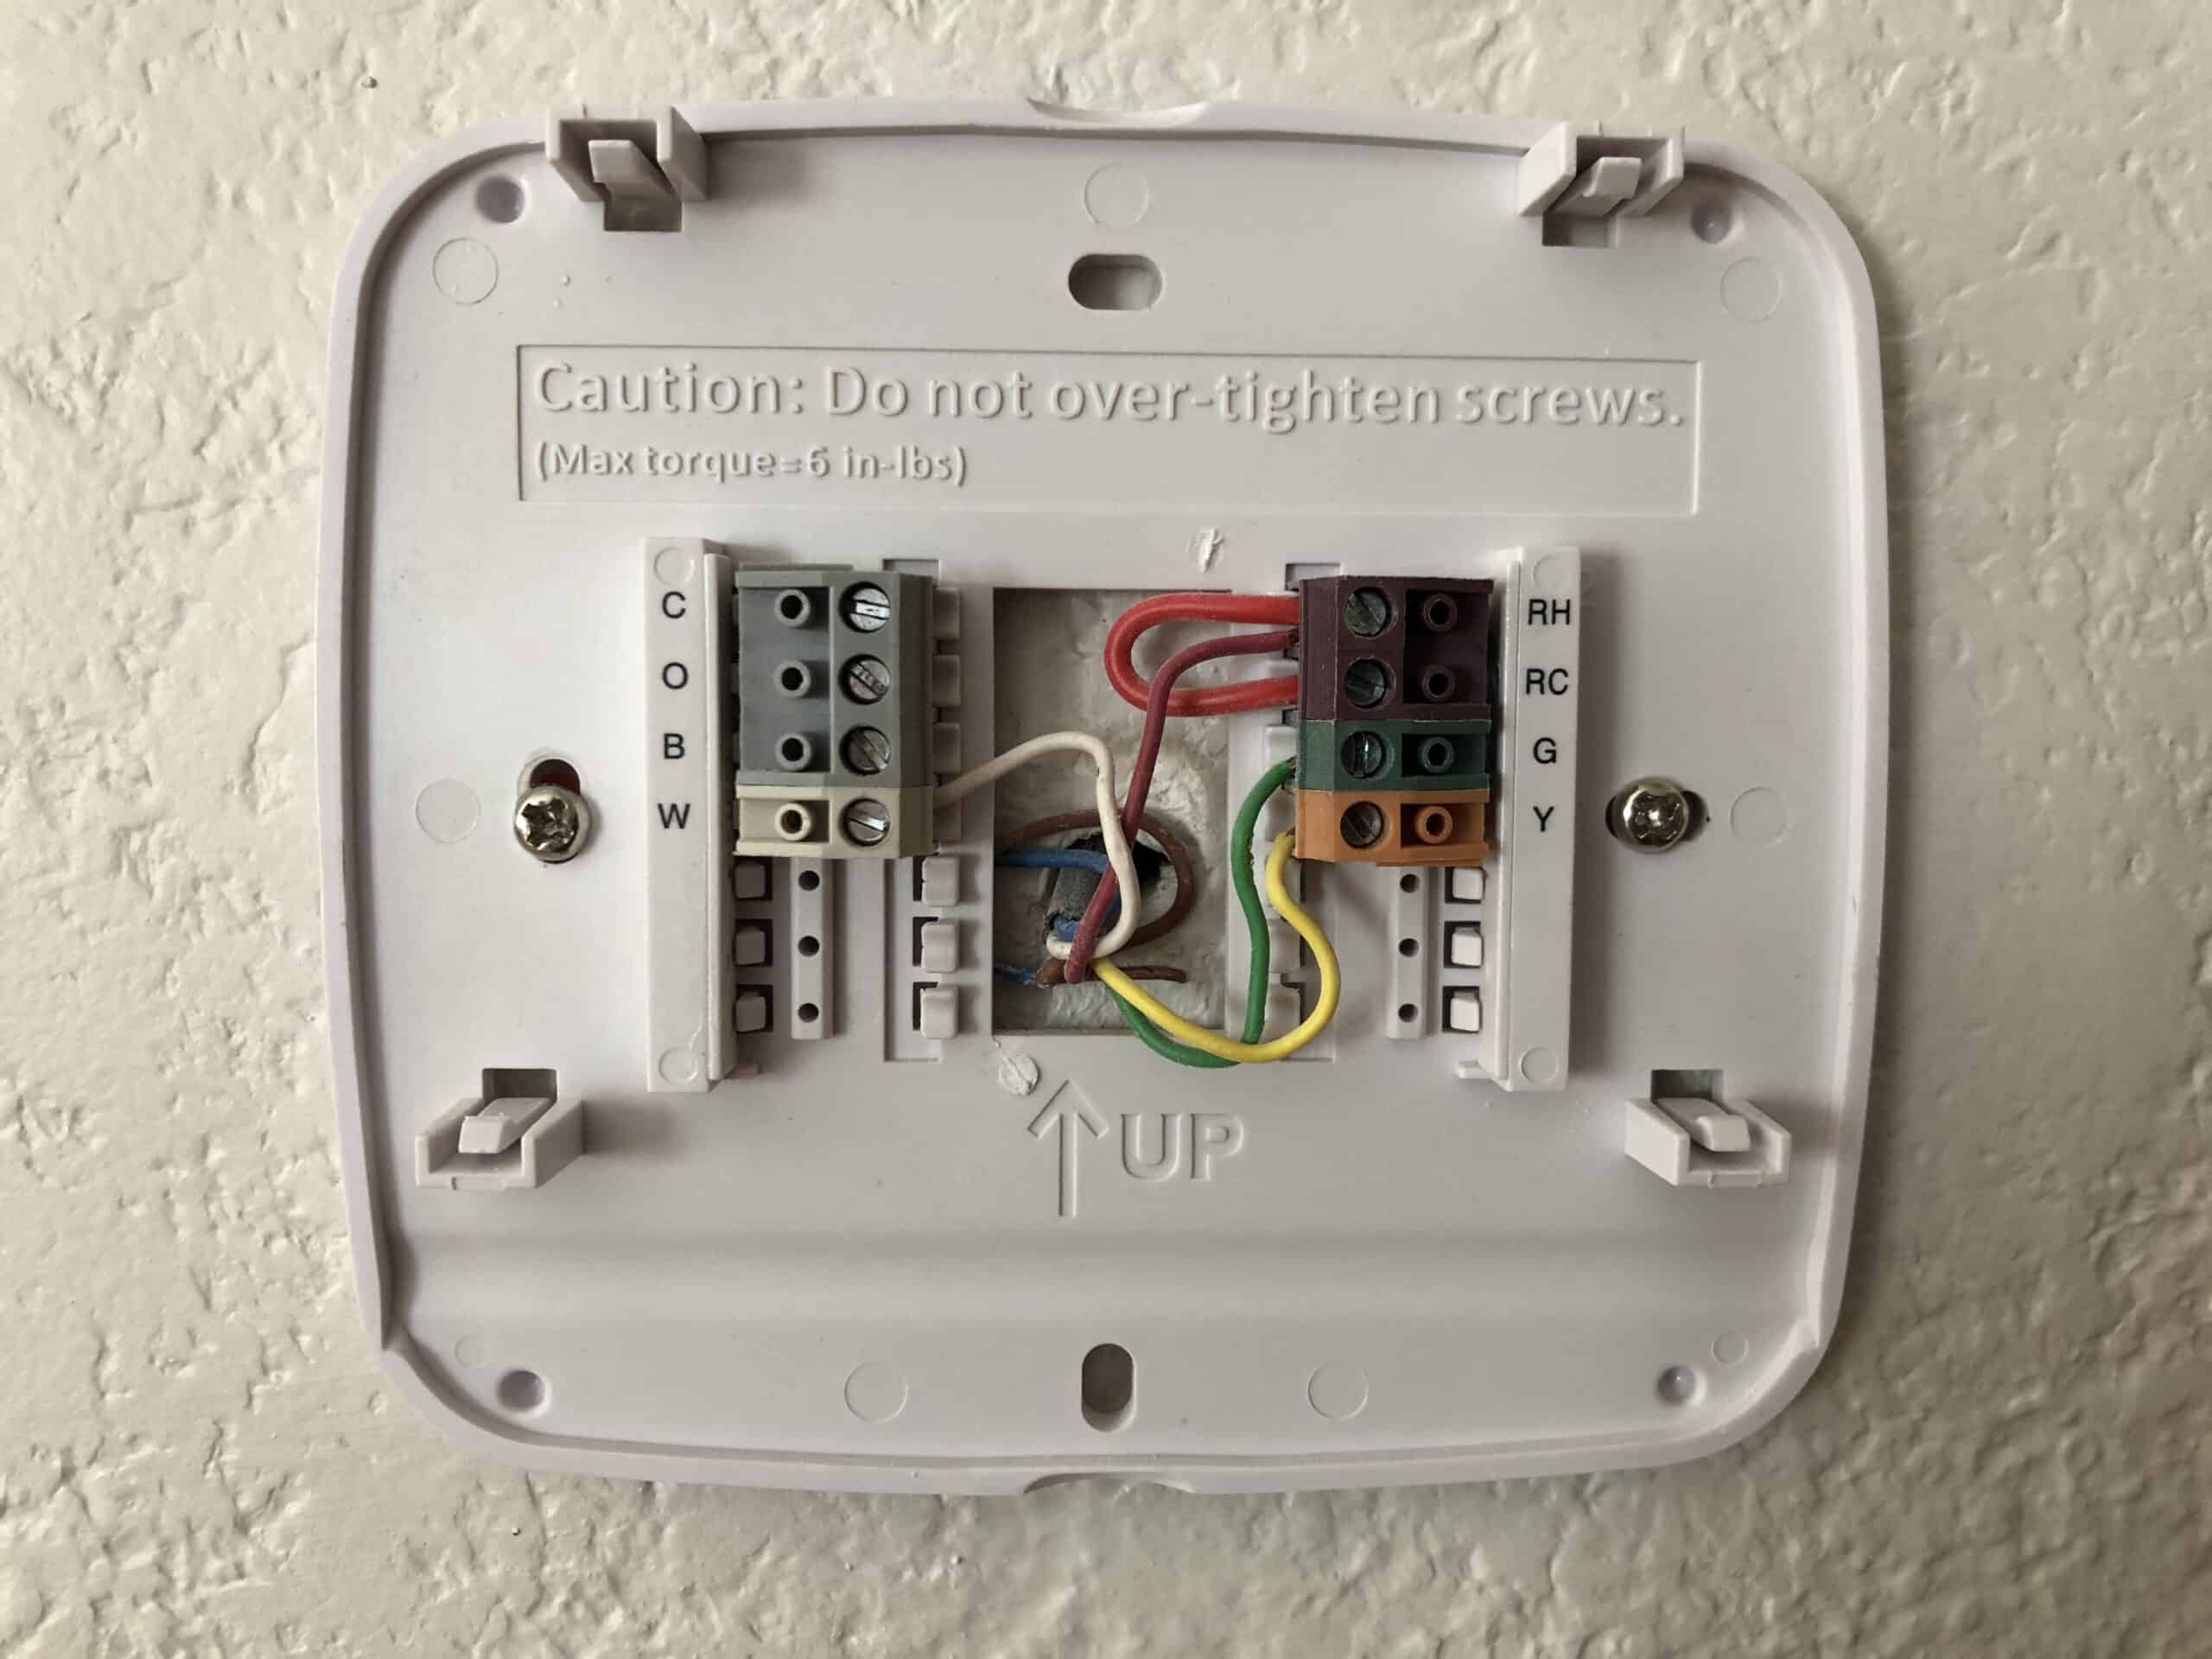
Step 4: Mount the New Thermostat Base
Position the new thermostat base on the wall, ensuring that it is level and securely anchored with the appropriate screws and anchors. This step is essential for providing a stable foundation for the thermostat.
Step 5: Connect the Wires
Referencing the labeled wires, connect each wire to its designated terminal on the new thermostat base. Use a screwdriver to secure the wires in place, ensuring a snug and reliable connection.
Step 6: Insert Batteries or Restore Power
If your thermostat requires batteries, insert them into the designated compartment. If not, restore power to the HVAC system at the circuit breaker, activating the thermostat.
Step 7: Program the Thermostat
Follow the manufacturer’s instructions to program the thermostat settings, including the desired temperature levels for heating and cooling, as well as any scheduling preferences for automated temperature adjustments.
Read more: What Is The Orange Wire On A Thermostat
Step 8: Test the System
Once the thermostat is programmed, test the system by adjusting the temperature settings and verifying that the heating and cooling systems respond accordingly. This step will confirm the successful integration of the thermostat with your HVAC system.
By following these systematic steps, you’ll be able to wire up your thermostat with confidence and precision, harnessing the full potential of this essential component of your home’s comfort system. With the thermostat seamlessly integrated, you can look forward to enjoying personalized temperature control and energy-efficient operation within your living space.
Testing the Thermostat Connection
After successfully wiring up your thermostat, it’s essential to conduct thorough testing to ensure that the connection between the thermostat and your HVAC system is functioning as intended. By performing these critical tests, you can verify the proper operation of the thermostat and address any potential issues before they impact your home’s comfort and energy efficiency.
1. Power Verification
Begin by confirming that the thermostat is receiving power. This can be done by checking the display for any indicators of power, such as an illuminated screen or LED status lights. If the thermostat is battery-powered, ensure that the batteries are properly installed and functional.
2. Temperature Adjustment
Test the thermostat’s temperature adjustment functionality by setting the desired temperature for both heating and cooling modes. Observe the HVAC system’s response to these adjustments, ensuring that the heating and cooling systems activate and deactivate as expected based on the temperature settings.
Read more: What Color Are Thermostat Wires
3. Mode Selection
If your thermostat supports both heating and cooling modes, verify that the system seamlessly transitions between these modes as dictated by the temperature settings. This test ensures that the thermostat accurately controls the operation of your HVAC system based on your comfort preferences.
4. Fan Operation
If your HVAC system includes a fan for air circulation, test the thermostat’s control over the fan operation. Activate the fan manually and verify that the thermostat can initiate and halt the fan’s operation as needed to maintain comfortable airflow within your home.
5. Scheduling and Automation
If your thermostat offers programmable or smart features, thoroughly test the scheduling and automation capabilities. Program specific temperature settings for different times of the day and days of the week, and ensure that the thermostat accurately follows these schedules, providing personalized comfort and energy efficiency.
6. Remote Access (If Applicable)
If your thermostat is part of a smart home system and offers remote access via a mobile app or online platform, test the remote control functionality. Verify that you can adjust the thermostat settings and monitor its operation from a remote location, providing added convenience and control over your home’s climate.
By meticulously testing the thermostat connection through these comprehensive evaluations, you can confidently confirm the seamless integration of the thermostat with your HVAC system. Any issues or discrepancies identified during testing can be promptly addressed, ensuring that your home’s comfort and energy efficiency are optimized through the reliable operation of the thermostat.
Read more: What Is The Jumper Wire For On A Thermostat
Conclusion
Congratulations! You’ve successfully navigated the intricate process of wiring up a thermostat, empowering yourself to take control of your home’s comfort and energy efficiency with confidence and precision. By gaining a comprehensive understanding of thermostat wiring, assembling the necessary tools and materials, and following the systematic steps outlined in this guide, you’ve unlocked the potential of this essential component of your HVAC system.
Through your efforts, you’ve established a seamless connection between the thermostat and your heating, ventilation, and air conditioning systems, setting the stage for personalized temperature control and energy-efficient operation within your living space. By harnessing the power of your thermostat, you can create a comfortable environment tailored to your preferences while optimizing energy usage and cost savings.
As you bask in the enhanced comfort and control facilitated by your newly wired thermostat, remember that your journey doesn’t end here. Regular maintenance and periodic checks of your thermostat and HVAC system will ensure continued reliability and performance. Additionally, staying informed about advancements in thermostat technology and smart home integration can open doors to further enhancements in your home’s comfort and energy management.
Whether you’re a seasoned DIY enthusiast or a newcomer to the world of home improvement, the skills and insights gained from this experience have equipped you to tackle future projects with confidence. The knowledge you’ve acquired in understanding thermostat wiring and the meticulous attention to detail demonstrated during the installation process will serve as valuable assets in your ongoing journey toward a smarter, more comfortable home.
As you revel in the fruits of your labor, take pride in the fact that you’ve taken a proactive step toward optimizing your home’s comfort and energy efficiency. Your commitment to mastering thermostat wiring exemplifies the spirit of innovation and empowerment that defines the modern homeowner, paving the way for a more connected, comfortable, and sustainable living environment.
So, as you savor the benefits of your newly wired thermostat, remember that the power to transform your home is in your hands. With each project you undertake, you’re not only enhancing your living space but also embracing the boundless potential of home automation and the profound impact it can have on your daily life.
Frequently Asked Questions about How To Wire Up A Thermostat
Was this page helpful?
At Storables.com, we guarantee accurate and reliable information. Our content, validated by Expert Board Contributors, is crafted following stringent Editorial Policies. We're committed to providing you with well-researched, expert-backed insights for all your informational needs.
0 thoughts on “How To Wire Up A Thermostat”