Articles
How to Install an Attic Fan
Modified: October 21, 2024
Learn how to install an attic fan with our step-by-step articles. Upgrade your home with this energy-efficient ventilation solution.
(Many of the links in this article redirect to a specific reviewed product. Your purchase of these products through affiliate links helps to generate commission for Storables.com, at no extra cost. Learn more)
Introduction
Installing an attic fan is a great way to improve the ventilation and overall air quality in your home. Attic fans help to prevent the buildup of excess heat and moisture in the attic, which can lead to a range of problems such as mold growth, reduced energy efficiency, and even structural damage. By properly installing an attic fan, you can ensure that your attic remains cool, dry, and properly ventilated all year round.
In this guide, we will walk you through the step-by-step process of installing an attic fan, from measuring the attic space to sealing and insulating the surrounding area. Whether you’re a seasoned DIY enthusiast or a first-time homeowner looking to tackle a home improvement project, this guide will provide you with all the information you need to successfully install an attic fan.
Before we dive into the installation process, let’s take a moment to understand the importance of proper attic ventilation. During the summer months, the temperature in the attic can rise significantly, reaching up to 150 degrees Fahrenheit or more in some cases. This excess heat can transfer into the living spaces below, causing the air conditioning system to work harder and increasing energy costs. It can also lead to discomfort in the living areas and potential damage to the roof and insulation.
Additionally, without proper ventilation, moisture can accumulate in the attic due to factors like bathroom exhaust fans, cooking, and even everyday activities like showering and breathing. This moisture buildup can contribute to the growth of mold and mildew, which can compromise the air quality in your home and pose a risk to your health.
An attic fan works by drawing in cooler air from the outside and expelling hot air from the attic, effectively reducing the temperature and removing excess moisture. This helps to maintain a more comfortable environment inside the attic and prevents the air conditioning system from overworking. Additionally, a well-ventilated attic prolongs the lifespan of your roof and insulation by preventing moisture-related damage.
Now that we understand the importance of attic ventilation, let’s move on to the installation process. In the following steps, we’ll guide you through each stage, providing detailed instructions and useful tips along the way to ensure a successful attic fan installation.
Key Takeaways:
- Proper attic ventilation is crucial for maintaining a comfortable and healthy home environment. Installing an attic fan can effectively regulate temperature, reduce moisture, and improve energy efficiency, benefiting both your home and your well-being.
- Careful planning, precise installation, and thorough sealing and insulation are essential for maximizing the effectiveness of an attic fan. By following the step-by-step process and ensuring proper maintenance, you can enjoy a cooler, well-ventilated attic and extended lifespan of your roof and insulation.
Read more: How To Install An Attic Gable Fan
Step 1: Measure the Attic Space
Before you begin the installation process, it’s important to accurately measure the attic space to determine the size and capacity of the attic fan you will need. To do this, follow these simple steps:
- Access the Attic: Make sure you have a safe and secure way to access your attic. This may involve using a ladder or stairs, so ensure you have a stable platform to work from.
- Take Measurements: Once in the attic, measure the length, width, and height of the space where you plan to install the attic fan. To measure the length and width, use a tape measure and record the dimensions in feet or meters. For the height, measure from the floor of the attic to the highest point of the roof.
- Calculate Cubic Feet: To determine the cubic feet of your attic space, multiply the length, width, and height measurements together. For example, if your attic measures 20 feet in length, 15 feet in width, and 8 feet in height, the cubic feet would be 20 x 15 x 8 = 2,400 cubic feet.
- Determine Required CFM: CFM stands for cubic feet per minute, which is a measure of the airflow capacity of the attic fan. The required CFM will depend on the size and condition of your attic. As a general rule of thumb, you should aim for a fan that can provide 1 CFM per square foot of attic space.
- Select the Right Attic Fan: Based on the calculated cubic feet and required CFM, choose an attic fan that meets your ventilation needs. Consider factors such as noise level, energy efficiency, and additional features like a built-in thermostat or humidity sensor.
Accurately measuring your attic space and selecting the right-sized attic fan ensures that the fan will effectively ventilate the entire area without being under- or oversized. Having the correct CFM rating also helps to maintain a balanced airflow and prevents the fan from working too hard or not providing sufficient ventilation.
By following this step and accurately measuring your attic space, you’re ready to move on to the next step: choosing the right attic fan.
Step 2: Choose the Right Attic Fan
Choosing the right attic fan is crucial to ensure optimal ventilation and energy efficiency in your attic. There are several factors to consider when selecting an attic fan:
- Size and Capacity: Refer to the measurements and cubic feet calculation from Step 1 to determine the appropriate size and capacity of the attic fan. It should be able to adequately ventilate the entire attic space.
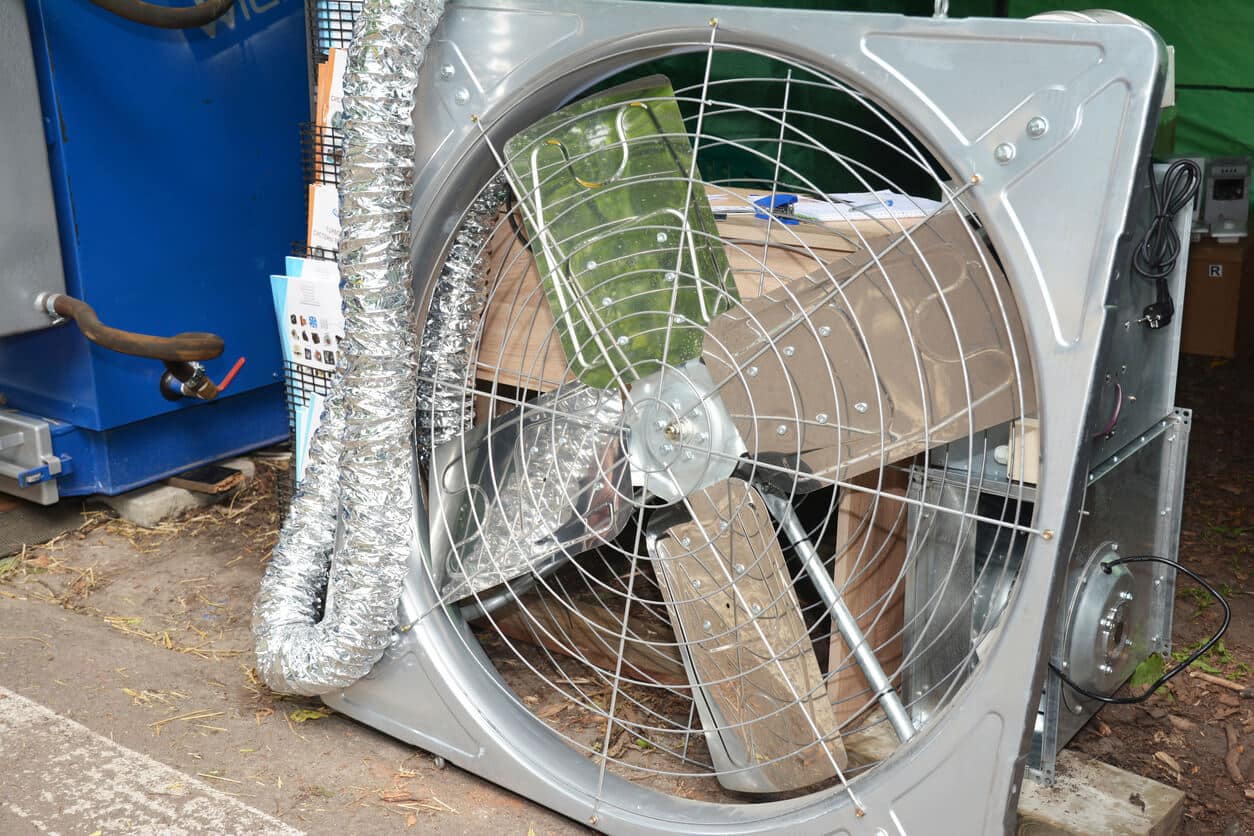
- Type of Attic Fan: There are different types of attic fans available, including roof-mounted fans, gable-mounted fans, and whole-house fans. Consider the layout and design of your attic and choose the type of fan that suits your needs and installation requirements best.
- Noise Level: Attic fans can produce noise, especially high-powered ones. If noise level is a concern for you, look for attic fans that are designed to operate quietly.
- Energy Efficiency: Opt for an attic fan that has high energy efficiency ratings to minimize power usage and reduce your utility bills.
- Additional Features: Some attic fans come with built-in thermostats, humidity sensors, or timers, allowing for more precise control over the ventilation and energy consumption.
- Warranty and Brand Reputation: Research different brands of attic fans and read customer reviews to ensure that you choose a reliable product with a good warranty and a reputation for durability.
Consider your specific requirements and budget when making your decision. It’s also a good idea to consult with a professional if you’re unsure about which attic fan is best suited for your attic.
Once you have chosen the right attic fan, you can proceed to the next step: gathering the necessary tools and materials for the installation process.
Step 3: Gather the Necessary Tools and Materials
Before you begin the attic fan installation, gather all the necessary tools and materials to ensure a smooth and efficient process. Here’s a list of the most commonly needed items:
Tools:
- Tape Measure
- Screwdriver (or drill with screwdriver bits)
- Pliers
- Adjustable Wrench
- Roofing Nails
- Utility Knife
- Wire Cutters/Strippers
- Hammer
- Safety Glasses
- Ladder or Step Stool
Read more: How To Install An Attic Exhaust Fan
Materials:
- Attic Fan
- Mounting Brackets
- Screws
- Electrical Wire
- Wire Connectors
- Electrical Tape
- Caulk or Weather Stripping
- Roof Flashing (if required)
- Insulation (if needed)
Ensure that you have all the tools and materials listed above before starting the installation process. It’s important to have everything on hand to avoid interruptions and delays.
Additionally, make sure to prioritize safety during the installation process. Wear appropriate personal protective equipment (PPE) such as safety glasses to protect your eyes, and use a sturdy ladder or step stool to reach the attic safely. If you’re not comfortable working at heights, consider hiring a professional to assist you with the installation.
Now that you have gathered all the necessary tools and materials, you’re ready to move on to the next step: determining the installation location.
Step 4: Determine the Installation Location
Determining the proper installation location for your attic fan is crucial to ensure its effectiveness and efficiency. Here are the key considerations when choosing the installation location:
Attic Space:
Take into account the layout and available space in your attic. Look for an area that allows for sufficient air circulation and is accessible for installation and maintenance.
Ventilation Needs:
Identify the areas in the attic that require the most ventilation. This could be areas with poor air circulation, high heat buildup, or moisture concerns. Installing the attic fan in these strategic locations will help address specific ventilation needs.
Read more: How Much To Install An Attic Fan
Roof Access:
Consider the accessibility and proximity to a roof opening or vent. Installing the attic fan near an existing roof opening like a vent or ridge vent can streamline the installation process.
Obstructions:
Check for any obstructions, such as electrical wires, plumbing pipes, or ductwork, which may interfere with the attic fan installation. Ensure that there is enough space and clearance for the fan to function properly.
Type of Attic Fan:
If you are installing a roof-mounted fan, ensure that the location allows for proper flashing and sealing to prevent leaks. For gable-mounted fans, choose a location on the gable end that provides optimal airflow and is easily accessible for installation and maintenance.
Once you’ve considered all these factors, mark the chosen location in the attic for the installation of the attic fan. Ensure that it aligns with the ventilation needs of your attic and meets the necessary requirements for the specific type of attic fan you have selected.
With the installation location determined, you’re ready to move on to the next step: preparing the attic for installation.
Step 5: Prepare the Attic for Installation
Preparing the attic before installing the attic fan is essential to ensure a smooth and successful installation. Follow these steps to properly prepare the attic:
Read more: How To Install Solar Attic Fan
Clean the Attic:
Remove any debris, insulation, or other obstructions in the area where the attic fan will be installed. This will provide a clean and clear workspace and prevent any potential hazards during the installation process.
Find the Roof Rafters:
Locate the roof rafters in the attic, as these will serve as the anchor points for mounting the attic fan. Use a stud finder or visually inspect the attic to identify the positions of the rafters.
Mark Mounting Holes:
Using the attic fan’s mounting brackets as a guide, mark the positions for the mounting holes on the roof rafters. Ensure that the markings are accurate and aligned with the chosen installation location.
Cut a Hole for Wiring:
If needed, cut a small hole in the attic ceiling to route the electrical wiring from the fan to a power source. Ensure that the hole is positioned in a convenient and concealed location.
Check for Existing Wiring and Plumbing:
Inspect the attic for any existing wiring or plumbing that may be in the path of the attic fan installation. If necessary, re-route or relocate these components to avoid interference with the fan.
Secure the Attic Floor:
If the attic doesn’t have a solid flooring, ensure that you have a secure and stable surface to work from. Lay down plywood or boards to create a safe platform for installation.
By properly preparing the attic, you create a clean and organized workspace, ensure the stability of the installation, and avoid any potential obstacles or hazards during the process. With the attic prepared, you’re ready to move on to the exciting part – installing the attic fan itself.
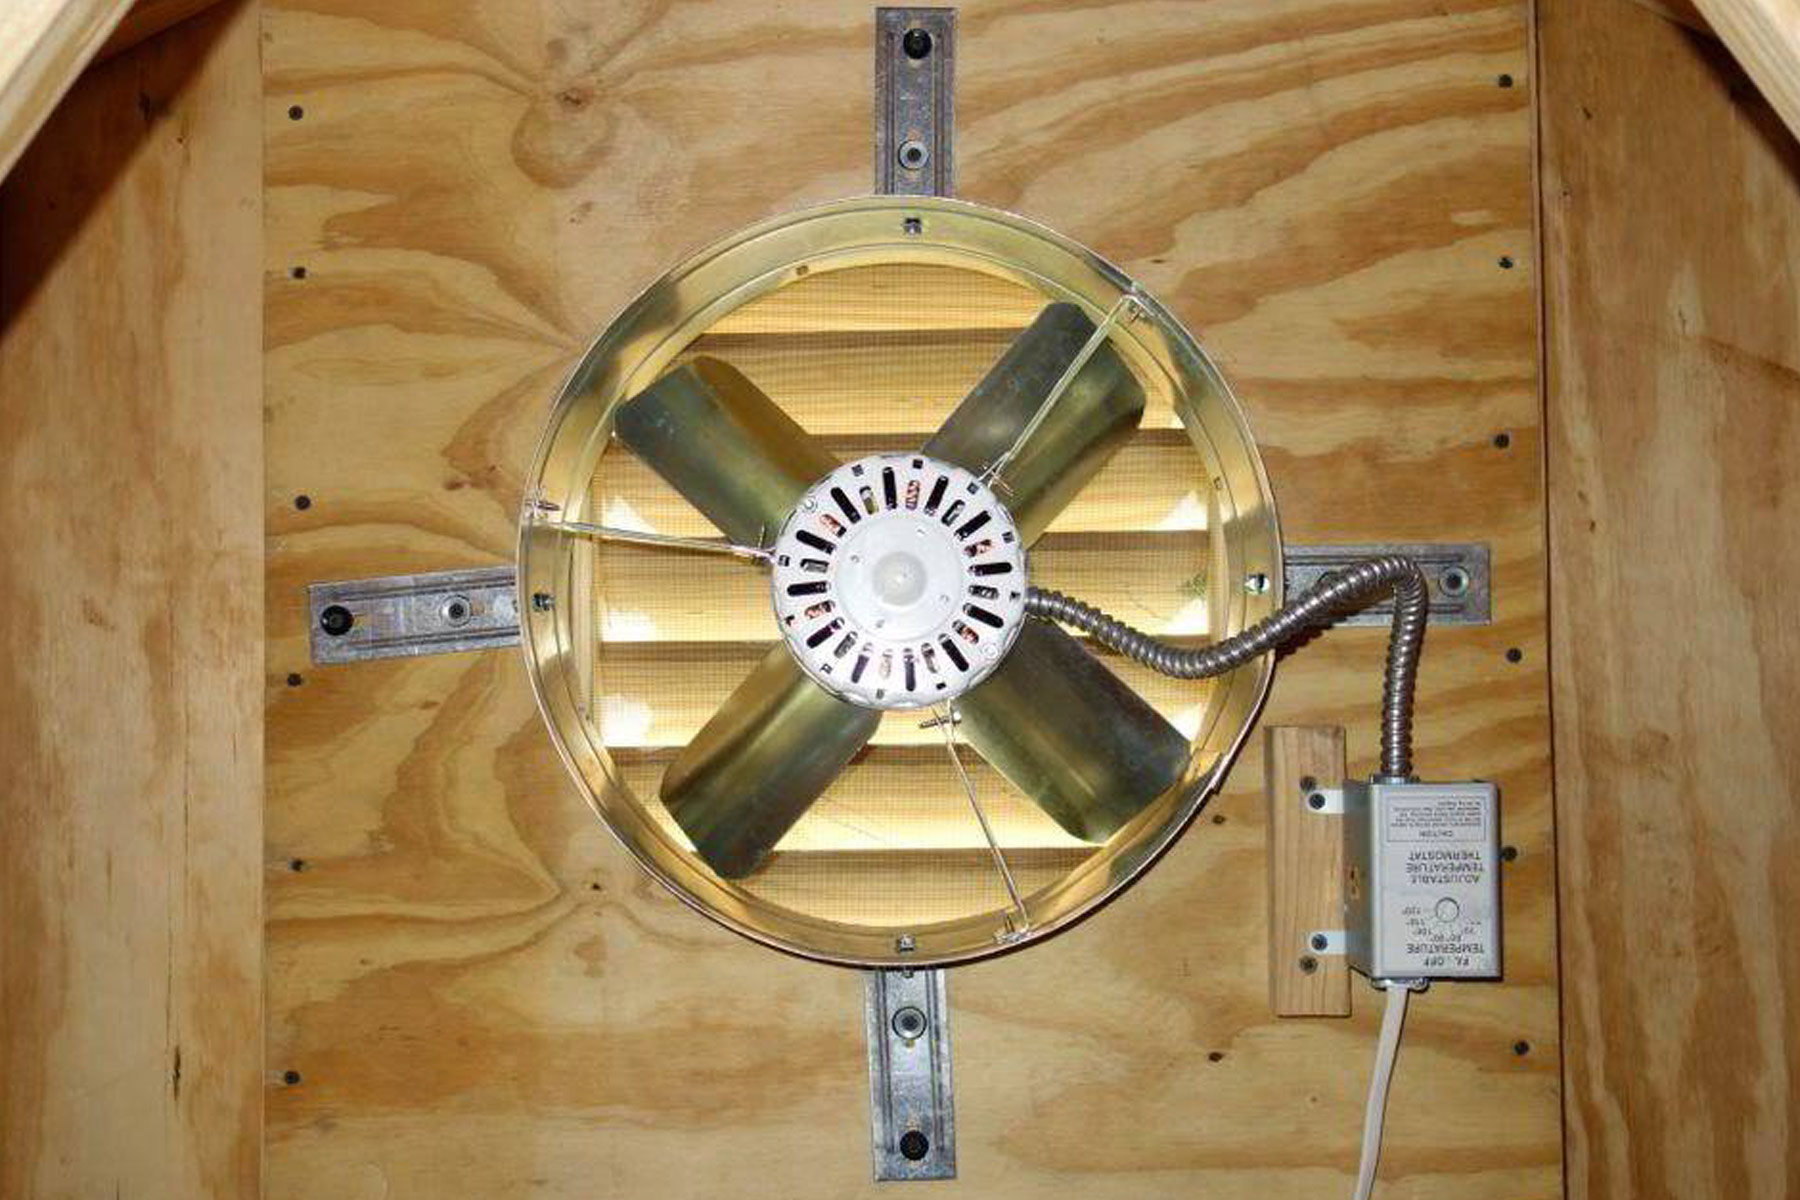
Step 6: Install the Attic Fan
Now that the attic is prepped and ready, it’s time to install the attic fan. Follow these steps for a successful installation:
1. Position the Fan:
Place the attic fan in the predetermined installation location. Ensure that it is centered and aligned with the marked mounting holes on the roof rafters.
2. Attach the Mounting Brackets:
Using screws or bolts, attach the mounting brackets securely to the roof rafters. Make sure they are tight and properly aligned.
3. Secure the Fan:
Following the manufacturer’s instructions, attach the attic fan to the mounting brackets. Ensure that it is properly secured and stable in its position.
4. Connect the Ductwork (if applicable):
If you’re installing a ducted attic fan, connect the ductwork to the fan according to the manufacturer’s instructions. Ensure a tight and secure connection to facilitate proper airflow.
5. Fasten the Fan to the Roof:
Secure the fan to the roof using roofing nails or other recommended fasteners. Make sure the fan is firmly attached and will withstand windy conditions.
6. Check for Proper Alignment:
Verify that the fan is level and aligned correctly. Adjust if necessary to ensure it functions optimally.
7. Double-Check Stability:
Ensure that the attic fan is securely installed and doesn’t wobble or move when gently pushed or touched. This will prevent any future issues or damage.
8. Follow Manufacturer’s Instructions:
Always refer to the specific instructions provided by the manufacturer of the attic fan. Follow their guidelines for installation to ensure the best performance and warranty compliance.
With the attic fan securely installed, you’re one step closer to improving the ventilation in your attic. The next step is to connect the wiring and power up the fan for testing purposes.
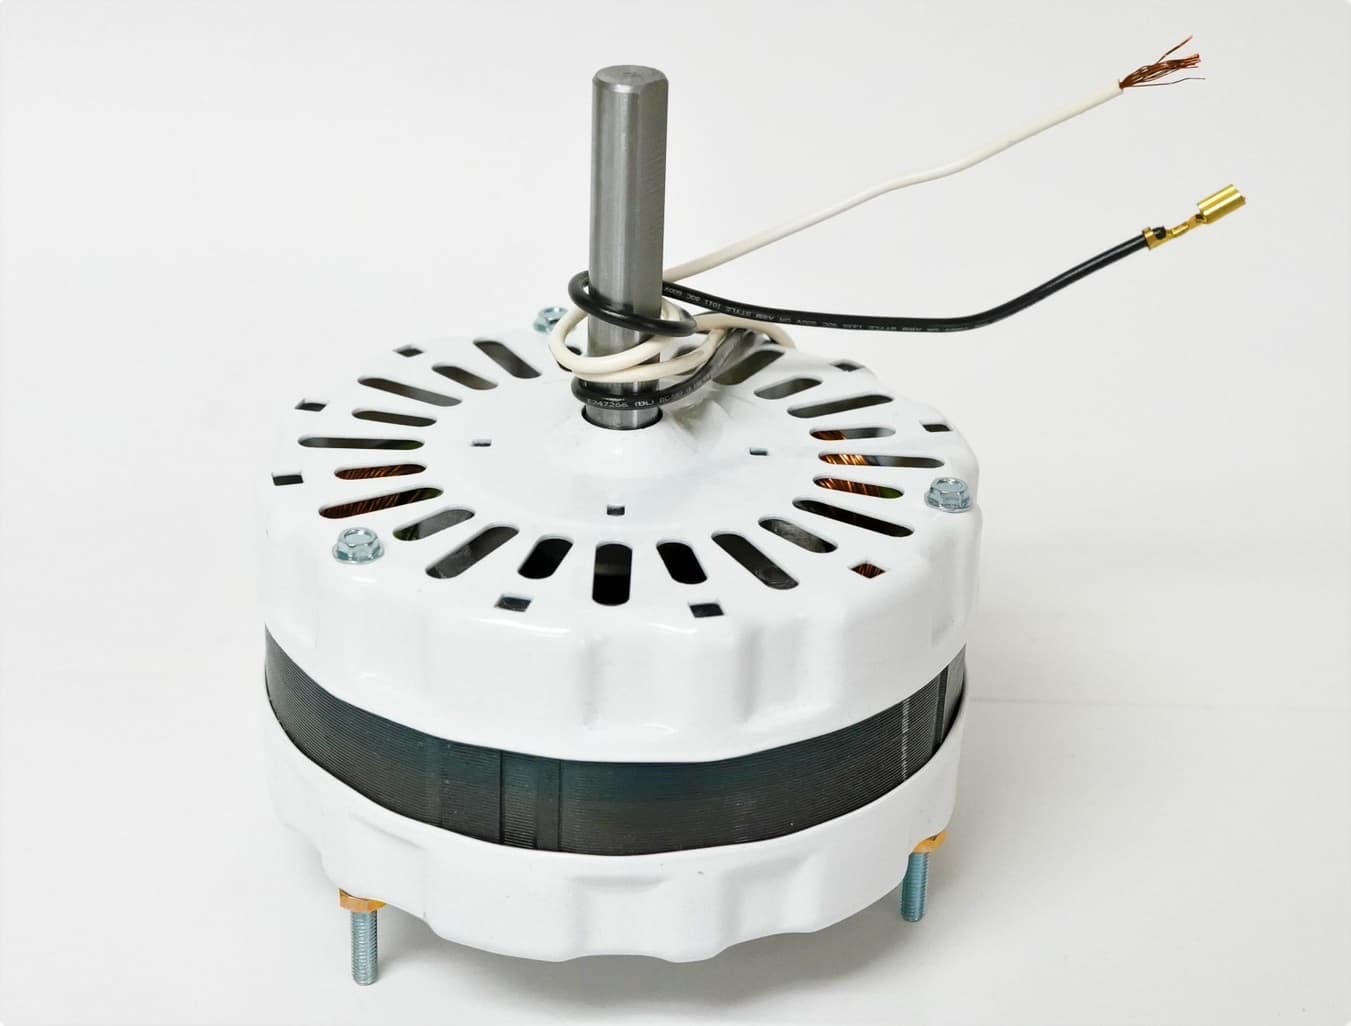
Step 7: Connect the Wiring
Connecting the wiring is a crucial step in the installation process to ensure that the attic fan operates safely and effectively. Follow these steps to connect the wiring:
1. Turn Off Power:
Before working with any electrical connections, switch off the power at the circuit breaker or fuse box to prevent any accidents or electrical shocks. Confirm that the power is completely off before proceeding.
2. Plan the Wiring Route:
Determine the most optimal route for the electrical wiring from the attic fan to the nearest power source. This may involve routing the wires along existing conduits or creating new openings in the attic.
3. Measure and Cut the Electrical Wire:
Measure the distance from the fan to the power source and cut the electrical wire to the appropriate length. Leave a little extra length to allow for flexibility during the wiring process.
4. Strip the Wire Ends:
Carefully strip the insulation from the ends of the electrical wire to expose the bare copper ends. Use wire strippers or a knife, ensuring that you remove the appropriate amount of insulation.
Read more: How To Fix An Attic Fan
5. Connect the Wiring:
Connect the wires from the attic fan to the corresponding wires from the power source. Twist together the exposed copper ends of the wires and secure them with wire connectors. Make sure the connections are tight and secure.
6. Insulate the Connections:
Wrap electrical tape around the wire connectors to insulate the connections and provide additional protection against moisture and accidental disconnection. This will help ensure the safety and longevity of the wiring connections.
7. Secure the Wiring:
Using cable clamps or staples, secure the electrical wiring to prevent it from hanging loosely or coming into contact with any sharp objects or moving parts. This will help prevent damage and minimize the risk of electrical hazards.
8. Test the Wiring:
Once the wiring is connected and secured, turn on the power at the circuit breaker or fuse box. Test the wiring to ensure that the attic fan receives power and functions properly. Observe the fan’s operation to ensure that it is running smoothly and quietly.
It’s essential to follow electrical safety guidelines and local building codes when connecting the wiring for the attic fan. If you’re not comfortable working with electrical wiring, it’s recommended to consult a licensed electrician for assistance.
With the wiring successfully connected, you’re almost finished with the attic fan installation. The next step is to test the attic fan to ensure it’s operating as intended.
Read more: How Much Is An Attic Fan
Step 8: Test the Attic Fan
Once the attic fan is installed and the wiring is connected, it’s crucial to test the fan to ensure that it’s working properly. Follow these steps to test the attic fan:
1. Double-Check Safety Measures:
Ensure that all safety precautions have been taken, including turning off the power to the fan at the circuit breaker or fuse box before proceeding with the testing.
2. Turn on the Power:
Switch on the power to the attic fan at the circuit breaker or fuse box to supply electricity to the fan. Ensure that the power is switched on before proceeding to the next steps.
3. Activate the Fan:
Use the fan’s control switch or thermostat to activate the fan. Adjust the settings, if applicable, to the desired level of operation such as speed or temperature threshold. Observe the fan’s blades to confirm that they are spinning correctly.
Read more: How To Remove An Attic Fan
4. Listen for Noise:
Pay close attention to any abnormal or excessive noise coming from the fan. While some noise is normal, ensure that there are no unusual rattling, grinding, or squeaking sounds that could indicate a mechanical issue.
5. Check Air Movement:
Stand near the attic fan and feel for the airflow. If the fan is properly working, you should be able to feel a noticeable amount of air movement. This indicates that the fan is effectively ventilating the attic space.
6. Monitor Temperature and Humidity:
If your attic fan has a built-in thermostat or humidity sensor, monitor the displayed temperature or humidity levels to ensure that they are within the desired range. The fan should activate and deactivate as needed based on the preset settings.
7. Test Fan Controls:
If your attic fan has multiple speed settings or adjustable controls, test each setting to ensure that they all function as intended. Adjust the controls and observe the changes in fan speed and airflow.
Read more: When To Use An Attic Fan
8. Consult the Manufacturer’s Instructions:
Refer to the manufacturer’s instructions for any specific testing procedures or recommendations. Follow their guidelines to ensure that the fan is operating within the specified parameters.
If you encounter any issues during the testing process, refer to the troubleshooting section of the fan’s instruction manual or consult a professional for assistance. Once you have confirmed that the attic fan is working properly, it’s time to move on to the final step: sealing and insulating the surrounding area.
Step 9: Seal and Insulate the Surrounding Area
After successfully installing and testing the attic fan, it’s important to seal and insulate the surrounding area to maximize its efficiency and prevent any air leaks. Follow these steps to seal and insulate the area:
1. Inspect for Gaps and Cracks:
Thoroughly inspect the area around the attic fan for any gaps, cracks, or openings. Look for areas where air might escape or enter, such as gaps between the fan and the surrounding roof, or openings in the attic floor or ceiling.
2. Apply Caulk or Weather Stripping:
Use caulk or weather stripping to seal any gaps and cracks that you identified. Apply caulk around the edges of the fan where it meets the roof or ceiling. Place weather stripping around the attic access door or hatch to create a tight seal.
3. Seal the Electrical Hole:
If you cut a hole in the attic ceiling for the wiring, make sure to seal it properly. Use a screwdriver or utility knife to remove any excess insulation and fill the hole with expanding foam insulation or caulk. This will prevent air leakage and maintain insulation integrity.
4. Insulate the Attic Access Point:
If your attic has an access point, such as a door or opening, ensure it is properly insulated. Install weather stripping or a door sweep to seal any gaps around the access point. Consider adding insulation to the attic access door to minimize heat transfer.
5. Install Additional Insulation:
If your attic is lacking sufficient insulation, consider adding additional insulation to improve energy efficiency. Use fiberglass batts or blown-in insulation to cover the attic floor and ensure that it is evenly distributed.
6. Inspect Existing Insulation:
Check the condition of any existing insulation in the attic. Replace or repair any damaged or compressed insulation to maintain its effectiveness in providing thermal protection.
Read more: How To Install Attic Antenna
7. Properly Ventilate the Attic:
Ensure that there is adequate ventilation in the attic to allow for proper airflow. This could include installing additional vents, ridge vents, or soffit vents, depending on your attic’s specific needs.
8. Periodically Check and Maintain:
Regularly inspect and maintain your attic fan, seals, and insulation to ensure optimal performance. Look for signs of wear or damage and clean or replace components as necessary.
Sealing and insulating the surrounding area of the attic fan not only helps improve energy efficiency but also prevents air leaks and external influences from affecting the fan’s operation. By properly sealing and insulating, you can ensure that the attic fan functions optimally and provides effective ventilation for your attic space.
Congratulations! With Step 9 complete, you have successfully installed and sealed your attic fan. Make sure to keep the installation manual and any relevant documentation for future reference. Enjoy the benefits of better attic ventilation and improved energy efficiency in your home!
Conclusion
Installing an attic fan is a worthwhile investment that can greatly improve the ventilation and air quality in your home. By following the step-by-step process outlined in this guide, you can successfully install an attic fan and enjoy the numerous benefits it brings.
We began by understanding the importance of proper attic ventilation and how an attic fan can help regulate temperature, reduce moisture, and improve energy efficiency. We then covered the essential steps, from measuring the attic space and choosing the right attic fan to gathering the necessary tools and materials.
We discussed determining the installation location and preparing the attic for installation, emphasizing the importance of a clean and clear workspace. We then moved on to the actual installation, guiding you through securing the fan, connecting the wiring, and testing the fan for proper operation.
To ensure optimal performance, we concluded with the step of sealing and insulating the surrounding area. This step helps to prevent air leaks and maintain the integrity of the attic fan’s ventilation system.
It’s important to follow safety guidelines and consult professional assistance if needed, particularly for electrical connections and working at heights. Always refer to the manufacturer’s instructions for specific installation requirements and recommendations.
By installing an attic fan and properly maintaining it, you can enjoy a cooler, well-ventilated attic, improved energy efficiency, reduced moisture-related issues, and extended lifespan of your roof and insulation.
Remember, a well-ventilated attic not only benefits your home but also contributes to your overall comfort and well-being. So, take the necessary steps to install an attic fan and create a healthier living environment for you and your family.
Thank you for choosing this guide as your resource for installing an attic fan. Enjoy the enhanced ventilation and improved energy efficiency in your home!
Frequently Asked Questions about How To Install An Attic Fan
Was this page helpful?
At Storables.com, we guarantee accurate and reliable information. Our content, validated by Expert Board Contributors, is crafted following stringent Editorial Policies. We're committed to providing you with well-researched, expert-backed insights for all your informational needs.
0 thoughts on “How to Install an Attic Fan”