Articles
Troubleshooting Door Hinge Problems
Modified: August 27, 2024
"Discover helpful articles and tips to troubleshoot door hinge problems. Fix common issues with our expert advice and keep your doors working smoothly."
(Many of the links in this article redirect to a specific reviewed product. Your purchase of these products through affiliate links helps to generate commission for Storables.com, at no extra cost. Learn more)
Introduction
Door hinges play a crucial role in the smooth operation of doors, allowing them to open and close effortlessly. However, like any other mechanical component, door hinges can develop problems over time. These issues can range from minor annoyances like squeaky hinges to more serious problems like misalignment or rust. If you’re experiencing difficulties with your door hinges, it’s important to address these issues promptly to prevent further damage and ensure the longevity of your doors.
In this article, we will explore the most common problems that can occur with door hinges and provide step-by-step troubleshooting solutions to help you resolve these issues. Whether you’re dealing with squeaky hinges, loose hinges, misaligned hinges, stuck hinges, hinges that won’t hold position, or rusty and corroded hinges, we’ve got you covered. By following our troubleshooting steps and implementing the necessary repairs, you can restore your door hinges to optimal functionality and enjoy smooth and seamless door operation once again.
Before we dive into the specific problems and solutions, it’s important to note that safety should always be the top priority when working with doors and hinges. If you’re unsure about any of the steps or if the problem seems too complicated, it’s best to consult a professional locksmith or handyman for assistance. They have the knowledge and experience to handle more complex hinge issues and ensure that your doors are fixed properly.
So, let’s get started and learn how to troubleshoot common door hinge problems!
Key Takeaways:
- Keep your door hinges in optimal condition by addressing common problems such as squeaking, misalignment, and rust. Regular maintenance and simple troubleshooting steps can restore smooth and silent door operation.
- Troubleshoot and resolve door hinge issues with ease. From lubricating squeaky hinges to reinforcing and removing rust, follow step-by-step solutions to ensure smooth and reliable door operation.
Read more: How To Fix A Storm Door Hinge
Common Door Hinge Problems
Door hinges may encounter various problems over time, leading to difficulties in their functionality. Understanding these common hinge problems can help you identify the issue and determine the necessary steps for troubleshooting.
1. Squeaky Hinges: One of the most common hinge problems is a squeaking noise when opening or closing the door. This annoying sound is often caused by friction between the hinge components due to lack of lubrication.
2. Loose Hinges: Another prevalent problem is loose hinges, which can cause the door to sag or not close properly. Over time, the screws holding the hinges in place may become loose, resulting in an unstable and misaligned door.
3. Misaligned Hinges: If your door is sticking or not aligning properly with the frame, it may be due to misaligned hinges. This can occur when the hinges become loose or bent or when the door settles over time.
4. Stuck Hinges: Sometimes, door hinges can become stuck, making it difficult to open or close the door smoothly. This problem often occurs due to debris or rust buildup within the hinge mechanism.
5. Hinges Not Holding Position: In some cases, the hinges may fail to hold the door in open or closed positions. This can cause the door to swing open or shut unexpectedly, posing potential safety hazards.
6. Rusty or Corroded Hinges: Hinges exposed to moisture and humidity can develop rust or corrosion over time. This not only impacts their functionality but also detracts from the appearance of the door.
By identifying these common door hinge problems, you can take the necessary steps to resolve them efficiently. In the following sections, we will guide you through the troubleshooting steps for each specific problem, providing practical solutions to restore your door hinges to their optimal condition.
Problem 1: Squeaky Hinges
Squeaky hinges can be a persistent annoyance when opening or closing doors. The squeaking sound is often caused by friction between the hinge components, which can be due to lack of lubrication. Fortunately, addressing this problem is relatively simple.
To troubleshoot squeaky hinges, follow these steps:
- Step 1: Identify the squeaky hinge: Carefully open and close the door, listening for the source of the squeaking sound. Once you have identified the problem hinge, proceed to the next step.
- Step 2: Lubricate the hinge: Apply a lubricating agent to the hinge pin and the pivot points using a suitable lubricant such as silicone spray or a quality penetrating oil. Be sure to aim the lubricant into the areas where the hinge components rub against each other.
- Step 3: Move the door: Open and close the door multiple times to allow the lubricant to penetrate the hinge components. This helps to reduce friction and eliminate the squeaking sound.
- Step 4: Wipe off excess lubricant: After applying the lubricant, use a clean cloth to wipe off any excess oil or spray from the hinge. This prevents it from attracting dirt or grime, which can lead to future problems.
- Step 5: Test the door: Once you have completed the lubrication process, test the door to ensure that the squeaking noise has been eliminated. If the problem persists, you may need to repeat the steps or consider seeking professional assistance.
Regular maintenance and periodic lubrication can help prevent squeaky hinges from occurring. It is recommended to lubricate the hinges at least once a year to keep them in optimal condition. Additionally, choosing a high-quality lubricant specifically designed for door hinges can provide long-lasting results.
By following these simple steps, you can easily address squeaky hinges and enjoy smooth and noise-free door operation.
Problem 2: Loose Hinges
Loose hinges can lead to a sagging or misaligned door, compromising its functionality and overall appearance. Over time, the screws holding the hinges in place may loosen, causing instability and difficulty in properly closing the door. Fortunately, tightening loose hinges is a straightforward process that can restore the stability of your door.
To troubleshoot loose hinges, follow these steps:
- Step 1: Inspect the hinges: Examine the hinges closely to identify any loose screws or hinge plates. You may need to open the door fully to access the screws on the hinge plates.
- Step 2: Tighten the screws: Using a screwdriver that matches the size of the screws, tighten each screw on the hinge plates. Start with the loosest ones and gradually tighten all the screws, making sure not to overtighten them.
- Step 3: Check the door alignment: After tightening the screws, close the door and check its alignment with the door frame. If the door is still sagging or not closing properly, you may need to adjust the hinge position (which will be discussed in more detail in the upcoming sections).
- Step 4: Test the door: With the screws tightened, open and close the door to ensure that it operates smoothly and aligns properly with the door frame. If the door is now stable and functional, you have successfully resolved the loose hinge problem.
Regular inspection and maintenance of hinges are essential to prevent them from becoming loose in the future. Periodically check the screws on the hinge plates and tighten them if necessary.
If tightening the screws doesn’t solve the problem or if you notice that the screw holes are stripped, you may need to use larger or longer screws to secure the hinges properly. Alternatively, you can use wooden dowels or filler material to reinforce the screw holes before tightening the screws.
By following these simple steps, you can effectively address loose hinges and restore stability and functionality to your door. If you encounter any difficulties or if the problem persists, it is advisable to consult a professional for further assistance.
Problem 3: Misaligned Hinges
Misaligned hinges can cause a door to stick, not close properly, or have gaps between the door and the frame. This issue can occur due to various reasons, such as the settling of the door over time or hinges becoming loose or bent. Fortunately, with a few adjustments, you can realign the hinges and restore proper door functionality.
To troubleshoot misaligned hinges, follow these steps:
- Step 1: Identify the misaligned hinge: Carefully observe the door and frame to determine which hinge is causing the misalignment. Pay attention to any gaps or areas where the door is sticking.
- Step 2: Loosen the hinge screws: Use a screwdriver that matches the size of the screws and gradually loosen the screws on the misaligned hinge. Avoid removing the screws completely; you only need to loosen them enough to allow adjustments.
- Step 3: Adjust the hinge position: With the screws loosened, gently shift the hinge up, down, left, or right, depending on the direction of misalignment. This will allow you to realign the hinge with the door frame.
- Step 4: Tighten the screws: Once you have adjusted the hinge position, firmly tighten the screws back into place. Take care not to overtighten them, as this could lead to additional problems.
- Step 5: Test the door alignment: Close the door and check its alignment with the frame. If the door is now properly aligned, try opening and closing it to ensure smooth operation. If needed, make further adjustments until the door is aligned correctly.
In some cases, misaligned hinges may require more extensive adjustments, such as adding shims or adjusting the mortises in the door frame. If you are unsure about these techniques or if the misalignment is severe, seeking assistance from a professional is recommended.
Regular inspection and maintenance of hinges can help prevent misalignment. Check the hinge screws periodically to ensure they remain tight and make any necessary adjustments promptly.
By following these troubleshooting steps, you can effectively address misaligned hinges and ensure that your doors operate smoothly and fit properly within the door frame.
Read more: How To Mount Hinges On A Shed Door
Problem 4: Stuck Hinges
Stuck hinges can make it difficult to open or close a door smoothly, causing frustration and inconvenience. This problem often occurs due to debris or rust buildup within the hinge mechanism. Fortunately, with a little bit of cleaning and maintenance, you can unstick the hinges and restore their functionality.
To troubleshoot stuck hinges, follow these steps:
- Step 1: Identify the stuck hinge: Carefully observe the door and determine which hinge is causing the sticking issue. Look for any signs of debris or rust around the hinge mechanism.
- Step 2: Remove dirt and debris: Use a brush or a toothbrush to gently remove any dirt, dust, or debris around the hinge mechanism. Pay close attention to the pivot points and the area where the hinge components rub against each other.
- Step 3: Apply a lubricant: Once the hinge is free of dirt and debris, apply a lubricant such as silicone spray or a quality penetrating oil to the hinge pin and pivot points. This will help to reduce friction and loosen any rust or corrosion.
- Step 4: Work the hinge: After lubricating the hinge, gently move the door back and forth several times to work the lubricant into the hinge mechanism. This will help to break up any remaining obstructions and improve the hinge’s movement.
- Step 5: Clean up excess lubricant: Wipe off any excess lubricant from the hinge and surrounding areas using a clean cloth. This will prevent any buildup of dirt or grime that could potentially lead to future sticking issues.
- Step 6: Test the hinge: Once you have completed the cleaning and lubrication process, test the hinge by opening and closing the door. If the hinge is now moving smoothly without sticking, you have successfully resolved the problem.
Regular cleaning and lubrication of door hinges can help prevent them from sticking in the future. It is recommended to inspect and maintain the hinges at least once a year.
If the hinges continue to stick even after following these troubleshooting steps, there may be underlying issues such as bent or damaged hinge components. In such cases, it is best to consult a professional locksmith or handyman for further assessment and repairs.
By following these simple steps, you can effectively unstick your door hinges and ensure smooth and hassle-free door operation.
Problem 5: Hinges Not Holding Position
When your hinges fail to hold the door in its open or closed position, it can be frustrating and inconvenient. This problem can lead to doors unexpectedly swinging open or shut, posing safety hazards and disrupting the functionality of your space. Fortunately, there are steps you can take to troubleshoot and resolve this issue.
To troubleshoot hinges that are not holding their position, follow these steps:
- Step 1: Evaluate the hinge tension: Examine the hinge to determine if it has the appropriate tension to hold the door in position. Observe if the hinge feels loose or if the resistance has diminished over time.
- Step 2: Locate the hinge adjustment screws: Many hinges have tension adjustment screws that can be found on the sides or underneath the hinge. These screws allow you to increase or decrease the tension applied to the hinge.
- Step 3: Adjust the tension screws: Using a screwdriver, turn the tension adjustment screws in small increments to increase or decrease the tension. Experiment with different settings until you find the right level of tension that allows the door to hold its position securely.
- Step 4: Test the door: After making adjustments, test the door to see if it now holds its position properly. Open and close the door, and check if it stays in the desired position without drifting or swinging unexpectedly.
- Step 5: Fine-tune the tension: If necessary, make further adjustments to the tension screws until you achieve the desired results. It’s important to strike a balance to ensure that the door is secure but still easy to open and close.
If there are no tension adjustment screws on your hinges or if adjusting them doesn’t solve the problem, the issue may be due to worn hinges or a misaligned door frame. In such cases, it is advisable to seek the assistance of a professional locksmith or handyman to diagnose and fix the underlying issue.
Regular inspection of hinges and periodic adjustments can help prevent them from losing their ability to hold position. It is recommended to inspect the hinges at least once a year and make any necessary adjustments.
By following these troubleshooting steps, you can address hinges that are not holding their position and ensure a secure and stable door operation.
Problem 6: Rusty or Corroded Hinges
Rusty or corroded hinges not only compromise the functionality of your doors but also detract from their overall appearance. Hinges that are exposed to moisture and humidity over time can develop rust or corrosion, making it difficult to open and close the doors smoothly. Fortunately, with proper cleaning and maintenance, you can remove the rust or corrosion and restore the performance of your hinges.
To troubleshoot rusty or corroded hinges, follow these steps:
- Step 1: Inspect the hinges: Examine the hinges closely for any signs of rust or corrosion. Pay attention to areas where the metal surfaces are in contact with each other.
- Step 2: Remove loose rust or corrosion: Use a wire brush or steel wool to gently scrub away any loose rust or corrosion from the hinge surfaces. Be sure to remove as much of the build-up as possible.
- Step 3: Apply a rust remover: Use a commercial rust remover or a homemade solution like vinegar or lemon juice to break down the remaining rust or corrosion. Apply the solution to the affected areas and let it sit for a few minutes to allow the rust to dissolve.
- Step 4: Scrub the hinge: Using the wire brush or steel wool, scrub the hinge again to remove the remaining rust or corrosion. Continue scrubbing until the metal surfaces appear clean and free from rust.
- Step 5: Rinse and dry the hinge: Rinse the hinge with clean water to remove any residue from the rust remover. Dry the hinge thoroughly with a clean cloth to prevent moisture from causing further rusting.
- Step 6: Apply lubricant: Once the hinge is clean and dry, apply a lubricant such as silicone spray or a light machine oil to the pivot points and hinge components. This will help to prevent future rust and keep the hinge moving smoothly.
Regular maintenance and preventive measures can help prevent hinges from rusting or corroding. Avoid exposing the hinges to excessive moisture and humidity, and consider using a protective coating or paint specifically designed for metal surfaces.
In severe cases where the rust or corrosion has caused significant damage to the hinge, it may be necessary to replace the hinge altogether. Consult a professional locksmith or handyman if you are unsure about the condition of the hinge or if you need assistance with replacement.
By following these troubleshooting steps, you can effectively address rusty or corroded hinges and ensure smooth and reliable door operation.
If your door is squeaking, try applying a lubricant to the hinges to reduce friction and noise. This can help the door swing more smoothly.
Troubleshooting Steps
Now that we have explored the common problems associated with door hinges, let’s discuss the step-by-step troubleshooting process you can follow to address these issues effectively. Whether you’re dealing with squeaky hinges, loose hinges, misaligned hinges, stuck hinges, hinges that won’t hold their position, or rusty and corroded hinges, the following steps will guide you towards resolving these problems.
- Step 1: Identify the problem: Carefully observe the door hinges and determine the specific problem you are facing, such as squeaking, looseness, misalignment, sticking, inability to hold position, or rust/corrosion. This will help you focus on the appropriate troubleshooting steps.
- Step 2: Gather necessary tools: Depending on the problem at hand, make sure you have the right tools and materials. This may include lubricants, screwdrivers, wire brushes, steel wool, rust remover, cleaning solutions, lubricating oils, or additional screws if needed.
- Step 3: Perform the appropriate troubleshooting steps: Follow the specific troubleshooting steps provided in each problem section of this article. These steps will guide you in addressing the particular issue you are facing with your door hinges.
- Step 4: Test the door: After implementing the troubleshooting steps, test the door by opening and closing it multiple times. Observe if the problem has been resolved and if the door now operates smoothly and functions properly.
- Step 5: Repeat or seek professional assistance: If the problem persists, you may need to repeat the troubleshooting process or consider seeking assistance from a professional locksmith or handyman. They can offer expert advice and more advanced solutions for complex hinge issues.
- Step 6: Regular maintenance: To prevent future hinge problems, make a habit of inspecting and maintaining your hinges regularly. Clean them, lubricate them, and tighten any loose screws as necessary. This proactive approach will help keep your door hinges in optimal condition.
By following these troubleshooting steps, you can effectively address a wide range of door hinge problems and ensure smooth and reliable door operation in your home or office. Remember to prioritize safety, and if you’re unsure or uncomfortable with any step, it’s always best to consult a professional for assistance.
Now, armed with this knowledge, you can confidently troubleshoot and resolve the issues that may arise with your door hinges, allowing you to enjoy functional and hassle-free doors for years to come.
Read more: How To Fix A Cabinet Door Hinge
Step 1: Lubricating the Hinges
Lubricating the hinges is an essential step in maintaining smooth and silent door operation. Over time, hinges can become dry and develop friction, leading to squeaking noises and difficulty in opening or closing the door. Thankfully, by applying a lubricant to the hinges, you can eliminate these problems and restore their functionality.
To lubricate the hinges, follow these steps:
- Step 1: Gather the necessary materials: Prepare a suitable lubricant for hinges such as silicone spray, light machine oil, or a penetrating oil. Ensure that you have a clean cloth on hand for wiping off any excess lubricant.
- Step 2: Open the door: Open the door fully to access the hinges easily. This will allow you to effectively apply the lubricant to all the necessary areas.
- Step 3: Identify the pivot points: Observe the hinge and identify the pivot points where the hinge components rotate or rub against each other. These are the areas that require lubrication.
- Step 4: Apply the lubricant: Using the lubricant, apply a small amount to the pivot points of each hinge. Be careful not to overapply, as excessive lubricant can attract dirt and debris.
- Step 5: Move the door back and forth: Open and close the door multiple times to distribute the lubricant evenly across the hinge components. This will help to reduce friction and eliminate squeaky noises.
- Step 6: Wipe off excess lubricant: After applying the lubricant and operating the door, use a clean cloth to wipe off any excess oil or spray from the hinge. This will prevent it from collecting dirt or becoming sticky.
Regularly lubricating your hinges can greatly extend their lifespan and prevent potential issues. It is advisable to lubricate the hinges at least once a year or whenever you notice squeaking or stiffness.
If the squeaking or difficulty in door operation persists after lubrication, you may need to explore other troubleshooting steps specific to the problem you are facing. However, in most cases, lubricating the hinges will resolve these minor issues effectively.
By following these simple steps and incorporating regular lubrication into your hinge maintenance routine, you can enjoy smooth and silent door operation throughout your home or office.
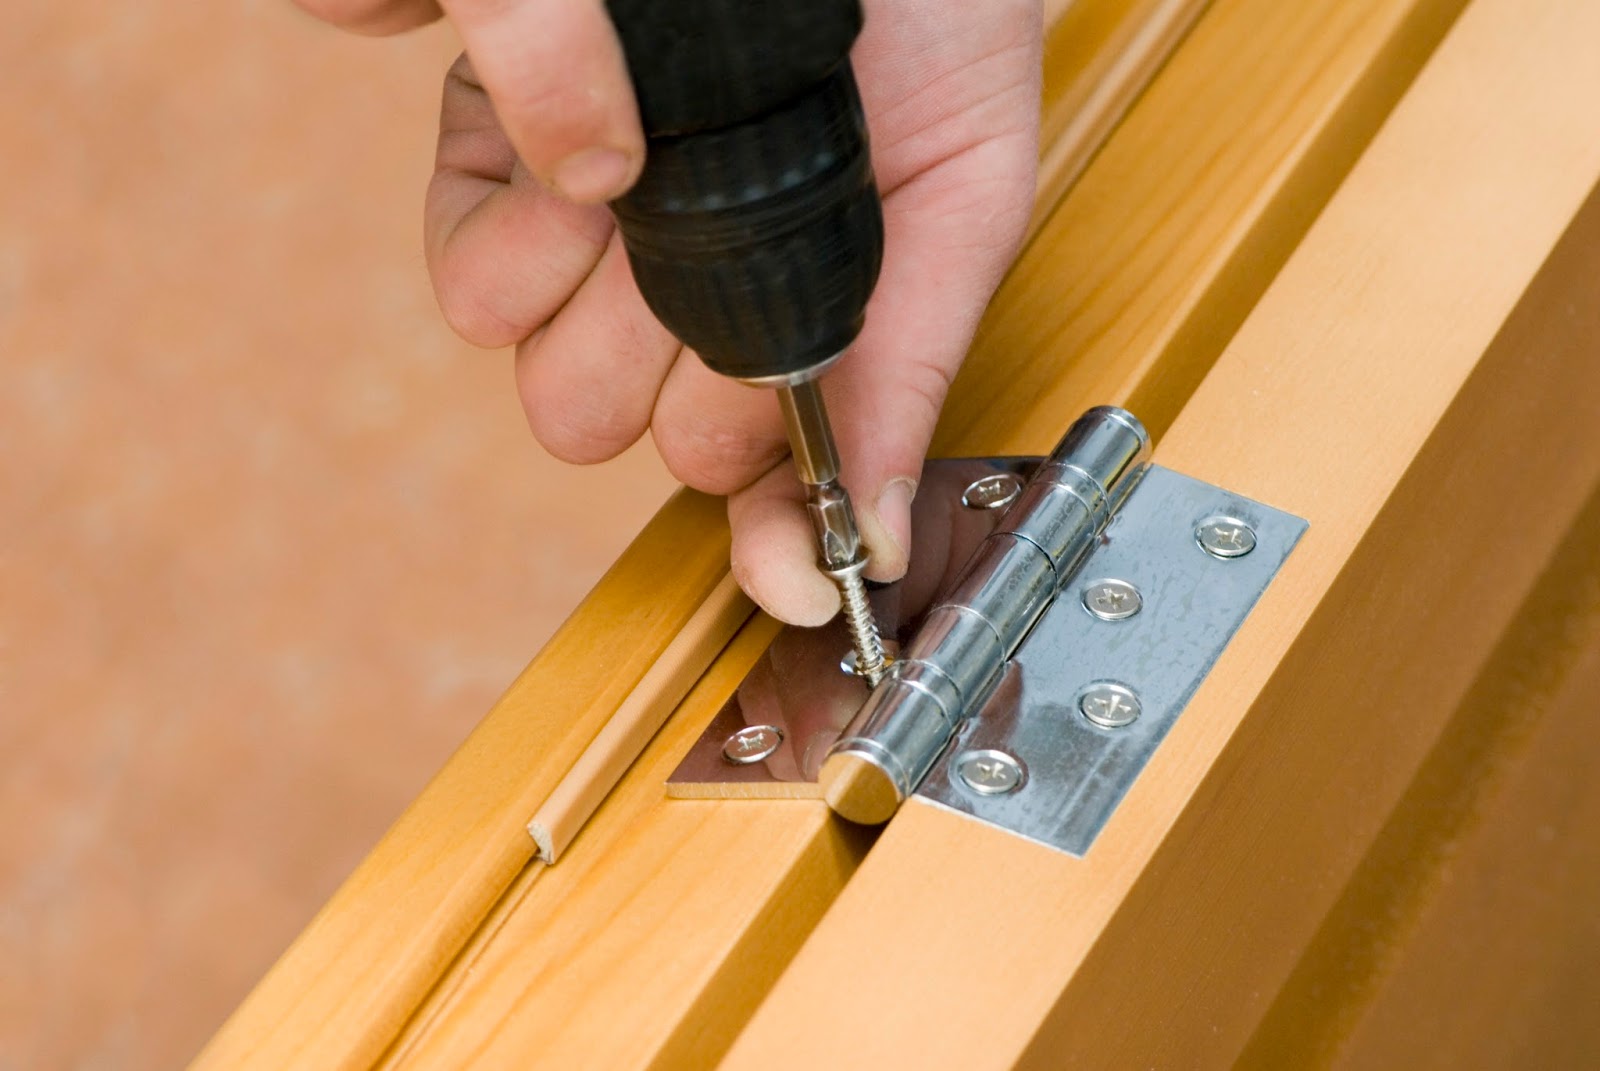
Step 2: Tightening Loose Hinges
Loose hinges can cause a variety of problems, including a sagging or misaligned door that doesn’t close properly. Fortunately, tightening loose hinges is a relatively simple process that can restore stability and functionality to your door. By securing the hinges firmly, you can ensure that your door operates smoothly and aligns correctly with the frame.
To tighten loose hinges, follow these steps:
- Step 1: Gather the necessary tools: To tighten loose hinges, you will need a screwdriver that matches the size of the screws used in your hinges. Prepare the appropriate screwdriver to ensure a secure and proper fit.
- Step 2: Inspect the loose hinges: Examine the hinges closely to identify the specific screws that have become loose. It’s important to determine if the screws on the hinge plates or the ones connecting the door to the hinge are the loosened ones.
- Step 3: Tighten the hinge screws: Using the screwdriver, start by tightening the loose screws on the hinge plates. Gradually tighten each screw, ensuring that they are securely fastened but without overtightening, which could strip the screw holes or damage the hinges.
- Step 4: Test the door alignment: After tightening the screws, close the door to check if it now aligns properly with the door frame. Ensure that there are no gaps and that the door opens and closes smoothly.
- Step 5: Tighten the screws connecting the door to the hinge: If the door still appears sagging or misaligned, you may need to tighten the screws that connect the door to the hinge leaf. Carefully tighten these screws, making sure not to overtighten.
- Step 6: Test the door again: Close and open the door multiple times to ensure that the tightening of the hinge screws has resolved the issue. If necessary, make further adjustments or seek professional assistance.
Regular inspection and maintenance of hinges can help prevent them from becoming loose in the future. It is recommended to check the hinge screws periodically and tighten them if necessary.
If tightening the screws doesn’t solve the problem, or if the screw holes are stripped, you may need to use larger or longer screws to secure the hinges properly. Additionally, you can use wooden dowels or filler material to reinforce the screw holes before tightening the screws.
By following these simple steps and ensuring that the hinge screws are secure, you can effectively address loose hinges and restore stability and functionality to your door.
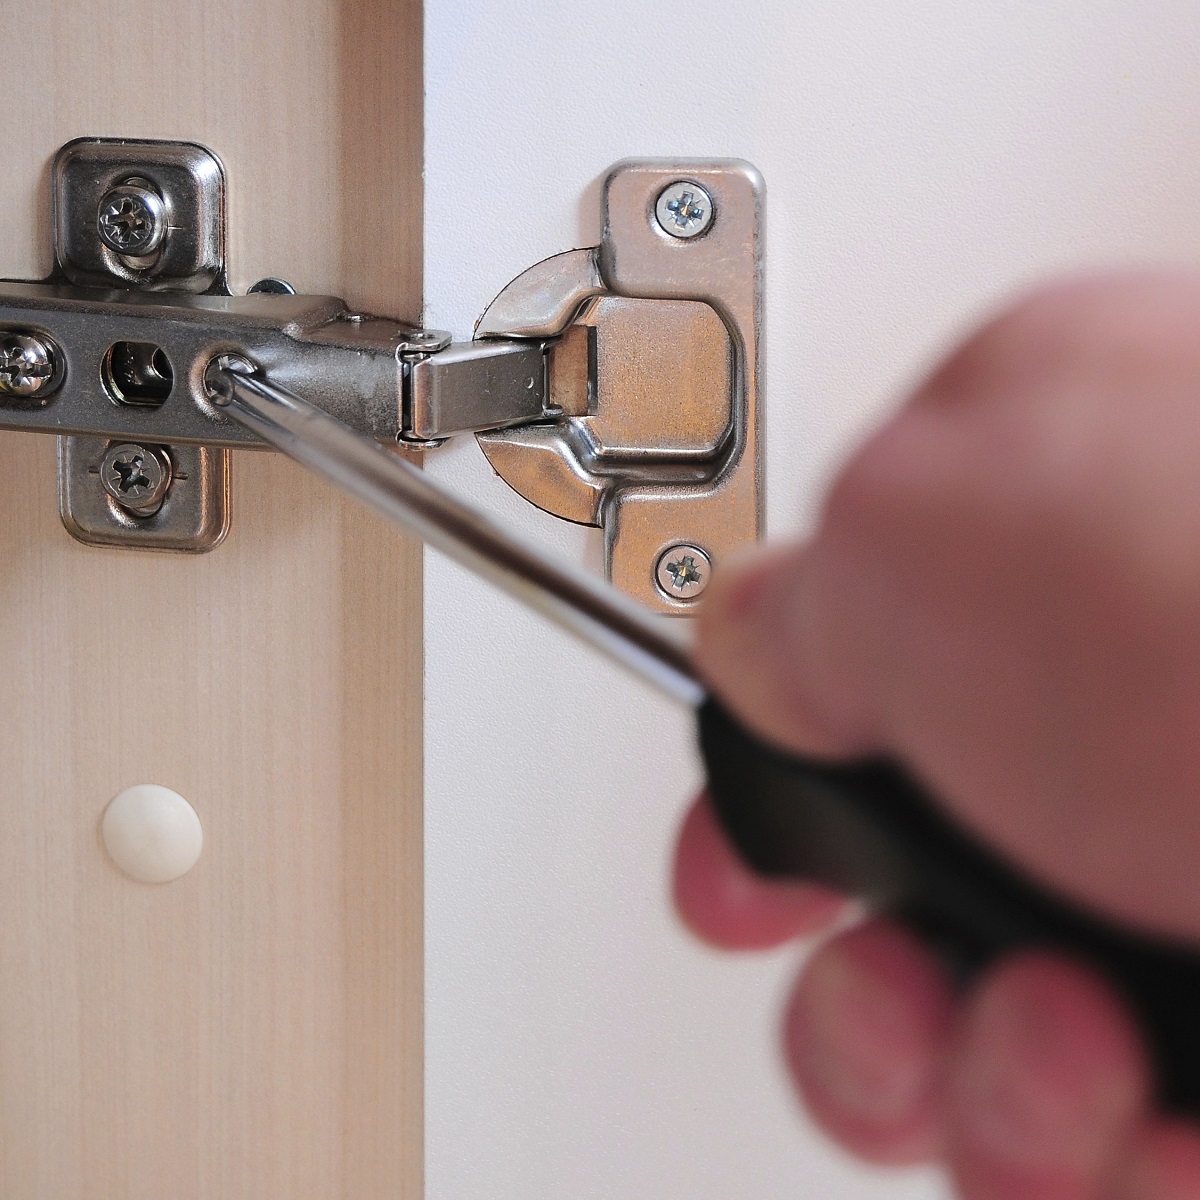
Step 3: Adjusting Misaligned Hinges
Misaligned hinges can cause doors to stick, not close properly, or have gaps between the door and the frame. Adjusting misaligned hinges can help restore proper alignment and functionality to your doors. By making necessary adjustments, you can ensure that your doors open and close smoothly and fit properly within the door frame.
To adjust misaligned hinges, follow these steps:
- Step 1: Identify the misaligned hinge: Observe the door and frame to determine which hinge is causing the misalignment. Look for any gaps between the door and the frame or areas where the door is sticking.
- Step 2: Loosen the hinge screws: Using a screwdriver, gradually loosen the screws on the misaligned hinge. Loosen them just enough to allow for adjustment without removing the screws completely.
- Step 3: Adjust the hinge position vertically: If the door is sagging or the gaps are uneven, you may need to adjust the hinge vertically. To do this, lift or lower the hinge leaf slightly until the door aligns properly with the frame. You can use a wooden wedge to hold the hinge in place temporarily while you tighten the screws.
- Step 4: Adjust the hinge position horizontally: If the door is sticking or there are gaps on the sides, you may need to adjust the hinge horizontally. To do this, shift the hinge left or right slightly until the door fits properly within the frame. Again, you can use a wooden wedge to hold the hinge in place temporarily.
- Step 5: Tighten the hinge screws: With the hinge adjusted, use the screwdriver to tighten the screws securely. Start with the top and bottom screws, then move on to the middle screws, ensuring that all screws are tightened evenly.
- Step 6: Test the door alignment: Close the door and check if it aligns properly with the frame. Open and close the door multiple times to ensure smooth operation. If needed, make further adjustments until the door is properly aligned.
In some cases, misaligned hinges may require more extensive adjustments, such as adding shims or adjusting the mortises in the door frame. If you are unsure about these techniques or if the misalignment is severe, it is advisable to seek assistance from a professional locksmith or handyman.
Regular inspection and maintenance of hinges can help prevent misalignment. Check the hinge screws periodically to ensure they remain tight and make any necessary adjustments promptly.
By following these steps and making necessary adjustments, you can effectively address misaligned hinges and ensure that your doors function properly within the door frame.
Step 4: Unsticking Hinges
Stuck hinges can make it difficult to open or close a door smoothly, which can be frustrating and inconvenient. This problem typically occurs due to debris or rust buildup within the hinge mechanism. By addressing these issues and properly cleaning the hinges, you can unstick them and restore their functionality.
To unstick hinges, follow these steps:
- Step 1: Identify the stuck hinge: Observe the door and determine which hinge is causing the sticking issue. Look for signs of debris or rust around the hinge mechanism.
- Step 2: Remove dirt and debris: Use a brush or toothbrush to gently remove any dirt, dust, or debris from the hinge mechanism. Pay close attention to the pivot points and the areas where the hinge components rub against each other.
- Step 3: Apply a penetrating oil: Penetrating oils such as WD-40 or a similar product can help break up rust and corrosion. Apply the oil to the hinge mechanism and work it into the stuck areas using a brush or cloth. Let the oil sit for a few minutes to allow it to penetrate and loosen the stuck hinge.
- Step 4: Work the hinge: After applying the penetrating oil, gently move the door back and forth to work the oil into the hinge mechanism. This helps to break up any remaining obstructions and improves the hinge’s movement.
- Step 5: Clean up excess oil: Use a clean cloth to wipe off any excess oil from the hinge and surrounding areas. This prevents the oil from attracting dirt or dust that could interfere with the hinge’s operation.
- Step 6: Test the hinge: Once you have completed these steps, test the hinge by opening and closing the door. Check if the sticking issue has been resolved and if the door now operates smoothly.
Regular maintenance and preventive measures can help prevent hinges from sticking in the future. Avoid exposing the hinges to excessive moisture and humidity, and consider using a protective coating or lubricant specifically designed for hinges and metal surfaces.
In cases where the hinges are severely rusted or damaged, it may be necessary to replace them. Consult a professional locksmith or handyman if you are unsure about the condition of the hinge or if you need assistance with replacement.
By following these steps and properly addressing sticking hinges, you can restore smooth and reliable door operation in your home or office.
Read more: How To Install Shed Door Hinges
Step 5: Reinforcing Hinges
Reinforcing hinges is a valuable step in improving the stability and durability of your doors, especially if you’re dealing with heavy or frequently used doors. Reinforcing hinges involves adding extra support to ensure that the hinges can withstand the weight and stress placed on them. This step can help prevent hinge failure, door misalignment, and other related problems.
To reinforce hinges, follow these steps:
- Step 1: Evaluate hinge support: Assess the current support of your hinges to determine if reinforcement is necessary. Take note of any signs of wear, weakness, or movement in the hinge components.
- Step 2: Select hinge reinforcement options: There are several methods you can use to reinforce hinges, including the use of larger or longer screws, adding hinge shims, using hinge jamb reinforcement plates, or installing hinge pin door stoppers. Choose the option that is appropriate for your specific hinge and door setup.
- Step 3: Replace screws: Remove the existing screws from the hinges and replace them with longer or thicker screws. These longer screws will help anchor the hinges more securely into the door frame or the door itself.
- Step 4: Install hinge shims: Hinge shims can be used to fill the gaps between the hinges and the door or the frame. These shims provide extra support and stability, ensuring that the hinges remain in a secure position.
- Step 5: Apply hinge jamb reinforcement plates: Reinforcement plates can be added to the door jamb to strengthen the hinge area. These plates are installed behind the hinge leafs and provide additional support to prevent hinge sagging or pulling away from the door frame.
- Step 6: Consider hinge pin door stoppers: Hinge pin door stoppers can be installed on the hinge pin to prevent the door from swinging open too far and putting excess strain on the hinges. This can help prevent hinge damage and increase the longevity of the hinges.
By reinforcing your hinges, you can extend the lifespan of your doors and reduce the likelihood of hinge-related problems. Reinforced hinges provide added support, stability, and security to ensure that your doors operate smoothly and effectively for years to come.
If you are unsure about the best method to reinforce your hinges, consult a professional locksmith or handyman for advice and assistance. They can guide you and offer recommendations based on their expertise and experience.
By following these steps and reinforcing your hinges, you can help ensure the longevity and reliable functionality of your doors.
Step 6: Removing Rust or Corrosion from Hinges
Rust and corrosion can greatly affect the functionality and overall appearance of your door hinges. These issues are commonly caused by exposure to moisture and humidity over time. Removing rust or corrosion from hinges is necessary to restore their smooth operation and prevent further deterioration. By following these steps, you can effectively remove rust or corrosion and restore your hinges to optimal condition.
To remove rust or corrosion from hinges, follow these steps:
- Step 1: Gather the necessary materials: You will need a wire brush, steel wool, rust remover solution, vinegar, lemon juice, or a similar acidic solution, a clean cloth, and lubricating oil or rust preventative spray.
- Step 2: Inspection: Carefully inspect the hinges and identify areas where rust or corrosion has formed. Pay close attention to the hinge surfaces, hinge pins, and areas where metal components rub against each other.
- Step 3: Remove loose rust or corrosion: Use a wire brush or steel wool to gently scrub away any loose rust or corrosion from the hinge surfaces. Be thorough but careful not to damage the hinge or surrounding areas.
- Step 4: Apply rust remover: If there are stubborn or heavily rusted areas, use a commercial rust remover according to the manufacturer’s instructions. Alternatively, you can create a natural solution by mixing vinegar or lemon juice with water.
- Step 5: Abrade the rusted areas: Dip the steel wool or brush into the rust remover solution and scrub the affected areas. Apply light pressure and continue until the rust or corrosion has been removed. Rinse the hinge with clean water afterwards.
- Step 6: Dry and lubricate the hinges: Use a clean cloth to dry the hinges thoroughly. Once dry, apply a lubricating oil or rust preventative spray to the hinge components to protect against future rusting and promote smooth operation.
Regular maintenance and preventive measures can help mitigate the risk of rust and corrosion. Avoid exposing the hinges to excessive moisture and humidity, and consider using a protective coating or lubricant that specifically guards against rust on metal surfaces.
In severe cases where the rust or corrosion has caused significant damage to the hinge, it may be necessary to replace the hinge altogether. Consult a professional locksmith or handyman if you are unsure about the condition of the hinge or if you need assistance with replacement.
By following these steps and effectively removing rust or corrosion from your hinges, you can restore their functionality and appearance, ensuring smooth and reliable door operation.
Conclusion
Door hinges are essential components that allow doors to open and close smoothly. However, over time, hinges can develop various problems that affect their functionality, including squeaking, looseness, misalignment, sticking, inability to hold position, and rust or corrosion. Recognizing these common issues and implementing proper troubleshooting steps can help restore the performance and longevity of your hinges.
In this comprehensive guide, we have outlined the step-by-step troubleshooting process for each of these hinge problems. From lubricating squeaky hinges to tightening loose hinges, adjusting misaligned hinges, unsticking hinges, reinforcing them, and removing rust or corrosion, we have provided detailed instructions to address these issues effectively.
Throughout the troubleshooting process, it’s important to prioritize safety and be aware of your limitations. If a problem seems too complex or you are unsure about the appropriate steps, it is always advisable to seek professional assistance from a locksmith or handyman.
Regular maintenance and preventive measures can help prolong the life of your hinges and prevent future issues. It is recommended that you periodically inspect your hinges, lubricate them, tighten any loose screws, and address any signs of hinge wear or damage promptly.
By following the steps outlined in this guide and practicing regular maintenance, you can ensure smooth and reliable door operation, enhance the security of your space, and prolong the lifespan of your doors and hinges.
Remember, by maintaining your door hinges properly, you not only improve their function but also add convenience and value to your home or office. With a little effort and attention, you can keep your doors operating seamlessly for years to come.
Frequently Asked Questions about Troubleshooting Door Hinge Problems
Was this page helpful?
At Storables.com, we guarantee accurate and reliable information. Our content, validated by Expert Board Contributors, is crafted following stringent Editorial Policies. We're committed to providing you with well-researched, expert-backed insights for all your informational needs.


0 thoughts on “Troubleshooting Door Hinge Problems”