Articles
What Goes Under Roof Shingles
Modified: August 28, 2024
Discover the articles that go under roof shingles for proper installation and maintenance. Enhance your knowledge about roofing materials and techniques.
(Many of the links in this article redirect to a specific reviewed product. Your purchase of these products through affiliate links helps to generate commission for Storables.com, at no extra cost. Learn more)
Introduction
In the world of roofing, shingles play a vital role in protecting our homes from the elements. The quality and durability of roof shingles are important considerations, but what often goes unnoticed is the importance of what goes under roof shingles. The underlayment, as it is commonly referred to, is a crucial component that provides an extra layer of protection to the roof, helping to prevent leaks and maintain the longevity of the shingles.
In this article, we will explore the different types of underlayment that can be used beneath roof shingles, with a specific focus on synthetic underlayment and traditional felt underlayment. We will also discuss the factors to consider when choosing the right underlayment for your roofing project, as well as the installation process.
Understanding the role of underlayment is essential to ensure the overall effectiveness and performance of your roof. So, let’s dive in and discover what goes under roof shingles!
Key Takeaways:
- The underlayment beneath roof shingles is a critical component that provides an extra layer of protection, with options including synthetic underlayment for enhanced durability and moisture resistance.
- Choosing the right underlayment involves considering factors such as climate, roof type, budget, and personal preference, and proper installation techniques are crucial for creating a secure and effective barrier against water intrusion.
Read more: What Is A Roof Shingle
Understanding Roof Shingles
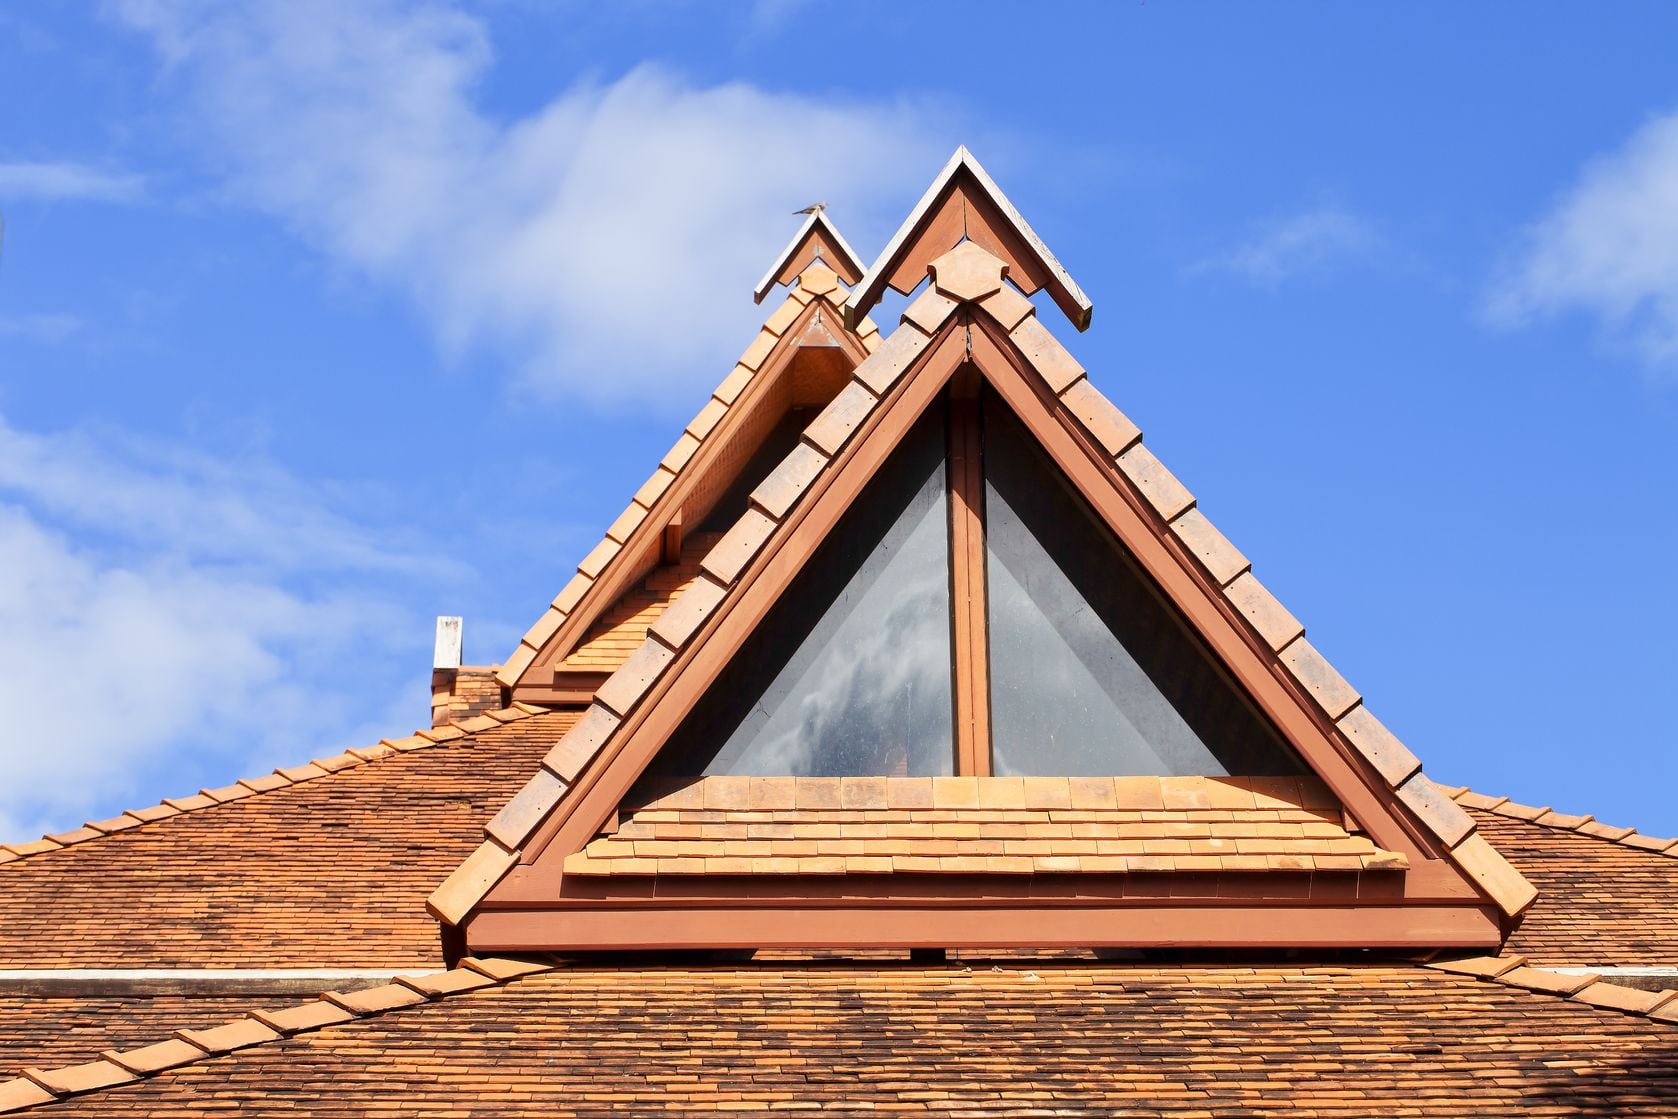
Roof shingles are the outermost layer of a roof and are designed to protect the underlying structure from various weather conditions such as rain, snow, wind, and sunlight. They come in a wide range of materials, including asphalt, wood, metal, and slate, each with their own unique characteristics and benefits.
Shingles are typically installed in overlapping rows, starting from the bottom of the roof and working upwards. This overlapping pattern creates a watertight barrier and helps to channel water away from the roof’s surface.
While shingles are responsible for shielding the roof from rain and other elements, they are not entirely impervious to water. In cases where water manages to penetrate the shingles, the underlayment serves as an additional layer of protection, preventing water from seeping into the underlying structure.
The underlayment acts as a secondary barrier, safeguarding the roof deck from leaks and providing added protection against wind-driven rain. It also helps to create a smooth surface for the shingles to adhere to, ensuring proper installation and minimizing the risk of damage.
Now that we have a basic understanding of roof shingles and their purpose, let’s explore the different types of underlayment that can be used beneath them.
Types of Underlayment
There are two main types of underlayment that are commonly used beneath roof shingles: synthetic underlayment and traditional felt underlayment. Each has its own advantages and considerations, and the choice between the two will depend on factors such as climate, budget, and personal preference.
Synthetic Underlayment
Synthetic underlayment is a newer alternative to traditional felt underlayment. It is made from a combination of materials such as polypropylene, fiberglass, and polyester. Synthetic underlayment offers several advantages over felt, including enhanced durability, moisture resistance, and tear resistance.
This type of underlayment is lightweight and easy to install. It provides superior protection against leaks and can withstand extreme weather conditions. Synthetic underlayment is also less prone to wrinkling and buckling, which can affect the overall appearance of the roof.
Additionally, synthetic underlayment is highly breathable, allowing the roof to ventilate properly and preventing moisture buildup. This is particularly important in areas with high humidity or heavy rainfall.
Felt Underlayment
Felt underlayment, also known as roofing felt or tar paper, has been a popular choice for many years. It is typically made from organic materials such as cellulose or fiberglass, which are infused with bitumen or asphalt to provide waterproofing capabilities.
Felt underlayment is a cost-effective option and is widely available. It provides a good level of protection and is suitable for most residential roofing applications. However, it is not as durable as synthetic underlayment and may require replacement more frequently.
One of the drawbacks of felt underlayment is its tendency to absorb moisture. While it does provide some waterproofing properties, it can become saturated over time, leading to potential issues such as mold or mildew growth.
Despite these limitations, felt underlayment is still a viable option for many homeowners, especially for those on a tight budget or in areas with milder weather conditions.
Now that we have explored the different types of underlayment available, let’s move on to understanding the factors to consider when choosing the right underlayment for your roofing project.
Read more: What Are The Best Roof Shingles
Synthetic Underlayment
Synthetic underlayment is a popular choice for many homeowners and roofing professionals due to its numerous benefits and advantages over traditional felt underlayment. Made from synthetic materials like polypropylene, fiberglass, and polyester, synthetic underlayment offers enhanced durability, moisture resistance, and tear resistance.
One of the biggest advantages of synthetic underlayment is its superior durability. It is designed to withstand the harsh elements and prolonged exposure to the sun. Unlike felt underlayment, which can deteriorate over time, synthetic underlayment maintains its integrity, ensuring long-lasting protection for your roof.
In addition to its durability, synthetic underlayment also provides excellent moisture resistance. It is designed to repel water and prevent water infiltration into the roof structure. This is especially important in areas with high rainfall or frequent storms. Synthetic underlayment acts as an additional barrier, protecting your roof from potential leaks and reducing the risk of water damage.
Another advantage of synthetic underlayment is its tear resistance. Due to its composition and manufacturing process, synthetic underlayment is less likely to tear or rip during installation or exposure to strong winds. This ensures a tighter and more secure installation, minimizing the risk of water intrusion.
Synthetic underlayment is also known for its lightweight nature, making it easier to handle and install compared to traditional felt underlayment. Its lightweight design reduces the strain on roofers during the installation process, allowing for faster and more efficient installation.
Furthermore, synthetic underlayment is highly breathable. It allows for proper air circulation and ventilation underneath the shingles, which helps in preventing the accumulation of moisture and reducing the potential for mold or rot. This breathability also helps to regulate the temperature in the attic, improving energy efficiency and reducing cooling and heating costs.
When it comes to aesthetics, synthetic underlayment typically has a sleek and professional appearance. It lays flatter and smoother than felt underlayment, resulting in a neater overall look for your roofing project.
While synthetic underlayment offers numerous benefits, it is important to note that it usually comes at a higher price point compared to traditional felt underlayment. However, the added costs can be justified by the increased durability and longevity it provides.
With its durability, moisture resistance, tear resistance, and other advantages, synthetic underlayment is a popular choice for those looking for a reliable and long-lasting underlayment option for their roof.
Now that we have discussed synthetic underlayment, let’s move on to understanding traditional felt underlayment and its benefits and considerations.
Felt Underlayment
Felt underlayment, also known as roofing felt or tar paper, has been a long-standing choice for many roofing projects. It is made from organic materials such as cellulose or fiberglass, which are infused with bitumen or asphalt to provide waterproofing capabilities.
One of the key advantages of felt underlayment is its affordability. It is generally less expensive compared to synthetic underlayment, making it a popular choice for cost-conscious homeowners or those on a tight budget.
Felt underlayment also offers a good level of protection for the roof. It serves as an additional layer of defense against moisture, preventing water from seeping into the roof structure. While it may not have the same level of durability as synthetic underlayment, it still provides adequate protection for most residential roofing applications.
In addition, felt underlayment is widely available and easy to install, making it a convenient choice for both DIY enthusiasts and professional roofers. Its flexibility allows for easy maneuverability and fitting around various roof components.
However, one of the main considerations with felt underlayment is its tendency to absorb moisture. Over time, it can become saturated, especially in areas with high humidity or significant rainfall. This can lead to mold or mildew growth and potential damage to the roof structure if not properly addressed.
Another drawback of felt underlayment is its susceptibility to wrinkling or buckling during installation. If not installed correctly, wrinkles or creases can form, which may affect the appearance and performance of the roof. Proper installation techniques, such as careful rolling and smoothing, can help minimize these issues.
Despite these limitations, felt underlayment remains a suitable choice for many homeowners, particularly in regions with milder weather conditions or for projects with budget constraints.
It is important to note that the choice between synthetic underlayment and felt underlayment will depend on factors such as climate, budget, and personal preferences. Consulting a roofing professional can help in determining the most appropriate underlayment option for your specific needs and circumstances.
Now that we have explored both synthetic underlayment and felt underlayment, let’s move on to discussing the factors you should consider when choosing the right underlayment for your roofing project.
Choosing the Right Underlayment
When it comes to choosing the right underlayment for your roofing project, there are several factors to consider. The decision should be based on a combination of climate, roof type, budget, and personal preference.
1. Climate: The climate in your area plays a significant role in determining the type of underlayment that is best suited for your roof. If you live in a region with high rainfall, extreme temperatures, or frequent storms, a more durable and moisture-resistant option like synthetic underlayment may be preferable. On the other hand, if you reside in a milder climate with less severe weather conditions, traditional felt underlayment may suffice.
2. Roof Type: The type of roof you have will also influence your underlayment choice. Different roofing materials and designs may require specific underlayment types to ensure proper installation and long-term performance. Consult with a roofing professional to understand the underlayment requirements for your specific roof type.
3. Budget: Your budget will play a role in determining the underlayment option that fits within your financial means. Synthetic underlayment typically comes at a higher cost compared to felt underlayment, so it is essential to consider your budget constraints while still aiming for quality and long-lasting protection.
4. Personal Preference: Your personal preference and any specific requirements or concerns you may have should also be taken into account. Think about factors like sustainability, breathability, fire resistance, and any other specific features that matter to you.
It is highly recommended to consult with a roofing professional or contractor who can assess your specific roofing needs and provide expert guidance on the most suitable underlayment option for your project. They can consider all the relevant factors and help you make an informed decision.
Remember that while underlayment is important, it works in conjunction with the overall roofing system. Proper installation, ventilation, and maintenance are equally important factors to ensure the longevity and efficiency of your roof.
Now that we have discussed the factors to consider when choosing the right underlayment, let’s move on to understanding the installation process and best practices for underlayment application.
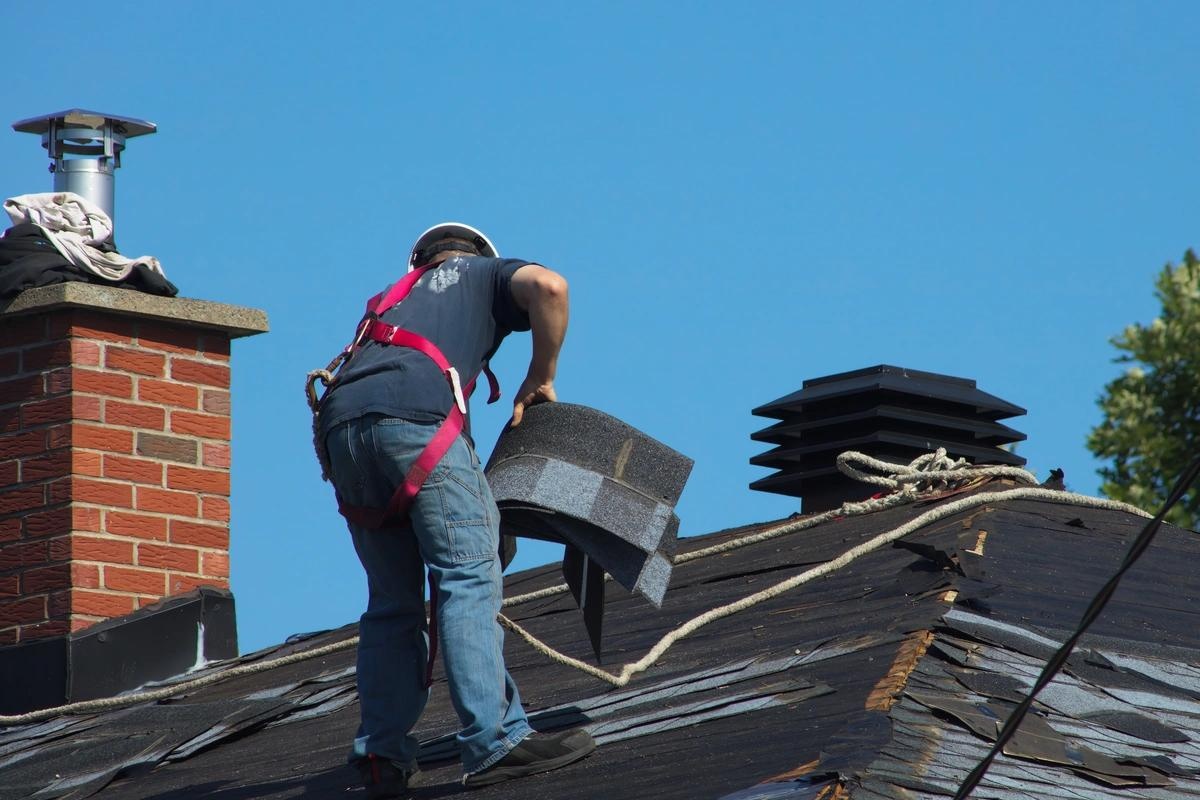
Installation Process
The installation process of underlayment is a crucial step in creating a well-protected and durable roof. It involves careful preparation of the roof surface, proper application of the underlayment, and following specific techniques for overlapping.
Read more: What Goes Under A Mattress
Preparing the Roof Surface
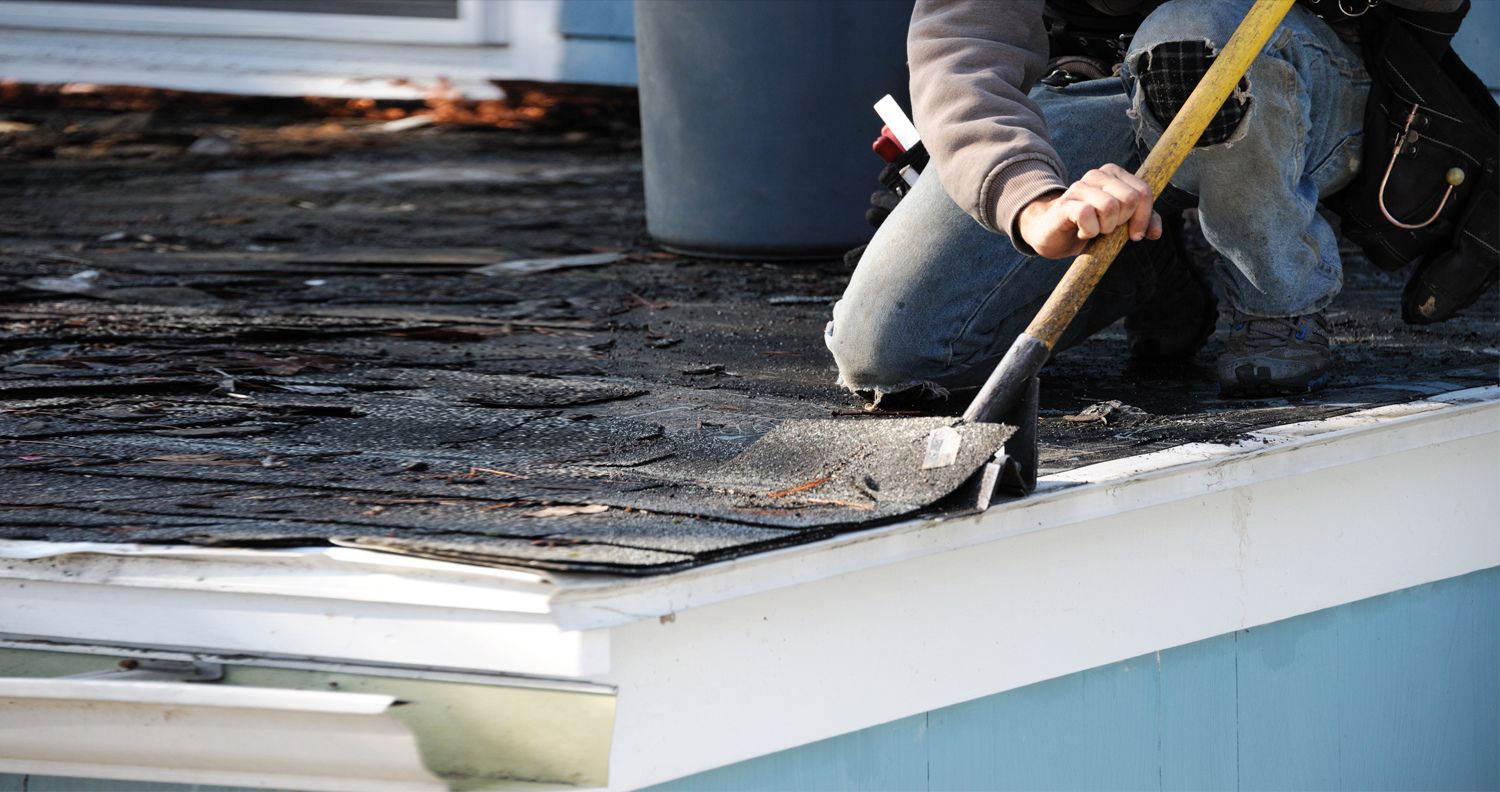
Before installing the underlayment, it is important to ensure that the roof surface is clean, dry, and free from any debris or loose materials. Remove any existing underlayment or damaged shingles, and inspect the roof for any signs of damage or leaks that need to be addressed before proceeding.
Applying Underlayment
Start at the bottom of the roof and work your way up. Unroll the underlayment across the roof, leaving a slight overhang at the edges. Secure the underlayment with roofing nails or staples, following the manufacturer’s guidelines for spacing and placement.
When installing synthetic underlayment, ensure that the printed side is facing up to provide optimal UV protection. With felt underlayment, the exposed side should face down to allow for proper adhesion with the shingles.
Overlapping Techniques
Proper overlapping of the underlayment is important to create a watertight barrier and prevent water from seeping through the seams.
For synthetic underlayment, overlap the edges by a minimum of 6 inches horizontally and 4 inches vertically. Use roofing nails or staples to secure the overlapping sections, making sure they are adequately fastened but not too tight, as this can cause distortion or tearing of the underlayment.
For felt underlayment, overlap the edges by approximately 2 inches horizontally and 4 inches vertically. Use asphalt cement or roofing adhesive to seal the overlapping sections, ensuring a tight and secure bond.
Pay extra attention to valleys, ridges, and any areas where different roof planes meet. These areas often require additional layers of underlayment for added protection against water intrusion.
Throughout the installation process, avoid walking directly on the underlayment as much as possible to prevent damage. Use caution and proper safety measures when working on the roof.
It is important to follow the specific installation guidelines provided by the manufacturer of your chosen underlayment. These guidelines may vary depending on the type and brand of underlayment you are using.
Remember that underlayment acts as a secondary layer of protection and should not replace proper flashing, ventilation, and other essential components of a roofing system. Ensure that these elements are also properly installed to maintain the overall integrity and performance of your roof.
Now that we have covered the installation process of underlayment, let’s conclude our discussion.
Preparing the Roof Surface
Before installing underlayment, it is crucial to properly prepare the roof surface. This preparatory stage ensures that the underlayment will adhere effectively and that the roof will have a solid foundation for optimal performance. Here are the key steps involved in preparing the roof surface:
Read more: How To Shingle A Gable Roof
Clean the Roof
Start by removing any debris, dirt, or loose materials from the roof surface. Use a broom, brush, or air blower to clear away leaves, branches, and other debris that may have accumulated. If there are any stubborn stains or buildup, consider using a gentle cleaning solution recommended by the roofing manufacturer.
Repair Damage
Inspect the roof for any signs of damage, such as cracked or broken shingles, damaged flashing, or leaks. Address these issues before installing the underlayment. Replace any damaged or missing shingles and repair or replace any compromised flashing. This will ensure that the underlayment is placed on a structurally sound and properly sealed roof.
Address Moisture Issues
If there are any indications of moisture or water damage on the roof, it is essential to address these issues before proceeding. Look for signs of water stains, mold, or rot on the roof deck. If necessary, consult with a roofing professional or inspector to identify the source of the moisture and take appropriate measures to repair and mitigate further damage.
Ensure Proper Ventilation
Check the ventilation system in the attic to ensure that it is functioning correctly. Adequate ventilation is crucial for preventing the buildup of excess heat and moisture in the attic, which can lead to roof damage and reduced energy efficiency. Make sure that vents are clear of obstructions and that air can freely circulate through the attic space.
Read more: What Goes Under Fake Grass
Inspect the Roof Deck
Examine the roof deck for any signs of weakness or deterioration. Take note of any areas that feel soft or spongy, as this may indicate rot or structural issues. Address any necessary repairs or reinforcement to ensure that the roof deck can adequately support the underlayment and shingles.
By thoroughly preparing the roof surface, you create a strong foundation for the underlayment and the entire roofing system. This preparation ensures that the underlayment will adhere properly and provide the necessary protection against moisture and other elements.
Remember to follow the specific instructions provided by the underlayment manufacturer and consult with a professional roofer if needed. Taking the time to properly prepare the roof surface will help ensure the longevity and effectiveness of your roof.
Now that we have covered the preparation of the roof surface, let’s move on to the next step in the installation process: applying the underlayment.
Applying Underlayment
Once the roof surface has been properly prepared, it’s time to apply the underlayment. This step is crucial in providing an additional layer of protection against moisture and ensuring the longevity of your roof. Here’s a step-by-step guide on how to apply underlayment:
Start at the Bottom
Begin at the bottom edge of the roof and work your way up. Unroll the underlayment parallel to the eave, leaving a slight overhang of about 2 to 4 inches. This overhang will help direct water away from the roof and prevent it from infiltrating the underlying structure.
Secure the Underlayment
Once the underlayment is positioned, secure it to the roof using roofing nails or staples. The specific fastening requirements will depend on the type of underlayment you are using, so refer to the manufacturer’s instructions. Typically, nails or staples should be placed around 6 to 12 inches apart along the edges and seams, ensuring a secure and tight fit.
Read more: What Goes Under Vinyl Siding
Overlap the Underlayment
As you progress up the roof, make sure to overlap each row of underlayment. The amount of overlap required will depend on the type of underlayment and local building codes, but a general rule of thumb is to overlap the side edges by around 2 to 6 inches and the end edges by around 4 to 6 inches. This overlapping technique helps create a watertight seal and improves the overall durability of the roofing system.
Adhere the Overlapping Sections
In the case of synthetic underlayment, the overlapping sections can be simply overlapped. However, for felt underlayment, it is important to adhere the overlapping sections together using asphalt cement or roofing adhesive. Apply a thin, even layer of the adhesive to the underlayment and press the sections together, ensuring a secure and watertight seal.
Avoid Distortion or Wrinkles
During installation, take care to avoid any distortion or wrinkles in the underlayment. Smooth out the surface as you go along to ensure a flat and even application. It’s recommended to avoid walking directly on the underlayment to prevent any accidental damage.
It’s worth noting that the specific application techniques may vary depending on the type of underlayment and local building codes. Always refer to the manufacturer’s instructions and consult with a professional roofer if you have any doubts or questions.
By properly applying the underlayment, you create a reliable and effective moisture barrier that helps protect your roof and home. The underlayment provides an additional layer of defense against water infiltration and helps to extend the lifespan of your roofing system.
Now that we have covered the process of applying underlayment, let’s move on to the important aspect of overlapping techniques.
Overlapping Techniques
Proper overlapping of underlayment is crucial for creating a strong and watertight barrier on your roof. It ensures that any water that may reach one layer of underlayment is channeled safely down the roof without seeping through to the underlying structure. Here are some important overlapping techniques to consider:
Read more: What Paint Goes With A Brown Roof
Horizontal Overlap
For both synthetic underlayment and felt underlayment, it is important to achieve a horizontal overlap between the rows. This involves overlapping the side edges of the underlayment as you work your way up the roof. The recommended overlap distance is typically around 2 to 6 inches, depending on the specific underlayment and local building codes. This horizontal overlap ensures that any water running down the roof will flow over the top edges of the underlayment, rather than finding its way through the seams.
Vertical Overlap
In addition to the horizontal overlap, it is also important to achieve a vertical overlap when applying the underlayment. This involves overlapping the end edges of the underlayment as you move from one row to the next. The recommended vertical overlap distance is usually around 4 to 6 inches, but it’s important to check the manufacturer’s instructions and local building codes for the specific requirements. The vertical overlap helps ensure that water cannot infiltrate the seams between adjoining sections of underlayment.
Staggered Overlap
In certain situations, it may be necessary to stagger the overlaps to provide even more protection. This is especially important in areas prone to heavy rain or strong winds. Staggering the overlaps helps to create a more robust barrier against water infiltration. To stagger the overlaps, simply offset each row’s vertical overlap by a few inches compared to the row below it.
Adhering the Overlapping Sections
While synthetic underlayment typically requires a simple overlap, felt underlayment may need the overlapping sections to be adhered together. This is done using asphalt cement or roofing adhesive. Apply a thin, even layer of the adhesive to the underlayment and carefully press the overlapping sections together. This ensures a secure and watertight seal at the seams.
Remember that the specific overlap requirements may vary depending on the type of underlayment and local building codes. Always refer to the manufacturer’s instructions and consult with a professional roofer if you have any doubts or questions.
By employing proper overlapping techniques, you can enhance the integrity and effectiveness of the underlayment, providing a robust layer of protection for your roof. This helps to minimize the risk of water infiltration and ensures the durability and longevity of your roofing system.
Now that we have covered the important overlapping techniques, let’s summarize what we have learned so far.
Conclusion
In conclusion, the underlayment plays a crucial role in protecting your roof and preserving its longevity. Understanding what goes under roof shingles is essential for homeowners and roofing professionals alike. We have explored the different types of underlayment, including synthetic underlayment and traditional felt underlayment. Both options have their own advantages and considerations, depending on factors such as climate, budget, and personal preference.
Synthetic underlayment offers enhanced durability, moisture resistance, and tear resistance. It is lightweight, easy to install, and highly breathable, making it an excellent choice for areas with harsh weather conditions or high humidity.
Felt underlayment, although more affordable, still provides adequate protection for most residential roofing applications. It is widely available and easy to work with, making it a common choice for homeowners with budget constraints or in milder climate areas.
Choosing the right underlayment involves considering factors such as climate, roof type, budget, and personal preference. Consultation with a roofing professional is highly recommended to ensure the most suitable option for your specific needs.
The installation process of underlayment requires careful preparation of the roof surface, proper application techniques, and attention to overlapping. This ensures a secure and effective barrier against water intrusion, contributing to the overall performance and durability of your roof.
By understanding the importance of underlayment and following the recommended practices, you can enhance the protection and longevity of your roof. Remember to consult with a professional roofer for expert guidance and adhere to the manufacturer’s instructions for the specific underlayment you are using.
Properly installing the underlayment sets the stage for a successful roofing project, providing peace of mind and assurance that your home will be well protected from the elements for years to come.
Now you are equipped with the knowledge to make informed decisions about what goes under your roof shingles. Whether you choose synthetic underlayment or felt underlayment, ensure that your roofing system is properly protected with a high-quality underlayment that suits your specific needs.
Frequently Asked Questions about What Goes Under Roof Shingles
Was this page helpful?
At Storables.com, we guarantee accurate and reliable information. Our content, validated by Expert Board Contributors, is crafted following stringent Editorial Policies. We're committed to providing you with well-researched, expert-backed insights for all your informational needs.


0 thoughts on “What Goes Under Roof Shingles”