Articles
What To Do When Roof Is Leaking
Modified: October 20, 2024
Learn effective ways to deal with a leaking roof in our informative articles. Discover expert advice on roof repairs and prevent further damage.
(Many of the links in this article redirect to a specific reviewed product. Your purchase of these products through affiliate links helps to generate commission for Storables.com, at no extra cost. Learn more)
Introduction
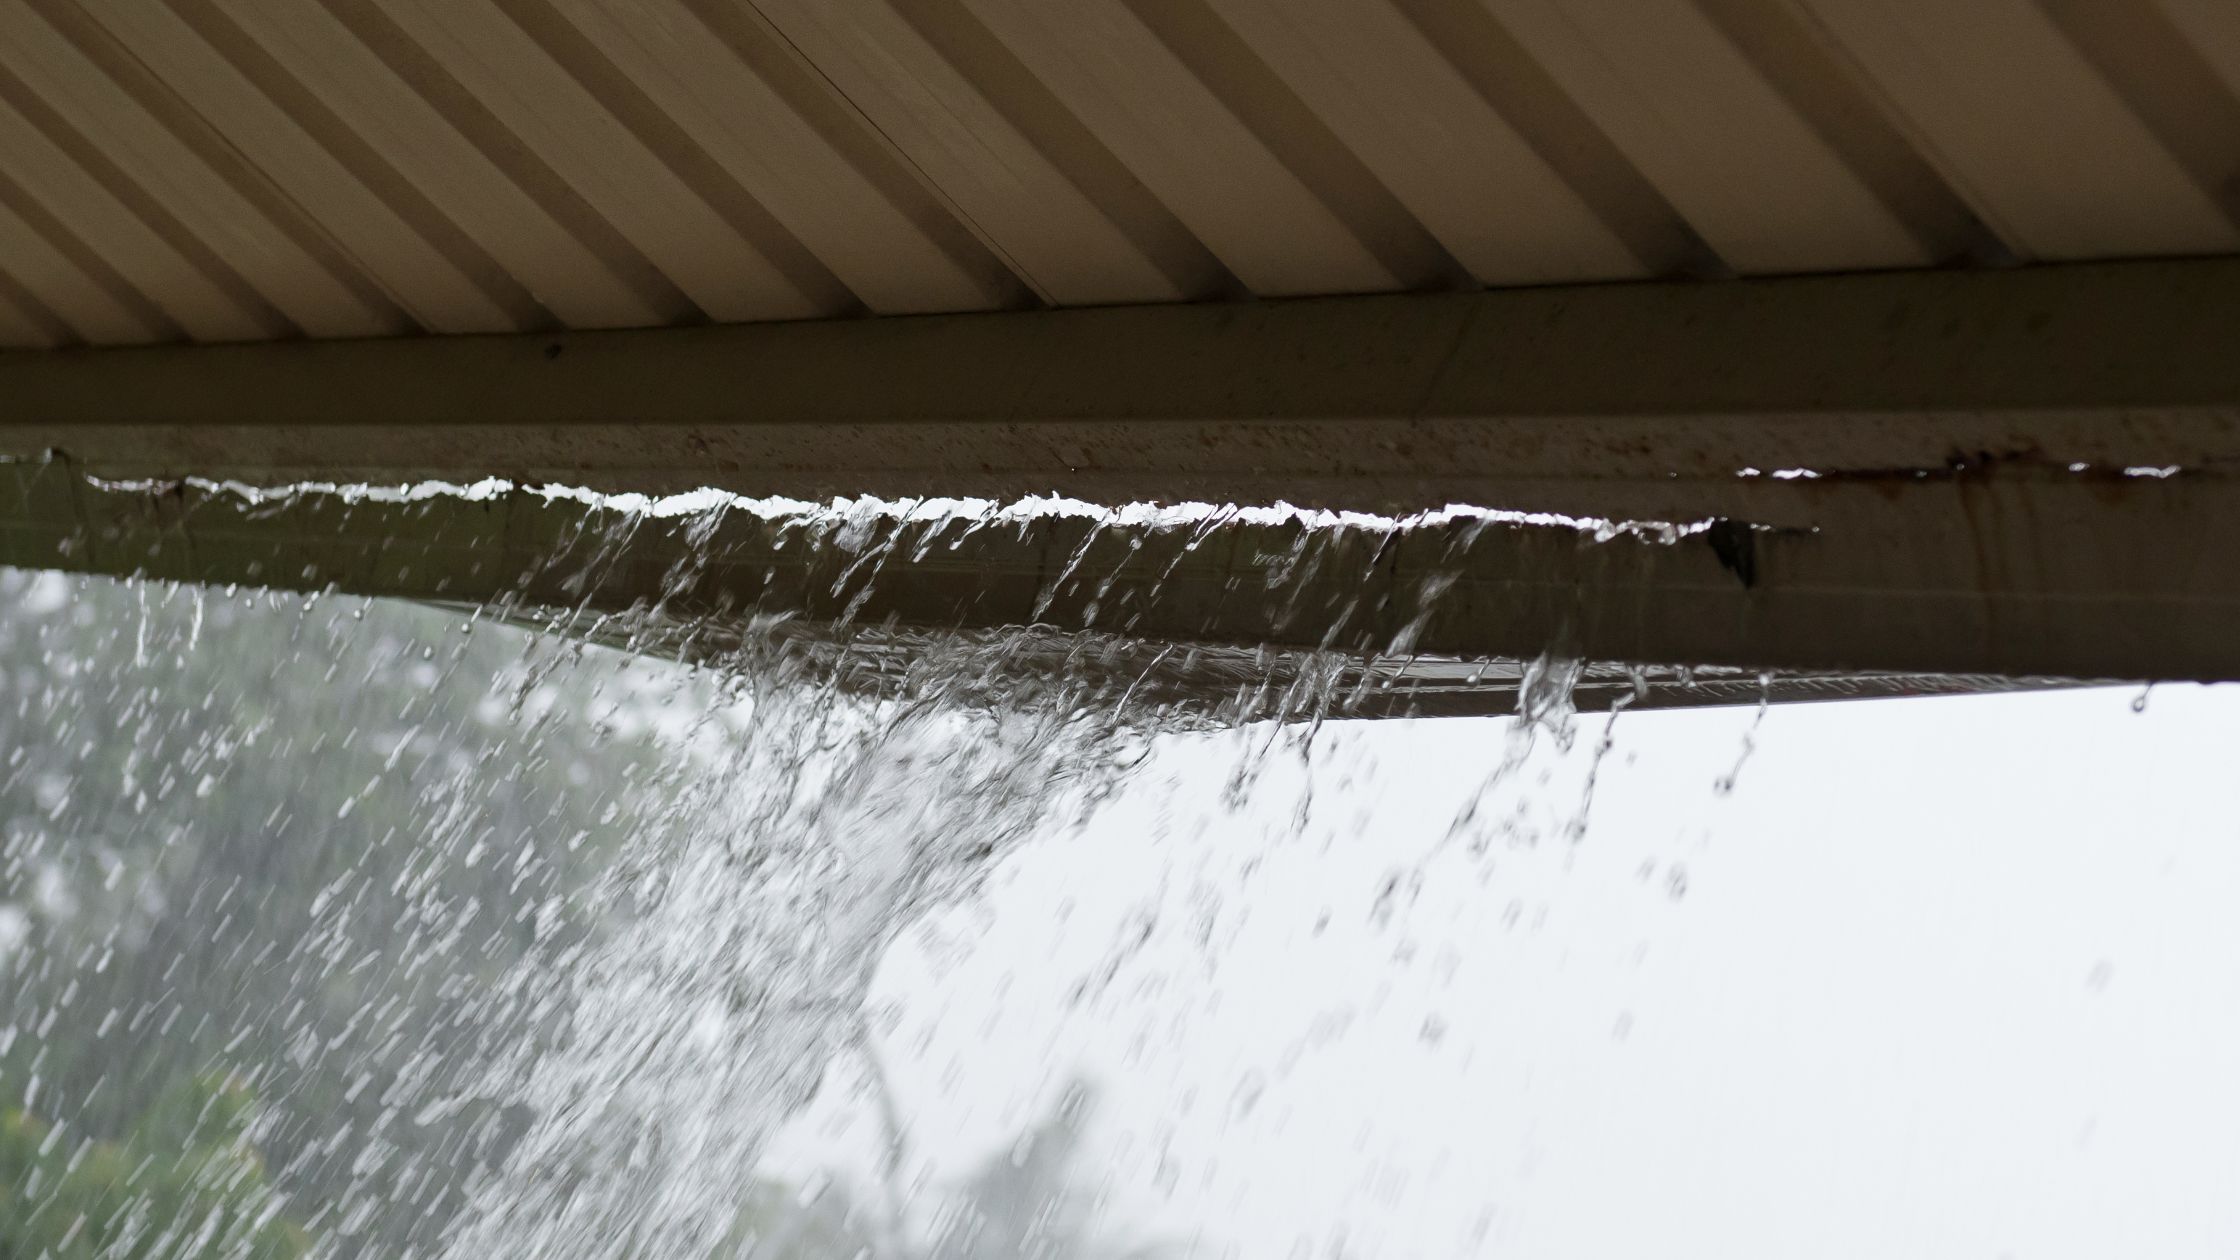
A leaking roof can be a homeowner’s worst nightmare. It not only leads to water damage and mold growth but also poses safety risks if left unattended. When you notice signs of a leaking roof, it’s crucial to take immediate action to prevent further damage to your home. This article will guide you through the steps to follow when your roof is leaking, from ensuring safety to contacting a professional roofing contractor for repairs.
Understanding the causes of a leaking roof is essential in addressing the problem effectively. Whether it’s due to age, improper installation, or severe weather conditions, identifying the source of the leak is the first step towards finding a solution. With the help of this article, you’ll be equipped with the knowledge and necessary steps to mitigate the damage caused by a leaking roof.
By understanding the signs of a leaking roof, you’ll be able to detect the problem early on and prevent it from escalating into a major issue. From water stains on the ceiling to damp spots in the attic, these signs can help you identify the presence of a leak and act promptly. The faster you address the issue, the less extensive the damage will be, and the quicker you can restore your home to its original condition.
Once you’ve confirmed that your roof is indeed leaking, it’s essential to take immediate action to prevent further damage. Ensuring safety should be your priority. This means taking measures to safeguard yourself, your family, and your belongings from potential hazards, such as slipping on a wet floor or getting exposed to electrical hazards caused by water infiltration.
In this article, we will guide you through the steps you should take when your roof is leaking. From identifying the source of the leak to temporary fixes and seeking professional help, these steps will ensure that you address the issue effectively and minimize the damage caused by a leaking roof. Additionally, we’ll discuss the importance of documenting the damage for insurance claims and provide tips on how to prevent future roof leaks.
Remember, a leaking roof requires immediate attention to prevent further damage and protect your home. By following the steps outlined in this article, you’ll be well-equipped to handle the situation, restore your roof’s integrity, and safeguard your home from future leaks.
Key Takeaways:
- Promptly addressing a leaking roof is crucial to prevent further damage. From ensuring safety to contacting a professional roofing contractor, taking immediate action is essential for protecting your home.
- Regular maintenance and timely repairs are key to preventing future roof leaks. By staying proactive and vigilant, homeowners can extend the lifespan of their roof and minimize the risk of water damage.
Read more: How To Find Roof Leak
Causes of a Leaking Roof
A leaking roof can have various causes, ranging from natural wear and tear to severe weather conditions. Understanding the root causes of a leaking roof can help you address the problem effectively and take preventative measures to avoid future leaks. Here are some common causes of roof leaks:
- Age: As your roof ages, it becomes more susceptible to deterioration and leaks. Over time, exposure to the elements, temperature changes, and general wear and tear can weaken the roofing materials, making them more prone to leakage.
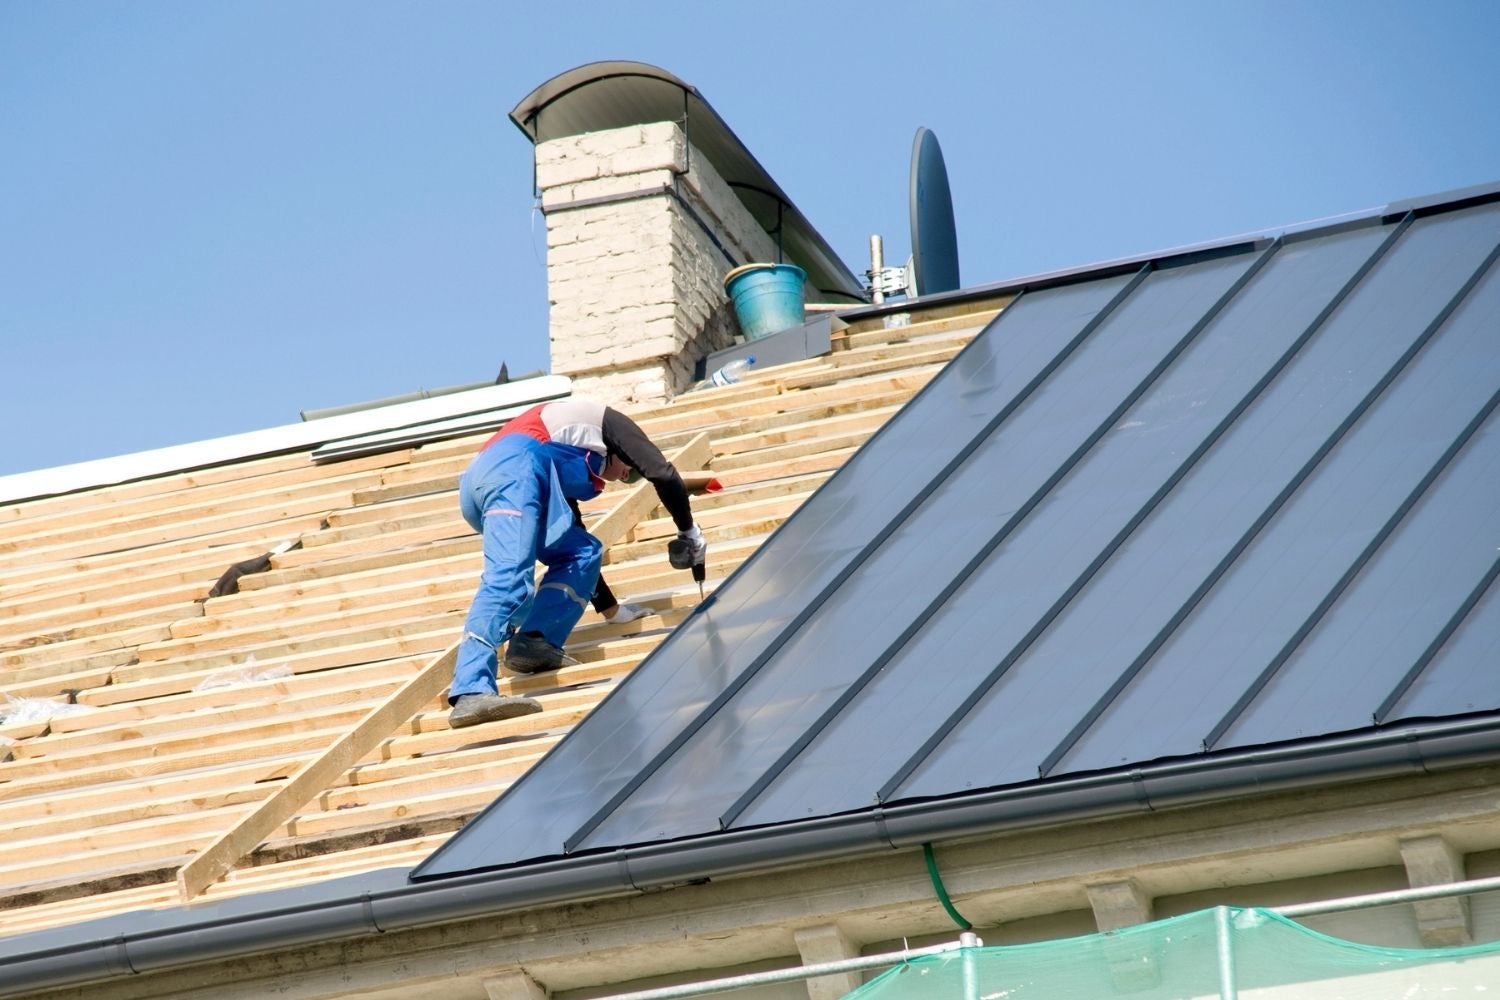
- Improper Installation: If your roof was not installed correctly, it can lead to leaks. Poor craftsmanship or improper sealing of roofing components can create gaps and openings for water to enter, especially during heavy rainfall or snowstorm events.
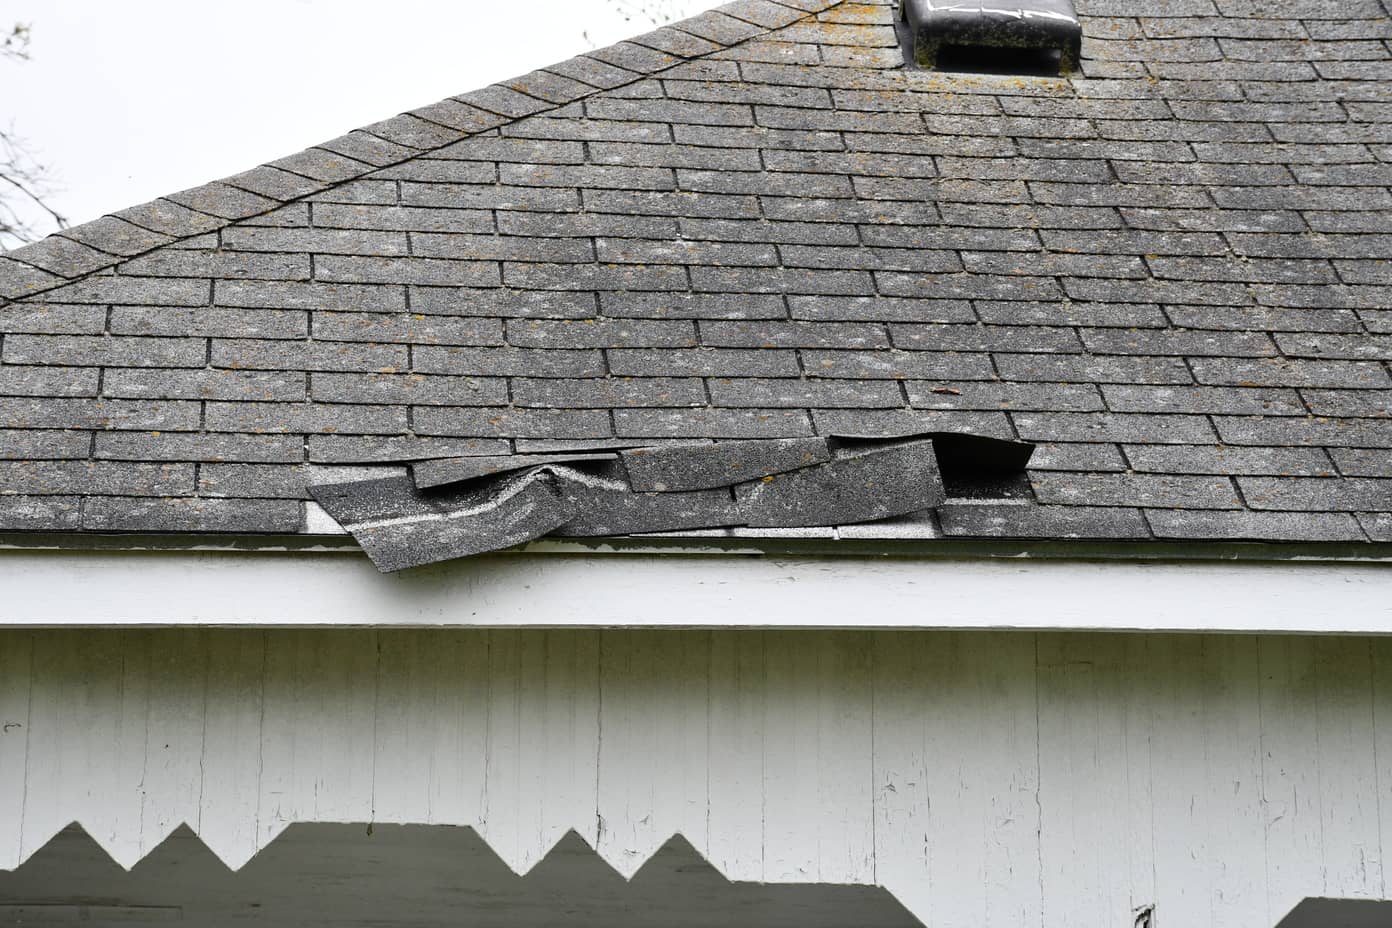
- Missing or Damaged Shingles: If your roof has missing or damaged shingles, it can compromise its ability to shed water effectively. Cracked, curled, or broken shingles can allow water to penetrate beneath the surface, leading to leaks in your home.
- Flashing Issues: Flashing is a material used to seal the joints where different parts of the roof meet, such as chimneys, vents, and skylights. If the flashing is damaged, improperly installed, or deteriorated over time, it can create openings for water to seep into your home.
- Clogged Gutters: When your gutters are clogged with leaves, debris, or other obstructions, water can accumulate on your roof instead of being directed away from your home. This can lead to water pooling and seeping through the roof, causing leaks.
- Condensation: Improper ventilation in the attic can lead to condensation buildup, resulting in moisture problems that can cause the roof to leak over time. Excessive moisture can weaken the roof’s structure and contribute to the growth of mold and mildew.
- Extreme Weather Conditions: Severe weather events, including heavy rain, strong winds, hailstorms, and snow accumulation, can damage the roofing materials and create openings for water to enter. It’s important to regularly inspect your roof after such events to identify any potential damage.
- Tree Damage: Overhanging tree branches or fallen trees can cause physical damage to your roof, such as puncturing the shingles or breaking the flashing. This damage can result in water infiltrating your home during rainfall.
Identifying the specific cause of your roof leak will help you determine the most appropriate course of action. In some cases, you may be able to address the issue with simple DIY repairs or maintenance. However, for more significant issues or if you’re unsure of the cause, it’s best to seek the expertise of a professional roofing contractor.
By understanding the causes of a leaking roof, you can take proactive steps to maintain your roof’s integrity and prevent future leaks. Regular inspections, timely repairs, and proper maintenance can extend the lifespan of your roof and protect your home from water damage caused by roof leaks.
Signs of a Leaking Roof
Recognizing the signs of a leaking roof is crucial in addressing the issue promptly and preventing further damage to your home. By being vigilant and watching out for specific indicators, you can catch roof leaks early on and take the necessary steps to repair them. Here are some common signs that your roof may be leaking:
- Water Stains on the Ceiling: One of the most obvious signs of a roof leak is the presence of water stains on your ceiling. These stains may appear as discolored patches, often yellow or brown, and can vary in size and shape.
- Damp or Moldy Odors: A leaking roof can cause moisture to accumulate in your home, leading to damp or moldy odors. If you notice a musty smell in certain areas of your house, it could be an indication of water infiltration through your roof.
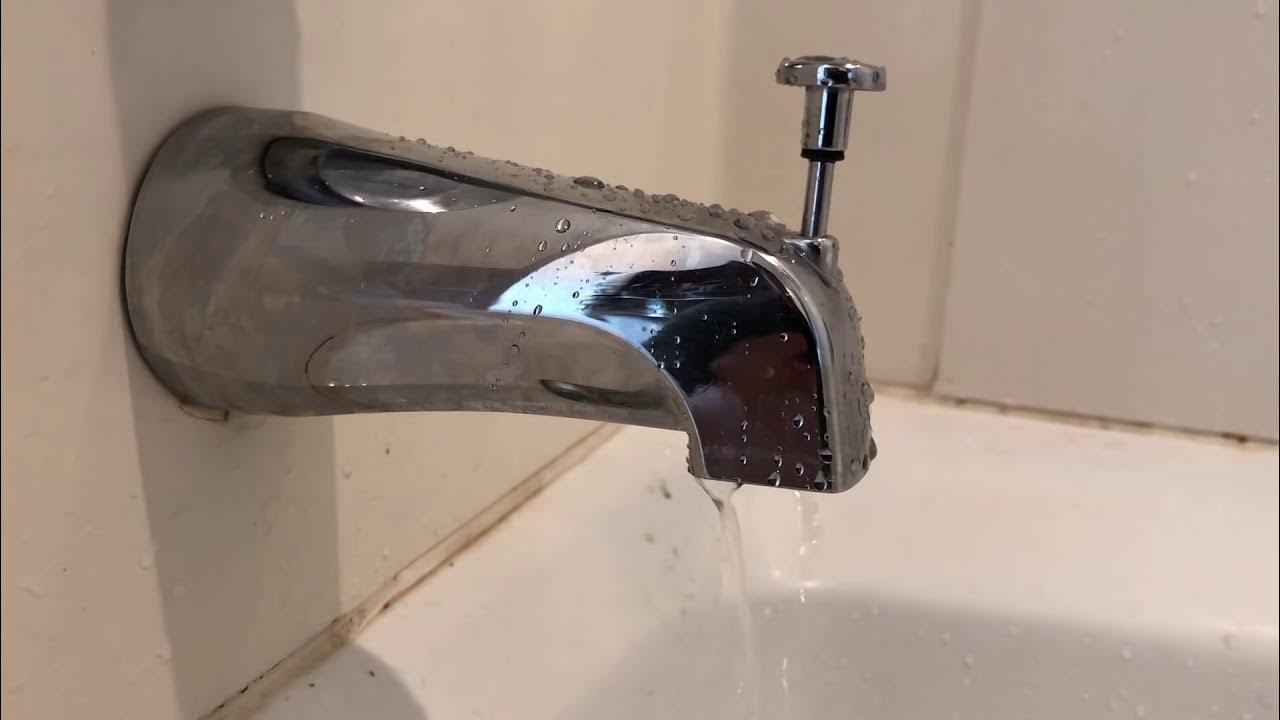
- Visible Water Dripping: In some cases, you may physically observe water dripping from the ceiling or walls. This is a clear sign of an active roof leak and should be addressed immediately to prevent further damage and potential safety hazards.
- Dampness in the Attic: Regularly inspect your attic for signs of moisture or dampness. Check for wet insulation, water stains on the walls or flooring, or any other indications that water is seeping into your home through the roof.
- Peeling or Bubbling Paint: If your roof is leaking, the excess moisture can seep into the walls and cause paint to peel or bubble. This typically occurs in areas where water is infiltrating, such as around windows, doors, or corners of rooms.
- Leakage during Rainstorms: Pay attention to any signs of water entering your home during rainstorms. This could be in the form of drips, water stains, or even significant water pooling on the floor. These signs suggest that your roof may have a leak that needs immediate attention.
- Damp or Wet Insulation: Inspect your attic or crawl spaces for wet or damp insulation. Excessive moisture in these areas can indicate a roof leak. Wet insulation not only loses its effectiveness but also promotes the growth of mold and mildew.
- Sagging or Cracked Ceiling: If your roof has been leaking for an extended period, it can cause the ceiling materials to become weakened and sag. In severe cases, you may even notice cracks or visible signs of structural damage.
If you notice any of these signs, it’s crucial to address the roof leak as soon as possible. Ignoring a leaking roof can lead to more significant damage, costly repairs, and potential health hazards from mold growth. Contact a professional roofing contractor to assess the extent of the damage and carry out the necessary repairs.
Remember, regular roof inspections can help you detect leaks before they cause extensive damage. It’s also advisable to conduct maintenance checks after severe weather events or if you suspect any issues with your roof’s integrity. By being proactive and responsive to the signs of a leaking roof, you can ensure the longevity and protection of your home.
Steps to Take When Your Roof is Leaking
Discovering a leaking roof can be a stressful situation, but it’s essential to take immediate action to prevent further damage to your home. Follow these steps to effectively address a roof leak:
- Ensure Safety: The first and most critical step when dealing with a leaking roof is to ensure your safety. Move any furniture or valuables away from the affected area to prevent damage. Place buckets or containers to catch dripping water and lay down towels or tarps to absorb any pooling water on the floor.
- Identify the Source of the Leak: Carefully inspect the area where the water is entering your home. Look for signs of damage, such as missing or cracked shingles, damaged flashing, or gaps in the roof. By identifying the source of the leak, you can determine the appropriate course of action.
- Temporary Fixes for Immediate Relief: If you’re confident in your ability to safely access your roof, you can attempt temporary fixes to minimize further water infiltration. Use roofing cement to seal small cracks or gaps in the roof or apply a waterproof patch over damaged areas. However, keep in mind that these fixes are temporary and should not replace professional repairs.
- Contact a Professional Roofing Contractor: It’s crucial to reach out to a qualified roofing contractor as soon as possible. Professional roofers have the expertise, tools, and experience to assess the extent of the damage and provide comprehensive repairs. Look for reputable contractors in your area and request emergency service if necessary.
- Document the Damage for Insurance Purposes: To support your insurance claim, document the damage caused by the roof leak. Take photos and videos of the affected areas, including any visible signs of water damage or mold growth. Keep a record of any repair quotes, invoices, or correspondence with your roofing contractor and insurance company.
- Schedule Roof Repairs: Once you’ve consulted with a professional roofing contractor, schedule a time for the necessary roof repairs. Depending on the extent of the damage, the repairs may involve replacing shingles, sealing cracks, repairing flashing, or even installing a new roof. Trust the expertise of the roofing professional to recommend the best course of action.
- Prevent Future Roof Leaks: After the immediate repairs are completed, take proactive steps to prevent future roof leaks. Regularly maintain your roof by cleaning gutters, removing debris, and inspecting for possible damage. Address any issues promptly to avoid further damage and ensure the long-term integrity of your roof.
Keep in mind that it’s best to leave major roof repairs to professionals. Attempting to repair your roof without the necessary skills and equipment can lead to further damage or personal injury. Hiring a professional roofing contractor will ensure that the repairs are done correctly and with long-lasting results.
Remember, a leaking roof requires immediate attention to prevent further damage and protect your home. By following these steps, you can address the issue effectively and minimize the impact of a roof leak on your property.
Step 1: Ensure Safety
When dealing with a leaking roof, the first and most critical step is to ensure the safety of yourself, your family, and your belongings. A roof leak can lead to hazards such as slippery surfaces and potential electrical dangers. Here’s what you need to do to prioritize safety:
- Move Furniture and Valuables: If the leak is affecting an area of your home, such as a living room or bedroom, move furniture and valuables away from the affected area. This will help prevent any damage to your belongings. Place them in a dry and secure location until the roof leak is resolved.
- Contain Dripping Water: Place buckets, pots, or containers under the leaking area to catch dripping water. Make sure these containers are stable and won’t pose a tripping hazard. Additionally, consider placing towels or tarps on the floor to absorb any pooling water and prevent slips and falls.
- Turn off Electrical Power if Necessary: If water is coming into contact with electrical outlets, light fixtures, or appliances, turn off the power to those areas to avoid potential electrical hazards. It’s crucial to prioritize electrical safety to prevent shocks or fires caused by water damage to electrical components. Consult with a qualified electrician if you’re unsure about turning off the power.
- Be Mindful of Wet Floors: As water leaks from the roof, it can create slippery surfaces, especially on tiled or hardwood floors. Take extra precautions when walking in the affected area to avoid slips and falls. Use caution signs or temporary barriers to indicate wet areas and prevent accidents.
- Use Protective Gear: If you need to assess the leaky area or attempt any temporary repairs, it’s advisable to use appropriate protective gear. This can include wearing gloves, goggles, and non-slip footwear to minimize the risk of injury or exposure to harmful substances.
- Don’t Attempt Dangerous Repairs: While it’s important to address a roof leak promptly, avoid attempting repairs that require you to climb onto your roof or take on tasks beyond your skill level. Leave major repairs to professional roofing contractors who have the necessary training and equipment to work safely at heights.
Prioritizing safety is crucial when dealing with a leaking roof. By following these steps, you can minimize the risk of injury and ensure the well-being of everyone in your home. Remember, it’s better to be cautious and seek the help of professionals when needed, rather than putting yourself at risk.
Once you’ve taken the necessary safety measures, you can move on to identifying the source of the leak and initiating the appropriate actions to fix your roof.
Read more: How To Find A Roof Leak With No Attic
Step 2: Identify the Source of the Leak
After ensuring the safety of yourself and your belongings, the next step in addressing a leaking roof is to identify the source of the leak. Pinpointing the exact location where water is entering your home will help you determine the best course of action for repairs. Here’s what you need to do to identify the source of the leak:
- Check the Attic: Start by inspecting your attic or crawl space. Look for signs of moisture, such as damp insulation, water stains on the rafters or flooring, or any visible water dripping. Follow the path of the water to trace its entry point from the roof to the interior of your home.
- Inspect the Roof Exterior: If it’s safe to do so, carefully climb onto your roof to visually inspect the exterior. Look for missing or damaged shingles, cracked flashing, or any other signs of wear and tear. Pay close attention to areas where different roof components meet, such as vents, chimneys, and skylights, as these are common areas for leaks to occur.
- Check for Obvious Damage: Look for any obvious signs of damage, such as holes, cracks, or gaps in the roofing materials. Pay attention to areas where water could potentially penetrate, such as valleys and low-lying sections of the roof. You may also come across damaged or deteriorated caulking or sealant around roof penetrations.
- Follow Water Stains: If you notice water stains on your ceiling or walls, follow the direction of these stains to trace their origin. Remember that water can travel along structures, so the point where you see the water inside your home may not necessarily be directly beneath the roof leak.
- Consider Weather Conditions: Take into account any recent heavy rainstorms, windstorms, or other extreme weather events. These conditions can intensify existing roof issues or cause new ones to develop. Be aware that the source of the leak may not always be directly above the area where you observe water infiltration.
- Document the Location: As you identify the source of the leak, make note of its specific location. Taking photos or videos can be helpful for documentation and for discussing the issue with a roofing professional. Accurate information about the source of the leak will aid in effective repairs.
Identifying the source of the leak is crucial for determining the appropriate repairs and preventing future leaks. However, keep in mind that while you can perform preliminary inspections, it’s always recommended to consult with a professional roofing contractor to accurately assess the extent of the damage and provide the necessary expertise.
Once you have identified the source of the leak, you can proceed to temporary fixes to mitigate further damage while you wait for professional repairs or contact a roofing contractor immediately if the damage requires immediate attention.
If your roof is leaking, the first thing to do is to contain the water by placing a bucket or tarp to prevent further damage. Then, contact a professional roofer to assess and repair the leak as soon as possible.
Step 3: Temporary Fixes for Immediate Relief
When facing a leaking roof, it’s crucial to take immediate action to minimize further water infiltration and prevent additional damage to your home until a professional roofing contractor can make permanent repairs. Temporary fixes can provide temporary relief and help protect your home until professional help arrives. Here are some temporary fixes you can attempt:
- Apply Roofing Cement: For small cracks or gaps in the roof, you can use roofing cement to create a temporary seal. Clean the area carefully, removing any debris or loose materials. Apply the roofing cement generously, using a putty knife or trowel to spread it evenly. Smooth the surface and allow the cement to dry completely.
- Use Roofing Tape or Sealant: Roofing tape or sealant can provide a temporary solution for small leaks or damaged areas. Clean the affected area and apply the tape or sealant according to the manufacturer’s instructions. Make sure the surface is dry and free from debris for the best adhesion.
- Place Tarp or Plastic Sheet: If you have immediate access to a tarp or plastic sheet, you can use it as a temporary cover to prevent water from entering your home. Secure the tarp or plastic sheet tightly over the leaky area, extending it beyond the damaged section to ensure full coverage. Fasten it securely using ropes, bungee cords, or nails, making sure it is taut to prevent water pooling.
- Clear Clogged Gutters and Downspouts: If clogged gutters or downspouts are causing water to overflow and enter your home, clearing them can provide temporary relief. Remove any debris or blockages from the gutters and downspouts to allow water to flow properly. This can help redirect water away from your roof and minimize further leakage.
- Keep Interior Surfaces Dry: Place buckets or containers under the leaking area to catch dripping water. Lay towels or tarps on the floor to absorb any pooling water and minimize damage to your flooring. Regularly empty the containers to prevent overflowing, and replace the towels or tarps as needed.
- Do Not Delay Professional Repairs: While temporary fixes can provide immediate relief, they are not permanent solutions. It’s crucial to contact a professional roofing contractor as soon as possible to assess and repair the roof damage properly. Temporary fixes are meant to minimize further damage while you wait for professional repairs.
Remember that temporary fixes are temporary and should not replace proper repairs by a professional roofing contractor. It’s essential to contact a qualified roofer to assess the damage and provide permanent solutions for your leaking roof.
By taking these temporary measures, you can mitigate further damage and minimize the impact of a leaking roof on your home. However, it’s important to arrange for professional repairs without delay to ensure the long-term integrity of your roof and prevent future leaks.
Step 4: Contact a Professional Roofing Contractor
When dealing with a leaking roof, it’s crucial to contact a professional roofing contractor as soon as possible. Roofing experts have the knowledge, experience, and equipment necessary to assess the extent of the damage and provide the appropriate repairs. Here’s what you need to do when contacting a roofing contractor:
- Research Reputable Roofing Contractors: Start by researching and identifying reputable roofing contractors in your area. Look for companies with positive reviews, long-standing experience, and proper licensing and insurance. Seek recommendations from friends, family, or neighbors who have recently had roof repairs or replacements.
- Request Quotes and Consultations: Contact multiple roofing contractors to request quotes and schedule consultations. During the consultation, share details about the leak and any observations you made about the source of the problem. The roofing contractor will assess the damage, provide recommendations, and offer a quote for the required repairs.
- Consider Insurance Coverage: If your homeowner’s insurance covers roof damage, contact your insurance company to report the leak and discuss the claim process. Your roofing contractor can work with the insurance adjuster to assess the damage and ensure any necessary documentation is provided for your claim.
- Discuss Emergency Services: If the roof leak is severe or causing immediate and extensive damage, discuss the possibility of emergency services with the roofing contractor. Some contractors offer emergency response teams that can address urgent situations and provide temporary relief until permanent repairs can be scheduled.
- Confirm Licensing and Insurance: Before hiring a roofing contractor, verify that they have the necessary licensing and insurance coverage. This includes asking for proof of liability insurance, workers’ compensation insurance, and any required licenses or certifications for your area. Working with a properly licensed and insured contractor ensures you’re protected in case of accidents or further damage during repairs.
- Ask About Warranties: Inquire about any warranties offered by the roofing contractor for their workmanship and the materials used. A reputable contractor should provide warranties that cover their work to give you peace of mind and ensure the longevity of the repairs.
- Schedule the Roof Repair: Once you’ve selected a roofing contractor and are satisfied with the quote and terms discussed, schedule the roof repair. The contractor will work with you to determine a suitable date for the repairs to be carried out. Be prepared for the possibility of some flexibility, as scheduling may depend on weather conditions or the availability of materials.
By contacting a professional roofing contractor, you can ensure that your leaking roof is handled by experts who will provide high-quality repairs. They will have the knowledge and experience to address the specific issues with your roof and restore its integrity effectively.
Remember, delay in seeking professional help can result in further damage to your home and potential safety hazards. Contacting a roofing contractor promptly is crucial to minimize the impact of a leaking roof on your property.
Step 5: Document the Damage for Insurance Purposes
When faced with a leaking roof, it’s important to document the damage for insurance purposes. Proper documentation will support your insurance claim and increase the likelihood of receiving coverage for the necessary repairs. Here’s what you need to do when documenting the damage:
- Take Photos and Videos: Start by taking clear and detailed photos or videos of the affected areas. Capture the visible signs of water damage, including water stains on the ceiling, walls, or floors. Take close-up shots of any structural damage or deteriorated roofing materials. Make sure to use good lighting and capture different angles to provide a comprehensive view of the damage.
- Record the Date and Time: Note the date and time when the leak was discovered and when any visible damage occurred. This information can be crucial for determining the timeline of the incident and verifying the cause of the leak.
- Keep Track of Communication: Document any communication related to the roof leak and subsequent repairs. This includes phone calls, emails, or letters exchanged with your roofing contractor, insurance company, and any other relevant parties. Record the dates, names of the individuals involved, and a summary of the discussions or agreements made.
- Keep Receipts and Invoices: Retain copies of all receipts and invoices related to the roof leak and repair work. This includes invoices from the roofing contractor, materials purchased, and any other expenses incurred due to the leak, such as temporary accommodations or additional cleaning services.
- Obtain Written Reports: If your roofing contractor conducts a formal inspection or assessment, request a written report detailing the extent of the damage, the cause of the leak, and the recommended repairs. This report can serve as valuable supporting documentation for your insurance claim.
- Cooperate with the Insurance Adjuster: In cases where your homeowner’s insurance covers roof damage, an insurance adjuster may need to assess the damage. Cooperate with the adjuster by providing them with the necessary documentation and access to your property. Make sure to point out the areas of concern and share any relevant information you’ve gathered.
- Follow Insurance Claim Procedures: Contact your insurance company to report the leak and initiate the claim process. Follow their instructions for filing a claim and provide them with all the necessary documentation, including photos, videos, reports, and receipts. Be prepared to answer any questions they may have and provide additional information if required.
Documenting the damage is crucial to ensure a smooth insurance claim process and increase the chances of receiving the coverage you deserve. Thorough documentation will provide evidence of the extent of the damage and demonstrate the need for repairs.
Remember to keep copies of all documents and maintain a well-organized record of the entire process. This will help you track the progress of the claim and ensure that you have all the necessary information readily available if further documentation is requested.
By taking the time to document the damage properly, you’ll be prepared to navigate the insurance claim process and ensure that you receive the compensation necessary to repair your leaking roof.
Read more: How To Fix A Leaking Shed Roof
Step 6: Schedule Roof Repairs
After consulting with a professional roofing contractor and documenting the damage, the next step is to schedule the necessary roof repairs. Prompt action is crucial in addressing a leaking roof and preventing further damage to your home. Here’s what you need to do when scheduling roof repairs:
- Discuss Repair Timeline: During your consultation with the roofing contractor, discuss the estimated timeline for the repairs. Understand the availability of the roofing contractor and their team, as well as any external factors that may affect the repair schedule, such as weather conditions or material availability.
- Consider Urgency of Repairs: Assess the urgency of the repairs based on the severity of the leak and the potential for further damage. Communicate this to the roofing contractor to ensure they understand the criticality of the situation and can prioritize your repair needs accordingly.
- Obtain a Written Estimate: Request a written estimate from the roofing contractor that outlines the scope of the repairs and the associated costs. Make sure the estimate includes all the necessary details, such as materials, labor, and any additional services or warranties provided.
- Review the Estimate and Contract: Carefully review the estimate and contract provided by the roofing contractor. Ensure that you understand all terms, including payment terms, timelines, and warranty information. Seek clarification on any areas that may be unclear or require further explanation.
- Consider Insurance Coverage: If you filed an insurance claim for the roof leak, coordinate with your insurance company to review and approve the repair estimate. Ensure that the proposed repair costs align with your coverage to avoid any potential discrepancies that may affect reimbursement.
- Sign the Contract: Once you are satisfied with the estimate, contract terms, and insurance coordination, sign the contract to move forward with the repairs. Make sure you retain a copy of the signed contract for your records.
- Prepare for the Repairs: Make the necessary preparations for the repair work. This may include clearing the area around your home to provide easy access for the roofing crew, removing any valuable items or fragile decorations from the workspace, and ensuring that parking spaces or driveways are available for the contractor’s vehicles.
- Stay in Communication: Maintain regular communication with the roofing contractor leading up to the scheduled repair date. Stay informed about any updates or changes to the timeline and address any questions or concerns you may have.
- Be Flexible: Keep in mind that unexpected circumstances, such as inclement weather or unforeseen structural damage, may arise during the repair process. Stay flexible and be prepared to adjust the schedule if necessary to ensure that the repairs are completed effectively.
Scheduling roof repairs promptly is essential to prevent further damage and restore the integrity of your roof. By following these steps, you’ll be well-prepared to coordinate and schedule the repairs with your chosen roofing contractor.
Remember, open and clear communication with the contractor is key to ensuring a smooth repair process. Don’t hesitate to raise any concerns or questions you may have and maintain regular contact throughout the repairs.
Once the repairs are completed, you can move on to the final step: taking preventative measures to avoid future roof leaks and maintain the long-term integrity of your roof.
Step 7: Prevent Future Roof Leaks
After addressing a leaking roof and completing the necessary repairs, it’s essential to take proactive measures to prevent future roof leaks. By implementing preventative strategies, you can extend the lifespan of your roof and minimize the risk of future water damage. Here are some steps you can take to prevent future roof leaks:
- Maintain Regular Roof Inspections: Schedule regular inspections of your roof to identify potential issues before they escalate into leaks. Hire a professional roofing contractor for a comprehensive inspection at least once a year or after severe weather events.
- Clear Debris from Gutters and Downspouts: Regularly clean out your gutters and downspouts to prevent clogging. Debris accumulation can obstruct proper water flow and lead to water backing up on your roof, increasing the risk of leaks.
- Trim Overhanging Tree Branches: Trim back any tree branches that overhang your roof. During storms or strong winds, these branches can cause damage to your roof or puncture the shingles, allowing water to infiltrate.
- Inspect and Maintain Flashing: Regularly check the flashing around vents, chimneys, skylights, and other protrusions. Look for signs of damage or deterioration and have any issues addressed promptly. Properly installed and maintained flashing helps prevent water from seeping into your home.
- Address Shingle Issues: Keep an eye out for damaged or missing shingles. Replace any cracked, curled, or broken shingles as soon as possible to maintain a watertight roof surface.
- Monitor Attic Ventilation: Ensure proper ventilation in your attic to prevent heat and moisture buildup. Excessive heat and moisture can lead to roof deterioration and contribute to the development of leaks. Consult with a professional if you suspect ventilation issues.
- Look for Signs of Water Damage Inside: Regularly inspect your ceiling, walls, and attic for signs of water damage, such as water stains, discoloration, or mold growth. Early detection can help identify any potential leaks before they cause significant damage.
- Address Issues Promptly: If you notice any signs of roof damage, such as loose or damaged shingles, deteriorated flashing, or leaks, address them promptly. Ignoring small issues can lead to more extensive damage and costly repairs in the long run.
- Consider Routine Roof Maintenance: Engage in routine maintenance tasks, such as cleaning debris off the roof surface, inspecting for potential issues, and repairing minor damage as needed. Regular maintenance helps keep your roof in optimal condition and prevents the development of leaks.
- Consult with Roofing Professionals: If you have concerns about the condition of your roof or need guidance on preventative measures, consult with roofing professionals. They can provide expert advice tailored to your specific roof type and ensure you implement the most effective preventative strategies.
By taking these preventative measures, you can prolong the lifespan of your roof and minimize the risk of future leaks. Regular maintenance and timely repairs are key to ensuring the integrity of your roof and protecting your home from water damage.
Remember, prevention is always better than having to deal with a leaky roof. Stay proactive, be vigilant for signs of damage, and take action promptly to maintain a secure and dry roof for years to come.
Conclusion
Dealing with a leaking roof can be a challenging and stressful situation for any homeowner. However, by following the right steps and taking prompt action, you can address the issue effectively and prevent further damage to your home. From ensuring safety to contacting a professional roofing contractor, each step plays a crucial role in the process.
Understanding the causes and signs of a leaking roof is essential in identifying the source of the problem and taking appropriate measures. By documenting the damage for insurance purposes and scheduling roof repairs with a reputable contractor, you can restore the integrity of your roof and protect your home from further leaks.
It’s important to remain proactive in preventing future roof leaks by conducting regular inspections, maintaining gutters and downspouts, and addressing any issues promptly. Taking preventative measures can extend the lifespan of your roof and save you from potential costly repairs down the line.
Remember, when it comes to a leaking roof, safety should always be the top priority. Ensure the safety of yourself, your family, and your belongings before attempting any temporary fixes or contacting a professional. By following the steps outlined in this article, you can navigate through the process and regain peace of mind knowing that your home is protected.
Addressing a leaking roof may require professional expertise, so don’t hesitate to reach out to qualified roofing contractors who can provide the necessary repairs and advice. With their assistance, you can restore the integrity of your roof and take the necessary preventative measures to ensure a leak-free future.
Ultimately, by being proactive, taking immediate action, and following the steps outlined in this article, you can effectively address a leaking roof, protect your home, and maintain the long-term integrity of your roof for years to come.
Frequently Asked Questions about What To Do When Roof Is Leaking
Was this page helpful?
At Storables.com, we guarantee accurate and reliable information. Our content, validated by Expert Board Contributors, is crafted following stringent Editorial Policies. We're committed to providing you with well-researched, expert-backed insights for all your informational needs.


0 thoughts on “What To Do When Roof Is Leaking”