Home>Gardening & Outdoor>Outdoor Structures>How To Fix A Leaking Shed Roof
Outdoor Structures
How To Fix A Leaking Shed Roof
Modified: August 27, 2024
Learn how to fix a leaking shed roof and protect your outdoor structures. Follow our expert tips for a watertight solution.
(Many of the links in this article redirect to a specific reviewed product. Your purchase of these products through affiliate links helps to generate commission for Storables.com, at no extra cost. Learn more)
Introduction
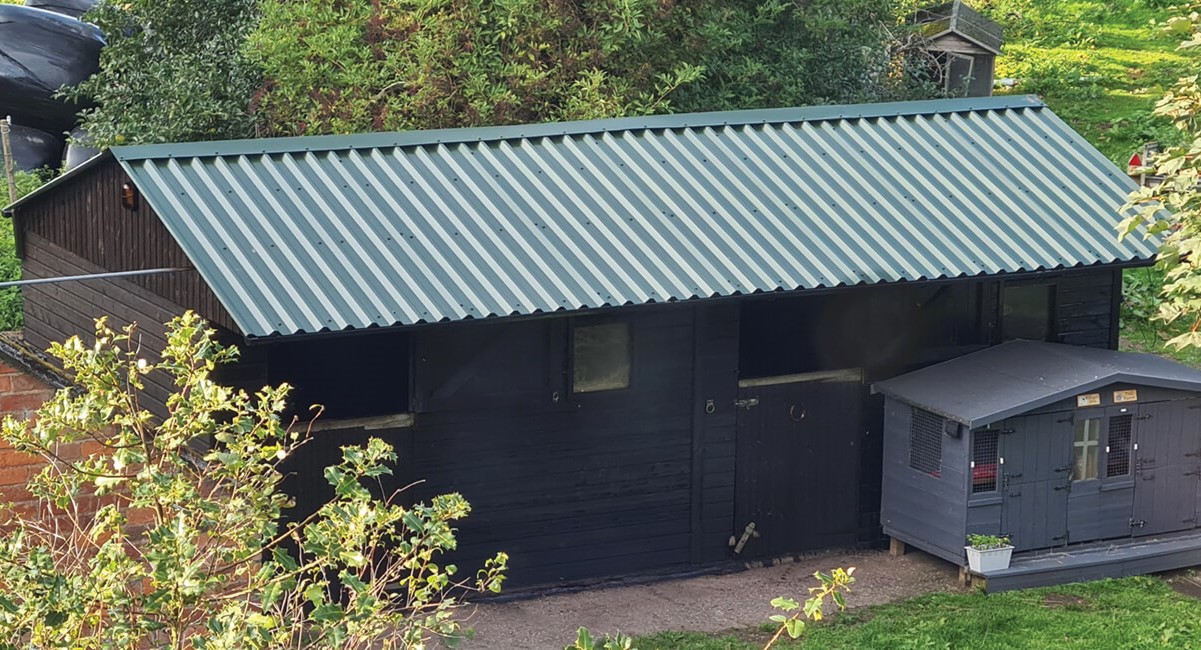
Welcome to the world of outdoor structures, where the beauty of nature meets the practicality of human ingenuity. Whether you use your shed for storage, as a workshop, or a cozy retreat, a leaking roof can put a damper on your plans. Fear not, for with a little know-how and some elbow grease, you can easily fix a leaking shed roof and restore your outdoor haven to its former glory.
In this comprehensive guide, we will walk you through the process of assessing the damage, gathering the necessary materials, and executing the repairs. From patching small holes and cracks to replacing damaged shingles or panels, we’ve got you covered. We’ll also delve into the importance of sealing joints and seams, as well as applying a protective coating to ensure long-lasting results.
So, roll up your sleeves, put on your DIY hat, and let’s embark on this journey to reclaim the integrity of your shed roof. By the end of this guide, you’ll have the confidence and knowledge to tackle this task with ease, leaving you with a sturdy, leak-free shed that can weather any storm.
Key Takeaways:
- Don’t let a leaking shed roof rain on your parade! Assess, gather materials, and repair with care to fortify your outdoor haven against leaks and ensure lasting protection.
- By fixing small holes, replacing damaged shingles, and applying a protective coating, you can transform your shed roof into a resilient and reliable shelter for years to come.
Read more: How To Fix A Shed Roof
Assessing the Damage
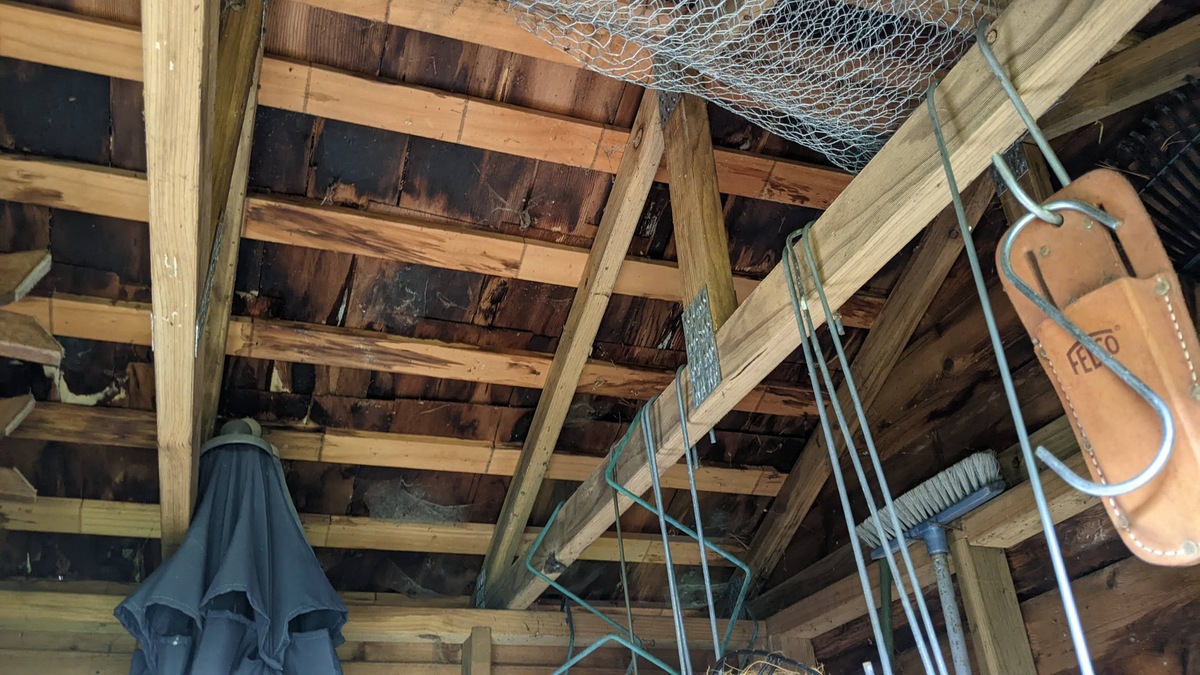
Before diving into the repair process, it’s crucial to assess the extent of the damage to your shed roof. Start by conducting a thorough visual inspection, both from the inside and outside of the shed. Look for signs of water stains, mold, or mildew on the ceiling and walls, as these indicate potential areas of leakage.
On the exterior, carefully examine the roof for any visible cracks, holes, or missing shingles or panels. Pay close attention to the areas around vents, chimneys, and skylights, as these are common trouble spots for leaks. Additionally, check the condition of the flashing, which is the metal or plastic edging that seals the joints and edges of the roof.
If your shed has a flat roof, pooling water can also lead to leaks over time. Take note of any areas where water accumulates, as this may require additional attention during the repair process.
Once you’ve identified the areas of concern, consider the underlying causes of the damage. Heavy rainfall, snow, ice, and UV exposure can all take a toll on the integrity of your shed roof. Furthermore, age and poor initial installation can contribute to susceptibility to leaks.
Keep in mind that addressing the damage promptly can prevent it from escalating into more extensive and costly repairs down the road. By taking the time to thoroughly assess the condition of your shed roof, you’ll be better equipped to proceed with the necessary repairs and ensure a lasting solution.
Gathering Materials
Now that you’ve assessed the damage to your shed roof, it’s time to gather the materials needed to commence the repair process. Having the right tools and supplies on hand will streamline the repair process and ensure that you can tackle the job effectively.
Here’s a list of essential materials you may need:
- Roofing Cement: This versatile adhesive is ideal for sealing small cracks and holes in the roof.
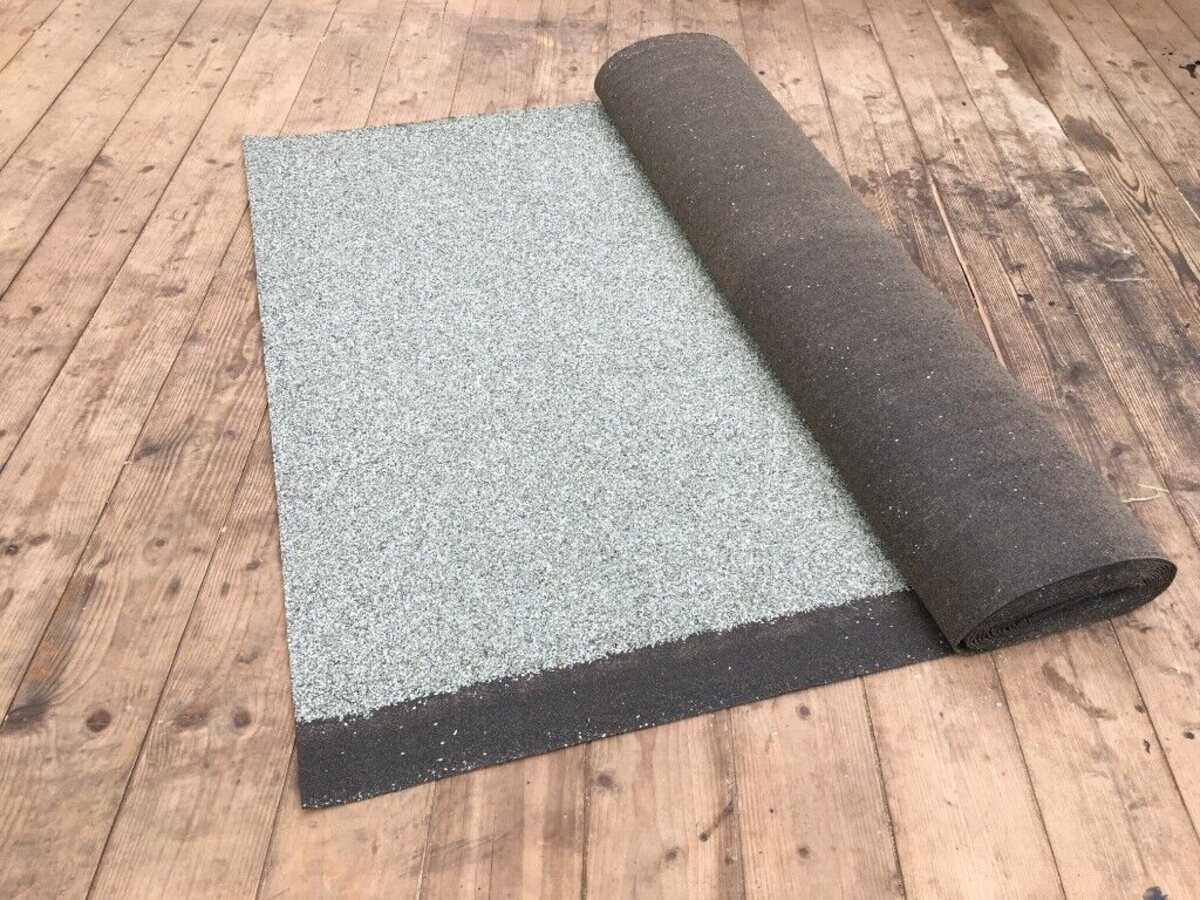
- Replacement Shingles or Panels: If you’ve identified damaged or missing shingles or panels, make sure to have replacements that match the existing roofing material.
- Flashing Tape or Sealant: To reinforce the flashing around vents, chimneys, and skylights, consider using flashing tape or sealant to prevent water intrusion.
- Protective Coating: A high-quality protective coating can safeguard your shed roof from future damage caused by UV rays, moisture, and other environmental factors.
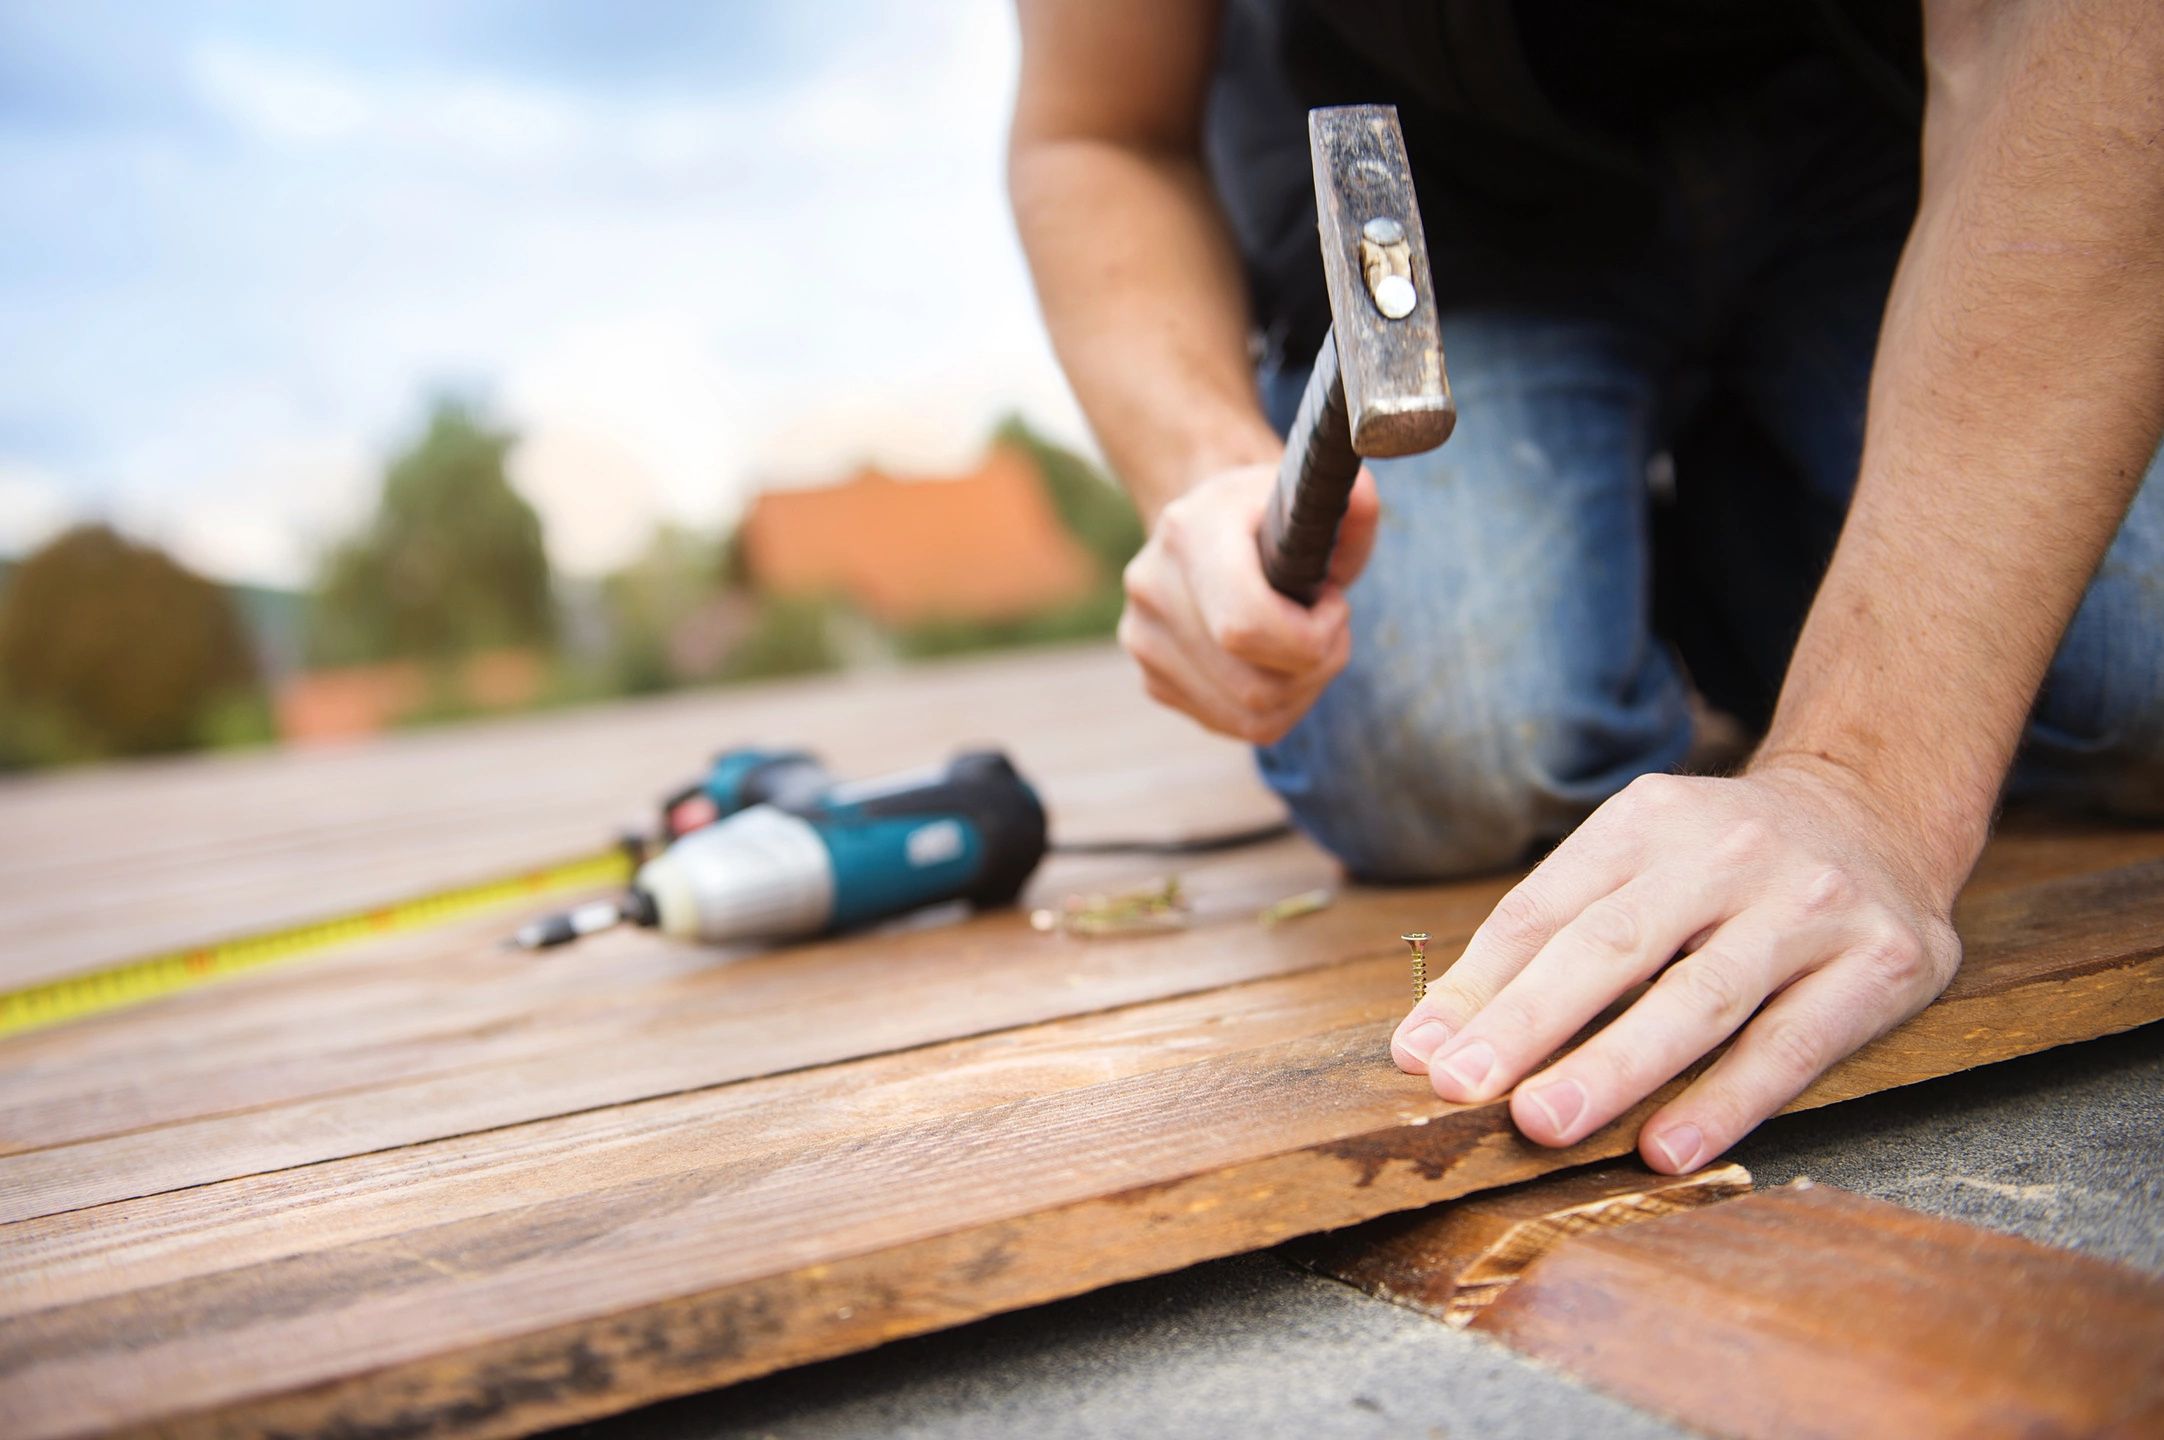
- Roofing Nails and Hammer: These are essential for securing new shingles or panels in place during the repair process.
- Roofing Brush or Roller: Use a brush or roller to apply the protective coating evenly across the surface of the roof.
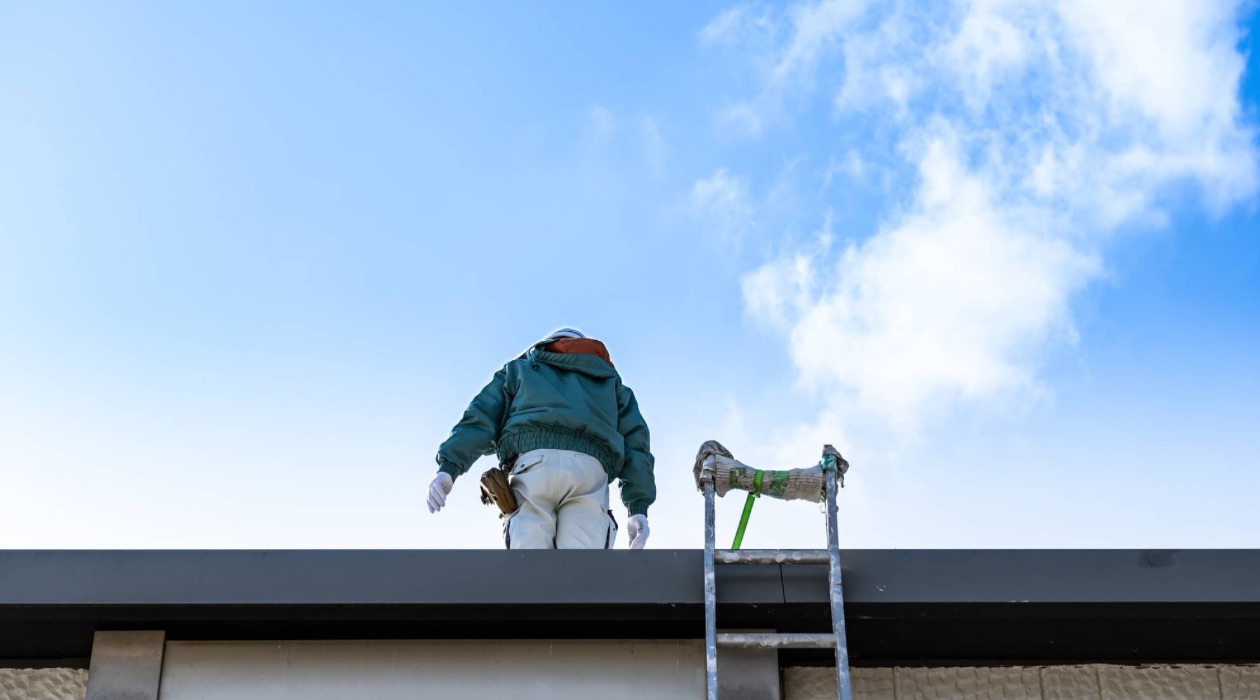
- Safety Gear: Prioritize your safety by wearing gloves, safety goggles, and appropriate footwear while working on the roof.
- Ladder: A sturdy ladder is essential for accessing the roof safely and effectively.
- Caulk Gun and Caulking Compound: These are useful for sealing joints, seams, and other vulnerable areas on the roof.
Before purchasing materials, take accurate measurements of the damaged areas to ensure that you acquire the correct quantity of replacement shingles or panels. Additionally, consider the weather conditions in your area and plan the repair work for a dry and mild day to facilitate the process and allow for proper curing of adhesives and coatings.
By gathering the necessary materials in advance, you’ll be well-prepared to address the damage to your shed roof effectively and efficiently, restoring its structural integrity and protecting it from future leaks.
Repairing Small Holes and Cracks
Small holes and cracks in your shed roof can be a common source of leaks, but fortunately, they are relatively simple to fix with the right materials and techniques. Here’s a step-by-step guide to repairing these minor imperfections:
- Clean the Area: Begin by clearing any debris, dirt, or loose roofing material from the damaged area. Use a brush or broom to ensure that the surface is clean and free of any obstructions.
- Apply Roofing Cement: Using a putty knife, carefully apply roofing cement over the small holes and cracks. Ensure that the cement covers the damaged areas completely and forms a tight seal to prevent water infiltration.
- Smooth the Surface: After applying the roofing cement, use the putty knife to smooth the surface, ensuring a uniform and level finish. This will help enhance the durability and effectiveness of the repair.
- Allow for Proper Curing: Give the roofing cement sufficient time to cure and form a strong bond with the surrounding roofing material. Follow the manufacturer’s instructions regarding the curing time to ensure optimal results.
- Inspect and Test: Once the repair is complete, inspect the area to ensure that the small holes and cracks have been effectively sealed. You can also perform a simple water test by gently spraying the repaired area with water to check for any signs of leakage.
It’s important to note that while repairing small holes and cracks can be a relatively straightforward process, attention to detail and thoroughness are key to achieving a durable and watertight seal. By addressing these minor imperfections promptly, you can prevent them from escalating into larger issues that require more extensive repairs.
With the small holes and cracks effectively sealed, you’re one step closer to restoring the integrity of your shed roof and ensuring that it provides reliable protection against the elements.
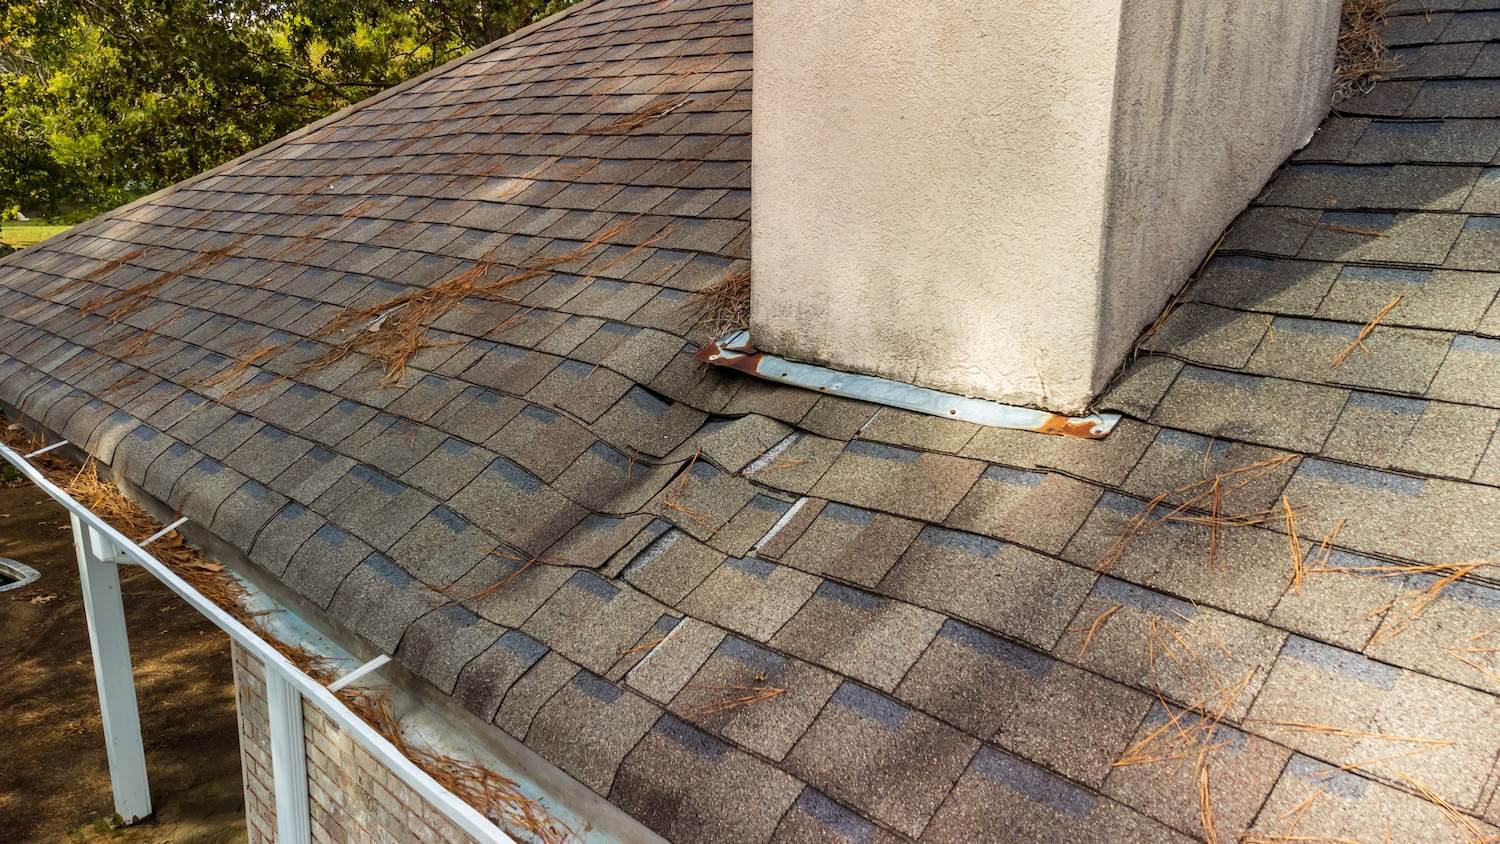
Inspect the roof for damaged or missing shingles, and replace them as needed. Apply roofing sealant to any cracks or gaps to prevent further leaks.
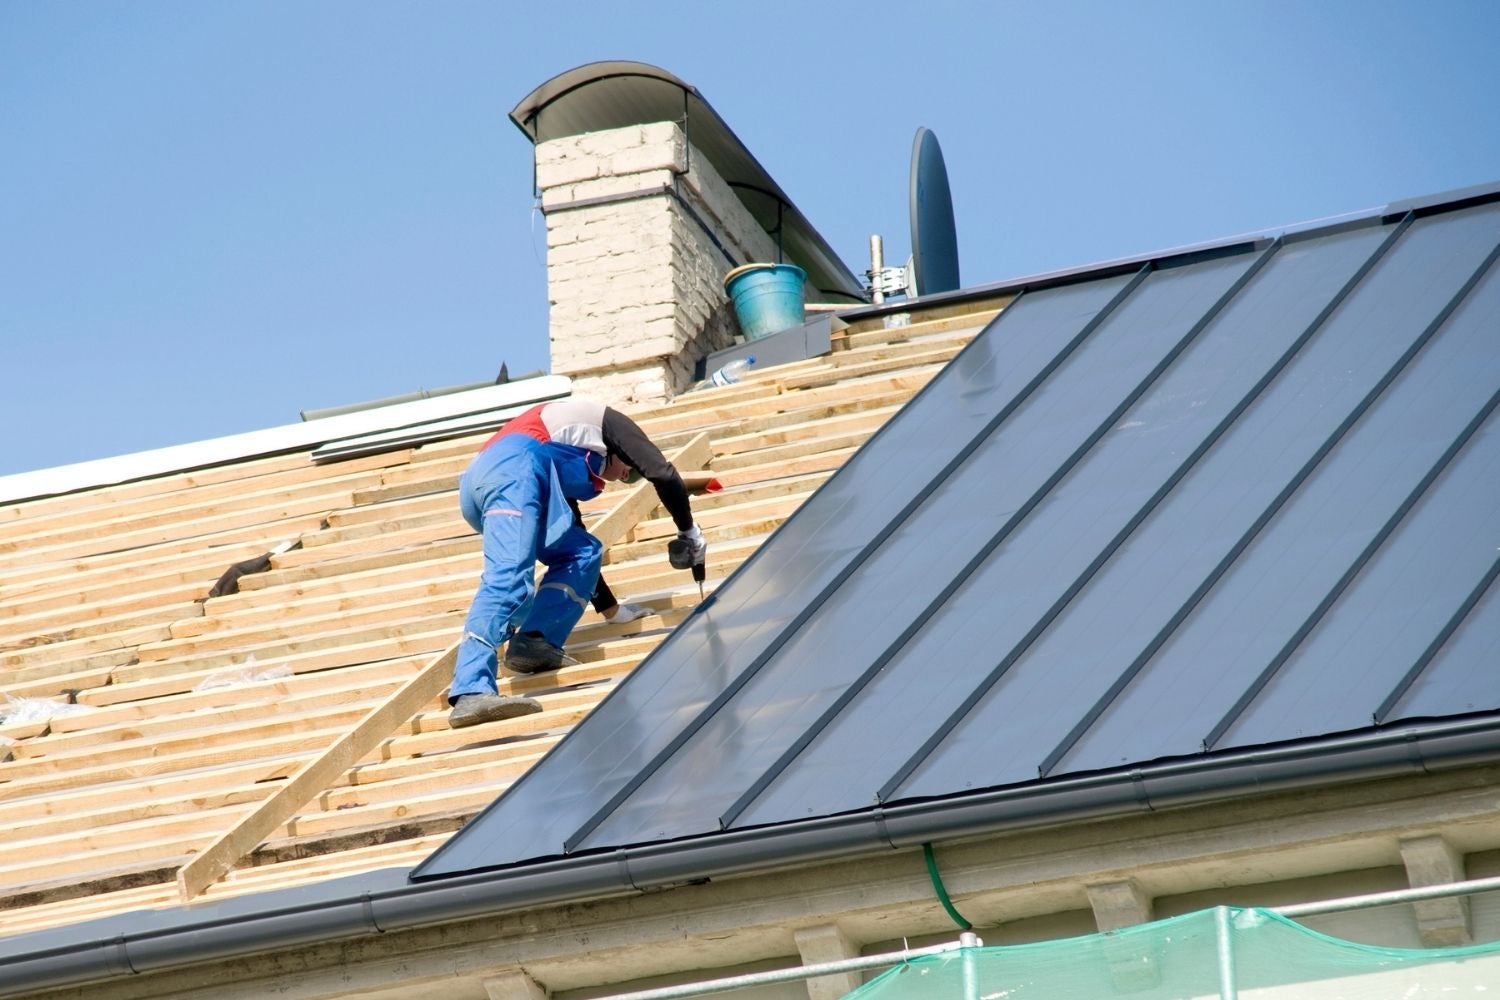
Replacing Damaged Shingles or Panels
If your shed roof has sustained damage to its shingles or panels, replacing these components is essential to prevent leaks and maintain the structural integrity of the roof. Here’s a detailed guide to help you navigate the process of replacing damaged shingles or panels:
- Assess the Extent of Damage: Begin by identifying the specific shingles or panels that are damaged or missing. Take note of the size and shape of the affected area to ensure that you acquire suitable replacements.
- Remove the Damaged Material: Carefully lift the edges of the surrounding shingles or panels using a pry bar to access the damaged area. Gently detach the damaged material and remove any remaining nails or fasteners to prepare the surface for the new installation.
- Install New Shingles or Panels: Position the new shingle or panel in place, ensuring that it aligns seamlessly with the surrounding roofing material. Secure it by driving roofing nails through the designated nail slots, taking care to maintain the proper spacing and alignment.
- Apply Roofing Cement: To reinforce the bond and seal between the new and existing roofing material, apply roofing cement beneath the overlapping edges of the adjacent shingles or panels. This will enhance the weatherproofing and stability of the repair.
- Inspect and Test: Once the replacement shingles or panels are installed, conduct a thorough visual inspection to confirm that they are securely in place and form a watertight seal. Additionally, test the repaired area by simulating exposure to light water spray to ensure that it effectively repels moisture.
By meticulously replacing damaged shingles or panels, you can rectify areas of vulnerability on your shed roof and fortify it against potential leaks. This proactive approach not only safeguards the interior of your shed from water damage but also prolongs the lifespan of the entire roof structure.
With the new shingles or panels seamlessly integrated into the existing roofing, you can take pride in knowing that your shed roof is well-equipped to withstand the elements and provide reliable protection for years to come.
Read more: How To Fix A Sagging Flat Shed Roof
Sealing Joints and Seams
Effective sealing of joints and seams is a critical aspect of maintaining a leak-free shed roof. These vulnerable areas are prone to water infiltration, making it essential to apply the appropriate sealant to reinforce their integrity. Here’s a comprehensive guide to sealing joints and seams on your shed roof:
- Clean and Prepare the Surface: Begin by thoroughly cleaning the joints and seams to remove any dirt, debris, or old sealant. Use a brush or cloth to ensure that the surface is free from obstructions and allows for optimal adhesion of the new sealant.
- Apply High-Quality Sealant: Choose a durable and weather-resistant sealant specifically designed for roofing applications. Using a caulking gun, carefully apply the sealant along the joints and seams, ensuring complete coverage and a uniform bead of sealant.
- Smooth and Shape the Sealant: After applying the sealant, use a putty knife or a specialized tool to smooth and shape the bead, creating a neat and watertight seal. Pay attention to the consistency and thickness of the sealant to ensure its effectiveness in repelling water.
- Allow for Proper Curing: Give the sealant adequate time to cure and form a strong bond with the roofing material. Follow the manufacturer’s recommendations regarding the curing time and environmental conditions to optimize the performance of the sealant.
- Inspect and Reinforce: Once the sealant has cured, inspect the sealed joints and seams to verify that the seal is intact and free from any gaps or inconsistencies. If necessary, apply an additional layer of sealant to reinforce the waterproofing and enhance the longevity of the repair.
By meticulously sealing the joints and seams on your shed roof, you can fortify these vulnerable areas against water intrusion and minimize the risk of leaks. This proactive measure contributes to the overall resilience of the roof and ensures that it can withstand the rigors of changing weather conditions.
With the joints and seams effectively sealed, you can have confidence in the structural integrity of your shed roof, knowing that it is equipped to repel moisture and provide reliable protection for the contents within.
Applying a Protective Coating
Applying a protective coating to your shed roof serves as a proactive measure to safeguard it against the detrimental effects of environmental factors and prolong its longevity. A high-quality protective coating acts as a shield, providing enhanced resistance to UV radiation, moisture, and physical wear. Here’s a comprehensive guide to the application of a protective coating for your shed roof:
- Clean the Roof Surface: Before applying the protective coating, ensure that the roof surface is clean and free from debris, dirt, and any existing coatings or residues. Use a broom or pressure washer to thoroughly clean the surface and allow it to dry completely.
- Choose the Right Coating: Select a protective coating specifically formulated for the material and type of your shed roof. Consider factors such as the climate in your area, the level of UV exposure, and the desired durability of the coating.
- Apply the Coating Evenly: Using a roofing brush or roller, apply the protective coating evenly across the entire surface of the roof. Ensure consistent coverage, paying attention to potential trouble spots such as seams, edges, and areas prone to water accumulation.
- Allow for Proper Curing: Give the protective coating ample time to cure and form a resilient barrier on the roof surface. Follow the manufacturer’s guidelines regarding the curing time and environmental conditions to optimize the performance of the coating.
- Inspect and Assess: Once the coating has cured, conduct a thorough inspection of the roof surface to ensure that the protective layer is uniform and free from any imperfections. Verify that all areas are adequately covered and that the coating forms a seamless shield against external elements.
By applying a protective coating to your shed roof, you not only enhance its resistance to weather-related damage but also contribute to the preservation of its aesthetic appeal. This proactive measure helps mitigate the effects of aging and prolongs the overall lifespan of the roof structure.
With the protective coating in place, your shed roof is fortified to withstand the challenges posed by the elements, ensuring that it remains a durable and reliable shelter for your belongings and activities within.
Conclusion
Congratulations on successfully navigating the process of fixing a leaking shed roof! By following the steps outlined in this guide, you’ve taken proactive measures to address the damage, fortify vulnerable areas, and protect your shed from potential leaks. As you conclude this repair journey, it’s important to reflect on the significance of your efforts and the impact they have on the longevity and functionality of your outdoor structure.
By assessing the damage, gathering the necessary materials, and executing the repairs with precision and care, you’ve not only rectified existing issues but also laid the foundation for a more resilient and reliable shed roof. The attention to detail and proactive approach demonstrated throughout the repair process are key factors in ensuring the effectiveness and durability of the repairs.
Furthermore, the application of a protective coating and meticulous sealing of joints and seams serve as proactive measures to fortify the shed roof against future environmental stressors. These efforts contribute to the overall resilience of the roof, providing long-term protection and peace of mind.
As you admire the restored integrity of your shed roof, take pride in knowing that your proactive approach has enhanced its ability to withstand the elements and provide a secure haven for your belongings and activities. Your dedication to maintaining and fortifying your outdoor structure reflects a commitment to preserving its functionality and aesthetic appeal for years to come.
Remember that regular maintenance and periodic inspections can further contribute to the longevity and performance of your shed roof. By staying proactive and addressing any signs of wear or damage promptly, you can minimize the risk of future leaks and ensure that your shed remains a reliable and resilient space.
With your newfound knowledge and hands-on experience, you’re well-equipped to tackle any future challenges that may arise, ensuring that your shed continues to stand strong and serve its purpose as a functional and inviting outdoor space.
So, as you bid farewell to the repair process, take pride in the transformation you’ve achieved and the enhanced protection you’ve bestowed upon your shed roof. Your commitment to proactive maintenance and repair sets the stage for a durable, leak-free, and dependable outdoor structure that can weather any storm.
Frequently Asked Questions about How To Fix A Leaking Shed Roof
Was this page helpful?
At Storables.com, we guarantee accurate and reliable information. Our content, validated by Expert Board Contributors, is crafted following stringent Editorial Policies. We're committed to providing you with well-researched, expert-backed insights for all your informational needs.


0 thoughts on “How To Fix A Leaking Shed Roof”