
Articles
Why Is My Ceiling Fan Clicking
Modified: October 19, 2024
Discover the reasons behind your ceiling fan clicking in this informative article. Find solutions and tips to fix the issue.
(Many of the links in this article redirect to a specific reviewed product. Your purchase of these products through affiliate links helps to generate commission for Storables.com, at no extra cost. Learn more)
Introduction
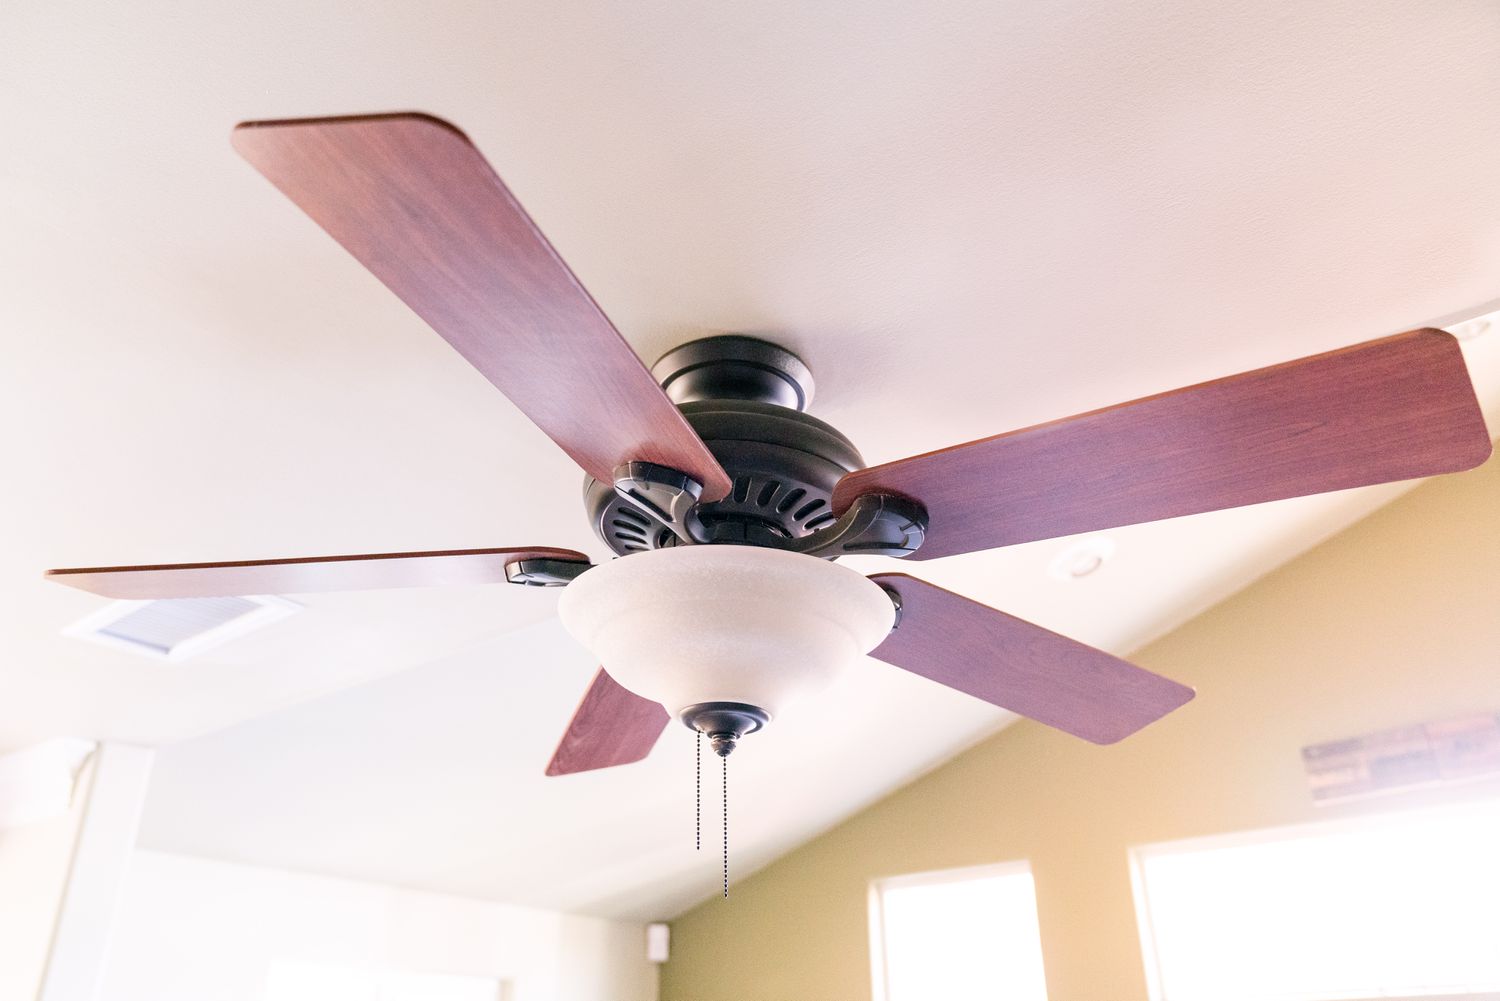
A ceiling fan is a common and essential appliance found in many homes and offices. It helps to circulate air, provide a cooling effect, and create a comfortable environment. However, there may be times when you start to notice an annoying clicking sound coming from your ceiling fan. This repetitive noise can be quite distracting and frustrating, disrupting the peaceful ambiance of your space.
But fear not! In this article, we will explore the various reasons why your ceiling fan may be clicking and provide you with practical solutions to fix the issue. Understanding the possible causes of the clicking noise in your ceiling fan will empower you to take the necessary steps to resolve it and restore the tranquility in your living or working space.
Key Takeaways:
- Don’t let a clicking ceiling fan disrupt your peace! Tighten connections, replace capacitors, and clean to restore tranquility and optimal fan performance.
- Address clicking noises by aligning blades, lubricating ball bearings, and seeking professional help when needed. Keep your space peaceful with a well-functioning ceiling fan.
Read more: Why Is My Surge Protector Clicking
Reasons for Clicking Ceiling Fan
A clicking noise in a ceiling fan can be attributed to several factors. It is crucial to identify the root cause of the issue before attempting any repairs. Here are some common reasons why your ceiling fan may be clicking:
- Loose Connections: Over time, the electrical connections inside your ceiling fan may become loose. Loose wires or terminals can cause vibrations, resulting in a clicking sound.
- Worn-out Capacitor: The capacitor in your ceiling fan controls its speed and helps it start. If the capacitor is faulty or worn out, it can lead to a clicking noise as it struggles to initiate the fan’s operation.
- Worn-out Ball Bearings: Ceiling fans are equipped with ball bearings that allow smooth rotation. Over time, these bearings can wear out, causing the fan to click or make other unusual sounds.
- Misaligned Blades: When the fan blades are not aligned properly, they may scrape against one another or hit the fan housing. This misalignment can generate clicking noises.
- Dust or Debris Accumulation: Dust, lint, or debris can accumulate on the fan blades, motor, or other components over time. As the fan rotates, these particles can interfere with its operation, resulting in a clicking sound.
By understanding these potential causes, you can begin to troubleshoot and address the specific issue affecting your ceiling fan. Let’s delve into some solutions to fix a clicking ceiling fan in the next section.
Loose Connections
One of the common reasons for a clicking ceiling fan is loose connections. Over time, the electrical connections inside the fan can become loose or detached, leading to vibrations and a clicking sound. To fix this issue, follow these steps:
- Turn off the fan: Before you begin any repairs, ensure that the fan is switched off and completely disconnected from the power source to avoid any accidents.
- Remove the fan cover: Use a screwdriver to remove the screws holding the fan cover in place. Set aside the screws and carefully remove the cover to expose the internal components.
- Tighten the connections: Once you have access to the internal components, inspect the wires and terminals for any signs of looseness. The wires should be securely connected to the terminals. Use a screwdriver or pliers to tighten any loose connections.
- Check the light kit connections: If your ceiling fan has a light kit, ensure that the connections for the light bulbs and sockets are also secure and tight.
- Reassemble the fan: After tightening all the connections, carefully put the fan cover back in place and secure it with the screws.
- Turn on the fan: Once the fan is reassembled, turn it on to check if the clicking noise has stopped. If the issue persists, you may need to explore other potential causes.
Tightening the connections is a simple and effective solution for addressing clicking caused by loose electrical connections. However, if the clicking noise continues, it might be necessary to investigate other possible causes.
Damaged Capacitor
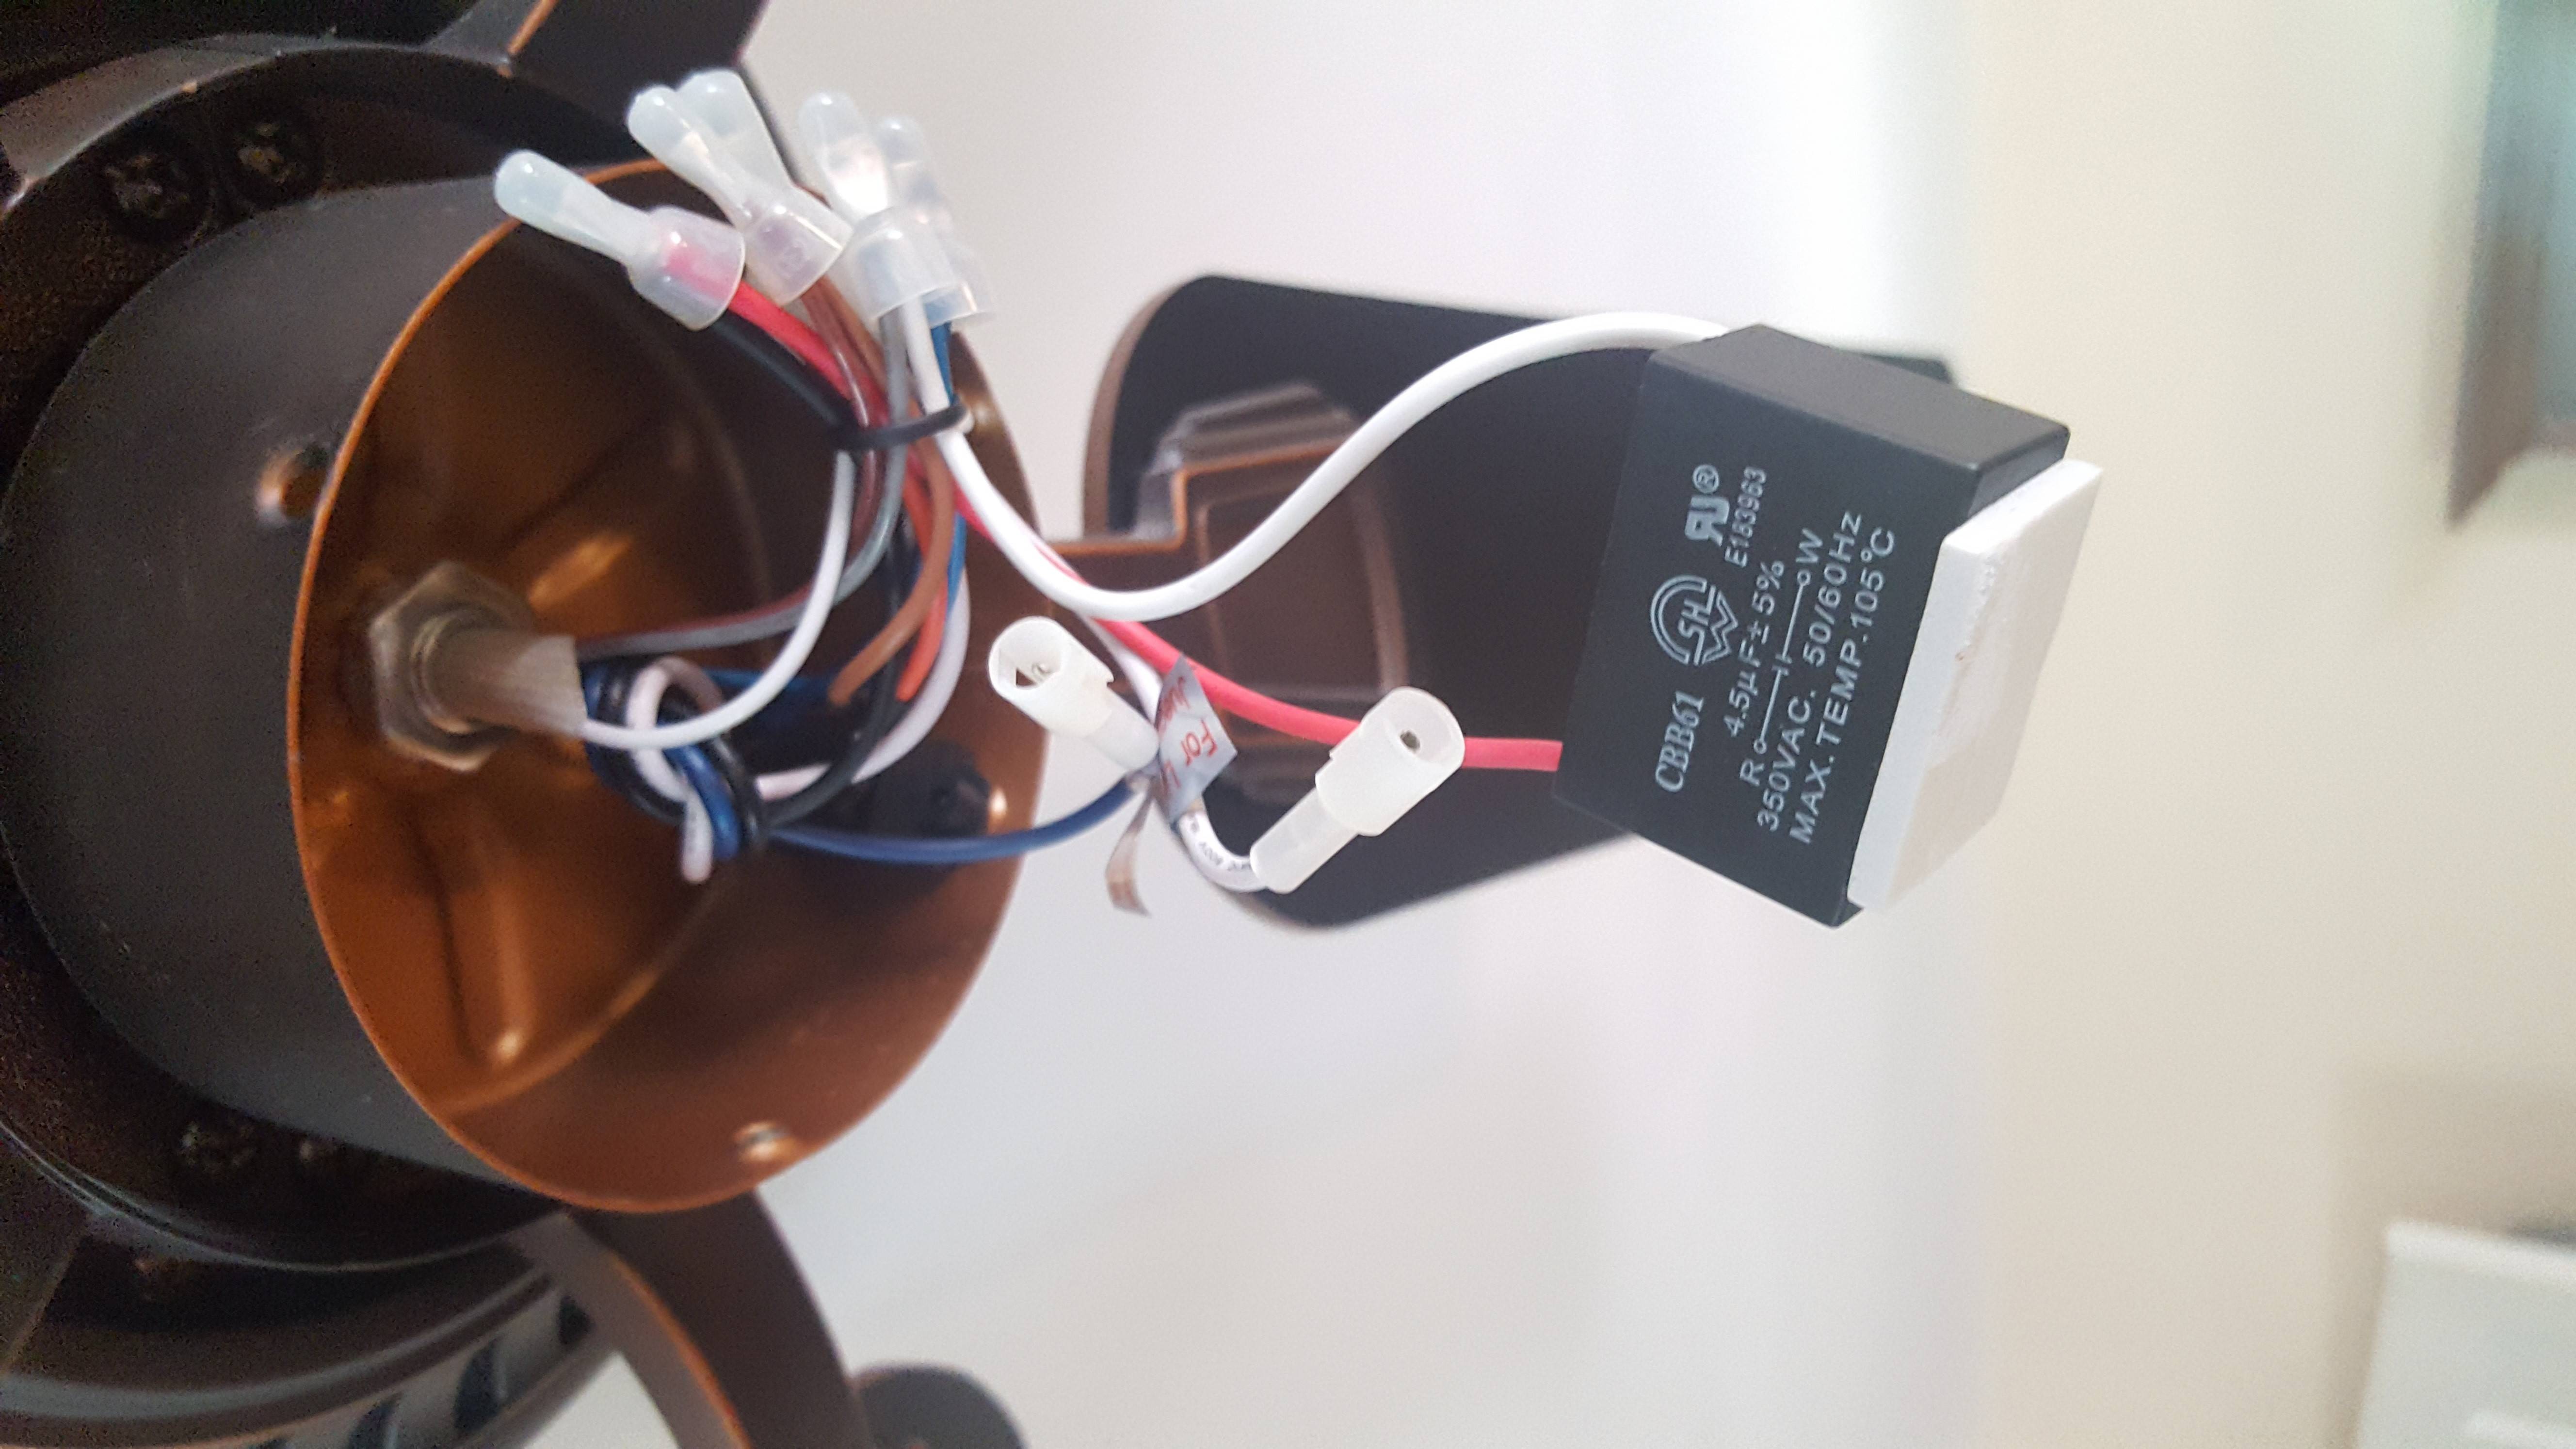
If your ceiling fan is still clicking after checking and tightening the connections, the issue may lie with a damaged capacitor. The capacitor in a ceiling fan is responsible for controlling the fan’s speed and assisting in starting it up. If the capacitor is faulty or worn out, it can lead to clicking noises.
To fix a clicking ceiling fan caused by a damaged capacitor, follow these steps:
- Turn off the fan: Ensure that the fan is switched off and disconnected from the power source to avoid any electrical accidents.
- Access the capacitor: Most capacitors are located near the fan motor, often hidden beneath a cover. Use a screwdriver to remove the cover and expose the capacitor.
- Inspect the capacitor: Carefully examine the capacitor for any signs of swelling, leakage, or physical damage. A damaged capacitor will likely need to be replaced.
- Disconnect the old capacitor: Take note of the wiring configuration before disconnecting any wires from the old capacitor. It’s helpful to take a photo or label the wires to ensure proper reconnection later.
- Install the new capacitor: Purchase a new capacitor of the same specifications as the old one. Connect the wires to the corresponding terminals on the new capacitor, following the labeled or photographed reference.
- Reassemble the fan: Once the new capacitor is securely installed, replace the cover and any screws that were removed during the process.
- Turn on the fan: Restore power to the ceiling fan and turn it on to confirm if the clicking noise has been resolved. If the clicking persists, further investigation may be necessary.
Remember to exercise caution when working with electrical components. If you are unsure or uncomfortable with handling the capacitor replacement, it’s recommended to seek the assistance of a professional electrician or a qualified technician.
By replacing a damaged capacitor, you can eliminate the potential source of the clicking noise and restore your ceiling fan’s smooth operation.
Worn-out Ball Bearings
If your ceiling fan continues to click even after addressing loose connections and replacing the capacitor, the issue might be worn-out ball bearings. Ceiling fans are equipped with ball bearings that allow for smooth rotation. Over time, these bearings can become worn out, causing the fan to produce clicking or grinding noises.
To fix a clicking ceiling fan caused by worn-out ball bearings, you can try the following steps:
- Turn off the fan: Ensure that the fan is turned off and disconnected from the power source to prevent any accidents.
- Check for accessibility: Some ceiling fans have easy access to the bearings, while others may require disassembling the fan to reach them. Check your fan’s manual or consult the manufacturer’s instructions for guidance.
- Apply lubrication: If the bearings are accessible, use a lubricant specifically designed for ceiling fan bearings. Apply a few drops of the lubricant to each bearing to reduce friction and eliminate clicking noises. Turn the fan manually to distribute the lubricant evenly.
- Replace the bearings: If lubrication doesn’t resolve the clicking noise, the bearings may need to be replaced. Consult the manufacturer’s instructions or seek the help of a professional technician or electrician to replace the worn-out bearings.
- Reassemble the fan: Once the lubrication or bearing replacement is complete, carefully reassemble the fan, ensuring all screws and components are securely fastened.
- Turn on the fan: Restore power to the ceiling fan and turn it on to verify if the clicking noise has been addressed. If the clicking persists, there might be another underlying issue.
Keep in mind that accessing and replacing bearings can be more complex compared to other solutions. If you are unsure or uncomfortable with this process, it’s best to consult a professional technician to perform the necessary repairs.
By lubricating or replacing worn-out ball bearings, you can restore your ceiling fan’s smooth and quiet operation, eliminating the clicking noise in the process.
Read more: Why Does My Ceiling Fan Hum
Misaligned Blades
If your ceiling fan is still clicking after checking the connections, replacing the capacitor, and addressing worn-out ball bearings, another potential culprit could be misaligned blades. When the fan blades are not properly aligned, they can scrape against each other or hit the fan housing, resulting in a clicking noise.
To fix a clicking ceiling fan caused by misaligned blades, follow these steps:
- Turn off the fan: Always ensure that the fan is switched off and disconnected from the power source before attempting any repairs.
- Inspect the blades: Carefully examine each blade to determine if they are aligned correctly. Look for any signs of visible damage or warping that may be causing the misalignment.
- Adjust the blade alignment: Gently bend the misaligned blades into the correct position. Start by aligning the blade tips with each other, ensuring they are parallel and equidistant from each other and the fan housing.
- Check for balance: After aligning the blades, check for balance by using a fan balancing kit or placing a small weight on each blade. Turn on the fan and observe if any clicking noises persist. If necessary, make further adjustments to achieve proper balance.
- Reassemble the fan: Once the blades are aligned and balanced, reassemble the fan by securing all screws and components.
- Turn on the fan: Restore power to the ceiling fan and turn it on to verify if the clicking noise has been resolved. If the clicking persists, there may be another issue to address.
Properly aligning the blades ensures smooth and uninterrupted airflow, eliminating the clicking noise caused by blade misalignment. If the clicking persists after this adjustment, it is advisable to seek professional help to diagnose and resolve any underlying issues.
Dust or Debris Accumulation
If your ceiling fan is still clicking despite checking the connections, replacing the capacitor, addressing worn-out ball bearings, and aligning the blades, the issue may be due to dust or debris accumulation. Over time, dust, lint, and other particles can gather on the fan blades, motor, and other components, interfering with the smooth operation of the fan and causing clicking noises.
To resolve a clicking ceiling fan caused by dust or debris accumulation, follow these steps:
- Turn off the fan: Ensure that the fan is turned off and disconnected from the power source for safety.
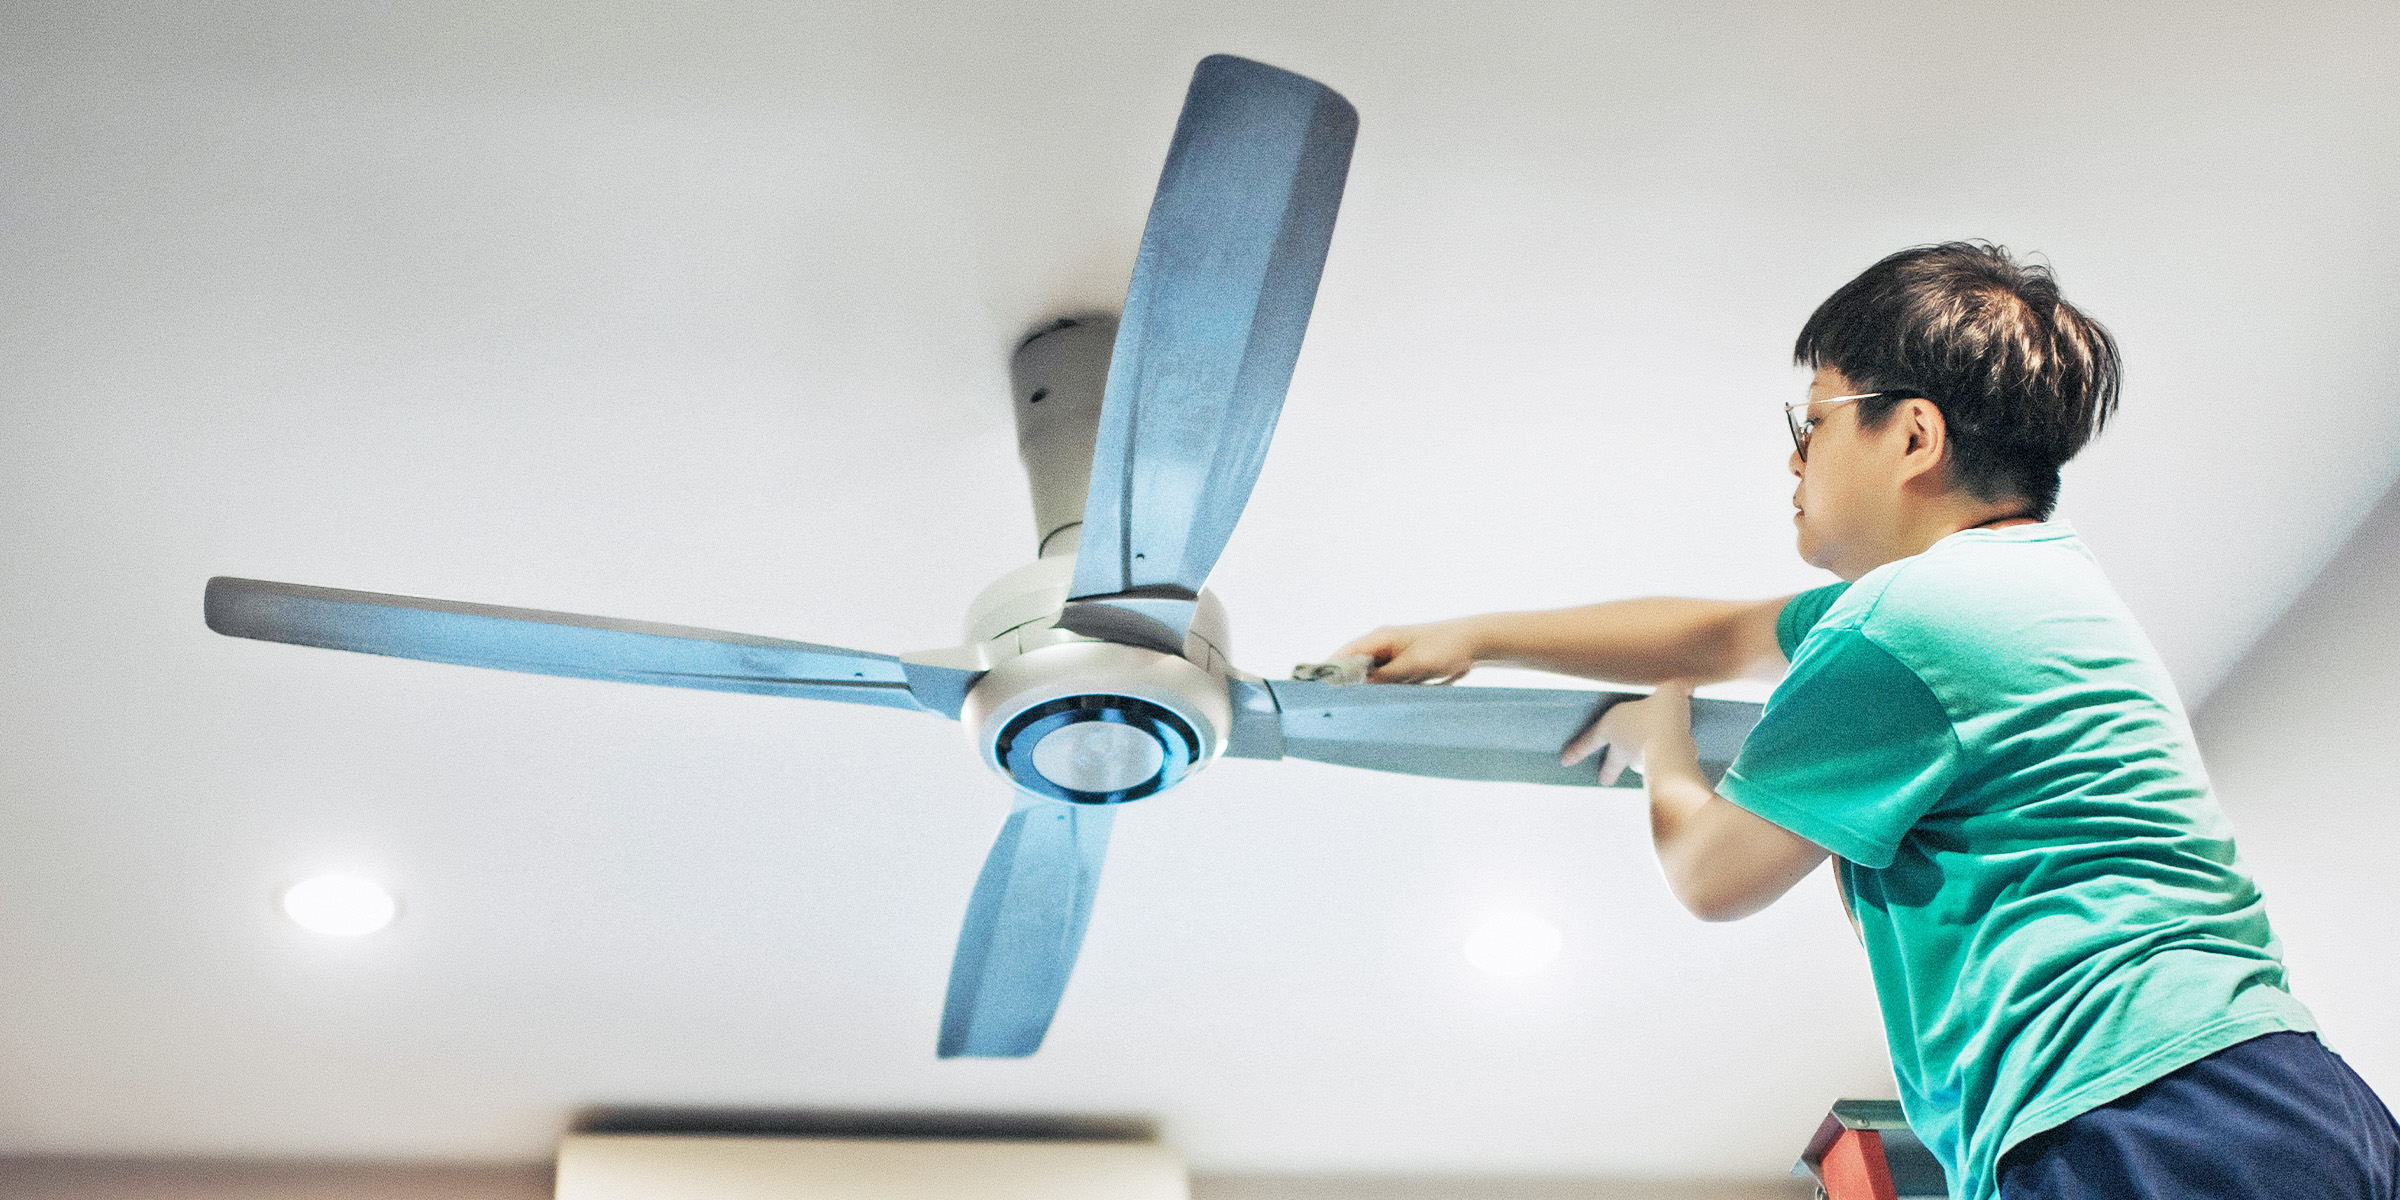
- Clean the fan blades: Use a soft cloth or dusting tool to gently wipe down each fan blade, removing any dust or debris that may have accumulated. Pay attention to both the upper and lower surfaces of the blades.
- Clean the motor housing: Carefully dust and clean the motor housing, ensuring that dirt or debris does not obstruct the motor’s movement.
- Inspect other components: Check for any other areas where dust or debris may have gathered, such as the light kit, switches, or pull chains. Clean these components as necessary.
- Reassemble the fan: Once the cleaning is complete, reassemble the fan by securing any removed parts, such as the fan cover or light kit.
- Turn on the fan: Restore power to the ceiling fan and turn it on to determine if the clicking noise has been eliminated. If the clicking sound persists, further investigation may be required.
Regularly cleaning your ceiling fan not only helps to prevent clicking noises but also improves the overall efficiency and lifespan of the fan. It is recommended to incorporate fan cleaning into your regular household maintenance routine.
By removing dust and debris from your ceiling fan, you ensure smoother operation and reduce the chances of clicking noises caused by obstruction or buildup.
Check for loose screws or blades that may be hitting the fan housing. Tighten any loose parts to see if the clicking noise stops. If not, consider calling a professional to inspect and repair the fan.
How to Fix Clicking Ceiling Fan
A clicking noise in a ceiling fan can be frustrating, but fortunately, there are several steps you can take to fix the issue. Here is a summary of the solutions we discussed earlier:
- Check for loose connections: Ensure that all electrical connections within the fan are securely tightened.
- Replace the damaged capacitor: If the capacitor is faulty or worn out, replacing it can eliminate clicking noises.
- Address worn-out ball bearings: Lubricate or replace the ball bearings to reduce friction and clicking sounds.
- Align the blades: Misaligned blades can cause scraping and clicking. Adjust them to achieve proper alignment.
- Clean the fan: Dust and debris accumulation can interfere with the fan’s smooth operation. Regularly clean the fan to reduce the chances of clicking noises.
Following these steps should help resolve the clicking noise in your ceiling fan. However, if the issue persists or if you are unsure about performing the repairs yourself, it is always recommended to seek the assistance of a professional technician or electrician. They have the expertise and tools to diagnose and fix more complex issues that may be causing the clicking noise.
Remember, a well-functioning and silent ceiling fan not only enhances the comfort of your living or working space but also prolongs the longevity of the fan itself. By addressing clicking noises promptly, you can restore peace and tranquility to your environment while ensuring optimal performance from your ceiling fan.
Tighten the Connections
One of the most common reasons for a clicking ceiling fan is loose electrical connections. Over time, the vibrations from the fan’s operation can cause wires and terminals to become loose, resulting in a clicking sound. Fortunately, tightening the connections is a simple and effective solution. Here’s how you can do it:
- Turn off the fan: Before you start any repairs, make sure the fan is switched off and disconnected from the power source to avoid any electrical hazards.
- Access the electrical components: Remove the fan cover or housing to gain access to the internal components. Use a screwdriver to unscrew and remove the necessary screws. Keep them in a safe place for reassembling later.
- Inspect the connections: Carefully examine the wires and terminals inside the fan. Look for any signs of loose or disconnected wires. Ensure that all connections are securely fastened.
- Tighten the connections: Using a screwdriver or pliers, tighten any loose connections. Make sure the wires are properly inserted into the terminals and the screws are securely tightened. Be cautious not to overtighten, as it may damage the connections.
- Reassemble the fan: Once all the connections are tightened, reassemble the fan by placing the fan cover or housing back in place. Secure it with the screws that were removed earlier.
- Turn on the fan: Restore power to the ceiling fan and turn it on to check if the clicking noise has subsided. If the clicking noise persists, you may need to explore other potential causes.
Tightening the connections is a crucial step to address clicking caused by loose electrical connections. By ensuring a secure and stable connection within the fan, you can eliminate vibrations and restore the fan’s smooth and quiet operation.
If you’re uncertain about performing this task yourself or if the clicking noise continues, it’s advisable to seek assistance from a professional electrician or technician to ensure a safe and accurate repair.
Replace the Capacitor
If tightening the connections did not resolve the clicking noise in your ceiling fan, the issue might lie with a faulty or worn-out capacitor. The capacitor plays a vital role in controlling the fan’s speed and facilitating its startup. Replacing it can help eliminate clicking noises. Here’s how you can replace the capacitor:
- Turn off the fan: Ensure the fan is turned off and disconnected from the power source to prevent any electrical accidents.
- Access the capacitor: Locate the capacitor, usually positioned near the fan motor. Depending on your fan’s design, you may need to remove a cover or housing to access it. Use a screwdriver to carefully remove the necessary screws and take off the cover.
- Identify the capacitor: Examine the existing capacitor and note its specifications, including the voltage and microfarad (μF) ratings. This information is crucial when purchasing a replacement capacitor.
- Disconnect the wires: Before removing the old capacitor, take a photo or make note of the wire connections to ensure proper reconnection later. Use pliers to detach the wires from the capacitor’s terminals.
- Install the new capacitor: Purchase a replacement capacitor with the same voltage and microfarad ratings as the old one. Connect the wires to the corresponding terminals on the new capacitor, following your previous notes or photo.
- Reassemble the fan: Once the new capacitor is securely installed, replace the cover or housing and tighten the screws to hold it in place.
- Turn on the fan: Restore power to the ceiling fan and turn it on to verify if the clicking noise has been resolved. If the clicking persists, there may be another underlying issue that needs to be addressed.
It’s important to note that working with electrical components can be dangerous. If you are unsure or uncomfortable with replacing the capacitor yourself, it is best to seek the assistance of a professional electrician or technician to ensure a safe and accurate replacement.
By replacing a faulty capacitor, you can eliminate a potential source of the clicking noise and restore your ceiling fan to its regular, quiet operation.
Lubricate or Replace Ball Bearings
If your ceiling fan continues to click even after tightening the connections and replacing the capacitor, the issue may be caused by worn-out ball bearings. Ceiling fans are equipped with ball bearings that allow for smooth rotation. Over time, these bearings can become worn out, resulting in clicking or grinding noises. Here are steps to address this issue:
- Turn off the fan: Ensure that the fan is switched off and disconnected from the power source for safety.
- Access the bearings: Some ceiling fans have easy access to the bearings, while others may require disassembling the fan to reach them. Consult your fan’s manual or manufacturer’s instructions for guidance.
- Inspect the bearings: Carefully examine the bearings for any signs of wear, damage, or lack of lubrication. Bearings that are excessively worn or damaged may need to be replaced, while those in good condition may just require lubrication.
- Lubricate the bearings: If the bearings appear to be in good condition, apply a few drops of lubricant specifically designed for ceiling fan bearings. Be cautious not to over-lubricate. Spin the fan manually to allow the lubricant to distribute evenly.
- Replace the bearings: If the bearings are visibly worn, damaged, or do not respond to lubrication, it might be necessary to replace them. Consult the manufacturer’s instructions or consider hiring a professional technician to handle the replacement.
- Reassemble the fan: After lubricating or replacing the bearings, reassemble the fan by securing any removed parts or covers.
- Turn on the fan: Restore power to the ceiling fan and turn it on to check if the clicking noise has been resolved. If the clicking noise persists, it may be a sign of another underlying issue.
Working with bearings can be intricate, and improper handling can potentially damage the fan. If you are unsure or uncomfortable with this process, it is best to consult a professional technician to perform the necessary repairs.
By lubricating or replacing worn-out ball bearings, you can restore your ceiling fan’s smooth and quiet operation, eliminating the clicking noise in the process.
Realign the Blades
If your ceiling fan is still producing a clicking noise after addressing loose connections, replacing the capacitor, and lubricating or replacing the ball bearings, the issue might be misaligned blades. Misaligned blades can scrape against each other or hit the fan housing, resulting in a clicking sound. Here are steps to realign the blades:
- Turn off the fan: Ensure that the fan is turned off and disconnected from the power source to prevent any accidents.
- Inspect the blade alignment: Carefully examine each blade to determine if they are aligned properly. Look for any visible signs of bending or warping. Even a slight misalignment can cause clicking noises.
- Adjust the blade position: Gently bend the misaligned blades into the correct position. Start by aligning the blade tips with each other, ensuring they are parallel and equidistant from each other and the fan housing. Use caution and make small adjustments to avoid damaging the blades.
- Check for balance: Once the blades are aligned, check for balance. You can use a fan balancing kit or place a small weight, such as a coin, on each blade. Turn on the fan and observe if there is any wobbling or clicking. If necessary, make further adjustments to achieve proper balance.
- Reassemble the fan: Once the blades are aligned and balanced, reassemble the fan by securing any removed parts, such as the fan cover or blade brackets.
- Turn on the fan: Restore power to the ceiling fan and turn it on to verify if the clicking noise has been resolved. If the clicking persists, there may be another underlying issue that needs attention.
Properly aligning the blades ensures smooth airflow and eliminates clicking noises caused by blade misalignment. When making adjustments, take your time and be gentle to prevent any damage to the fan or blades. If you feel uncertain about performing the realignment yourself, consider seeking the assistance of a professional electrician or technician
By realigning the blades, you can restore your ceiling fan’s smooth and quiet operation, eliminating the clicking noise and ensuring optimal airflow in your space.
Clean the Fan
If your ceiling fan is producing a clicking noise despite addressing loose connections, replacing the capacitor, lubricating or replacing ball bearings, and realigning the blades, the problem may be due to dust or debris accumulation. Dust, lint, and other particles can accumulate on the fan blades, motor, and other components over time, leading to interference with smooth operation and resulting in clicking noises. Follow these steps to clean your ceiling fan:
- Turn off the fan: Make sure the fan is switched off and disconnected from the power source for safety.
- Prepare cleaning supplies: Gather a soft cloth, a vacuum cleaner with a brush attachment, a step ladder, and a gentle cleaning solution or water for dampening the cloth if needed.
- Clean the blades: Climb the step ladder and use the soft cloth to gently wipe down each fan blade, removing any dust and debris. Start from the base of the blades and work your way towards the tips. If the blades are excessively dirty, lightly dampen the cloth or use a mild cleaning solution to clean them. Avoid dripping excess liquid onto the motor or other electrical components.
- Clean the motor housing: Use the vacuum cleaner’s brush attachment to carefully remove any dust or debris from the motor housing. Be gentle to avoid damaging the motor or other internal components.
- Clean other components: Wipe down any other visible parts of the fan, such as the fan cover, light kit, switches, or pull chains, using the soft cloth.
- Reassemble the fan: Once the cleaning is complete and all components are dry, reassemble the fan by securing any removed parts or covers. Ensure that all screws and attachments are tight and secure.
- Turn on the fan: Restore power to the ceiling fan and turn it on to determine if the clicking noise has been eliminated. If there is still clicking, it may be necessary to investigate further or seek professional help.
Cleaning your ceiling fan regularly not only helps to eliminate clicking noises but also improves the air quality in your space. By removing dust and debris, you enhance the fan’s efficiency and prolong its lifespan.
If you have concerns about working at heights or are unsure about performing the cleaning yourself, it is recommended to seek the assistance of a professional technician or cleaner.
Read more: Why Does My Ceiling Fan Turn On By Itself
Conclusion
A clicking noise in your ceiling fan can be quite bothersome, but fortunately, there are several potential solutions to address the issue. By understanding the various causes of a clicking ceiling fan and following the appropriate steps, you can restore your fan to its normal, quiet operation.
We discussed several common reasons for a clicking noise, including loose connections, damaged capacitors, worn-out ball bearings, misaligned blades, and dust or debris accumulation. For each potential cause, we provided detailed steps on how to fix the issue.
Tightening electrical connections, replacing a faulty capacitor, lubricating or replacing worn-out ball bearings, realigning the blades, and cleaning the fan are all effective methods to resolve clicking noises. It’s important to follow proper safety precautions and, if needed, seek the assistance of professionals when performing repairs or replacements.
Regular maintenance and cleaning can significantly reduce the likelihood of a clicking ceiling fan. By keeping the fan in good condition and addressing any issues promptly, you can prolong its lifespan and ensure its optimal performance.
If you find that the clicking noise persists or you are unsure about performing the repairs yourself, it is always recommended to consult a professional technician or electrician. They have the expertise and knowledge to diagnose and fix more complex issues that may be causing the clicking noise.
Remember, a quiet and well-functioning ceiling fan not only provides comfort but also contributes to a peaceful and relaxing environment in your home or office. Take the necessary steps to address clicking noises promptly, and enjoy the cool breeze and tranquility provided by your ceiling fan once again.
Now that you've pinpointed why your ceiling fan is clicking, you might need to dive deeper into repairs. Our detailed guide on how to repair ceiling fans provides step-by-step instructions to ensure your fan runs smoothly. If broader home upkeep is on your mind, don't miss our comprehensive checklist on essential home maintenance tasks to keep your living space in top shape year-round. Stay ahead of common issues with these expert tips and tricks.
Frequently Asked Questions about Why Is My Ceiling Fan Clicking
Was this page helpful?
At Storables.com, we guarantee accurate and reliable information. Our content, validated by Expert Board Contributors, is crafted following stringent Editorial Policies. We're committed to providing you with well-researched, expert-backed insights for all your informational needs.


0 thoughts on “Why Is My Ceiling Fan Clicking”